

Page 1
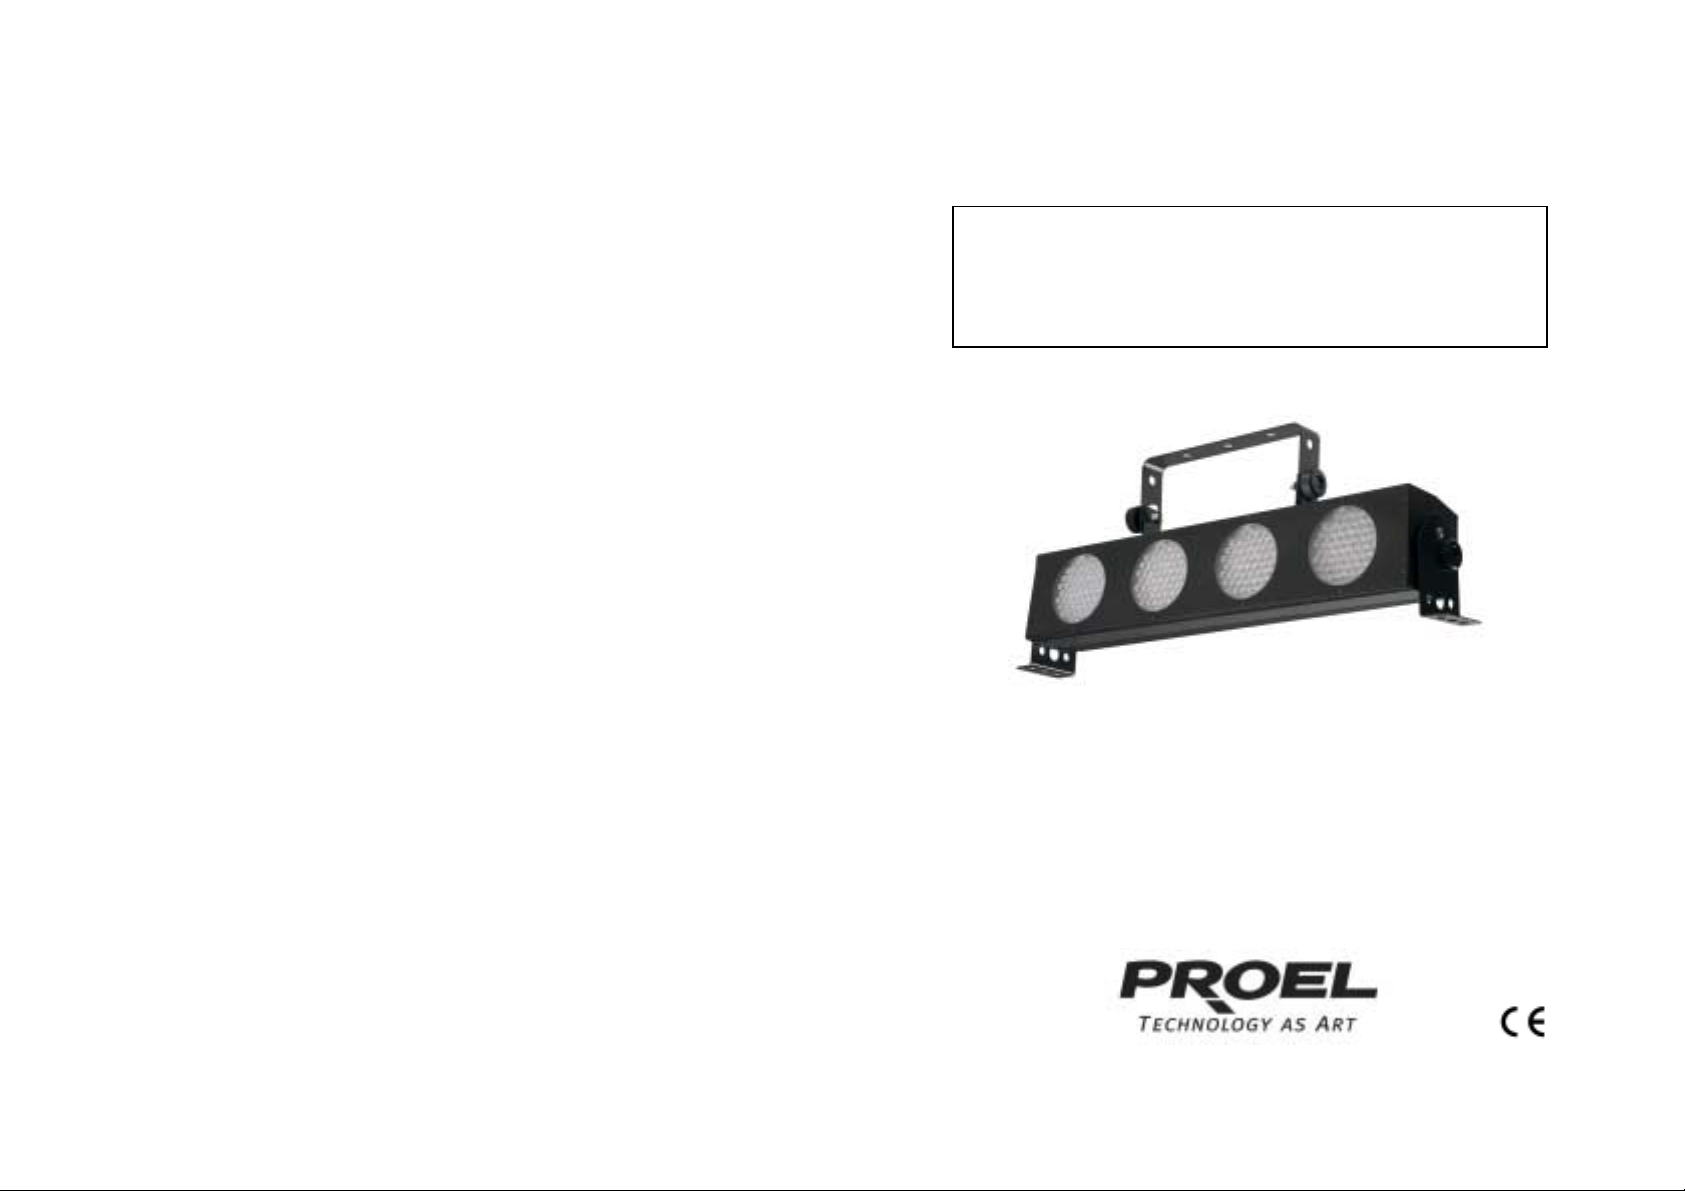
MANUALE UTENTE – USER’S MANUAL
LED FOOTLIGHT 4
PLLEDRB4
Rev. 06/2007
Page 2

INDICE
CARATTERISTICHE GENERALI ..........................................................4
CARA TTERISTICHE TECNICHE..........................................................5
ISTRUZIONI GENERALI .......................................................................5
UTILIZZO SICURO ED EFFICIENTE....................................................5
AVVERTENZE .......................................................................................6
CONTROLLO E FUNZIONI ...................................................................6
Connessione DMX..............................................................................6
Pannello frontale.................................................................................7
GUIDA AL FUNZIONAMENTO ..............................................................7
Modalità BUILT-IN PROGRAM...........................................................7
Modalità AUTO RUN...........................................................................8
Modalità DMX .....................................................................................8
Modalità SLAVE................................................................................10
Modalità SOUND ..............................................................................11
2
Page 3

TABLE OF CONTENTS
GENERAL FEATURES........................................................................12
TECHNICAL SPECIFICATION ............................................................13
GENERAL INSTRUCTIONS.............................................................13
SAFE AND EFFICIENT USE............................................................13
PRODUCT CARE ................................................................................14
CONTROL AND FUNCTION................................................................14
DMX CONNECTIONS ......................................................................14
OPERATION GUIDE............................................................................15
Front panel........................................................................................15
BUILT-IN PROGRAM mode..............................................................15
AUTO RUN mode .............................................................................16
DMX mode........................................................................................16
SLAVE mode.....................................................................................18
SOUND mode...................................................................................19
3
Page 4

CARATTERISTICHE GENERALI
Il PLLEDRB4 è un abbagl iatore a 4 matrici LED con un totale di 220
LED e sistema RGB. Possiede una varietà di caratteristiche che
includono:
• Porta DMX IN / OUT standard a 3 poli per ricevere segnali
DMX 512 da una centralina esterna e collegare più faretti in
serie;
• Intensità RGB regolabile in grado di creare una varietà di colori
molto ampia;
• Programmi interni di giochi luce;
• Modalità di funzionamento musicale;
• Basso assorbimento di energia e lunga durata;
• Display a due righe da 16 caratteri.
È stato impiegato i massimo sforzo per far convergere affidabilità e
solidità in ciascuna unità. I nuovi prodotti vengono costantemente
aggiornati per soddisfare le esigenze del mondo dello spettacolo e
dell’industria lighting. I Vostri commenti riguardo i nostri prodotti e
servizi sono molto graditi.
È un piacere e un privilegio essere al vostro servizio.
4
Page 5

CARATTERISTICHE TECNICHE
Alimentazione: AC 230V / 50Hz – AC 110V / 60Hz
Potenza 53 W
Ingresso / uscita DMX Prese XLR a 3 poli
Dimensioni (mm) 710×145×230
Peso (kg) 4,3
Angolo fascio luminoso 20°
ISTRUZIONI GENERALI
Leggere attentamente le is truzioni contenute in questo manuale prim a
di installare od utilizzare il prodotto. Successivamente, conservare il
manuale in un luogo sicuro allo scopo di poterlo consultare in futuro.
UTILIZZO SICURO ED EFFICIENTE
• Questo prodotto deve essere collegato a terra.
• Evitare che liqu idi infiammabili, acqua od ogg etti metallici penetrino
nell’apparecchio.
• Evitare di danneggiar e il cavo di al imentazione.
• Non aprire l’apparecchio, nessun componente può essere riparato
dall’utente. Per la riparazione consultare sempre personale
autorizzato.
• In caso di problemi di funzionamento cessare immediatamente
l’utilizzo, disconnettere la presa dell’alimentazione e rivolgersi al
proprio rivendit ore per un c ontrollo op pure contattare direttam ente la
PROEL Spa.
5
Page 6

• Per prevenire rischi di incendio o di shock elettrico, non esporre il
1
prodotto alla pioggia o all’umidità.
• Evitare di eseguire la riparazione. Eventuali interventi da parte di
personale non qualificato potrebbero provocare danni o il
funzionamento difettoso.
AVVERTENZE
• Questo prodotto è destinato all’esclusivo utilizzo interno.
• Disconnettere la presa di alimentazione quando l’unità non viene
utilizzata per lunghi periodi.
• Non utilizzare l’unità in luoghi esposti ad eccessiva umidità, vibrazioni
o urti.
• Porre l’unità in una posizione stabile.
• Non smontare o apportare modifiche all’apparecchio.
CONTROLLO E FUNZIONI
CONNESSIONE DMX
2
1. Presa XLR femmina: Presa di uscita per il segnale DMX
2. Presa XLR maschio: Presa di ingresso per il segnale DMX
6
Page 7

PANNELLO FRONTALE
Tasto MODE: premere per entrare nel menù principale e per
selezionare le m odalità d i fun zionam ento aut om atico,
tramite controllo DMX, modalità slave, modalità
musicale.
Tasto SETUP: premere per entrare ne lla modalità desider ata e per
confermare il valore immesso.
Tasto UP: premere per incrementare il valore di un’unità.
Tasto DOWN: premere per diminuire il valore di un’unità.
GUIDA AL FUNZIONAMENTO
MODALITÀ BUILT-IN PROGRAM
L’abbagliatore PLLEDRB4 permette di scegliere tra 14 differenti
programmi preimpostati semplicemente premendo il tasto SETUP e
scorrendo i programmi grazie ai tasti UP e DOWN. Inoltre per ogni
programma è poss ibile impostare il valore dello Step Time (SP) e del
Flash Speed (FS) tra valori compresi rispettivamente tra 001 e 100 e tra
000 e 100.
7
Page 8

MODALITÀ AUTO RUN
Attivando questa modalità, il proiettore esegue ciclicamente i 14
programmi interni con la possibilità di scegliere la velocità di
esecuzione. La veloc ità può essere impostata grazie ai pulsant i UP e
DOWN.
MODALITÀ DMX
L’abbagliatore è controllabile tramite una centralina che utilizza il
protocollo DMX.
INDIRIZZAMENTO
Per assegnare l’ind irizzo al proiettore, premere il tasto SET UP fino a
quando sul display appare:
Ora è possibile assegn are il canale desiderato premendo i tasti UP e
DOWN.
PROTOCOLLO DMX
L’abbagliatore PLLEDRB4 ha l a pos sibil ità di es sere c ontr ollato tr am ite
5, 8 o 14 canali DMX.
Premere il tasto SETUP fino a che il display mostri:
Quindi scegliere, tram ite i tas ti UP e DOWN, il val ore dei can ali con c ui
DMX MODE
Dmx address:
DMX MODE
Channel num: 14
8
Page 9

si vuole controllare l’abbagliatore.
Scegliendo il valore 14, il primo canale DMX controlla il DIMMER, il
secondo regola l’effetto STROBO, ed ogni matrice LED occupa 3 canali
(controllo del sistema RGB) per un totale di 14 canali DMX.
CH. EFFETTO
1 DIMMER
2 STROBO
3-5 MATRICE 1
6-8 MATRICE 2
9-11 MATRICE 3
12-14 MATRICE 4
Scegliendo il valore 8, il primo canale DMX controlla il DIMMER, il
secondo regola l’effetto STROBO, ed una coppia di matrice LED
occupa 3 canali (co ntrollo del sistema RGB) per un totale di 8 canali
DMX.
CH. EFFETTO
1 DIMMER
2 STROBO
MATRICE 1 +
3-5
MATRICE 2
MATRICE 3 +
6-8
MATRICE 4
Scegliendo il valore 5, il primo canale DMX controlla il DIMMER, il
secondo regola l’effetto STROBO e tutte le matrici LED occupano 3
9
Page 10
canali (controllo del sistema RGB) per un totale di 5 canali DMX.
CH. EFFETTO
1 DIMMER
2 STROBO
MATRICE 1 +
MATRICE 2 +
3-5
MATRICE 3 +
MATRICE4
MODALITÀ SLAVE
Questa modalità di fun zionamento fa sì che il proietto re funzionerà in
sincronia con il proiettore master a c ui è collegato tramite una catena
DMX.
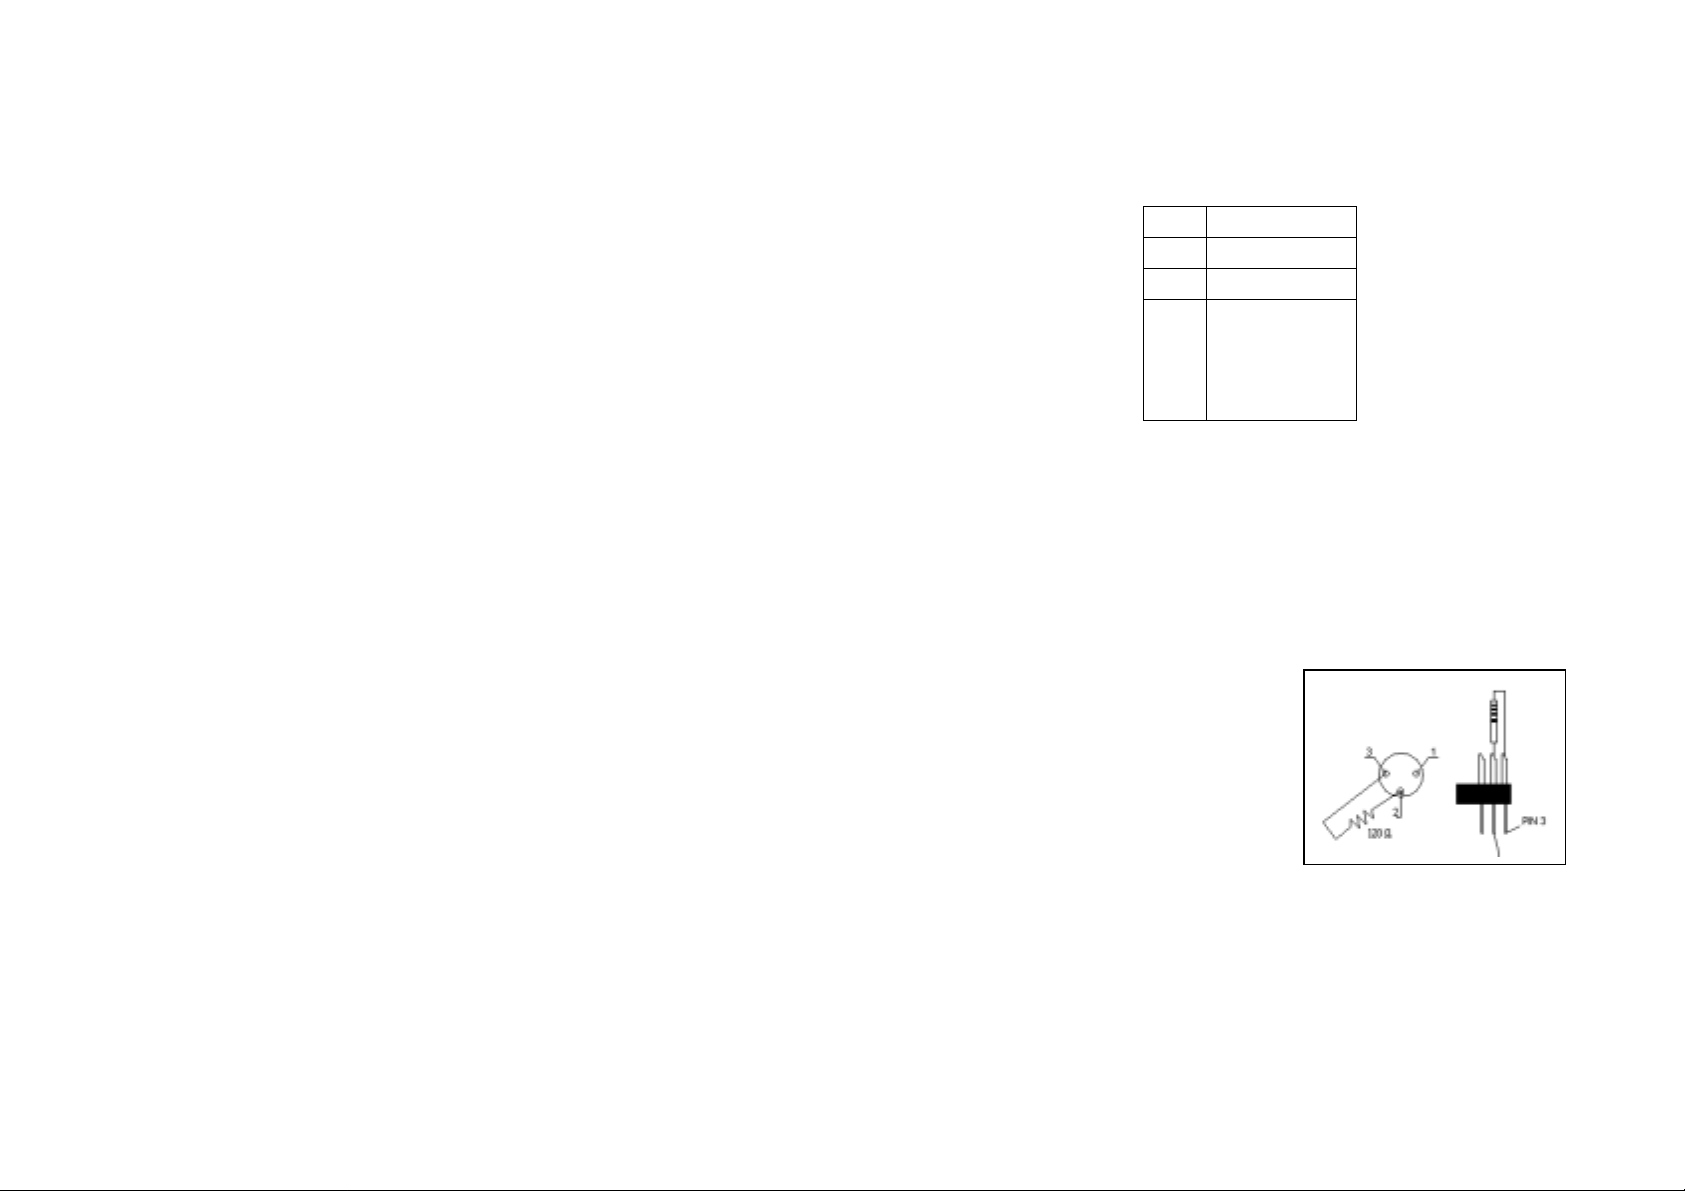
Per installazioni dove il cavo di segnale deve percorrere lunghe distanze
o dove vi sono disturbi elet trici, per esem pio in discotec a, è consiglia to
l’uso di una terminazione DMX.
Il terminatore DMX è semplicemente un
connettore XLR con co llegato ad esso
una resistenza da 120Ω (Ohm) tra i
piedini 2 e 3. La resistenza viene
innestata nella presa DIGITAL THRU
dell’ultimo proiettore della catena.
10
Page 11

MODALITÀ SOUND
Scegliendo la modalità Sound, il proiettore funzionerà in modalità
musicale. L’abbagliatore sente gli impulsi acustici tramite il m icrofono
posto vicino al display. Lo stesso microfono ha la possibilità di poter
regolare la sua sensibilità grazie alla manopola situata sulla parte
frontale del proiettore.
11
Page 12

GENERAL FEATURES
The PLLEDRB4 is a d evice with 4 LED spotlights and it is featured b y
220LEDs and RGB system. The unity includes:
• 3 pin standard DMX IN / O UT ports providing to comm unicate
with a external controller and with others PLLEDRB4 units.
• Modulate function of RGB three base tones.
• Built-in programs.
• The regular speed of flashes frequently function.
• Low power dissipation, longer - lived.
Every effort has been made to design dependability, reliability and
comfort into each u nit. New products are b eing designed c onstantly to
meet the needs of both entertainment and the lighting industry. We
welcome your comments about our product and services.
It is both a privilege and pleasure serving you.
12
Page 13

TECHNICAL SPECIFICATION
Power input AC 230V / 50Hz – AC 110V / 60Hz
Power 53 W
DMX In/Out 3 pin XLR sockets
Dimensions (mm) 710×145×230
Weight (kg) 4,3
LED beam angle: 20°
GENERAL INSTRUCTIONS
Please read through this operating instructions before installing or using
your new product. After you hav e finished readin g the instructions , put
them jn a safe place for future reference.
SAFE AND EFFICIENT USE
• This product must be earthed
• Do not mak e any inflamm able liquids , water or m etal objects enter
the unit.
• Take care not to damage the power cord.
• No user serviceable parts inside, always consult authorized
personnel for repairs.
• In the event of malf unction imm ediately sto p operation , disconnect
the power supply plug and consult authorized service personnel.
• To prevent fire or shock hazard, do not expose this pr oduct to rain
or moisture.
13
Page 14

PRODUCT CARE
1
• This product is intended for indoor use only.
• Provide occasional ventilation during use.
• Unplug the power plug from the sockets when not using the unit
for extended period.
• Do not use the unit in places subject to excessive humidity,
vibration or bumps.
• Place this unit in a stable location.
• Do not dismantle or modify the unit.
CONTROL AND FUNCTION
DMX CONNECTIONS
2
1. Male XLR socket: Input socket for DMX signal
2. Female XLR socket: Input socket for DMX signal
14
Page 15

OPERATION GUIDE
FRONT PANEL
MODE button: Tap to enter in main menu and to selec t th e Auto
Run mode, DMX mode, Slave mode, Sound
mode.
SETUP button: Tap to enter in the desired mode and to co nfirm
the requested value.
UP button: Tap to increase the value.
DOWN button: Tap to decrease the value.
BUILT-IN PROGRAM MODE
The PLLEDRB4 LED blinder allows to choose among 14 different
internal program s simply tapping the SETUP button and scann ing the
programs by the UP and DOWN buttons. Moreover each program
allows to set Step Time (SP) and the Flash Speed (FS) respectively
between 001- 100 and 000 - 100.
15
Page 16

AUTO RUN MODE
Selecting this m ode, the pr oj ector r uns all 1 4 pro gram s in a co ntinuo us
loop and it is possible to set up the frequency by pressing UP and
DOWN buttons.
DMX MODE
It is possible to control the device by a DMX controller.
ADDRESSING
To set the address of the projector, push SETUP button until the display
shows:
Now it is possible to assign the wanted channel to the projector by
pushing UP or DOWN buttons.
DMX PROTOCOL
The PLLEDRB4 blinder allows you to set 5 or 8 or 14 DMX channels for
different applications.
Push SETUP button until display is as follows:
Set the desired cha nnel’s value (5 or 8 or 14) b y pressing the UP or
DOWN buttons.
Choosing 14 as va lue, the first c hannel is occupied from DIMMER, the
DMX MODE
Dmx address:
DMX MODE
Channel num: 14
16
Page 17

second one ad just the ST ROBE effect and each spotlight oc cupies 3
channels so that the whole channels occupied from the projector are
14.
CH. EFFECT
1 DIMMER
2 STROBE
3-5 SPOT 1
6-8 SPOT 2
9-11 SPOT 3
12-14 SPOT 4
Setting the projector on 8 channels value, the DIMM ER occupies the
first channel, the FLAS H occupies the seco nd channel an d a couple of
spotlight occupies 3 c hannels so that the who le channels that control
the projector are 8.
CH. EFFECT
1 DIMMER
2 STROBO
SPOT 1 +
3-5
SPOT 2
SPOT 3 +
6-8
SPOT 4
If you set the channel num ber on 5 val ue, th e dim mer occupies the fir st
channel, the STRO BE occupies the second one a nd all four spotlight
17
Page 18
occupy 3 channels so that you have 5 channels to have the whole
projector’s control.
CH. EFFECT
1 DIMMER
2 STROBO
SPOT 1 +
SPOT 2 +
3-5
SPOT 3 +
SPOT4
SLAVE MODE
This function mode is utilized so that the projector synchronously works
with the projector in master mode which is connected by a DMX cable.
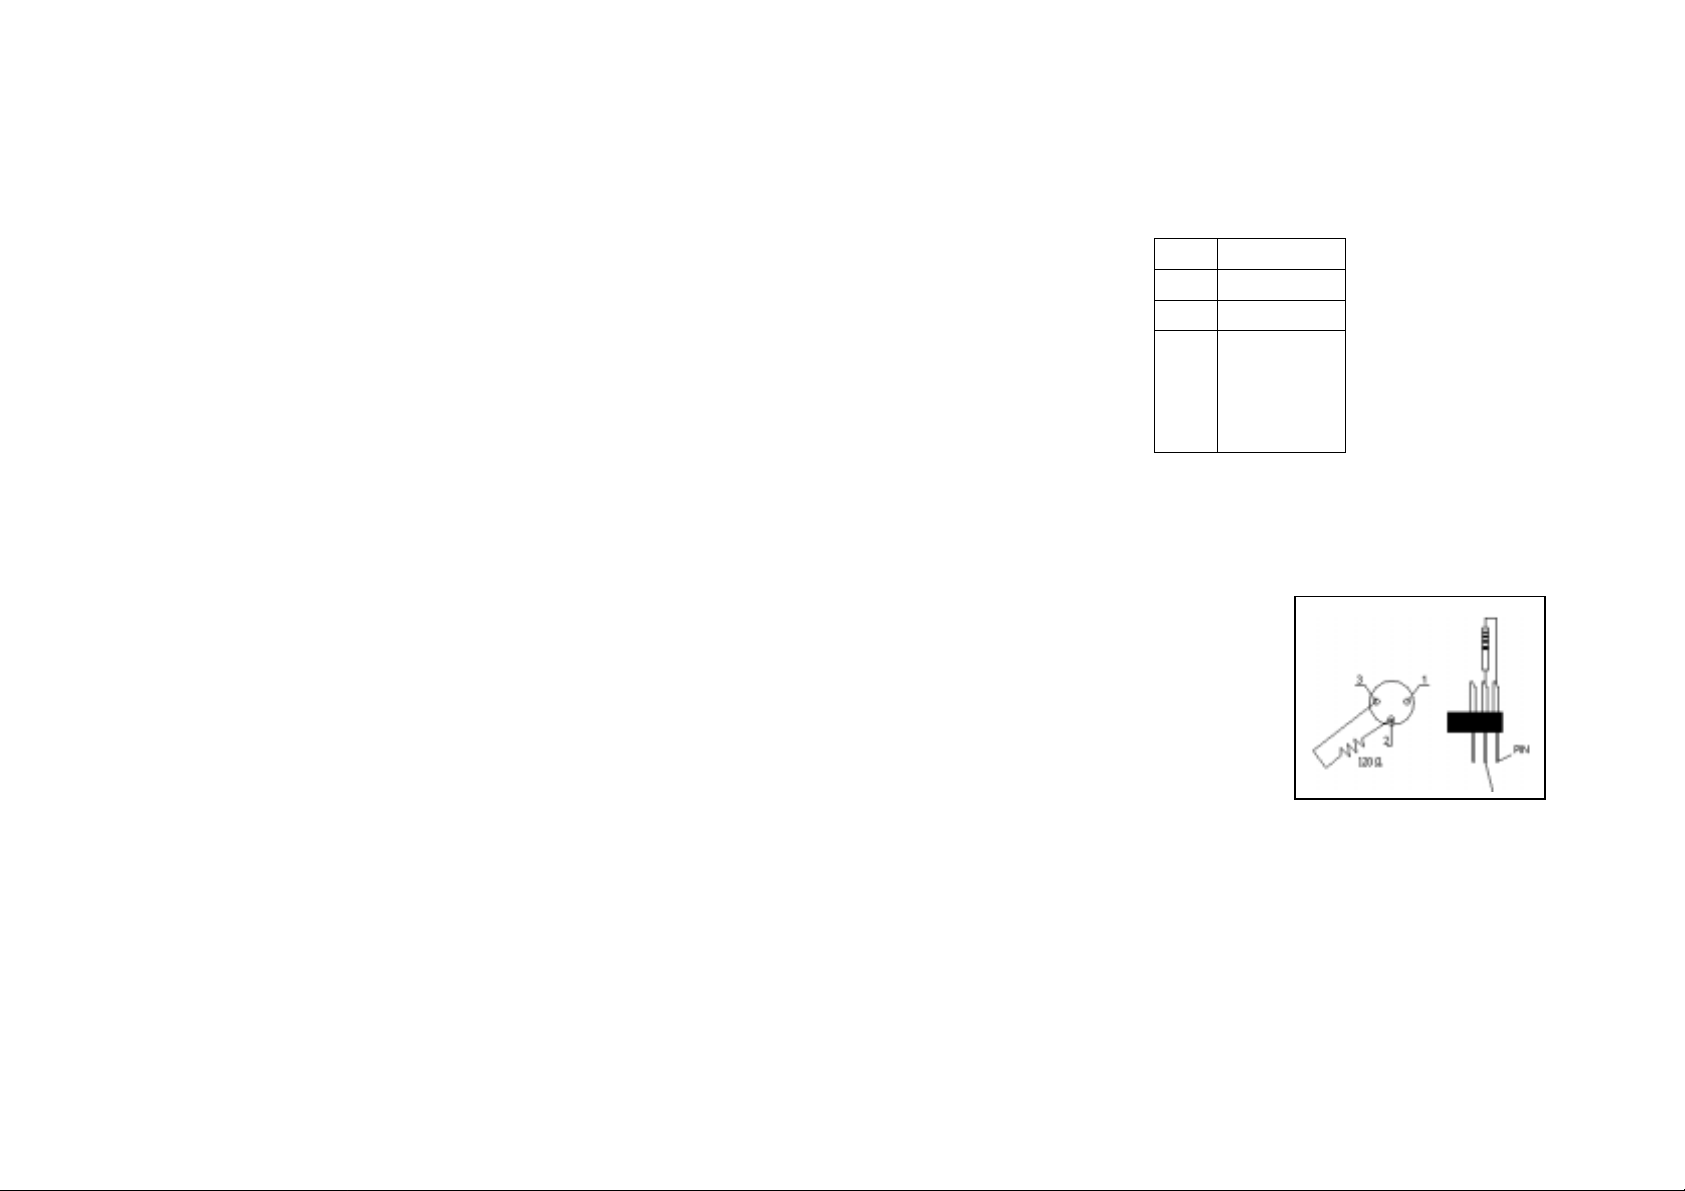
For all installation, having long signal
cables or in the presence of electric al
noise, for exam ple a discothequ e, it is
recommended practic e to use a DMX
terminator: this assist in preventing
corruption of the digital control signal
by external noise.
The DMX terminator is s imply an XLR connector with a 120Ω (Ohm)
resistor connected acros s pins 2 and 3, which is then plugged into the
DIGITAL THRU socket on the last projector in the chain.
18
Page 19

SOUND MODE
Setting the blinder in Sound Mode, the projector will work in musical
mode. The blinder receives the acoustic signals by the internal
microphone. The same microphone has the possibility to adjust its
sensitivity by rotating the knob sited near the display.
19
Page 20

(World Headquarters – Factory)
64027 Sant’Omero (TE) – Italy
e-mail: [email protected]
PROEL S.p.A.
Via alla Ruenia 37/43
Tel. +39 0861 81241
Fax. +39 0861 887862
www.proelgroup.com
 Loading...