

Production Basics 8632, 8634, 8633 Assembly Manual
ASSEMBLY MANUAL
1603A863
1
FLAT SCREEN MONITOR ARM AND
ADD-ON KEYBOARD TRAY
Item Numbers 8632, 8634 + 8633
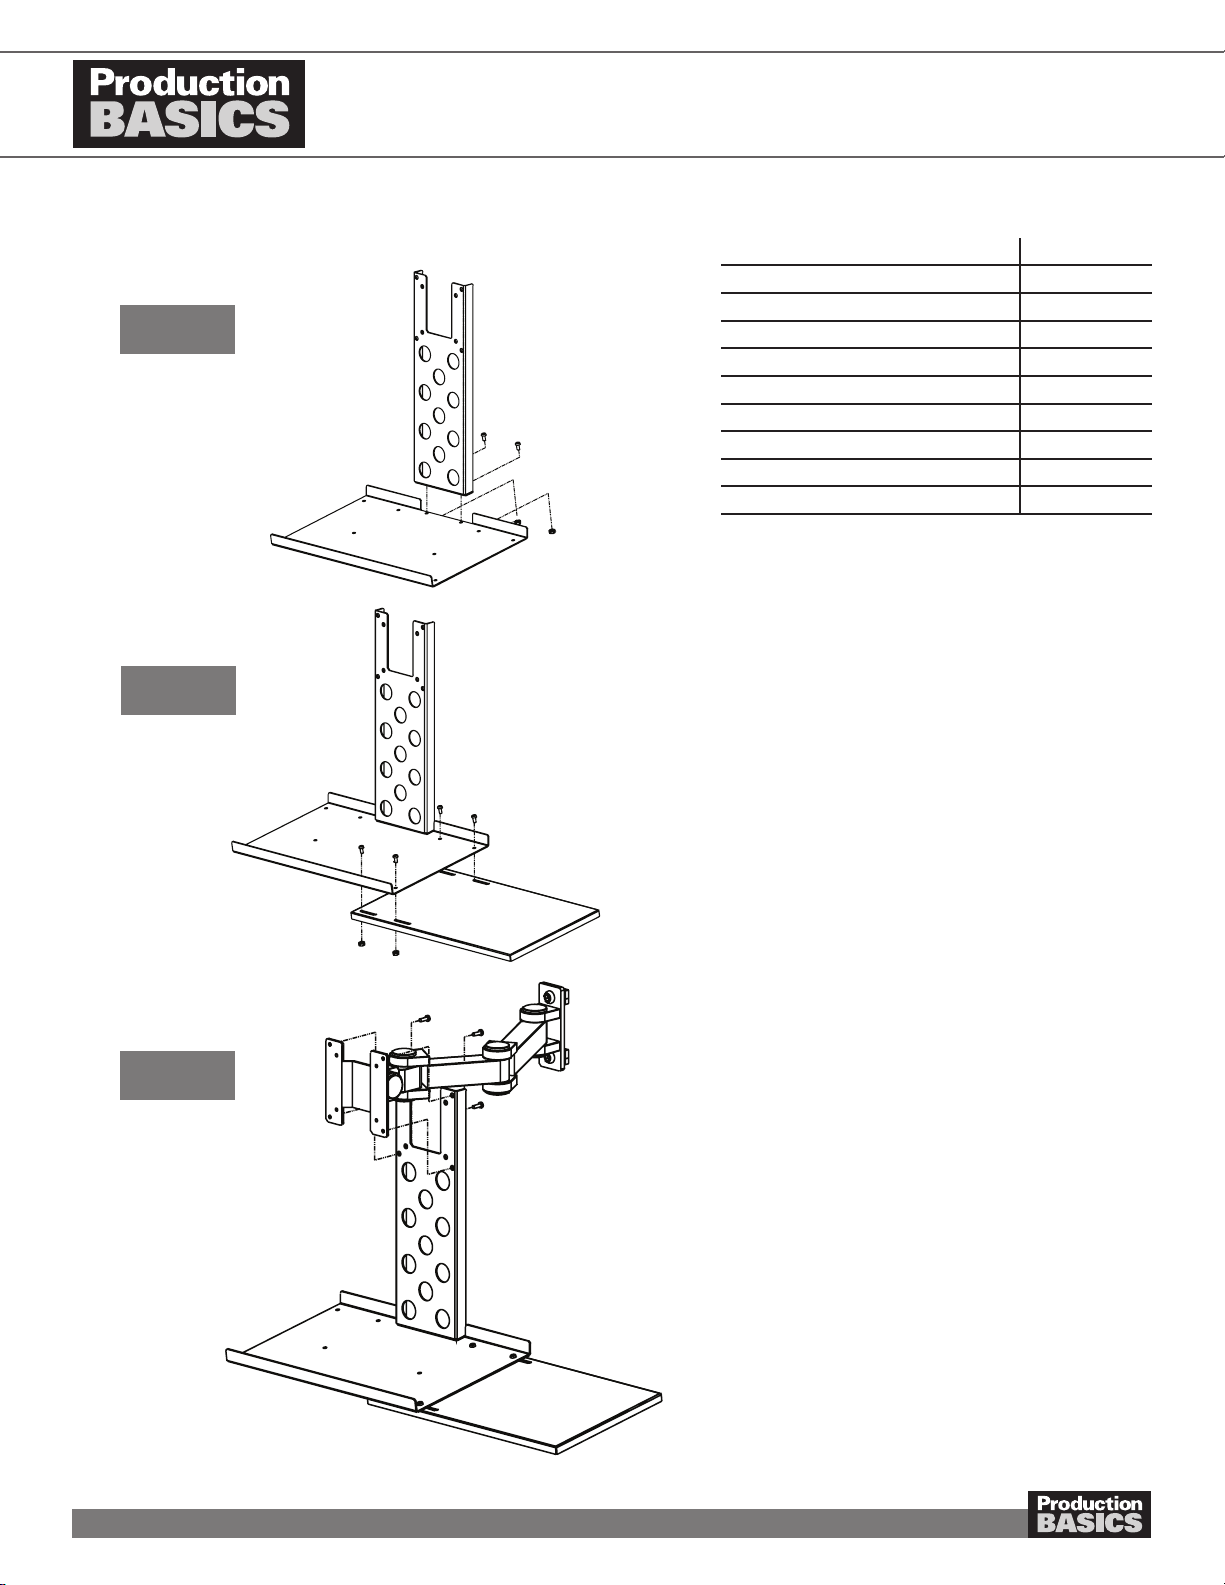
Step 1
Step 2
ACCESSORIES
PARTS AND HARDWARE QUANTITY
Keyboard Tray Base 1
Tray Extender 1
Mouse Pad 1
8-32 bolts 6
8-32 nuts 6
M4 x 14mm 4
Allen Wrench 1
Other Items Needed (not included)
Flat Screen Monitor Arm
• Note: Monitor Arm and Add-on Keyboard Tray
sold separately.
1. Attach Keyboard Tray Base to Tray Extender with two (2)
8-32 bolts and nuts.
2. Attach Mouse Pad to Keyboard Tray Base using four (4)
8-32 bolts and nuts. Mouse Pad can be positioned on
right, left or center front of Tray Base. Use adjustment
slots for proper sizing.
3. Install full assembly to the back of your Flat Screen
Monitor Arm (sold seperately), through the mounting plate
and then through the monitor. The Flat Screen Monitor
Arm mounting plate should be sandwiched between the
Add-on Keyboard Tray assembly and your monitor. Use
the bolts that came with your Flat Screen Monitor Arm.
Step 3
Production Basics, Inc. Massachusetts, USA 800.318.2770 617.926.8100 Fax: 617.926.8010 www.pbasics.com
ASSEMBLY VIDEOS AVAILABLE ON-LINE http://video.pbasics.com

ASSEMBLY MANUAL
1603A863
2
ADJUSTABLE KEYBOARD SUPPORT
Item Numbers 8680
Mounting Plate
See Step 4a for RTW Tables,
Easy-Lift 4-Post
Adapter Plate
See Step 1
Adapter Plate
See Step 2 for C-Leg,
Easy-Lift Dual-Leg
PARTS AND HARDWARE QUANTITY
Adapter Plate 1
Mounting Plate 1
8/32 Button head bolt 6
Nuts 6
Washers 6
Wood screws 4
Basic Bolts 4
Basic Nuts 4
7/32 Allen Wrench 1
3/32 Allen Wrench 1
1. Before assembling the keyboard support with the
enclosed instructions, attach mounting plate to adapter
using button head bolts and nuts provided. See diagram
at left.
2. Insert a Basic Bolt into the corner holes of the adapter
and secure with a Basic Nut, turning only one revolution.
See diagram at left. For RTW Tables, proceed to step
4a.
3. Insert nuts attached to adapter into Worksurface Support
Rails on your workstation, as shown. Turn Basic Bolt 90
degrees clockwise to grip. Tighten the bolts.
4. Proceed with enclosed instructions for your keyboard.
a. For RTW Tables, insert wood screws through holes
on tabs to attach Keyboard Support to underside of
worksurface.
5. Secure the wrist support by inserting plastic screws from
the bottom and tighten.
Production Basics, Inc. Massachusetts, USA 800.318.2770 617.926.8100 Fax: 617.926.8010 www.pbasics.com
ASSEMBLY VIDEOS AVAILABLE ON-LINE http://video.pbasics.com
 Loading...