

Production Basics 7301, 7312, 7311, 7302, 7321 Assembly Manual
...
ASSEMBLY MANUAL
Assembly Tips
Review entire instruction manual before proceeding.•
Production Basics name plate indicates front of frame. •
Don’t be a slave to gravity–recruit a co-worker to help you •
install and correctly position components and accessories.
References to ‘Left’ and ‘Right’ are oriented as if you were •
facing the front of the workstation.
Before assembly, choose the side where each storage •
package will be placed.
WORKSTATIONS
PEDSYS SERIES,
LEFT & RIGHT SIDE STORAGE
Item Numbers 7300-7455
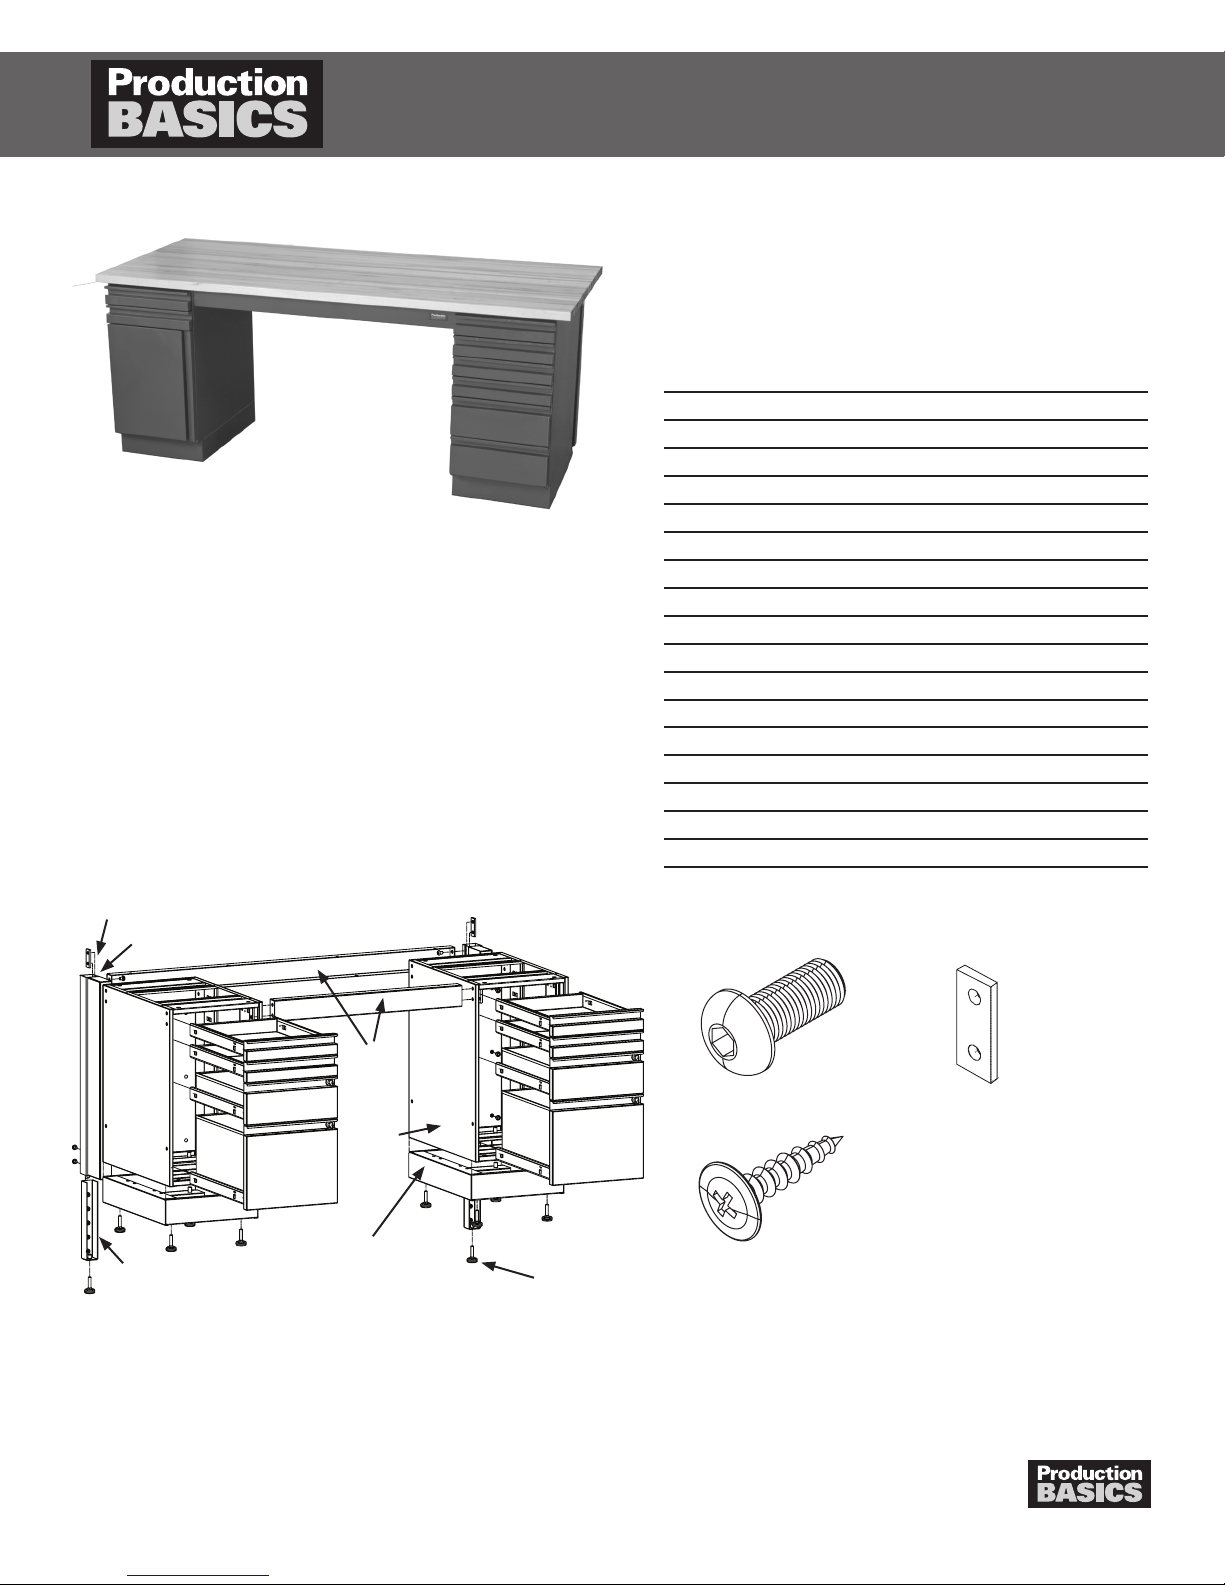
PARTS AND HARDWARE QUANTITY
PedSys Support Leg 2
Leg Adjusters 2
Short Support Rail (Front) 1
Long Support Rail (Back) 1
Chrome Mounting Plate
Leveling Feet
Basic Bolts 18
3/8 Kep nuts 6
Wood screws 15
Storage Package 2
7/32 Basic Allen Wrench (included) 1
Other Items Needed (not included)
Worksurface (sold separately)
Phillips head screwdriver or drill
Rubber Mallet
Level
Tape Measure
10
4
Chrome Mounting Plate
PedSys Support Leg
Leg Adjusters
Support
Rail
Storage
Package
PedSys base
Leveling Feet
Basic Bolt
Wood Screw
Chrome Mounting Plate
Production Basics, Inc. Massachusetts, USA 800.318.2770 617-926-8100 Fax: 617-926-8010 www.pbasics.com
1
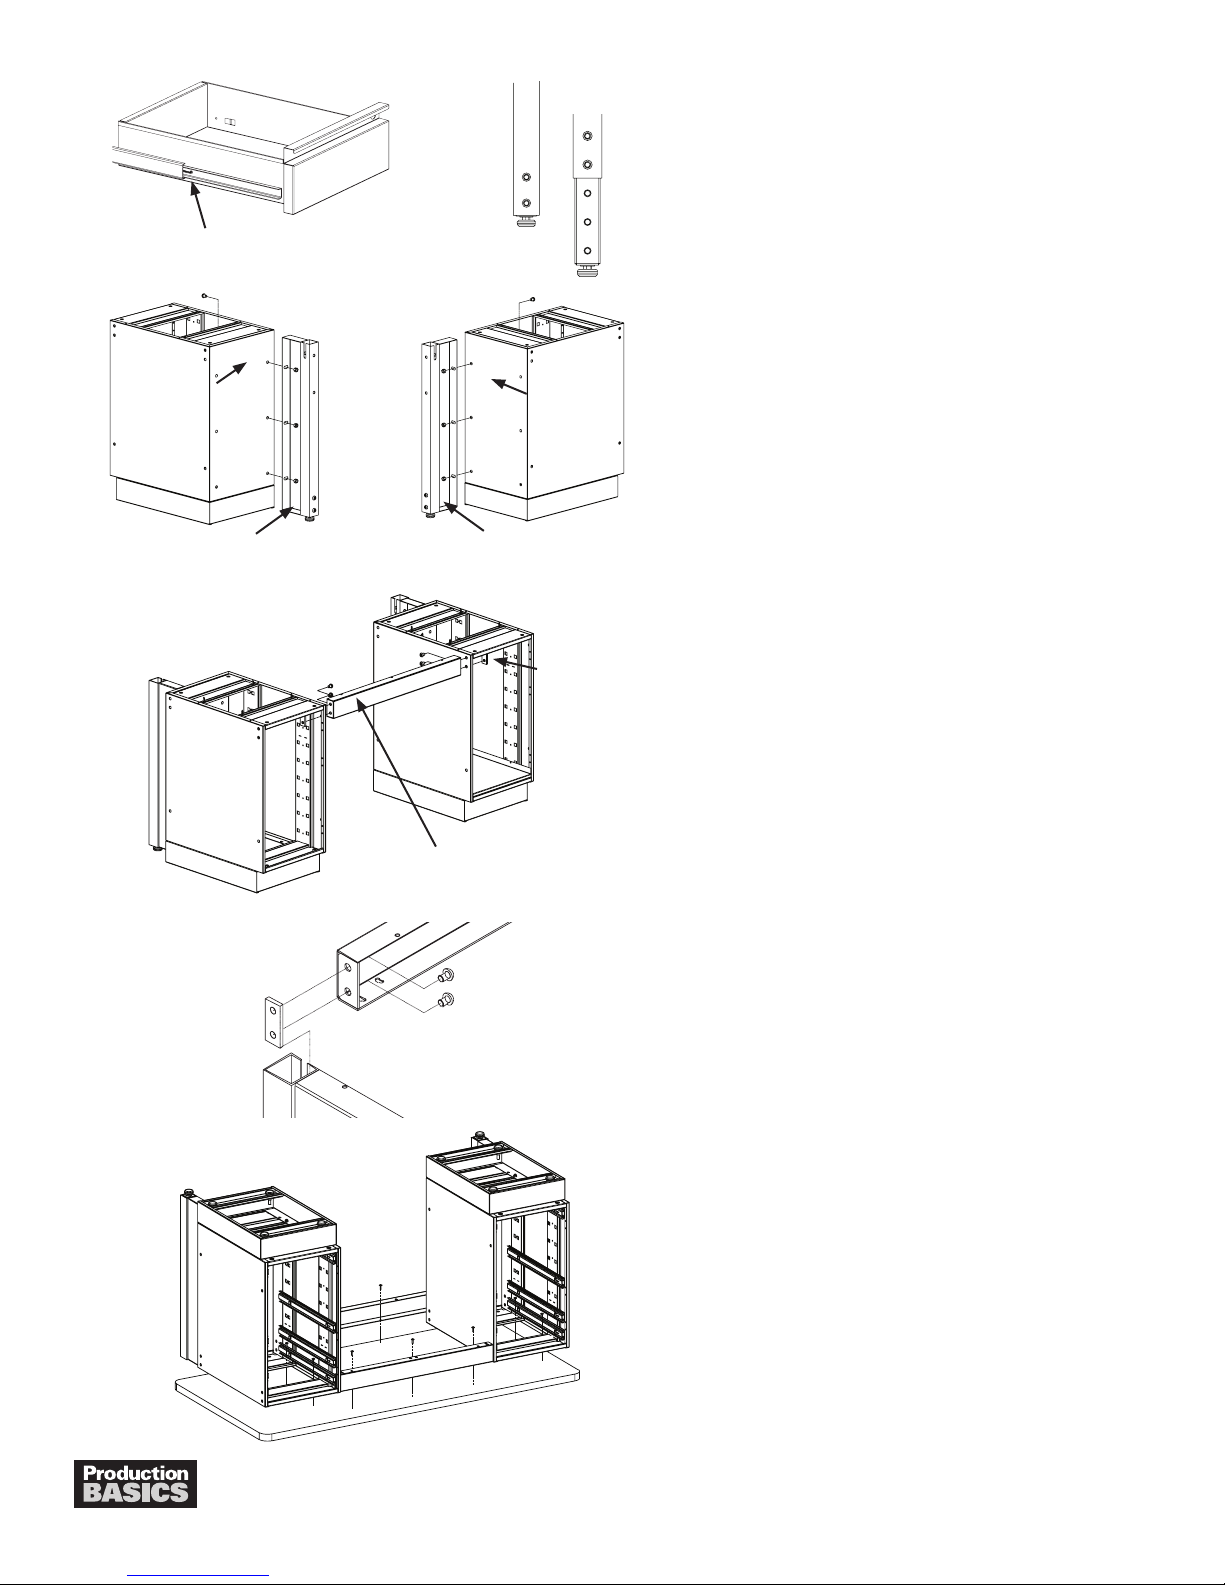
Black tabs- push to release drawer
Left Storage
Package-back
Left PedSys Support Leg
30” high
shorter Suppor t Rail
36” high
Right Storage
Package-back
Right PedSys Support Leg
Chrome Mounting Plate
Remove drawers and/or pull-out shelves from the 1.
Storage Package by pushing up or down on the black
tabs (depending on side) on both sides of the drawer
slide and pull forward. Set aside.
Screw leveling feet into the bottom of the Leg Adjusters. 2.
Slide Leg Adjusters into the bottom of the PedSys 3.
Support Legs and secure position by inserting two
(2) Basic Bolts. For 30” high models, Basic Bolts will
secure Leg Adjusters in the lowest position. For 36” high
models, Basic Bolts will secure Leg Adjusters in the
highest position, using top 2 holes.
Punch out bolt holes on the back of the storage 4.
package using a mallet and screwdriver. Insert
three (3) Basic Bolts from the inside of the Storage
Package through the PedSys Support Leg and secure
with kep nut. Repeat for opposite storage package.
Locate Support Rails. Loosely attach the Chrome 5.
Mounting Plates to the outside of the longer Support Rail
with two (2) Basic Bolts using Allen wrench provided.
Repeat for other side.
Punch out bolt holes on the side corners of the 6.
Storage Package using a mallet and screwdriver.
Insert Basic Bolts from the inside of the short Support
Rail through the Storage Package and secure with
a Chrome Mounting Plate on the inside corner of
Storage Package. Channel faces inward and oval
slots face downward on Support Rail. Repeat for
other side. Tighten connections.
Set long Support Rail between PedSys Support Legs 7.
from Step 3, creating the back width of your work bench.
Channel faces inward and oval slots downward. Tighten
connections.
Makenaladjustmentsandtightenallhardware,8.
ensuring PedSys Support Frame and Storage Package
components are square.
Invert the assembled PedSys work bench onto the 9.
underside of the worksurface. Position the worksurface
ushwiththebackoftheunitwithequaloverhang,left
and right.
Attach the worksurface to the PedSys assembly by 10.
drilling wood screws through the pre-drilled holes in
the Support Rails and Storage Packages, then into
the underside of the worksurface. For Phenolic Resin
surfaces, see Phenolic Resin assembly instructions.
Turn complete assembly right side up. Replace drawers 11.
and pull-out shelves in Storage Package.
Need Help? Call Assembly Support at 800.318.2770
2
 Loading...