

Produal TEUFL Series, TEUFL-24, TEUFL-DI User Manual
COMMISSIONING
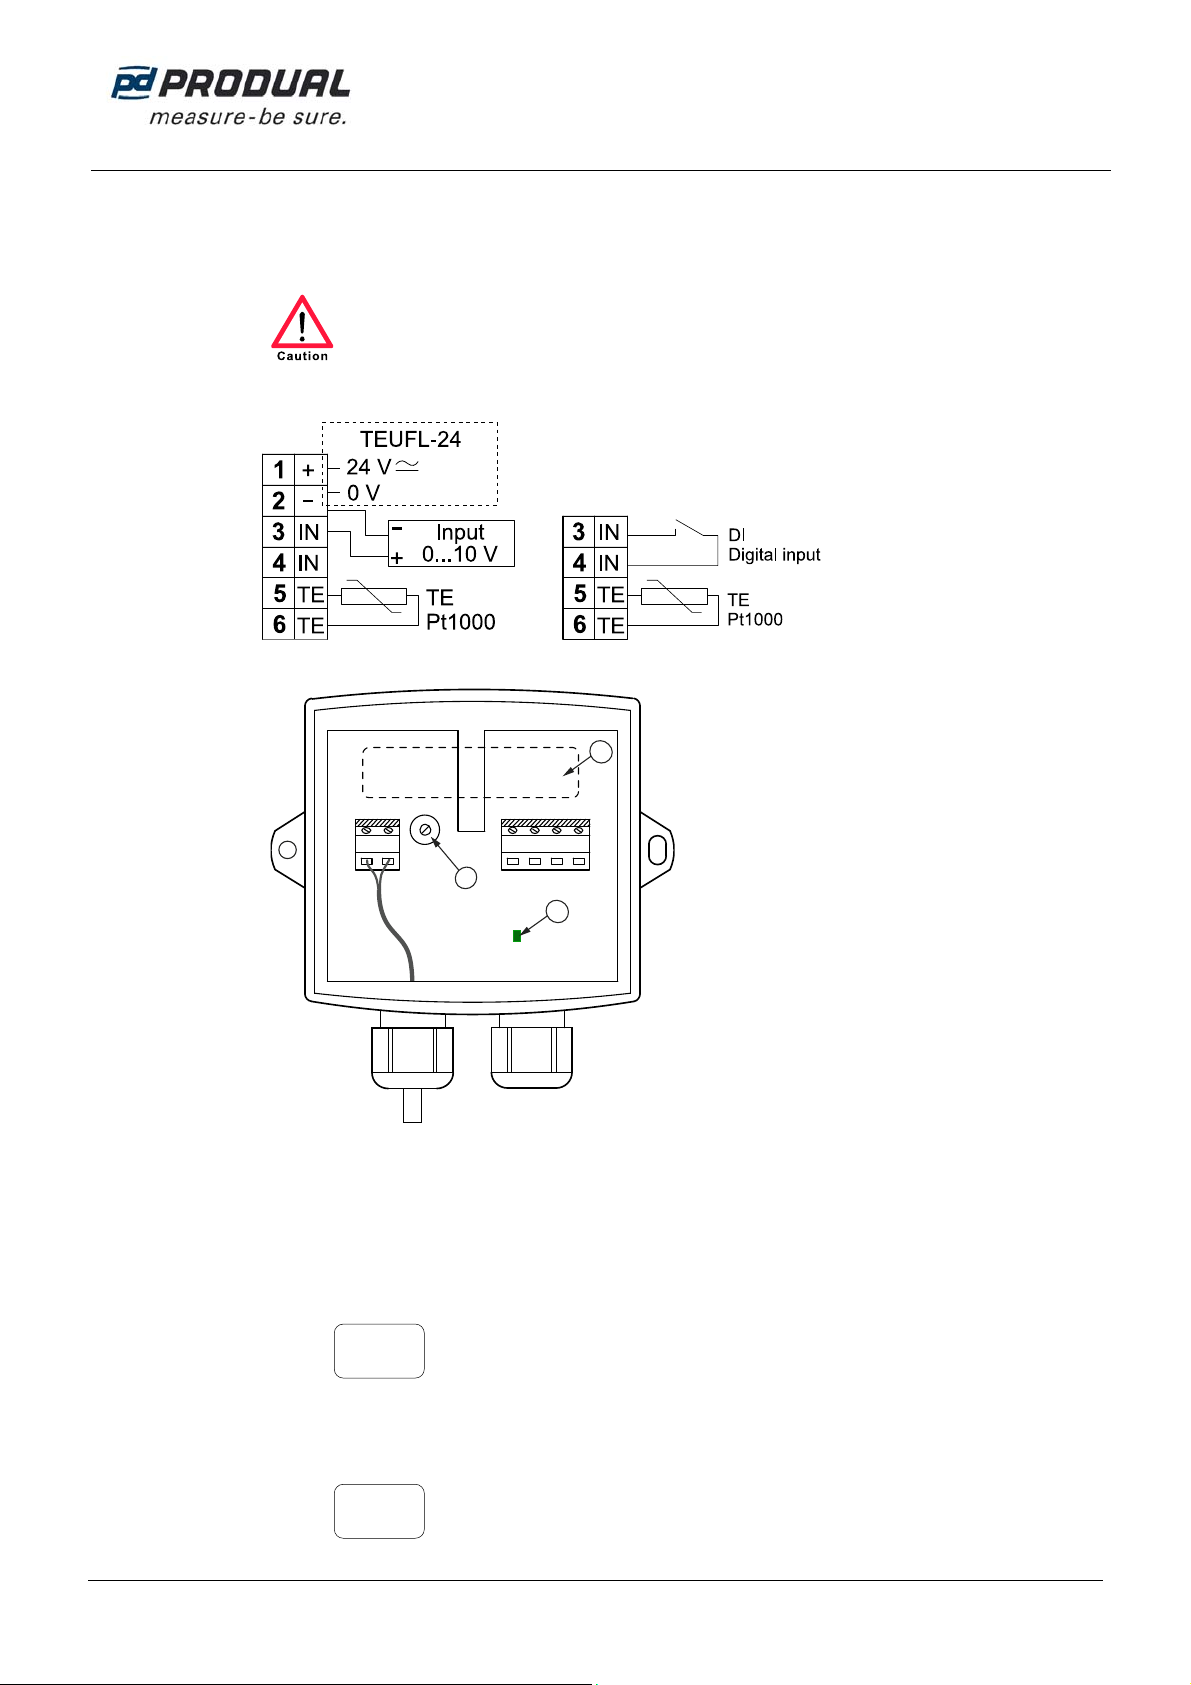
Wiring
Device wiring and commissioning can only be carried out by qualified professionals. Always make the
wirings while the power is switched off.
TEUFL and TEUFL-24 TEUFL-DI
B
USER GUIDE
TEUFL
V2.2 (05.12.2014)
1 (2)
B battery (TEUFL and TEUFL-DI)
P potentiometer for setting the transmission interval
(6 s…30 min)
L indicator light
56 1234
P
+-inin
L
Connecting the transmitter to the wireless network
The FLSER commissioning tool is needed for transmitter commissioning.
1. Disconnect the transmitter power supply (battery / 24 V supply).
2. Set the FLSER tool switch to the MID position.
3. Push the + and - buttons to select the FLTA base station master ID (MID) to which you are connecting the
transmitter.
6
MID=
4. Push the OK button.
5. Set the FLSER tool switch to the S-RID position.
6. Push the + and - buttons to select the sensor ID (SID) for the transmitter.
8
SID=
Produal Oy Keltakalliontie 18, 48770 Kotka FINLAND Tel: +358 10 219 9100 / Fax: +358 5 230 9210 info@produal.fi www.produal.com
Information is subject to change without prior notice.
USER GUIDE
TEUFL
7. Push the OK button.
“Wait” message starts to flash on the FLSER tool display. You have now approximately 30 seconds to
complete the next step.
8. Connect the transmitter power supply.
“OK” flashes on the FLSER display. When the flashing stops, the transmitter is ready to start the
communication with the FLTA base station.
9. FLSER tool starts to display the communication signal strengths between the FLSER and transmitter.
2 (2)
8
RSSI 9
The bigger number indicates the strength of the received signal sent by FLSER and the smaller number the
strength of received signal sent by the transmitter.
Received Signal Strength Indication:
1…2 = poor,
3…5 = satisfactory,
6…9 = good
10. Leave the transmitter to the planned position and go to the FLTA base station.
11. Check that the signal strengths are adequate.
12. Set the FLSER tool switch to the OFF position.
The transmitter starts to communicate with the FLTA base station.
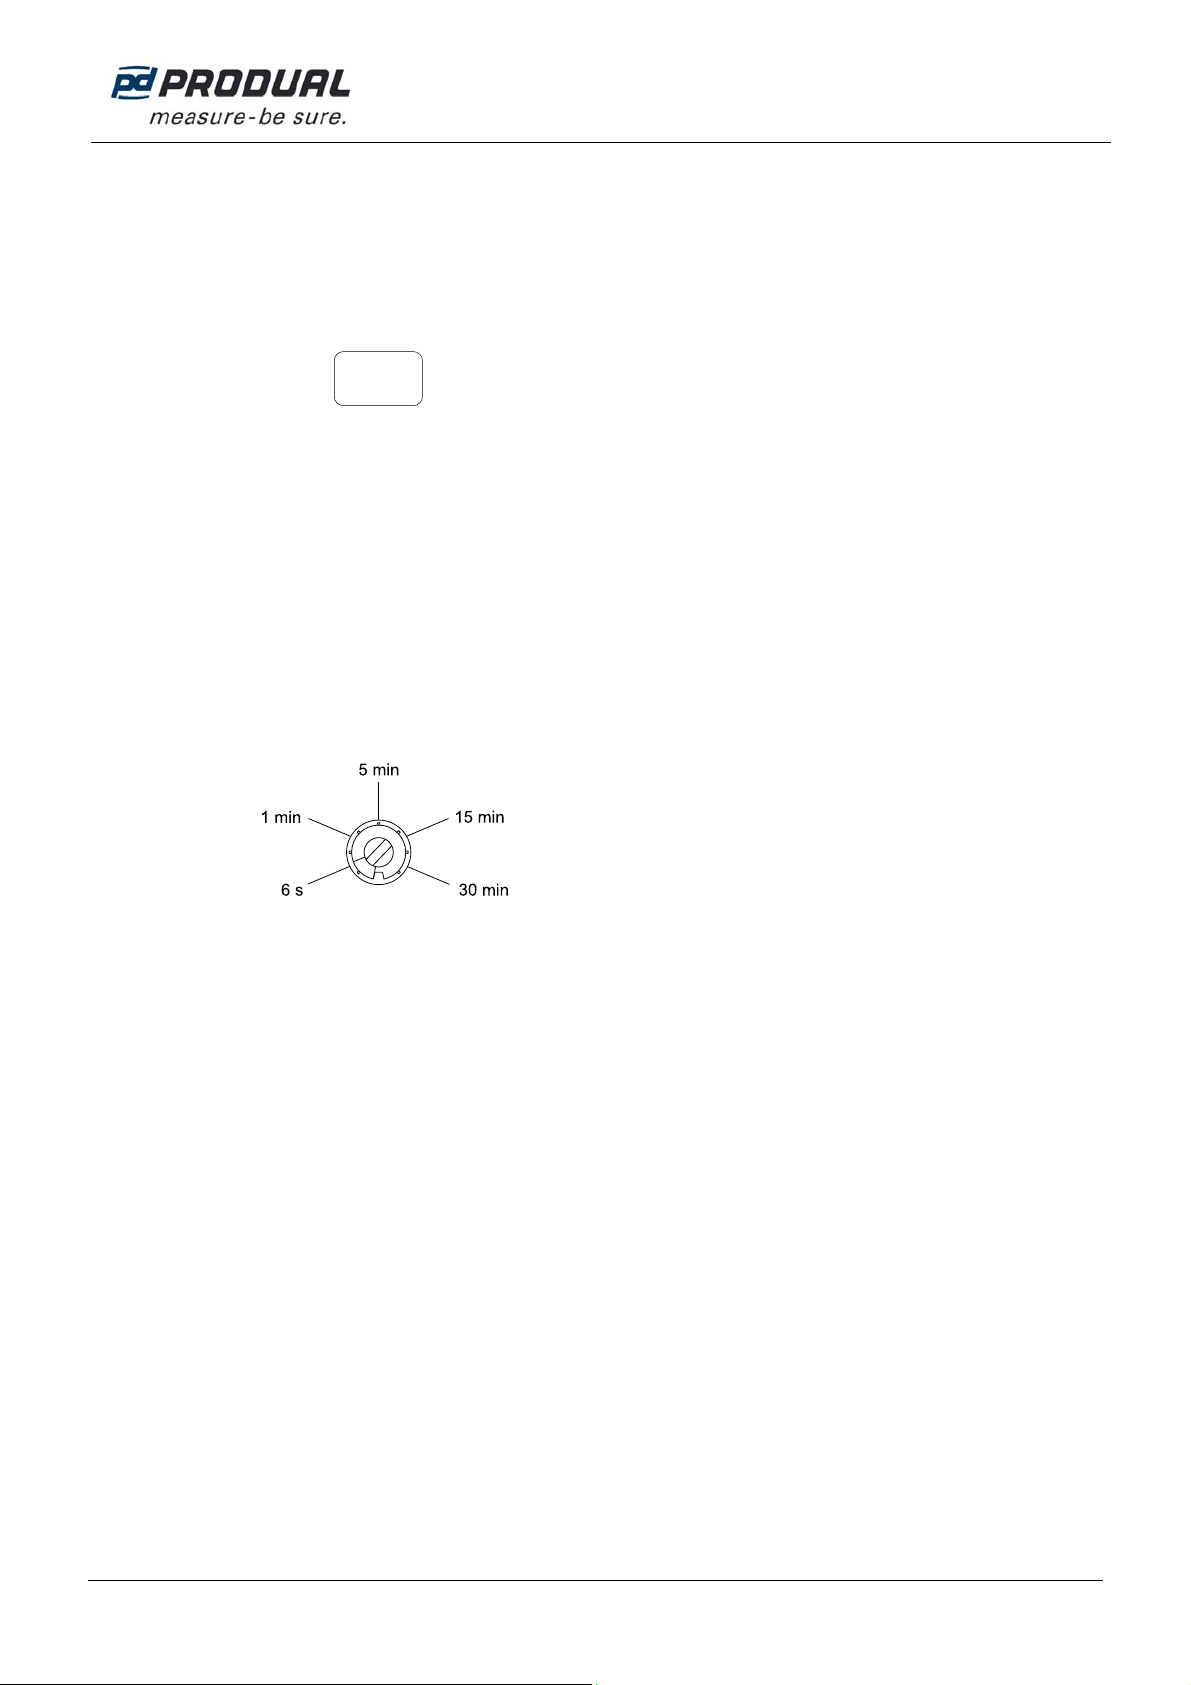
Selecting the transmission interval
You can select transmission interval with a trimmer inside the device.
The indicator light informs which interval is selected when you turn the trimmer:
1 flash 6 seconds
2 flashes 1 minute
3 flashes 5 minutes
4 flashes 15 minutes
5 flashes 30 minutes
INDICATOR LIGHT FUNCTIONS IN ERROR SITUATIONS
The device informs the possible network problems and service needs with an indicator light:
One flash every other second network error and low battery
One flash every four seconds low battery
One flash every eight seconds network error
Produal Oy Keltakalliontie 18, 48770 Kotka FINLAND Tel: +358 10 219 9100 / Fax: +358 5 230 9210 info@produal.fi www.produal.com
Information is subject to change without prior notice.
 Loading...