

Page 1
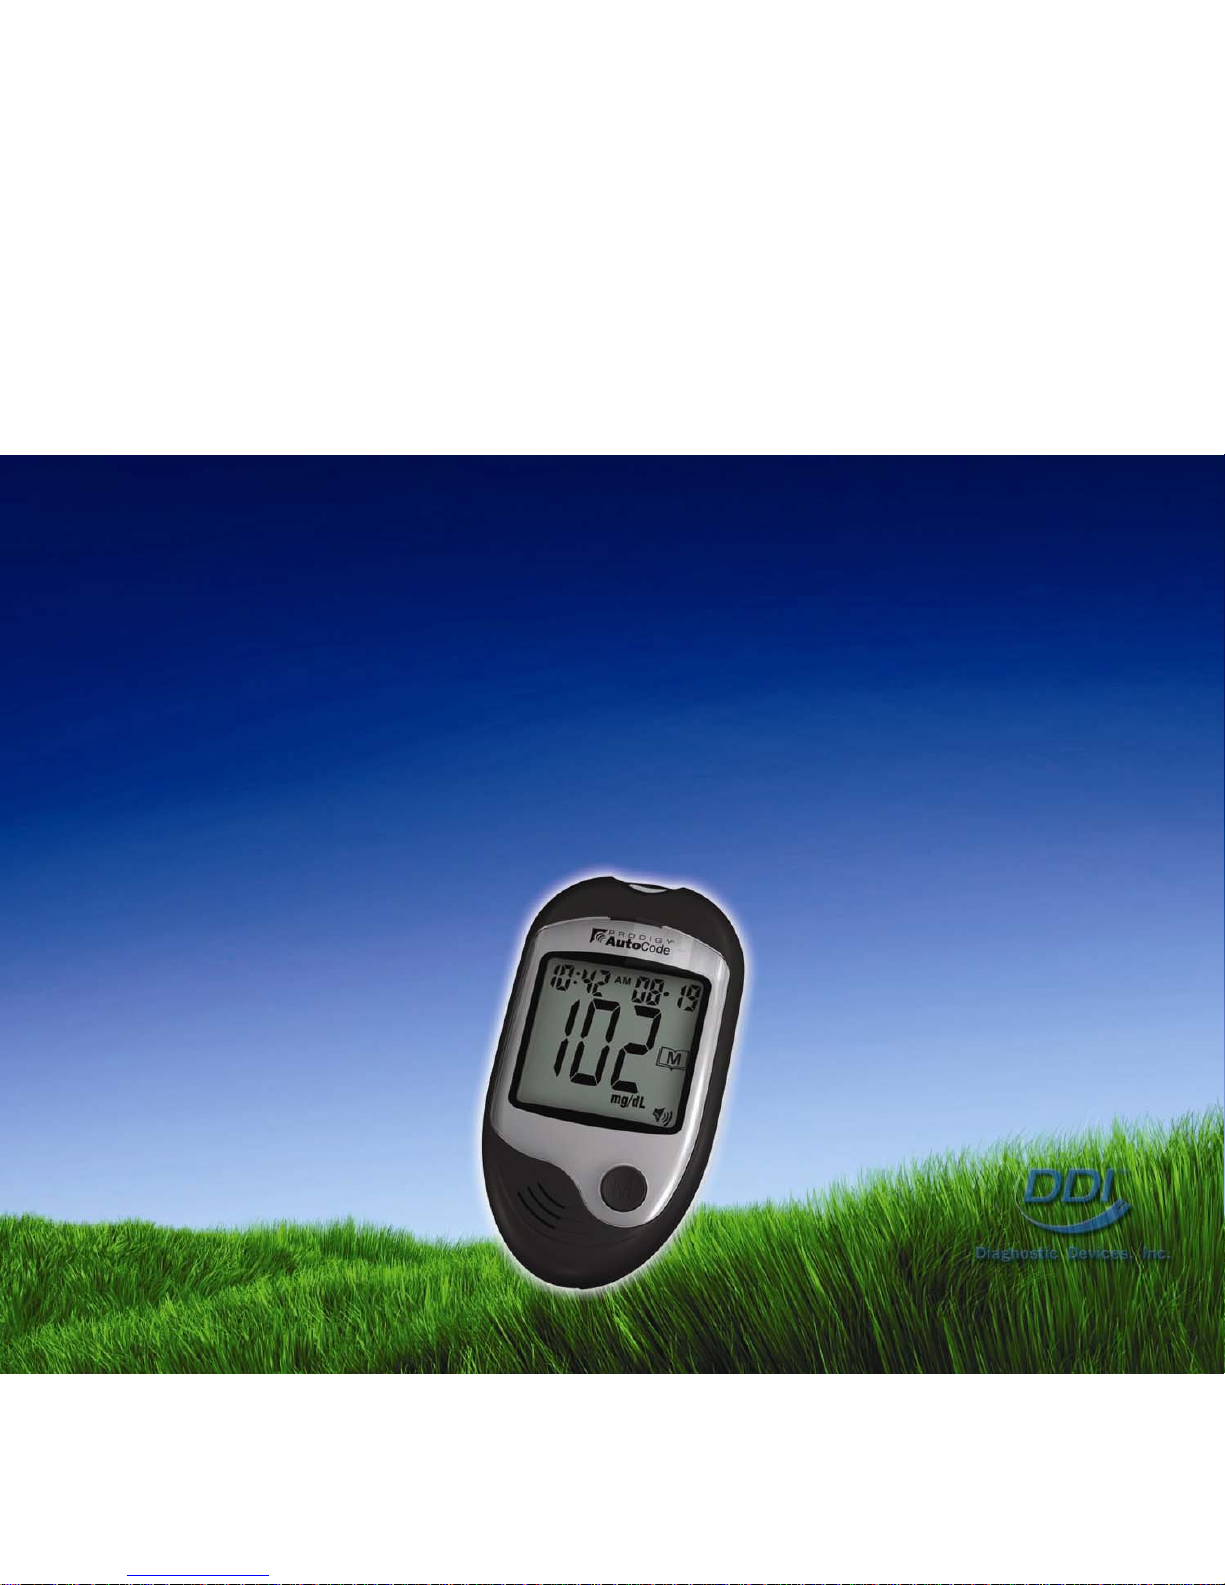
Prodigy AutoCode
®
Reference Guide
Page 2

• Diagnostic Devices, Inc. (DDI) is an innovative
American-based company committed to providing
the newest technology by offering high quality
diabetes products with great features at an
affordable cost to help people manage their
disease.
• “Living Well with Diabetes
™
” is our latest campaign
that motivates diabetics to lead a healthy lifestyle
and encourages them to live well with diabetes.
About Diagnostic Devices, Inc.
Page 3

• Audible
Speaks in English and Spanish.
• No-Coding
Simply insert test strip.
• Fast Results
Hear accurate test results in only 7 seconds.
• One Button Simplicity
Easy one button navigation.
Key Features
Page 4

• Small Blood Sample
Requires only a tiny drop of blood.
• Alternate Site Testing (AST)
Test on the palm, the forearm, the upper arm,
the calf or the thigh.
• Data Management
Stores up to 120 test results with date and
time. Provides 7, 14, and 28-day averages.
FREE Prodigy®Diabetes Management Software
available online at
www.prodigymeter.com
Key Features
Page 5
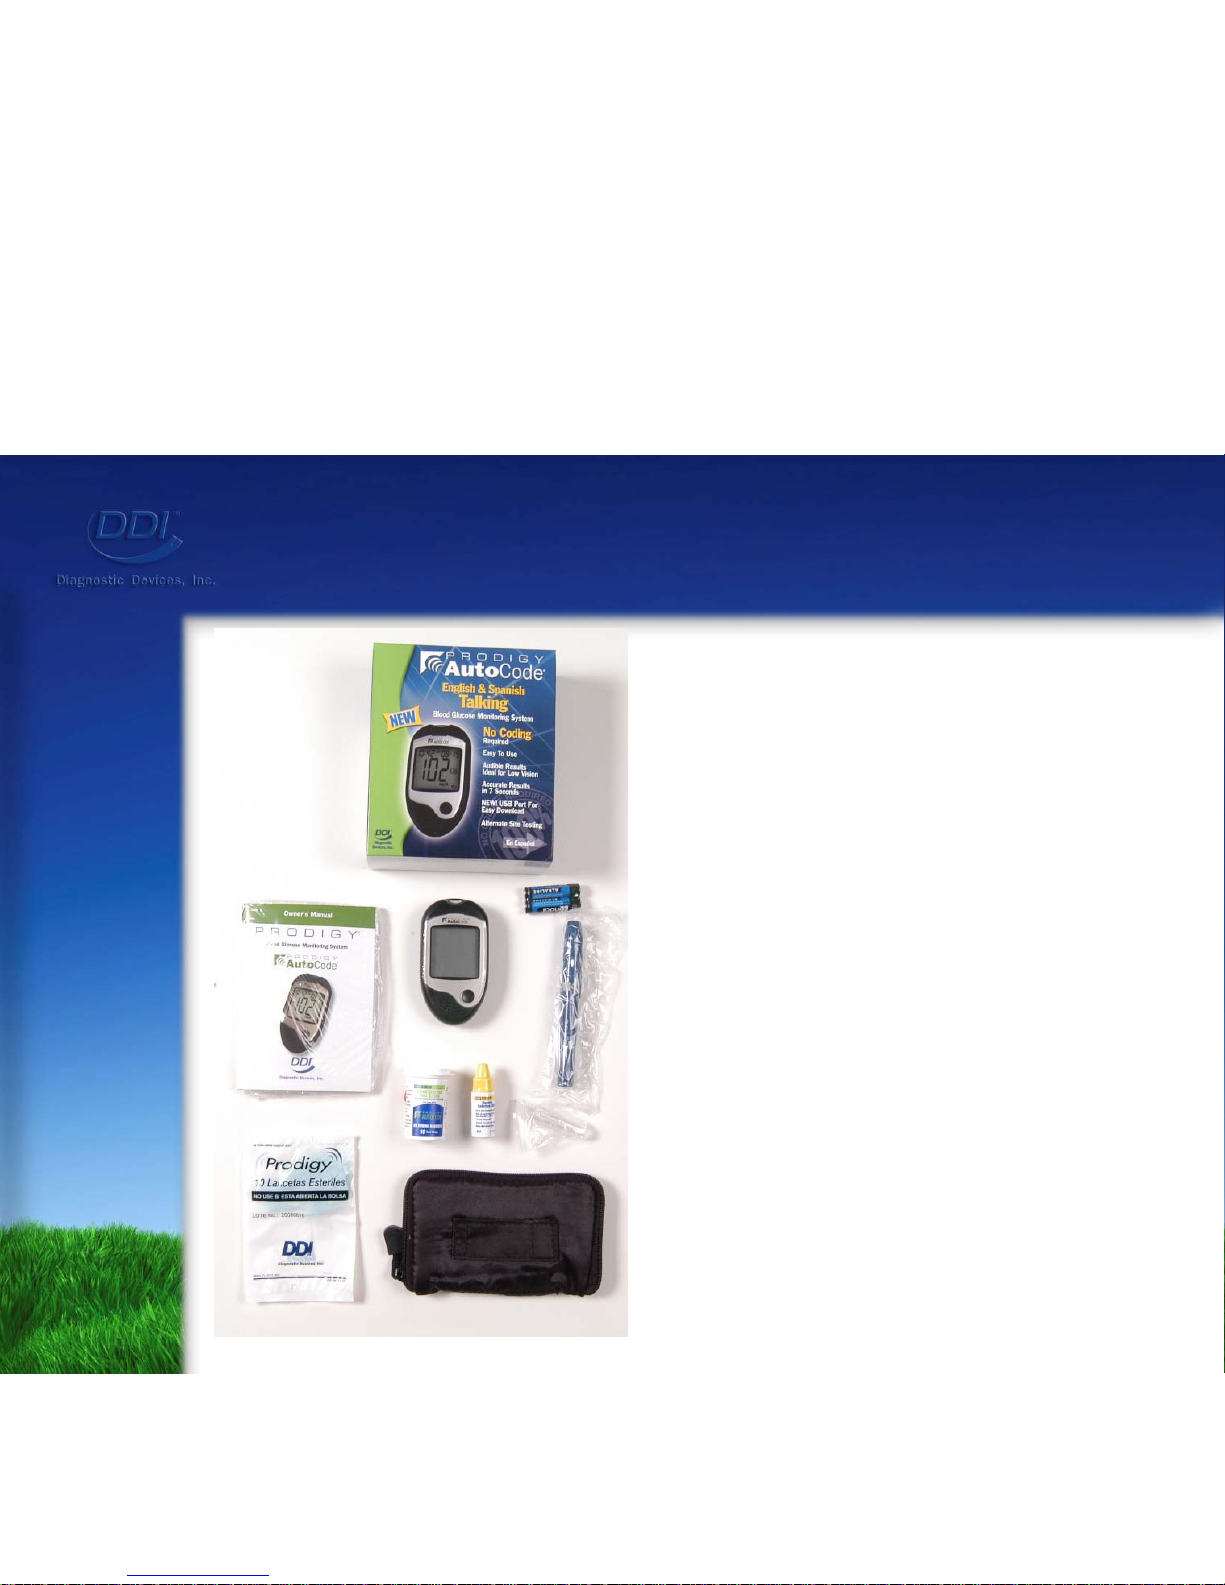
Prodigy AutoCode® Meter
Prodigy AutoCode
®
Test Strips
Prodigy Control Solution
Lancing Device
Clear Cap
Lancets
Owner’s Manual (printed)
Log Book
Warranty Card
Two (2) AAA Alkaline batteries
Carrying Case
Contents
Page 6
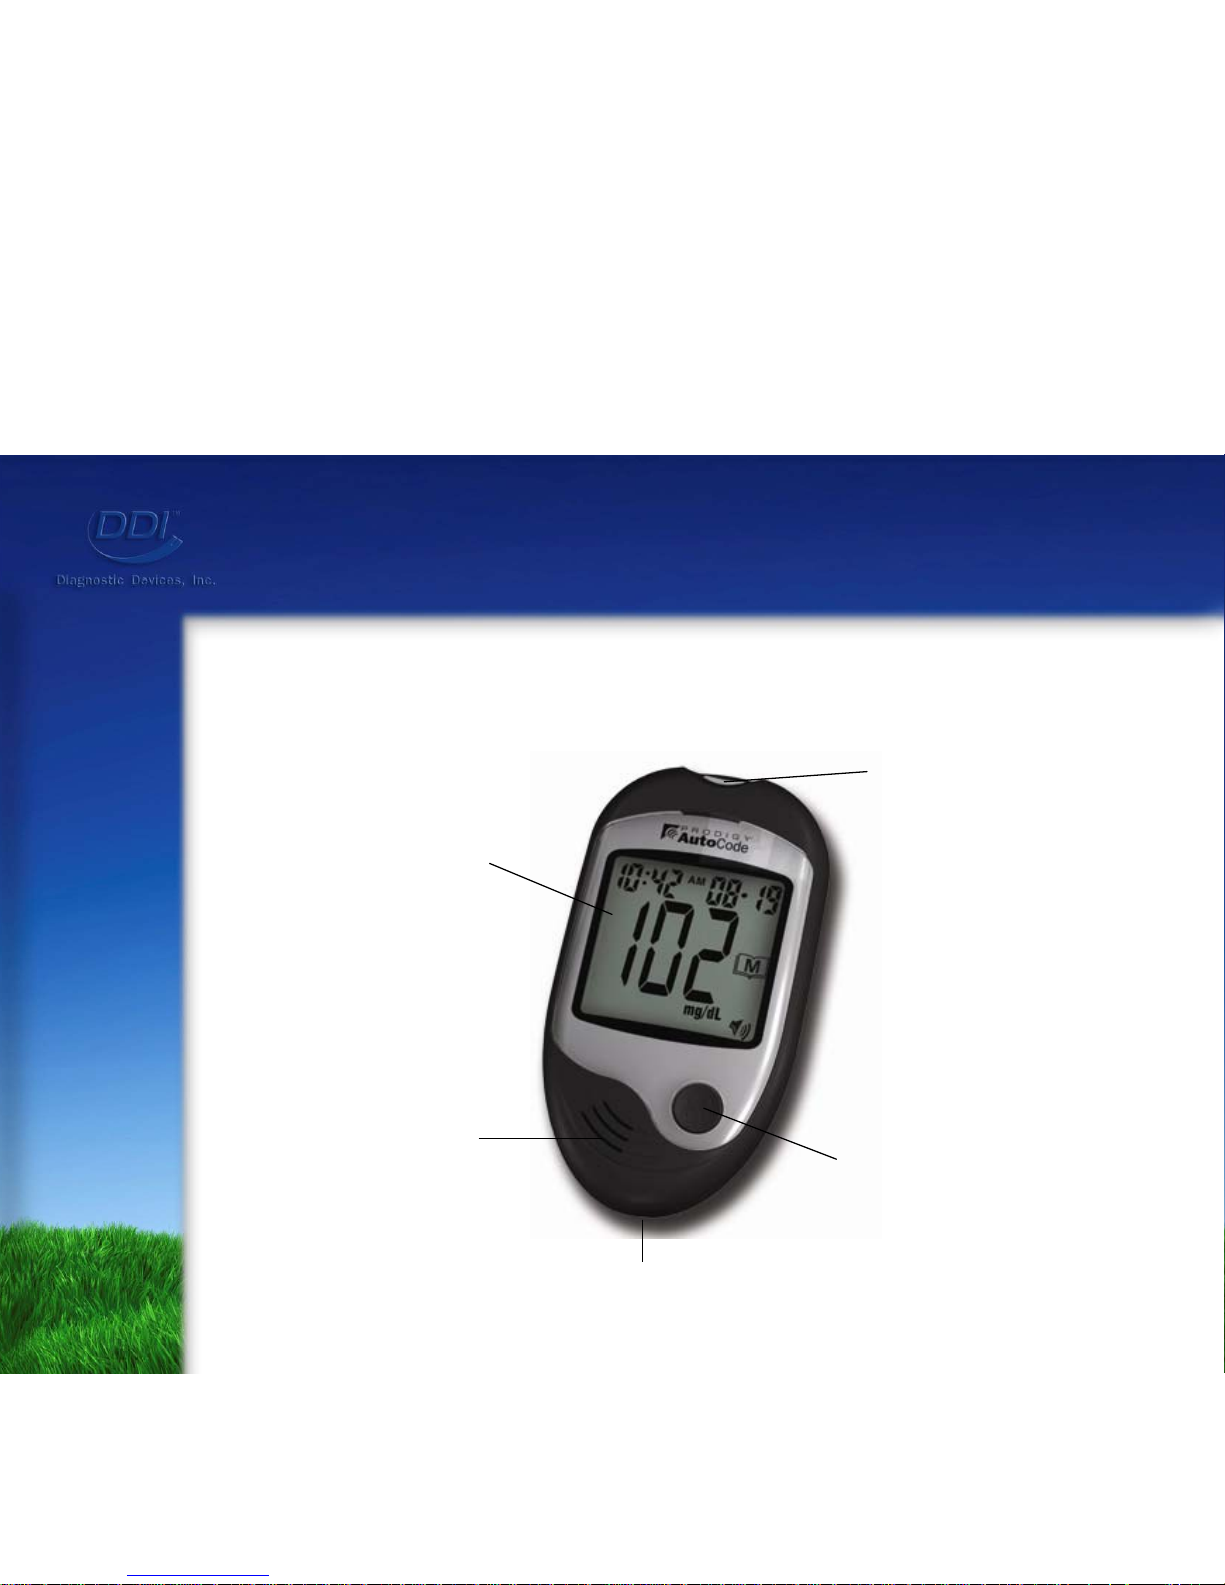
Front of Meter
Orientation & Functions
LCD Display
Speaker
Standard USB Port
Main Button
Test Strip Slot
Page 7
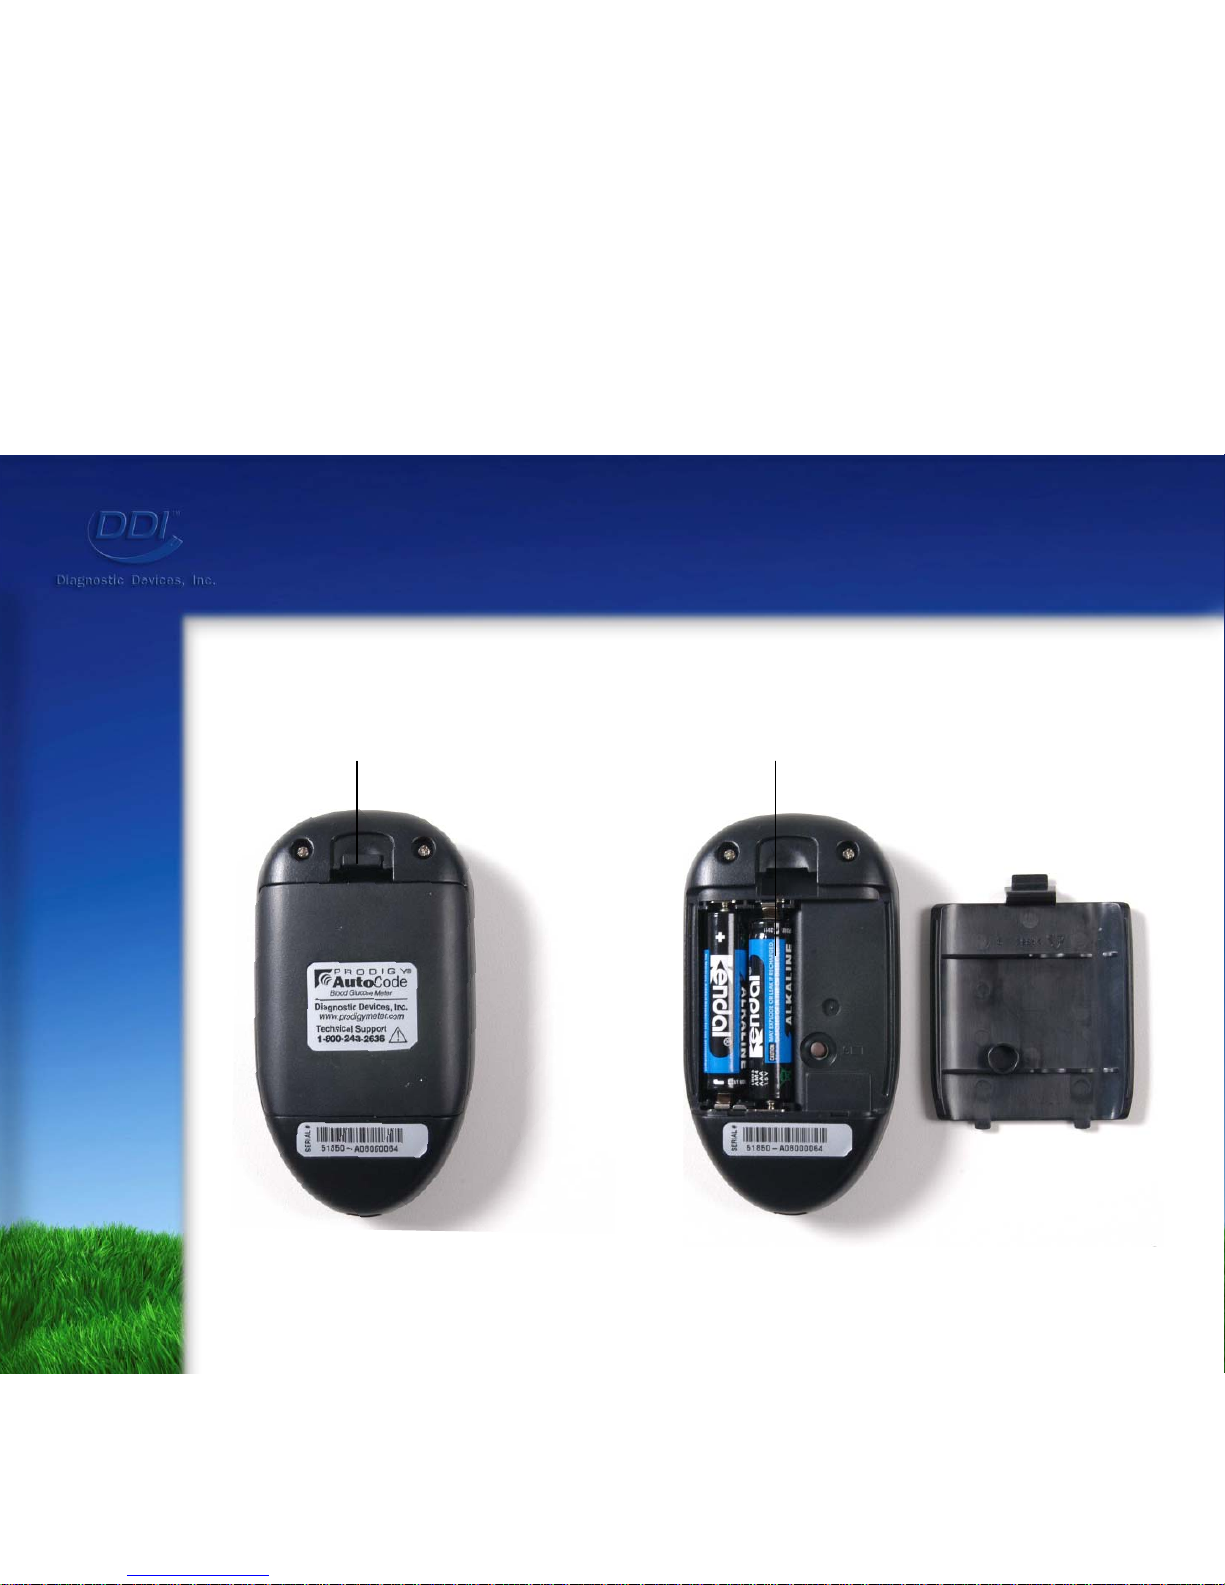
Orientation & Functions
Buckle
Back Of Meter
* Requires two (2) AAA Alkaline Batteries.
Battery Compartment
Page 8

Orientation & Functions
• Test Strip Slot
Where the test strip is inserted for testing.
• Main Button
Used to turn the meter on, enter memory recall
mode and navigate through the settings.
• Standard USB Port
Download the meter’s test results to a
computer with Prodigy
’s FREE software.
• LCD Display
Displays test results, symbols and simple messages.
• Speaker
Used to hear audible messages.
Page 9
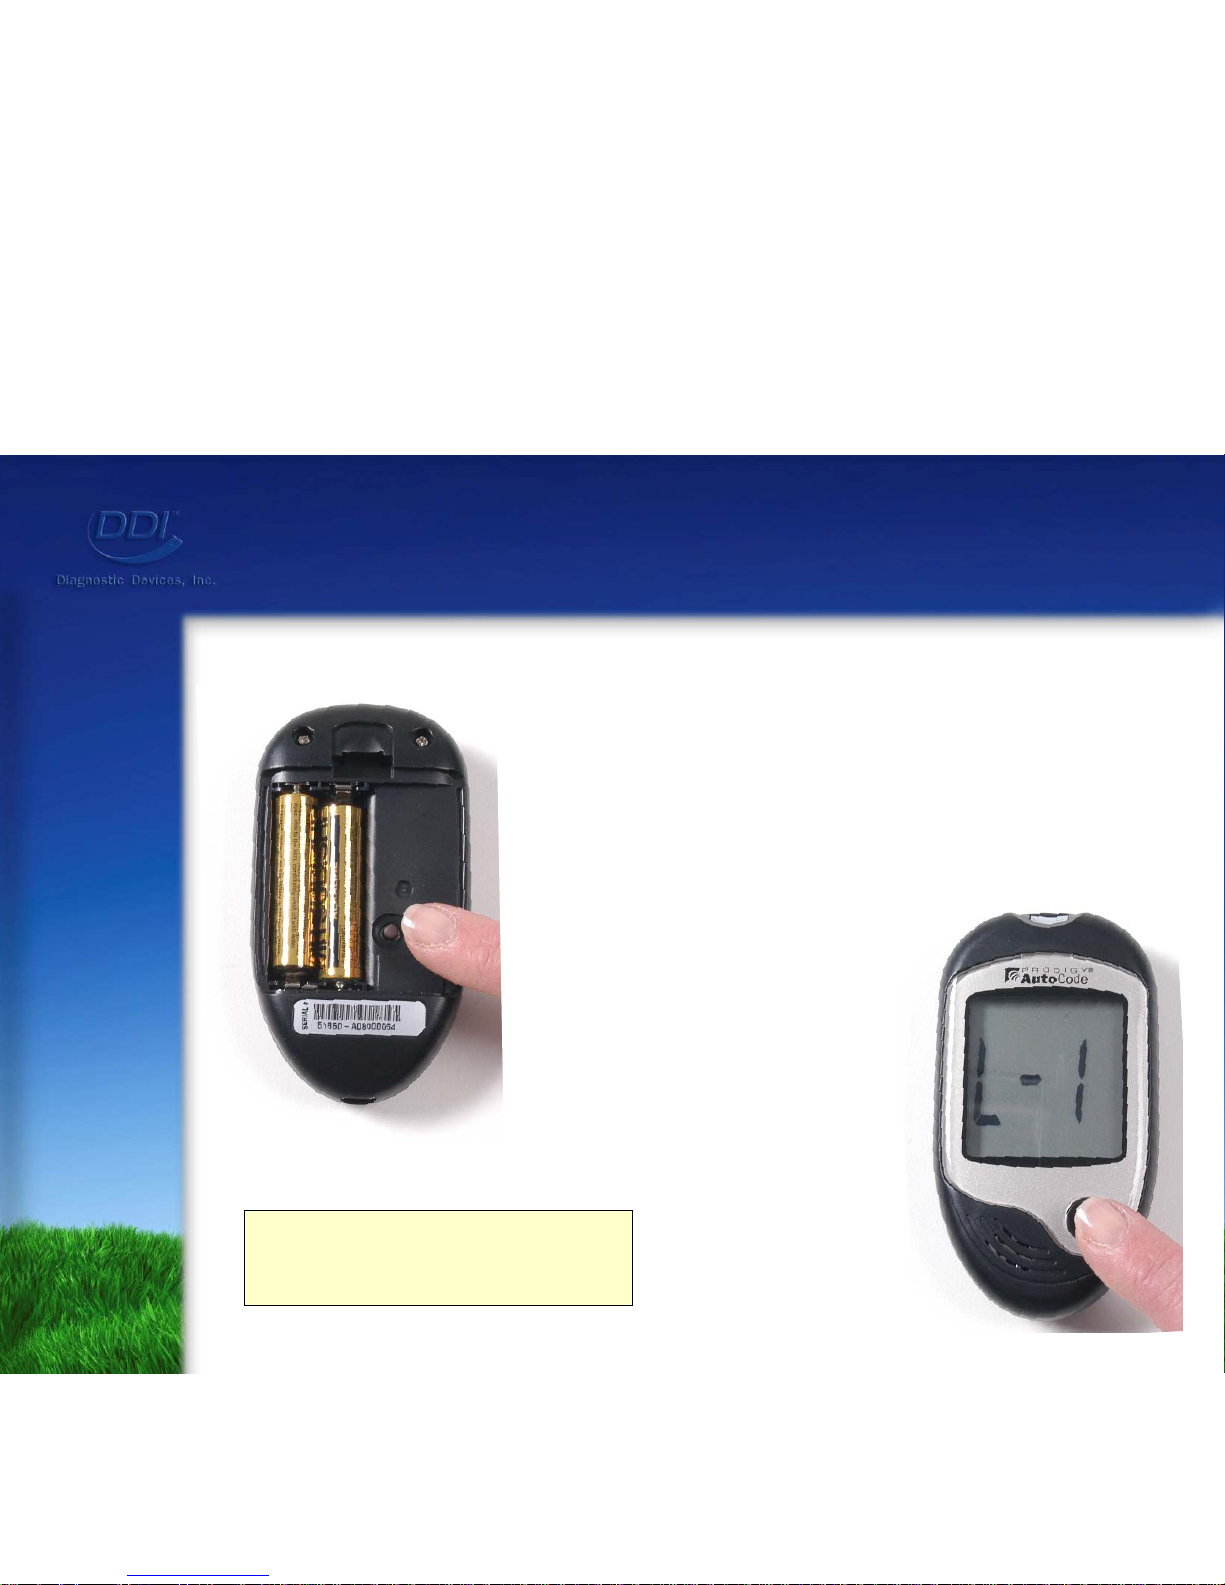
Setting Up the Meter
Step 2: Press the
“M” button
for the
desired
language.
L1: English Language
L2: Spanish Language
Step 1: To enter setting mode,
press & hold down the
“Set” button.
Page 10
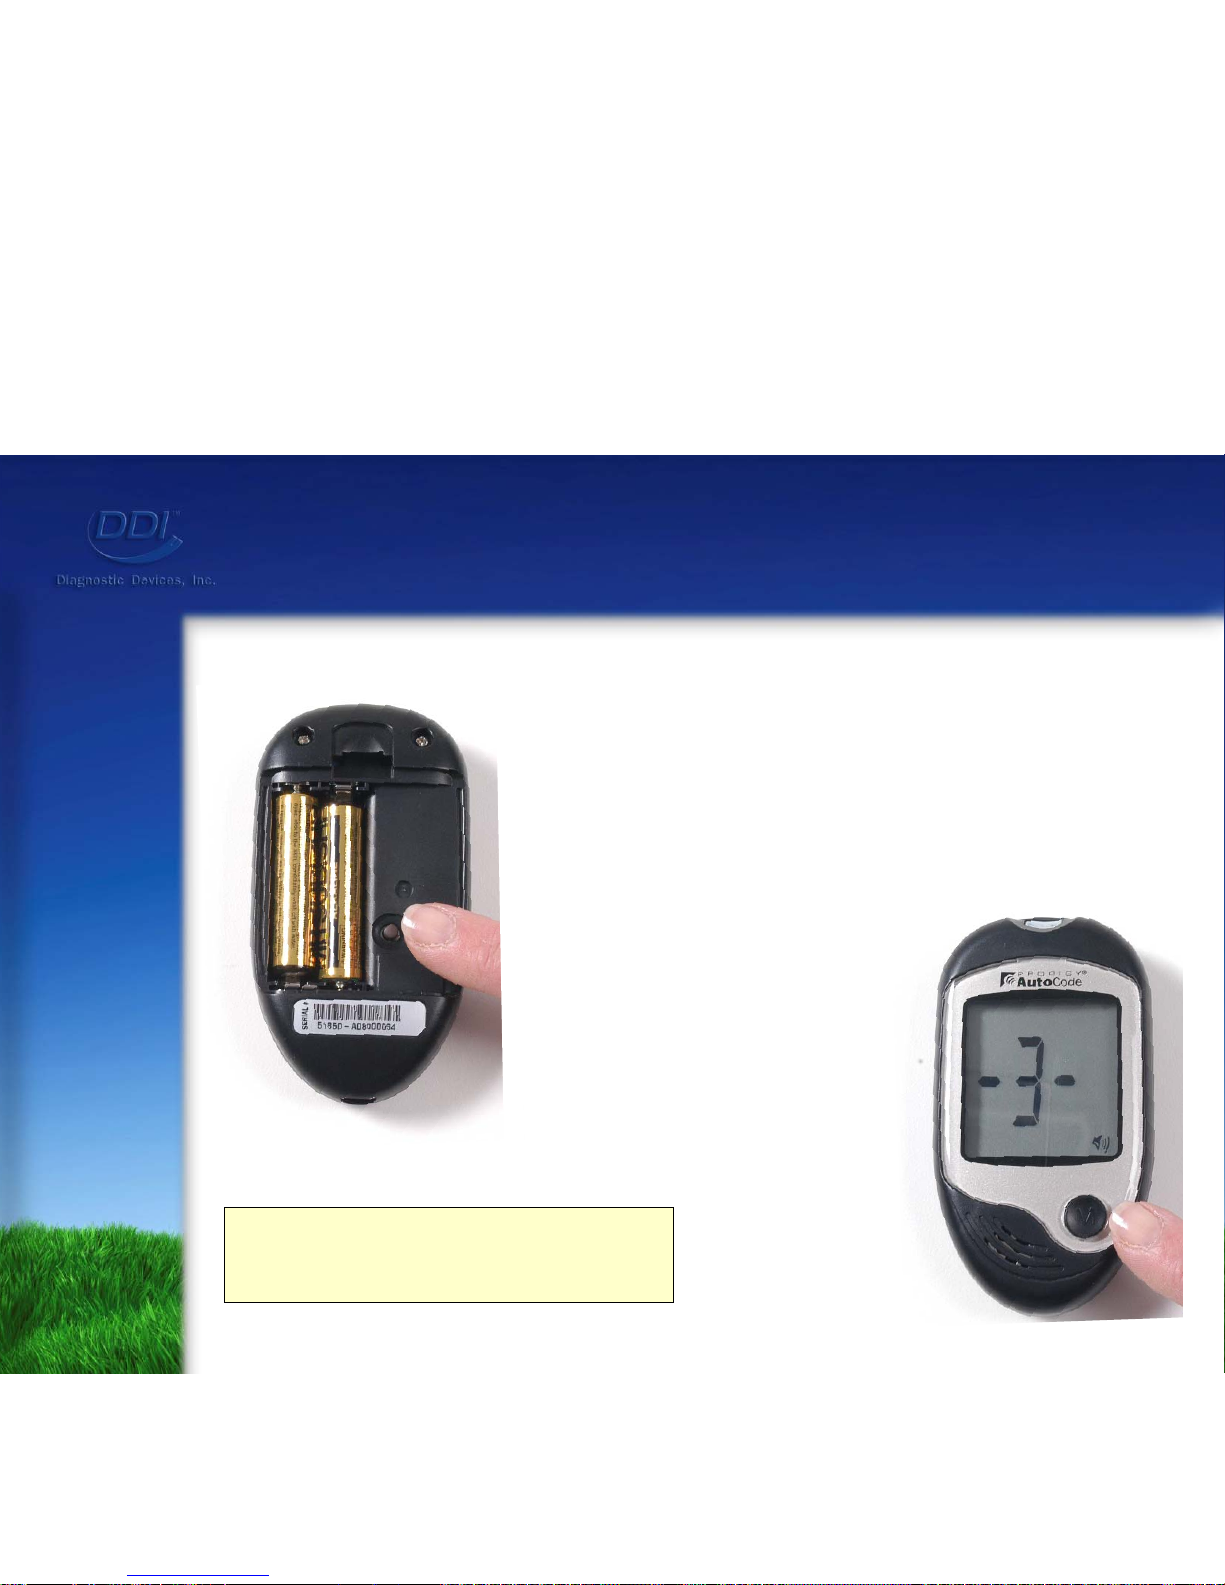
Setting Up the Meter
Step 4: Press the
“M” button
for the
desired volume.
Step 3: Press the “Set” button to
set the volume.
Number 0: No Sound
Numbers 1-3: Low to High
Page 11
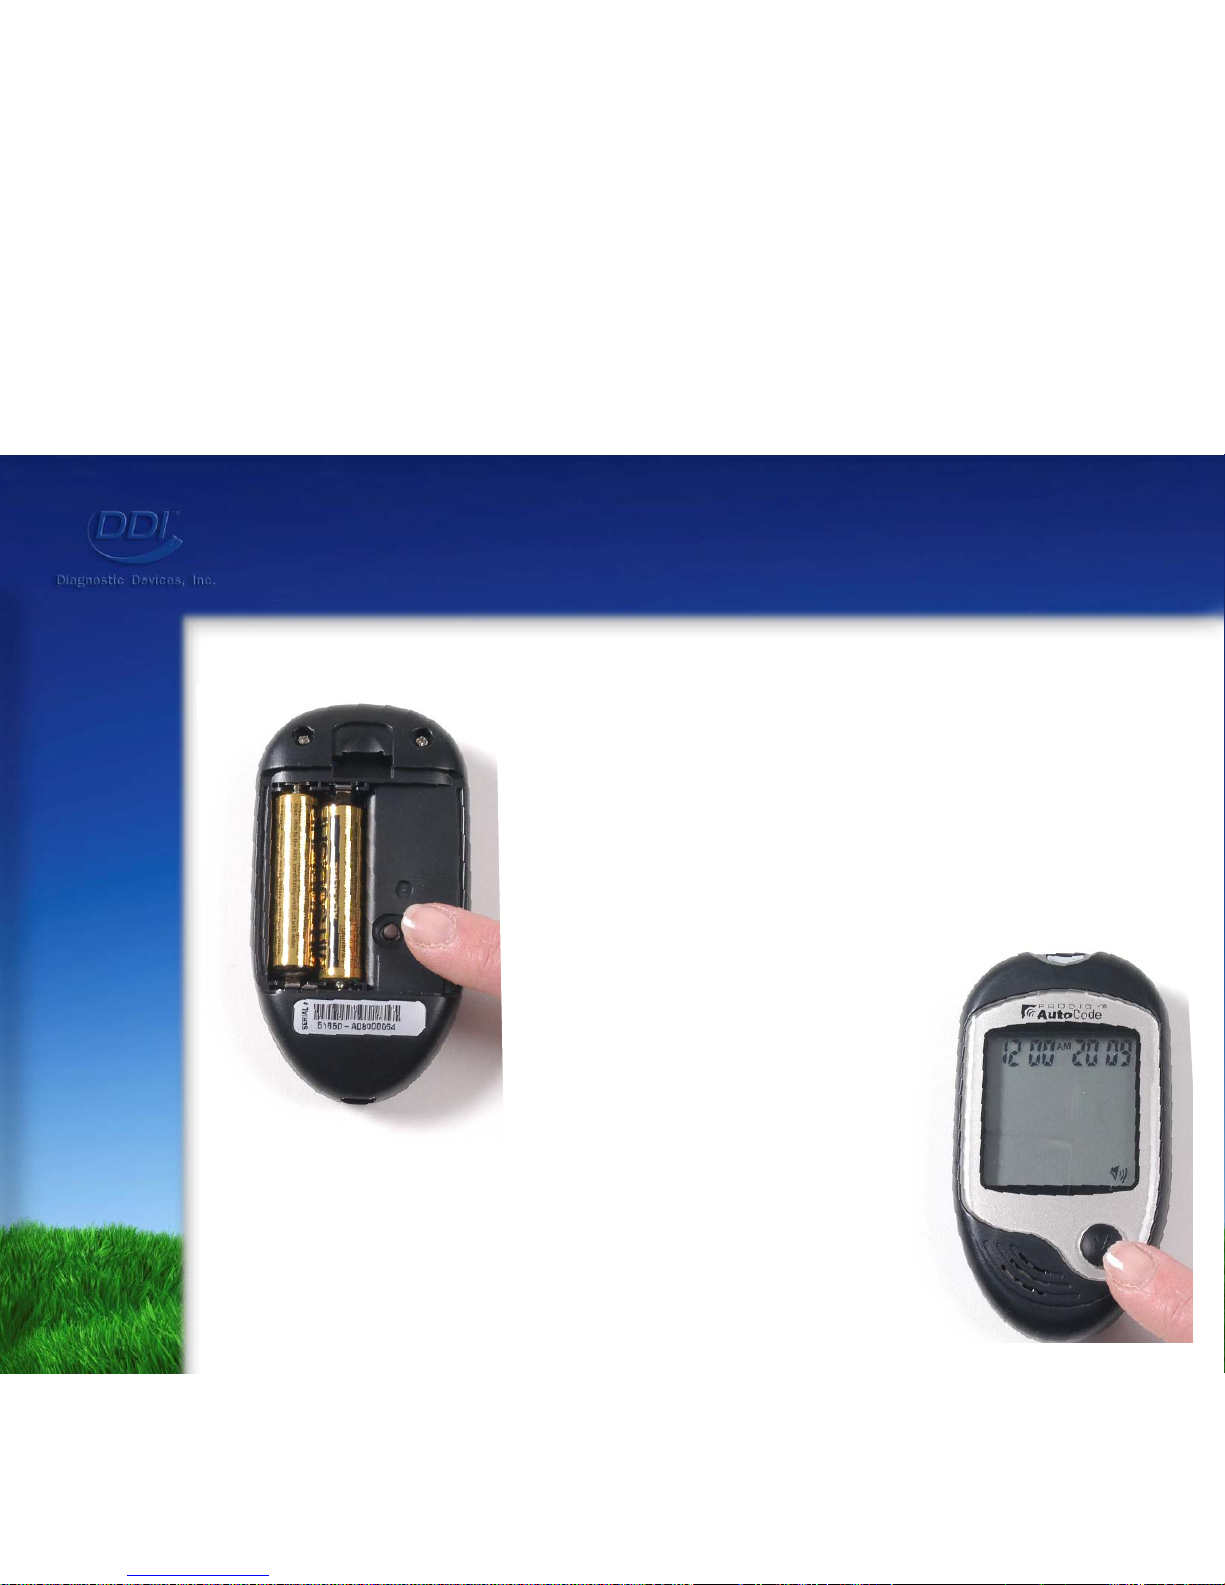
Setting Up the Meter
Step 6: Press the
“M” button
for the
desired year.
Step 5: Press the “Set” button to
set the year.
Page 12
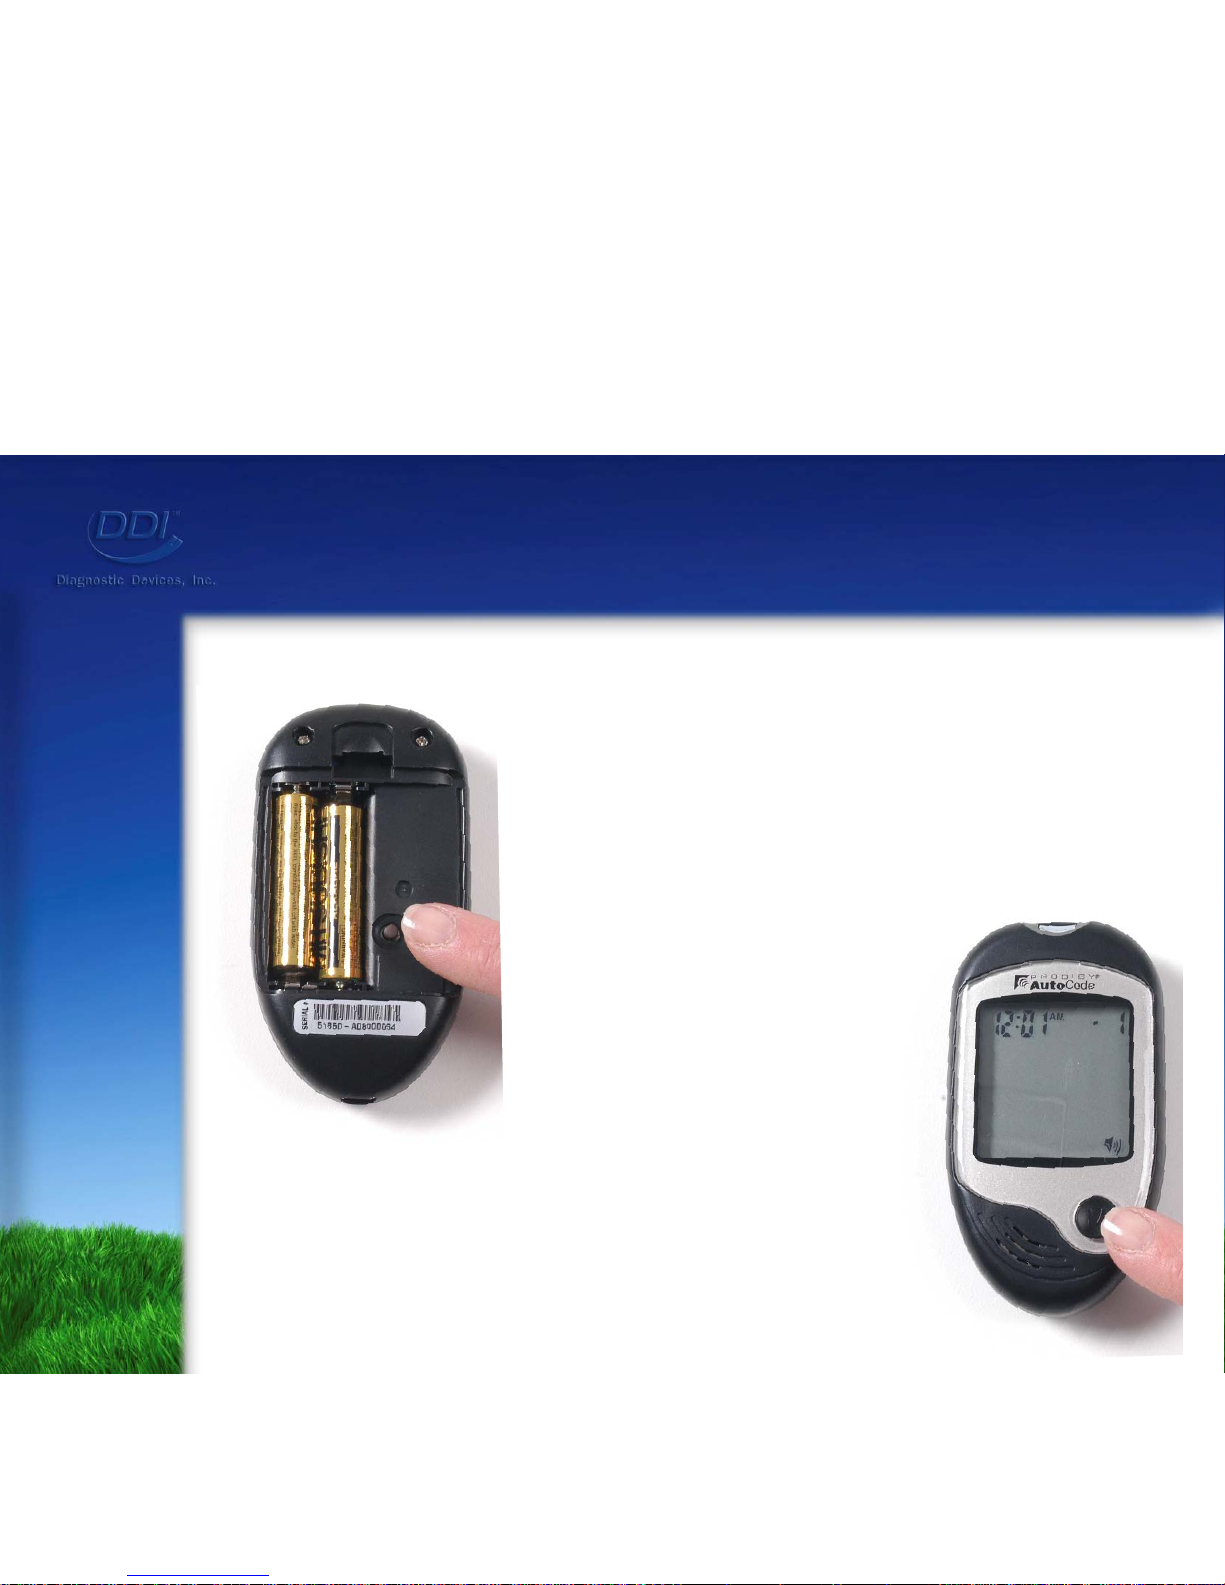
Setting Up the Meter
Step 7: Press the “Set” button to
set the month.
Step 8: Press the
“M” button
for the
desired month.
Page 13
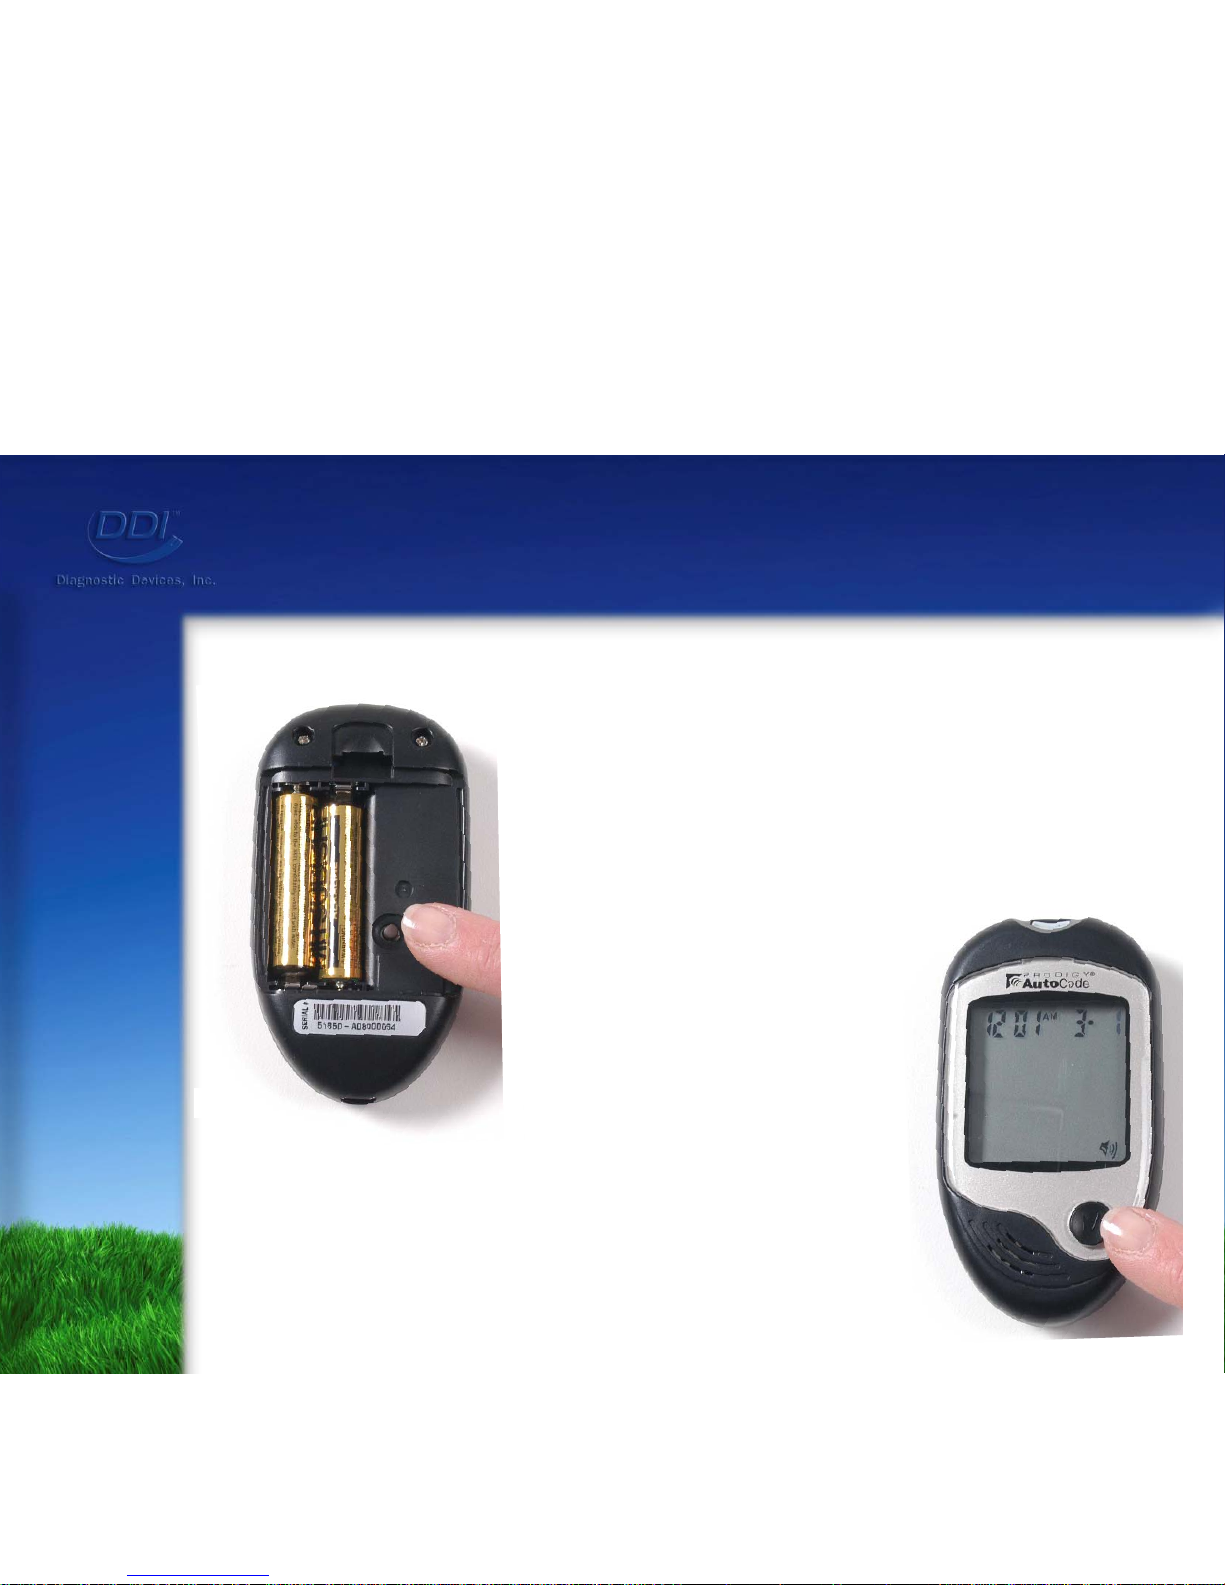
Setting Up the Meter
Step 9: Press the “Set” button to
set the date.
Step 10: Press the
“M” button
for the
desired date.
Page 14
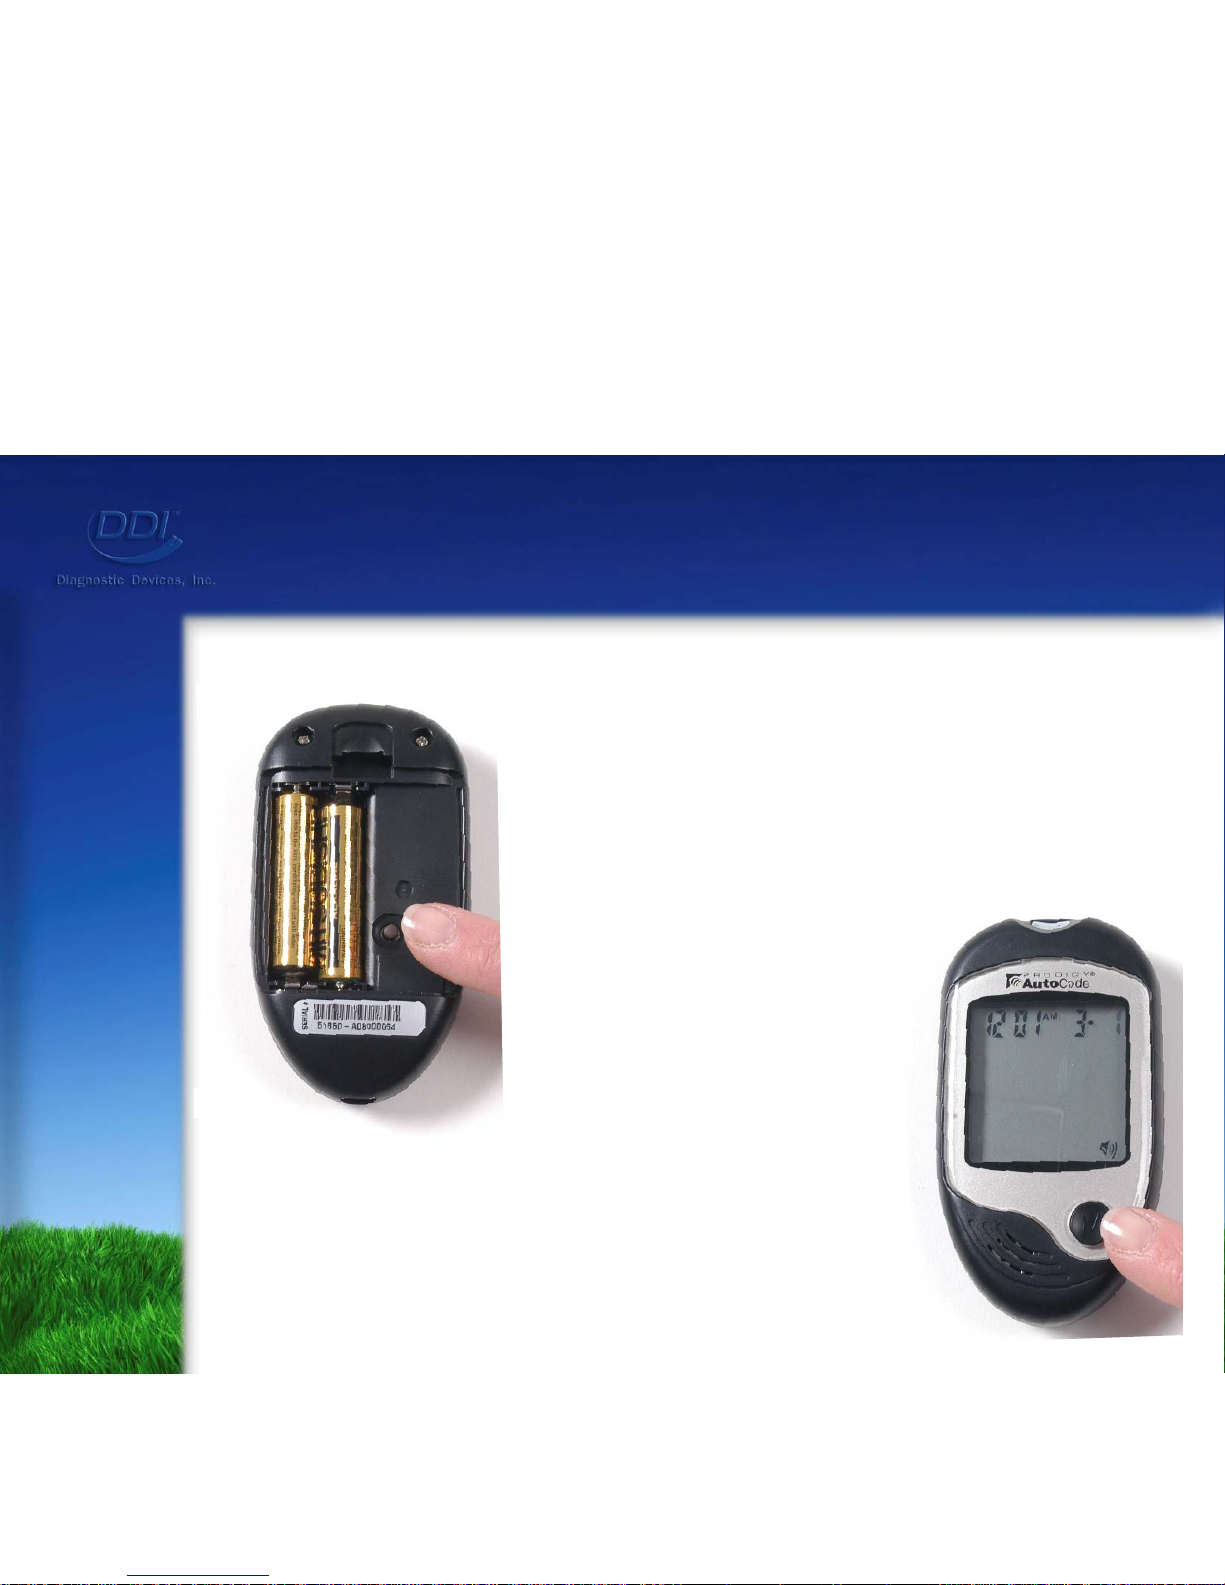
Setting Up the Meter
Step 12: Press the
“M” button
for the
desired hour.
Step 11: Press the “Set” button
to set the hour.
Page 15
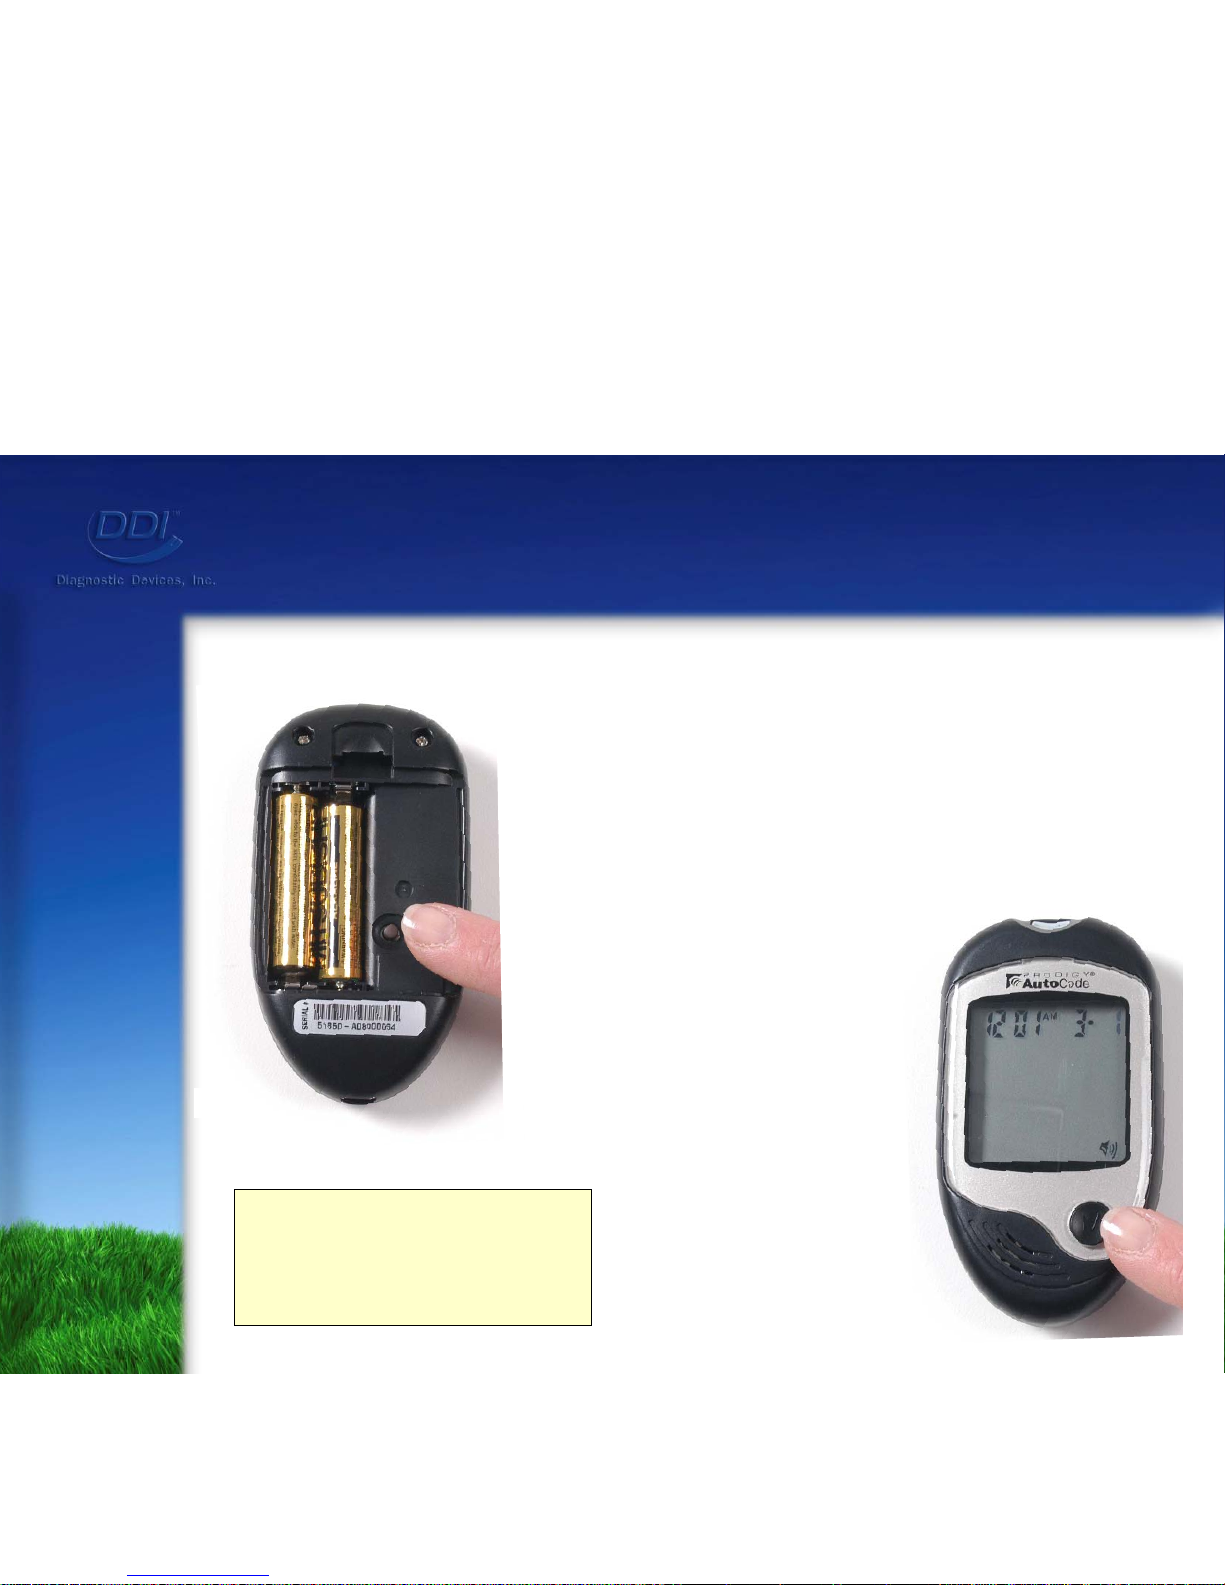
Setting Up the Meter
Step 13: Press the “Set” button
to set the minutes.
Step 14: Press the
“M” button
for the
desired
minutes.
*Changes to the date
and time may affect
test result averages.
Page 16
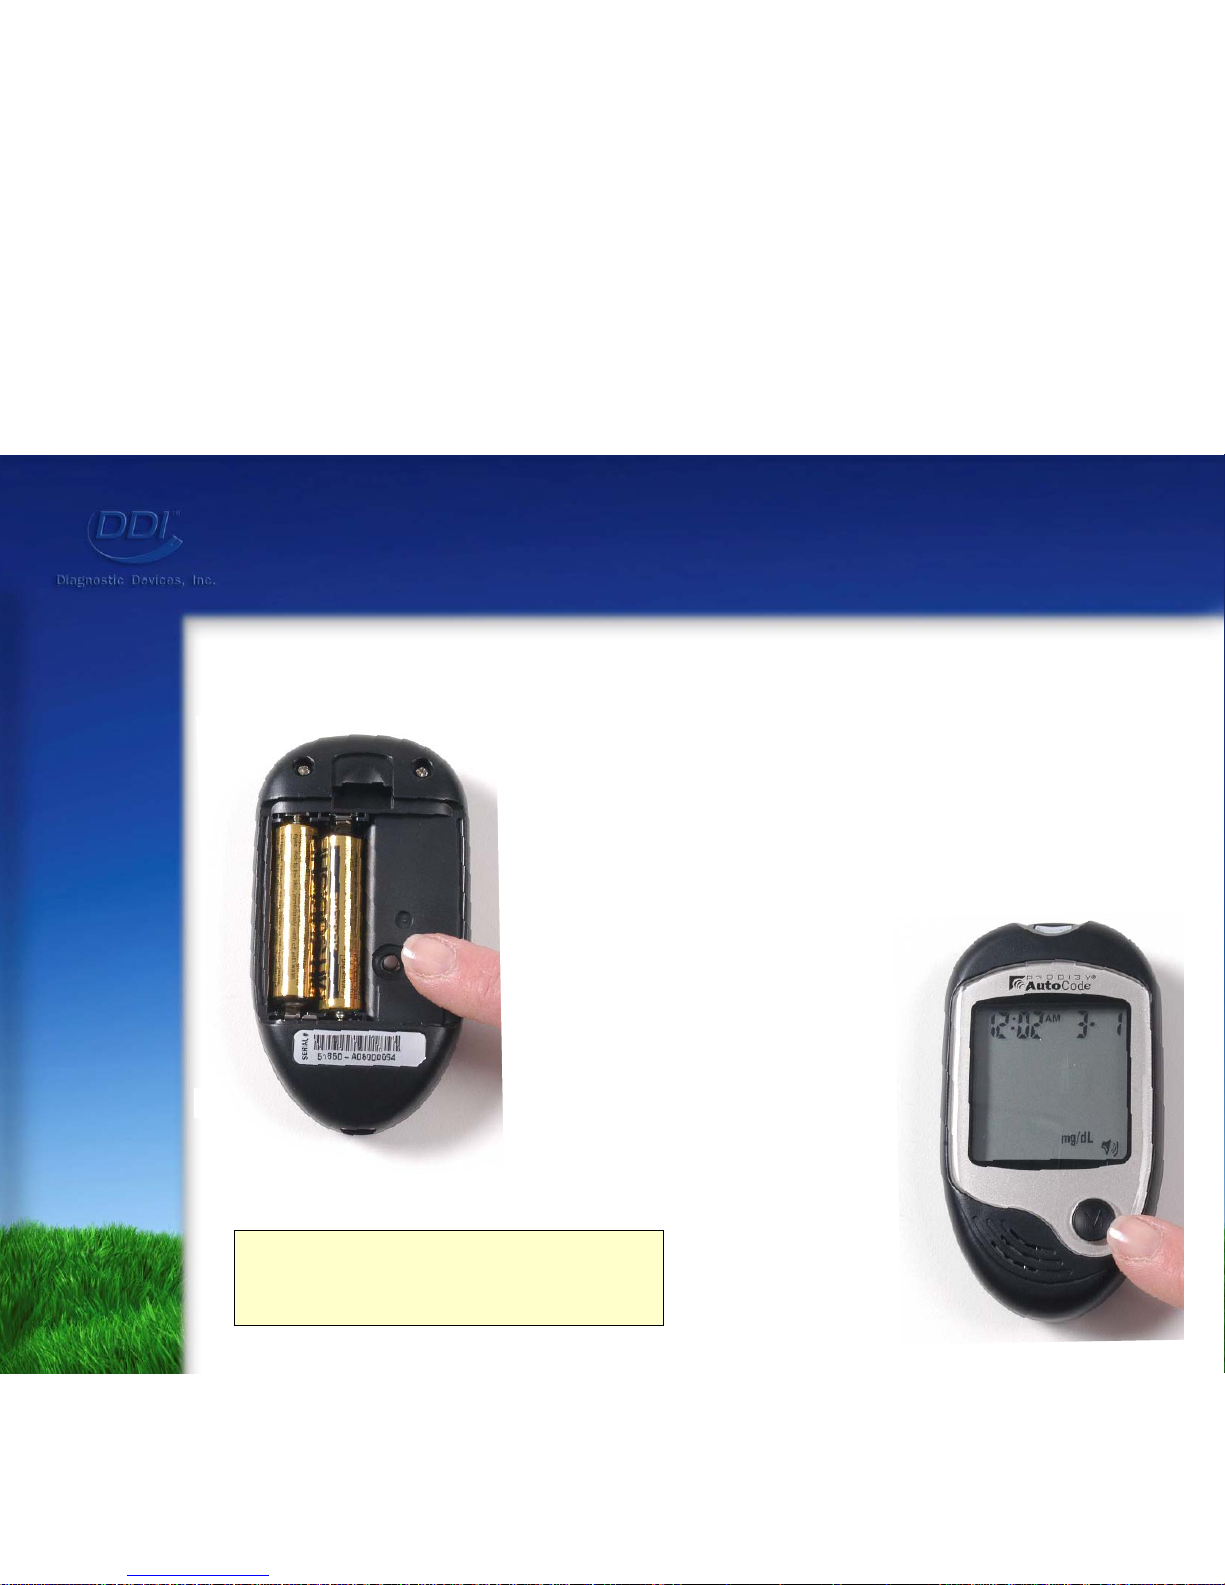
Setting Up the Meter
mg/dL-American System
mmol/L-Canadian System
Step 15: Press the “Set” button
to set the unit of
measurement.
Step 16: Press the
“M” button
for the
desired
unit of
measurement.
Page 17
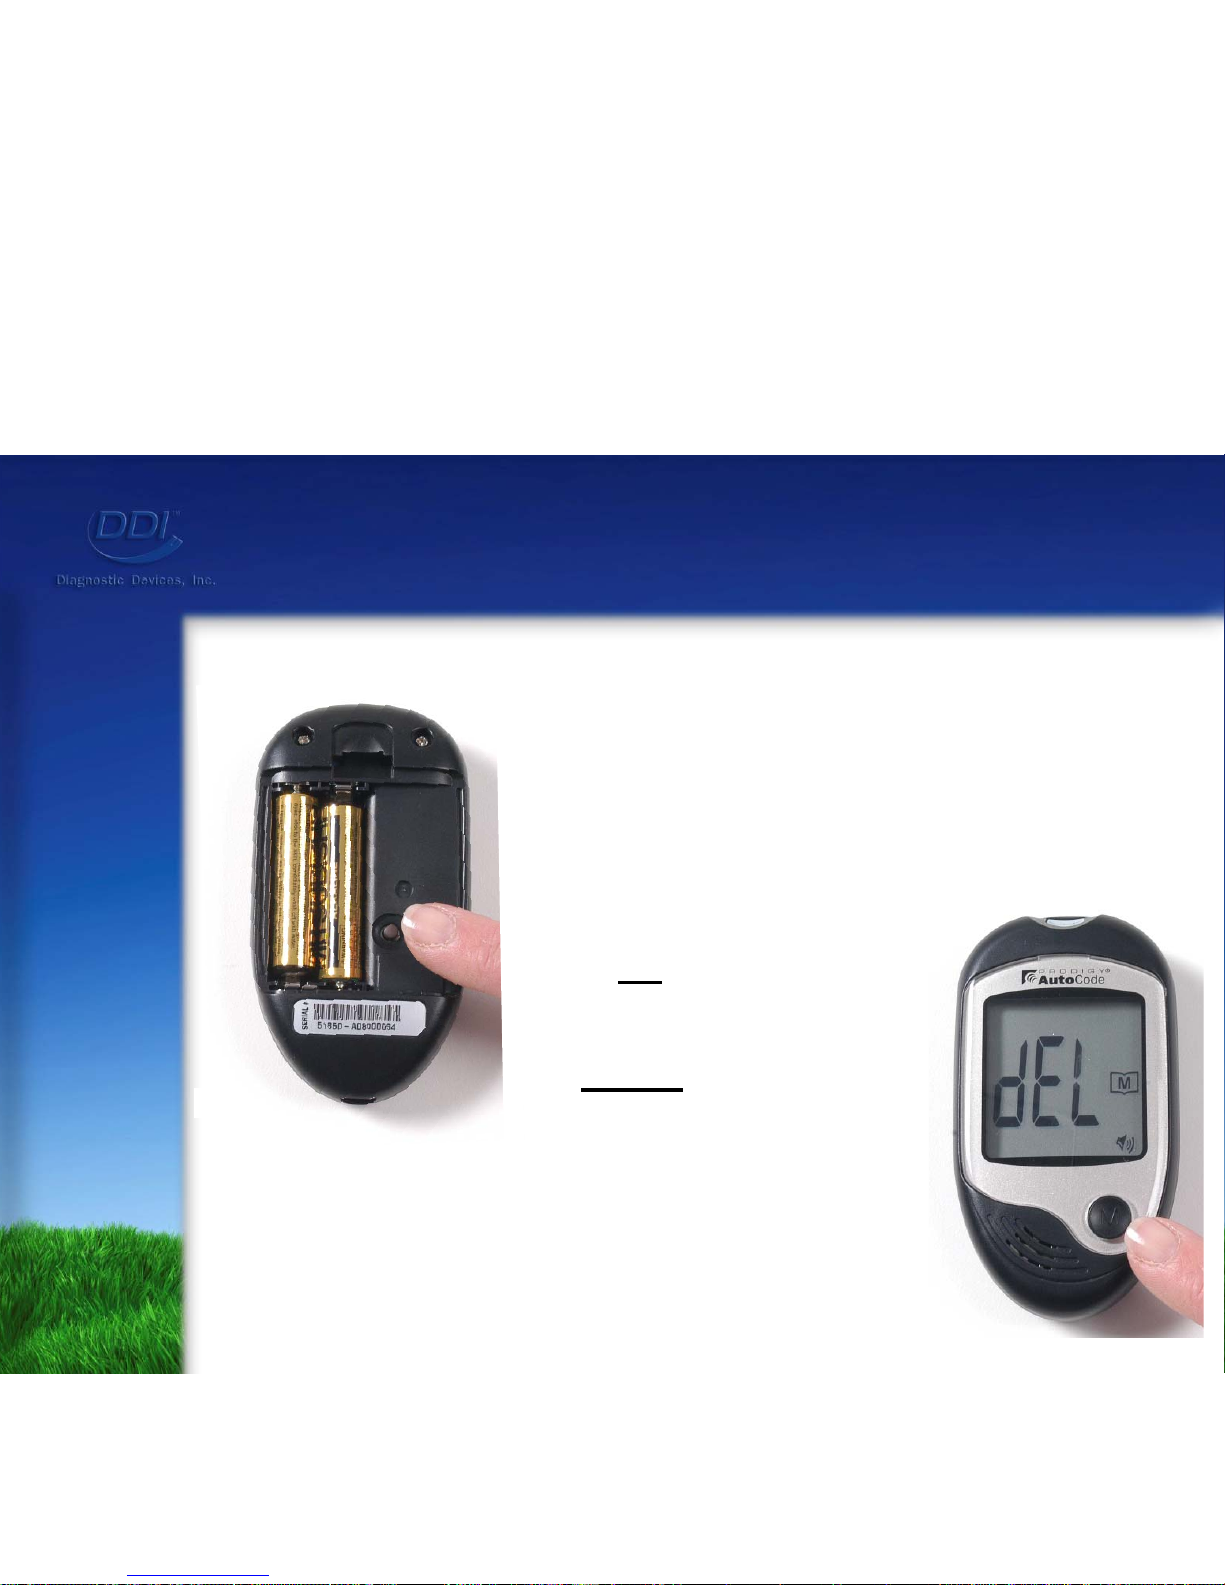
Setting Up the Meter
Step 17: Pres the “Set” button
and delete memory
option will appear.
Press the “M” button to
clear all
records.
To avoid
deleting the
memory; press the
“Set” Button. The meter
turns off automatically.
The Prodigy AutoCode® is now set!
Page 18
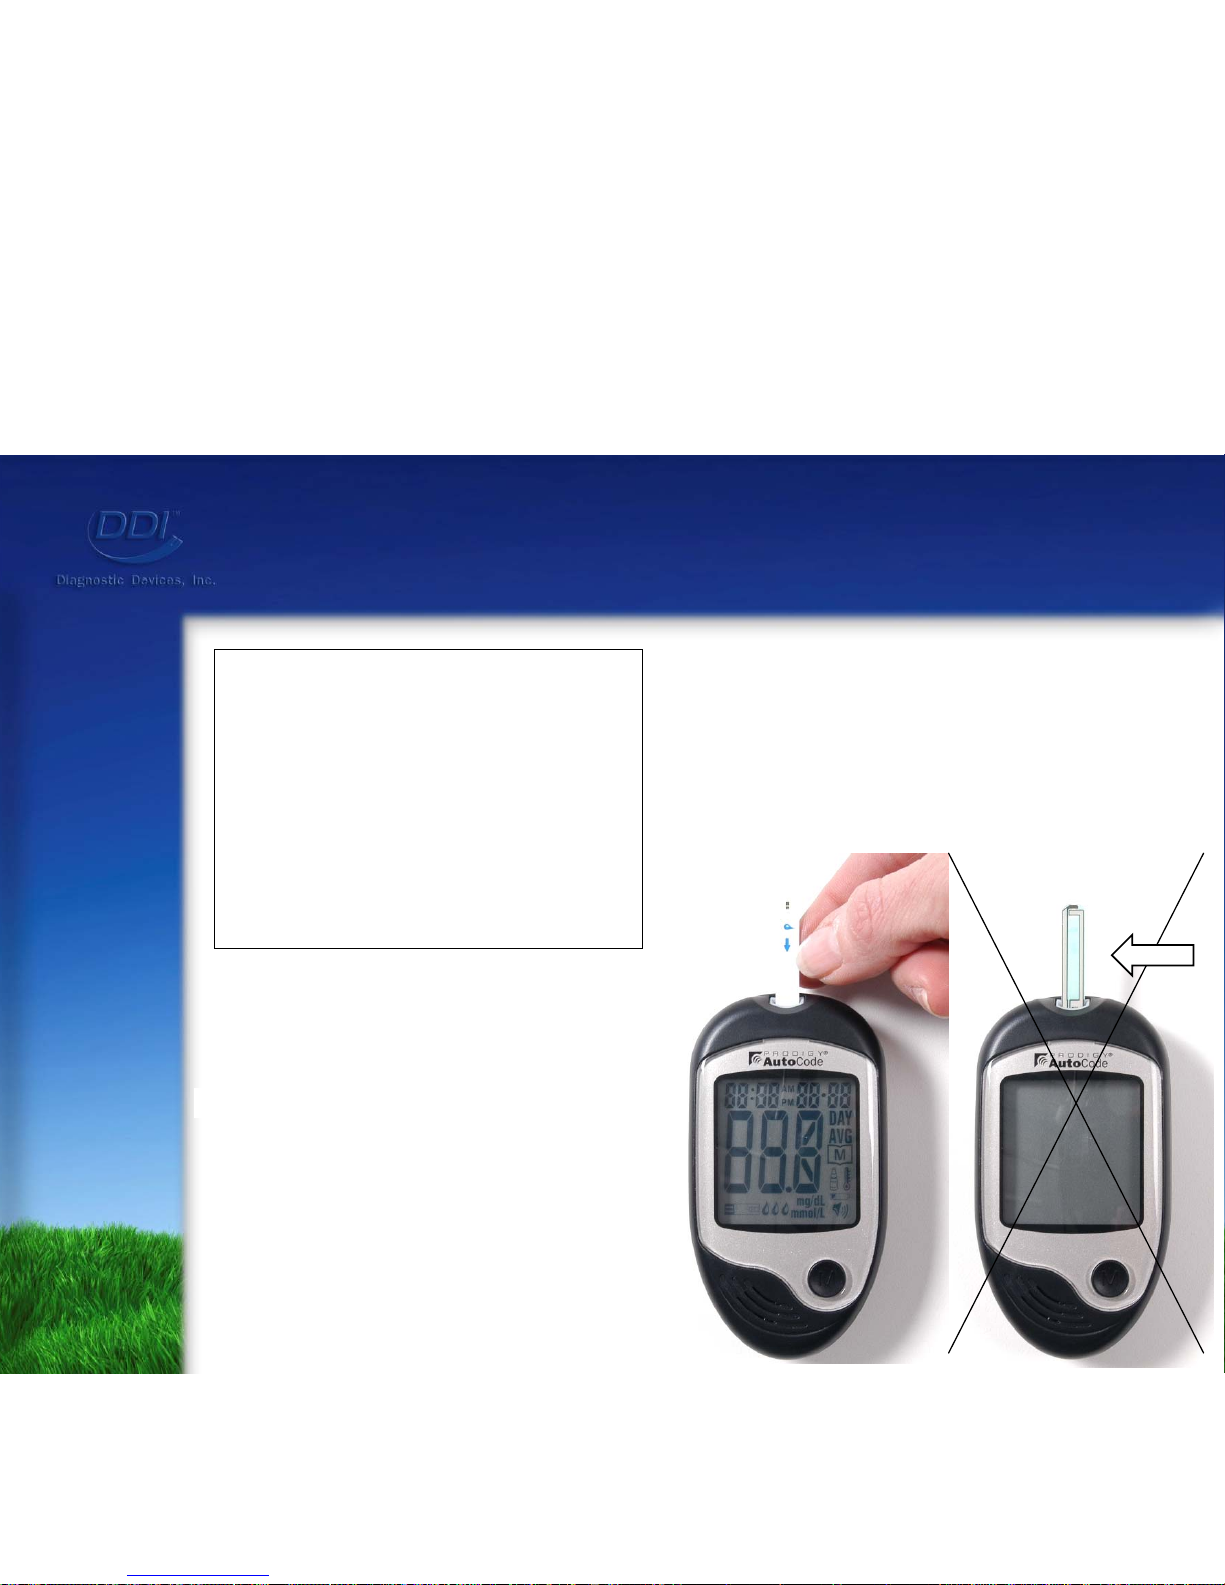
Performing a Control Solution Test
*Only use Prodigy Control
Solution & Prodigy AutoCode
®
Test Strips with the meter.
Items Needed:
Prodigy AutoCode
®
Meter
Test Strips
Lancing Device
Lancet
Control Solution
Tissue
Step 1: Insert a
test strip into
the Test Strip Slot.
Page 19
Performing a Control Solution Test
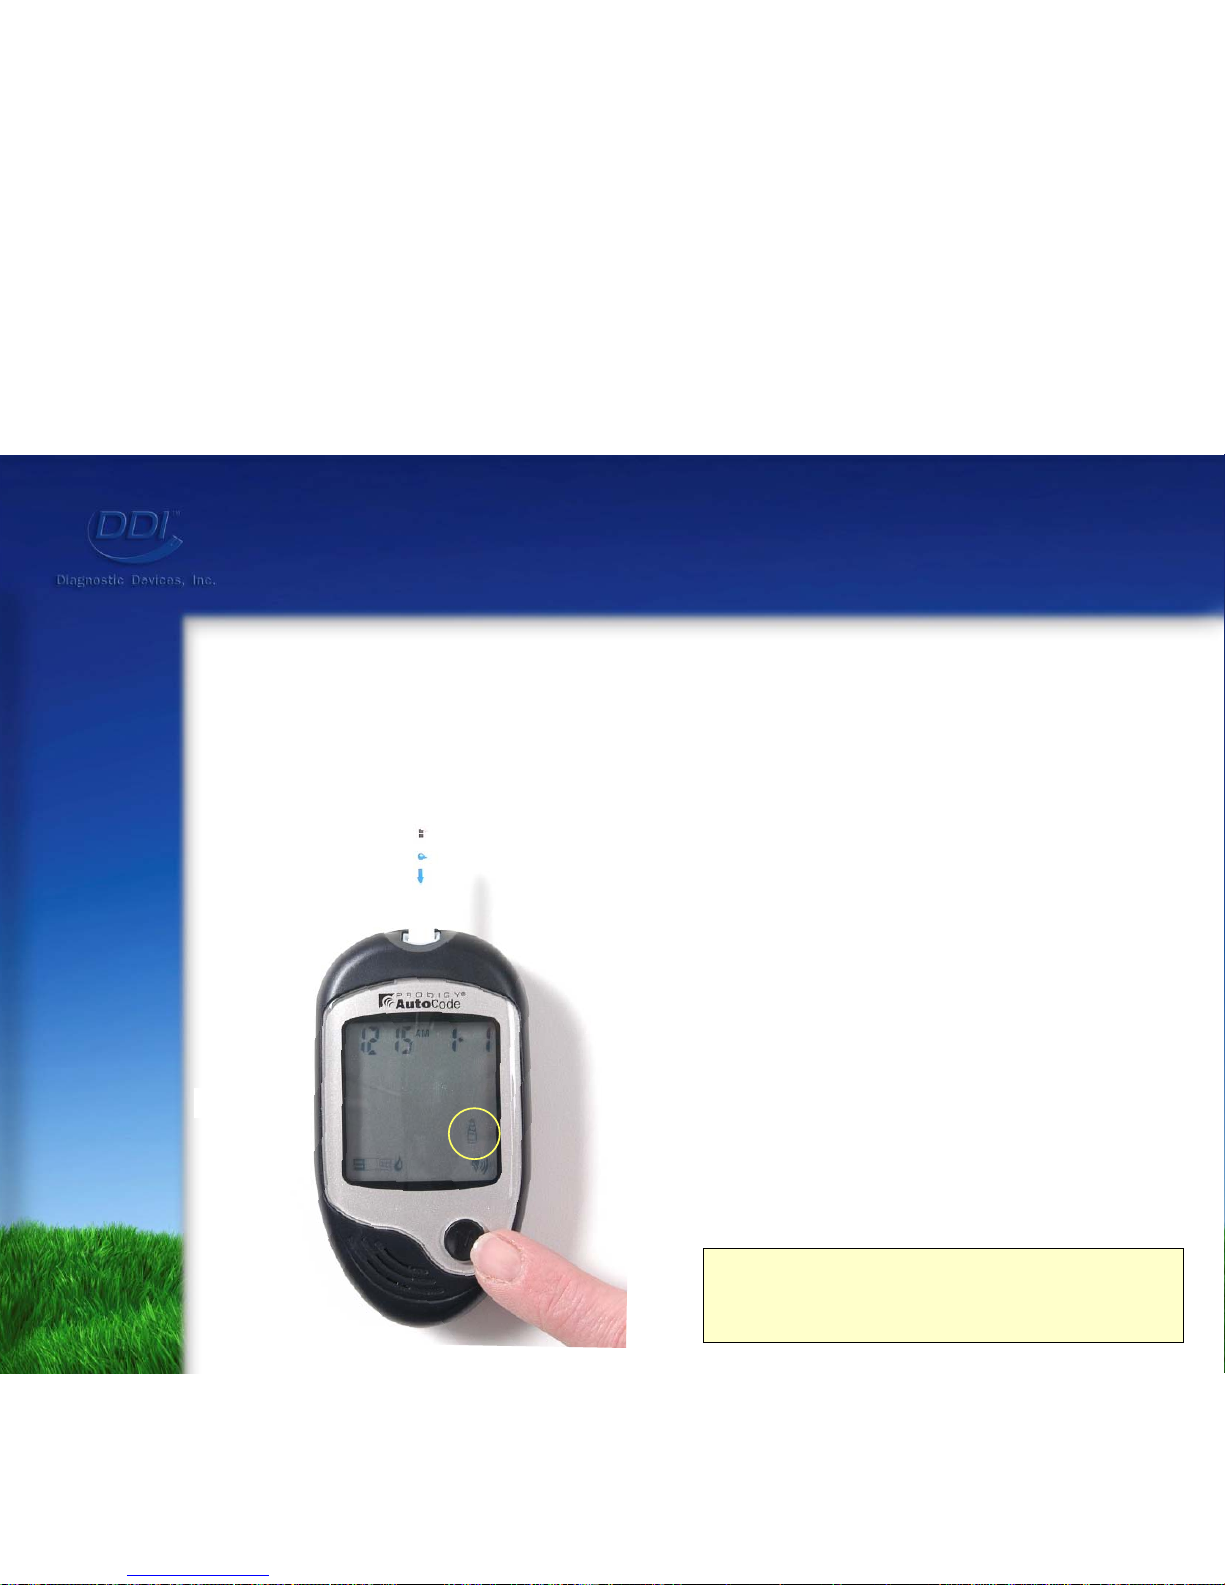
Step 2: Press the “M”
button to enter
control solution
mode.
*Test Results will not be
stored in the meter memory.
You will hear: “Your Prodigy Meter is on, Please apply
blood to the test strip”,
You will then hear: “You
are now in Control
Solution Mode.”
Page 20
Performing a Control Solution Test
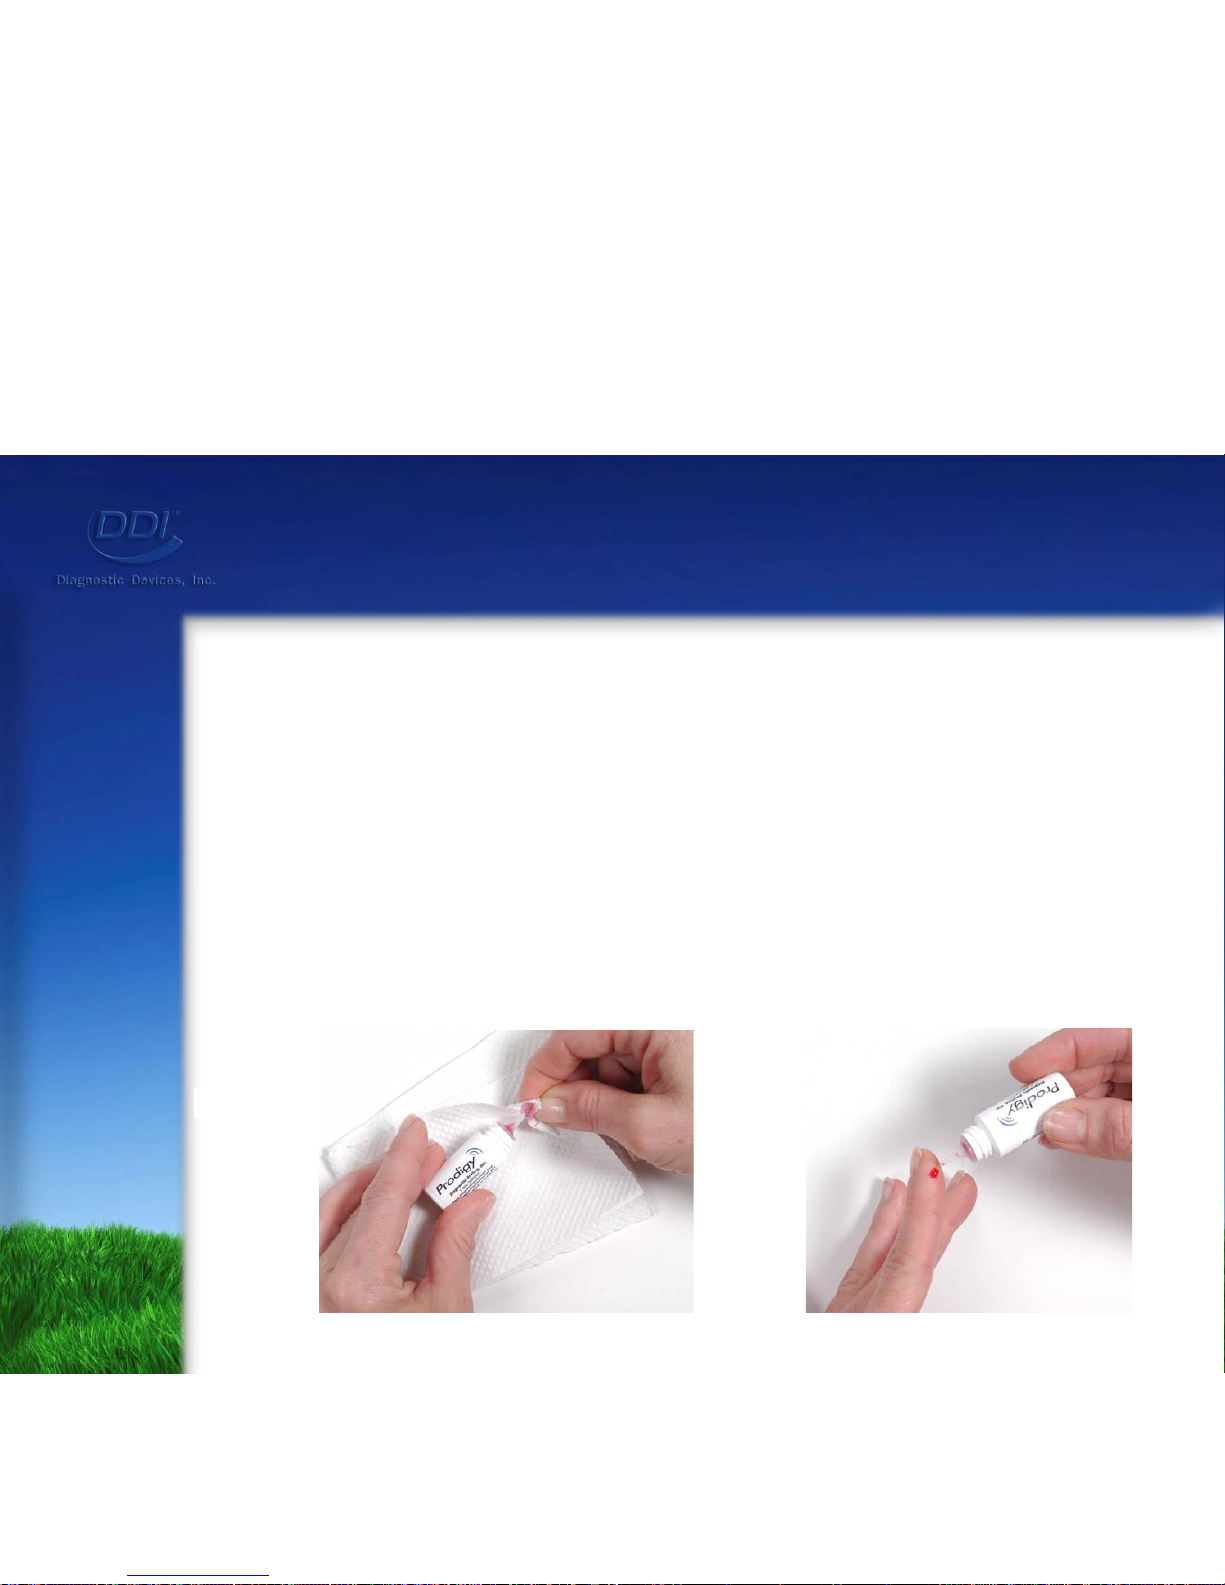
Step 3: Shake the bottle.
Squeeze & discard the first drop.
Wipe off dispenser tip with tissue.
Page 21
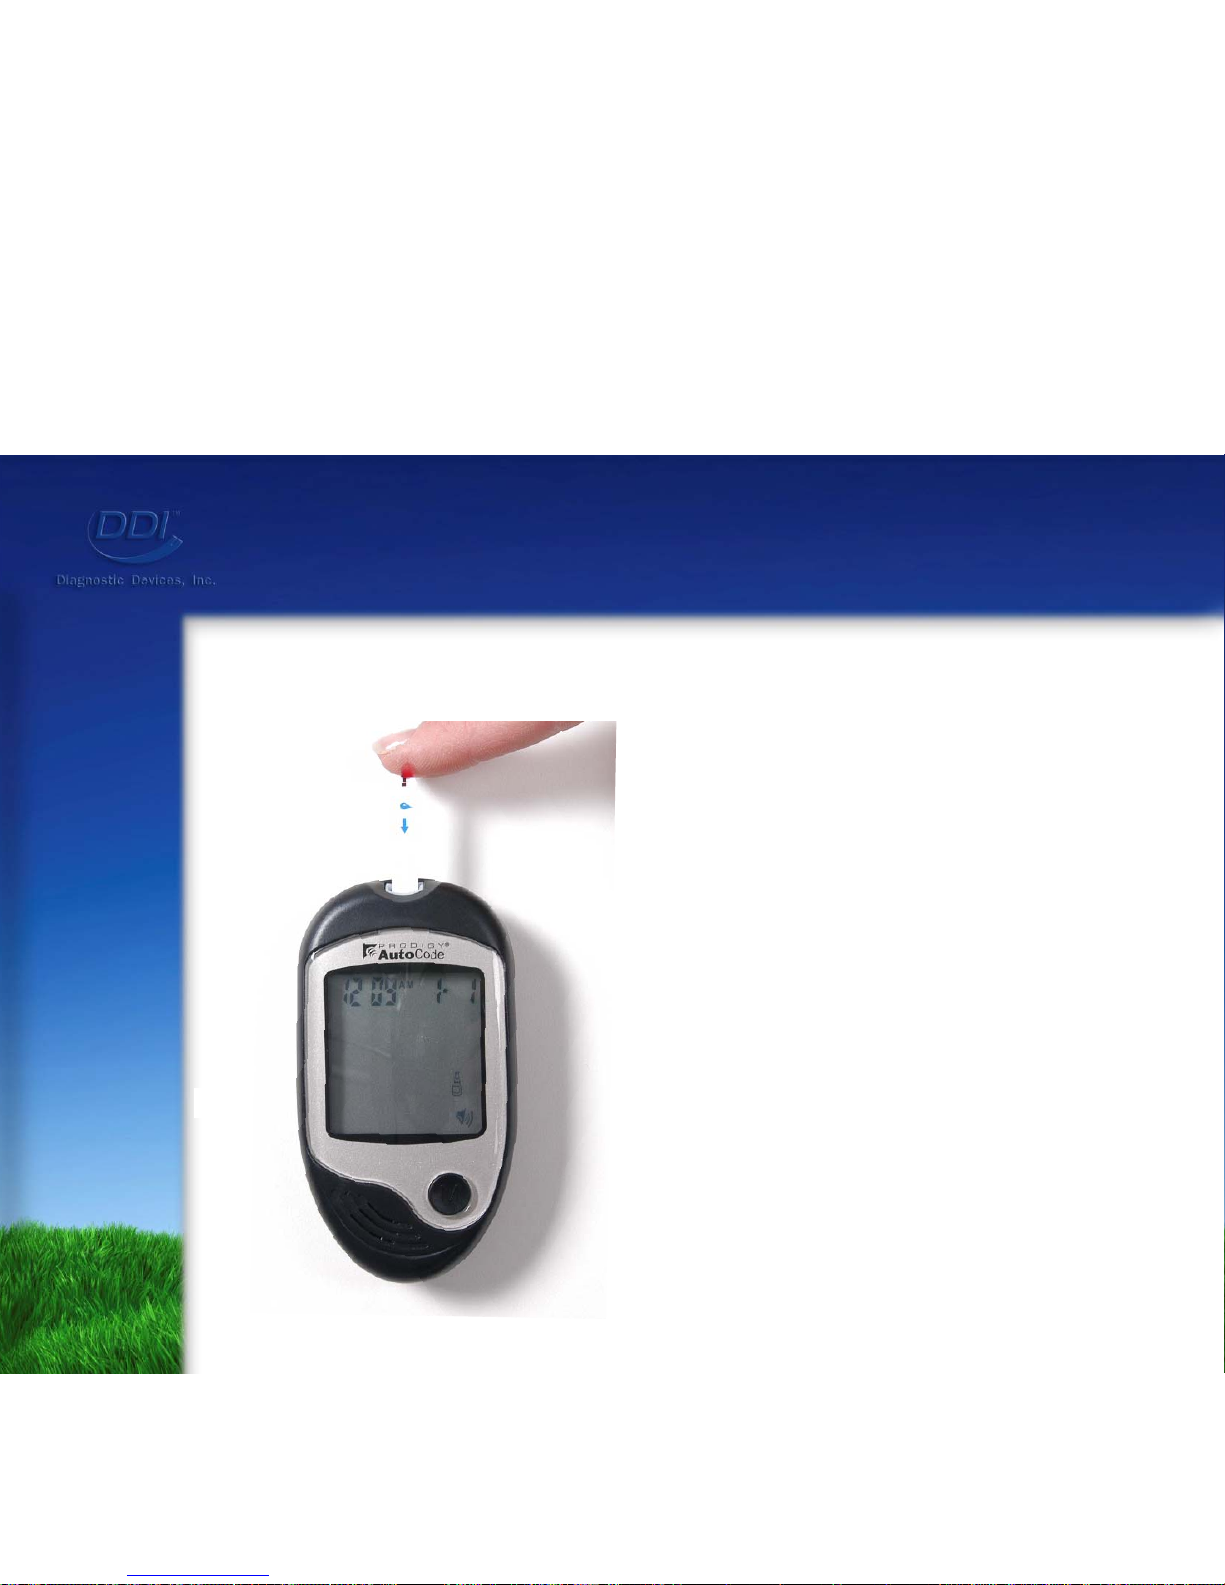
Performing a Control Solution Test
Step 4: Apply control
solution to the
test strip.
Page 22
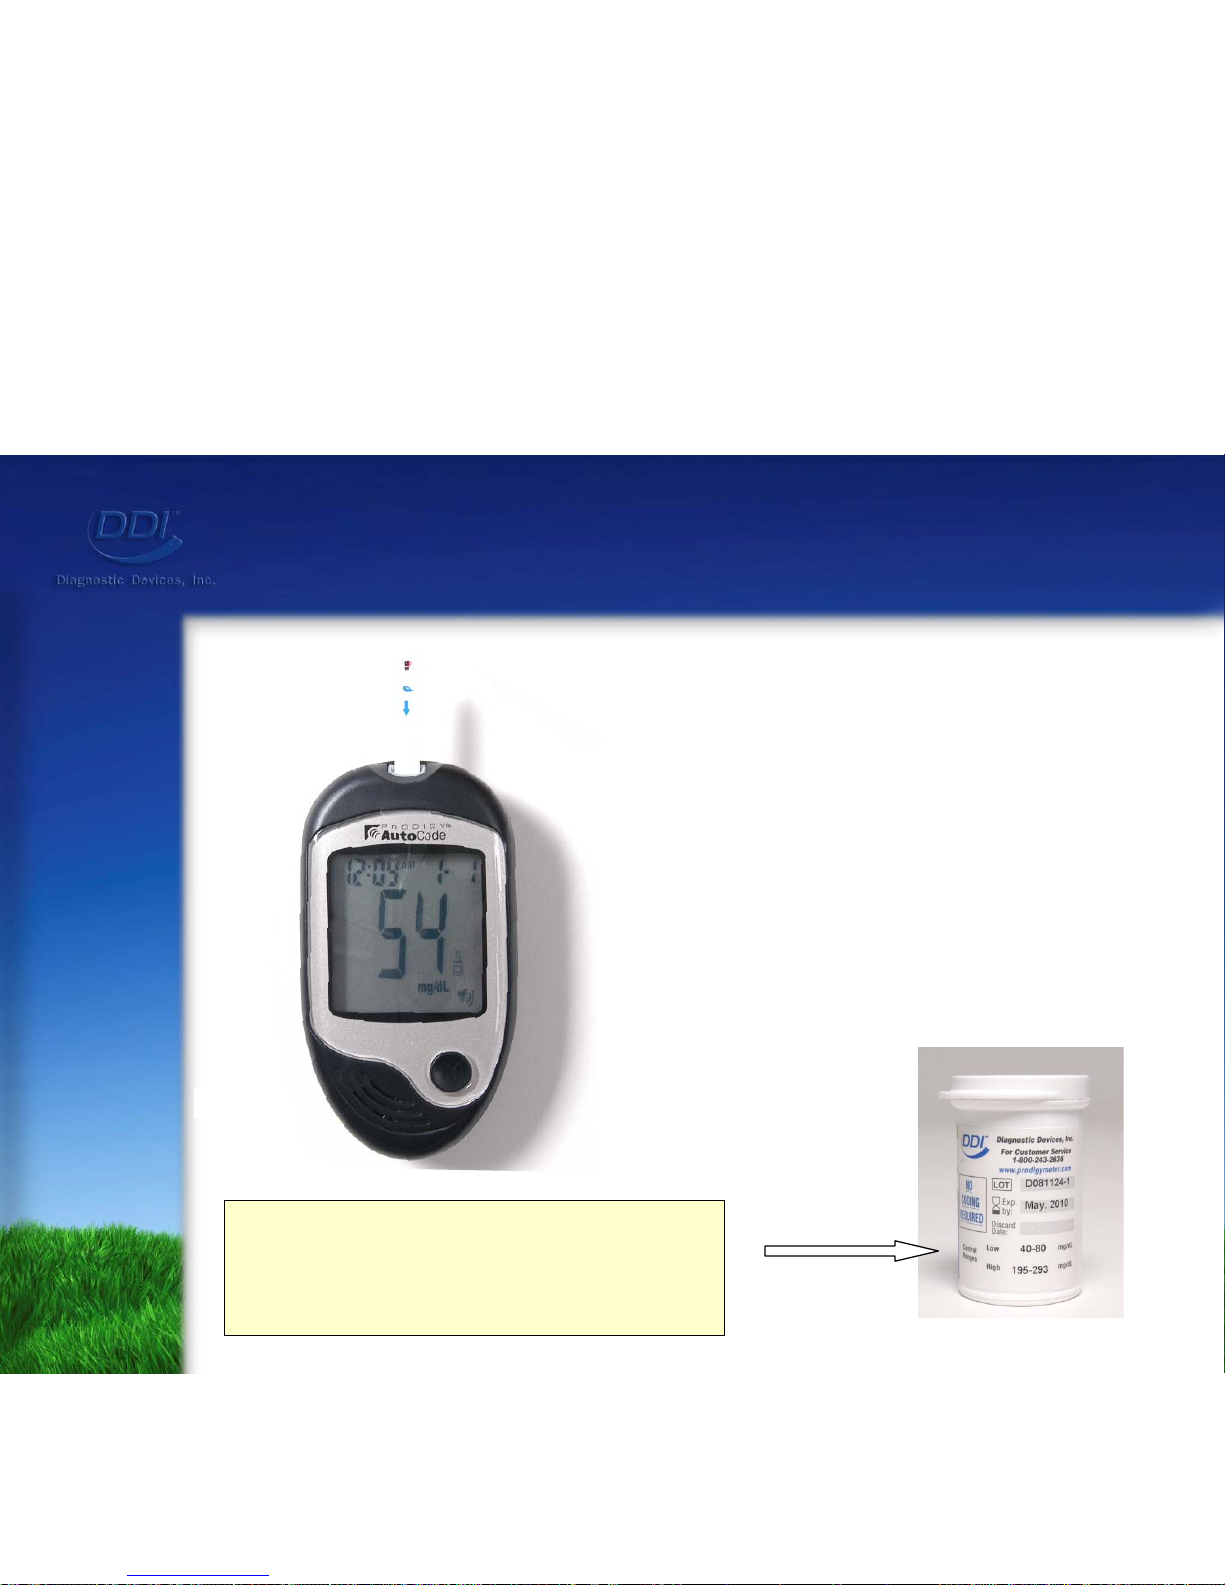
Step 5: Remove
the test
strip.
*Expected control solution
ranges are on the back of the
test strip vial label.
Performing a Control Solution Test
The meter will count down from
6 to 1, then report,
“Your blood glucose is __”
Page 23
Performing a Blood Glucose Test
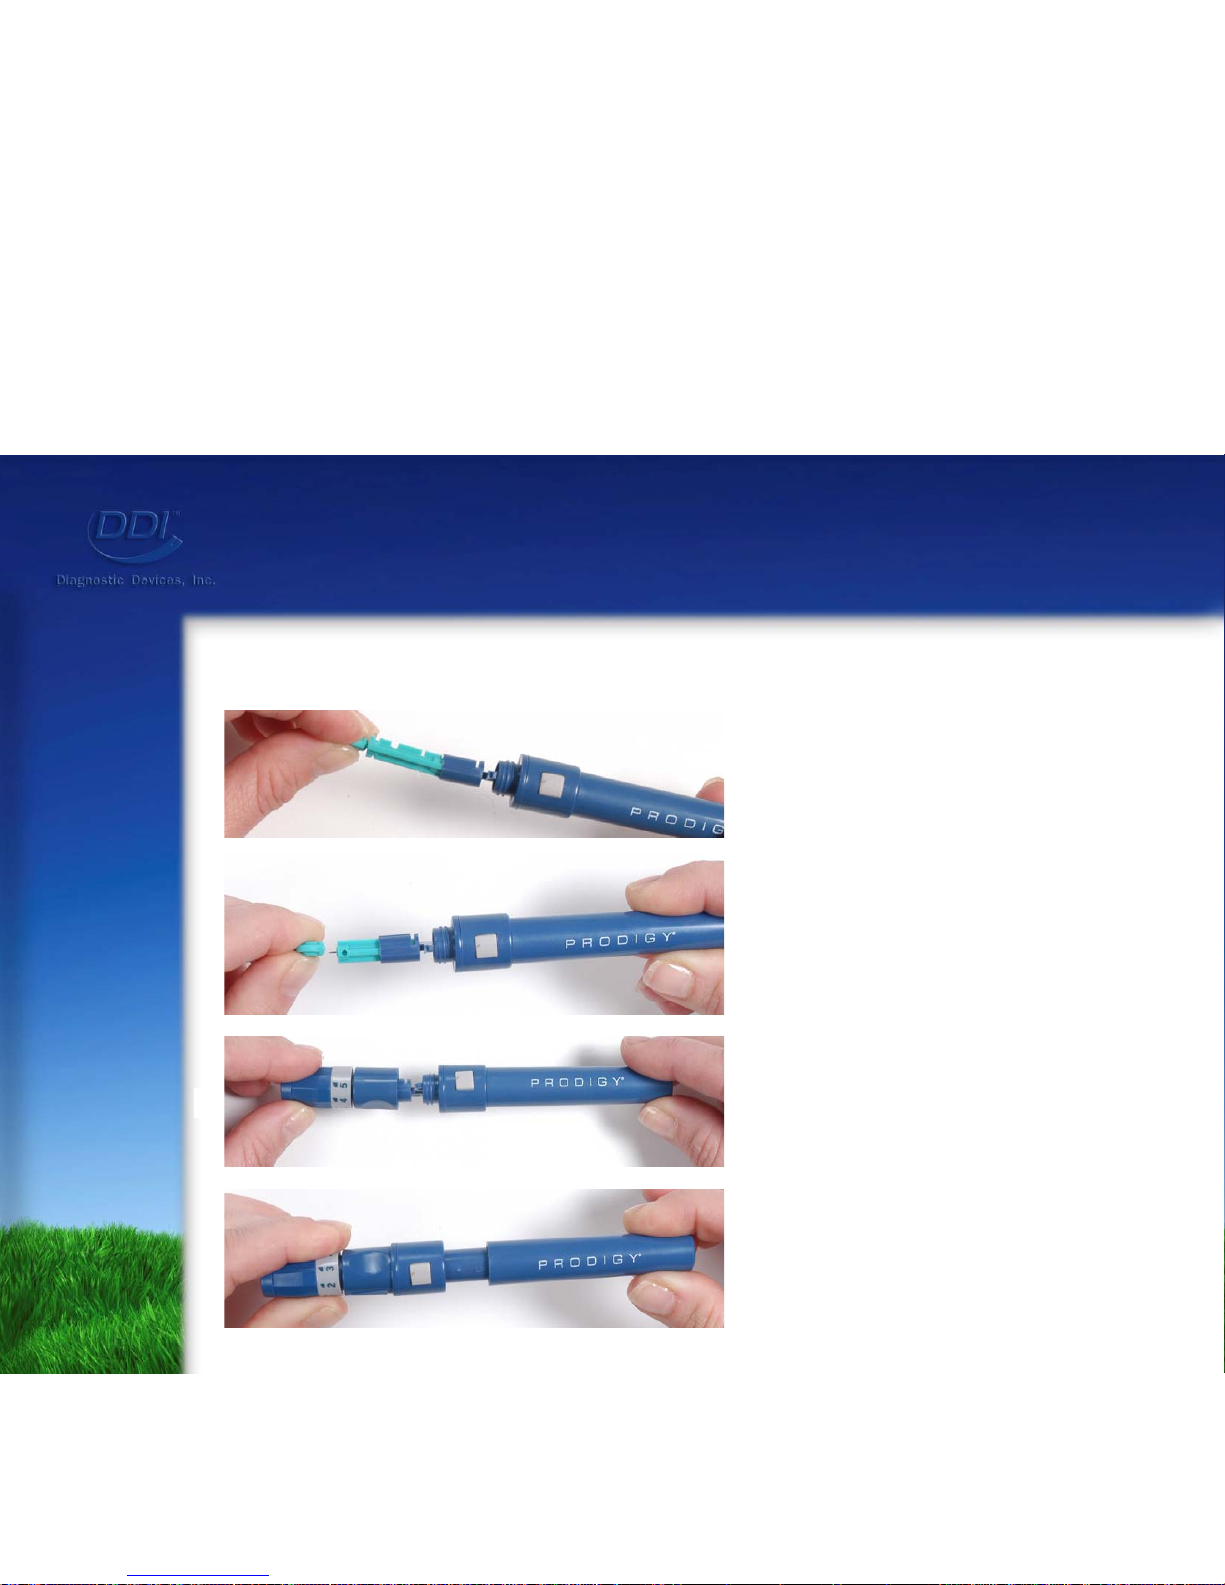
Step 1
a. Insert lancet into
lancing device.
b. Twist cap.
c. Put cap on.
d. Cock the lancing
device.
Page 24
Performing a Blood Glucose Test
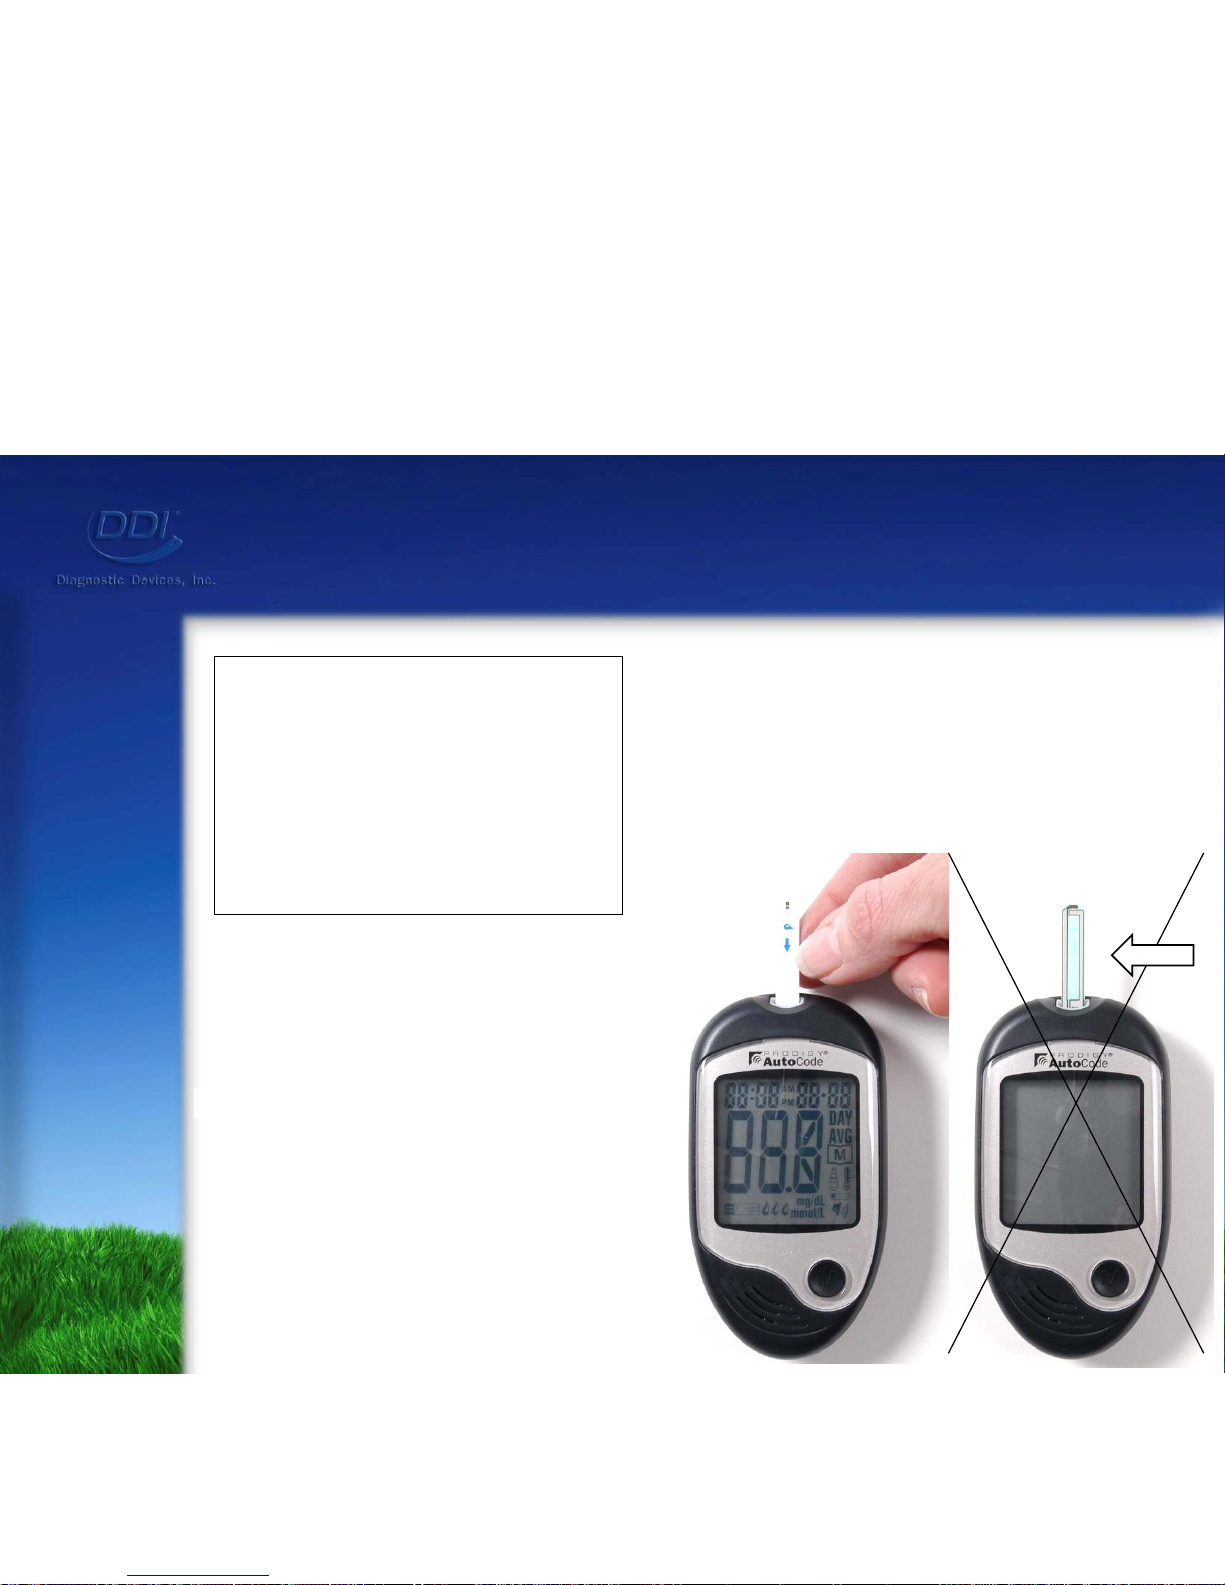
You will hear:
“Your Prodigy Meter is on,
please apply blood to the test
strip”
Items Needed:
Prodigy AutoCode
®
Meter
Test Strips
Lancing Device
Lancet
Tissue
Step 2: Insert a test strip
into the Test
Strip Slot.
Page 25
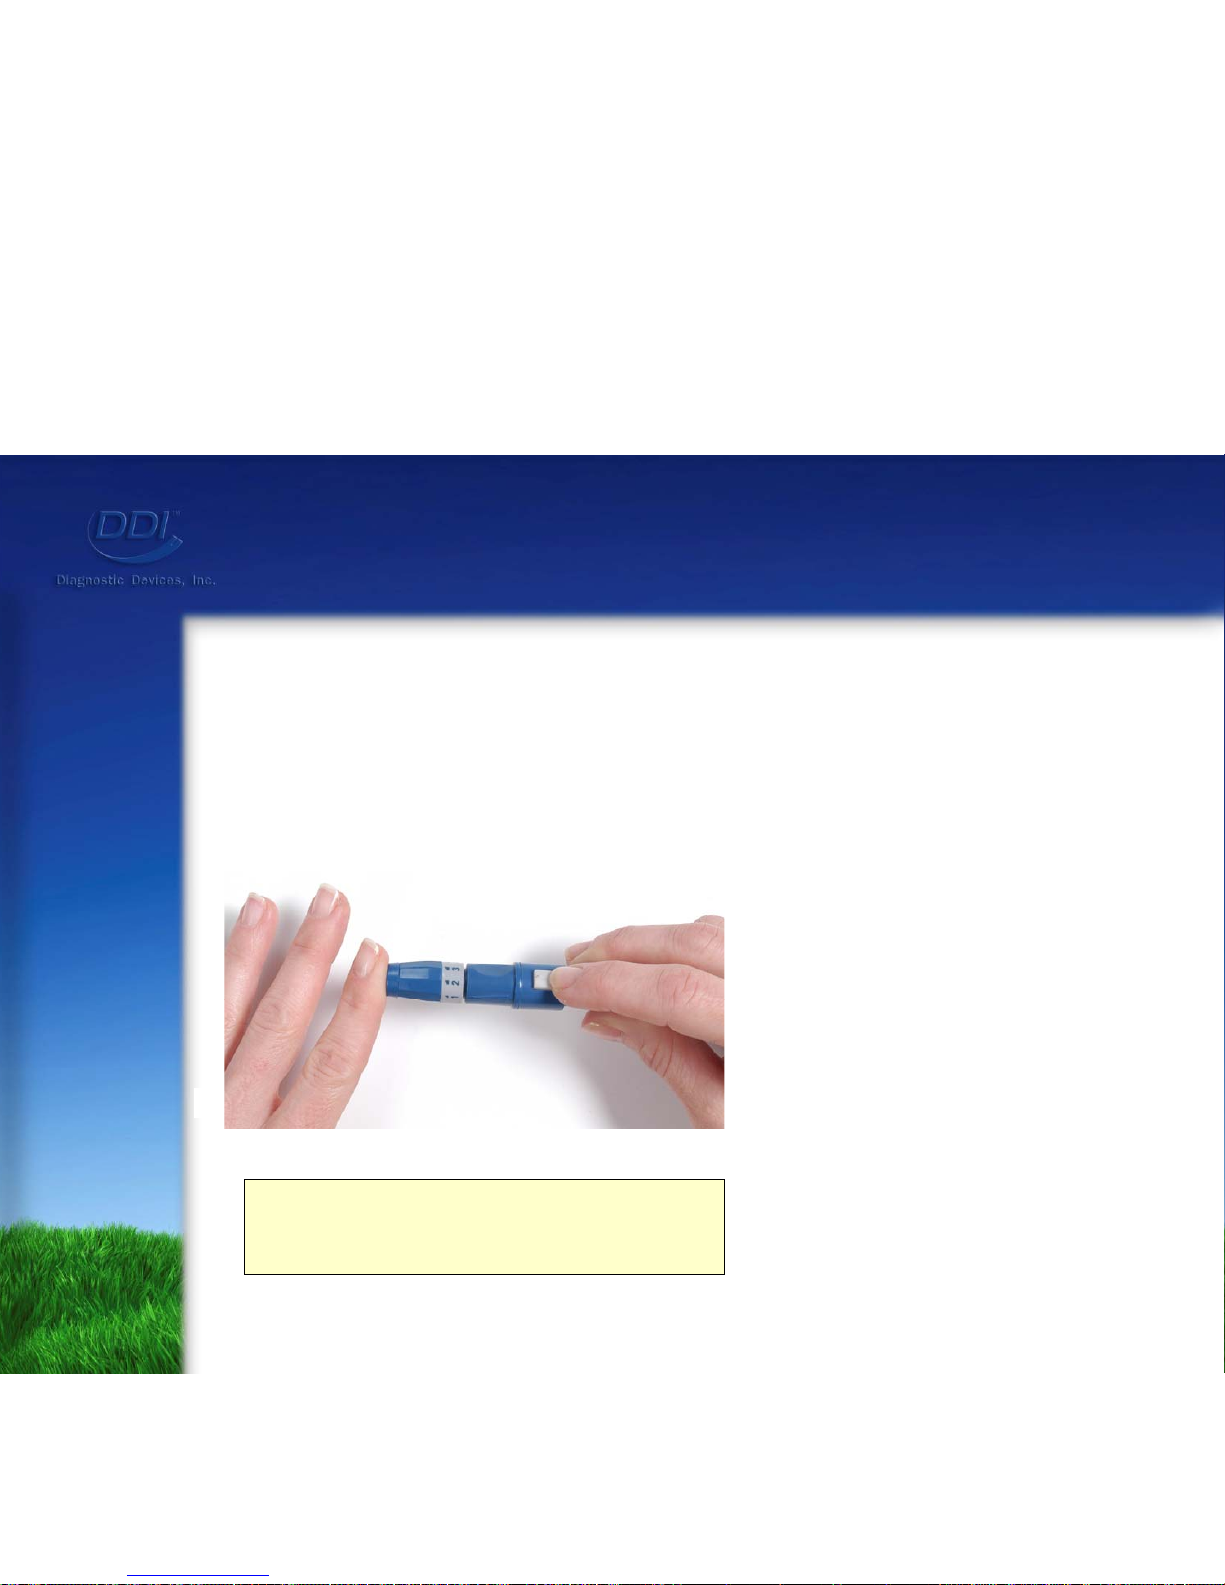
Performing a Blood Glucose Test
Step 3: Puncture finger
with the lancing
device.
*Wipe off first drop of blood.
Use second drop for sample.
Page 26
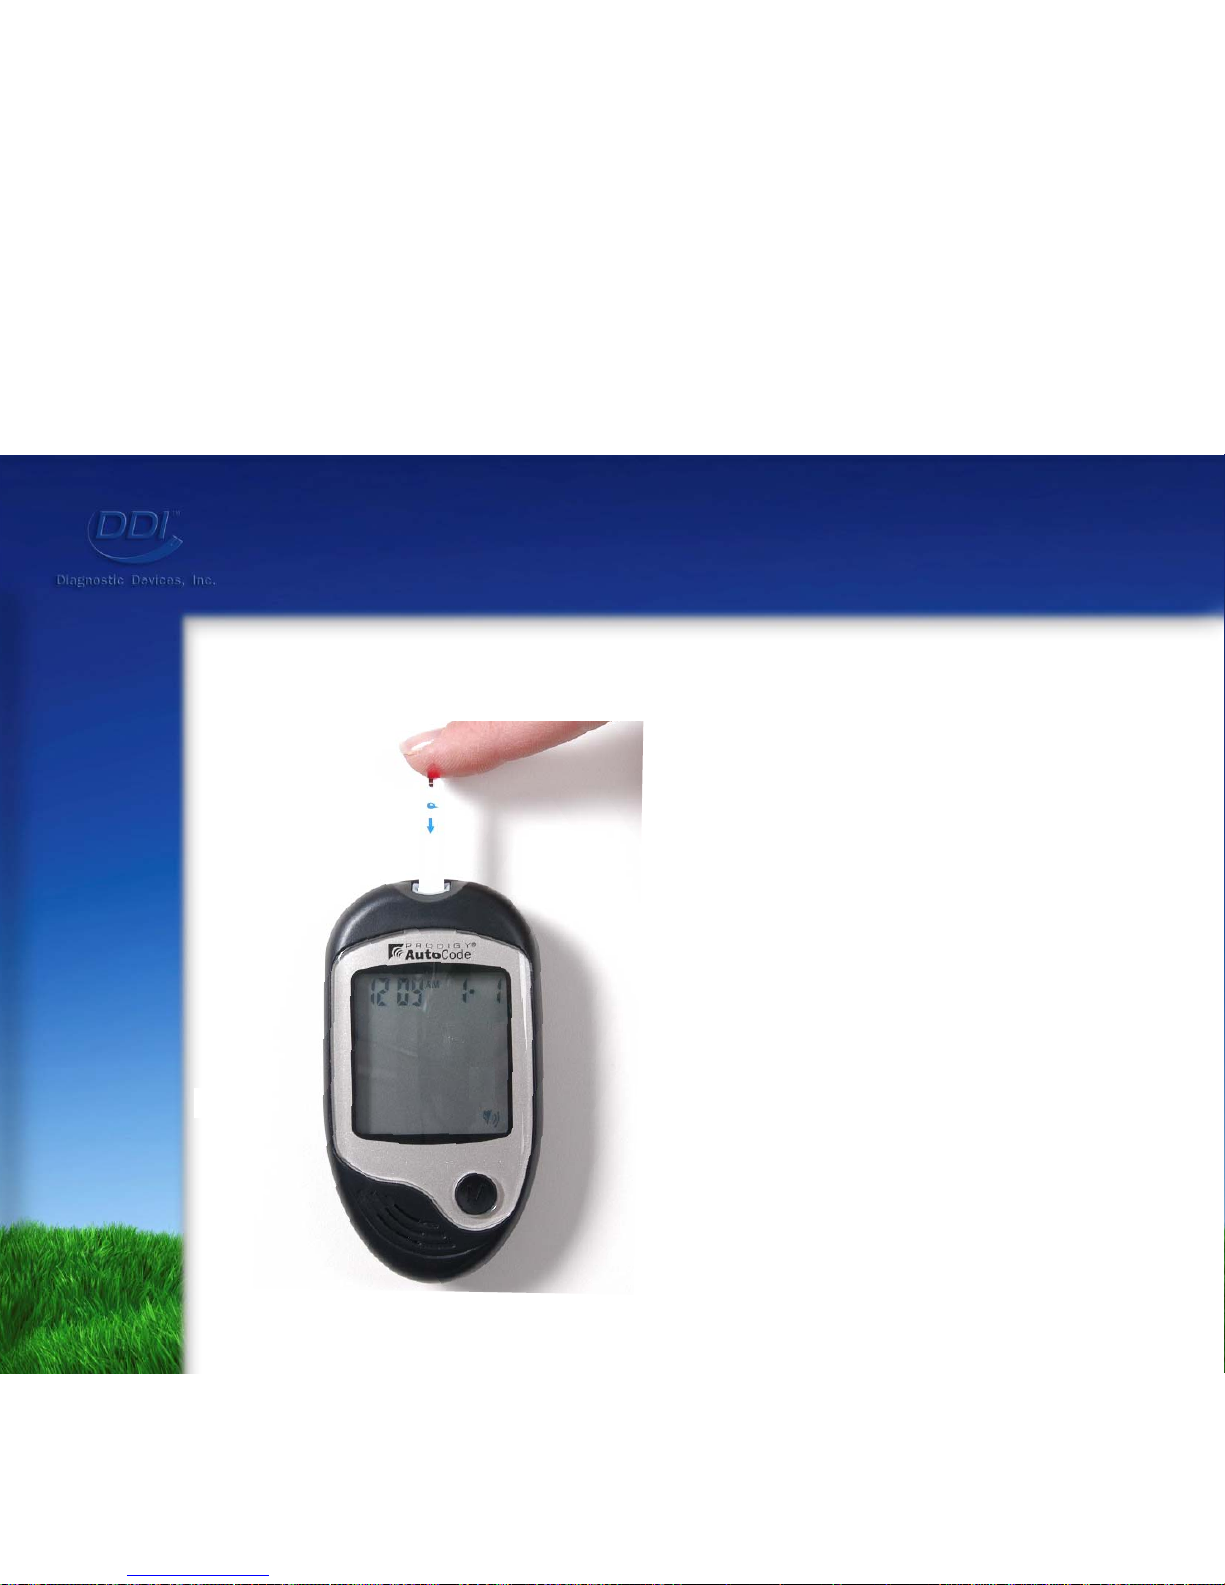
Performing a Blood Glucose Test
Step 4: Apply blood
sample to the
test strip.
Page 27
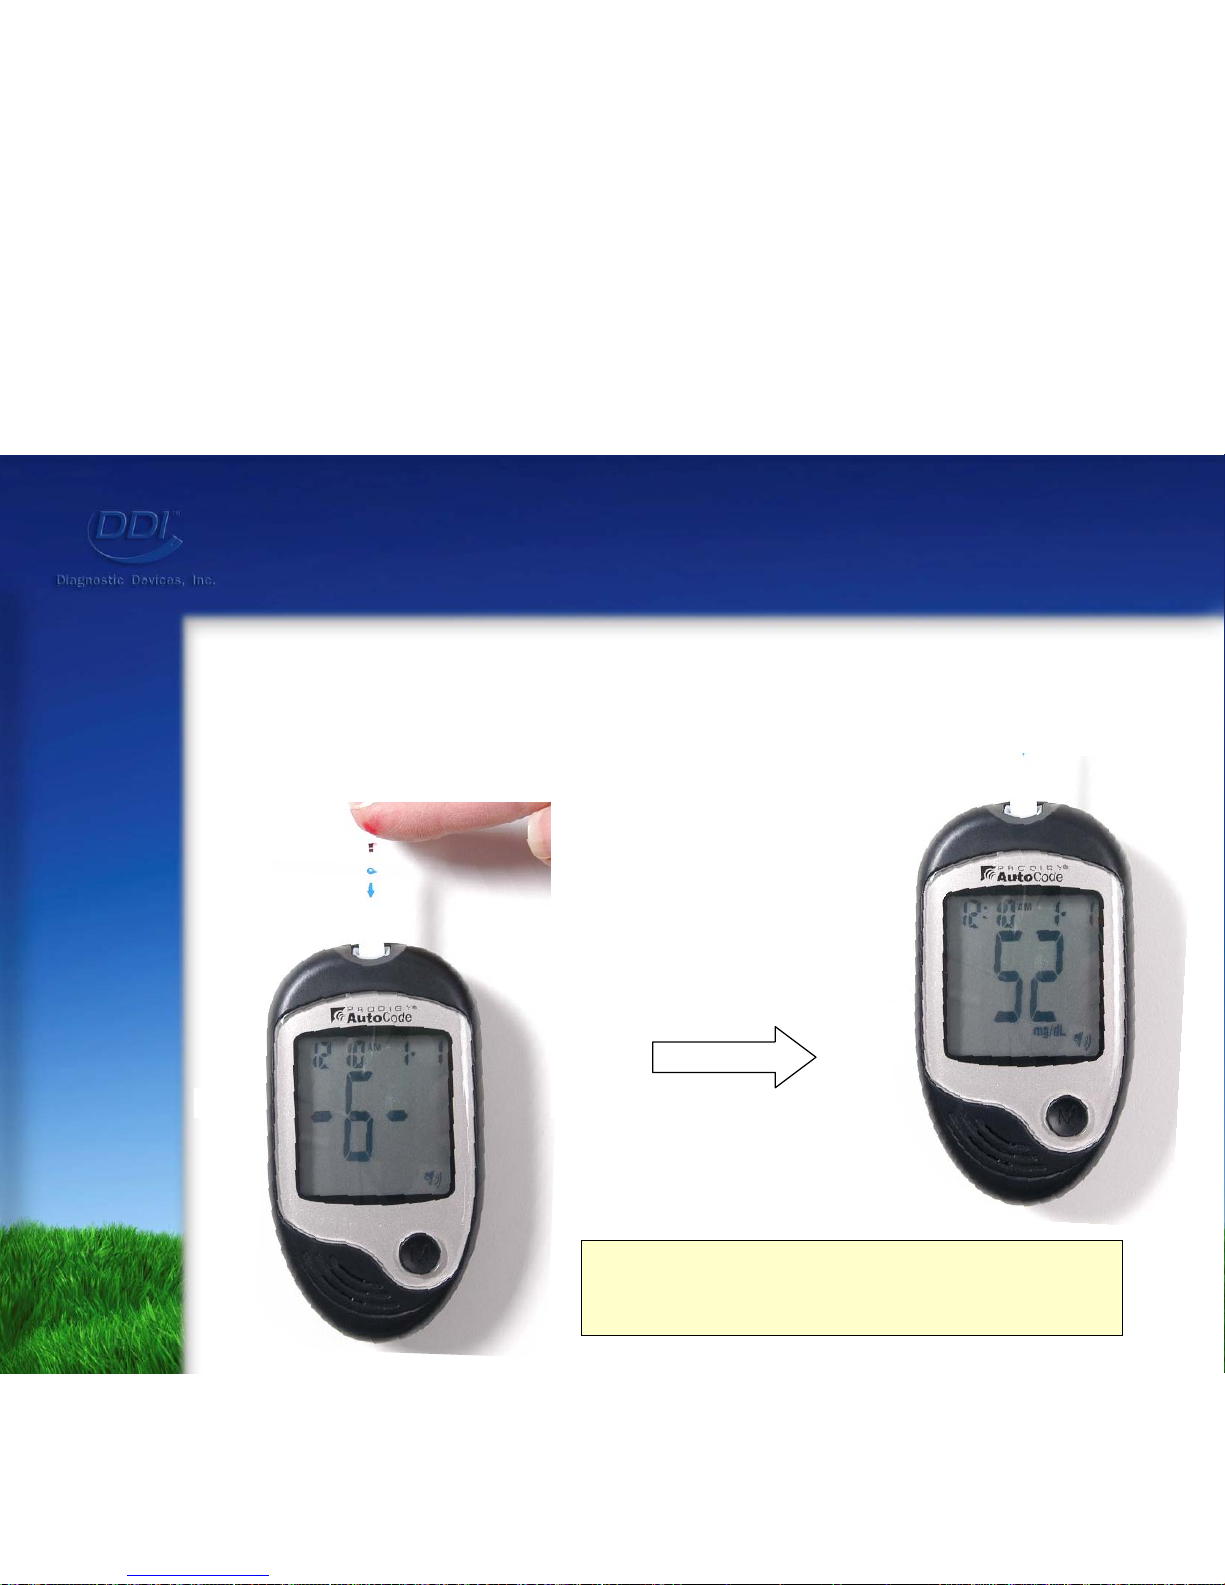
Performing a Blood Glucose Test
The meter will count down from 6 to 1, then report,
“Your blood glucose is __”
Step 5: Remove
the test
strip.
*Discard the used test strip
according to local regulations.
Page 28
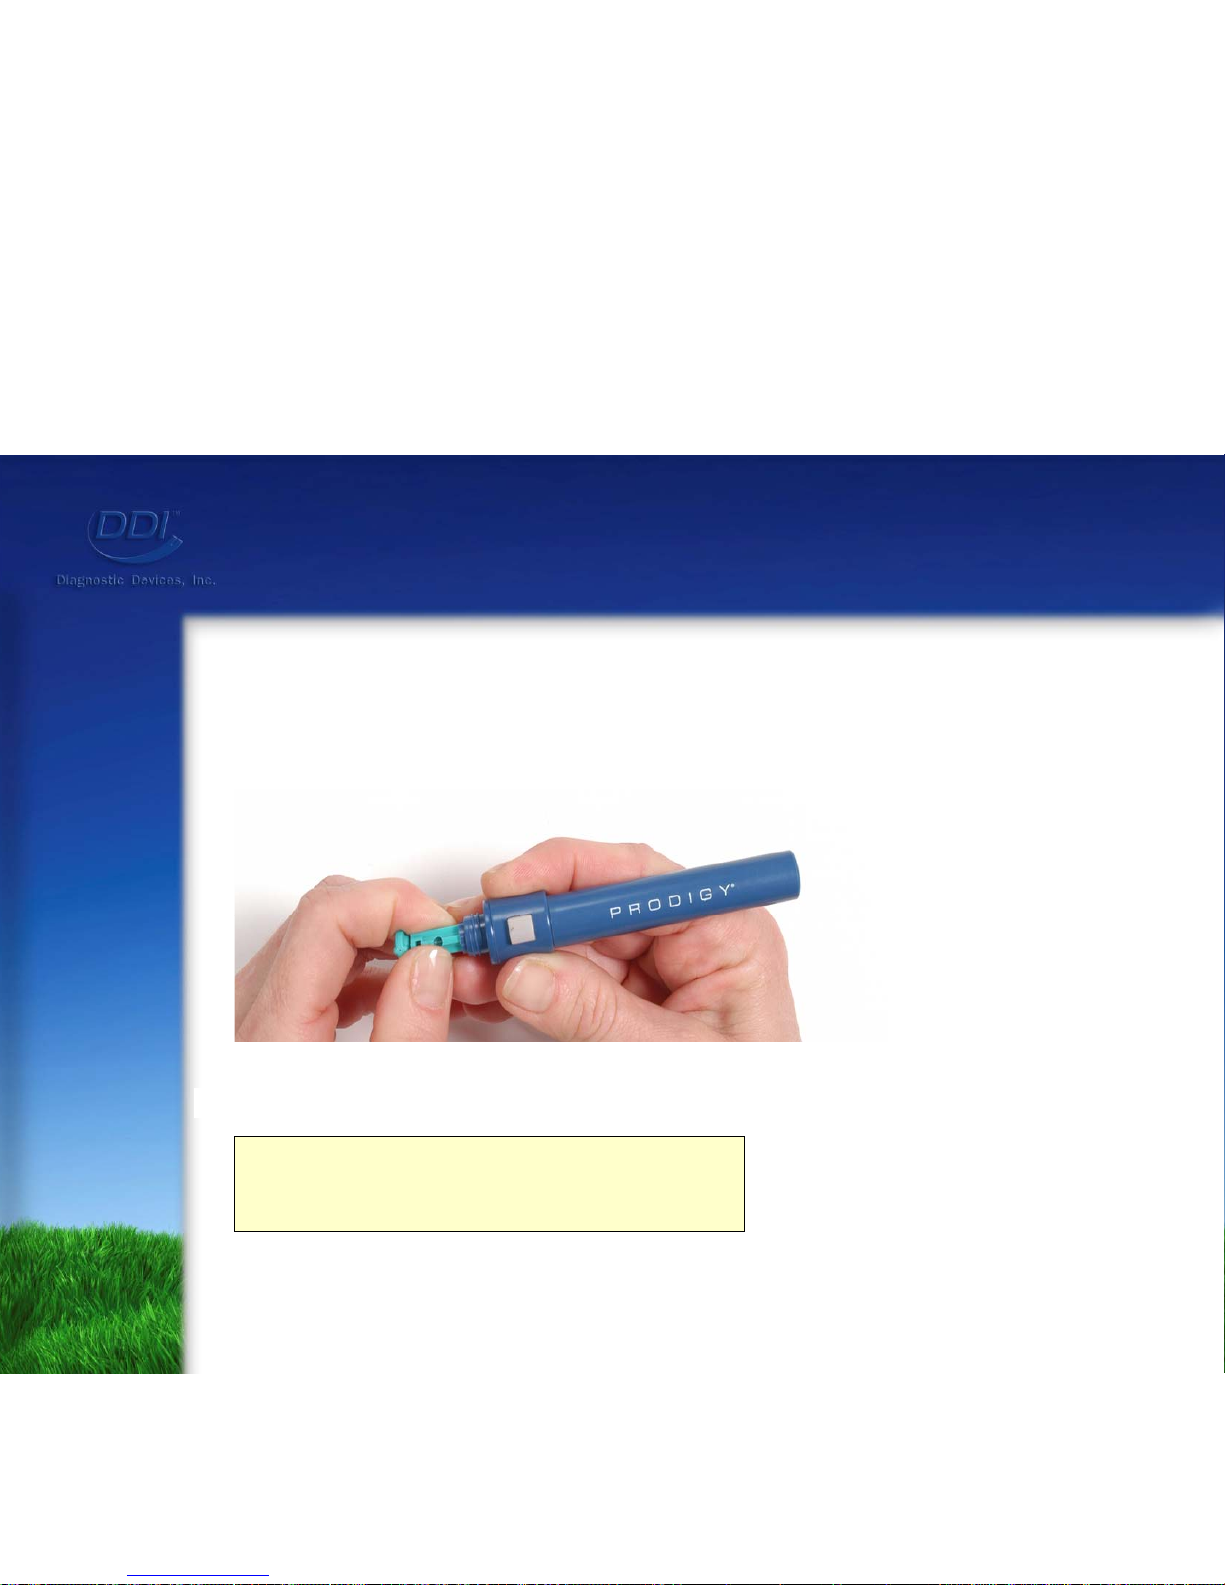
Performing a Blood Glucose Test
Step 6: Remove lancet
from lancing
device.
*Discard the used lancet
according to local regulations.
Page 29
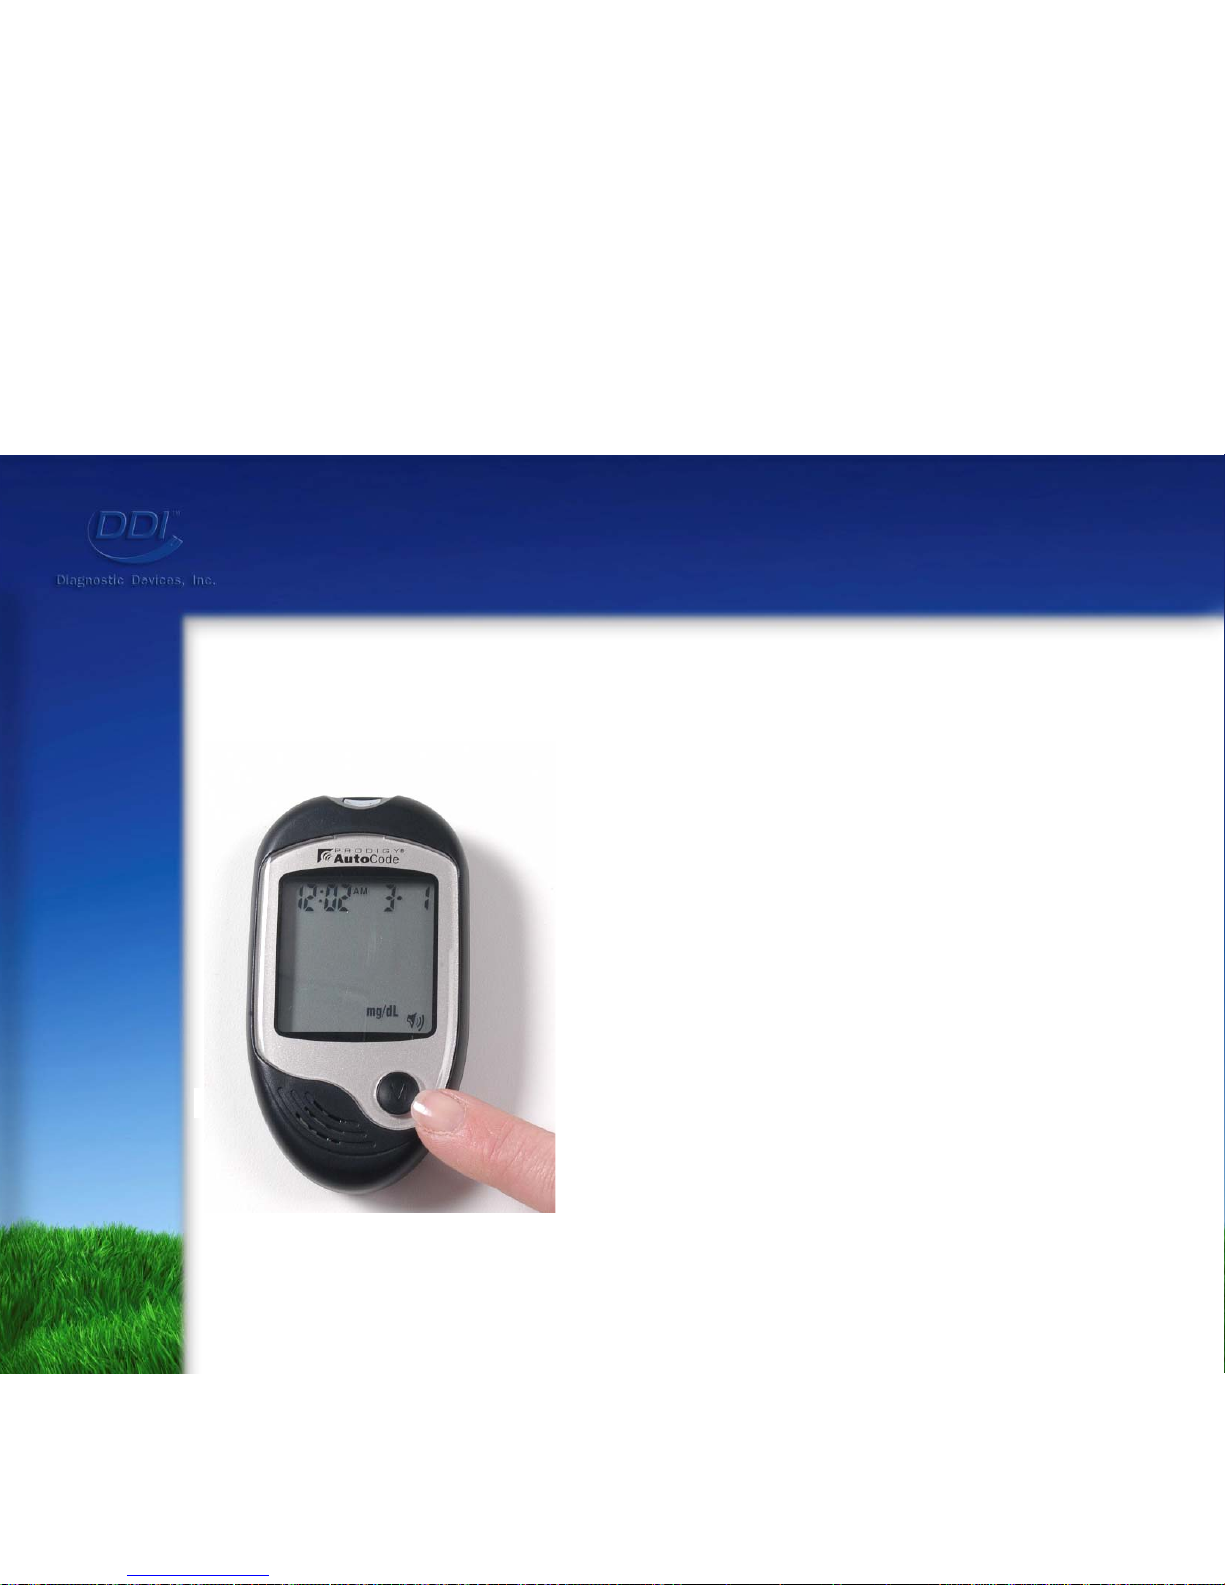
Recalling Test Results
Press the “M” button to enter the
memory mode while the meter is off.
You will hear:
“Your Prodigy Meter is on, Please
insert the test strip.”
Press the “M” button again to enter
memory recall mode.
Enter Memory Mode:
Page 30
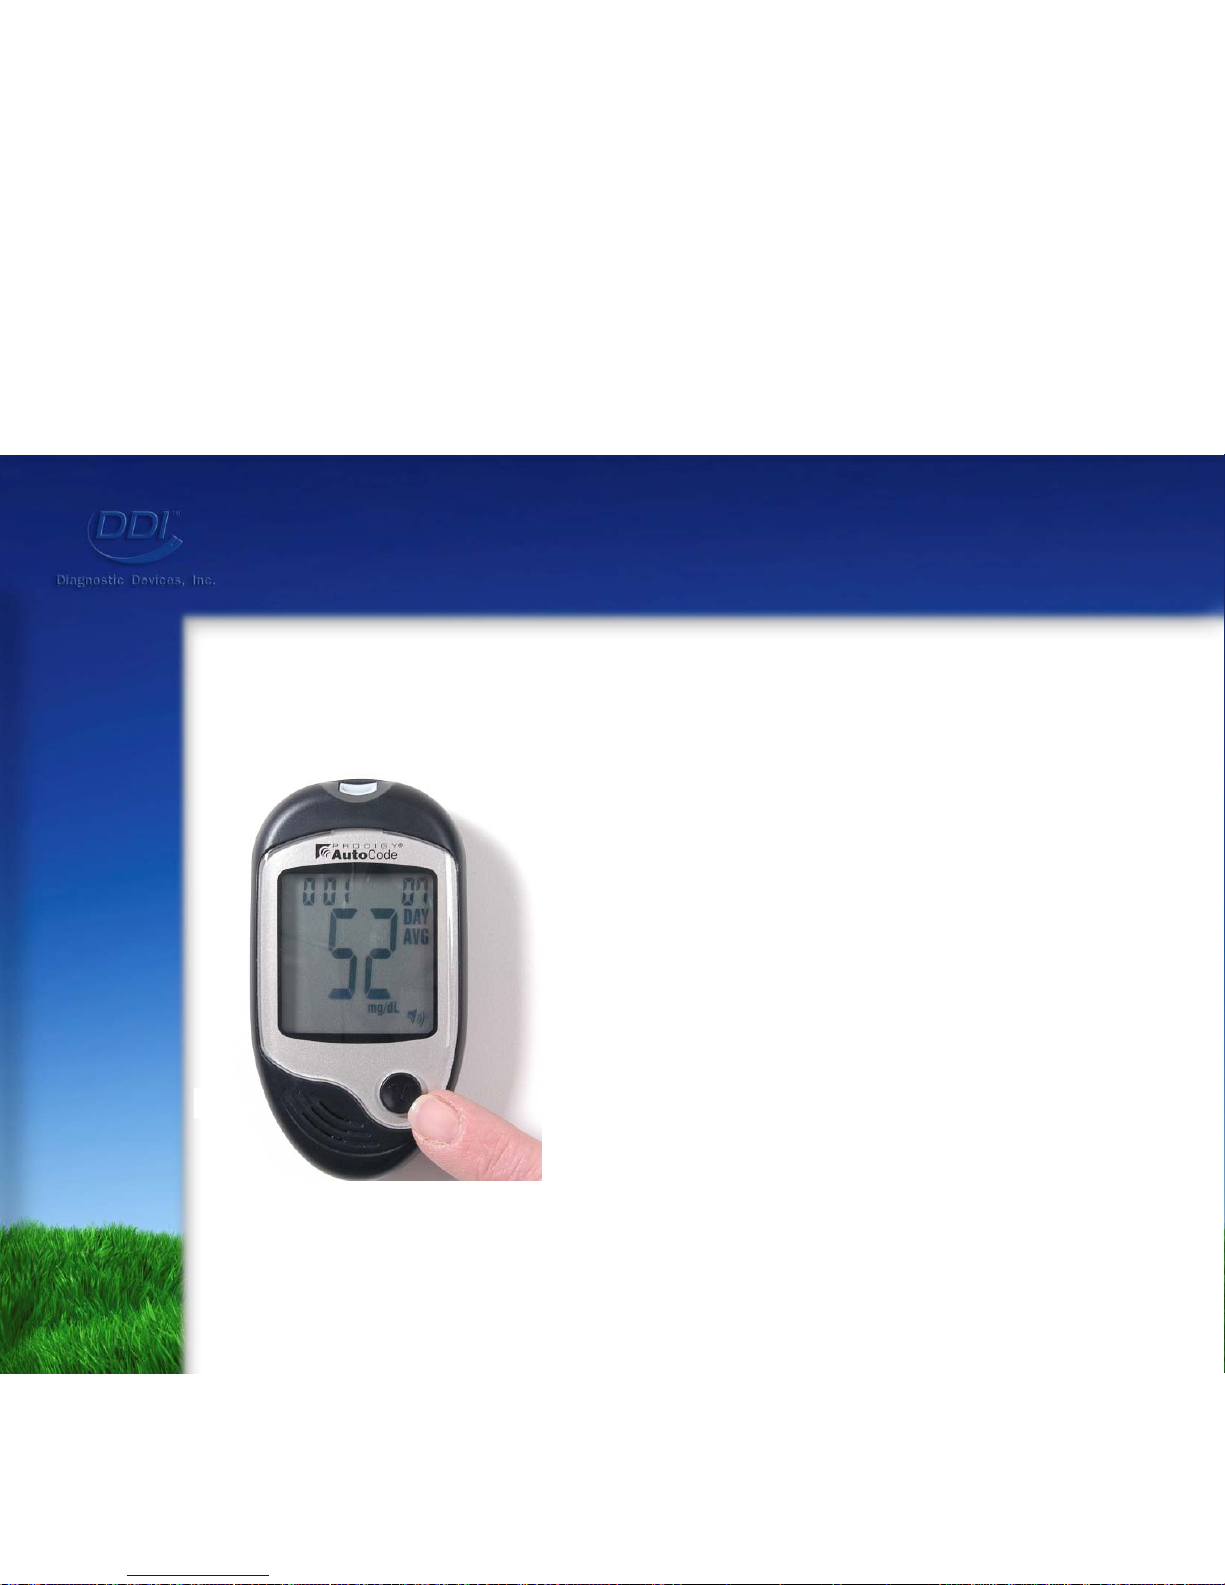
Recalling Test Results
The meter will report the 7-day
average result first.
Press the “M” button to advance
to the 14 and 28-day averages.
Recalling Average Test Results:
Page 31
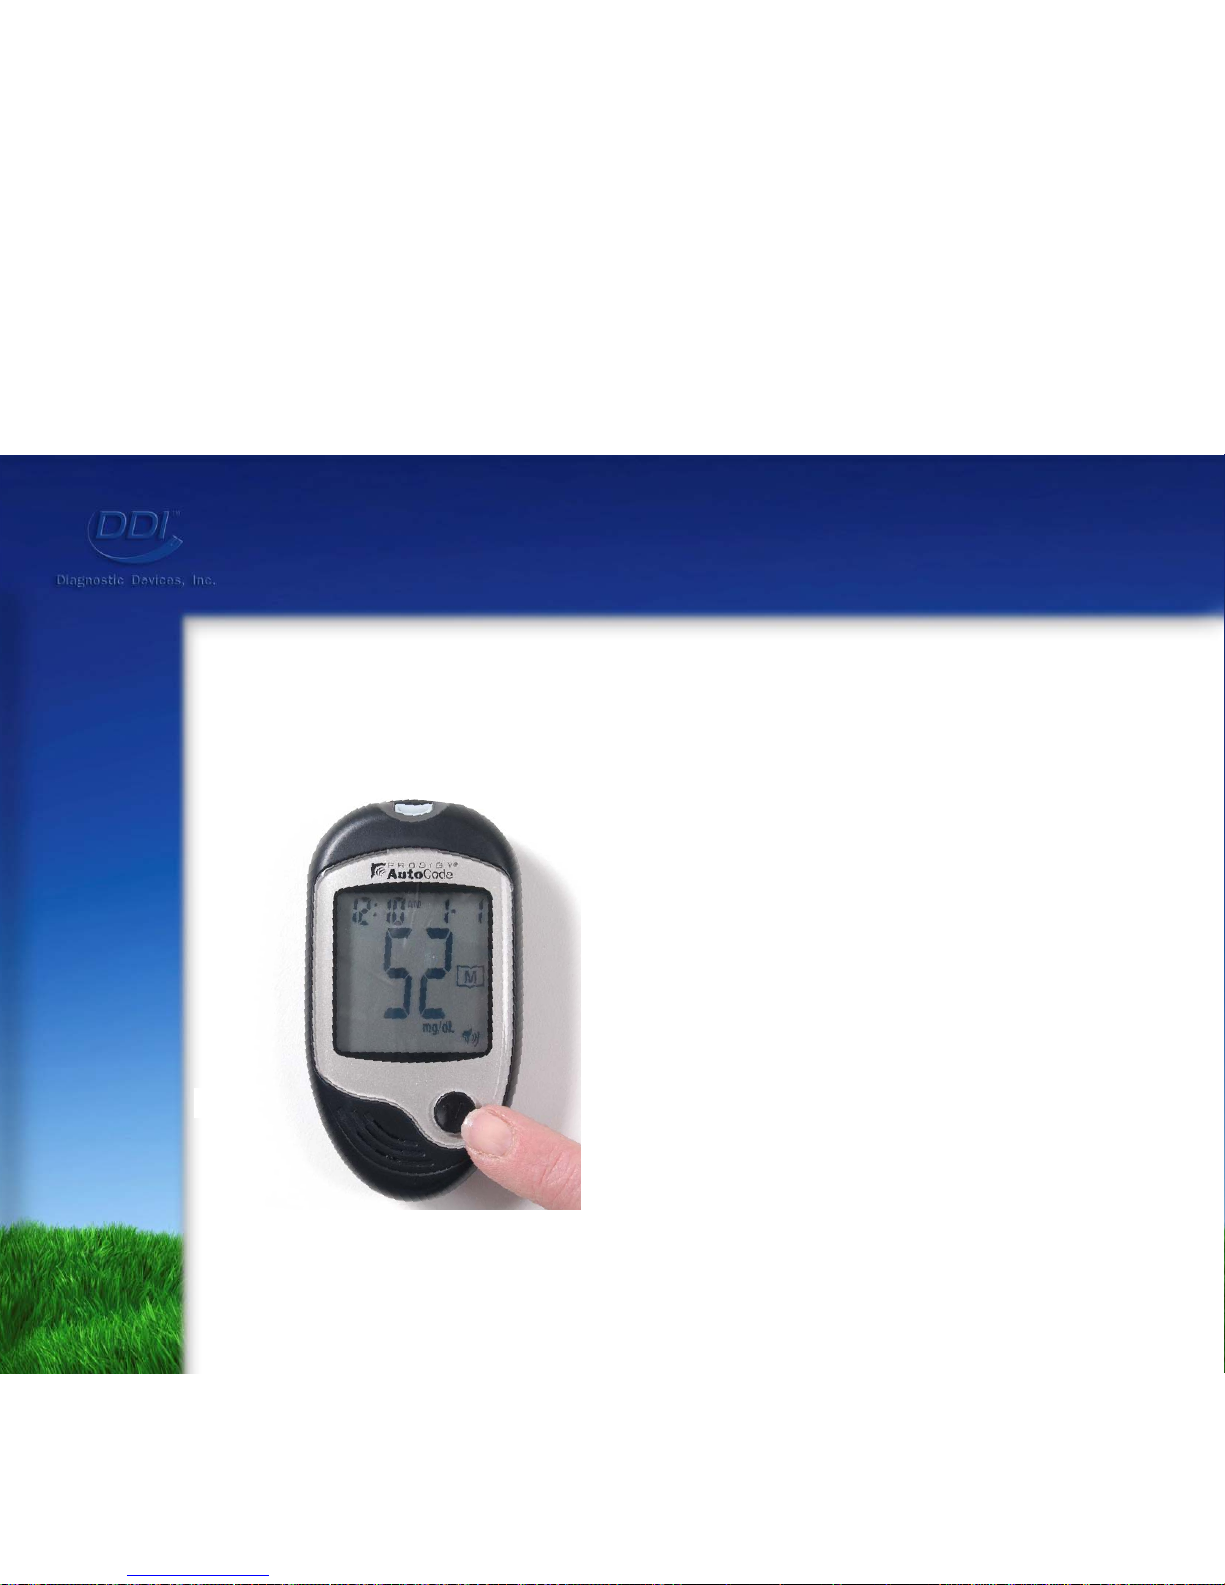
Recalling Test Results
After reviewing the averages,
press the “M” button and the
most recent individual test result
will appear.
Press the “M” button to advance
through a maximum of 120 test
results.
Recalling Individual Test Results:
Page 32
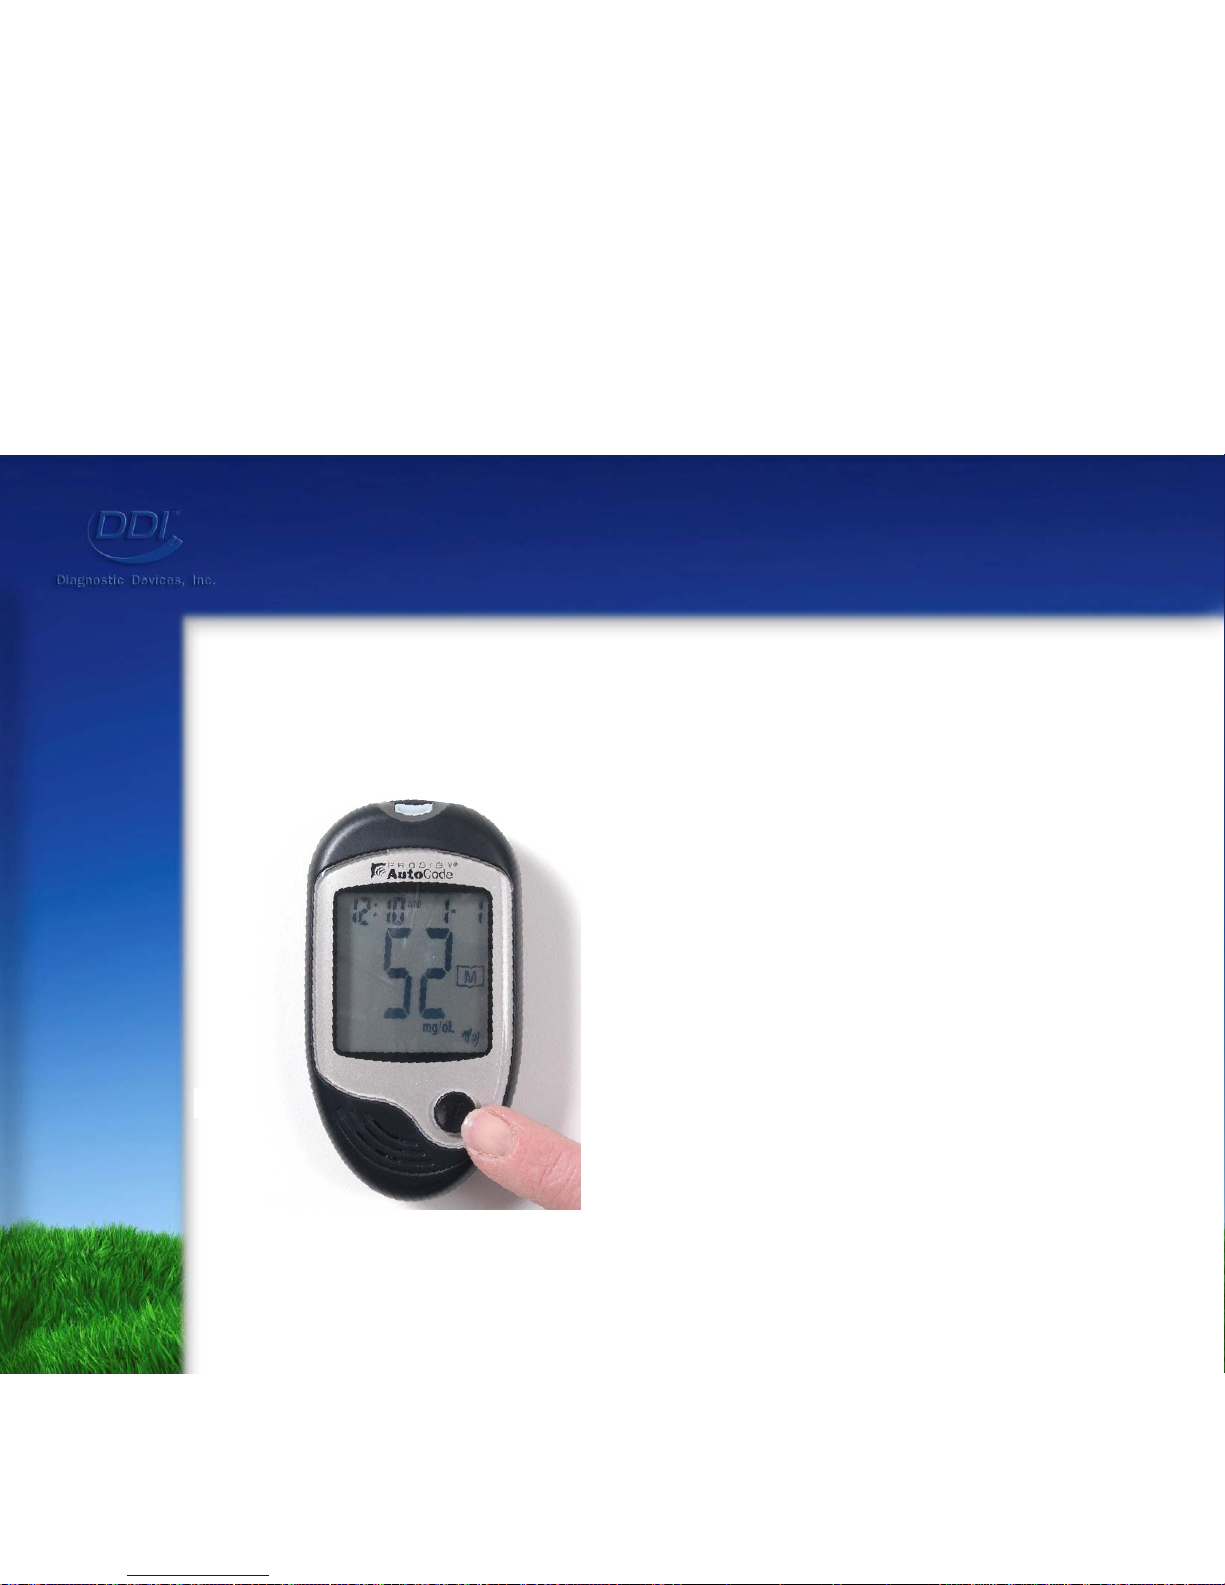
Recalling Test Results
Press and hold the “M” button for
5 seconds or leave the meter
alone for 2 minutes.
It will turn off automatically.
To exit memory mode:
Page 33
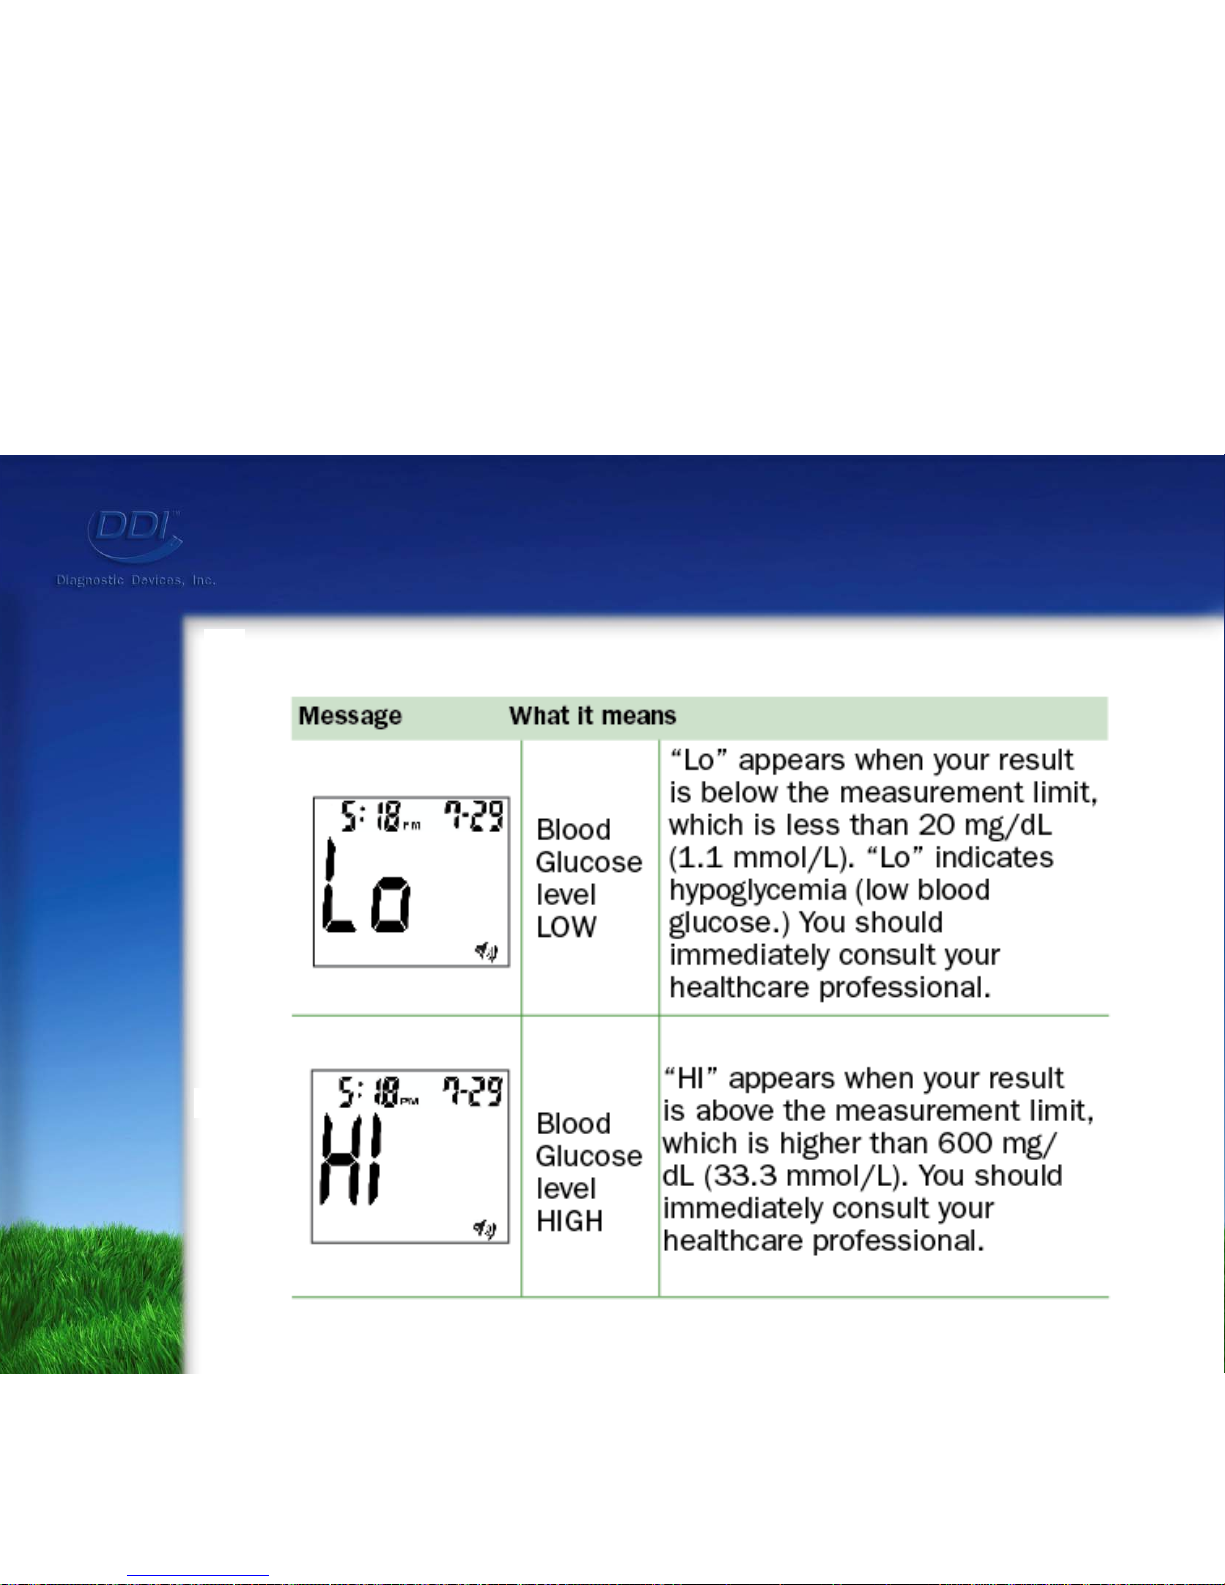
Special Messages
Page 34
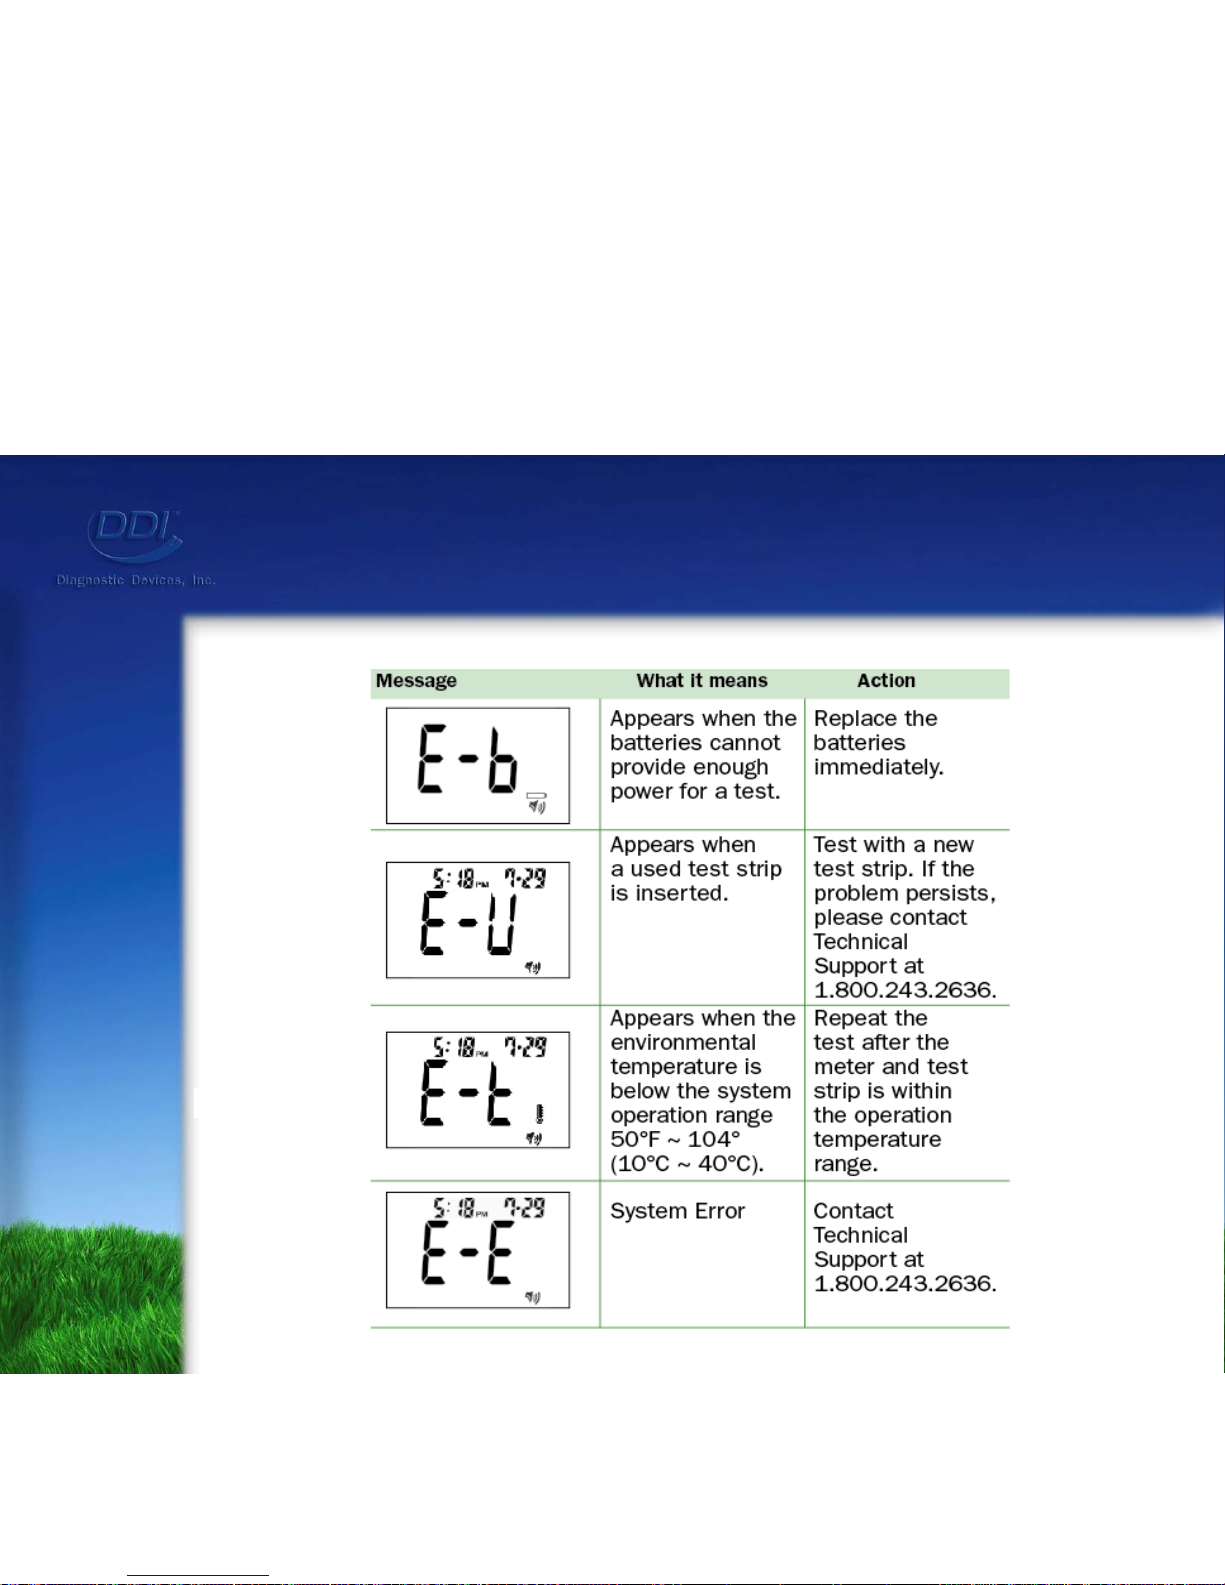
Error Messages
Page 35

Frequently Asked Questions
Q. Does Prodigy have downloadable software?
A.
Prodigy’s Diabetes Management Software is downloadable
from www.prodigymeter.com
.
Q. What unit or measurement does the meter have?
A.
The standard unit of measure is milligrams per deciliter
(mg/dL) for the United States and millimoles per liter
(mmol/L) for Canada.
Q. When testing, how long before the meter turns off?
A.
The meter will turn off in less than two (2) minutes
without action.
Page 36

Frequently Asked Questions
Q. What kind of bio-censor does the meter have?
A
. It is called Glucose Oxidase and it detects levels of
glucose by keeping track of the number of electrons
that pass through it and measures the resulting charge.
Q. Do you have to mark a control solution test?
A.
Yes. Press the “M” button after the meter says
“Please apply blood to the test strip.”
Q. How long do the batteries last?
A.
The batteries last for approximately 1,000 tests.
Q. What are the operation ranges for the Prodigy
®
Meters?
A.
50˚F - 104˚F (10˚C - 40˚C).
Page 37

Frequently Asked Questions
Q. Why does this meter use either high or low
control solutions?
A.
FDA regulations.
Q. Does the meter require cleaning and maintenance?
A.
As long as blood and control solution does not come in
contact with the internal part of the meter, special cleaning
is not required. Simply dampen a cloth with water and mild
detergent to wipe down the outside of the meter.
Q. What are the testing ranges for the Prodigy® Meters?
A.
20-600 mg/dL or 1.1-33.3 mmol/L.
Page 38

Let’s Review!
1) What type of batteries are required for the Prodigy
AutoCode
®
?
2) What do the ranges on the vial of test strips refer to?
3) Can I use other Prodigy Meter test strips with the
Prodigy AutoCode
®
Meter?
4) Does the Prodigy AutoCode
®
require coding?
5) Does this meter require a special cable to download
test results to a computer?
Page 39

6) Is the volume level adjustable?
7) Does the meter store the test result in the memory
if it is in control solution mode?
8) Where is the “Set” button located?
9) How many different averages does the meter report?
10) What does “L1” indicate when it is displayed on the
LCD screen?
Let’s Review!
Page 40

Contact Information
For further assistance, please contact one of
the following:
For Product Information or Sales:
Call 800-366-5901
For Technical Support:
Call 800-243-2636
www.prodigymeter.com
Page 41

Notes
Page 42

Thank you for your interest in our
Prodigy
®
products!
Important Information: The information in this Prodigy AutoCode® Reference Guide serves
as a training resource only. It is not designed to replace the product owner’s manual. Please
refer to the owner’s manual for complete instructions and product warnings.
AC Ref Guide Rev 01. 04/2009
 Loading...