

Proctor PCW-107R User Manual
1.3 Megapixel
Compact IP
Dome Camera
User’s Manual
Ver1.4

1
Table of Contents
1. Software Version ........................................................................................................3
2. Introduction.................................................................................................................4
2.1 Features.............................................................................................................4
2.2 Package Contents..............................................................................................5
2.3 Camera Overview ..............................................................................................5
3. Preparations for IP Camera Setup ............................................................................7
3.1 System Requirements........................................................................................7
3.2 Ethernet Connection ..........................................................................................7
4. Accessing Camera .....................................................................................................9
5. Configuration & Operation.......................................................................................16
5.1 Browser-based Viewer Introduction .................................................................16
5.2 Home Page......................................................................................................18
5.3 System Related Settings..................................................................................19
5.3.1 Host Name and System Time Setting................................................20
5.3.2 Security..............................................................................................21
5.3.3 Network .............................................................................................23
5.3.4 DDNS ................................................................................................26
5.3.5 Mail ....................................................................................................27
5.3.6 FTP....................................................................................................28
5.3.7 Motion Detection................................................................................29
5.3.8 Snapshot ...........................................................................................31
5.3.9 Iris Adjustment (Box Camera and Vandal Proof Dome).....................32
5.3.10 View Log File .....................................................................................33
5.3.11 View User Information .......................................................................34
5.3.12 View Parameters ...............................................................................36
5.3.13 Factory Default ..................................................................................37
5.3.14 Software Version ...............................................................................38
5.3.15 Software Upgrade..............................................................................39
5.4 Video and Audio Streaming Settings ...............................................................42
5.4.1 Video Resolution and Rotate Type ....................................................42
5.4.2 Video Compression ...........................................................................44
5.4.3 Video OCX Protocol...........................................................................45
5.4.4
Video Frame Skip ..............................................................................46
5.4.5 Privacy Masking Function..................................................................47
5.4.6 Audio Setting .....................................................................................49
5.5 Camera Settings ..............................................................................................50
5.5.1 Exposure Setting ...............................................................................50
5.5.2 White Balance Setting .......................................................................51

2
5.5.3 Backlight Setting................................................................................52
5.5.4 Brightness Setting..............................................................................52
5.5.5 Sharpness Setting .............................................................................53
5.5.6 Contrast Setting.................................................................................53
5.5.7 Digital Zoom Setting ..........................................................................53
5.6 Logout..............................................................................................................54
6. CMS Software Introduction......................................................................................55
Appendix A: Technical Specifications...........................................................................56
Appendix B: Internet Security Settings .........................................................................58
Appendix C: DC Viewer Download Procedure ..............................................................61

3
1. Software Version
The Compact IP Dome Camera’s current software version is as follows:
Time Released Version
Oct., 2012 p20091016PS

4
2. Introduction
The 1.3 Megapixel Compact IP Dome Camera features a 1/3.8” Sony
Progressive CMOS Sensor and generates excellent image quality. Having
excellent high definition image quality in low-light conditions, this camera could
identify the individuals and objects of interest easily.
With Power over Ethernet (IEEE 802.3af) feature, the need of power outlets
could be totally eliminated; likewise installation and cabling cost would be
significantly reduced.
The IP Dome Camera’s flat and sophisticated design enhances more
application possibilities, such as indoor/outdoor and mobile surveillance.
Additionally, its light weight and compact size offer quick and simple installation
on the ceilings or walls of houses and vehicles.
2.1 Features
• 1/3.8” 1.3M progressive CMOS
• Simultaneous MPEG-4 and MJPEG video stream (dual stream)
• Resolution: MPEG-4 VGA,QVGA,CIF,QCIF
MJPEG 1280 x 960(4 VGA), VGA, QVGA, CIF, QCIF
• Frame Rate: MPEG-4 30fps@VGA; MJPEG 15fps@1280 x 960
• Image Setting:
Rotation: Flip, Mirror, and 180 Rotate∘
Brightness, Sharpness, Contrast, White Balance, Exposure Control
Digital Zoom: x1 ~ x12
• Audio Compression: G.711 PCM 64 kbit/s
G.726 ADPCM 32 or 24 kbit/s
• Shutter Speed: 1.5~1/15000 sec
• Interface: 10/100 Ethernet
• Compact Size Dome Cover and Housing
• Power over Ethernet
5
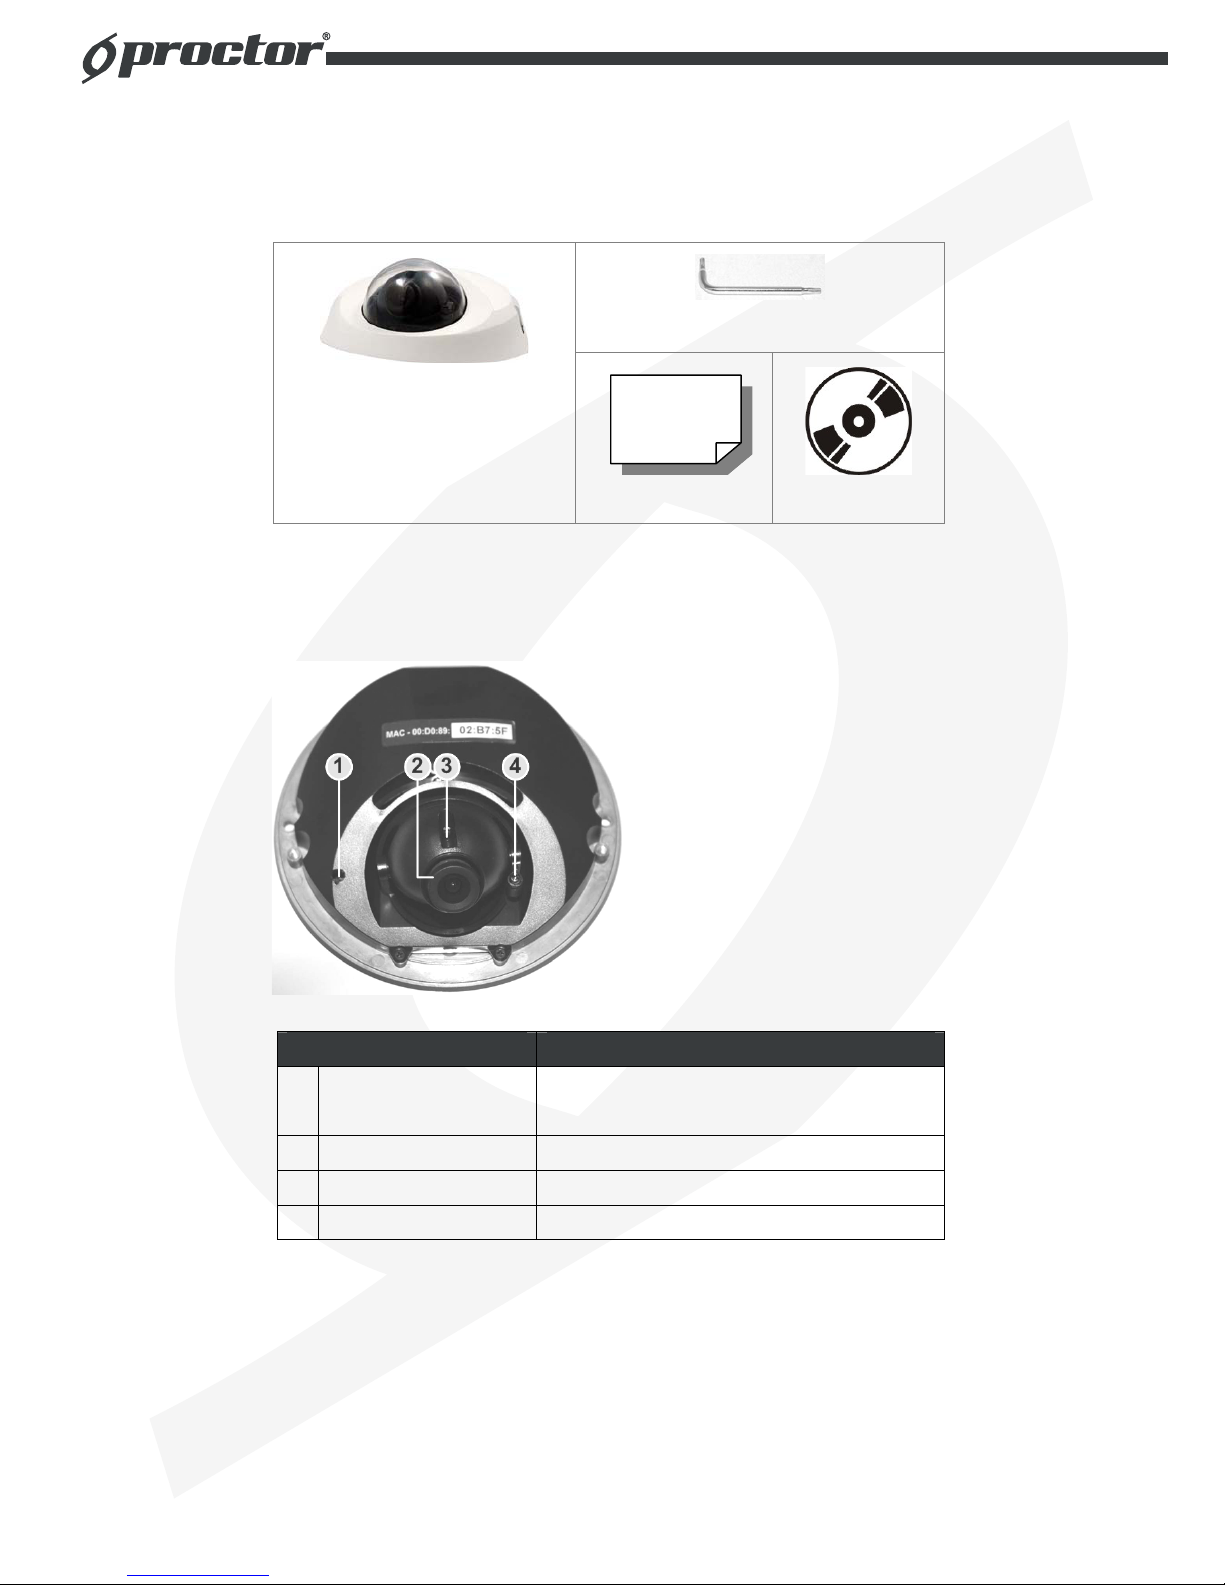
2.2 Package Contents
Please check the package contains the following items listed below.
Security Torx
Indoor Camera/
Rugged Camera (with Cable )
Quick Guide
CD
2.3 Camera Overview
Designation Description
1
Reset Button
Restore to default setting; press the
button with a proper tool
2
Lens Rotate the lens right/left to adjust focus
3
Focus Fixed Screw Loosen the screw to adjust the lens
4
Tilt Fixed Screw Loosen the screw to adjust tilt angle

6
Dimensions
7
3. Preparations for IP Camera Setup
This chapter outlines information about system requirements for IP Dome
Camera operation, power and Ethernet connection for Indoor/Outdoor IP Dome
Camera, and access to the camera.
3.1 System Requirements
To perform the IP Dome Camera via web browser, please ensure your PC is in
good network connection, and meet system requirements as described below.
Items Minimum Requirement
Personal Computer
1. Intel Pentium IV, 3 GHz or higher, Intel Core2 Duo, 2
GHz or higher
2. 1 GB RAM or more
3. AGP graphics card 64 MB RAM, Direct Draw
Operating System
Windows VISTA or Windows XP
Web Browser
Microsoft Internet Explorer 6.0 or later
Network Card
10Base-T (10 Mbps) or 100Base-TX (100 Mbps) operation
Viewer
ActiveX control plug-in for Microsoft IE
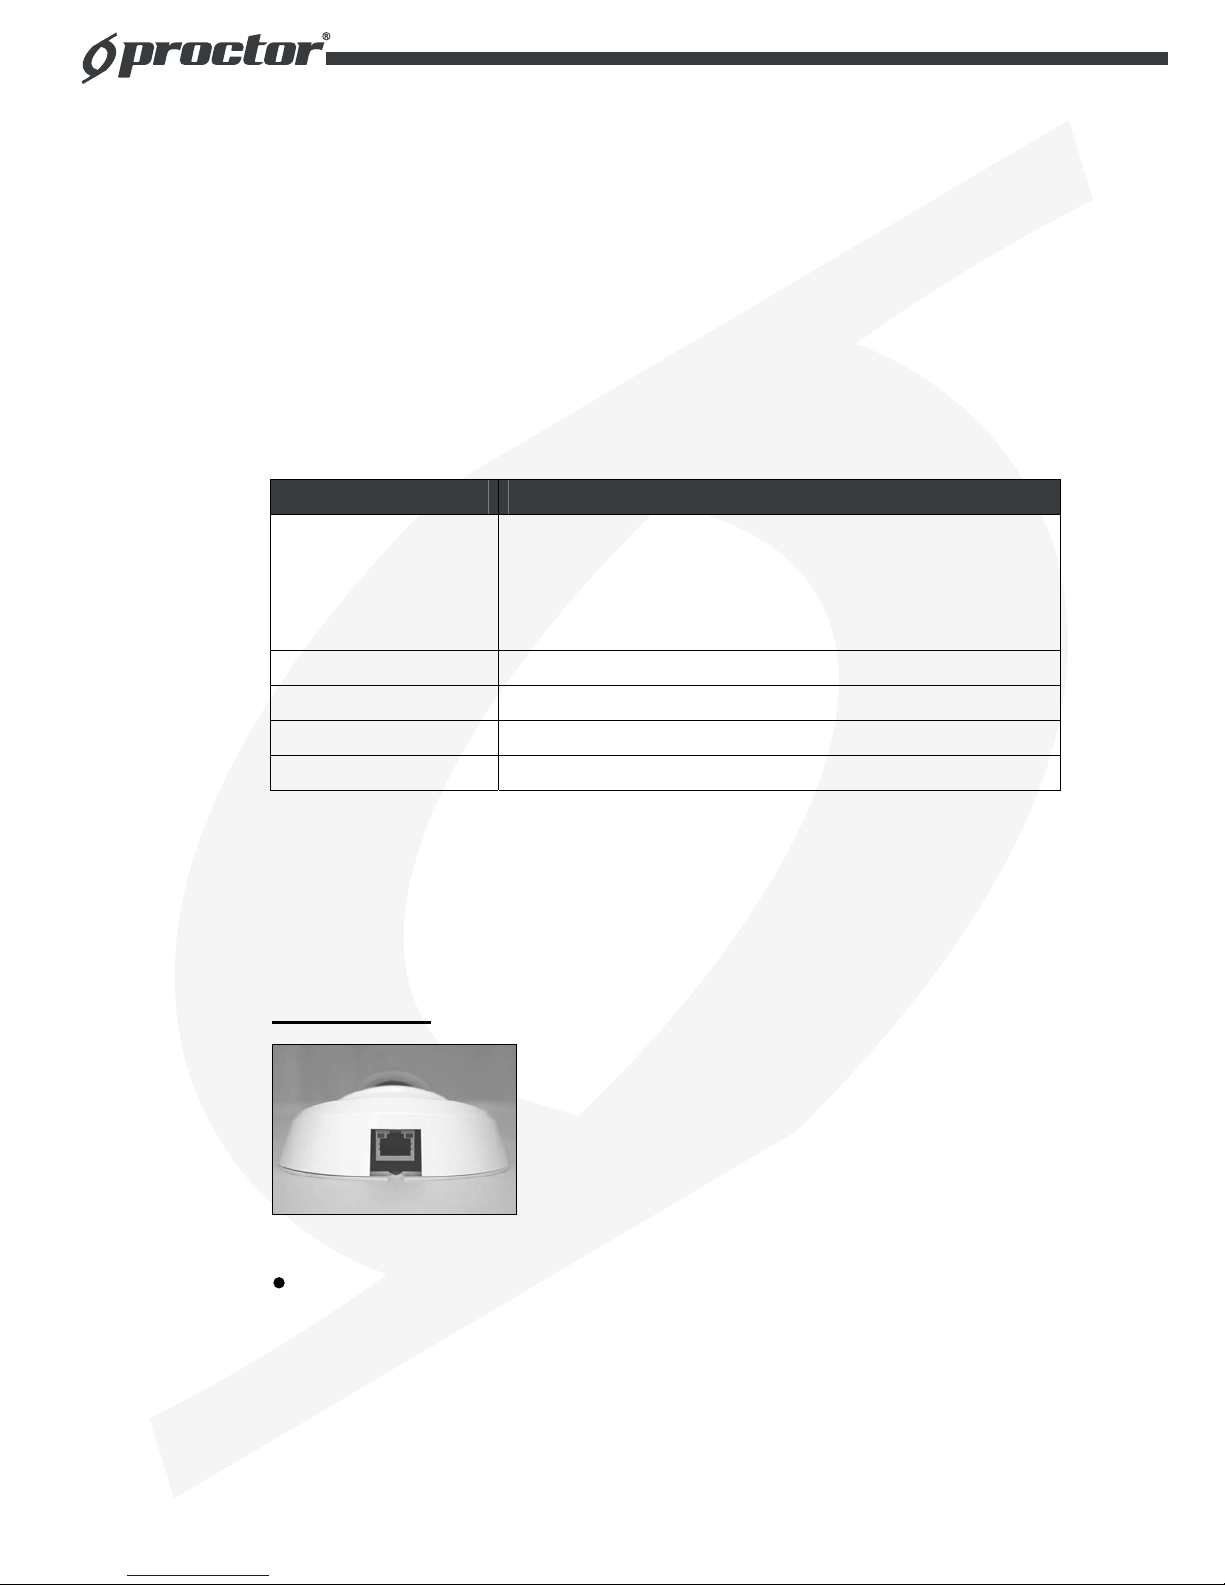
3.2 Ethernet Connection
Please follow the instructions below to connect Indoor/Rugged IP Dome
Camera’s Ethernet cable.
Indoor Camera
PoE Connection
Connect the one end of the PoE cable to the Ethernet port on the camera,
and the other end to Power Sourcing Equipment (PSE) like hubs or routers.

8
Check the status of the link indicator and activity indicator LEDs; if the LEDs
are unlit, please check the connections.
Green Link Light indicates good network connection.
Orange Activity Light flashes for network activity indication.
Rugged Camera
M12 D-Coded Connector PoE Waterproof Switch
M12 D-Coded Connection
For the Rugged IP Dome Camera, connect its Ethernet cable to a M12
waterproof switch as shown above.
NOTE: Please use a PoE waterproof switch/hub so that the camera
can work.
M12 D-Coded Connector’s Pin Definition
Pin 1: Rx+
Pin 2: Tx+
Pin 3: Rx-
Pin 4: Tx-
9
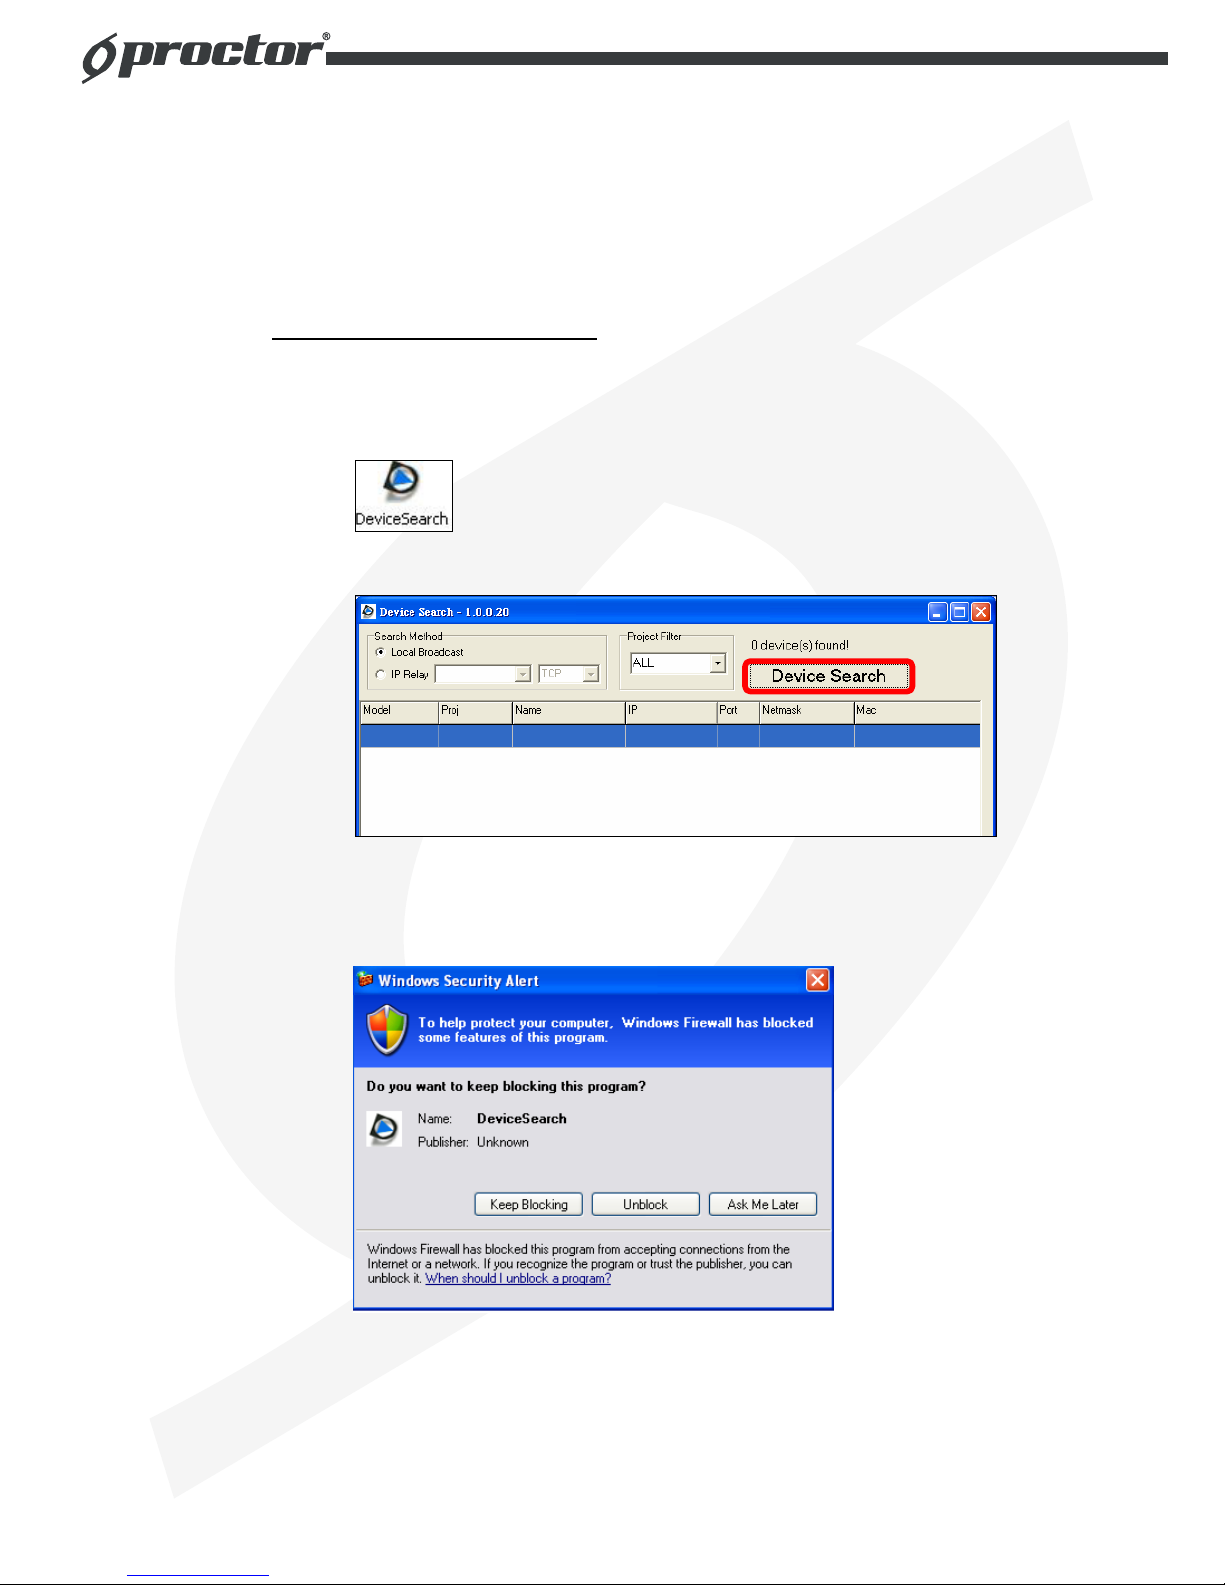
4. Accessing Camera
For initial access to the IP Dome Camera, users can search the camera through
the installer program: DeviceSearch.exe, which can be found in “DeviceSearch”
folder in the supplied CD.
Device Search Software Setup
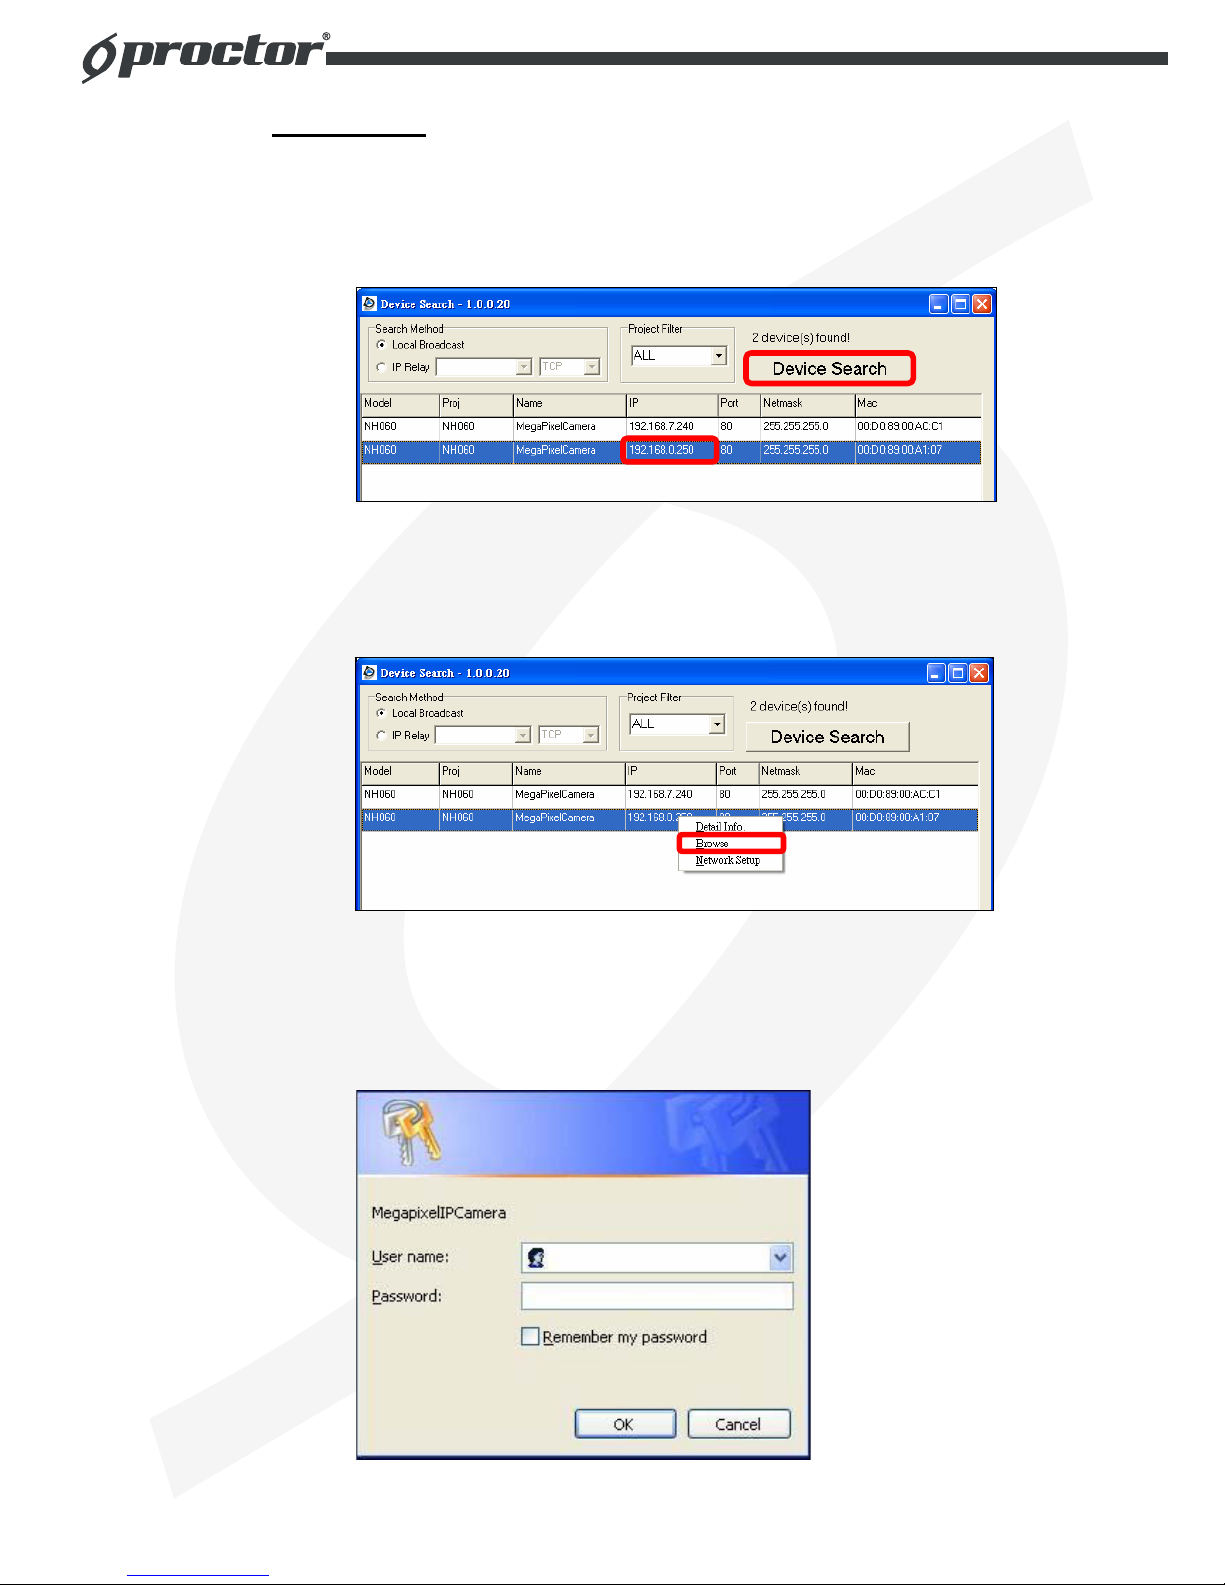
Step 1: Double click on the program Device Search.exe (see the icon below);
its window will appear as shown below. Then click the “Device Search”
button.
Step 2: The security alert window will pop up. Click “Unblock” to continue.
10
Device Search
Step 3: Click “Device Search” again, and all the finding IP devices will be listed
in the page, as shown in the figure below. The IP Dome Camera’s
default IP address is: 192.168.0.250.
Step 4: Double click or right click and select “Browse” to access the camera
directly via web browser.
Step 5: Then the prompt window of request for entering default username
and password (as shown below) will appear for logging in to the IP
Dome Camera.
11
The default login ID and password for the Administrator are:
Login ID Password
Admin 1234
NOTE: ID and password are case sensitive.
NOTE: It is strongly advised that administrator’s password be
altered for the security concerns. Refer to section 5.3.2 Security
for further details.
Additionally, users can change the IP Dome Camera’s network property, either
DHCP or Static IP directly in the device finding list. Refer to the following section
for changing the IP Dome Camera’s network property.
Example of Changing IP Dome Camera’s Network Property
Users can directly change an IP Dome Camera’s network property, ex. from
static IP to DHCP, in the finding device list. The way to change the IP Dome
Camera’s network property is specified below:
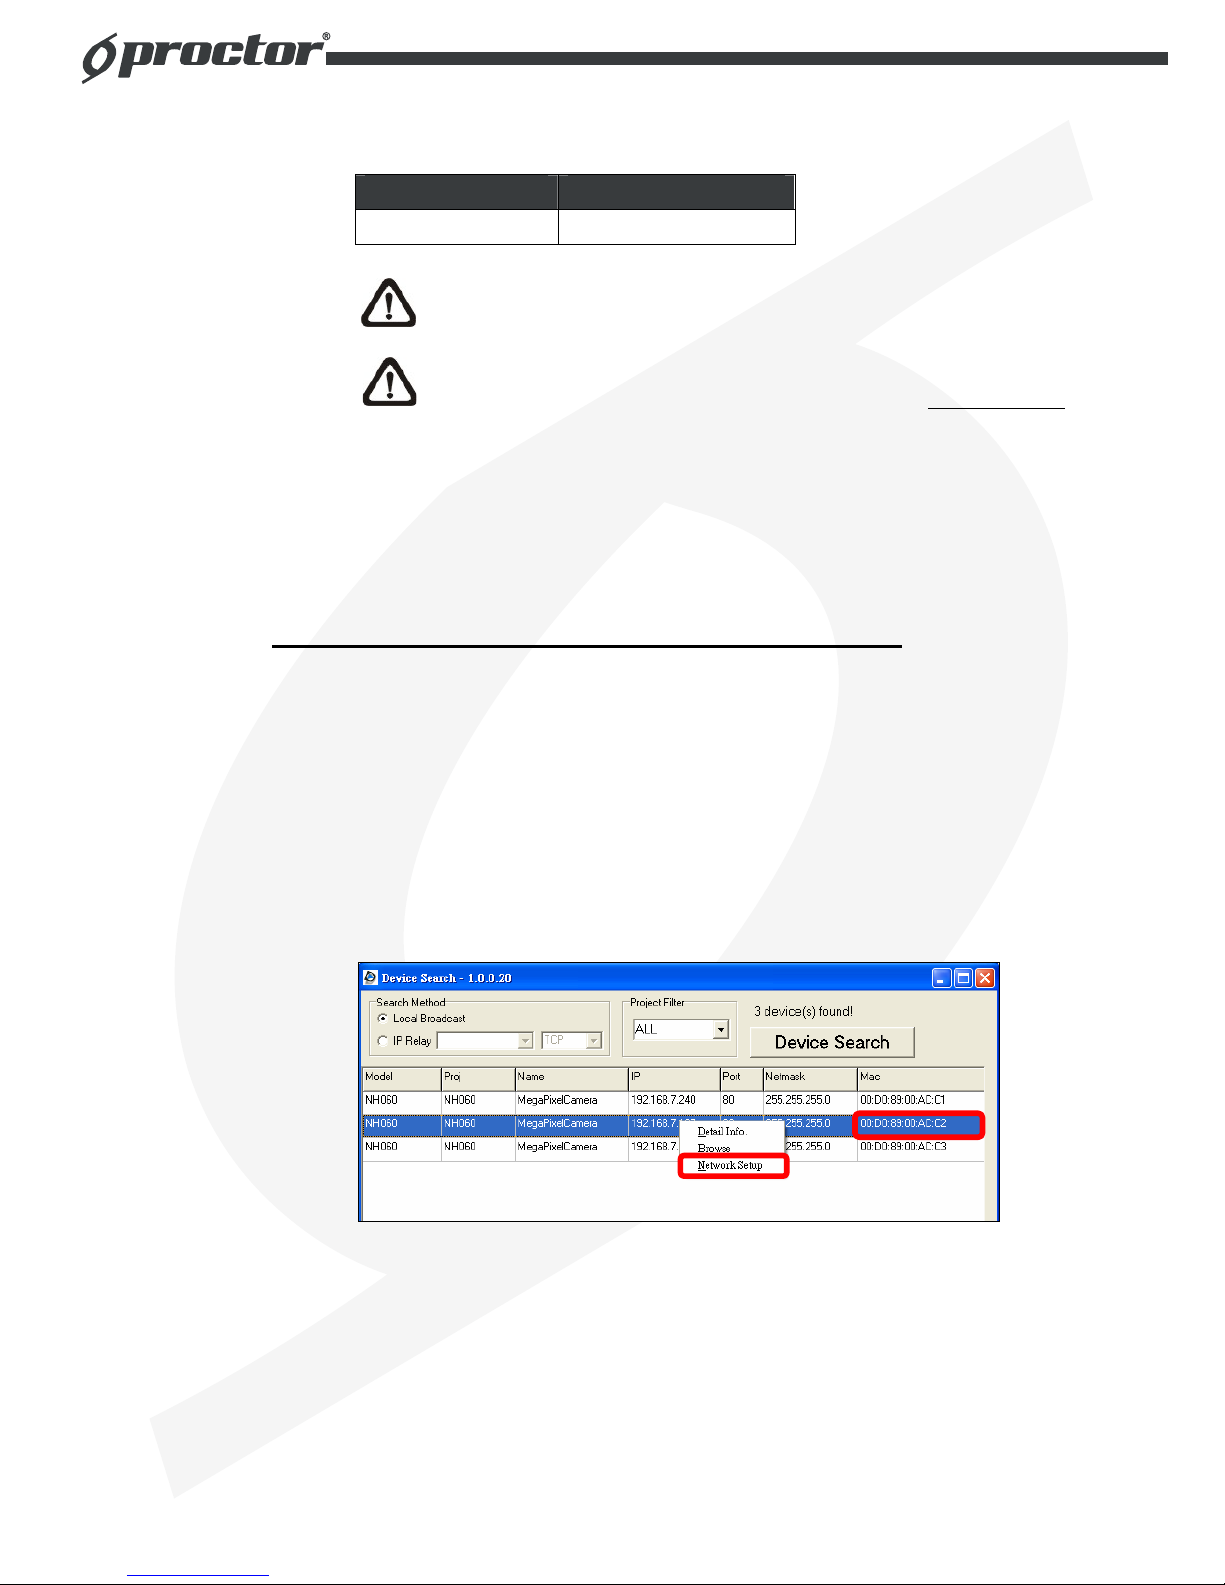
Step 1: In the finding device list, click on the IP Dome Camera that you would
like to change its network property. On the selected item, right click and
select “Network Setup.” Meanwhile, record the IP Dome Camera’s
MAC address, for future identification.
Step 2: The “Network Setup” page will come out. Select “DHCP,” and press
“Apply” button down the page.

12
Step 3: Click “OK” on the Note of setting change. Wait for one minute to
re-search the IP Dome Camera.
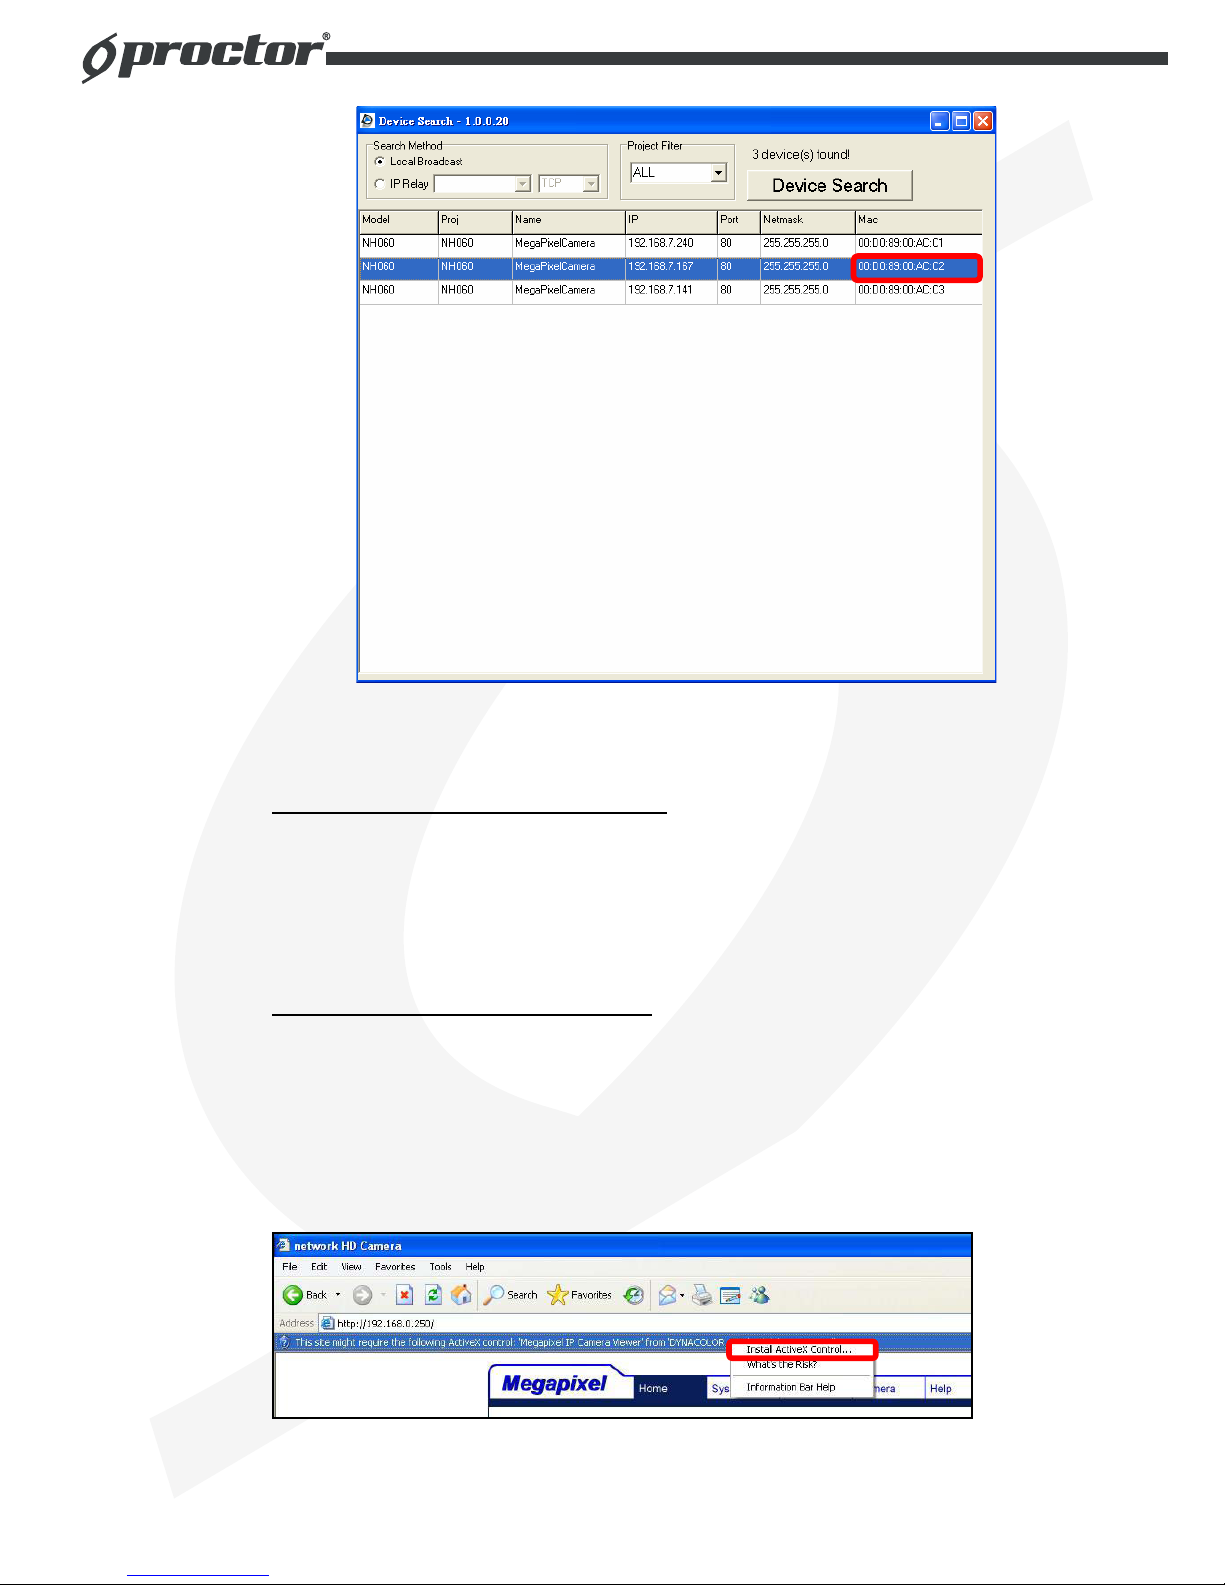
Step 4: Click the “Device Search” button to re-search all the devices. Then
select the IP Dome Camera with the correct MAC address. Double click
on the IP Dome Camera, and the login window will come out.
13
Step 5: Enter User name and Password to access the IP Dome Camera.
Installing DC Viewer Software Online
For the initial access to the IP Dome Camera, a client program, DC Viewer, will
be automatically installed to your PC when connecting to the IP Dome Camera.
If the Web browser doesn’t allow DC Viewer installation, please check the
Internet security settings or ActiveX controls and plug-ins settings (see
Appendix B: Internet Security Settings) to continue the process.
The Information Bar (just below the URL bar) may come out and ask for
permission to install the ActiveX Control for displaying video in browser (see the
figure below). Right click on the Information Bar and select “Install ActiveX
Control…” to allow the installation.
14
Then the security warning window will pop up. Click “Install” to carry on software
installation.
Click “Finish” to close the DC Viewer window when download is finished. For
the detailed software download procedure, please refer to Appendix C: DC
Viewer Download Procedure.
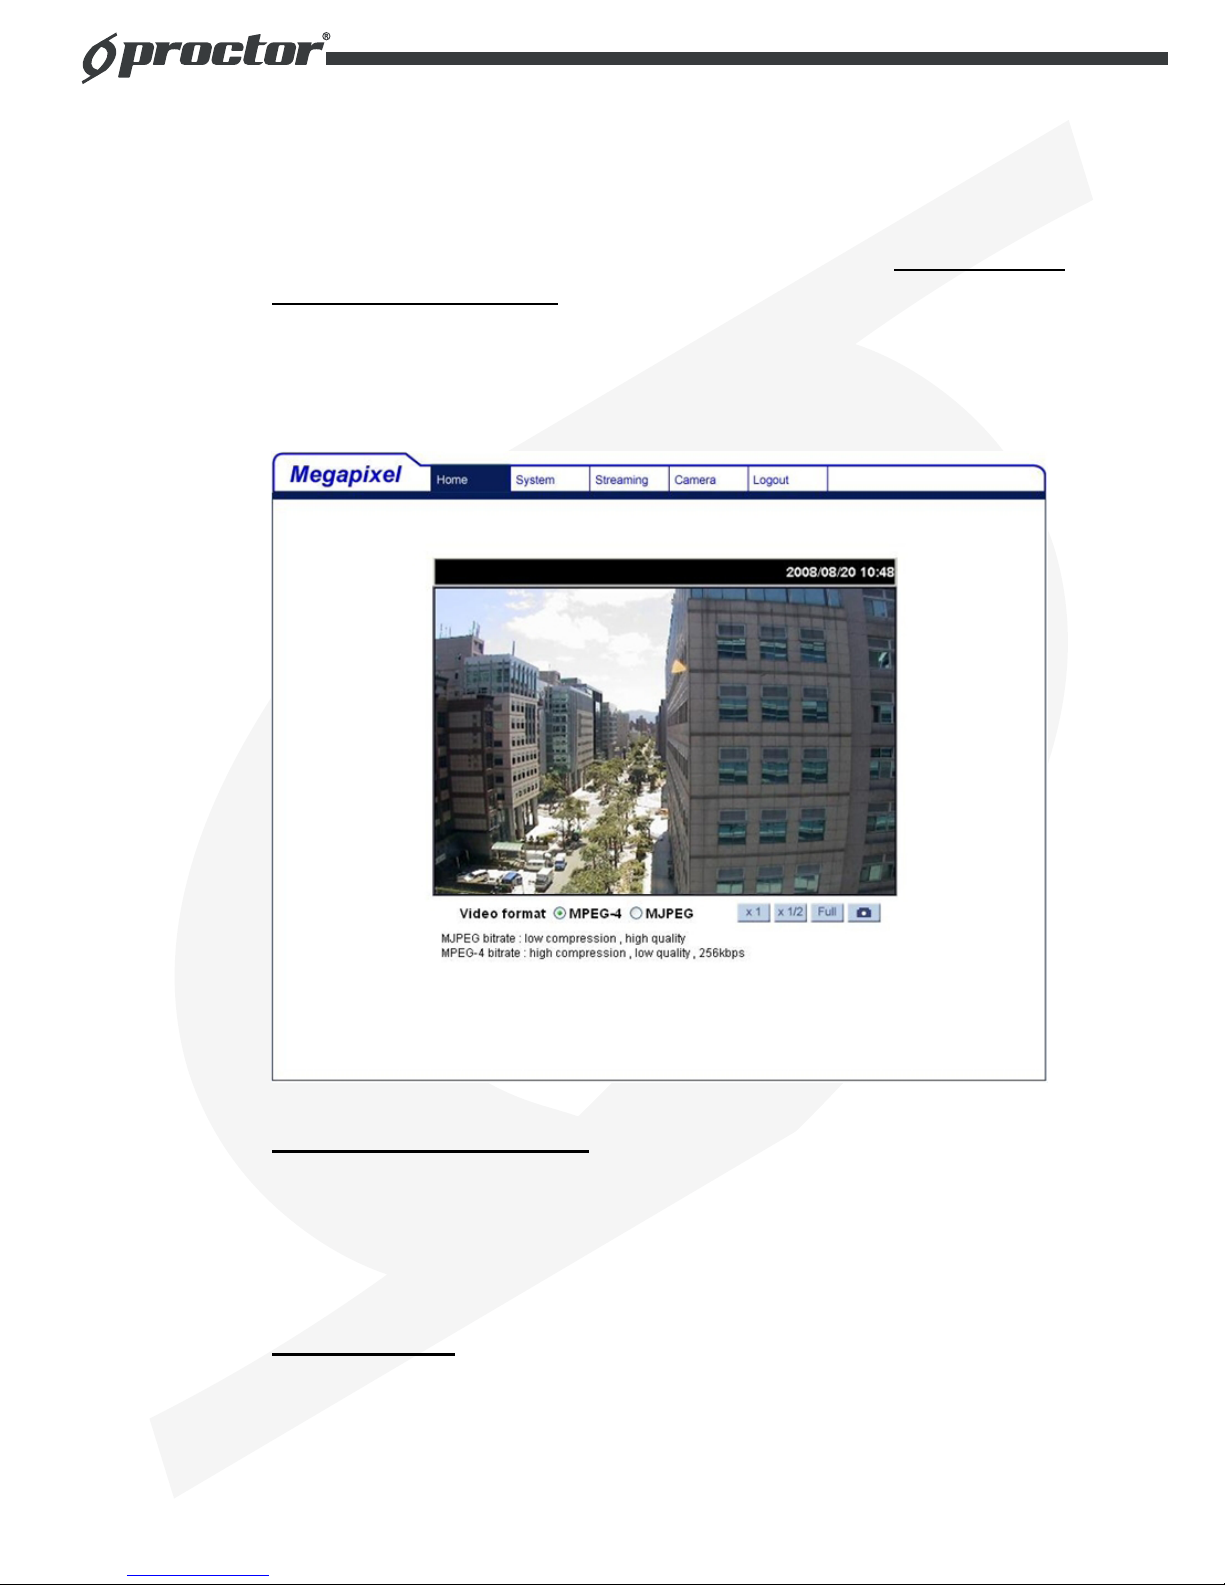
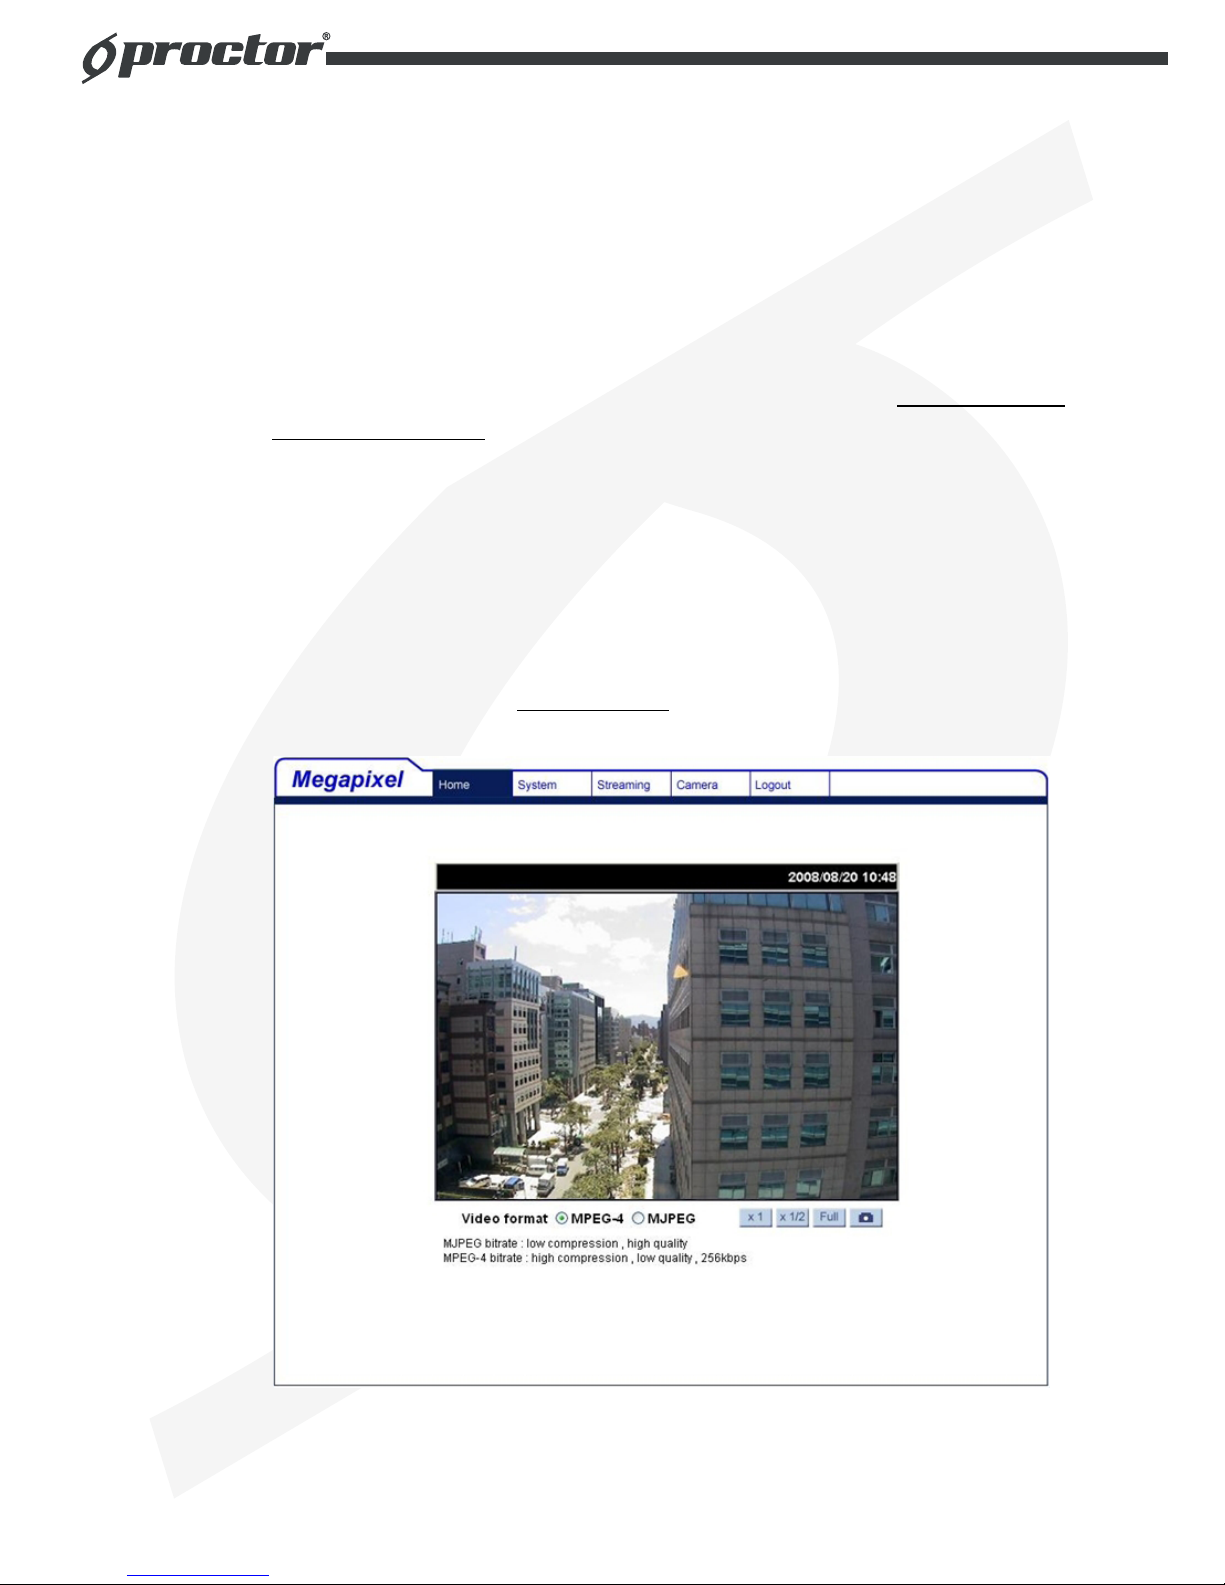
Once login to the IP Dome Camera, users will see the Home page as shown
below:
Administrator/User Privileges
“Administrator” represents the person who can configure the IP Dome Camera
and authorize users access to the camera; “User” refers to whoever has access
to the camera with limited authority, i.e. entering Home and Camera setting
pages.
Lens Adjustment
The image displays on the Home page when successfully accessing to the IP
Dome Camera. Adjust the camera’s focus to produce a clear image. Please
refer to the procedure below.
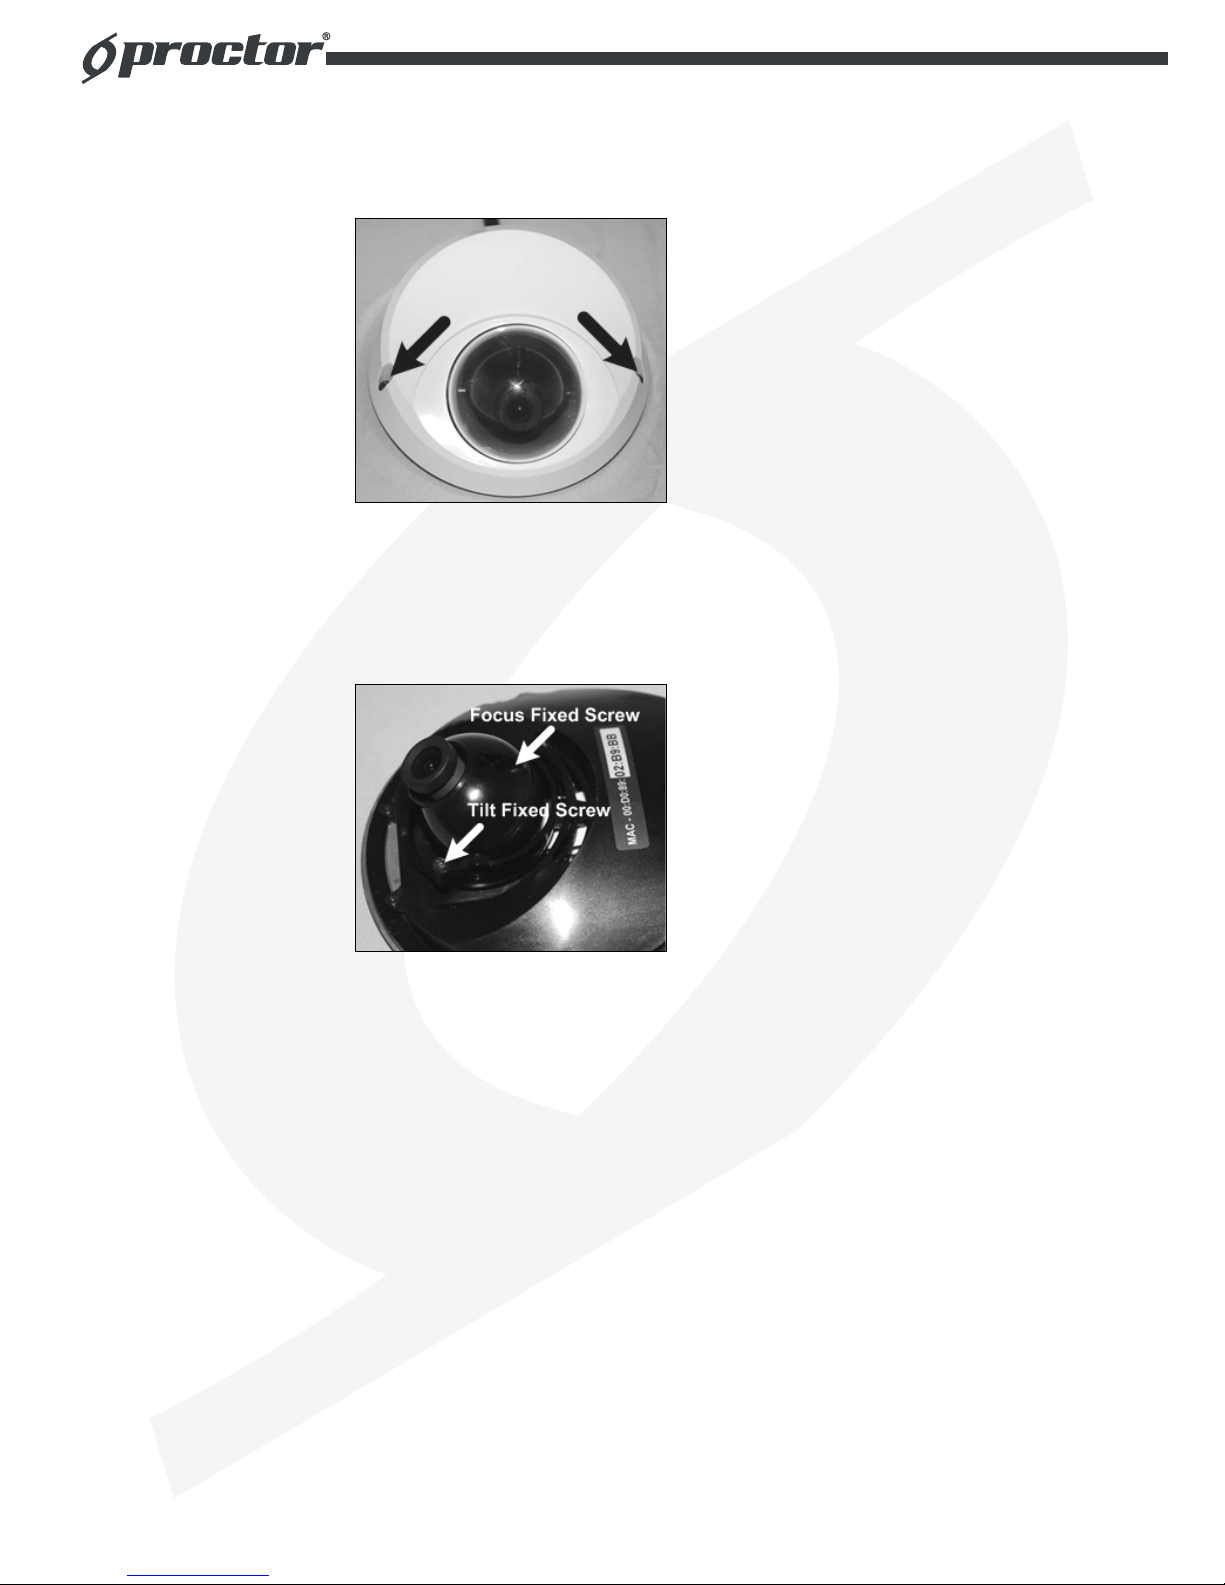
15
Step 1: Unscrew the IP Dome Camera’s cover.
Step 2: Loosen the focus fixed screw, and rotate the lens counter-/clockwise to
adjust focus; loosen the tilt fixed screw, and adjust the camera’s tilt
angle.
16
5. Configuration & Operation
The IP Dome Camera is provided with a user-friendly browser-based
configuration interface, and a free bundled CMS (Central Management System)
for record and playback video. In this chapter, information about main page
introduction, system related settings and camera settings will be described in
detail.
For further information about CMS software, please refer to Chapter 6. CMS
Software Introduction and CMS user manual.
5.1 Browser-based Viewer Introduction
The figure below shows the main page of the IP Dome Camera user interface.
At the bottom of the main page, users can adjust video display size (x1, x1/2
and full screen), select a kind of video format (MPEG-4 and MJPEG) and save
MJPEG snapshots (see 5.3.8 Snapshot
).

17
There are five tabs: Home, System, Streaming, Camera and Logout on the top
panel.
Home
Users can monitor live video of the targeted area.
System setting
Administrator can set host name, system time, root password, network related
settings, etc. Further details will be interpreted in section 5.3 System Related
Settings.
Streaming setting
Administrator can modify video resolution and rotate type and select audio
compression mode in this page.
Camera setting
Users can adjust various camera parameters, including <Exposure>, <White
Balance>, <Brightness>, <Sharpness>, <Contrast> and <Digital Zoom>.
Logout
Click on the tab to relogin the IP Dome Camera with another username and
password.
18
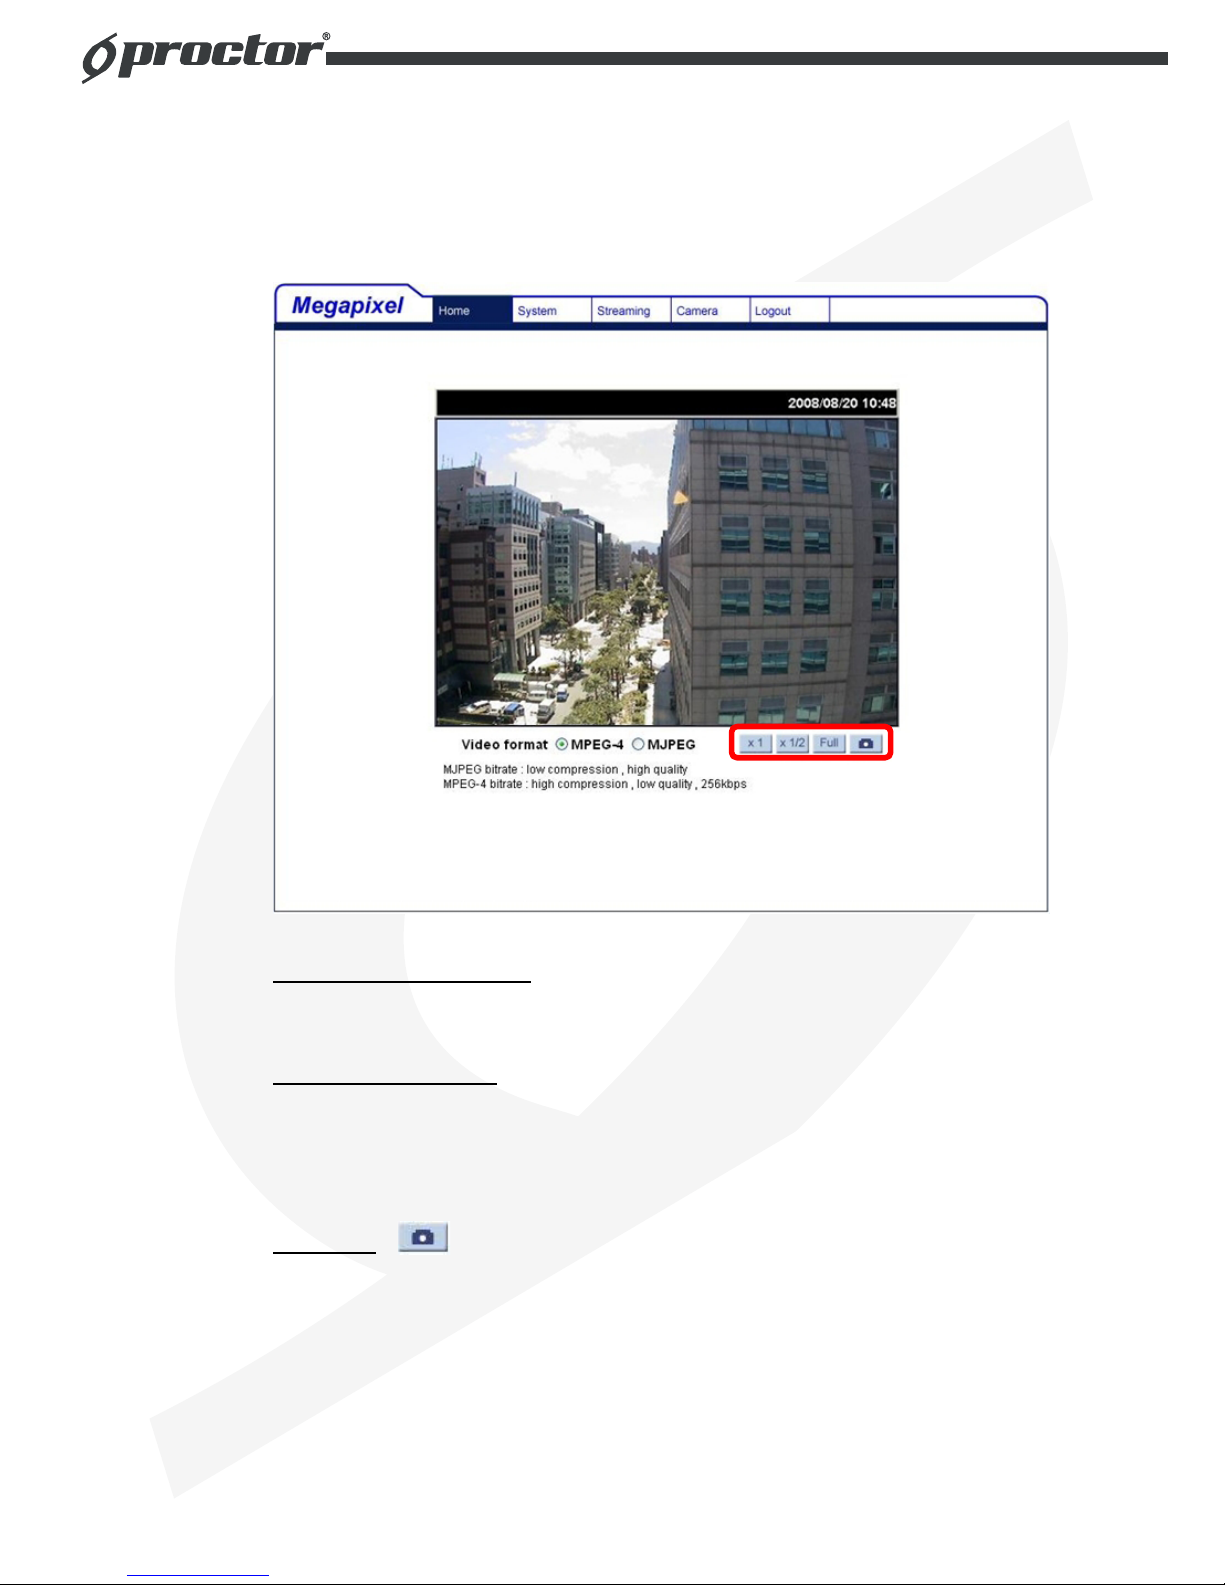
5.2 Home Page
In the Home page, there are several function buttons right down the displayed
image.
Screen Size Adjustment
Image display size can be adjusted to x1/2 and full screen.
Digital Zoom Control
In the full screen mode, users can implement digital PTZ by right clicking the
mouse, rotating the mouse wheel (for zoom in/out), and drag the mouse into
any direction.
Snapshot
Press the button, and the MJPEG snapshots will automatically be saved in the
appointed place. The default place of saving snapshots is: C:\.
 Loading...