

Page 1
PT-109 40 EP
Owner's Manual
Specifications
Hull Length ............................................ 40 in (1016mm)
Beam ................................................... 10.5 in (267mm)
Motor ..................................... Water-cooled 550-size (x2)
Speed Control ...................Waterproof electronic w/reverse
Radio System.......................... Pro Boat 2-stick 27MHz AM
Drive System ................................................Direct Drive
Steering System ................................................ 3-rudder
www.ProBoatModels.com
Page 2

Introduction
Thank you for purchasing the Pro Boat™
PT-109™ Ready-To-Run boat. Please
read these instructions carefully before
attempting to operate your boat.
The PT-109 comes Ready-To-Run with
the Pro Boat 27MHz AM radio system
and electronic speed controller already
installed. All assembly and building is
done at the factory, allowing you to
quickly get your boat running.
Table of Contents
Table of Contents .......................................................................................2
Introduction ...............................................................................................2
General Guidelines .....................................................................................3
Additional Required Items ...........................................................................3
Inspection .................................................................................................3
Contents ...................................................................................................4
Getting Started ..........................................................................................4
Installing the Transmitter Batteries ...............................................................5
Installing the Motor Batteries .......................................................................6
Checking the Radio System .........................................................................7
Accessory Installation .................................................................................9
Testing Your Boat in the Water ...................................................................12
Maintenance ............................................................................................12
Replacement Parts ....................................................................................13
Identification of Components .....................................................................14
Instructions for Disposal of WEEE by Users in the European Union ..................15
Warranty Information ................................................................................15
Operating Notes ....................................................................................... 19
22
Page 3

General Guidelines
It is important you read and follow
this instruction manual before you run
this exciting boat. Failure to read and
understand the manual could result
in personal injury, property damage
or permanent damage to your boat.
It is also important to run your boat
responsibly. With proper care and
maintenance, you will be able to proudly
enjoy your PT-109 for many years to
come.
Additional Required Items
When operating the boat, stay clear of
people, full-scale boats, stationary objects
and wildlife. It is preferable to operate the
PT-109 in low-wake, low-wind conditions
and in areas free of people, wildlife and
objects.
Before you operate your model, make
sure your frequency is clear. If someone
is operating on the same frequency, both
models could go out of control, possibly
causing damage to the models or to
others. Check all of the hardware and the
propeller for damage and loose screws
before and after each run.
You will need to purchase the following to get your boat on the water:
• 8 AA alkaline batteries for the radio transmitter
• 6-cell 3300mAh Ni-MH battery pack (DYN1185) (2)
• Charger for motor batteries (DYN4033)
• Medium CA
• Soldering iron w/solder
Inspection
Carefully remove the boat, radio
transmitter, battery and charger from the
box. Inspect all items to make sure no
damage is present. If you notice damage
is present, please contact the hobby shop
where you purchased your model.
3
Page 4
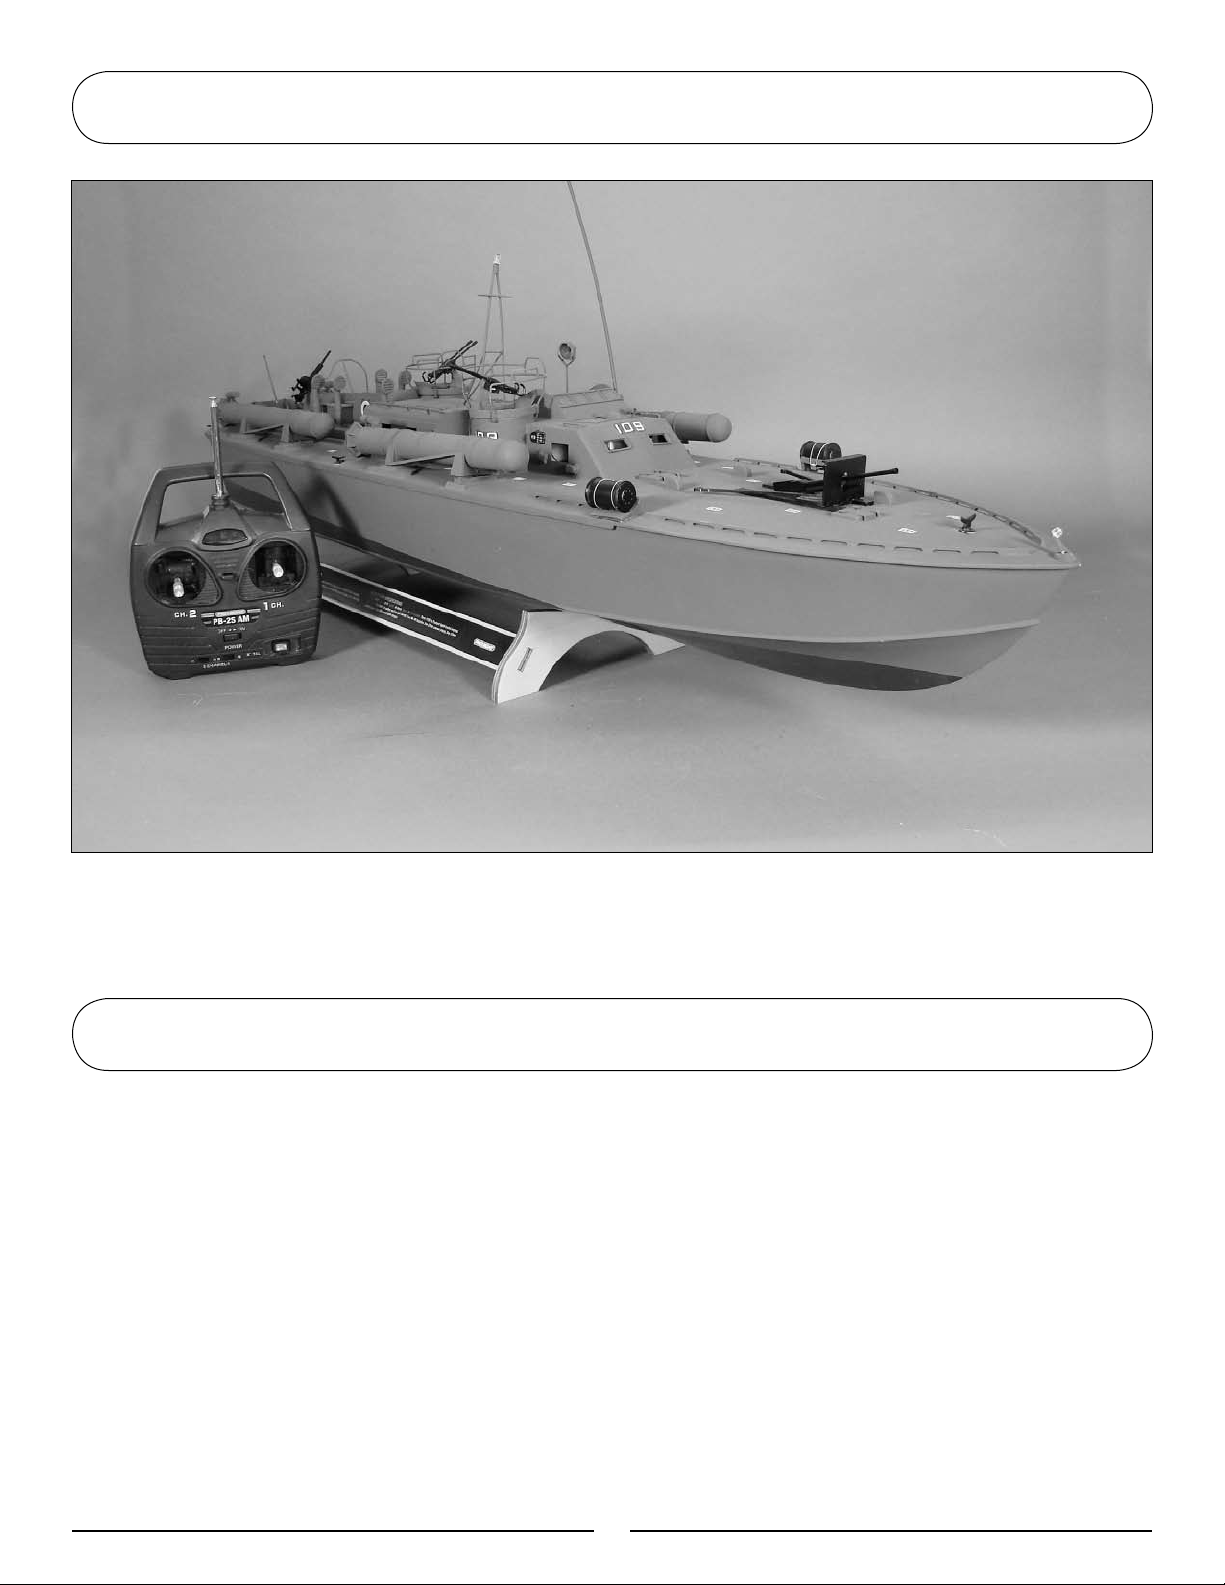
• Assembled PT-109 RTR
• Pro Boat radio transmitter
• Boat stand
Contents
Getting Started
Before you start running your new
PT-109, it is absolutely necessary that
you read through all of the operating
instructions to prevent unnecessary
damage and get the maximum enjoyment
from your boat.
Charging the Motor Battery
Plug the battery charger into a standard
110/120V AC wall outlet or 12 volts DC
depending on the type of charger used.
Connect a fully discharged battery to the
charge plug.
Change the battery according to the
instructions provided with the charger.
Do not leave the battery pack unattended
while charging or serious damage or fire
may occur.
4
Page 5
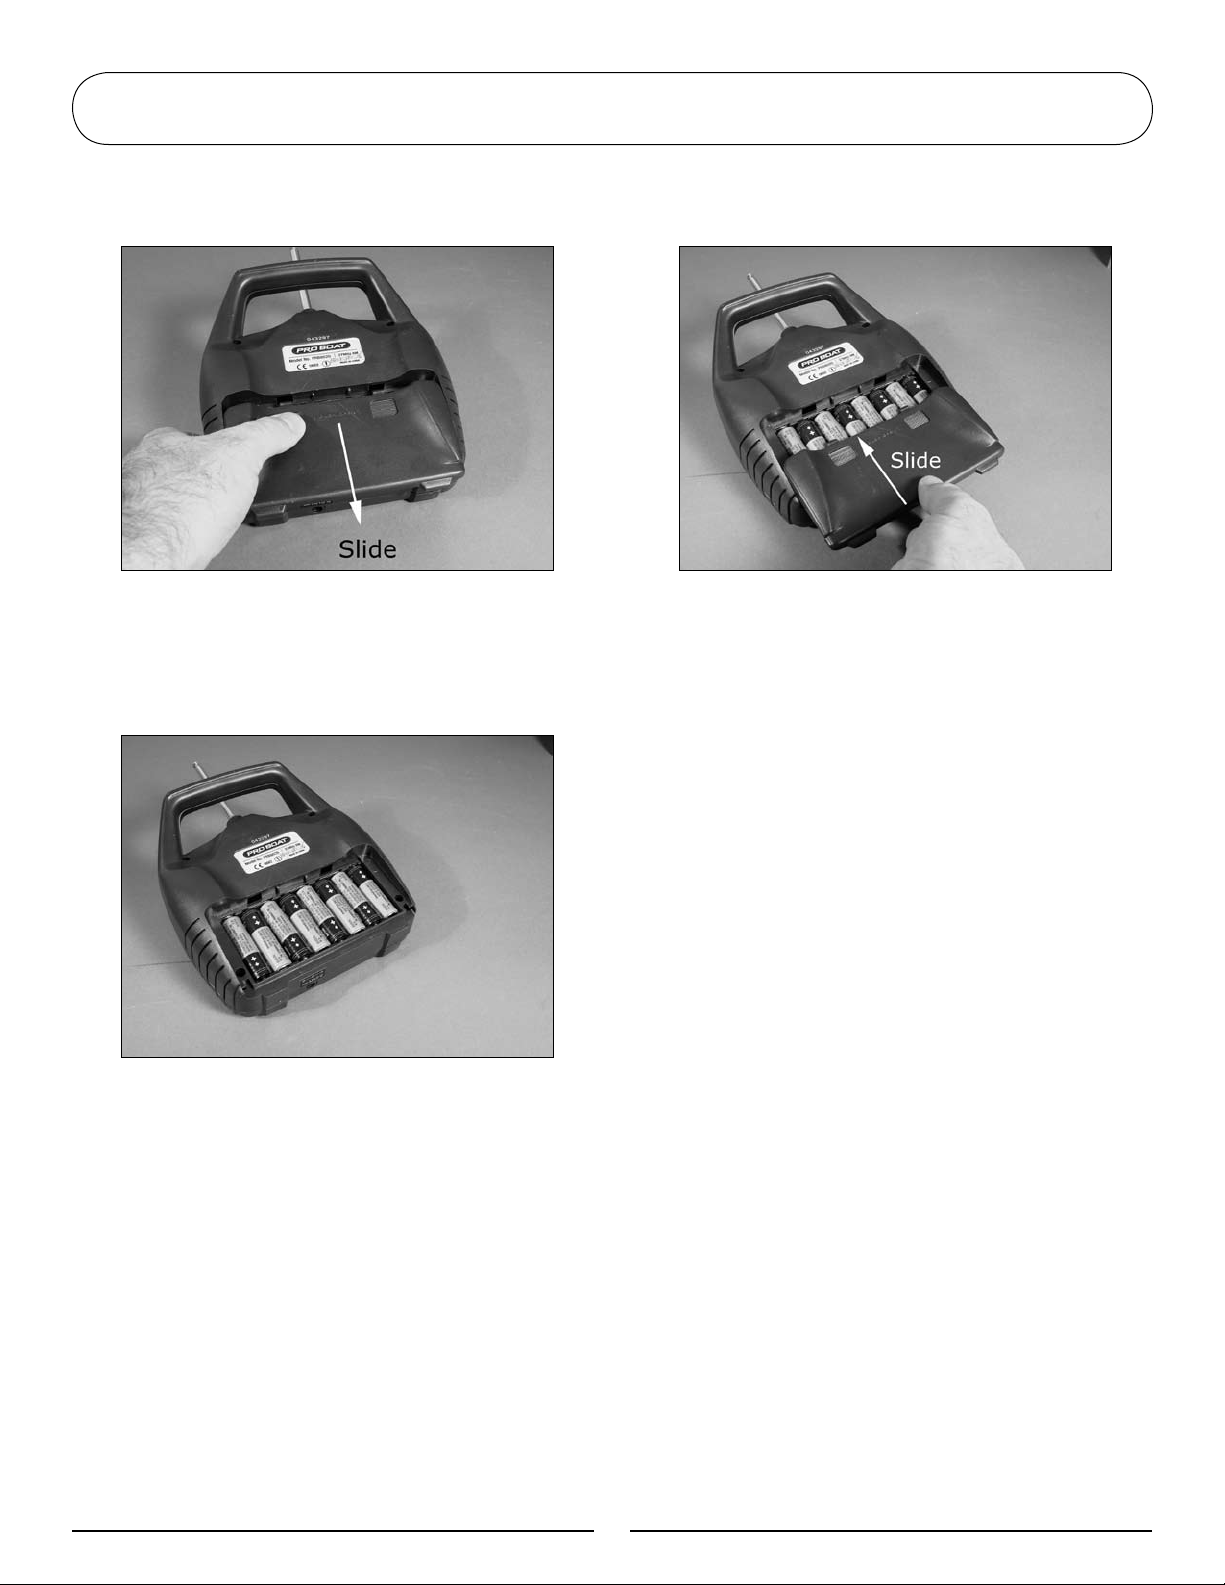
Installing the Transmitter Batteries
Remove the transmitter battery cover by
sliding the cover from top to bottom.
Install eight (8) AA batteries into the
transmitter. Pay close attention to the
correct direction of the positive (+) and
negative (-) ends as marked.
Install the battery cover by sliding it on
from bottom to top.
5
Page 6
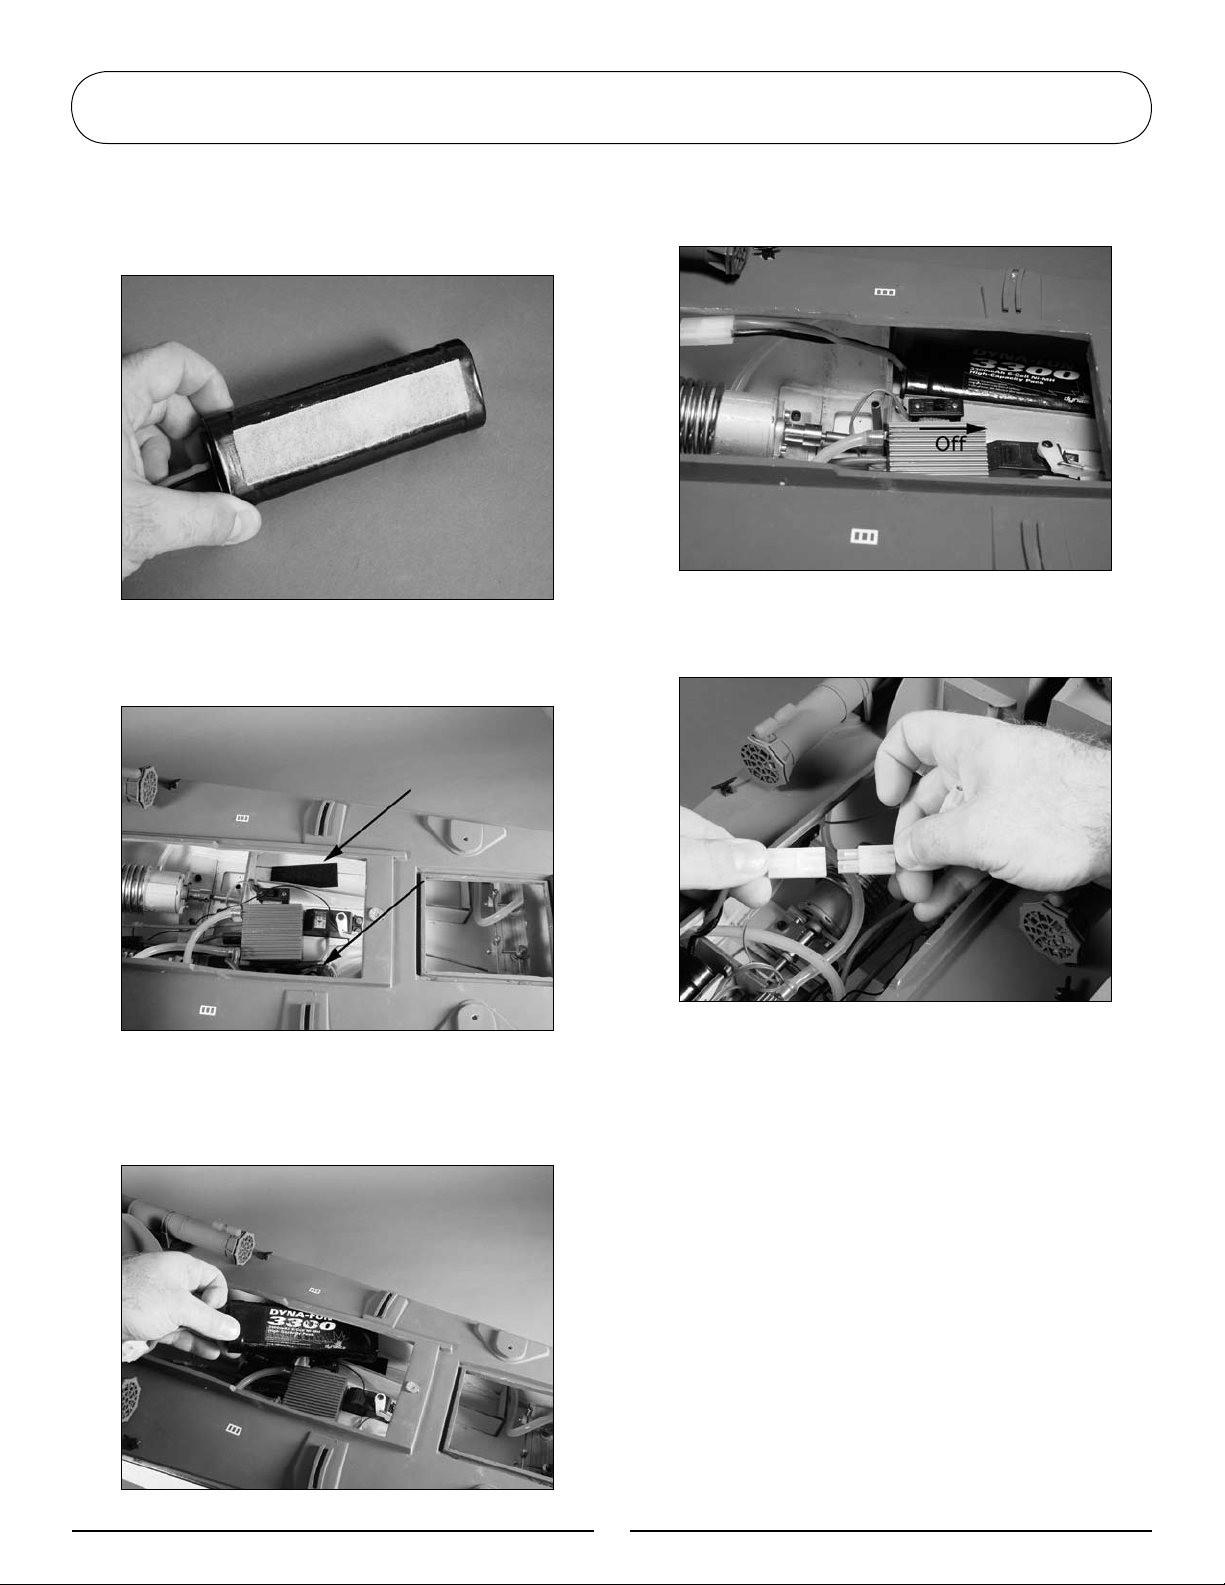
Installing the Motor Batteries
Once the batteries are charged, apply
the supplied hook and loop tape to the
batteries.
Attach the remaining hook and loop to
the hull as shown.
Confirm the receiver switch has been set
to the "OFF" position at this time.
Plug the connectors from battery packs to
the connectors from the ESC.
Install the battery packs into the hull
as shown. Batteries are located on the
left and right side of the hull.
6
Page 7

Checking the Radio System
Check to make sure the propellers
are free from any objects. The first
time you turn on your PT-109 the
motors may start, and any objects near
the propellers, or even the propellers,
may become damaged.
Always turn on the transmitter first
by sliding the switch on the front of
the transmitter from left to right. The
small red and green lights on the front
of the transmitter should both light up.
If not, you need to check for low or
incorrectly installed batteries.
If the propellers spin, adjust the Throttle
Trim lever located next to the throttle
stick until the propellers stop.
Give a small amount of throttle input
by moving the throttle stick toward the
top of the transmitter to ensure the
motors are working.
Checking the Throttle Operation
Once the transmitter has been turned
on, turn on the PT-109 by sliding the
switch on the speed controller to the
“On” position.
To test reverse speed operation, wait
for the model to stop then move the
throttle stick toward the bottom of
the transmitter. Once everything is
functioning correctly, you are ready to
check the operation of the steering.
7
Page 8

Checking the Radio System
Checking the Steering Operation
With your PT-109 and transmitter on,
move the steering stick to the right to
make the rudders move to the right to
incur a right turn. Conversely, when left
input is given, the rudders will move to
the left.
After you have completed checking your
radio system, turn the PT-109 receiver off
FIRST by sliding the switch to the “OFF”
position. After the model has been turned
off, turn off the transmitter.
It may be necessary to adjust the
Steering Trim so the rudders are
centered prior to operation. Use the
Steering Trim to center the rudders
prior to operation. You may also need
to fine-tune the steering trim to make
sure the boat runs straight during
operation. This can only be accomplished
when operating the boat in the water
and is detailed in a following section.
If you find the steering or throttle
operates backwards as described,
you may need to actuate the servo
reversing switch.
Note: If you are transporting your
PT-109, make sure you disconnect
the batteries from the speed
controller and then turn your radio
off until you are ready to run the
boat. Once ready, simply plug the
batteries into the speed controller,
turn the radio on and make sure
that the boat is in neutral.
Range Testing
Collapse the transmitter antenna and
move the rudder controls. Walk away
from the boat and confirm that you have
control at least 20 yards away.
88
Page 9

Accessory Installation
Use a #1 Phillips screwdriver to remove
the screw from the rear cover.
Carefully lift the rear cover at the rear. A
tab holds the cover at the front, so pull
the cover rearward to release the tab. Set
the cover aside in a safe place.
The torpedos are attached to the hull
using a tab at the front and a piece
of rubber tubing at the rear. Once the
torpedos are in place on the hull, you will
need to slide the tubing onto the threaded
studs from inside the hull.
Place the tab on the front of the torpedo
into the slot on the hull. Rotate the
torpedo into position, making sure you
keep the torpedo close to the hull to
prevent damaging the tab.
9
Page 10

Accessory Installation
Lower the threaded stud into the
pre-drilled holes in the top of the hull.
Slide the tubing onto the stud from the
inside of the hull. Repeat this step for
all four torpedos.
Slide the front of the torpedos so they
are aligned with the hull. Once all the
torpedos are in position, replace the rear
cover and use a #1 Phillips screwdriver to
attach the cover.
Slide the rear mast into the tube at the
rear of the hull.
Slide the scale antenna into position on
the side of the driver's cabin.
Slide the spotlight into position in the
tube next to the driver's seat.
10
Page 11

Accessory Installation
Slide the navigation light into the forward
hatch, guiding the wires through the holes
in the cabin. Use medium CA to secure
the navigation light to the front hatch.
Carefully solder the wires together to
power the navigation light, making sure
to connect the red wire to the red wire
and the black wire to black wire. The
electrical connection to power the light
is made at the front magnets when the
hatch is mounted to the hull.
Use heat-shrink tubing or electrical tape
to insulate the connection made in the
previous step.
The switch to turn the accessory lighting
on is located on the left side of the
hull near the motor. The lighting will
only power on when the batteries are
connected to the speed controller. With
the batteries plugged in, turn on the
lighting and place the forward hatch in
place. Sit back and enjoy the glow from
the scale lighting of your PT-109.
11
Page 12

Testing Your Boat in the Water
Make sure the radio is "ON" and the
battery is plugged into the speed
controller. Test the radio system for
proper operation and then carefully
place the boat in the water. Pilot the
boat at slow speeds, staying close to the
shoreline to ensure you have good control
and that the boat is functioning correctly.
Be certain to avoid all objects in the
water at all times.
Maintenance
Once you feel comfortable with the
control of your boat, it is safe to go
further away from the shoreline and at
faster speeds. When you notice the boat
beginning to lose speed, bring the boat
back to shore. It will be necessary to
allow the electronic components to cool
down and to replace or recharge the
battery before heading out again.
Adjust the Steering Trim
When going forward, the model should
move in a straight line. If not, adjust
the steering trim so that it tracks in a
straight line without having to turn the
steering wheel.
Before and at the end of each run,
make sure all screws are tight and
the propellers are free from any
entanglement. At the end of each run,
be sure to remove any debris from the
rudders and/or propellers and rinse the
hull of your boat as well.
Lubricating the Drive Shaft
The drive shafts should be lubricated
immediately after running in salt water,
after every 3–4 hours of use and at
the end of each boating season prior to
storage to ensure proper operation of
your boat.
To lubricate the drive shafts, simply
place the end of the PRB0100 Grease
Gun w/Marine Grease (see your local
hobby shop) into the grease tube near
the motors. Apply grease until it starts to
run out of the end of the drive shaft tube.
Periodically, you may have to remove the
driveshafts to remove build-up. Lubricate
the shaft prior to installation.
Note: Running the PT-109 RTR in
salt water could cause some parts to
corrode. If you run the boat in salt
water, rinse it thoroughly in fresh
water after each use and lubricate
the drive system.
12
Page 13

Replacement Parts
If you have any questions concerning the setup or running of your PT-109, please call
the Horizon Service Center toll-free at (877) 504-0233.
PRB3105 ............................................................................................. Motor
PRB3601 ........................................................................................ Hull Only
PRB3602 ................................................................................... Main Canopy
PRB3603 ......................................................................................Rear Hatch
PRB3604 ............................................................................ Stuffing Box Strut
PRB3605 ................................................................... Driveshafts w/Hardware
PRB3606 ............................................................Rudder Pushrods w/Hardware
PRB3607 ............................................................................... Cooling System
PRB3608 .................................................................................. Motor Mounts
PRB3609 ..................................................................................Machine Guns
PRB3610 .................................................................................... Torpedo (4)
PRB3611 ........................................................................... Light Kit Complete
PRB3612 .......................................................................Misc. Hull Accessories
PRB3613 .................................................................................. Front Cannon
PRB3614 ............................................................................ Depth Charge (2)
PRB3615 .................................................................................. Smoke Bomb
PRB3616 .......................................................................................Light Mast
PRB3617 ....................................................................................Search Light
PRB3618 .........................................................................................Flag Pole
PRB3619 ..........................................................................................Antenna
PRB3620 ......................................................................................Rudder (3)
PRB3621 ....................................................................................Propeller (2)
PRB3622 ............................................................................................. Decal
PRB3623 ................................................................................ ESC w/Reverse
PRB3624 ......................................................................................Boat Stand
13
Page 14

Identification of Components
PRB3623
PRB3624
PRB3606
PRB3610
PRB3618
PRB3615
PRB3617
PRB3607
PRB3610
PRB3105
PRB3608
PRB3602
PRB3610
PRB3609
PRB3618
PRB3603
PRB3615
PRB3619
PRB3610
PRB3620
PRB3604
PRB3621
PRB3616
PRB3609
PRB3624
PRB3620
PRB3014
14
Page 15

Instructions for Disposal of WEEE by
Users in the European Union
This product must not be disposed of
with other waste. Instead, it is the
user’s responsibility to dispose of their
waste equipment by handing it over
to a designated collection point for the
recycling of waste electrical and electronic
equipment. The separate collection and
recycling of your waste equipment at
the time of disposal will help to conserve
natural resources and ensure that it is
recycled in a manner that protects human
Warranty Information
Warranty Period
Horizon Hobby, Inc., (Horizon) warranties
that the Products purchased (the
“Product”) will be free from defects in
materials and workmanship at the date of
purchase by the Purchaser.
health and the environment. For more
information about where you can drop
off your waste equipment for recycling,
please contact your local city office, your
household waste disposal service or
where you purchased the product.
FITNESS FOR A PARTICULAR PURPOSE
OF THE PRODUCT. THE PURCHASER
ACKNOWLEDGES THAT THEY ALONE HAVE
DETERMINED THAT THE PRODUCT WILL
SUITABLY MEET THE REQUIREMENTS OF
THE PURCHASER’S INTENDED USE.
Limited Warranty
(a) This warranty is limited to the original
Purchaser ("Purchaser") and is not
transferable. REPAIR OR REPLACEMENT
AS PROVIDED UNDER THIS WARRANTY
IS THE EXCLUSIVE REMEDY OF THE
PURCHASER. This warranty covers
only those Products purchased from an
authorized Horizon dealer. Third party
transactions are not covered by this
warranty. Proof of purchase is required
for warranty claims. Further, Horizon
reserves the right to change or modify
this warranty without notice and disclaims
all other warranties, express or implied.
(b) Limitations- HORIZON MAKES NO
WARRANTY OR REPRESENTATION,
EXPRESS OR IMPLIED, ABOUT NONINFRINGEMENT, MERCHANTABILITY OR
(c) Purchaser Remedy- Horizon's sole
obligation hereunder shall be that Horizon
will, at its option, (i) repair or (ii) replace,
any Product determined by Horizon to be
defective. In the event of a defect, these
are the Purchaser's exclusive remedies.
Horizon reserves the right to inspect any
and all equipment involved in a warranty
claim. Repair or replacement decisions
are at the sole discretion of Horizon. This
warranty does not cover cosmetic damage
or damage due to acts of God, accident,
misuse, abuse, negligence, commercial
use, or modification of or to any part of
the Product. This warranty does not cover
damage due to improper installation,
operation, maintenance, or attempted
repair by anyone other than Horizon.
Return of any goods by Purchaser must
be approved in writing by Horizon before
shipment.
15
Page 16

Warranty Information
Damage Limits
HORIZON SHALL NOT BE LIABLE FOR
SPECIAL, INDIRECT OR CONSEQUENTIAL
DAMAGES, LOSS OF PROFITS OR
PRODUCTION OR COMMERCIAL LOSS
IN ANY WAY CONNECTED WITH THE
PRODUCT, WHETHER SUCH CLAIM IS
BASED IN CONTRACT, WARRANTY,
NEGLIGENCE, OR STRICT LIABILITY.
Further, in no event shall the liability of
Horizon exceed the individual price of the
Product on which liability is asserted. As
Horizon has no control over use, setup,
final assembly, modification or misuse,
no liability shall be assumed nor accepted
for any resulting damage or injury. By the
act of use, setup or assembly, the user
accepts all resulting liability.
If you as the Purchaser or user are
not prepared to accept the liability
associated with the use of this Product,
you are advised to return this Product
immediately in new and unused condition
to the place of purchase.
Law: These Terms are governed by
Illinois law (without regard to conflict of
law principals).
Safety Precautions
This is a sophisticated hobby Product
and not a toy. It must be operated
with caution and common sense and
requires some basic mechanical ability.
Failure to operate this Product in a safe
and responsible manner could result in
injury or damage to the Product or other
property. This Product is not intended
for use by children without direct adult
supervision.
The Product manual contains instructions
for safety, operation and maintenance.
It is essential to read and follow all the
instructions and warnings in the manual,
prior to assembly, setup or use, in order
to operate correctly and avoid damage or
injury.
Questions, Assistance, and Repairs
Your local hobby store and/or place of
purchase cannot provide warranty support
or repair. Once assembly, setup or use of
the Product has been started, you must
contact Horizon directly. This will enable
Horizon to better answer your questions
and service you in the event that you
may need any assistance.
For questions or assistance, please
direct your email to productsupport@
horizonhobby.com, or call 877.504.0233
toll-free to speak to a service technician.
16
Page 17

Warranty Information
Inspection or Repairs
If this Product needs to be inspected
or repaired, please call for a Return
Merchandise Authorization (RMA). Pack
the Product securely using a shipping
carton. Please note that original boxes
may be included, but are not designed to
withstand the rigors of shipping without
additional protection. Ship via a carrier
that provides tracking and insurance for
lost or damaged parcels, as Horizon is
not responsible for merchandise until it
arrives and is accepted at our facility.
A Service Repair Request is available at
www.horizonhobby.com on the “Support”
tab.
If you do not have internet access,
please include a letter with your complete
name, street address, email address and
phone number where you can be reached
during business days, your RMA number,
a list of the included items, method of
payment for any non-warranty expenses
and a brief summary of the problem.
Your original sales receipt must also
be included for warranty consideration.
Be sure your name, address, and RMA
number are clearly written on the outside
of the shipping carton.
Warranty Inspection and Repairs
To receive warranty service, you must
include your original sales receipt
verifying the proof-of-purchase date.
Provided warranty conditions have been
met, your Product will be repaired or
replaced free of charge.
Repair or replacement decisions are at
the sole discretion of Horizon Hobby.
Non-Warranty Repairs
Should your repair not be covered by
warranty the repair will be completed
and payment will be required without
notification or estimate of the expense
unless the expense exceeds 50% of
the retail purchase cost. By submitting
the item for repair you are agreeing to
payment of the repair without notification.
Repair estimates are available upon
request. You must include this request
with your repair. Non-warranty repair
estimates will be billed a minimum
of ½ hour of labor. In addition you
will be billed for return freight. Please
advise us of your preferred method of
payment. Horizon accepts money orders
and cashiers checks, as well as Visa,
MasterCard, American Express, and
Discover cards. If you choose to pay by
credit card, please include your credit
card number and expiration date. Any
repair left unpaid or unclaimed after
90 days will be considered abandoned
and will be disposed of accordingly.
Please note: non-warranty repair is
only available on electronics and model
engines.
Electronics and engines requiring
inspection or repair should be shipped to
the following address:
Horizon Service Center
4105 Fieldstone Road
Champaign, Illinois 61822
All other Products requiring warranty
inspection or repair should be shipped to
the following address:
Horizon Product Support
4105 Fieldstone Road
Champaign, Illinois 61822
Please call 877-504-0233 with any
questions or concerns regarding this
product or warranty.
17
Page 18

Warranty Information
Safety, Precautions, and Warnings
As the user of this product, you are solely
responsible for operating it in a manner
that does not endanger yourself and
others or result in damage to the product
or the property of others.
Carefully follow the directions and
warnings for this and any optional support
equipment (chargers, rechargeable
battery packs, etc.) that you use.
This model is controlled by a radio signal
that is subject to interference from
many sources outside your control. This
interference can cause momentary loss of
control so it is necessary to always keep a
safe distance in all directions around your
model, as this margin will help to avoid
collisions or injury.
• Always operate your model in an open
area away from people.
• Avoid operating your model where
injury or damage can occur.
• Never operate the model out in
populated areas for any reason.
• Never operate your model with low
transmitter batteries.
• Carefully follow the directions and
warnings for this and any optional
support equipment (chargers,
rechargeable battery packs, etc.) that
you use.
• Keep all chemicals, small parts and
anything electrical out of the reach of
children.
• Moisture causes damage to electronics.
Avoid prolonged water exposure to all
equipment not specifically designed and
protected for this purpose.
18
Page 19

Operating Notes
19
Page 20

www.ProBoatModels.com
© 2007, Horizon Hobby, Inc.
4105 Fieldstone Road
Champaign, Illinois 61822
(877) 504-0233
www.horizonhobby.com
Printed in China
11221
 Loading...