

IN THE USA: IF YOU ARE EXPERIENCING PROBLEMS WITH THIS UNIT
CALL 1-732-346-0061 FOR GCI TECHNOLOGIES CUSTOMER SERVICE.
DO NO ATTEMPT TO RETURN THIS EQUIPMENT TO YOUR DEALER.
Parts of the design of this product may be protected by worldwide patents. Information in this manual is
subject to changes without notice and does not represent a commitment on the part of the vendor.
GCI Technologies Corp. shall not be liable for any loss or damage whatsoever arising from the use of
information or any error contained in this manual.
No part of this manual may be reproduced, stored in a retrieval system or transmitted, in any form or by
any means, electronic, electrical, mechanical, optical, chemical, including photocopying and recording, for
any purpose without the express written permission of GCI Technologies Corp.
It is recommended that all maintenance and service on this product is performed by GCI Technologies.
Corp or its authorized agents. GCI Technologies will not accept liability for loss or damage caused by
maintenance or repair performed by unauthorized personnel.
Worldwide Headquarters • 1 Mayeld Ave, Edison, NJ 08837 • USA
Gemini Sound Products
Worldwide Headquarters
1 Mayfield Ave
Edison, NJ 08837 USA
Tel: (732) 346-0061
Fax: (732) 346-0065
Tel: (732) 346-0061 • Fax: (732) 346-0065
Gemini Sound Products
Unit 44
Brambles Enterprise Centre
Waterlooville P07 7TH, UK
Tel: 087 087 00880
Fax: 087 087 00990
GCI Technologies S.A.
Caspe, 172 - 1º A
08013 Barcelona, Spain
Tel: 34 93 436 37 00
Fax: 34 93 347 69 61
© GCI Technologies Corp. 2011 All Rights Reserved .
GCI Technologies GmbH
Lerchenstraße 14
80995 München, Germany
Tel: 089 - 319 019 8 - 0
Fax: 089 - 319 019 8 - 18
OPERATIONS MANUAL
MANUAL DE INSTRUCCIONES
MANUEL D’ INSTRUCTIONS
BEDIENUNGSHANDBUCH

english
Warning
Unit overview
Introduction
Frequency Chart
UHF-5100 Single UHF Wireless System
UHF-5200 Dual UHF Wireless System
Transmitter Operation
Specifications
Warranty
Product Registration
4
8
11
13
14
16
18
21
58
59
français
Mises en Garde
Schémas
Introduction
Tableau des Fréquences
UHF-5100 Système UHF sans fil à Émettueur/Récepteur Unique
UHF-5200 Système UHF sans fil à Deux Émettueurs et Récepteur
Utilisation de L'Émetteur
Caractéristiques Techniques
L'information de Garantie
Carte D’enregistrement de Garantie
6
8
35
37
38
40
42
45
58
59
español
Advertencias
Diagramas
Introducción
Tabla de Frecuencias
UHF-5100 Sistema Inalámbrico UHF de Canal Único
UHF-5200 Sistema Inalámbrico UHF Doble
Uso del Transmisor
Especificaciones Técnicas
Información de la Garantía
Registro del Producto
2
UHF-5000 series manU al • geminidj.com UHF-5000 series manU al • geminidj.com
5
8
23
25
26
28
30
33
58
59
UHF-5100 UHF Einzeldrahtlossystem
UHF-5200 UHF Doppeldrahtlossystem
Garantie-Informationen
deutsch
Warnung
Abbildungen
Einleitung
Frequenztabelle
Senderbetrieb
Technische Daten
Registrierung
7
8
47
49
50
52
54
57
58
59
3


introduction
functions
Base receiver antennas
1
2
Receiver Power Button
3
Volume Rotary Control
4
Menu Control
5
Select Control
6
Sync Control
7
LCD Display
8
IR Receiver
9
Balanced XLR Out
10
Mixed 1/4” out
11
Line/Mic Gain switch
12
DC IN
13
Battery cavity
14
Mic Power / Mute button
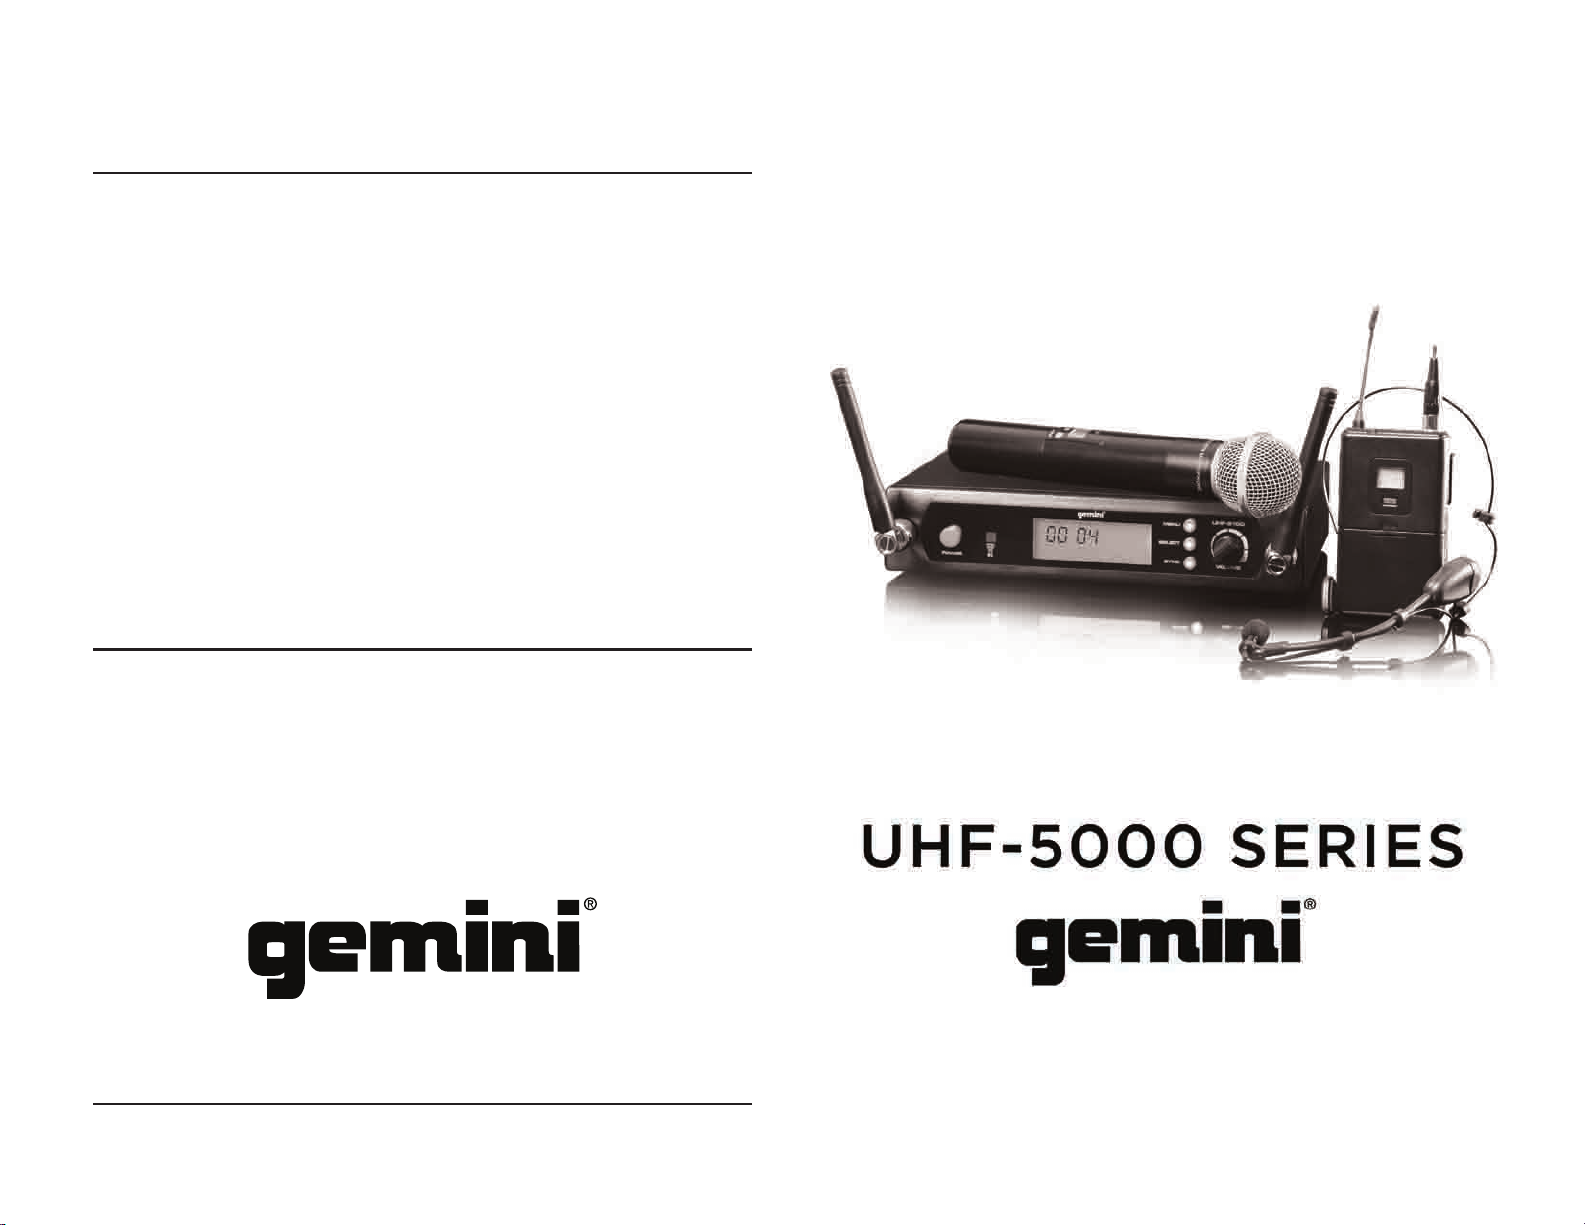
Congratulations on your purchasing a Gemini wireless system. This system includes the latest features and is backed by a one year limited warranty. Prior to use we suggest that you carefully read all the instructions.
This book includes instructions for both the UHF-5100 and the UHF5200 systems.
caution
1. All operating instructions should be read before using this equipment.
2. To reduce risk of electrical shock, do not open the unit. There are NO
USER OR SERVICEABLE PARTS INSIDE. Please refer servicing to a
qualified service techncian.
3. Do not expose this unit to direct sunlight or a heat source such as a
radiator or stove.
4. Dust, dirt and debris can interfere with the performance of this unit.
Make an effort to keep the unit away from dusty, dirty environments,
and cover the unit when it is not in use. Dust it regularly with a soft
clean brush.
5. When moving this equipment, it should be placed in its original carton and packaging. This will reduce the risk of damage during transit.
6. DO NOT EXPOSE THIS UNIT TO RAIN OR MOISTURE.
7. DO NOT USE ANY SPRAY CLEANER OR LUBRICANT ON ANY
CONTROLS OR SWITCHES.
10
15
Mic Select button
16
Transmitter LED Indicator
17
IR Transmitter
18
Belt Pack MUTE & ON/OFF switch
19
Belt Pack select button
20
Screw in Mini-XLR Jack
21
Padded head rest
22
Snap-off Lavalier Microphone
UHF-5000 series manU al • geminidj.com UHF-5000 series manU al • geminidj.com
Microphone:
1. Do not drop the microphone onto a hard surface.
2. Do not strike the microphone head front with fist or fingers, and do
not blow strongly into the microphone head front.
3. Do not use the microphone in areas of high humidity and /or high
temperature as this could lead to damage of the microphone.
fcc coM pliance
Gemini wireless systems are the type accepted under FCC rules parts 74
and 15. Licensing of Gemini equipment is the user’s responsibility and
licensability depends on the user’s classification and application.
This equipment has been tested and found to comply with the limits set
11
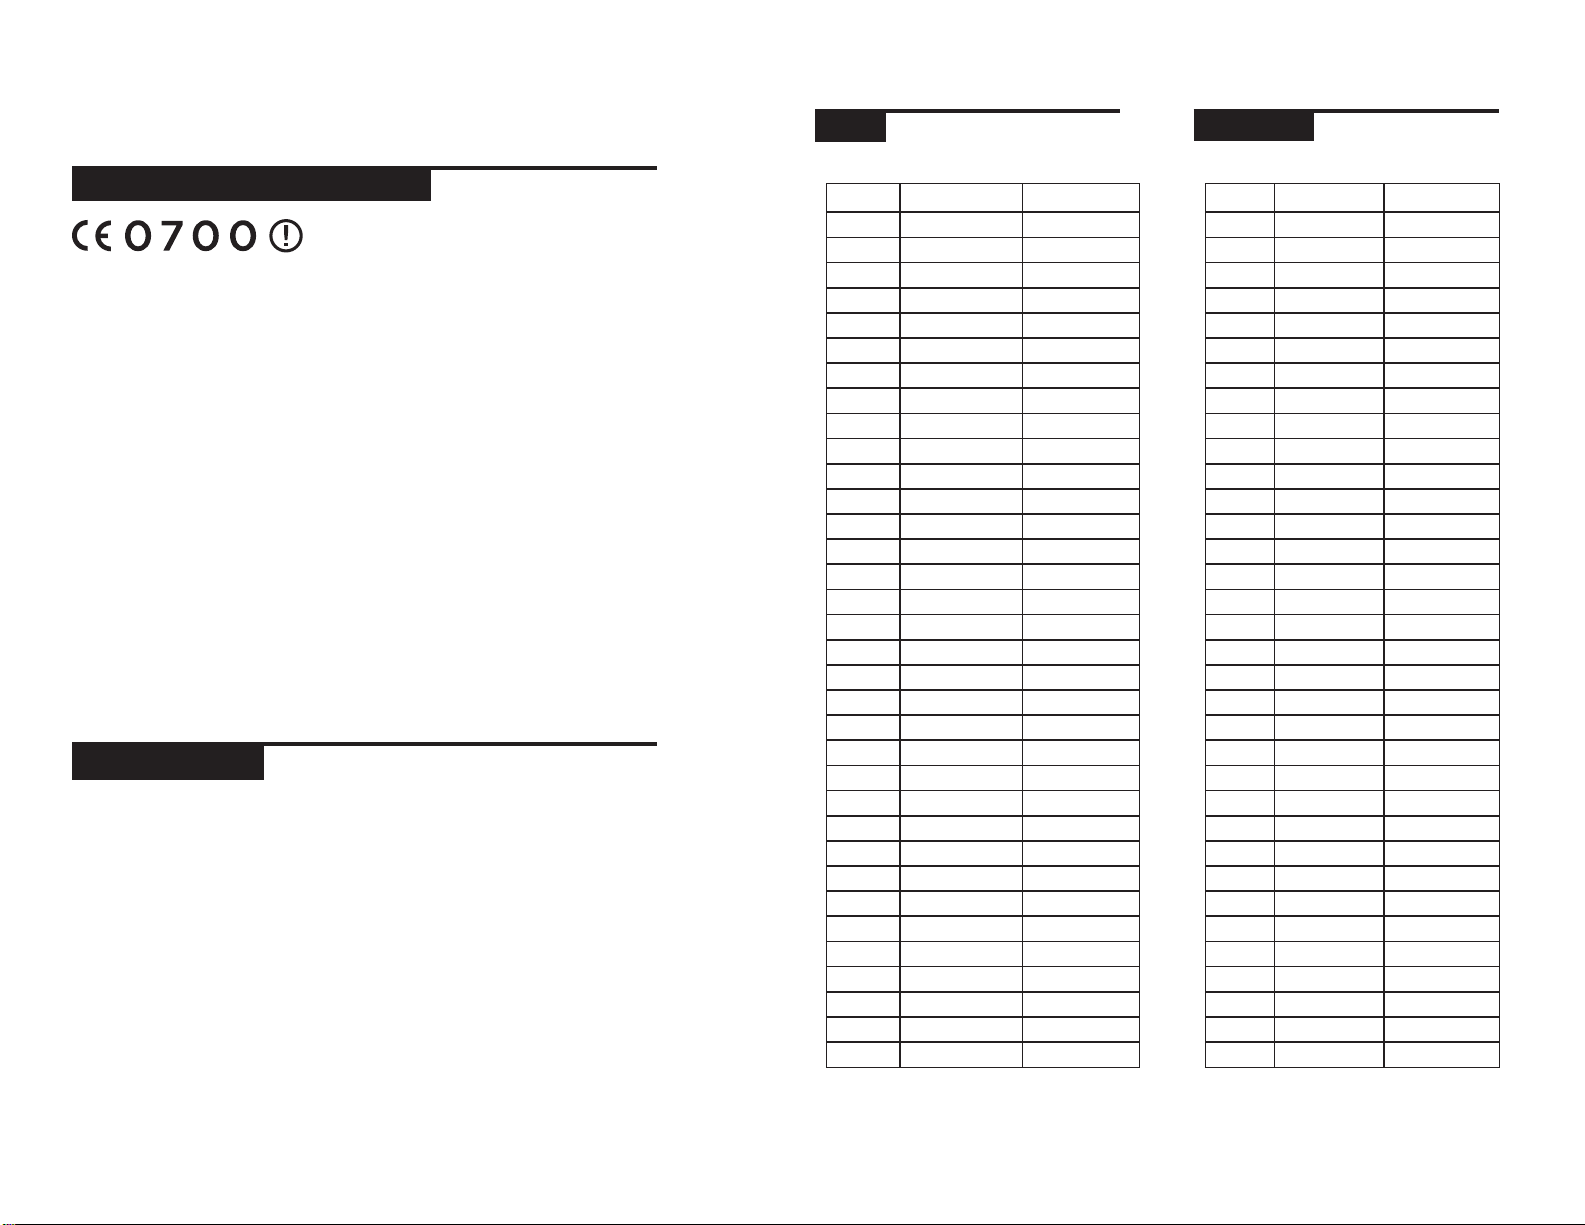
frequency chart
forth under part 15 and 74 of FCC rules.
european coM pliance
R & TTed countries
BE, DE, ES, FR, NL, UK
Hereby, GCI Technologies Corp., declares that this PROFESSIONAL UHF
WIRELESS SYSTEM is in compliance with the essential requirements
and other relevant provisions of Directive 1999/5/EC. The Declaration
of Conformity may be consulted at:
http://www.geminidj.com/uhf5000_DoC.pdf
IMPORTANT NOTE: (For European countries only)
A license may be required when using this UHF wireless microphone
system in your country. It is your responsibility to ensure that you have
the correct license for the frequencies used. Please check the frequency
table on Page 13 of this manual.
A license is not required for wireless microphones on UHF frequencies
from 836 MHz to 864 MHz in most EU countries, but please visit the following website for more information regarding licensing in your country:
http://www.ero.dk/rtte then follow the “National Frequency Tables” link.
features
HANDHELD TRANSMITTER FEATURES
• High sensitivity cardioid capsule for professional use
• Special noise absorption parts inside the barrels eliminating switch
shock and handling noise
HEADSET/ LAVALIER COMBO FEATURES
• Convertible lightweight headset
• Detachable lavalier microphone
• Foam wind and pop control inserts
BELT PACK TRANSMITTER FEATURES
• Group/Channel display and selection
• Power On / Mute switch
us europe
Channel frequencies increase at an interval of 0.025 MHz
Group Channel 0* Channel 33*
00 669.075 669.9
01 669.925 670.75
02 670.775 671.6
03 671.625 672.45
04 672.475 673.3
05 673.325 674.15
06 674.175 675
07 675.025 675.85
08 675.875 676.7
09 676.725 677.55
10 677.575 678.4
11 678.425 679.25
12 679.275 680.1
13 680.125 680.95
14 680.975 681.8
15 681.825 682.65
16 682.675 683.5
17 683.525 684.35
18 684.375 685.2
19 685.225 686.05
20 686.075 686.9
21 686.925 68 7.7 5
22 687.775 688.6
23 688.625 689.45
24 689.475 690.3
25 690.325 691.15
26 691.175 692
27 692.025 692.85
28 692.875 693.7
29 693.725 694.55
30 694.575 695.4
31 695.425 696.25
32 696.275 69 7.1
33 697.125 6 97. 95
Group Channel 0* Channel 33*
00 836.075 836.9
01 836.925 837.75
02 837.775 838.6
03 838.625 839.45
04 839.475 840.3
05 840.325 841.15
06 841.175 842
07 842.025 842.85
08 842.875 843.7
09 843.725 844.55
10 844.575 845.4
11 845.425 846.25
12 846.275 8 47.1
13 847.125 847.95
14 847.975 848.8
15 848.825 849.65
16 849.675 850.5
17 850.525 851.35
18 851.375 852.2
19 852.225 853.05
20 853.075 853.9
21 853.925 854.75
22 854.775 855.6
23 855.625 856.45
24 856.475 857.3
25 857.325 858.15
26 858.175 859
27 859.025 859.85
28 859.875 860.7
29 860.725 861.55
30 861.575 862.4
31 862.425 863.25
32 863.275 864.1
33 864.125 864.95
*Channel frequencies given in MHz.
12 13
UHF-5000 series manU al • geminidj.com UHF-5000 series manU al • geminidj.com

uhf-5100 single uhf
wireless systeM
The UHF-5100 single channel UHF series wireless system is a high quality audio product that provides excellent performance under most operating conditions and allows for automatic or manual frequency adjustment.
Two different versions are available and operate on different ranges of
UHF frequencies between either 669.075 MHz to 697.95 MHz (US version) and 836.075 MHz to 864.95 MHz (EURO version).
THE MODELS AVAILABLE ARE:
UHF-5100M - Which comes equipped with a handheld microphone
transmitter.
UHF-5100HL - Which comes equipped with a belt pack transmitter
and Headset/ lavalier combo.
operating the unit
1. Remove all packing materials. Save the box and packing materials
to transport the unit and in case the unit ever requires service.
2. Plug the AC/DC adaptor into the rear of the receiver (12). Then plug
the adaptor into an appropriate AC Outlet. Push the Power On (2)
button to turn the unit on. The LCD display will be illuminated.
3. Extend the antenna (1) fully vertical and point it out into the direction you will be speaking from.
4. Insert an XLR or 1/4” cable into the XLR jack (9) or 1/4” jack (10) on
the rear of the receiver and connect the other end of the cable to
your amp, effects or mixer jack.
5. Enter the menu by pressing the Menu Control (4) and toggle between the Automatic Channel Selection or Manual adjustment by
pressing the Menu Control.
FOR MANUAL SETTING:
1. Press menu twice. The LCD display (7) will show GROUP
and flash.
2. Press SELECT (5) to increase group one by one from 0 to
33. Press and hold to search through groups faster.
3. After setting the group, press SYNC (6) to escape, or wait
5 seconds to escape automatically.
4. Press menu 3 times. The LCD display will show CHANNEL and flash. Press SELECT repeatedly to increase channel one by one. From 0 to 33. Press and hold to search
through channels faster.
5. After setting the channel, press SYNC to escape, or wait 5
seconds to escape automatically.
6. After setting the channel control, press SELECT to display
existing channel frequency.
6. Adjust the volume using the level control (3) on the front panel. You
can also use the Line/Mic Gain switch (11) to toggle between a miclevel signal and line-level signal.
Note: Effective range between the transmitter and receiver is up to 250
feet.
FOR AUTOMATIC CHANNEL SELECTION:
1. Press MENU once. The LCD display (7) will show AUTOMATIC and flash.
2. Press SELECT (5), receiver start to scan clear channel and
stop.
14
UHF-5000 series manU al • geminidj.com UHF-5000 series manU al • geminidj.com
15

uhf-5200 dual uhf
wireless systeM
The UHF-5200 dual channel UHF series wireless system is a high quality
audio product that provides excellent performance under most operating conditions and allows for automatic or manual frequency adjustment.
Two different versions are available and operate on different ranges of
UHF frequencies between either 669.075 MHz to 697.95 MHz (US version) and 836.075 MHz to 864.95 MHz (EURO version).
THE MODELS AVAILABLE ARE:
UHF-5200M - Which comes equipped with (2) handheld microphone transmitters.
UHF-5200HL- Which comes equipped with (2) belt pack transmitters and (2) Headset/ lavalier combos.
operating the unit
1. Remove all packing materials. Save the box and packing materials
to transport the unit and in case the unit ever requires service.
2. Plug the AC/DC adaptor into the rear of the receiver (12). Then plug
the adaptor into an appropriate AC Outlet. Push the Power On (2)
button to turn the unit on. The LCD display will be illuminated.
3. Extend the antenna (1) fully vertical and point it out into the direction you will be speaking from.
4. Insert XLR or 1/4” cables into the XLR jacks (9) or 1/4” jack (10) on
the rear of the receiver and connect the other end of the cable to
your amp, effects or mixer jack.
5. Enter the menu by pressing the Menu Control (4) and toggle between the Automatic Channel Selection or Manual adjustment by
pressing the the Menu Control:
FOR MANUAL SETTING:
1. Press menu twice. The LCD display (7) will show GROUP
and flash.
2. Press SELECT (5) to increase group one by one from 0 to
33. Press and hold to search through groups faster.
3. After setting the group, press SYNC (6) to escape, or wait
5 seconds to escape automatically.
4. Press menu 3 times. The LCD display will show CHANNEL and flash. Press SELECT repeatedly to increase channel one by one. From 0 to 33. Press and hold to search
through channels faster.
5. After setting the channel, press SYNC to escape, or wait 5
seconds to escape automatically.
6. After setting the channel control, press SELECT to display
existing channel frequency.
6. Adjust the volume using the level control (3) on the front panel. You
can also use the Line/Mic Gain switch (11) to toggle between a miclevel signal and line-level signal.
Note: Effective range between the transmitter and receiver is up to 250
feet.
FOR AUTOMATIC CHANNEL SELECTION:
1. Press MENU once. The LCD display (7) will show AUTOMATIC and flash.
2. Press SELECT (5), receiver start to scan clear channel and
stop.
16 17
UHF-5000 series manU al • geminidj.com UHF-5000 series manU al • geminidj.com

transM itter operation
handheld M ic operation belt pack operation
1. Unscrew the battery cavity (13) to open. Insert the two included
AA batteries into the battery cavity according to the polarity indication marked on the battery housing.
2. Press and hold power/mute button (14) to turn transmitter on. The
transmitter LED will light green.
FOR AUTOMATIC CHANNEL SELECTION:
1. Keep the battery cover open and point the transmitter
infrared (17) toward the IR receiver (8) and press Sync
control (6) button.
2. The antenna icon on the LCD display will be illuminated.
3. Close the battery cavity (13).
FOR MANUAL SETTING:
1. Press and hold the SELECT (15) button until the first two
digits (group number) begin to flash. Press SELECT to increase group by increment from 0 to 33. After setting the
group number to match the receiver, wait 5 seconds until
the group number stops flashing.
2. Press and hold the SELECT button again. The last two
digits (channel number) start to flash. Press SELECT to
increase channel by increments of one from 0 to 33. After
setting the channel number to match the receiver, wait 5
seconds until the channel number stops flashing.
1. Unscrew the battery cavity (13) to open. Insert the two included
AA batteries into the battery cavity according to the polarity indication marked on the battery housing.
2. Press and hold the belt pack power/mute button (18) to turn the
transmitter on. The transmitter LED will light green.
FOR AUTOMATIC CHANNEL SELECTION:
1. Keep the battery cover open and point the transmitter
infrared (17) toward the IR receiver (8) and press Sync
control (6) button.
2. The antenna icon on the LCD display will be illuminated.
3. Close the battery cavity (13).
FOR MANUAL SETTING:
1. Press and hold the SELECT (19) button until the first two
digits (group number) begin to flash. Press SELECT to
increase group by increments of one from 0 to 33. After
setting the group number to match the receiver, wait 5
seconds until the group number stops flashing.
2. Press and hold the SELECT button again. The last two
digits (channel number) start to flash. Press SELECT to
increase channel by increments of one from 0 to 33. After
setting the channel number to match the receiver, wait 5
seconds until the channel number stops flashing.
3. The microphone can be muted by pressing the Mic Power / Mute
button (14). If the microphone is not going to be used for any
length of time, press and hold the Mic Power / Mute button (14) to
power the microphone off. The mic will not need to be resynced
upon powering it back on.
18
UHF-5000 series manU al • geminidj.com UHF-5000 series manU al • geminidj.com
3. The microphone can be muted by pressing the Mic Power / Mute
button (18). If the microphone is not going to be used for any
length of time, press and hold the Mic Power / Mute button (18) to
power the microphone off. The mic will not need to be resynced
upon powering it back on.
19

specifications
troubleshooting
This equipment operates at a frequency that has been authorized by
the FCC. However, there is no guarantee that interference will not occur in a particular installation. If this equipment does cause interference to radio or television reception, try one or more of the following
suggestions:
1. Change the operating frequency of the unit.
2. Repoint or relocate the receiving antenna.
3. Plug the equipment into a socket or a different circuit.
Remember, any changes made to the unit without authorization from
Gemini will void your warranty.
receiV er (uhf-5100 and uhf-5200)
Frequency range...................................... USA: 668 – 698MHz
Europe: 835 – 865MHz
Receiving System............................................. PLL synthesized
Frequency Stability.................................................... +/- 0.005%
Frequency response...............................50Hz-15KHz +/- 3dB
Signal-to-Noise Ratio...........................................................>95dB
Modulation Mode........................................................................FM3
IF Frequency.....................................................110 MHz; 10.7 MHz
T.H.D............................................................................ 0.5% (@ 1kHz)
Sensitivity………………...….. 6.5dBuV (FM: 40kHz, S/N:≥85Db
Power Supply...........................................................................12V DC
Audio Output.................................................………..Balanced XLR
Unbalanced 1/4”
Dimensions..................................................... 210 x 138 x 45 mm
transM itter (all Models)
Frequency range..................................... USA: 668 – 698MHz
Europe: 835 – 865MHz
RF Power Output...............................................................<10dBm
Oscillation Mode.............................................. PLL synthesized
Spurious Emission........................................... More than 50dB
below carrier frequency
Frequency Stability............... ±0.005% with quartz control
Max modulation…………………………………….…................ +/-70kHz
Current Consumption.....................................................… 120mA
Battery Type............................................... Two (2) AA Alkaline
Battery Life.............................................................................6 hours
transM itter (handheld)
Microphone Element.......….... Unidirectional Dynamic Mic
Polar Pattern...................................................…..................Cardioid
Dimensions...........................................................…...250 x 38 mm
transM itter (headset / laValier)
Microphone Element........................................ Condenser Mic
Polar Pattern.......................................................…............ Cardioid
Dimensions........................................................63 x 20 x 110 mm
20 21
UHF-5000 series manU al • geminidj.com UHF-5000 series manU al • geminidj.com

introducción
funciones
Antenas del receptor
1
2
Botón de encendido del receptor
3
Control giratorio de volumen
4
Control Menu
5
Control Select
6
Control Sync
7
Pantalla LCD
8
Receptor infrarrojos
9
Salida XLR balanceada
10
Salida de 6,3 mm
11
Interruptor Line/Mic Gain
12
Entrada de corriente
13
Receptáculo de la pila
14
Botón Mic Power / Mute
15
Botón Mic Select
16
Indicador LED del transmisor
17
Transmisor de infrarrojos
18
Interruptor MUTE & ON/OFF de petaca
19
Botón Select de petaca
20
Clavija Mini-XLR con fijación
Felicidades y gracias por su compra de un sistema inalámbrico Gemini.
Este sistema incluye la tecnología más moderna y le ofrece un año de
garantía limitada. Antes de usar este aparato le recomendamos que lea
completamente este manual de instrucciones.
Este manual incluye las instrucciones tanto del sistema UHF-5100 como
del UHF-5200.
cuidado
1. Lea estas instrucciones ANTES de usar este aparato.
2. Para reducir el riesgo de una descarga eléctrica, no abra este
aparato. NO HAY PIEZAS SUSCEPTIBLES DE SER REPARADAS
POR EL USUARIO. Dirija cualquier reparación al servicio técnico.
3. No permita que este aparato quede expuesto a la luz del sol directa
o a una fuente de calor como puede ser un radiador o un horno.
4. El polvo y la suciedad puede reducir el rendimiento de esta unidad.
Trate de mantener esta unidad limpia y lo más lejos posible de
lugares polvorientos y tápela cuando no la esté usando. Limpie
regularmente la suciedad acumulada con un trapo suave y seco.
5. A la hora de trasladar esta unidad a otra ubicación utilice el embalaje
y las protecciones originales si es posible. Esto reducirá el riesgo de
posibles daños durante el trayecto.
6. NO PERMITA QUE ESTA UNIDAD QUEDE EXPUESTA A LA LLUVIA
O LA HUMEDAD.
7. NO UTILICE SPRAYS LIMPIADORES O LUBRICANTES SOBRE LOS
CONTROLES O INTERRUPTORES.
Micrófono:
1. No deje caer el micrófono sobre una superficie dura.
2. No golpee el cabezal del micro con el puño o los dedos, ni sople
fuertemente de frente sobre el cabezal.
3. No use el micro en zonas con elevados niveles de humedad y/o
temperatura dado que eso puede dar lugar a daños en el micrófono.
22
21
Diadema acolchada
22
Micrófono Lavalier con pinza
norM atiVa fcc
Los sistemas inalámbricos Gemini cumplen con lo indicado en las
secciones 74 y 15 de las normas FCC. La licencia de los dispositivos
Gemini es responsabilidad del usuario y el nivel de la misma depende de
la clasificación del usuario y de la aplicación.
Se ha verificado que este aparato cumple con los límites establecidos
en las secciones 15 y 74 de las normas FCC.
UHF-5000 series manU al • geminidj.com UHF-5000 series manU al • geminidj.com
23

tabla de frecuencias
norM atiVa europea
Países R & TTed
BE, DE, ES, FR, NL, UK
Por la presente, GCI Technologies Corp., declara que este SISTEMA
INALÁMBRICO UHF PROFESIONAL cumple con los requisitos esenciales
y otras obligaciones de la Directiva 1999/5/EC. Puede consultar la
Declaración de Conformidad en este enlace de internet:
http://www.geminidj.com/uhf5000_DoC.pdf
NOTA IMPORTANTE: (solo para los países europeos)
Puede ser necesaria una licencia a la hora de usar este sistema de micro
inalámbrico UHF en su país. Queda bajo su responsabilidad el asegurarse
de tener la licencia adecuada para las frecuencias a usar. Compruebe la
tabla de frecuencias en la página 25 de este manual.
En la mayoría de países de la UE no será necesaria una licencia para
los micros inalámbricos usados en las frecuencias UHF entre 836 y 864
MHz, pero consulte toda la información relativa a las licencias necesarias
en su país en la siguiente página web:
http://www.ero.dk/rtte y siga el enlace “National Frequency Tables”.
caracterÍsticas
CARACTERÍSTICAS DEL MICRO MANUAL
• Cápsula cardioide de alta sensibilidad para uso profesional
• Piezas especiales de absorción de ruidos dentro de la carcasa que
eliminan los ruidos de manejo y chasquido del interruptor
CARACTERÍSTICAS DEL COMBO DIADEMA/LAVALIER
• Diadema ligera convertible
• Micrófono lavalier extraíble
• Incluye “cebolla” de esponja
CARACTERÍSTICAS DEL TRANSMISOR DE PETACA
• Indicación y selección de grupo/canal
• Interruptor de encendido/anulación (mute)
ee. uu. europa
Las frecuencias de canal aumentan a un intervalo de 0.025 MHz
Grupo Canal 0* Canal 33*
00 669.075 669.9
01 669.925 670.75
02 670.775 671.6
03 671.625 672.45
04 672.475 673.3
05 673.325 674.15
06 674.175 675
07 675.025 675.85
08 675.875 676.7
09 676.725 677.55
10 677.575 678.4
11 678.425 679.25
12 679.275 680.1
13 680.125 680.95
14 680.975 681.8
15 681.825 682.65
16 682.675 683.5
17 683.525 684.35
18 684.375 685.2
19 685.225 686.05
20 686.075 686.9
21 686.925 68 7.7 5
22 687.775 688.6
23 688.625 689.45
24 689.475 690.3
25 690.325 691.15
26 691.175 692
27 692.025 692.85
28 692.875 693.7
29 693.725 694.55
30 694.575 695.4
31 695.425 696.25
32 696.275 69 7.1
33 697.125 6 97. 95
Grupo Canal 0* Canal 33*
00 836.075 836.9
01 836.925 837.75
02 837.775 838.6
03 838.625 839.45
04 839.475 840.3
05 840.325 841.15
06 841.175 842
07 842.025 842.85
08 842.875 843.7
09 843.725 844.55
10 844.575 845.4
11 845.425 846.25
12 846.275 8 47.1
13 847.125 847.95
14 847.975 848.8
15 848.825 849.65
16 849.675 850.5
17 850.525 851.35
18 851.375 852.2
19 852.225 853.05
20 853.075 853.9
21 853.925 854.75
22 854.775 855.6
23 855.625 856.45
24 856.475 857.3
25 857.325 858.15
26 858.175 859
27 859.025 859.85
28 859.875 860.7
29 860.725 861.55
30 861.575 862.4
31 862.425 863.25
32 863.275 864.1
33 864.125 864.95
*Frecuencias de canal expresadas en MHz.
24 25
UHF-5000 series manU al • geminidj.com UHF-5000 series manU al • geminidj.com

uhf-5100 sisteM a inaláM brico
uhf de canal único
El sistema inalámbrico UHF de canal único UHF-5100 es un producto
audio de alta calidad que ofrece un alto rendimiento en las condiciones
operativas más extremas y permite un ajuste de frecuencias tanto
automático como manual.
Dispone de dos versiones distintas que actúan en diferentes rangos de
frecuencias UHF entre los 669.075 a 697.95 MHz (versión para EE.UU.)
y los 836.075 a 864.95 MHz (versión europea).
LOS MODELOS DISPONIBLES SON:
UHF-5100M - Que viene equipado con un transmisor de micrófono
de tipo manual.
UHF-5100HL - Que viene equipado con un transmisor de petaca y
un combo de diadema/lavalier.
uso de la unidad
1. Retire el embalaje y las protecciones, pero consérvelo por si acaso
necesita transportar la unidad o enviarla para su reparación.
2. Conecte el adaptador de AC/DC en la parte trasera del receptor
(12) y el otro extremo a una salida de corriente del voltaje adecuado.
Pulse el botón de encendido (2) para poner en marcha la unidad. El
pantalla LCD se iluminará.
3. Estire la antena (1) completamente en vertical y apúntela en la
dirección hacia donde vaya a cantar.
4. Introduzca un cable con conector XLR o de 6,3 mm en la toma XLR
(9) o de 6,3 mm (10) de la parte trasera del receptor y conecte el
otro extremo del cable a su amplificador, unidad de efectos o mesa
de mezclas.
5. Acceda al menú pulsando el control Menu (4) y cambie entre el
ajuste manual o la selección automática de canales pulsando el
control Menu.
PARA EL AJUSTE MANUAL:
1. Pulse menu dos veces. En la pantalla LCD (7) aparecerá la
indicación GROUP y parpadeará.
2. Pulse SELECT (5) para ir avanzando uno a uno por los
grupos entre el 0 y el 33. Mantenga pulsado SELECT para
hacer una búsqueda más rápida de los grupos.
3. Una vez que haya ajustado el grupo, pulse SYNC (6)
para salir manualmente o espere 5 segundos para que la
unidad salga automáticamente.
4. Pulse menu 3 veces. En la pantalla LCD (7) aparecerá la
indicación CHANNEL y parpadeará. Pulse SELECT varias
veces para ir pasando uno a uno por los canales entre
el 0 y el 33. Mantenga pulsado SELECT para hacer una
búsqueda más rápida de los canales.
5. Una vez que haya ajustado el canal, pulse SYNC (6) para
salir manualmente o espere 5 segundos para que la unidad
salga automáticamente.
6. Después de elegir el canal, pulse SELECT para visualizar
la frecuencia existente para el canal.
6. Ajuste el volumen usando el control de nivel (3) del panel frontal.
También puede usar el interruptor Line/Mic Gain (11) para cambiar
entre una señal de nivel de micro y una de nivel de línea.
Nota: El rango efectivo de cobertura entre el transmisor y el receptor es
de unos 250 pies (80 metros, aproximadamente).
PARA LA SELECCIÓN AUTOMÁTICA DE CANALES:
1. Pulse MENU una vez. En la pantalla LCD (7) aparecerá la
indicación AUTOMATIC y parpadeará.
2. Pulse SELECT (5), el receptor comenzará un barrido en
busca de canales limpios y se detendrá.
26
UHF-5000 series manU al • geminidj.com UHF-5000 series manU al • geminidj.com
27

uhf-5200 sisteM a
inaláM brico uhf doble
El sistema inalámbrico UHF de doble canal UHF-5200 es un producto
audio de alta calidad que ofrece un alto rendimiento en las condiciones
operativas más extremas y permite un ajuste de frecuencias tanto
automático como manual.
Dispone de dos versiones distintas que actúan en diferentes rangos de
frecuencias UHF entre los 669.075 a 697.95 MHz (versión para EE.UU.)
y los 836.075 a 864.95 MHz (versión europea).
LOS MODELOS DISPONIBLES SON:
UHF-5200M - Que viene equipado con dos (2) transmisores de
micrófono de tipo manual.
UHF-5200HL- Que viene equipado con dos (2) transmisores de
petaca y dos (2) combos de diadema/lavalier.
uso de la unidad
1. Retire el embalaje y las protecciones, pero consérvelo por si acaso
necesita transportar la unidad o enviarla para su reparación.
2. Conecte el adaptador de AC/DC en la parte trasera del receptor
(12) y el otro extremo a una salida de corriente del voltaje adecuado.
Pulse el botón de encendido (2) para poner en marcha la unidad. El
pantalla LCD se iluminará.
3. Estire la antena (1) completamente en vertical y apúntela en la
dirección hacia donde vaya a cantar o hablar.
4. Introduzca un cable con conector XLR o de 6,3 mm en la toma XLR
(9) o de 6,3 mm (10) de la parte trasera del receptor y conecte el
otro extremo del cable a su amplificador, unidad de efectos o mesa
de mezclas.
5. Acceda al menú pulsando el control Menu (4) y cambie entre el
ajuste manual o la selección automática de canales pulsando el
control Menu:
PARA EL AJUSTE MANUAL:
1. Pulse menu dos veces. En la pantalla LCD (7) aparecerá la
indicación GROUP y parpadeará.
2. Pulse SELECT (5) para ir avanzando uno a uno por los
grupos entre el 0 y el 33. Mantenga pulsado SELECT para
hacer una búsqueda más rápida de los grupos.
3. Una vez que haya ajustado el grupo, pulse SYNC (6)
para salir manualmente o espere 5 segundos para que la
unidad salga automáticamente.
4. Pulse menu 3 veces. En la pantalla LCD (7) aparecerá la
indicación CHANNEL y parpadeará. Pulse SELECT varias
veces para ir pasando uno a uno por los canales entre
el 0 y el 33. Mantenga pulsado SELECT para hacer una
búsqueda más rápida de los canales.
5. Una vez que haya ajustado el canal, pulse SYNC (6) para
salir manualmente o espere 5 segundos para que la unidad
salga automáticamente.
6. Después de elegir el canal, pulse SELECT para visualizar
la frecuencia existente para el canal.
6. Ajuste el volumen usando el control de nivel (3) del panel frontal.
También puede usar el interruptor Line/Mic Gain (11) para cambiar
entre una señal de nivel de micro y una de nivel de línea.
Nota: El rango efectivo de cobertura entre el transmisor y el receptor es
de unos 250 pies (80 metros, aproximadamente).
PARA LA SELECCIÓN AUTOMÁTICA DE CANALES:
1. Pulse MENU una vez. En la pantalla LCD (7) aparecerá la
indicación AUTOMATIC y parpadeará.
2. Pulse SELECT (5), el receptor comenzará un barrido en
busca de canales limpios y se detendrá.
28 29
UHF-5000 series manU al • geminidj.com UHF-5000 series manU al • geminidj.com

uso del transM isor
USO DEL MICRO MANUAL USO DEL MICRO DE PETACA
1. Desenrosque el receptáculo de la pila (13) para abrirlo. Inserte
la dos pilas AA incluidas dentro del receptáculo siguiendo la
indicación de polaridad que aparece dentro del propio receptáculo.
2. Mantenga pulsado el botón de encendido/anulación (14) para
encender el transmisor. El LED del transmisor se iluminará en
verde.
PARA LA SELECCIÓN AUTOMÁTICA DE CANALES:
1. Deje el receptáculo de las pilas abierto y apunte el emisor
de infrarrojos del transmisor (17) hacia el receptor de
infrarrojos (8) del receptor y pulse el control Sync (6).
2. El símbolo de la antena en el display LCD se iluminará.
3. Cierre el receptáculo de las pilas (13).
PARA EL AJUSTE MANUAL:
1. Mantenga pulsado el botón SELECT (15) hasta que los
dos primeros dígitos (número de grupo) empiecen a
parpadear. Pulse SELECT para cambiar de grupo entre el
0 y el 33. Una vez que haya elegido el número de grupo
que coincida con el del receptor, espere 5 segundos hasta
que el número de grupo deje de parpadear.
2. Mantenga pulsado de nuevo el botón SELECT. Los
dos últimos dígitos (número de canal) empezarán a
parpadear. Pulse SELECT para ir cambiando de canal de
uno en uno entre el 0 y el 33. Una vez que haya elegido el
número de canal que se corresponda con el del receptor,
espere 5 segundos hasta que el número de canal deje de
parpadear.
1. Desenrosque el receptáculo de la pila (13) para abrirlo. Inserte
la dos pilas AA incluidas dentro del receptáculo siguiendo la
indicación de polaridad que aparece dentro del propio receptáculo.
2. Mantenga pulsado el botón de encendido/anulación (18) para
encender el transmisor. El LED del transmisor se iluminará en
verde.
PARA LA SELECCIÓN AUTOMÁTICA DE CANALES:
1. Deje el receptáculo de las pilas abierto y apunte el emisor
de infrarrojos del transmisor (17) hacia el receptor de
infrarrojos (8) del receptor y pulse el control Sync (6).
2. El símbolo de la antena en el display LCD se iluminará.
3. Cierre el receptáculo de las pilas (13).
PARA EL AJUSTE MANUAL:
1. Mantenga pulsado el botón SELECT (19) hasta que los
dos primeros dígitos (número de grupo) empiecen a
parpadear. Pulse SELECT para cambiar de grupo entre el
0 y el 33. Una vez que haya elegido el número de grupo
que coincida con el del receptor, espere 5 segundos hasta
que el número de grupo deje de parpadear.
2. Mantenga pulsado de nuevo el botón SELECT. Los
dos últimos dígitos (número de canal) empezarán a
parpadear. Pulse SELECT para ir cambiando de canal de
uno en uno entre el 0 y el 33. Una vez que haya elegido el
número de canal que se corresponda con el del receptor,
espere 5 segundos hasta que el número de canal deje de
parpadear.
3. Puede anular (mute) el micrófono pulsando el botón Mic Power/
Mute (14). Si no va a usar el micro durante bastante tiempo,
mantenga pulsado este botón Mic Power / Mute (14) para
apagarlo. No hará falta que vuelva a resincronizar el micro la
próxima vez que lo encienda.
30 31
UHF-5000 series manU al • geminidj.com UHF-5000 series manU al • geminidj.com
3. Puede anular (mute) el micrófono pulsando el botón Mic Power/
Mute (18). Si no va a usar el micro durante bastante tiempo,
mantenga pulsado este botón Mic Power / Mute (18) para
apagarlo. No hará falta que vuelva a resincronizar el micro la
próxima vez que lo encienda.

especificaciones técnicas
RESOLUCIÓN DE PROBLEMAS
Este aparato funciona a una frecuencia autorizada por las normas FCC.
No obstante, no hay garantías de que no se produzca interferencias
en una instalación concreta. En caso de que este aparato produzca
algún tipo de interferencias en la recepción de la radio o TV, trate de
solucionarlo por medio de una o más de los siguientes consejos:
1. Cambiar la frecuencia operativa de la unidad.
2. Reubicar o apuntar en otra dirección la antena receptora.
3. Conectar este aparato a una regleta o salida de corriente distinta.
Tenga en cuenta que cualquier modificación que realice en este aparato
sin autorización expresa por parte de Gemini anulará su garantía.
receptor (uhf-5100 y uhf-5200)
Rango de frecuencias ............................. EE.UU.: 668 – 698 Hz
Europa: 835 – 865 MHz
Sistema de recepción ..........................................PLL sintetizado
Estabilidad de frecuencia ......................................... +/- 0.005%
Respuesta de frecuencia .................. 50 Hz - 15 KHz +/- 3 dB
Relación señal-ruido .............................................................. >95 dB
Modo de modulación .................................................................. FM3
Frecuencia IF ......................................................110 MHz; 10.7 MHz
T.H.D. .............................................................................0.5% (@ 1 kHz)
Sensibilidad .................. 6.5 dBuV (FM: 40 kHz, S/R:≥85 dB)
Fuente de alimentación ...................................................... 12 V DC
Salida audio XLR balanceado
6,3 mm no balanceado
Dimensiones .......................................................210 x 138 x 45 mm
transM isor (todos los Modelos)
Rango de frecuencias ......................... EE.UU.: 668 – 698 MHz
Europa: 835 – 865 MHz
Salida de potencia RF .......................................................<10 dBm
Modo de oscilación .............................................. PLL sintetizado
Emisiones espúreas .......................................... Superior a 50 dB
por debajo de frecuencia portadora
Estabilidad frecuencia .....±0.005 % con control de cuarzo
Modulación máxima ........................................................+/-70 kHz
Amperaje ................................................................................... 120 mA
Tipo de pilas ..................................................Dos (2) AA alcalinas
Duración de las pilas ............................................................ 6 horas
transM isor (Manual)
Elemento de micrófono ....... Micro dinámico unidireccional
Patrón polar.......................................................................... Cardioide
Dimensiones ................................................................. 250 x 38 mm
transM isor (diadeMa / laValier)
Elemento de micrófono ............................. Micro condensador
Patrón polar.......................................................................... Cardioide
Dimensiones .........................................................63 x 20 x 110 mm
32 33
UHF-5000 series manU al • geminidj.com UHF-5000 series manU al • geminidj.com

introduction
fonctions
Antennes récepteur
1
2
Marche/arrêt du récepteur
3
Potentiomètre de volume
4
Touche Menu
5
Touche Select
6
Touche Sync
7
Écran LCD
8
Led de réception infrarouge
9
Sortie XLR symétrique
10
Sortie mélangée en Jack 6,35 mm
11
Sélecteur de gain ligne/micro
12
Embase d’alimentation en tension continue
13
Compartiment de la pile
14
Micro marche/arrêt/Mute
15
Touche de sélection micro
16
Led d’émission
17
Led d’émission infrarouge
18
Touche marche/arrêt/Mute de l’émetteur
Merci d’avoir choisi ce système sans fil Gemini. Il vous offre les dernières
innovations technologiques et il bénéficie d’une garantie d’un an. Avant
de l’utiliser, prenez le temps de lire toutes les instructions.
Ce mode d’emploi regroupe les modèles UHF-5100 et UHF-5200.
M ise en garde
1. Lisez toutes les instructions relatives à l’utilisation de cet équipement avant de l’utiliser.
2. Pour réduire les risques d’électrocution, n’ouvrez pas l’appareil. Il
ne contient AUCUNE PIÈCE REMPLAÇABLE PAR L’UTILISATEUR.
Confiez toutes les réparations à un technicien qualifié.
3. N’exposez pas cet appareil directement au soleil ou à toute source
de chaleur (radiateur, système de chauffage, etc.).
4. La poussière, la saleté et les débris peuvent interférer avec le bon
fonctionnement de cet appareil. Utilisez cet appareil à l’écart des
zones poussiéreuses ou sales, et couvrez-le lorsque vous ne l’utilisez
pas. Nettoyez-le régulièrement avec un pinceau doux et propre.
5. Lors de vos déplacements, utilisez l’emballage original pour réduire
tout risque de dommage pendant le transport.
6. N’EXPOSEZ PAS CET ÉQUIPEMENT À LA PLUIE OU À L’HUMIDITÉ.
7. N’UTILISEZ AUCUN PRODUIT NETTOYANT CHIMIQUE OU LUBRIFIANT SUR LES BOUTONS OU TOUCHES.
Micro :
1. Ne laissez pas tomber le micro sur une surface dure.
2. Veillez à ne pas frapper sur la capsule du micro avec la main, et veillez à ne pas souffler directement sur la capsule.
3. N’utilisez pas le micro dans les zones de forte humidité et/ou à
hautes températures, ce qui pourrait endommager le micro.
34
19
Touche sélection d’émetteur ceinture
20
Mini XLR à verrouillage
21
Repose-tête rembourré
22
Micro cravate amovible sur clip
UHF-5000 series manU al • geminidj.com UHF-5000 series manU al • geminidj.com
norM es fédérales fcc
Les systèmes sans fil Gemini répondent aux normes fédérales FCC, alinéas 74 et 15. Les démarches en vue de l’obtention d’une licence d’utilisation des produits Gemini sont de la responsabilité de l’utilisateur.
Cet équipement a été testé et répond aux normes fédérales FCC alinéas
15 et 74.
35

tableau des fréquences
CONFORMITÉ AUX NORMES EUROPÉENNES
Pays concernés :
BE, DE, ES, FR, NL, UK
Par la présente, GCI Technologies Corp., déclare que ce système SANS
FIL UHF PROFESSIONNEL répond aux normes des directives européennes 1999/5/EC. La Déclaration de Conformité est disponible sur le
site : http://www.geminidj.com/uhf5000_DoC.pdf
REMARQUE IMPORTANTE : (pays de la CEE uniquement)
Il se peut que l’utilisation de ce micro sans fil UHF nécessite l’obtention
d’une licence d’utilisation dans votre pays. Il est de votre responsabilité
de veiller à ce que vous vous procureriez la licence/permis/autorisation
nécessaire pour l’utilisation des fréquences. Consultez le tableau des
fréquences en page suivante.
Dans la plupart des pays de la CEE, l’utilisation des micros sans fil UHF
sur une plage allant de 836 à 864 MHz ne nécessite aucune licence
— consultez néanmoins le site Internet suivant afin d’obtenir de plus
amples renseignements sur les particularités de votre pays :
http://www.ero.dk/rtte et allez au lien “National Frequency Tables”.
généralités
MICRO MAIN
• Capsule cardioïde haute sensibilité pour utilisations professionnelles
• Éléments internes spécifiques à l’absorption du bruit atténuant les
bruits d’impact et de manipulation.
MICRO SERRE-TÊTE/MICRO CRAVATE
• Système serre-tête léger modifiable en micro cravate
• Micro cravate détachable
• Bonnettes mousse anti-vent et anti-pop fournies.
ÉMETTEUR DE CEINTURE
• Affichage et sélection du Groupe/Canal
• Touche marche/arrêt/Mute
usa europe
Canaux incrémentés par pas de 0,025 MHz
Groupe Canal 0* Canal 33*
00 669.075 669.9
01 669.925 670.75
02 670.775 671.6
03 671.625 672.45
04 672.475 673.3
05 673.325 674.15
06 674.175 675
07 675.025 675.85
08 675.875 676.7
09 676.725 677.55
10 677.575 678.4
11 678.425 679.25
12 679.275 680.1
13 680.125 680.95
14 680.975 681.8
15 681.825 682.65
16 682.675 683.5
17 683.525 684.35
18 684.375 685.2
19 685.225 686.05
20 686.075 686.9
21 686.925 68 7.7 5
22 687.775 688.6
23 688.625 689.45
24 689.475 690.3
25 690.325 691.15
26 691.175 692
27 692.025 692.85
28 692.875 693.7
29 693.725 694.55
30 694.575 695.4
31 695.425 696.25
32 696.275 69 7.1
33 697.125 6 97. 95
Groupe Canal 0* Canal 33*
00 836.075 836.9
01 836.925 837.75
02 837.775 838.6
03 838.625 839.45
04 839.475 840.3
05 840.325 841.15
06 841.175 842
07 842.025 842.85
08 842.875 843.7
09 843.725 844.55
10 844.575 845.4
11 845.425 846.25
12 846.275 8 47.1
13 847.125 847.95
14 847.975 848.8
15 848.825 849.65
16 849.675 850.5
17 850.525 851.35
18 851.375 852.2
19 852.225 853.05
20 853.075 853.9
21 853.925 854.75
22 854.775 855.6
23 855.625 856.45
24 856.475 857.3
25 857.325 858.15
26 858.175 859
27 859.025 859.85
28 859.875 860.7
29 860.725 861.55
30 861.575 862.4
31 862.425 863.25
32 863.275 864.1
33 864.125 864.95
*Fréquences des canaux en MHz.
36 37
UHF-5000 series manU al • geminidj.com UHF-5000 series manU al • geminidj.com

uhf-5100 s ystèM e uhf sans fil
à é M etteur/ récepteur unique
Le système sans fil UHF-5100 à émetteur/récepteur unique est un produit audio haute qualité qui offre des performances excellentes dans
la plupart des conditions d’utilisation et permet un réglage manuel ou
automatique de la fréquence.
Deux versions différentes sont disponibles et fonctionnent sur des
plages de fréquences UHF comprises entre 669,075 MHz et 697,95 MHz
(version USA) et entre 836,075 MHz et 864.95 MHz (version CEE).
LES MODÈLES DISPONIBLES SONT :
UHF-5100M — fourni avec un micro main émetteur.
UHF-5100HL — fourni avec un émetteur de ceinture et un micro
serre-tête/micro cravate.
UTILISATION DU PRODUIT
1. Retirez le produit de son emballage. Conservez l’emballage pour
renvoyer l’appareil en cas de réparation.
2. Reliez l’adaptateur secteur à l’arrière du récepteur (12). Reliez l’adaptateur à une prise secteur. Appuyez sur la touche Power On (2)
pour placer le récepteur sous tension. Le écran LCD s’allume alors.
3. Dépliez les antennes (1) verticalement au maximum et pointées
dans votre direction.
4. Insérez un câble XLR ou Jack 6,35 mm dans l’embase XLR (9) ou
Jack 6,35 mm (10) à l’arrière du récepteur et connectez l’autre extrémité du câble à l’amplificateur, effet ou console de mixage.
5. Activez le menu en appuyant sur la touche Menu (4) et sélectionnez
Automatic Channel Selection (sélection automatique du canal) ou
Manual (sélection manuelle) en appuyant sur la touche Menu.
6. Réglez le volume à l’aide du potentiomètre Level (3) de la face avant.
POUR LA SÉLECTION MANUELLE DE CANAL :
1. Appuyez deux fois sur la touche Menu. L’écran LCD (7)
affiche GROUP et clignote.
2. Appuyez sur SELECT (5) pour passer au groupe suivant
(de 0 à 33). Maintenez la touche enfoncée pour accélérer
le défilement.
3. Après avoir sélectionné le groupe, appuyez sur SYNC
(6) pour quitter, ou attendez 5 secondes pour quitter
automatiquement le menu.
4. Appuyez 3 fois sur la touche Menu. L’écran LCD affiche
CHANNEL et clignote. Appuyez sur SELECT pour
incrémenter le canal un à un, de 0 à 33. Maintenez la
touche enfoncée pour accélérer le défilement.
5. Après avoir réglé le canal, appuyez sur SYNC (6)
pour quitter, ou attendez 5 secondes pour quitter
automatiquement le menu.
6. Après avoir sélectionné le réglage canal, appuyez sur
la touche SELECT pour afficher la fréquence du canal
courant.
Vous pouvez également utiliser le sélecteur Line/Mic Gain (11) pour
sélectionner un signal de sortie à niveau micro ou ligne.
Remarque : La portée utile entre l’émetteur et le récepteur est d’environ
75 mètres.
POUR LA SÉLECTION AUTOMATIQUE DE CANAL :
1. Appuyez une fois sur MENU. L’écran LCD (7) affiche
AUTOMATIC et clignote.
2. Appuyez sur SELECT (5) — le récepteur recheche un
canal libre et s’arrête.
38 39
UHF-5000 series manU al • geminidj.com UHF-5000 series manU al • geminidj.com

uhf-5200 s ystèM e uhf sans fil
à deux é M etteurs et récepteur
Le système sans fil UHF-5200 à deux émetteurs/récepteurs est un pro- UHF-5200 à deux émetteurs/récepteurs est un pro-à deux émetteurs/récepteurs est un produit audio haute qualité avec des performances excellentes dans la plupart des conditions d’utilisation et permet un réglage manuel ou automatique de la fréquence.
Deux versions différentes sont disponibles et fonctionnent sur des
plages de fréquences UHF comprises entre 669,075 MHz et 697,95 MHz
(version USA) et entre 836,075 MHz et 864.95 MHz (version CEE).
LES MODÈLES DISPONIBLES SONT :
UHF-5200M — fourni avec (2) émetteurs micro main.
UHF-5200HL — fourni avec (2) émetteurs de ceinture et (2) sys-fourni avec (2) émetteurs de ceinture et (2) sys-
tèmes micro serre-tête/micro cravate.
UTILISATION DU PRODUIT
1. Retirez le produit de son emballage. Conservez l’emballage pour
renvoyer l’appareil en cas de réparation.
2. Reliez l’adaptateur secteur à l’arrière du récepteur (12). Reliez l’adaptateur à une prise secteur. Appuyez sur la touche Power On (2)
pour placer le récepteur sous tension. Le écran LCD s’allume alors.
3. Dépliez les antennes (1) verticalement au maximum et pointées
dans votre direction.
4. Insérez un câble XLR ou Jack 6,35 mm dans l’embase XLR (9) ou
Jack 6,35 mm (10) à l’arrière du récepteur et connectez l’autre extrémité du câble à l’amplificateur, effet ou console de mixage.
5. Activez le menu en appuyant sur la touche Menu (4) et sélectionnez
Automatic Channel Selection (sélection automatique du canal) ou
Manual (sélection manuelle) en appuyant sur la touche Menu.
POUR LA SÉLECTION MANUELLE DE CANAL :
1. Appuyez deux fois sur la touche Menu. L’écran LCD (7)
affiche GROUP et clignote.
2. Appuyez sur SELECT (5) pour passer au groupe suivant
(de 0 à 33). Maintenez la touche enfoncée pour accélérer
le défilement.
3. Après avoir sélectionné le groupe, appuyez sur SYNC
(6) pour quitter, ou attendez 5 secondes pour quitter
automatiquement le menu.
4. Appuyez 3 foirs sur la touche Menu. L’écran LCD affiche
CHANNEL et clignote. Appuyez sur SELECT pour
incrémenter le canal un à un, de 0 à 33. Maintenez la
touche enfoncée pour accélérer le défilement.
5. Après avoir réglé le canal, appuyez sur SYNC (6)
pour quitter, ou attendez 5 secondes pour quitter
automatiquement le menu.
6. Après avoir sélectionné le réglage canal, appuyez sur
la touche SELECT pour afficher la fréquence du canal
courant.
6. Réglez le volume à l’aide du potentiomètre Level (3) de la face avant.
Vous pouvez également utiliser le sélecteur Line/Mic Gain (11) pour
sélectionner un signal de sortie à niveau micro ou ligne.
Remarque : La portée utile entre l’émetteur et le récepteur est d’environ
75 mètres.
POUR LA SÉLECTION AUTOMATIQUE DE CANAL :
1. Appuyez une fois sur MENU. L’écran LCD (7) affiche
AUTOMATIC et clignote.
2. Appuyez sur SELECT (5) — le récepteur recheche un
canal libre et s’arrête.
40 41
UHF-5000 series manU al • geminidj.com UHF-5000 series manU al • geminidj.com

utilisation de l ’ é M etteur
UTILISATION DU MICRO MAIN
1. Dévissez la porte du compartiment des piles (13) pour l’ouvrir. Insérez les deux piles LR6 (AA) fournies dans leur compartiment en
veillant à respecter les polarités indiquées.
2. Maintenez la touche Power/Mute (14) enfoncée pour placer l’émetteur sous tension. La LED de l’émetteur s’allumera en vert.
POUR LA SÉLECTION AUTOMATIQUE DU CANAL :
1. Laissez la porte du compartiment des piles ouverte et
dirigez la Led infrarouge de l’émetteur (17) vers la Led
infrarouge du récepteur (8), puis et appuyez sur la touche
Sync (6) .
2. Le logo représentant l’antenne sur l’écran LCD s’allumera.
3. Fermez la porte du compartiment des piles (13).
POUR LA SÉLECTION MANUELLE DU CANAL :
1. Maintenez la touche SELECT (15) enfoncée jusqu’à ce
que les deux premiers chiffres (numéro de groupe) se
mettent à clignoter. Appuyez sur la touche SELECT pour
faire défiler les groupes de 0 à 33. Une fois que le numéro
de groupe est identique à celui du récepteur, attendez 5
secondes, jusqu’à ce que le numéro du groupe cesse de
clignoter.
2. Maintenez à nouveau la touche SELECT (15) enfoncée.
Les deux derniers chiffres (numéro de canal) se mettent
à clignoter. Appuyez sur SELECT pour passer d’un canal
à l’autre de 0 à 33. Une fois le numéro de canal réglé sur
celui du récepteur, attendez 5 secondes, jusqu’à ce que le
numéro du canal cesse de clignoter.
UTILISATION DE L’ÉMETTEUR DE CEINTURE
1. Tirez sur la porte du compartiment des piles (13) pour l’ouvrir. Insérez les deux piles LR6 (AA) fournies dans leur compartiment en
veillant à respecter les polarités indiquées.
2. Maintenez la touche Power/Mute (18) enfoncée pour placer l’émetteur sous tension. La LED de l’émetteur s’allumera en vert.
POUR LA SÉLECTION AUTOMATIQUE DU CANAL :
1. Laissez la porte du compartiment des piles ouverte et
dirigez la Led infrarouge de l’émetteur (17) vers la Led
infrarouge du récepteur (8), puis appuyez sur la touche
Sync (6) .
2. Le logo représentant l’antenne sur l’écran LCD s’allumera.
3. Fermez la porte du compartiment des piles (13).
POUR LA SÉLECTION MANUELLE DU CANAL :
1. Maintenez la touche SELECT (15) enfoncée jusqu’à ce
que les deux premiers chiffres (numéro de groupe) se
mettent à clignoter. Appuyez sur la touche SELECT pour
faire défiler les groupes de 0 à 33. Une fois que le numéro
de groupe est identique à celui du récepteur, attendez 5
secondes, jusqu’à ce que le numéro du groupe cesse de
clignoter.
2. Maintenez à nouveau la touche SELECT (15) enfoncée.
Les deux derniers chiffres (numéro de canal) se mettent
à clignoter. Appuyez sur SELECT pour passer d’un canal
à l’autre de 0 à 33. Une fois le numéro de canal réglé sur
celui du récepteur, attendez 5 secondes, jusqu’à ce que le
numéro du canal cesse de clignoter.
3. Vous pouvez couper le micro (fonction Mute) en appuyant sur la
touche Mic Power/Mute (14). Si vous ne devez rester un certain
temps sans utiliser le micro, placez-le hors tension en maintenant
la touche Mic Power/Mute enfoncée (14). Le micro n’a pas besoin
d’être re-synchronisé lors de la mise sous tension.
42
UHF-5000 series manU al • geminidj.com UHF-5000 series manU al • geminidj.com
3. Vous pouvez couper le micro (fonction Mute) en appuyant sur la
touche Mic Power/Mute (18). Si vous ne devez rester un certain
temps sans utiliser le micro, placez-le hors tension en maintenant
la touche Mic Power/Mute enfoncée (18). Le micro n’a pas besoin
d’être re-synchronisé lors de la mise sous tension.
43

caractéristiques techniques
EN CAS DE PROBLÈME
Cet appareil fonctionne sur les fréquences autorisées par les normes
FCC. Ceci dit, il se peut que des interférences surviennent, selon l’installation. Si cet appareil cause des interférences aux communications et
réceptions radio ou TV, essayez l’une des solutions suivantes :
1. Changez de fréquence.
2. Re-dirigez ou déplacez l’antenne de réception.
3. Reliez l’appareil à une ligne secteur différente.
Une dernière chose : toute modification apportée à l’appareil sans l’autorisation de Gemini annule la garantie.
récepteur (uhf-5100 et uhf-5200)
Plage de fréquences ........................... USA : 668 – 698 MHz
Europe : 835 – 865 MHz
Système de réception....................................Synthétiseur PLL
Stabilité en fréquence............................................. +/- 0,005 %
Réponse en fréquence.................... 50 Hz - 15 kHz +/- 3 dB
Rapport Signal/Bruit...........................................................>95 dB
Mode de modulation................................................................ FM3
Fréquence intermédiaire............................110 MHz ; 10,7 MHz
D.H.T............................................................................ 0,5 % (à 1 kHz)
Sensibilité………………..... 6,5 dBV (FM : 40 kHz, S/B :≥85 dB
Alimentation...............................................................................12 Vcc
Sorties audio.................................................……..XLR symétrique
............Jack 6,35 mm asymétrique
Dimensions...................................................... 210 x 138 x 45 mm
é Metteur (tous Modèles)
Plage de fréquences ........................... USA : 668 – 698 MHz
Europe : 835 – 865 MHz
Puissance HF........................................................................<10 dBm
Mode d’oscillation........................................... Synthétiseur PLL
Crêtes intermédiaires..............................supérieures à 50 dB
au-dessous de la fréquence de la porteuse
Stabilité en fréquence........................... ±0,005 % par quartz
Modulation max.…………………………………….…................ +/-70 kHz
Consommation électrique............................................… 120 mA
Type de piles ............................ Deux (2) LR6 (AA) alcalines
Autonomie ..............................................................................6 hours
é Metteur (Micro Main)
Capsule................................….... Unidirectionnelle dynamique
Structure polaire...................................................…........Cardioïde
Dimensions...........................................................…...250 x 38 mm
é Metteur (serre-t Ête / Micro craVate )
Capsule.................................................................. À condensateur
Structure polaire...................................................…........Cardioïde
Dimensions........................................................63 x 20 x 110 mm
44 45
UHF-5000 series manU al • geminidj.com UHF-5000 series manU al • geminidj.com

EINLEITUNG
funktionen
Empfängerantennen
1
2
Netzschalter (Power)
3
Pegelregler (Volume)
4
Menu-Taste
5
Select-Taste
6
Sync-Taste
7
LC-Display
8
Infrarot-Empfänger (IR)
9
Symmetrischer XLR-Ausgang
10
6,35 mm-Ausgang
11
Line/Mic Gain-Schalter
12
Netzeingang (DC IN)
13
Batteriefach
14
Mic Power / Mute-Taste
15
Mic Select-Taste
16
Sender LED-Anzeige
17
Infrarot-Sender (IR)
18
Beltpack MUTE & ON/OFF-Schalter
19
Beltpack-Wahltaste
Herzlichen Glückwunsch zum Kauf eines Gemini Drahtlossystems. Es verfügt über die modernsten Features und eine 1-jährige beschränkte Garantie. Vor der Inbetriebnahme sollten Sie alle Anleitungen sorgfältig lesen.
Die Anleitungen dieses Handbuchs beziehen sich auf das UHF-5100 und
das UHF-5200 System.
Vorsicht
1. Lesen Sie vor der Inbetriebnahme alle Bedienungsanleitungen.
2. Um die Gefahr von Stromschlägen zu verringern, sollten Sie das Gerät
nicht öffnen. Es befinden sich keine VOM NUTZER WARTBAREN BAUTEILE IM GERÄTEINNERN. Überlassen Sie die Wartung einem qualifizierten Wartungstechniker.
3. Setzen Sie das Gerät weder direktem Sonnenlicht noch Wärmequellen,
wie Heizkörpern oder Öfen, aus.
4. Staub, Schmutz und Fremdkörper können den Betrieb des Geräts beeinträchtigen. Halten Sie das Gerät von staubigen, schmutzigen Umgebungen fern und decken Sie es bei Nichtgebrauch ab. Stauben Sie es
regelmäßig mit einem weichen, sauberen Pinsel ab.
5. Transportieren Sie das Gerät in seinem Originalkarton und -verpackungsmaterial. Dadurch verringern Sie das Risiko von Transportschäden.
6. SETZEN SIE DAS GERÄT WEDER REGEN NOCH FEUCHTIGKEIT AUS.
7. BEHANDELN SIE DIE REGLER UND SCHALTER NICHT MIT REINIGUNGSSPRAYS ODER SCHMIERMITTELN.
Mikrofon:
1. Lassen Sie das Mikrofon nicht auf harte Oberflächen fallen.
2. Schlagen Sie nicht mit der Faust oder den Fingern auf die Stirnseite des
Mikrofons und blasen Sie nicht fest hinein.
3. Verwenden Sie das Mikrofon nicht bei hoher Luftfeuchtigkeit und / oder
hohen Temperaturen, da es dadurch beschädigt werden könnte.
20
Verschraubbarer Mini-XLR Stecker
21
Kopfpolster
fcc ÜbereinstiMMung
Die Gemini Drahtlossysteme erfüllen die FCC Richtlinien Part 74 und 15.
Für die Lizensierung von Gemini-Geräten ist der Nutzer verantwortlich und
22
Aufsteckbares Lavalier-Mikrofon
die Lizensierungsfähigkeit richtet sich nach der Einstufung und Anwendung des Nutzers.
Dieses Gerät wurde getestet und erfüllt die Grenzwerte von Part 15 und 74
der FCC-Richtlinien.
46 47
UHF-5000 series manU al • geminidj.com UHF-5000 series manU al • geminidj.com

FREQUENZTABELLE
richtlinienkonforMitÄt in europa
Länder mit Richtlinie 1999/5/E (R&TT)
BE, DE, ES, FR, NL, UK
Die GCI Technologies Corp. erklärt hiermit, dass dieses PROFESSIONELLE
UHF DRAHTLOSSYSTEM den grundlegenden Anforderungen und übrigen einschlägigen Bestimmungen der Richtlinie 1999/5/EG entspricht. Die
Konformitätserklärung kann man nachlesen unter:
http://www.geminidj.com/uhf5000_DoC.pdf
WICHTIGER HINWEIS: (nur für europäische Länder)
Um dieses UHF Drahtlosmikrofonsystem in Ihrem Land zu betreiben, ist
eventuell eine Lizenz erforderlich. Sie müssen sicherstellen, dass Sie die
korrekte Lizenz für die verwendeten Frequenzen besitzen. Bitte überprüfen Sie dies anhand der Frequenztabelle auf Seite 13 dieses Handbuchs.
Für den Betrieb von Drahtlosmikrofonen im UHF-Frequenzbereich von
836 MHz bis 864 MHz wird in den meisten Ländern der EU keine Lizenz
benötigt. Informieren Sie sich aber bitte genauer auf folgender Website
über die in Ihrem Land erforderliche Lizenzierung:
http://www.ero.dk/rtte und folgen Sie dann dem “National Frequency
Tables” Link.
features
FEATURES DES HANDSENDERS
• Hochempfindliche Mikrofonkapsel mit Nierencharakteristik für professionelle Anwendungen
• Spezialbauteile im Gehäuse beseitigen Störgeräusche durch Stöße, Bewegung oder Bedienung
FEATURES DER HEADSET/LAVALIER-KOMBINATION
• Umrüstbares, leichtes Headset
• Abnehmbares Lavalier-Mikrofon
• Schaumstoff-Aufsätze gegen Wind- und Poppgeräusche
FEATURES DES BELTPACK-SENDERS
• Gruppen/Kanal-Anzeige und -Wahl
• Power On / Mute-Schalter
usa europa
Kanalfrequenzen erhöhen sich in Intervallen von 0,025 MHz
Gruppe Kanal 0* Kanal 33*
00 669.075 669.9
01 669.925 670.75
02 670.775 671.6
03 671.625 672.45
04 672.475 673.3
05 673.325 674.15
06 674.175 675
07 675.025 675.85
08 675.875 676.7
09 676.725 677.55
10 677.575 678.4
11 678.425 679.25
12 679.275 680.1
13 680.125 680.95
14 680.975 681.8
15 681.825 682.65
16 682.675 683.5
17 683.525 684.35
18 684.375 685.2
19 685.225 686.05
20 686.075 686.9
21 686.925 68 7.7 5
22 687.775 688.6
23 688.625 689.45
24 689.475 690.3
25 690.325 691.15
26 691.175 692
27 692.025 692.85
28 692.875 693.7
29 693.725 694.55
30 694.575 695.4
31 695.425 696.25
32 696.275 69 7.1
33 697.125 6 97. 95
Gruppe Kanal 0* Kanal 33*
00 836.075 836.9
01 836.925 837.75
02 837.775 838.6
03 838.625 839.45
04 839.475 840.3
05 840.325 841.15
06 841.175 842
07 842.025 842.85
08 842.875 843.7
09 843.725 844.55
10 844.575 845.4
11 845.425 846.25
12 846.275 8 47.1
13 847.125 847.95
14 847.975 848.8
15 848.825 849.65
16 849.675 850.5
17 850.525 851.35
18 851.375 852.2
19 852.225 853.05
20 853.075 853.9
21 853.925 854.75
22 854.775 855.6
23 855.625 856.45
24 856.475 857.3
25 857.325 858.15
26 858.175 859
27 859.025 859.85
28 859.875 860.7
29 860.725 861.55
30 861.575 862.4
31 862.425 863.25
32 863.275 864.1
33 864.125 864.95
*Kanalfrequenzangaben in MHz
48 49
UHF-5000 series manU al • geminidj.com UHF-5000 series manU al • geminidj.com

uhf-5100 UHF
EINZELDRAHTLOSSYSTEM
Das UHF Einzelkanal-Drahtlossystem UHF-5100 ist ein hochwertiges Audioprodukt, das sich unter den meisten Betriebsbedingungen durch eine
exzellente Performance auszeichnet und ein automatisches oder manuelles Einstellen der Frequenz erlaubt.
Die beiden unterschiedlichen Versionen arbeiten in unterschiedlichen
UHF-Frequenzbereichen von 669,075 MHz bis 697,95 MHz (US-Version)
bzw. 836,075 MHz bis 864,95 MHz (EU-Version).
VERFÜGBARE MODELLE:
UHF-5100M - ausgestattet mit einem Handmikrofonsender.
UHF-5100HL - ausgestattet mit einem Beltpack-Sender und einer Head-
set/Lavalier-Kombination.
GERÄT IN BETRIEB NEHMEN
1. Entfernen Sie das gesamte Verpackungsmaterial. Bewahren Sie Karton
und Verpackungsmaterial für zukünftige Transporte, z. B. Wartung, auf.
2. Schließen Sie den AC/DC-Adapter an die Rückseite des Empfängers
(12) und an eine geeignete Netzsteckdose an. Schalten Sie das Gerät
mit der Power On-Taste (2) ein. Die LC-Display leuchtet.
3. Ziehen Sie die Antenne (1) vertikal ganz heraus und richten Sie sie auf
die Stelle, an der Sie sprechen werden.
4. Schließen an der Rückseite des Empfängers ein XLR (9)- oder 6,35 mm
(10)-Kabel an und verbinden Sie das andere Kabelende mit einem Verstärker, Effektgerät oder Mischpult.
5. Öffnen Sie mit der Menu-Taste (4) das Menü und schalten Sie durch
Drücken der Menu-Taste zwischen Automatic Channel Selection und
Manual um.
MANUELLE EINSTELLUNG:
1. Drücken Sie zweimal MENU. Das LC-Display (7) zeigt GROUP
an und blinkt.
2. Drücken Sie SELECT (5), um die Gruppe schrittweise von
0 bis 33 zu erhöhen. Halten Sie die Taste gedrückt, um die
Gruppen im Schnelllauf durchzugehen.
3. Nach dem Einstellen der Gruppe können Sie das Menü mit
SYNC (6) verlassen oder 5 Sekunden warten, bis das Menü
automatisch verlassen wird.
4. Drücken Sie dreimal MENU. Das LC-Display zeigt CHANNEL
an und blinkt. Drücken Sie wiederholt SELECT, um die Kanalnummer schrittweise von 0 bis 33 zu erhöhen. Halten Sie
SELECT gedrückt, um die Kanäle im Schnelllauf durchzugehen.
5. Nach der Kanalwahl können Sie das Menü mit SYNC verlassen oder 5 Sekunden warten, bis das Menü automatisch verlassen wird.
6. Nachdem Sie mit canal die Gruppe eingestellt haben, drücken Sie SELECT, um die verfügbare Kanalfrequenz anzuzeigen.
6. Stellen Sie die Lautstärke mit dem vorderseitigen Pegelregler (3) ein.
Mit der Line/Mic Gain-Taste (11) können Sie zwischen Signalen mit Mikrofonpegel und Signalen mit Line-Pegel umschalten.
Hinweis: Der Übertragungsbereich zwischen Sender und Empfänger beträgt maximal 75 m.
AUTOMATISCHE KANALWAHL:
1. Drücken Sie einmal MENU. Das LC-Display (7) zeigt AUTOMATIC an und blinkt.
2. Drücken Sie SELECT (5). Der Empfänger sucht nach einem
klaren Kanal und hält an.
50 51
UHF-5000 series manU al • geminidj.com UHF-5000 series manU al • geminidj.com

uhf-5200 UHF
DOPPELDRAHTLOSSYSTEM
Das UHF Doppelkanal-Drahtlossystem UHF-5200 ist ein hochwertiges Audioprodukt, das sich unter den meisten Betriebsbedingungen durch eine
exzellente Performance auszeichnet und ein automatisches oder manuelles
Einstellen der Frequenz erlaubt.
Die beiden unterschiedlichen Versionen arbeiten in unterschiedlichen UHFFrequenzbereichen von 669,075 MHz bis 697,95 MHz (US-Version) bzw.
836,075 MHz bis 864,95 MHz (EU-Version).
VERFÜGBARE MODELLE:
UHF-5200M - ausgestattet mit zwei (2) Handmikrofonsendern.
UHF-5200HL - ausgestattet mit zwei (2) Beltpack-Sendern und zwei
(2) Headset/Lavalier-Kombinationen.
GERÄT IN BETRIEB NEHMEN
1. Entfernen Sie das gesamte Verpackungsmaterial. Bewahren Sie Karton
und Verpackungsmaterial für zukünftige Transporte, z. B. Wartung, auf.
2. Schließen Sie den AC/DC-Adapter an die Rückseite des Empfängers
(12) und an eine geeignete Netzsteckdose an. Schalten Sie das Gerät
mit der Power On-Taste (2) ein. Die LC-Display leuchtet.
3. Ziehen Sie die Antenne (1) vertikal ganz heraus und richten Sie sie auf
die Stelle, an der Sie sprechen werden.
4. Schließen an der Rückseite des Empfängers ein XLR (9)- oder 6,35 mm
(10)-Kabel an und verbinden Sie das andere Kabelende mit einem Verstärker, Effektgerät oder Mischpult.
5. Öffnen Sie mit der Menü-Taste (4) das Menü und schalten Sie durch
Drücken der Menü-Taste zwischen Automatic Channel Selection und
Manual um.
MANUELLE EINSTELLUNG:
1. Drücken Sie zweimal MENU. Das LC-Display (7) zeigt GROUP
an und blinkt.
2. Drücken Sie SELECT (5), um die Gruppe schrittweise von
0 bis 33 zu erhöhen. Halten Sie die Taste gedrückt, um die
Gruppen im Schnelllauf durchzugehen.
3. Nach dem Einstellen der Gruppe können Sie das Menü mit
SYNC (6) verlassen oder 5 Sekunden warten, bis das Menü
automatisch verlassen wird.
4. Drücken Sie dreimal MENU. Das LC-Display zeigt CHANNEL
an und blinkt. Drücken Sie wiederholt SELECT, um die Kanalnummer schrittweise von 0 bis 33 zu erhöhen. Halten Sie
SELECT gedrückt, um die Kanäle im Schnelllauf durchzugehen.
5. Nach der Kanalwahl können Sie das Menü mit SYNC verlassen oder 5 Sekunden warten, bis das Menü automatisch verlassen wird.
6. Nachdem Sie mit canal die Gruppe eingestellt haben, drücken Sie SELECT, um die verfügbare Kanalfrequenz anzuzeigen.
6. Stellen Sie die Lautstärke mit dem vorderseitigen Pegelregler (3) ein.
Mit der Line/Mic Gain-Taste (11) können Sie zwischen Signalen mit Mikrofonpegel und Signalen mit Line-Pegel umschalten.
Hinweis: Der Übertragungsbereich zwischen Sender und Empfänger beträgt maximal 75 m.
AUTOMATISCHE KANALWAHL:
1. Drücken Sie einmal MENU. Das LC-Display (7) zeigt AUTOMATIC an und blinkt.
2. Drücken Sie SELECT (5). Der Empfänger sucht nach einem
klaren Kanal und hält an.
52
UHF-5000 series manU al • geminidj.com UHF-5000 series manU al • geminidj.com
53

SENDERBETRIEB
HANDMIKROFONBETRIEB BELTPACK-BETRIEB
1. Schrauben Sie das Batteriefach (13) auf, um es zu öffnen. Legen Sie
die beiden mitgelieferten AA-Batterien entsprechend der im Batteriefach angezeigten Polaritätsmarkierung ein.
2. Halten Sie die Power/Mute-Taste (14) gedrückt, um den Sender einzuschalten. Die Sender-LED leuchtet grün.
AUTOMATISCHE KANALWAHL:
1. Lassen Sie das Batteriefach offen, zeigen Sie mit dem Infrarotsignal des Senders (17) in Richtung IR-Empfänger (8) und
drücken Sie die Sync-Taste (6).
2. Das Antennen-Symbol auf dem LCD-Display leuchtet.
3. Schließen Sie das Batteriefach (13).
MANUELLE EINSTELLUNG:
1. Halten Sie die SELECT-Taste (15) gedrückt, bis die ersten beiden Ziffern (Gruppennummer) zu blinken beginnen. Drücken
Sie SELECT, um die Gruppe schrittweise von 0 bis 33 zu erhöhen. Nachdem Sie die Gruppennummer auf den Empfänger eingestellt haben, warten Sie 5 Sekunden, bis die Gruppennummer nicht mehr blinkt.
2. Halten Sie erneut die SELECT-Taste gedrückt. Die letzten
beiden Ziffern (Kanalnummer) beginnen zu blinken. Drücken
Sie SELECT, um den Kanal schrittweise von 0 bis 33 zu erhöhen. Nachdem Sie die Kanalnummer auf den Empfänger eingestellt haben, warten Sie 5 Sekunden, bis die Kanalnummer
nicht mehr blinkt.
1. Schrauben Sie das Batteriefach (13) auf, um es zu öffnen. Legen Sie
die beiden mitgelieferten AA-Batterien entsprechend der im Batteriefach angezeigten Polaritätsmarkierung ein.
2. Halten Sie die Beltpack Power/Mute-Taste (18) gedrückt, um den Sender einzuschalten. Die Sender-LED leuchtet grün.
AUTOMATISCHE KANALWAHL:
1. Lassen Sie das Batteriefach offen, zeigen Sie mit dem Infrarotsignal des Senders (17) in Richtung IR-Empfänger (8) und
drücken Sie die Sync-Taste (6).
2. Das Antennen-Symbol auf dem LCD-Display leuchtet.
3. Schließen Sie das Batteriefach (13).
MANUELLE EINSTELLUNG:
1. Halten Sie die SELECT-Taste (19) gedrückt, bis die ersten beiden Ziffern (Gruppennummer) zu blinken beginnen. Drücken
Sie SELECT, um die Gruppe schrittweise von 0 bis 33 zu erhöhen. Nachdem Sie die Gruppennummer auf den Empfänger eingestellt haben, warten Sie 5 Sekunden, bis die Gruppennummer nicht mehr blinkt.
2. Halten Sie erneut die SELECT-Taste gedrückt. Die letzten
beiden Ziffern (Kanalnummer) beginnen zu blinken. Drücken
Sie SELECT, um den Kanal schrittweise von 0 bis 33 zu erhöhen. Nachdem Sie die Kanalnummer auf den Empfänger eingestellt haben, warten Sie 5 Sekunden, bis die Kanalnummer
nicht mehr blinkt.
3. Man kann das Mikrofon mit der Mic Power / Mute-Taste (14) stummschalten. Wenn Sie das Mikrofon über längere Zeit nicht benutzen, halten Sie die Mic Power / Mute-Taste (14) gedrückt, um es auszuschalten.
Das Mikrofon muss nach dem erneuten Einschalten nicht neu synchronisiert werden.
54
UHF-5000 series manU al • geminidj.com UHF-5000 series manU al • geminidj.com
3. Man kann das Mikrofon mit der Mic Power / Mute-Taste (18)
stummschalten. Wenn Sie das Mikrofon über längere Zeit nicht benutzen, halten Sie die Mic Power / Mute-Taste (18) gedrückt, um es auszuschalten. Das Mikrofon muss nach dem erneuten Einschalten nicht
neu synchronisiert werden.
55

TECHNISCHE DATEN
FEHLERBESEITIGUNG
Dieses Gerät arbeitet auf einer Frequenz, die von der FCC autorisiert wurde. Es gibt allerdings keine Garantien, dass bei bestimmten Installationen keine Interferenzen auftreten. Wenn dieses Gerät Interferenzen beim
Rundfunk- oder TV-Empfang verursacht, probieren Sie eine der folgenden
Maßnahmen aus:
1. Ändern Sie die Betriebsfrequenz des Geräts.
2. Richten Sie die Empfangsantenne neu aus oder positionieren Sie sie
neu.
3. Schließen Sie das Gerät an die Steckdose eines anderen Stromkreises an.
Alle Änderungen an dem Gerät, die ohne eine Autorisierung durch Gemini
vorgenommen werden, führen zum Verlust der Garantie.
e MpfÄnger (uhf-5100 und uhf-5200)
Frequenzbereich....................................... USA: 668 – 698 MHz
Europa: 835 – 865 MHz
Empfangssystem.............................................. PLL synthetisiert
Frequenzstabilität....................................................... +/- 0,005 %
Frequenzgang........................................50 Hz - 15 kHz +/- 3 dB
Geräuschspannungsabstand.............................................>95 dB
Modulationsmodus.......................................................................FM3
IF Frequenz.........................................................110 MHz; 10,7 MHz
Klirrfaktor.................................................................. 0,5 % (@ 1 kHz)
Empfindlichkeit…….….. 6,5 dBuV (FM: 40 kHz, S/N: ≥85 dB
Spannungsversorgung..........................................................12V DC
Audioausgang..........................................………..symmetrisch XLR
unsymmetrisch 6,35 mm
Abmessungen.................................................. 210 x 138 x 45 mm
sender (alle Modelle)
Frequenzbereich..................................... USA: 668 – 698 MHz
Europa: 835 – 865 MHz
RF Ausgangsleistung.......................................................<10 dBm
Oszillationsmodus........................................... PLL synthetisiert
Nebenschwingung.............................................. mehr als 50 dB
unter Trägerfrequenz
Frequenzstabilität................ ±0,005 % mit Quarzsteuerung
Max. Modulation…………………………………….…................. +/-70 kHz
Leistungsaufnahme..........................................................… 120 mA
Batterietyp.................................................. zwei (2) AA alkalisch
Batterielebensdauer.......................................................6 Stunden
sender (handgehalten)
Mikrofonelement........ unidirektionales Dynamikmikrofon
Richtcharakteristik..............................................…..................Niere
Abmessungen.....................................................…...250 x 38 mm
sender (headset / laValier)
Mikrofonelement.................................. Kondensatormikrofon
Richtcharakteristik..................................................…............ Niere
Abmessungen..................................................63 x 20 x 110 mm
56 57
UHF-5000 series manU al • geminidj.com UHF-5000 series manU al • geminidj.com


FCC ID: ZRIUHF-5000BP
IMPORTANT REGULATORY INFORMATION
This device complies with Part 15 of the FCC Rules: Operation is subject to the
following two conditions:
1. This device may not cause harmful interference and
2. This device must accept any interference that is received, including any
interference that may cause undesired operation.
WARNING:
Changes or modifications to this unit not expressly approved by the party
responsible for compliance could void the user’s authority to operate the
equipment.
 Loading...