

Pro Armor Polaris XP1000 Installation Instructions Manual
For further information on RZR Door Installations and Warnings please visit our website WW W.PR OARM OR.C OM or
Polaris XP1000 Stealth Doors (P141228)
Installation Instructions
WARNING
If you have questions about your installati n, are unable able to complete installati n, or your door is not working correctly
contact Pro Armor Customer Service or have an authorized dealer or trained technicians inspect your installation Pro Armor
recommends you do not use your UTV if installation of the Door is incomplete
Pro Armor Door Inserts are designed to work with the seat belt and other safety features provided by the manufacturer, along
with proper preparation and responsible driving from the driver Pro Armor recommends you follow all manufacturers’ instructions when preparing to ride and during operation
If you have any questions contact us at 1-888- 312 -7667 or WWW
PROARMOR COM
NOTE: DRILL AND 1/4” DRILL BIT NEEDED FOR INSTALL!!!
Di sclai mer
Please read : This product is sold without warranty expressed or implied No warranty or representation is made as to the products ability to protect the user / occupant from any injury or death in any manner of use The user assumes that risk.
The effectiveness of this equipment is directly related to the manner in which it is
installed, used, and / or maintained Proper installation is solely the responsibility
of the installer, and will not be assumed by Pro Armor.
Contact customer service at 1-888-31-ARMOR
For further information on RZR Door Installations and Warnings please visit our website WW W.PR OARM OR.C OM or
NOTICE
Due to the production variances and differing conditions of the frame, door adjustments may be necessary to avoid rubbing and proper fit Ensure proper fit before tightening hardware and continuing with installation! If adjustment is necessary, confirm all mounting points are secured
Installatio n Instr uctions:
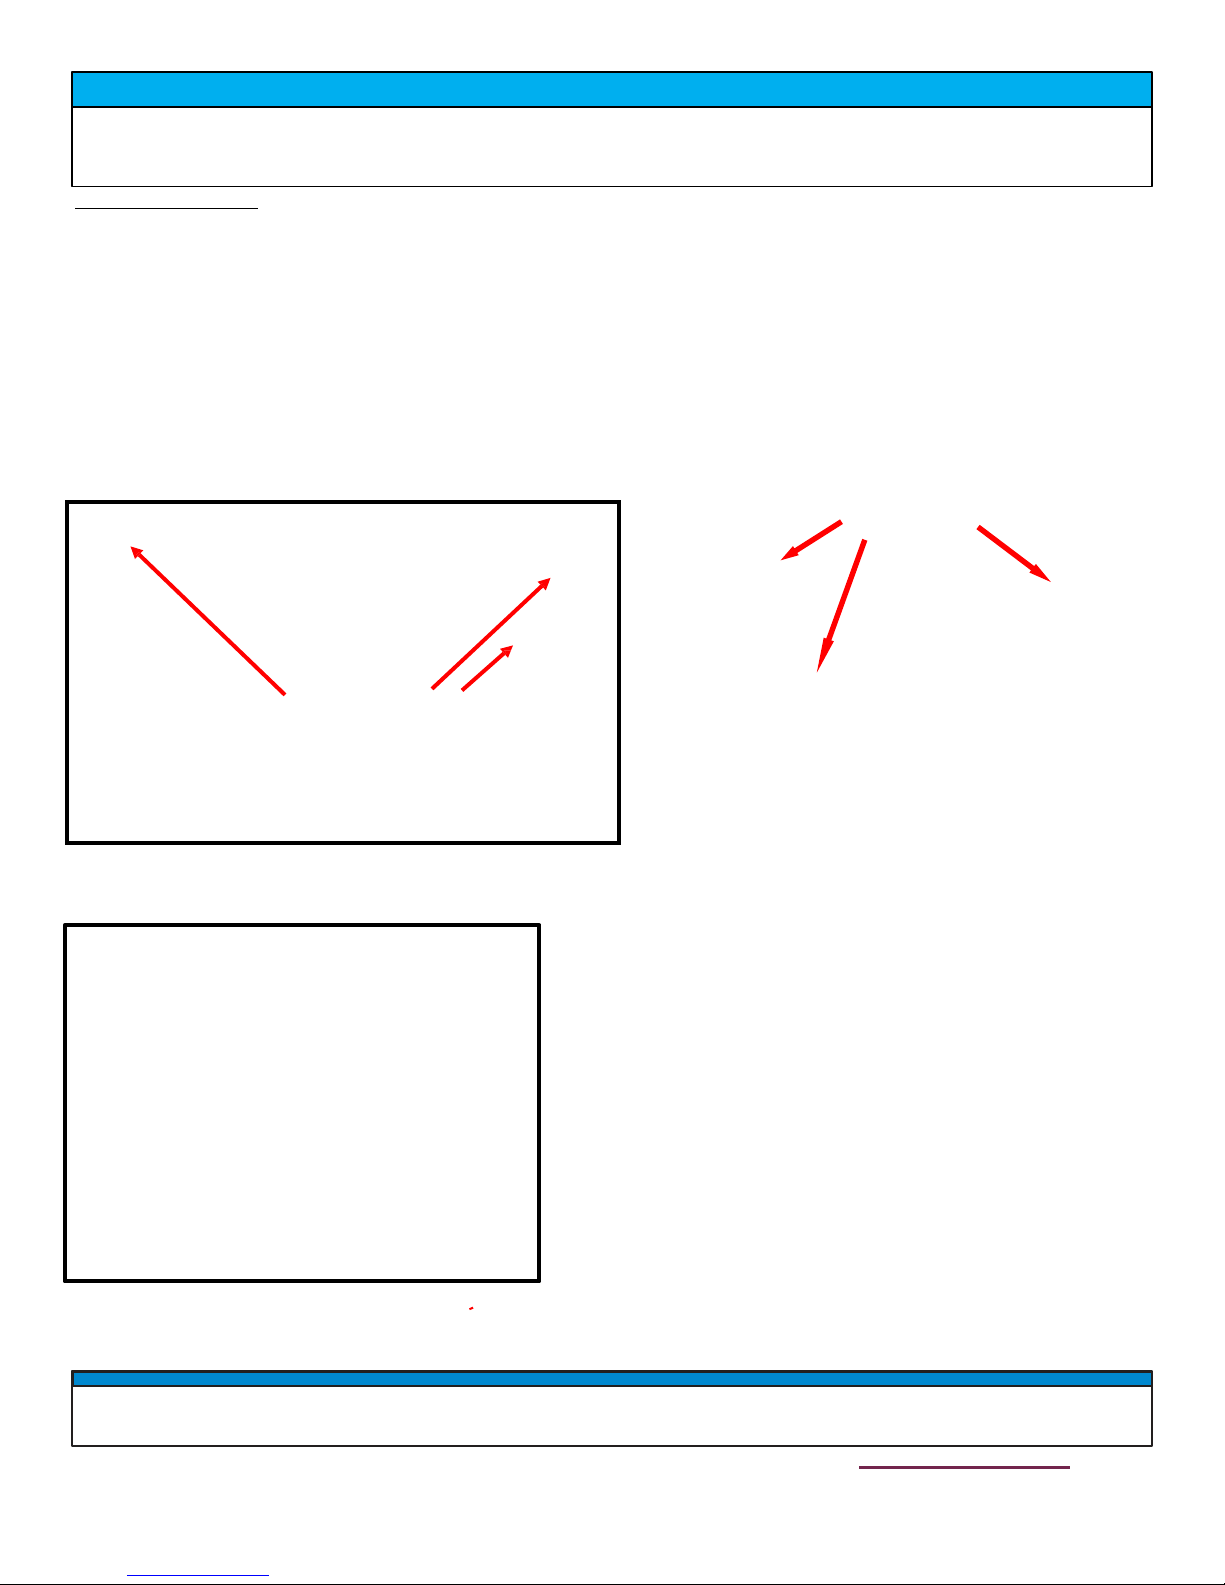
1. Make sure the stock doors are tight and fitment is good. The door must open and close with no issues.
Place the supplied adhesive rubber pads to the areas shown on the figure to the bottom right. Place them on the outer most flat surface
2.
area to aid in a quiet and solid mounting area.
3. Remove the top 2 hinge bolts and the upper panel bolt like shown in the figure on the bottom left.
Set the door panel over the stock door like shown below
4.
door. Make sure the panel lines up evenly with the plastic trim surrounding it. Also make sure the weather stripping makes a tight seal
when the door is in the closed position.
5.
Use a drill and 1/4” drill bit, then drill our your stock plastic door and use the supplied M6 Flange bolt and Cap nut to secure the panel to
the bottom of the stock door.
6.
Repeat for both si
des.
and tighten the bolts back up, so they mount the Aluminum panel to the stock
Rubber Adhesive Pads
Remove these bolts and
install door on these.
•
Due to the production variances and differing conditions of the frame, door adjustments may be necessary to avoid rubbing
and proper fit Ensur
e proper fit before tightening hardware and continuing with installation!
Contact customer service at 1-888-31-ARMOR
 Loading...