

Page 1
This manual covers the following models:
This manual covers TopTech models:
TT-N-721 and T721
• T721
OPERATING MANUAL
Congratulations on purchasing a
new thermostat. This thermostat was
designed to the highest reliability and
ease of use standards. Thank you for
choosing Pro1.
Table of Contents Page
Thermostat Quick Reference
Thermostat Operation
Set Time
More Information
Contact Us and Warranty Registration
2
3
4
5
6
Caution:
Equipment damage hazard
Do not operate the cooling
system if the outdoor
temperature is below 50˚ F
(10˚ C) to prevent possible
compressor damage.
Need Help?
For assistance with this product please visit
http://www.pro1iaq.com or call Pro1
Customer Care toll-free at 888-Pro1iaq
(776-1427) during normal business hours
(Mon-Fri 9 AM - 6 PM Eastern)
® U.S. Registered Trademark. Patents pending.
Copyright © 2006 Pro1 IAQ, Inc. All rights reserved.
Una versión española de este
manual puede ser descargada
en www.pro1iaq.com
Rev. 0850
1
Page 2
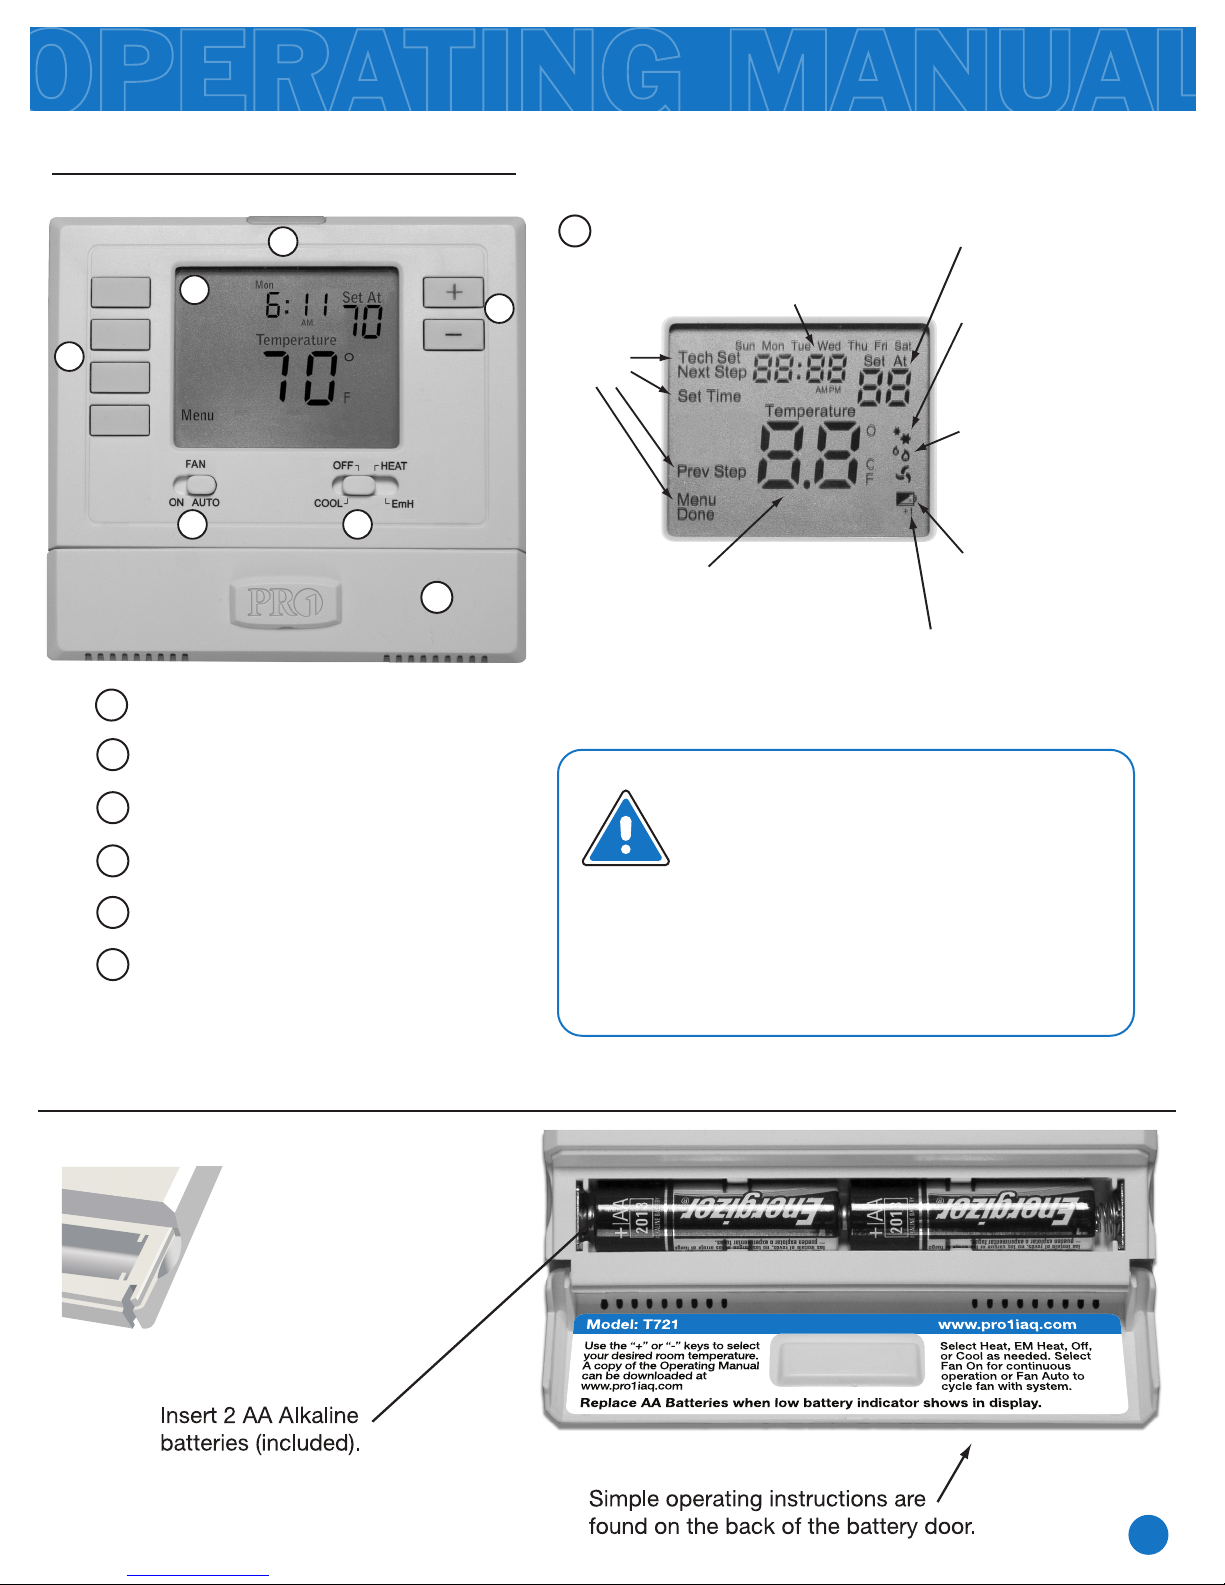
Getting to know your thermostat
2
1
7
THERMOSTAT QUICK REFERENCE
Displays the user
selectable setpoint
LCD
1
Days of the
week and time
6
Button
options
temperature.
System operation
indicators: The COOL,
HEAT or FAN icon will
display when the COOL,
HEAT or FAN is on.
NOTE: The compressor
delay feature is active if
these icons are flashing.
The compressor will not
turn on until the 5 minute
delay has elapsed.
3 4
2
Glow in the Dark Light Button
Fan Switch
3
System Switch
4
Easy Change Battery Door
5
Setpoint Buttons
6
User Buttons
7
Battery door information
Low Battery Indicator:
5
Indicates the current
room temperature.
+1 will appear in the
display when the auxiliary
heat is active.
Replace batteries when
indicator is shown.
Important:
The low battery indicator is displayed
when the AA battery power is low. If
the user fails to replace the battery
within 21 days, the thermostat
display will only show the low battery
indicator as a final warning before the
thermostat becomes inoperable.
Use the finger bevel on
the lower portion of the
side of the thermostat to
open the easy access
battery door.
2
Page 3
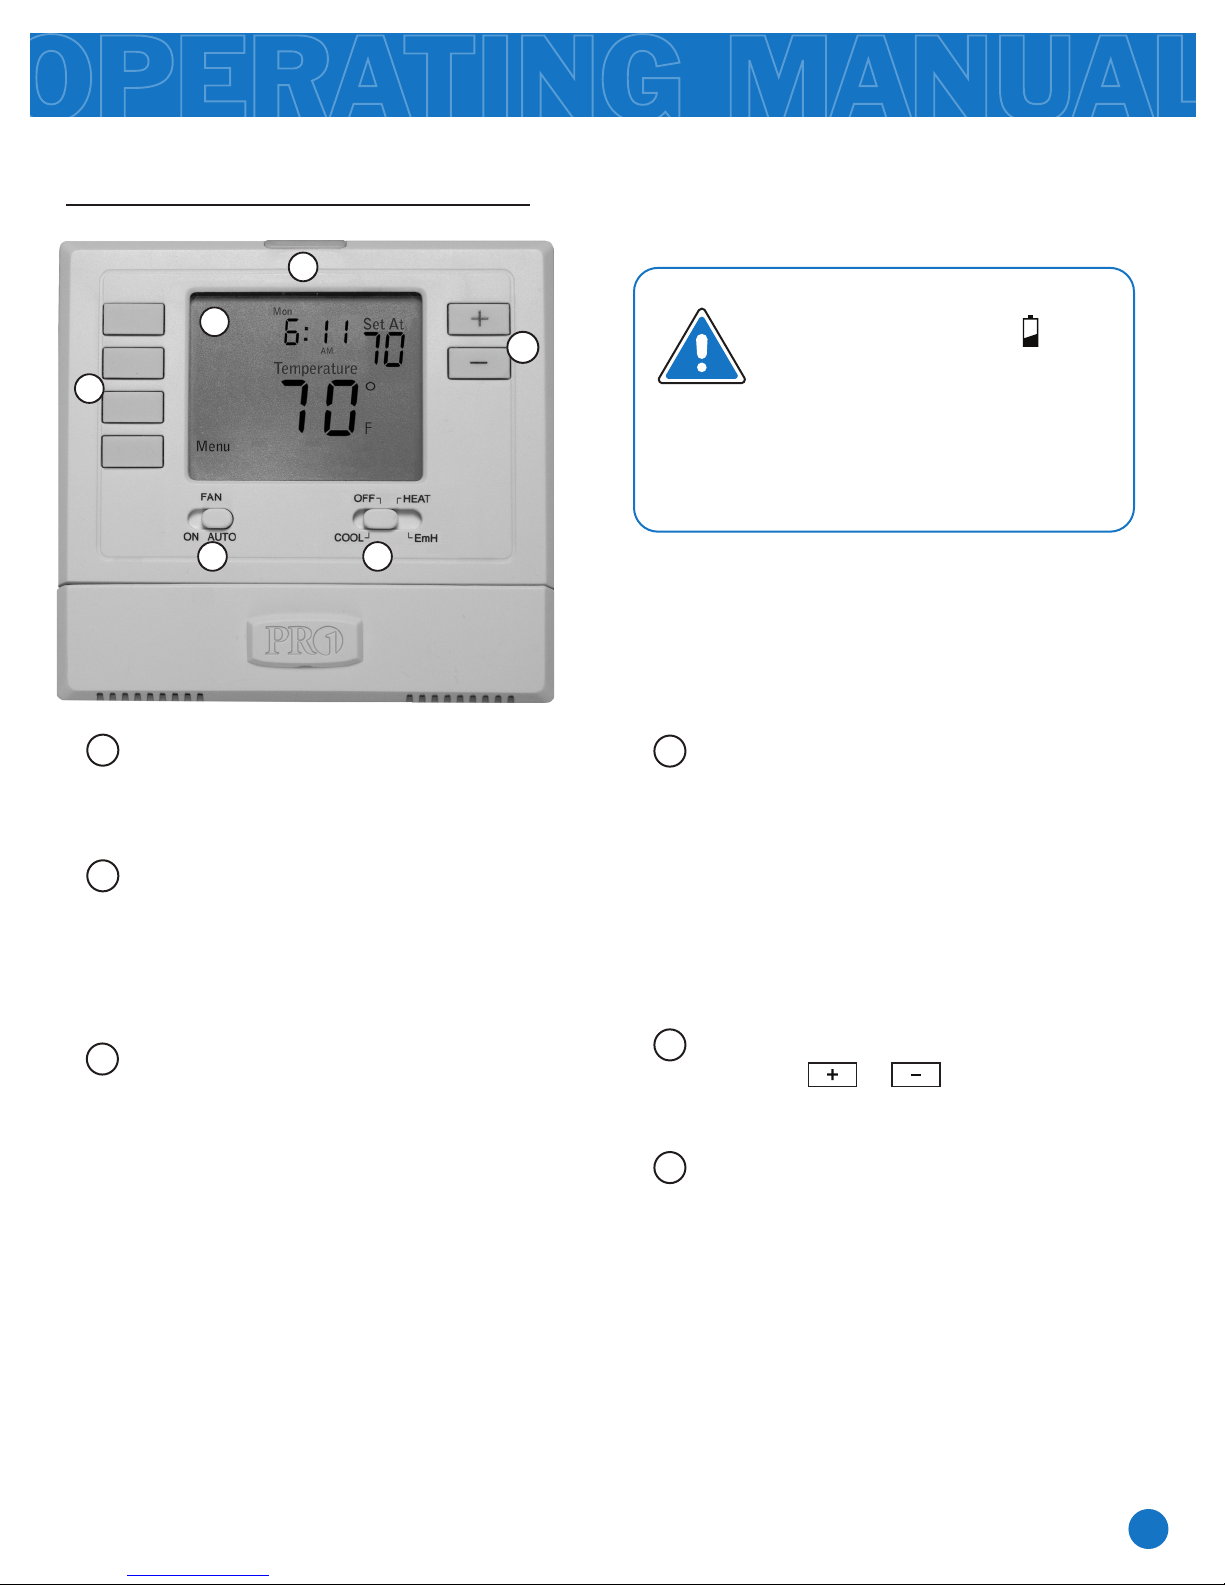
Easy to use controls
2
THERMOSTAT OPERATION
1
6
3 4
LCD Display:
1
See page 2 for details about this
display read out.
2
Glow in the Dark Light Button:
The glow in the dark light button will
self illuminate for several hours after
exposure to ambient light. This button
turns on the display light when pressed.
Caution:
5
4
System Switch:
Selects the operation mode of your
HVAC system. Selecting HEAT turns
on the heat mode. Selecting COOL
turns on the air conditioning mode.
Selecting OFF turns both heating
and cooling off. Selecting EmH locks
out your compressor and turns on
the secondary heat mode.
When the battery icon
appears replace your AA
batteries immediately. Failure
to do so may result in your
heating & cooling system
becoming inoperable.
Fan Switch:
3
Select ON or AUTO. ON will run
the fan continuously. AUTO will cycle
the fan on only when the heating or
cooling system is on.
5
Temperature Setpoint Buttons:
Press the or buttons to
select the desired room temperature.
6
User Buttons:
Use these buttons to set the time.
Refer to the next page for instructions.
3
Page 4
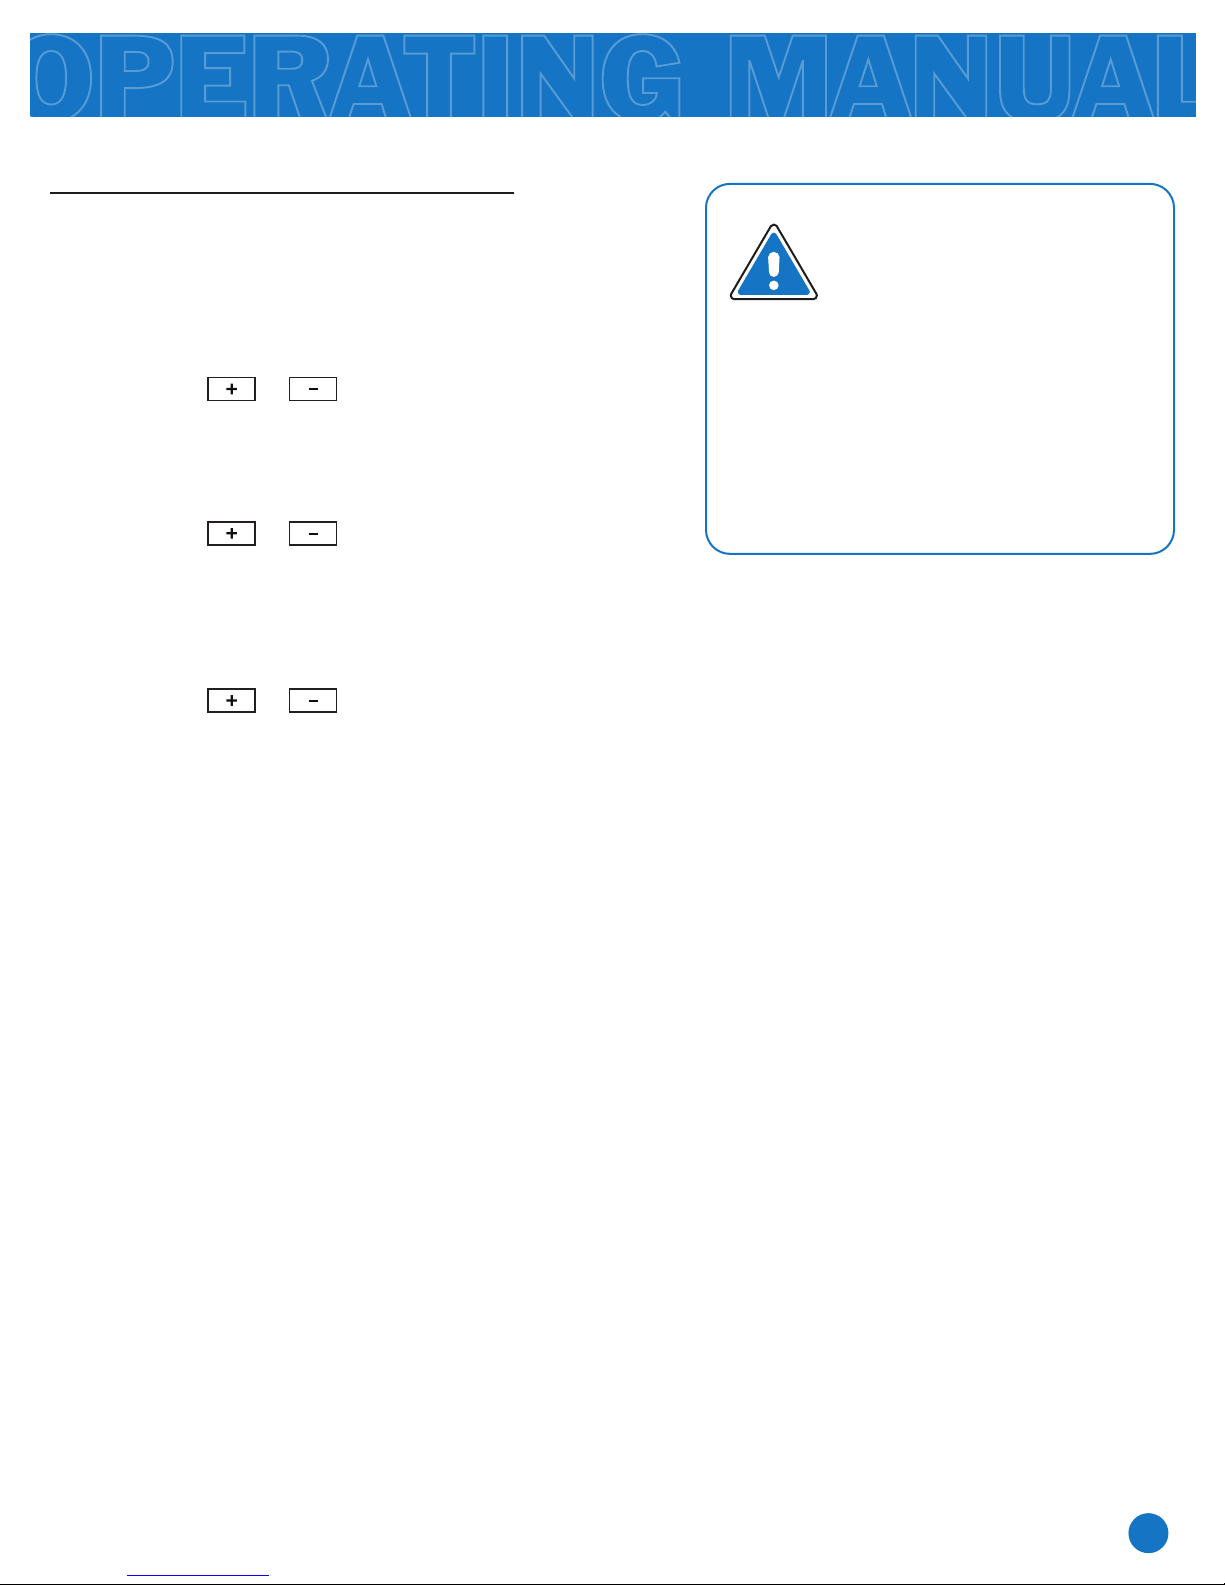
Set Time
SET TIME
Follow the steps below to set the current time:
1.
Press MENU
2.
Press SET TIME
3.
Day of the week will be flashing.
Use the or key to select the current
day of the week.
4.
Press NEXT STEP
5.
The current hour is flashing.
Use the or key to select the current
hour. When using 12-hour time, make sure the
correct a.m. or p.m. choice is selected.
6.
Press NEXT STEP
7.
Minutes are now flashing.
Use the or key to select
current minutes.
8.
Press DONE when completed
Important:
You will see a TECH SET
option after the MENU key
is pressed.
This TECH SET key is for
installer configuration and
should NOT be changed
unless you consult your
Professional Heating and
Air Conditioning Technician.
4
Page 5
MORE INFORMATION
Filter Change Reminder
If your installing contractor has configured
the thermostat to remind you when the air
filter needs changed, you will see FILT in the
display when your air filter needs changed.
FILT will be shown in the display after your
system has run long enough to require an air
filter change.
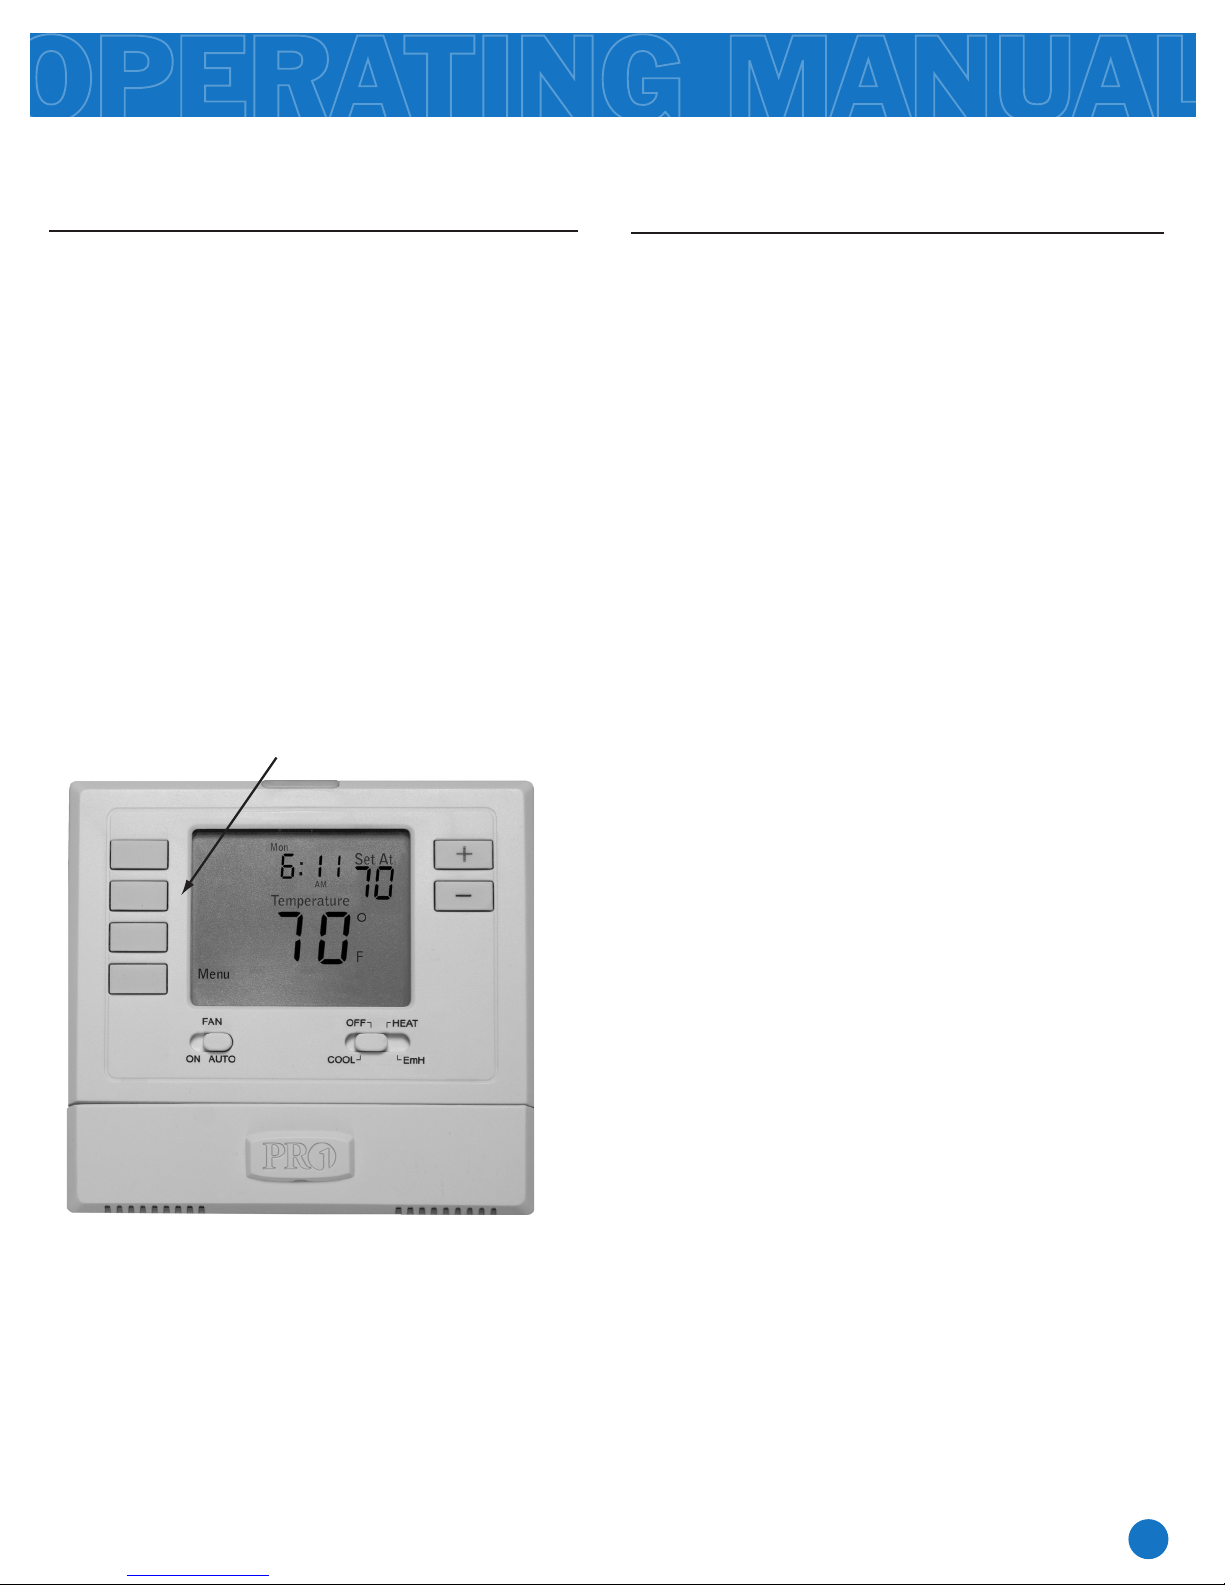
Resetting the filter change reminder: When
FILT reminder is displayed, you should
change your air filter and reset the reminder
by holding down the second button from the
top left side of the thermostat for 3 seconds.
Hold down for 3 seconds,
to reset filter reminder.
Understanding Thermostat Staging
Your thermostat will control two stages of
heating. The thermostat will try to maintain
your comfort setting using the first stage for
energy efficiency. The second stage of heating
will only be used if your thermostat cannot
maintain your comfort setting using only one
stage. When the second stage is used you will
see +1 in the display.
5
Page 6
CONTACT US AND WARRANTY INFORMATION
Pro1 IAQ Inc.
1111 S. Glenstone
Suite 2-100
Springeld, MO 65804
Toll-free: 1-888-Pro1iaq (776-1427)
Toll Number (Outside the USA): 330-821-3600
Web: http://www.pro1iaq.com
Hours of Operation: Monday - Friday 9 AM - 6 PM Eastern
Complete form and mail to:
Pro1 IAQ Inc.
1111 S. Glenstone
Suite 2-100
Springeld, MO 65804
Contact Us Information
Warranty Registration:
Your new Pro1 thermostat has a 5 year limited warranty. You must register your warranty
within 60 days of installation. You can register your new thermostat in 2 ways.
1
Go to www.pro1iaq.com, select warranty registration and fill out a short registration form.
- or -
2
Complete the form below and mail it to the address shown.
Pro1 IAQ Warranty Registration:
Name: ____________________________
Address: ____________________________
____________________________
City: ____________________________
State: ____________________________
Zip: _____________________
Thermostat Model: _____________________
Date Installed: _____________________
6
 Loading...