

Page 1
5010CE2.313eETaDJXv
Anleitung/Version:
197258_ DE_20191220
Bestell-Nr.: 4673 2111,
Nachdruck, auch aus zugs wei se,
nicht ge stat tet!
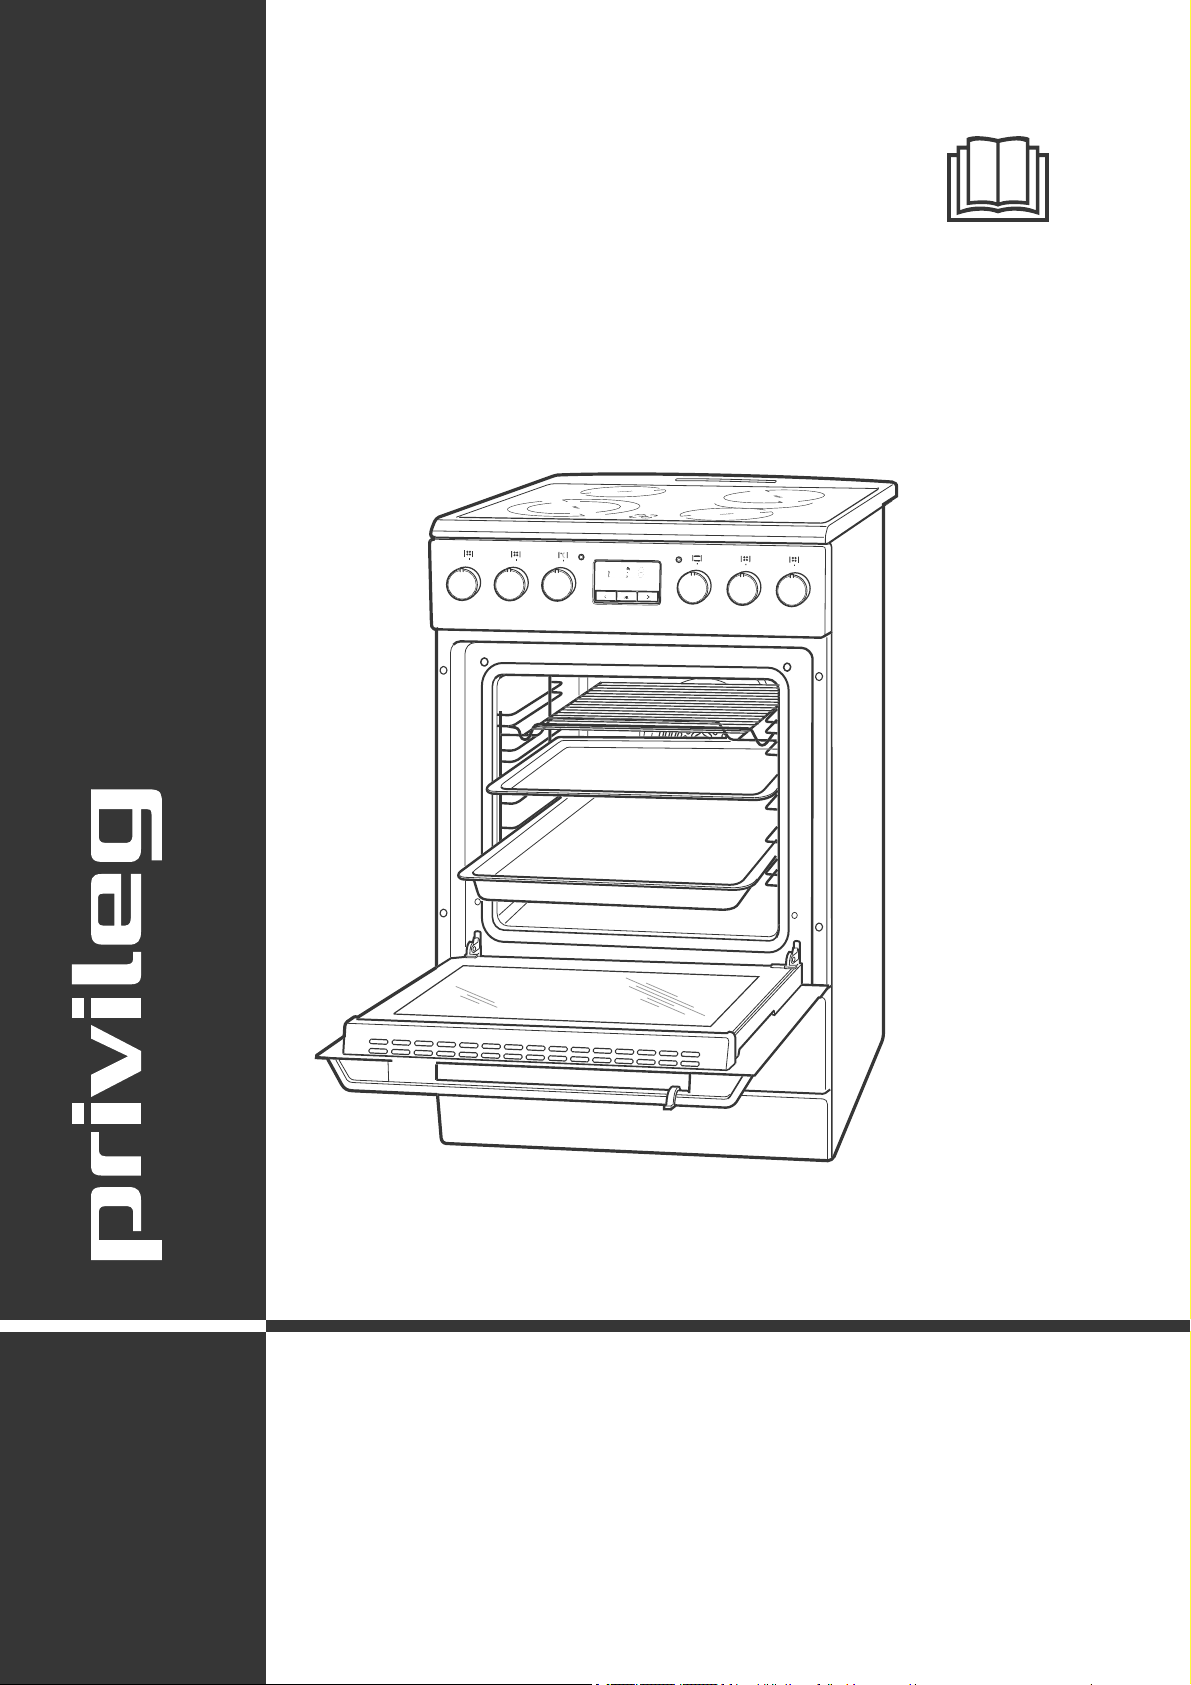
Gebrauchsanleitung
Standherd mit
Glaskeramik-Kochfeld und
Multifunktions-Backofen
Page 2

Seite DE-2 Inhaltsverzeichnis
Inhaltsverzeichnis
Informationen zum Aufstellen
und zur Installation fi nden Sie
ab Seite DE-28.
Lieferung . . . . . . . . . . . . . . . . . . . . . . . DE-3
Lieferumfang . . . . . . . . . . . . . . . . . . DE-3
Lieferung kontrollieren . . . . . . . . . . . DE-3
Verpackungs-Tipps . . . . . . . . . . . . . DE-3
Bedienelemente und Geräteteile . . . . DE-4
Sicherheit . . . . . . . . . . . . . . . . . . . . . . DE-5
Bestimmungsgemäßer Gebrauch . . DE-5
Symbol-/Begriffserklärung . . . . . . . . DE-5
Sicherheitshinweise . . . . . . . . . . . . . DE-5
Das Kochfeld . . . . . . . . . . . . . . . . . . . .DE-11
Glaskeramik-Kochfeld . . . . . . . . . . .DE-11
Das richtige Kochgeschirr . . . . . . . .DE-11
Kochzonen + Temperatur reg ler . . . DE-12
Netz-Kontrollleuchte . . . . . . . . . . . . DE-13
Tipps zum Garen und Energie
sparen . . . . . . . . . . . . . . . . . . . . . . DE-13
Kochfeld reinigen . . . . . . . . . . . . . . DE-14
Der Backofen . . . . . . . . . . . . . . . . . . DE-15
Vorbereitung . . . . . . . . . . . . . . . . . . DE-15
Das richtige Backofen-Geschirr . . . DE-15
Richtiger Umgang mit dem Ofen . . DE-15
Backblech und Fettpfanne . . . . . . . DE-15
Funktionsschalter . . . . . . . . . . . . . . DE-16
Temperaturregler . . . . . . . . . . . . . . DE-16
Backofen-Kontrollleuchte . . . . . . . . DE-17
Backofenbeleuchtung . . . . . . . . . . DE-17
Backofen ausschalten . . . . . . . . . . DE-18
Besonderheiten beim Auftauen . . . DE-18
Besonderheiten beim
Ansetzen von Hefeteig . . . . . . . . . . DE-18
Backofen reinigen . . . . . . . . . . . . . DE-18
Grundreinigung . . . . . . . . . . . . . . . DE-19
Gehäuseoberflächen reinigen . . . . DE-19
Garraum reinigen . . . . . . . . . . . . . . DE-19
Dampfreinigung . . . . . . . . . . . . . . . DE-19
Backblechträger reinigen . . . . . . . . DE-20
Backofenbeleuchtung auswechseln DE-22
Die Zeitschaltuhr . . . . . . . . . . . . . . . . DE-24
Uhrzeit einstellen/ändern . . . . . . . . DE-24
Halb- und Vollautomatik-Betrieb . . DE-24
Vollautomatischer Betrieb . . . . . . . DE-25
Kurzzeitwecker/Eieruhr . . . . . . . . . DE-26
Signalton ändern . . . . . . . . . . . . . . DE-27
Netzanschluss – Hinweise für
den Installateur . . . . . . . . . . . . . . . . . DE-28
Anschlussbedingungen . . . . . . . . . DE-28
Netzleitung anschließen . . . . . . . . . DE-28
Aufstellen. . . . . . . . . . . . . . . . . . . . . . DE-29
Voraussetzungen . . . . . . . . . . . . . . DE-29
Den Herd aufstellen . . . . . . . . . . . . DE-29
Kippschutz montieren . . . . . . . . . . DE-29
Transportsicherungen entfernen . . DE-30
Fehlersuchtabelle . . . . . . . . . . . . . . . DE-31
Unser Service . . . . . . . . . . . . . . . . . . DE-32
Beratung, Bestellung und
Reklamation . . . . . . . . . . . . . . . . . . DE-32
Reparaturen und Ersatzteile . . . . . DE-32
Umweltschutz . . . . . . . . . . . . . . . . . . DE-33
Elektro-Altgeräte umweltge-
recht entsorgen . . . . . . . . . . . . . . . DE-33
Verpackung . . . . . . . . . . . . . . . . . . DE-33
Tipps zum Energiesparen . . . . . . . DE-33
Tabelle Prüfgerichte . . . . . . . . . . . . . DE-34
Produktdatenblatt gemäß
VO (EU) Nr. 65/2014 . . . . . . . . . . . . . DE-35
Produktinformationen gemäß
VO (EU) Nr. 66/2014 . . . . . . . . . . . . . DE-36
Technische Daten . . . . . . . . . . . . . . . DE-38
Page 3

Lieferung
Seite DE-3
Bevor Sie das Gerät benutzen, le sen Sie bit te zu erst
die Si cher heits hin wei se und
die Ge brauchs an lei tung aufmerksam
durch. Nur so können Sie alle Funk tio nen si cher und zu ver läs sig nut zen.
Beachten Sie unbedingt auch die nationalen
Vorschriften in Ihrem Land, die zusätzlich
Lieferung
(a)
(b)
(c)
(d)
(e)
zu den in dieser Anleitung genannten Vorschriften gültig sind.
Bewahren Sie alle Sicherheitshinweise und
Anweisungen für die Zukunft auf. Geben Sie
alle Sicherheitshinweise und Anweisungen
an den nachfolgenden Verwender des Produkts weiter.
Lieferung kontrollieren
1. Transportieren Sie das Gerät an einen
geeigneten Standort und packen Sie es
dort aus.
2. Prüfen Sie, ob die Lieferung vollständig ist.
3. Kontrollieren Sie, ob das Gerät Transportschäden aufweist.
4. Sollte die Lieferung unvollständig sein
oder das Gerät einen Transportschaden
aufweisen, nehmen Sie bitte Kontakt mit
unserem Service auf, siehe Seite DE-32.
Lieferumfang
Standherd mit
(a) 1× Glaskeramik-Kochfeld
(b) 1× Backofen
(c) 1× Grillrost
(d) 1× Backblech
(e) 1× Fettpfanne
(f) 1× Kippschutz, siehe Seite DE-29
1× Gebrauchsanleitung
1× Kurzanleitung
1× Broschüre „Backen - Braten - Garen“
WARNUNG!
Stromschlaggefahr!
Nehmen Sie nie ein beschädigtes
Gerät in Betrieb.
Verpackungs-Tipps
Sollten es Ihre räumlichen Verhältnisse zulassen, empfehlen wir
Ihnen, die Verpackung zumindest
während der Garantiezeit aufzubewahren.
Sollte das Gerät zur Reparatur eingeschickt
werden müssen, ist es nur in der Originalverpackung ausreichend geschützt.
Wenn Sie sich von der Verpackung trennen
möchten, entsorgen Sie diese bitte umweltfreundlich.
Page 4
Seite DE-4 Bedienelemente und Geräteteile
ge
)
)
)
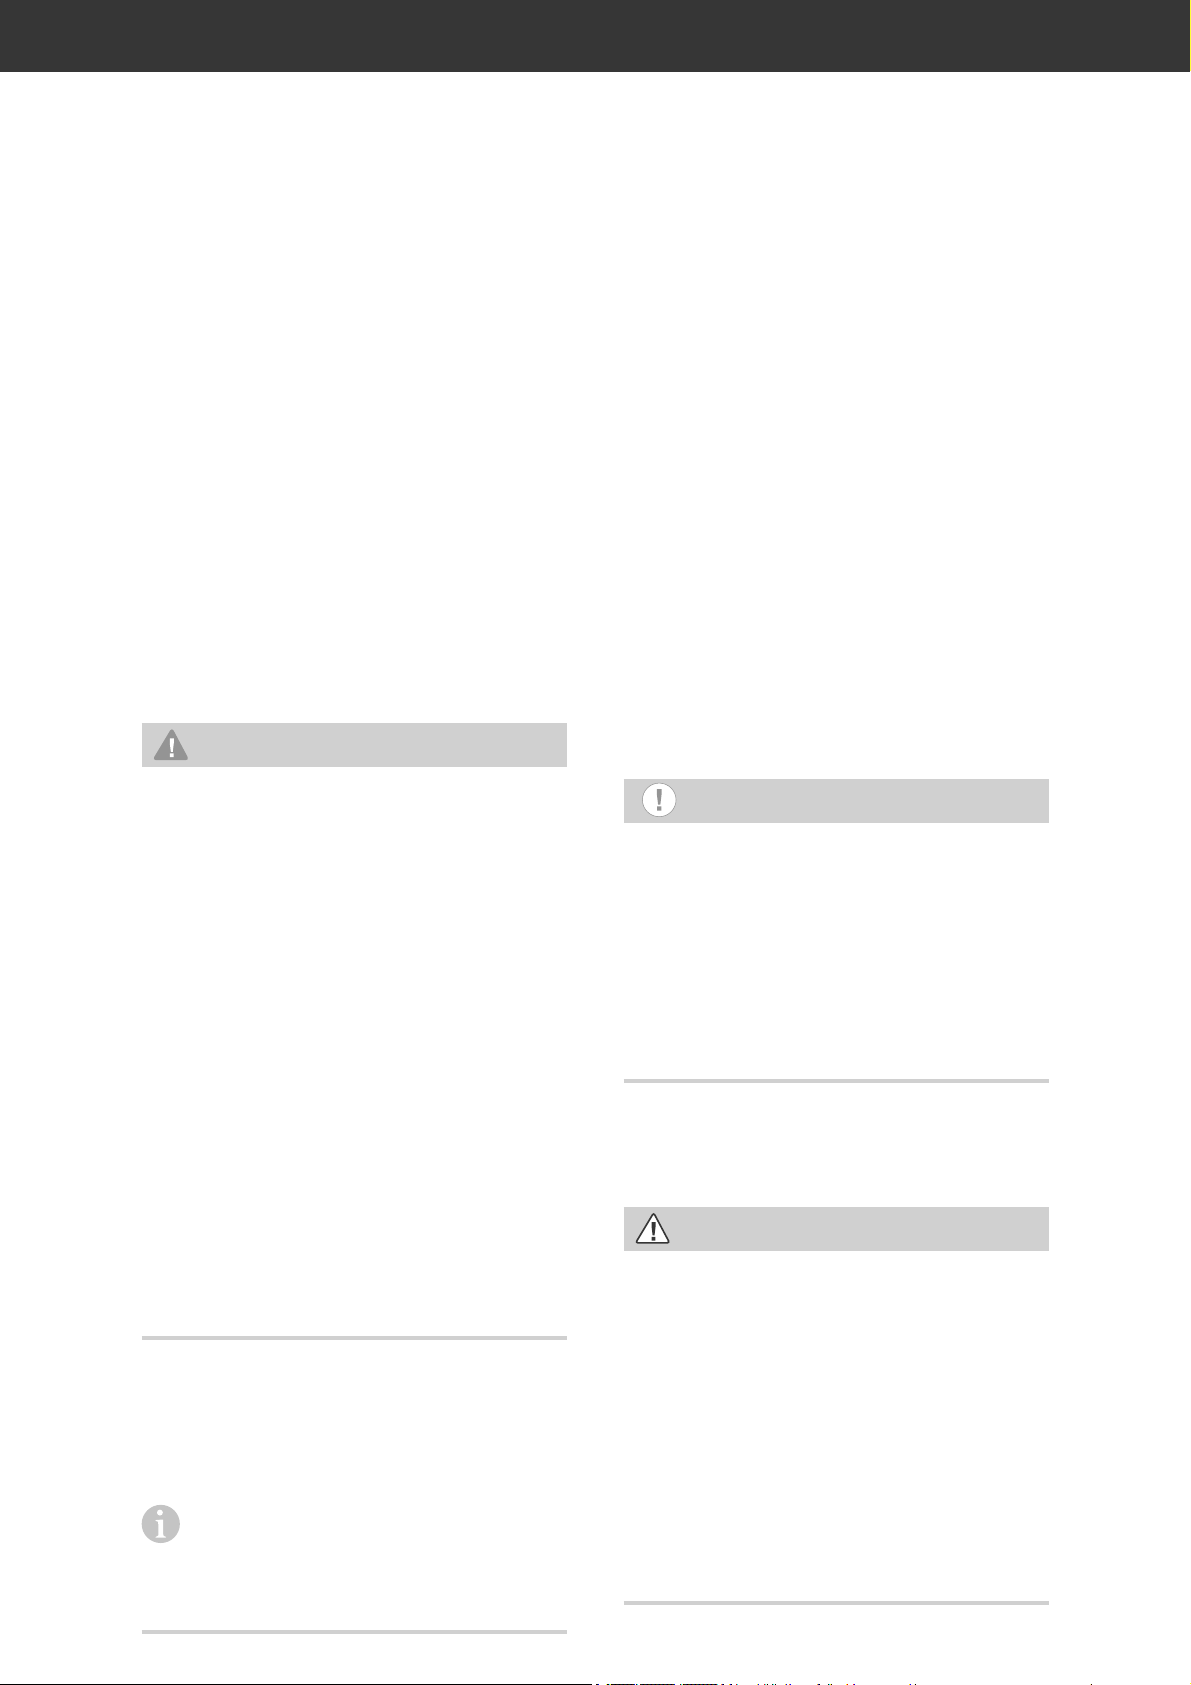
Temperaturregler für Kochzone (2)
ofe
euchte
e
)
)
)
)
)
Funktionsschalter für die
)
Temperaturregler für den
ackofen
g
ff17) G
n
)
0
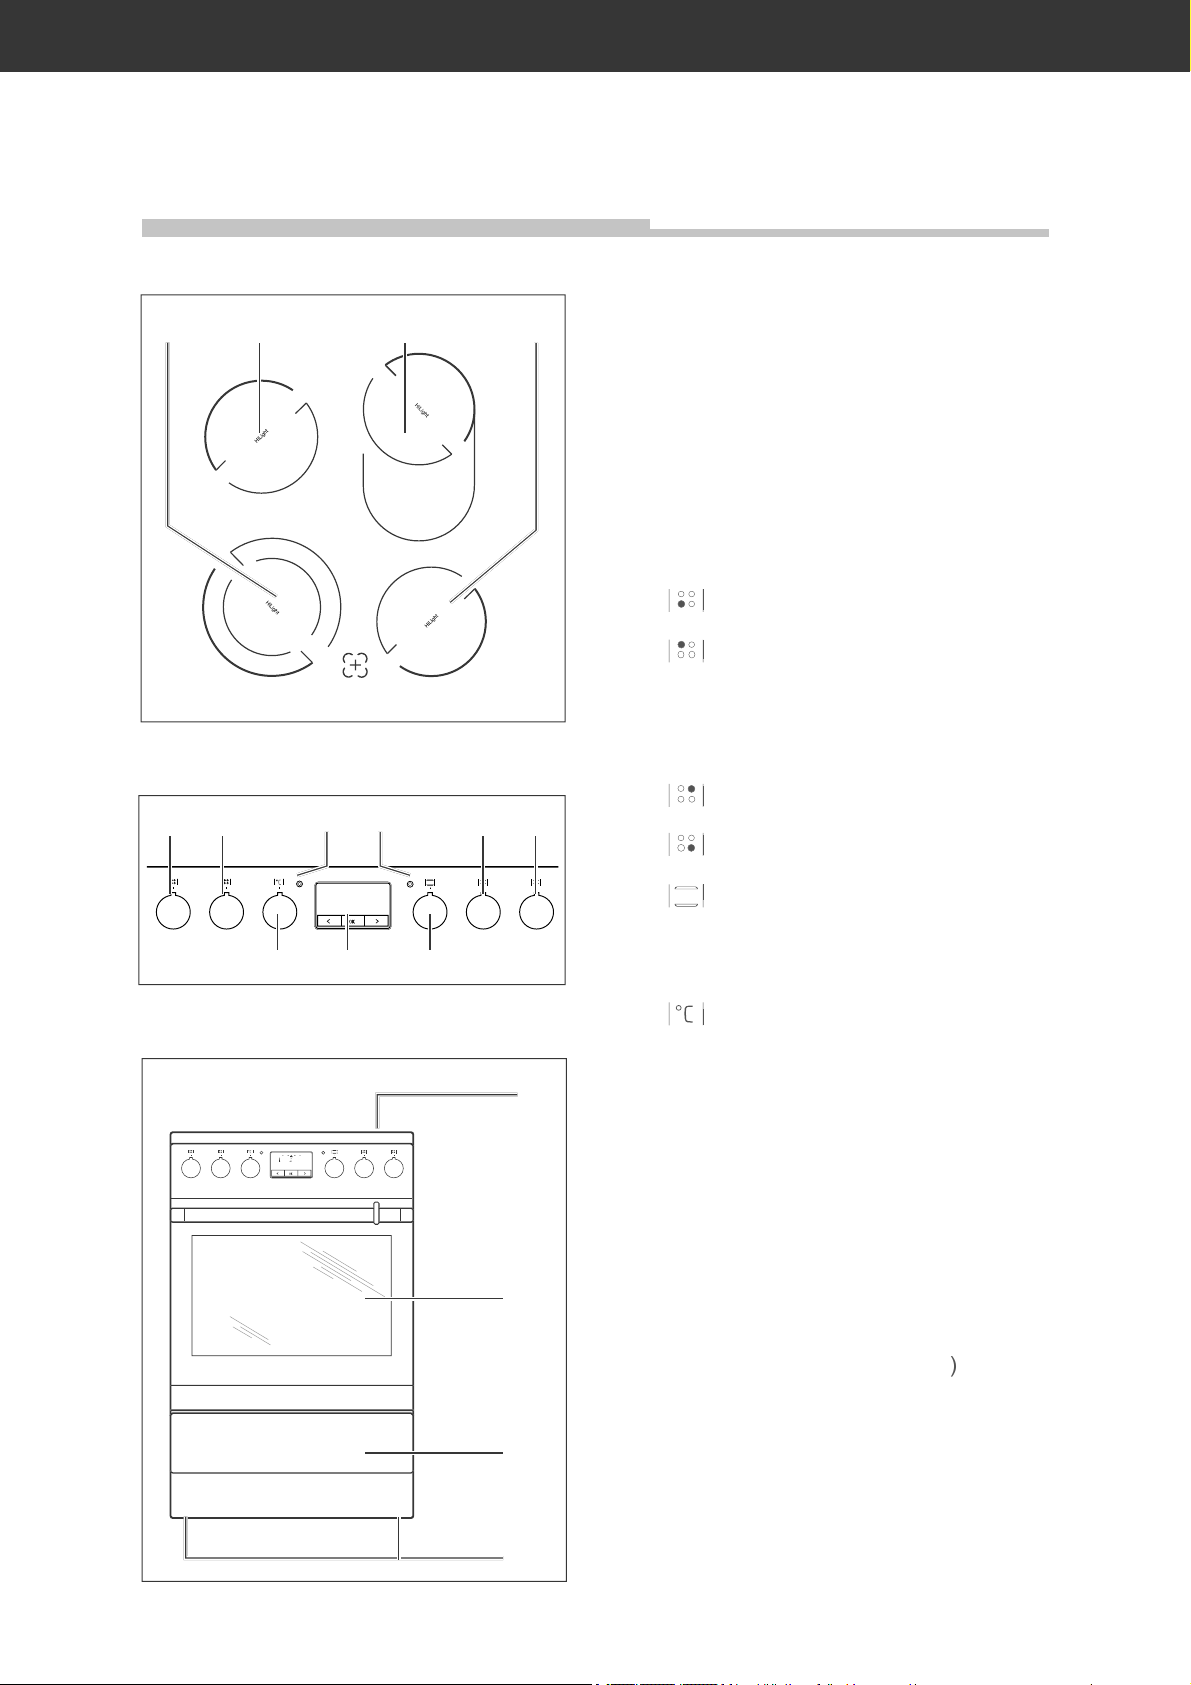
Bedienelemente und Geräteteile
(1) (2) (3) (4)
(5)
(6) (7)
(8)
(9) (10) (11)
1) Kochzone links vorne,
2) Kochzone links hinten,
3) Kochzone rechts hinten,
4) Kochzone rechts vorne,
5) Restwärmeanzei
6
7
8)Rote Back
9) Gelbe Netz-Kontrollleucht
10
11
Temperatur regler für Kochzone (1
n-Kontrolll
Temperatur regler für Kochzone (3
Temperatur regler für Kochzone (4
12,0 / 18,0 cm
14,5 cm
14,0 × 25,0 cm
14,5 cm
(14)
12
(12)(13)
(15)
(16)
(17)
13) Zeitschaltuhr
14
15) Wrasenabzu
16) Backofentür mit Sichtfenster und
18) Schraubfüße (hier nicht zu sehen
19) Backblechträger (eite DE-2
Beheizungsart des Backofens
B
Türgri
eschirrwage
(18)
Page 5

Sicherheit
Sicherheit
Seite DE-5
Bestimmungsgemäßer
Gebrauch
Das Standherd ist zum Kochen, Braten, Backen, Grillen, Warmhalten und Auftauen von
Speisen bestimmt.
Zum Auftauen von rohem Fleisch, Geflügel
oder Fisch sollte der Backofen nicht verwendet werden.
Das Gerät ist zur Verwendung im privaten
Haushalt konzipiert und ist nicht für eine gewerbliche Nutzung oder Mehrfachnutzung
(z. B.: Ver wendung durch mehrere Parteien in
einem Mehrfamilienhaus) ausgelegt.
Verwenden Sie das Gerät ausschließlich wie
in dieser Gebrauchsanleitung beschrieben.
Jede andere Verwendung gilt als nicht bestimmungsgemäß und kann zu Sach- oder
sogar Personenschäden führen. Der Hersteller übernimmt keine Haftung für Schäden, die
durch nicht bestimmungsgemäßen Gebrauch
entstanden sind.
Der Backofen eignet sich nicht zum Beheizen
eines Raumes. Die Leuchte im Backofen ist
nur zur Beleuchtung des Garraums vorgesehen und nicht als Raumbeleuchtung.
VORSICHT
Dieser Signalbegriff bezeichnet eine Gefährdung mit einem niedrigen Risikograd, die,
wenn sie nicht vermieden wird, eine geringfügige oder mäßige Verletzung zur Folge haben
kann.
HINWEIS
Dieser Signalbegriff warnt vor möglichen
Sachschäden.
Dieses Symbol verweist auf nützliche
Zusatzinformationen.
Sicherheitshinweise
In diesem Kapitel finden Sie allgemeine Sicherheitshinweise, die Sie zu Ihrem eigenen
Schutz und zum Schutz Dritter stets beachten
müssen. Beachten Sie zusätzlich die Warnhinweise in den einzelnen Kapiteln zu Bedienung, Einbau, Installation etc.
WARNUNG
Die Backofentür darf nicht als Stütze, Sitzfläche oder Trittbrett verwendet werden.
Symbol-/Begriffserklärung
Folgende Si gnal begriffe finden Sie in dieser
Gebrauchsanleitung.
WARNUNG
Dieser Signalbegriff bezeichnet eine Gefährdung mit einem mittleren Risikograd, die,
wenn sie nicht vermieden wird, den Tod oder
eine schwere Verletzung zur Folge haben
kann.
Risiken im Umgang mit
elektrischen Haushaltsgeräten
Stromschlaggefahr!
Das Berühren spannungsführender
Teile kann zu schweren Verletzungen
oder zum Tod führen.
■ Gerät nur in Innenräumen verwen-
den. Nicht in Feuchträumen oder im
Regen betreiben.
■ Ist die Oberfl äche gerissen, ist das
Gerät abzuschalten, um einen möglichen elektrischen Schlag zu vermeiden.
Page 6

Seite DE-6 Sicherheit
■ Gerät nicht in Betrieb nehmen oder
weiter betreiben, wenn es
– sichtbare Schäden aufweist, z. B.
die Anschlussleitung defekt ist;
– Rauch entwickelt oder verbrannt
riecht;
– ungewohnte Geräusche erzeugt.
In einem solchen Fall Netzstecker ziehen
und unseren Service kontaktieren (siehe
Seite DE-32).
■ Netzkabel / Netzstecker
– Netzkabel so verlegen, dass es nicht
zur Stolperfalle wird.
– Netzkabel nicht knicken oder klem-
men und nicht über scharfe Kanten
legen.
– Wenn das Netzkabel des Geräts be-
schädigt ist, muss es durch den Hersteller, dessen Kundendienst oder
eine qualifizierte Fachkraft ausgetauscht werden.
– Netzkabel nicht verlängern oder
verändern.
– Netzstecker und -kabel von offenem
Feuer und heißen Flächen fernhalten.
■ Der Anschluss an das Stromnetz darf
nur durch eine autorisierte Elektrofachkraft erfolgen, die beim örtlichen
Energieversorgungsunternehmen
zugelassen ist (siehe „Unser Service“
auf Seite DE-32). Nur so haben Sie unsere Garantie und ausreichende Sicherheit. Nicht autorisierte Personen
dürfen den Netz anschluss nicht vor neh men. Sie können sich und andere Benutzer in Le bens ge fahr brin gen!
Das gilt auch für das Tren nen vom
Stromnetz und den Aus bau des Altgeräts.
■ Da das Gerät nicht über eine zugäng-
liche Trennvorrichtung allpolig vom
Netz getrennt werden kann, muss
eine allpolige Trennvorrichtung gemäß Überspannungskategorie III in
der Hausinstallation mit mindestens
3 mm Kontaktabstand vorgeschaltet
sein; hierzu zählen Sicherungen, LSSchalter und Schütze.
■ Vor dem Anschluss des Geräts die
betreffenden Strom kreise ausschalten (Sicherungen ausschalten bzw.
herausdrehen) .
■ Niemals das Gehäuse öffnen.
■ Nie mals versuchen, das de fek te oder
ver meint lich defekte Gerät selbst zu
re pa rie ren. Sie kön nen sich und spä te re Be nut zer in Gefahr brin gen. Nur
au to ri sier te Fach kräf te dürfen die se
Re pa ra tu ren ausführen.
■ Das Gerät ist nicht für den Betrieb
mit einer externen Zeitschaltuhr oder
einem externen Fernwirk system bestimmt.
■ Keine Gegenstände in oder durch die
Gehäuseöffnungen stecken und sicherstellen, dass auch Kinder keine
Gegenstände hineinstecken können.
■ Backofen-Beleuchtung:
– Vor dem Auswechseln der Lampe
sicherstellen, dass das Gerät abgeschaltet ist, um einen möglichen
Schlag zu vermeiden.
– Zunächst den Backofen ausschal-
ten, dann die Sicherungen herausdrehen bzw. ausschalten.
– Glühlampe erst auswechseln, wenn
der Backofen nicht mehr heiß ist.
Page 7

Sicherheit
Seite DE-7
Risiken für Kinder
Erstickungsgefahr!
■ Kinder nicht mit der Verpackungsfolie
spielen lassen. Diese können sich darin verfangen oder ersticken.
■ Kinder daran hindern, Kleinteile vom
Gerät abzuziehen oder aus dem Zubehörbeutel zu nehmen und in den
Mund zu stecken.
Risiken für bestimmte
Personengruppen
Gefahren für Kinder und Personen mit
verringerten physischen, sensorischen
oder mentalen Fähigkeiten (beispielsweise teilweise Behinderte, ältere Personen mit Einschränkung ihrer physischen und mentalen Fähigkeiten)
oder Mangel an Erfahrung und Wissen
(beispielsweise ältere Kinder)!
■ Dieses Gerät kann von Kindern ab
8 Jahren sowie von Personen mit reduzierten physischen, sensorischen
oder mentalen Fähigkeiten oder Mangel an Erfahrung und/oder Wissen benutzt werden, wenn sie beauf sichtigt
werden oder bezüglich des sicheren
Gebrauchs des Geräts unterwiesen
wurden und die daraus resultierenden
Gefahren verstanden haben.
■ Kinder dürfen nicht mit dem Gerät
spielen und keinen Zugriff auf das
Gerät haben, wenn sie unbeaufsichtigt sind.
■ Reinigung und Wartung durch den
Benutzer dürfen nicht von Kindern
durchgeführt werden, es sei denn, sie
werden beauf sichtigt.
■ Kinder vom Türglas fernhalten! Das
Türglas kann im Betrieb sehr heiß
werden – Verbrennungsgefahr!
VORSICHT
Risiken im Umgang mit dem Gerät
Verbrennungsgefahr!
Während des Gebrauchs werden das Gerät
und seine berührbaren Teile heiß.
■ Vorsicht ist geboten, um das Berüh-
ren von Heizelemente zu vermeiden.
■ Kinder jünger als 8 Jahre müssen
ferngehalten werden, es sei denn, sie
werden ständig beaufsichtigt.
■ Kochfeld
– Die Kochzonen heizen sich im Be-
trieb stark auf und sind auch nach
dem Ausschalten noch heiß.
– Aus dem Wrasen abzug (Lüftung)
strömt beim Back ofen betrieb heißer Dampf.
■ Backofen
– Wasser nie direkt in den heißen
Backofen gießen. Durch den entstehenden Wasserdampf besteht
Verbrühungsgefahr und die Emaille
kann beschädigt werden.
– Heißes Wasser aus dem Backofen
unbedingt abkühlen lassen, bevor
Sie es ausgießen.
– Den Backofen während des Grillens
nicht unbe auf sichtigt lassen. Kin der fernhalten!
■ Die Kochzonen bzw. den Backofen
vollständig abkühlen lassen, bevor Sie
mit der Reinigung beginnen.
Page 8

Seite DE-8 Sicherheit
Brandgefahr!
■ Kochfeld
Unbeaufsichtigtes Kochen auf Kochmulden mit Fett und Öl kann gefährlich sein und zu Bränden führen.
– NIEMALS versuchen, ein Feuer mit
Wasser zu löschen, sondern das Gerät ausschalten und dann die Flammen zum Beispiel mit einem Deckel
oder einer Löschdecke abdecken.
– Wenn Sie Speisen mit Al ko hol zu-
bereiten, lassen Sie den Herd nicht
ohne Auf sicht! Die Spei sen kön nen
sich selbst ent zün den.
– Niemals Gegenstände auf der
Kochfläche lagern.
– Der Kochvorgang ist zu überwa-
chen. Ein kurzer Kochvorgang ist
ständig zu überwachen.
– Es dürfen nur Kochmuldenschutzgit-
ter oder Kochmuldenabdeckungen
des Kochmuldenherstellers oder die
vom Hersteller in der Gebrauchsanweisung des Gerätes freigegebenen
Kochmuldenschutzgitter oder Kochmuldenabdeckungen oder eingebaute Kochmuldenschutzgitter oder
Kochmuldenabdeckungen verwendet werden. Die Verwendung von ungeeigneten Kochmuldenschutzgittern oder Kochmulden abdeckungen
kann zu Unfällen führen.
■ Backofen
– Den Backofen grundsätzlich nur
mit geschlossener Backofentür betreiben.
– Braten oder Ku chen im Backofen
nicht mit Papier abdecken. Gargut,
Backpapier und -folien nicht mit
den Heizkörpern in Be rüh rung kom men lassen.
– Grillgut nicht zu weit nach hinten
an das Ende des Heizkörpers legen.
Dort ist es be son ders heiß. Fettes
Grillgut kann Feu er fangen.
– Temperaturempfindliche, brenn-
bare oder feuergefährliche Gegenstände nicht im Backofen aufbewahren! Bei unbeabsichtigtem
Einschalten können sie sich verformen oder entzünden.
– Backofen nicht als Stauraum ver-
wenden.
– Bei Feuer im Backofen: Backofentür
nicht öffnen!
■ Das Gerät nach dem Er lö schen des
Feu ers durch unseren Service über prü fen lassen (siehe Seite DE-32).
■ Zeitschaltuhr
– Vor dem Start des Zeitschaltuhrbe-
triebs alle Haushaltsangehörigen
informieren, damit nie mand etwas
in den Back ofen legt.
– Im Zeitschaltuhrbetrieb niemals
un be auf sich tigt grillen!
– Den Back ofen während des Zeit-
schaltuhrbetriebs überwachen, um
ein Überlaufen und An bren nen zu
verhindern. Beachten Sie, dass sich
Fette, Öle und Alkohol beim Erhitzen entzünden können.
Gesundheitsgefahr!
■ Fleisch, Gefl ügel und Fisch nicht im
Back ofen auftauen. Das Gefriergut frühzeitig aus dem Gefrierfach
nehmen und es abgedeckt im Kühlschrank auftauen lassen. Die Auf tau fl üs sig keit muss dabei abfl ießen
können, da sich sonst schädliche Mikroorganismen bilden können.
Page 9

Sicherheit
Seite DE-9
Acrylamid steht im Verdacht, krebserzeugend zu sein. Acrylamid entsteht bei
zu starker Erhitzung von Stärke, z. B. in
Kartoffeln (Pommes Frites, Chips), Keksen, Toast, Brot etc.
■ Die Gardauer möglichst kurz halten.
■ Die Lebensmittel nur leicht anbräu-
nen, starke Verfärbung vermeiden.
■ Pommes Frites eher größer schneiden
und bei maximal 180 °C zubereiten.
■ Bei Backwaren hilft das Einstreichen
mit Eiweiß oder Eigelb die Bildung
von Acrylamid zu verringern.
Kipp- und Verletzungsgefahr!
Wird die offene Backofentür mit einem
schweren Gewicht belastet, kann das
Gerät nach vorne kippen. Es besteht
Verletzungsgefahr durch herunterfallende Gegenstände.
■ Backofentür daher nicht als Stütze,
Sitzfl äche oder Trittbrett verwenden.
■ Der mitgelieferte Winkel muss vor
Gebrauch des Herdes unbedingt als
Kippschutz an der Wand befestigt
werden, um eine Kippgefahr des Gerätes zu vermeiden.
HINWEIS
Beschädigungsgefahr!
■ Das Kochfeld erst nach vollständigem
Abkühlen der Kochzonen als Arbeitsoder Abstellfl äche nutzen. Wärmeempfi ndliche Materialien wie Plastikschüsseln können sonst beschädigt
werden.
■ Zum Garen auf den Kochzonen kei-
ne Aluminiumfolie oder Kunststoffgefäße verwenden; sie können schmelzen.
■ Die Temperaturregler für Zweikreis-
und Bräter-Kochzone zum Einschalten nur im Uhrzeigersinn, zum Ausschalten gegen den Uhrzeigersinn
drehen. Nie mit Gewalt über das Doppelzonen-Symbol „
■ Ble che oder Alufolie nicht di rekt auf
“ hinwegdrehen.
den Garraumboden stellen. Da durch
staut sich die Hitze und die Emaille
des Back ofens wird beschädigt. Wenn
Sie Geschirr direkt auf den Garraumboden stellen möchten, darf die Backofentemperatur 50 °C nicht überschreiten. Vorsicht beim Hantieren
mit dem Geschirr – die Emaille kann
leicht zerkratzt werden.
■ Den Temperaturregler des Backo-
fens zum Einschalten nur im Uhrzeigersinn, zum Ausschalten gegen den
Uhrzeigersinn drehen. Nie mit Gewalt
über die Endposition hinausdrehen.
■ Reinigen: Keine scharfen abrasiven
Reini ger oder scharfen Metall schaber
für die Reinigung des Glases der Backofentür benutzen, da sie die Oberfl äche zerkratzen können. Dies kann das
Glas zerstören.
Page 10

Seite DE-10 Sicherheit
■ Zum Reinigen auch keine Stahl -
schwäm me, Backofensprays, Dampfoder Hochdruckreiniger ver wen den!
Sie können die Oberfl äche beschädigen und das Glas zerstören.
Hochdruckreiniger können einen
Kurzschluss verursachen.
■ Backblechträger und eventuell einge-
baute Teleskopschienen nicht im Geschirrspüler reinigen.
■ Die Backofentür ist schwer und hat
eine Glas front. Beim Aushängen nicht
fallen lassen!
■ Soll das Gerät mit einer Transportkar-
re gefahren werden, muss es so angehoben werden, wie auf der Verpackung gezeigt ist.
■ Den Herd nicht am Türgriff anheben!
Dieser ist nicht dafür gedacht, das
hohe Gewicht des Geräts zu tragen.
■ Stellen Sie beim Einkochen nur so
viele Gläser auf einmal in der Fettpfanne, dass sie sich nicht berühren.
Die Gläser können platzen.
Page 11
Das Kochfeld
Das Kochfeld
Seite DE-11
Glaskeramik-Kochfeld
Im Gegensatz zu Gusskochplatten besitzt Ihr
Herd eine flaches Kochfeld aus Glaskeramik,
mit deutlich erkennbaren Kochzonen. Damit
die Glaskeramik nicht zu Schaden kommt und
lange hält, braucht sie etwas Vorsicht, Pflege
und das geeignete Geschirr.
WARNUNG
Stromschlaggefahr!
Das Berühren spannungsführender
Teile kann zu schweren Verletzungen
oder zum Tod führen.
■ Bei Rissen in der Glaskeramik auf
keinen Fall wei ter ko chen! Wasser,
das durch Risse ins Innere des Glaskeramik-Kochfel ds läuft, kann unter
Spannung stehen! Wenn Risse in der
Glaskeramik sind, das GlaskeramikKochfeld vom Stromnetz trennen
( Sicherungen herausdrehen bzw. ausschalten). Dann unseren Service kontaktieren, siehe Seite DE-32.
HINWEIS
Beschädigungsgefahr!
Unsachgemäßer Umgang mit dem Gerät kann zu Beschädigungen führen.
■ Schweres Geschirr nicht über das
Kochfeld schieben. Die Glaskeramik
kann zerkratzen.
■ Kochfeld und Topfboden vor dem Be-
nutzen abwischen, um evtl. kratzende
Verschmutzungen zu beseitigen.
■ Das Kochfeld erst nach vollständigem
Abkühlen als Arbeits- oder Abstellfl äche nutzen. Wärmeempfi ndliche Materialien wie Plastikschüsseln können
sonst beschädigt werden.
Das richtige Kochgeschirr
HINWEIS
Beschädigungsgefahr!
Glas ist ein schlechter Wärmeleiter.
Deshalb kann es zu Tem pe ra tur span nun gen und Bruch kommen, wenn Sie
Kochgeschirr aus Glas auf den Kochzonen verwenden.
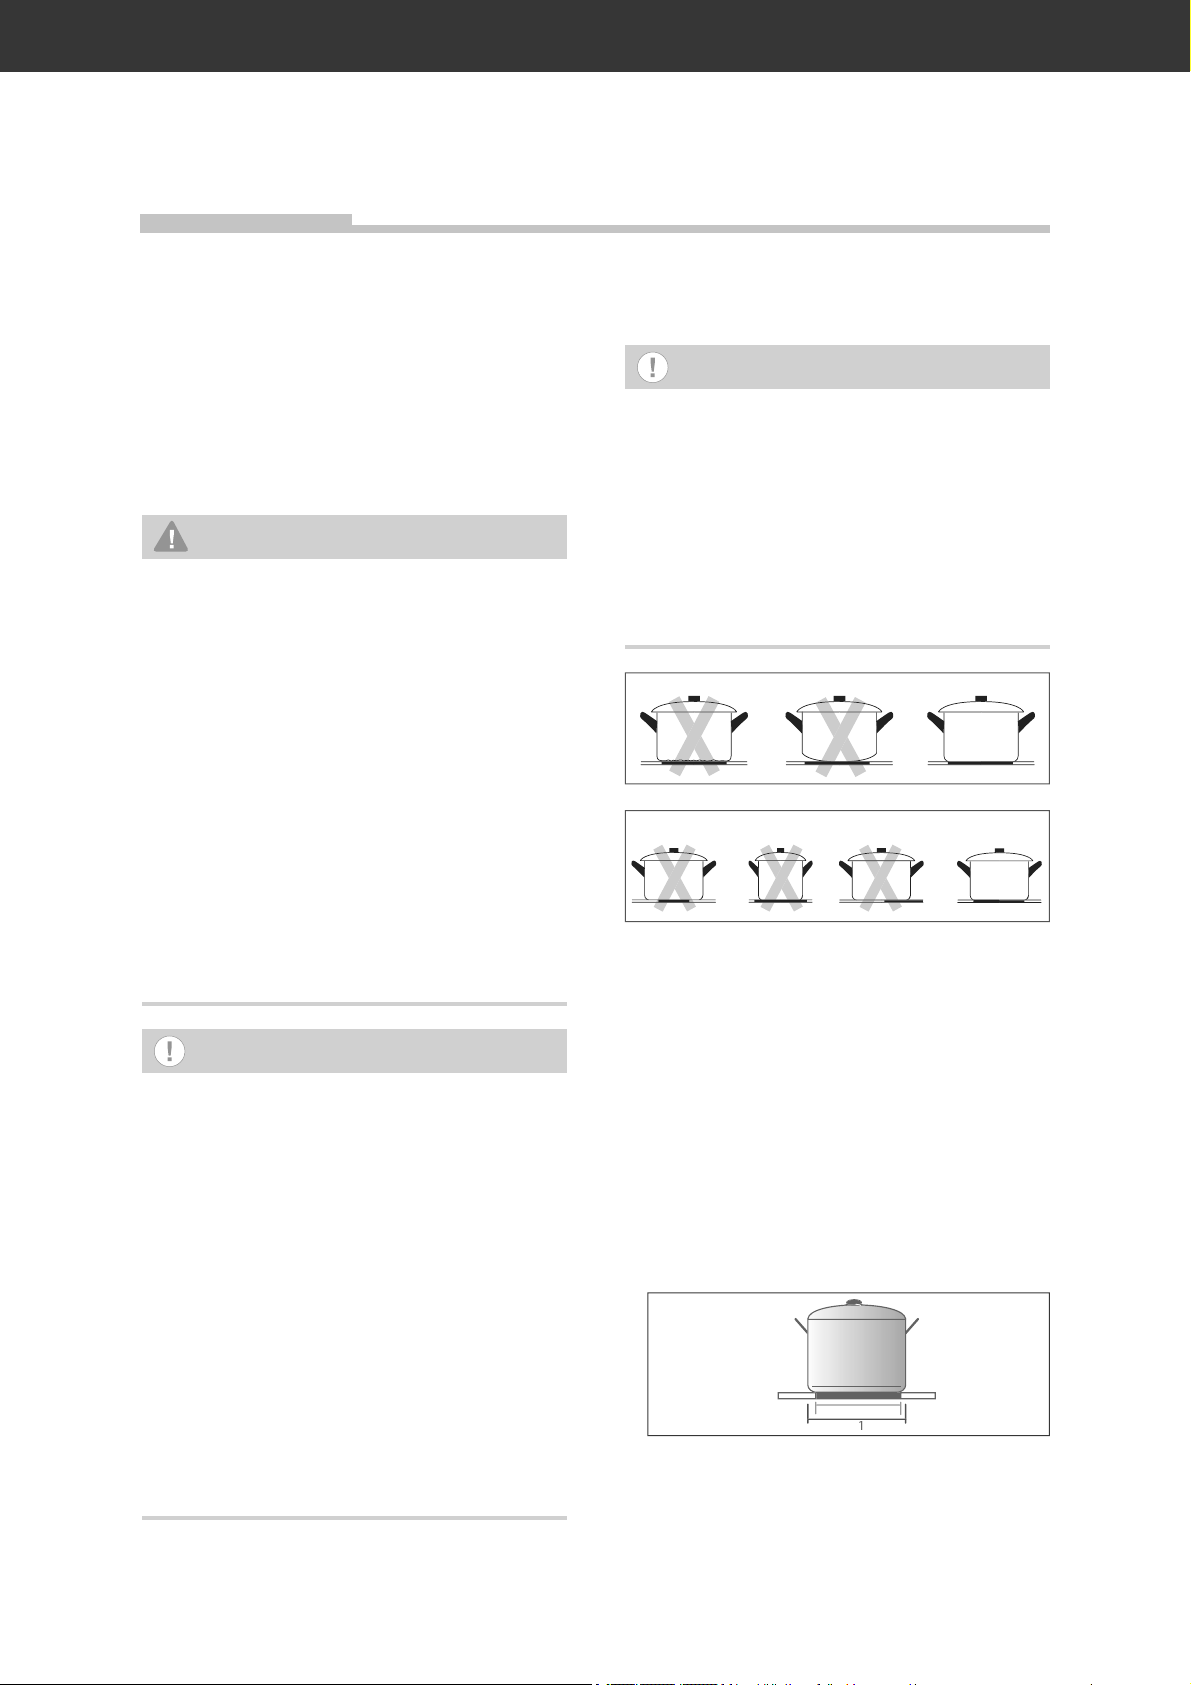
■ Möglichst nur Kochgefäße aus Metall
auf den Kochzonen verwenden.
Verwenden Sie am besten Elektrogeschirr
– mit einem völlig ebenen Boden, ggf. mit ei-
ner schwachen Wöl bung nach innen (Bo den dehnt sich aus beim Erhitzen!). So wird
die Wärme schneller und besser übertragen.
– mit ausreichender Bo den stär ke wie email-
lierte Stahltöpfe mit 2–3 mm und Edel stahl töp fe mit 4–6 mm, zu erkennen an
der Kenn zeich nung „Bo den stär ke nach
DIN 44904“.
– mit einer Größe, die der Kochzonen-Größe
entspricht.
Als Topf- bzw. Pfannengröße wird immer
der Durch messer d1 angegeben. Der Bodendurchmesser d2 ist jeweils etwa 2 cm
kleiner. Zu große Töpfe können Lackschäden verursachen.
Page 12

Seite DE-12 Das Kochfeld
Sehr gut geeignet sind auch
– energie- und zeit spa rende Dampf-
drucktöpfe. Die re la tiv hohen An schaf fungs ko sten sind schnell wie der eingespart.
–Stahl töp fe und -pfannen so wie be schich te-
tes und unbeschichtetes Alu mi ni um ge schirr
mit star kem Boden. Beschichtete Kochgeschirre dürfen jedoch nicht über hitzt oder
zerkratzt werden.
Nicht verwenden sollten Sie:
– eingedrückte oder ausgebeulte Töpfe.
– Töpfe mit rauem Boden.
– Töpfe mit gewölbtem Boden.
– beschichtetes Kochgeschirr, das innen zer-
kratzt ist.
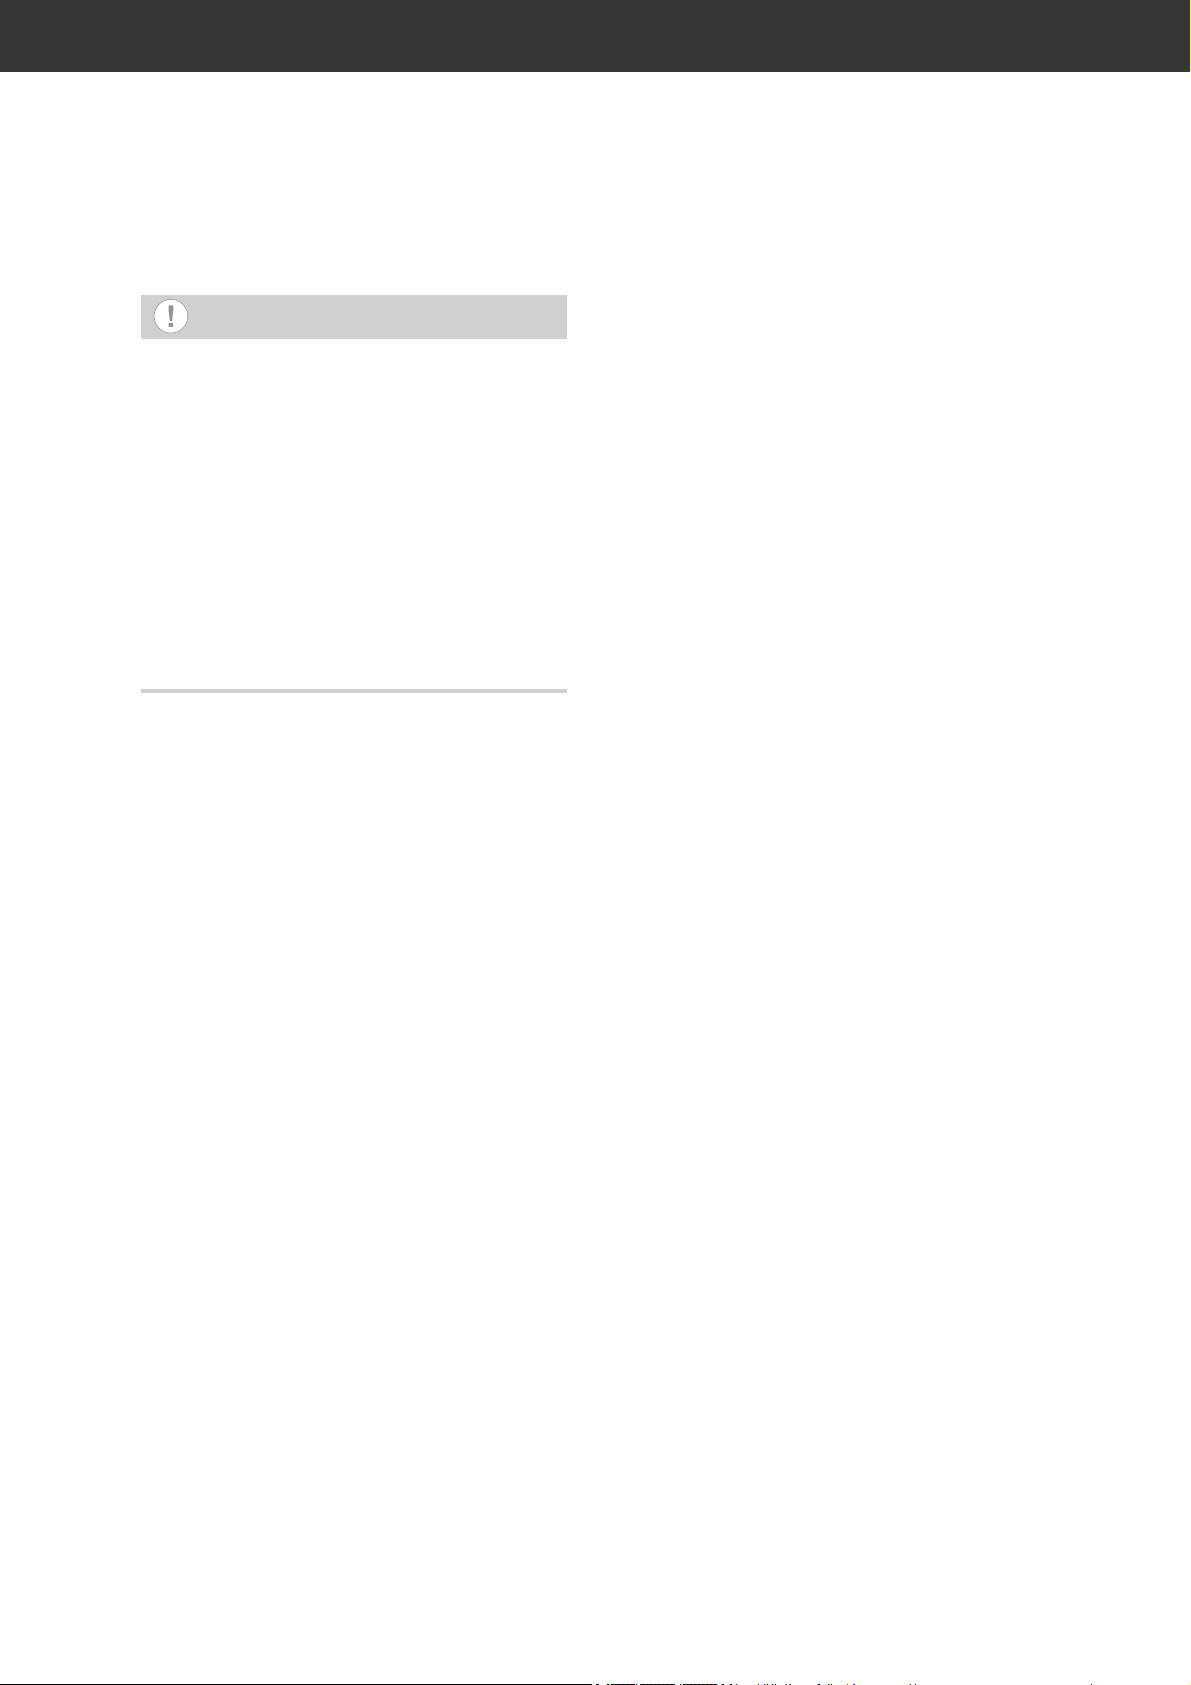
Kochzonen + Temperatur reg ler
(6)
(7) (10) (11)
• Drehen Sie die Temperaturregler je nach
Bedarf auf die gewünschte Heizleistung:
vom langsamen Quellen bis zum sprudelnden Kochen.
Die Heizstufen (0 – 3) finden Sie auf dem
Temperaturregler.
• Zum Ausschalten den Temperaturregler
auf Stufe „0“ drehen.
Zweikreis- und Bräter-Kochzone
bedienen
HINWEIS
Beschädigungsgefahr!
Die Temperaturregler für Zweikreis- und
Bräter-Kochzone zum Einschalten nur
im Uhrzeigersinn, zum Ausschalten gegen den Uhrzeigersinn drehen. Nie mit
Gewalt über das Doppelzonen-Symbol
„
“ hinwegdrehen.
(2)
(1)
Das Koc hfel d besitzt 4 Kochzonen. Jede Koch zone besitzt einen eigenen Temperaturregler.
Kochzone Temperatur-
(1) Zweikreis-Kochzone
(2) Normal-Kochzone
(3) Bräter-Kochzone
(4) Normal-Kochzone
(3)
(4)
regler
(6)
(7)
(10)
(11)
(20)
Um die Kochzone (1) oder (3) zu erweitern,
• drehen Sie den Temperaturregler kurz auf
das Doppelzonen-Symbol (20) „ “ und
lassen Sie ihn dann los.
• Stellen Sie die Leistung wie gewohnt ein.
Um die Kochzone wieder zu verkleinern,
• drehen Sie den Temperaturregler gegen
den Uhrzeigersinn auf „0“ und drehen Sie
dann den Temperaturregler im Uhrzeigersinn auf die gewünschte Leistung.
Page 13

Das Kochfeld
Seite DE-13
Netz-Kontrollleuchte
(9)
Die gelbe Netz-Kontrollleuchte (9) leuchtet
auf, sobald mindestens eine der Kochzonen
oder der Backofen eingeschaltet wurde. Sie
erlischt erst wieder, wenn alle Kochzonen
und der Backofen ausgeschaltet sind.
Restwärmeanzeige
Tipps zum Garen und Energie
sparen
Regler-
stellung
1
2-3
4-5
6-7
8
9
1)
Bei kleineren Mengen ½ Stufe niedriger, bei
größeren Mengen eine ½ Stufe höher wählen.
Anwendung und Beispiele
1)
Schwaches Weiter kochen /
Warmhalten, Quellen von Reis
Weiterkochen für die meisten Gerichte wie Suppen und Gemüse
Schwaches Braten / starkes
Weiter kochen für Paniertes
Normales Braten für Bratkartoffeln
Starkes Braten für Kurzgebratenes
Anbraten und Ankochen für Kartoffeln, Schmorbraten
(5)
Die Restwärmeanzeige (5) leuchtet, solange
eine Kochzone noch heiß ist. So werden Sie
vor möglichen Verbrennungen gewarnt und
Sie wissen, dass Sie noch Restwärme nutzen können.
VORSICHT!
Verbrennungsgefahr!
Bei einer Strom un ter bre chung erlischt
der Restwärmeindikator und zeigt eventuell vorhandene Rest wärme nicht weiter an!
■ Heiße Kochzone nach einer Strom-
unterbrechnung nicht berühren.
– Beim Ankochen und Anbraten immer die
höchste Einstellung wählen.
– Sobald der Topfinhalt kocht und sich Dampf
bildet oder das Steak von beiden Seiten
braun ist, auf eine niedrigere Stufe schalten; bei größeren Töpfen und Pfannen auf
„2“, sonst reicht Einstellung „1“.
– Braten über 1 kg am besten im Backofen
garen.
– Mit passendem Geschirr und wenig Was-
ser bzw. Fett garen; das erhält die Vitamine.
– Restwärme der Kochzonen nutzen. Die
Wärme reicht für ca. 5 bis 10 Minuten, z.B.
zum Quellen von Reis.
Page 14

Seite DE-14 Das Kochfeld
Kochfeld reinigen
VORSICHT!
Verbrennungsgefahr!
Unsachgemäße Reinigung kann zu Verbrennungen führen.
■ Die Kochzonen vor dem Reinigen voll-
ständig abkühlen lassen. Ausnahme:
Sie wollen zucker- oder stärkehaltige
Speisereste, Kunststoffe oder Alufolien entfernen (siehe weiter unten).
HINWEIS
Zum Reinigen keine scharfen Reinigungsmittel, Scheu er mit tel, Stahl schwäm me, Back ofensprays, Hochdruck- oder Dampfreiniger verwenden!
Sie können die Oberfl äche beschädigen. Hochdruck reiniger können einen
Kurzschluss verursachen.
• Reinigen und pflegen Sie das Kochfeld
regelmäßig mit einem speziellen Pflegemittel, das ein spezielles Imprägnieröl für
Glaskeramik-Kochfelder enthält. Solche
Pflegemittel sind über den Fachhandel zu
beziehen.
Leichte, nicht fest eingebrannte
Verschmutzungen
• Wischen Sie leichte Verschmutzungen
nach dem Abkühlen mit einem feuchten
Lappen ohne Reinigungsmittel ab. Trocknen Sie die Flächen anschließen mit einem wei chen Tuch ab, um Kalk flec ken zu
vermeiden.
• Helle Flecken mit Perlfarbton (Aluminiumrückstände, z. B. von Alufolien) können
Sie leicht mit einem speziell dafür geeigneten, im Fachhandel erhältlichen Reinigungsmittel entfernen.
• Zum Entfernen von Kalkrückständen eignet sich Essig gut.
Feste, eingebrannte
Verschmutzungen
• Hartnäckige Verschmutzungen lösen Sie
nach dem Abkühlen am besten mit einem
Klin gen scha ber (nicht im Lieferumfang).
• Im Fachhandel finden Sie auch speziell
dafür geeignete Reinigungsmittel.
Wischen Sie die Fläche zum Schluss mit
einem feuchten Lappen ab.
• Behandeln Sie das Kochfeld nach dem
Reinigen mit einem speziellen Pflegemittel.
Verunreinigungen mit zuckeroder stärkehaltigen Speisere sten,
Kunststoff oder Alufolie entfernen
HINWEIS
Zucker- oder stärkehaltige Speisereste
sowie Reste von Kunststoffen oder Alufolien müssen sofort entfernt werden.
Sie können das Kochfeld sonst dauerhaft und irreparabel beschädigen.
• Schützen Sie Ihre Hände vor dem Reinigen z. B. mit Küchenhandschuhen vor
Verbrennungen. Entfernen Sie die Verunreinigungen dann mit einem Klingenschaber (nicht im Lieferumfang).
• Wenn das Kochfeld abgekühlt ist, können
Sie verbliebene Schmutzreste mit einem
speziell dafür geeigneten, im Fachhandel
erhältlichen Reinigungsmittel entfernen.
• Behandeln Sie das Kochfeld nach dem
Reinigen mit einem speziellen Pflegemittel.
Page 15

Der Backofen
Der Backofen
Seite DE-15
Vorbereitung
1. Entfernen Sie alle vorhandenen Styropor-,
Papp- und Kunststoffsicherungsteile aus
dem Backofen und von den Backblech en.
2. Ziehen Sie alle Schutzfolien ab.
3. Führen Sie eine Grundreinigung durch,
siehe Seite DE-19.
Das richtige Backofen-Geschirr
– Töpfe mit hit ze be stän di gen Griffen, er kenn-
bar an der Kenn zeich nung „tem pe ra tur be stän dig bis 280 °C“.
– Feuerfeste For men aus Glas, Por zel lan,
Ke ra mik und Ton oder auch Guss ei sen.
– Insbesondere Back öfen mit Ober- und Un-
terhitze brau chen Formen und Ble che mit
guter Wär me über tra gung, am besten aus
schwarz lac kier ten Metallen. Darin wer den
Kuchen be son ders gut braun.
–Auch Alu mi ni um ble che, mit oder ohne Be-
schich tung, brin gen gute Er geb nis se.
■ Nach dem Er lö schen des Feu ers das
Gerät durch unseren Service überprüfen lassen, siehe Seite DE-32.
HINWEIS
Aufgestaute Hitze kann die Emaille des
Back ofens beschädigen.
■ Ble che oder Alufolie nie di rekt auf
den Garraumboden stellen.
■ Wenn Sie Geschirr direkt auf den Gar-
raumboden stellen möchten, darf
die Backofentemperatur 50 °C nicht
überschreiten. Vorsicht beim Hantieren mit dem Geschirr – die Emaille
kann leicht zerkratzt werden.
Backblech und Fettpfanne
Richtiger Umgang mit
dem Ofen
VORSICHT!
Brandgefahr!
■ Den Backofen grundsätzlich nur mit
geschlossener Backofentür betreiben.
■ Bei Feuer im Backofen
– die Sicherungen ausschalten/
herausdrehen,
– die Backofentür nicht öffnen, bis
das Feuer erloschen ist.
■ Brennendes Öl oder Fett nie mit
Was ser löschen! Zum Löschen eine
Löschdecke oder einen geeigneten
Feuerlöscher mit Kennzeichnung „F“
verwenden.
(c)
(d)
(e)
Das mitgelieferten Backblech (d) und die Fettpfanne (e) haben eine schräge Kante. Nach
dem Einschieben sollte diese Kante vorne
liegen. Der Grillrost (c) muss wie abgebildet
eingeschoben werden.
Page 16
Seite DE-16 Der Backofen
CO
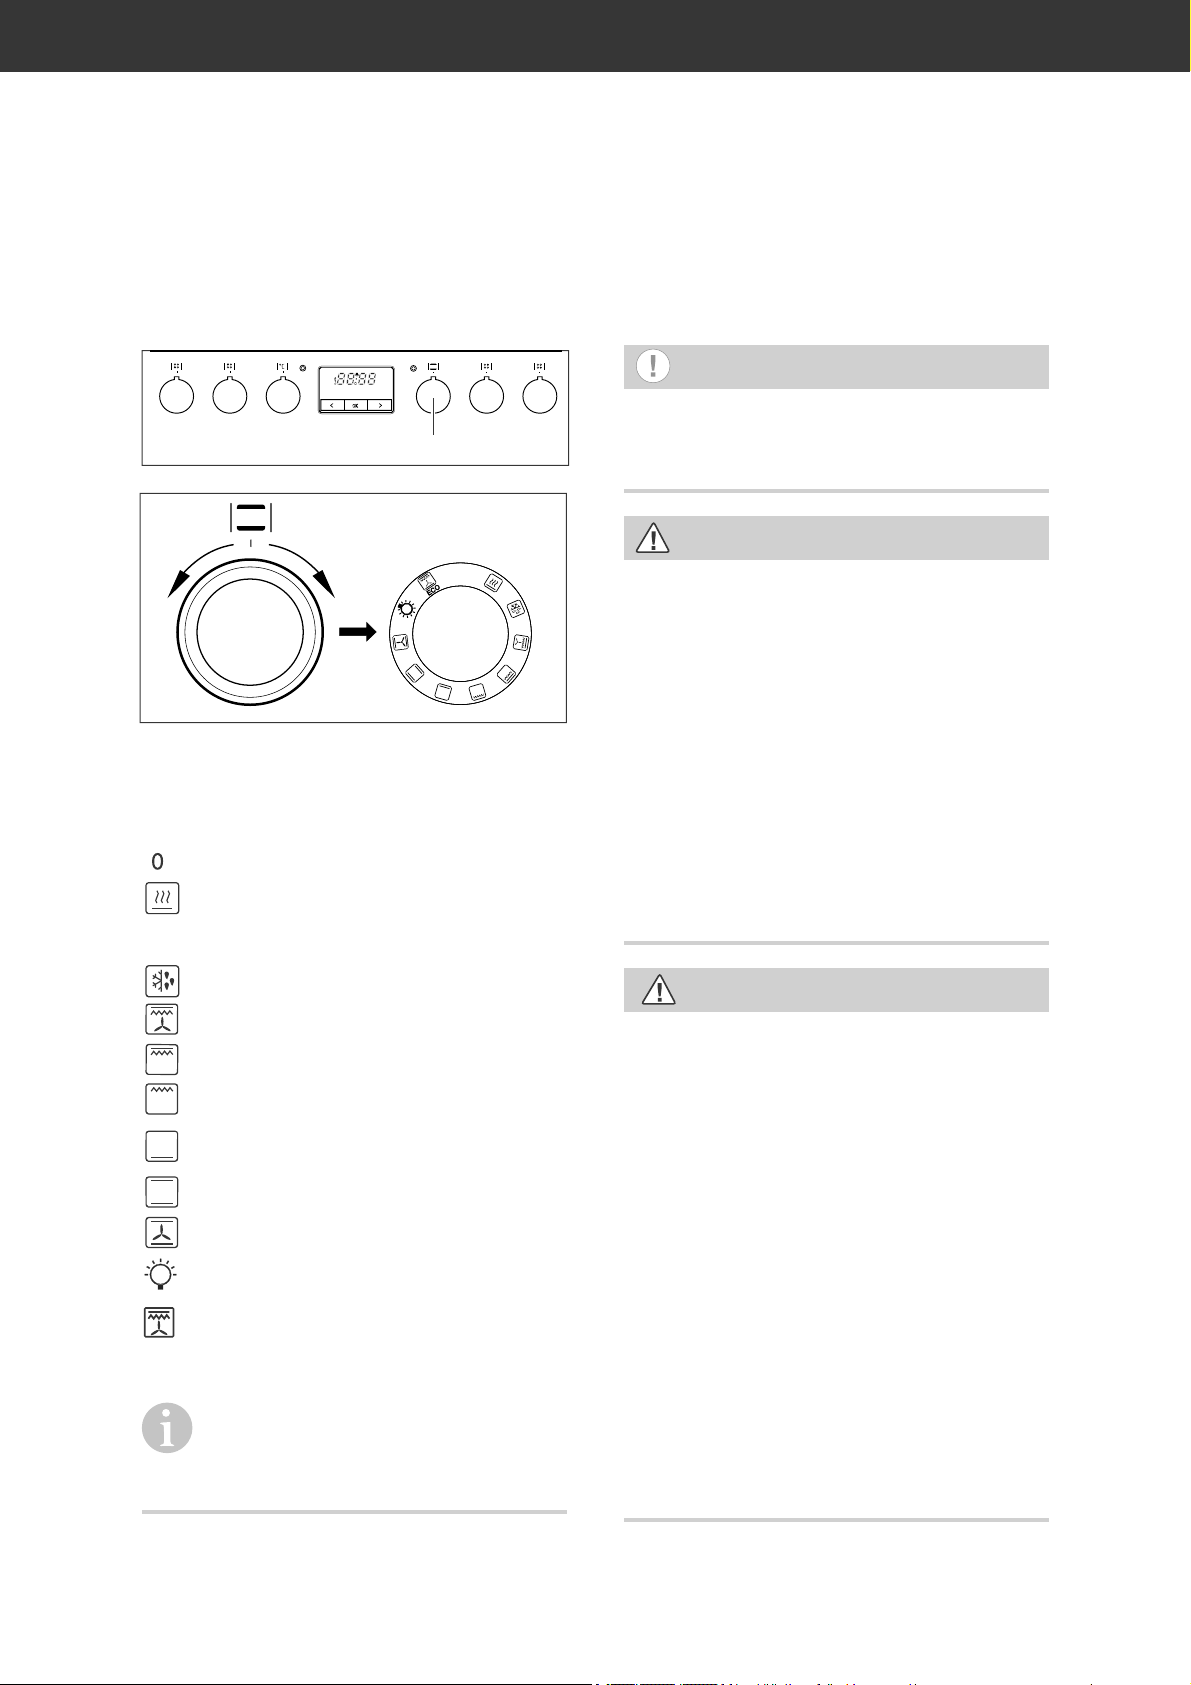
Funktionsschalter
(12)
0
Mit dem Funktionsschalter schalten Sie den
Backofen ein und wählen die Beheizungsart
aus. Die Backofenbeleuchtung wird eingeschaltet.
Aus
Schnelles Aufheizen zum Vorwärmen
des Backofens. Eingeschaltet sind
Ober- und Unterhitze, Heißluft und Grill.
Temperaturregler
HINWEIS
Beschädigungsgefahr!
■ Die Temperaturregler nicht mit Gewalt
über die Endposition hinaus drehen.
VORSICHT!
Verbrennungsgefahr!
Heizkörper, Wände, Backbleche usw.
werden beim Be trieb sehr heiß.
■ Zugängliche Teile können bei Benut-
zung heiß werden. Kleine Kinder fernhalten.
■ Direkte Berührung vermeiden.
■ Die Backofentür nur am Griff anfassen.
■ Aus dem Wrasen abzug strömt beim
Back ofen betrieb heißer Dampf. Vor sicht auch beim Öff nen der Back ofentür!
Auftauen
Intensivgrill mit Umluft
Intensivgrill (Infrarotgrill mit Oberhitze)
Infrarotgrill
Unterhitze
Ober- und Unterhitze
Umluft mit Ober- und Unterhitze
Backofenbeleuchtung
Optimierte Beheizung, energiesparen-
des Garen. Die Backofenleuchte bleibt
E
ausgeschaltet.
Detaillierte Angaben und Tipps zu
den einzelnen Beheizungsarten
fi nden Sie in der beiliegenden Broschüre
„Backen - Braten - Garen“.
VORSICHT!
Brandgefahr!
■ Den Backofen während des Gril lens
nicht unbeaufsichtigt lassen!
■ Fettes Grillgut kann Feuer fangen.
■ Braten oder Ku chen im Backofen
nicht mit Backpapier abdecken.
■ Gargut, Backpapier und -folien nicht
mit den Heizkörpern in Be rüh rung
kom men lassen.
■ Temperaturempfi ndliche, brennbare
oder feuergefährliche Gegenstände
nicht im Backofen aufbewahren.
■ Den Backofen nicht unbeaufsichtigt
lassen, wenn Sie Speisen in Öl, in Fett
oder mit Al ko hol zubereiten. Die Spei sen kön nen sich selbst ent zün den.
Page 17

(14)
(15)
Der Backofen
Seite DE-17
Backofen-Kontrollleuchte
(8)
Die rote Backofen-Kontrollleuchte (8) leuchtet,
sobald Sie eine Beheizungsart gewählt und
die Temperatur eingestellt haben. Sie leuchtet, solange der Backofen auf- bzw. nachheizt.
Wenn sie das erste Mal er lischt, ist die eingestellte Tem pe ra tur im Backofen er reicht.
Während der ge sam ten Garzeit wie der holt
sich das Ein- und Ausschalten der roten
Backofen-Kontrollleuchte.
• Stellen Sie nach der Wahl der Behei-
zungsart den Temperaturregler (14) auf die
ge wünsch te Back ofen tem pe ra tur ein. Sie
kön nen ihn stufenlos von 50 °C bis maximal 250 °C drehen.
Der Backofen ist damit eingeschaltet
dem Wrasenabzug (15) kann heißer Dampf
strömen.
. Aus
Wenn sich der Backofen nicht
einschalten lässt
Wenn sich Ihr Backofen nicht einschalten
lässt, zeigt Ihnen das Display den Grund.
Zwei Gründe sind möglich:
– Der Backofen arbeitet erst, wenn die Uhr-
zeit eingestellt ist. Anderenfalls blinkt die
Anzeige im Display, siehe „Uhrzeit einstellen/ändern“ auf Seite DE-24.
– Der Backofen befindet sich im Automatik-Be-
trieb. Im Display leuchtet “AUTO“, siehe „Die
Zeitschaltuhr“ auf Seite DE-24.
Zur Netz-Kontrollleuchte siehe Seite DE-13.
Backofenbeleuchtung
HINWEIS
Die Backofenbeleuchtung ausschließlich
zur Beleuchtung des Garraums verwenden. Sie ist nicht zur Beleuchtung eines
Zimmers geeignet.
• Stellen Sie den Funktionsschalter (12) auf
das Lampen-Symbol, um den Backofen
zu beleuchten.
• Die Backofenbeleuchtung wird auch eingeschaltet, sobald Sie die Backofentür
öffnen.
Informationen zum Austausch der
Glühlampe fi nden Sie auf Seite DE-22.
Page 18
Seite DE-18 Der Backofen
Backofen ausschalten
1. Drehen Sie den Temperaturregler (14) gegen den Uhrzeigersinn auf Stufe „0“.
Die rote Backofen-Kontrollleuchte (8) erlischt.
2. Drehen Sie den Funktionsschalter (12)
ebenfalls zurück auf die Po si ti on „0“. Die
Backofenbeleuchtung erlischt, ebenso die
gelbe Netz-Kontrollleuchte (9).
Besonderheiten beim
Auftauen
WARNUNG
Gesundheitsgefahr!
Das Auftauen von Fleisch, Gefl ügel
oder Fisch im Backofen kann zu sprunghaftem Anstieg von gefährlichen Mikroorganismen (wie z. B. Salmonellen)
führen. Dadurch besteht die Gefahr einer Vergiftung.
■ Fleisch, Gefl ügel und Fisch nicht im
Back ofen auftauen.
■ Die Auftau-Funktion nur zum Auftau-
en von Gemüse, Vorgekochtem etc.
benutzen.
■ Das Gefriergut frühzeitig aus dem
Gefrierfach nehmen und abgedeckt
im Kühlschrank auftauen lassen. Die
Auf tau fl üs sig keit muss dabei abfl ießen können, da sich sonst schädliche
Mikroorganismen bilden können.
Beim Auf tauen wird der Garraum lediglich von
unbeheizter Luft durchströmt. Auf diese Weise wird der Auftauvorgang beschleunigt. Die
Heizung ist während des Auftauens nicht in
Betrieb.
Um mehr Platz im Garraum zu erhal-
ten, dürfen Sie zum Auftauen das
Gefäß mit dem Gefriergut direkt auf den
Garraumboden stellen und die Backblechträger herausnehmen (siehe Seite DE-20).
Besonderheiten beim
Ansetzen von Hefeteig
1. Wenn die Backschüssel nicht in den Garraum passt, können Sie die Backblechträger entfernen, um das Garraumvolumen
zu vergrößern (siehe Seite DE-20).
2. Heizen Sie den Backofen auf 50 °C vor.
3. Schalten Sie den Backofen aus, wenn die
Temperatur erreicht ist.
4. Stellen Sie die Backschüssel mit dem
Hefeteig in den Garraum. Sie können die
Schüssel direkt auf den Garraumboden
stellen.
5. Schließen Sie die Backofentür und belassen Sie den Hefeteig für die gewünschte
Zeit im Backofen, ohne ihn weiter zu beheizen.
HINWEIS
Aufgestaute Hitze kann die Emaille des
Back ofens beschädigen.
■ Wenn Sie Geschirr direkt auf den Gar-
raumboden stellen möchten, darf
die Backofentemperatur 50 °C nicht
überschreiten. Vorsicht beim Hantieren mit dem Geschirr – die Emaille
kann leicht zerkratzt werden.
Backofen reinigen
VORSICHT!
Verbrennungsgefahr!
■ Den Backofen vollständig abkühlen
lassen, bevor Sie ihn reinigen.
■ Niemals Wasser direkt in den heißen
Back ofen gießen. Durch den entstehenden Wasserdampf besteht Verbrühungsgefahr, und die Emaille
kann beschädigt werden.
■ Wasser aus dem Backofen unbedingt
abkühlen lassen, bevor Sie es ausgießen.
Page 19
Der Backofen
Seite DE-19
HINWEIS
Unsachgemäße Reinigung kann zu Beschädigungen führen.
■ Zum Reinigen keine scharfen, abra-
siven Reini gungs- oder Scheu er mit t e l , S t a h l s c h w ä m m e , M e t a l l s c h a b e r ,
Backofensprays, Dampf- oder Hochdruckreiniger ver wen den! Sie können die Oberfläche beschädigen
und das Glas zerstören.
■ Hochdruckreiniger können einen
Kurzschluss verursachen.
Grundreinigung
Um Fett- und Öl-Rückstände aus der Produktion sowie hart näckige Staubablagerungen,
die durch Lagerung und Transport entstanden
sind, zuverlässig zu lösen, müssen Sie eine
Vorreinigung des Backofens durchführen. So
schützen Sie Ihre Gesundheit und sorgen für
schmackhafte Kuchen und Braten.
1. Betreiben Sie den Backofen mit Fettpfanne, Grillrost und Backblech 60 Minuten
lang mit 250 °C.
2. Lassen Sie den Backofen vollständig abkühlen.
3. Reinigen Sie den Garraum des Backofens
sowie Fettpfanne, Grillrost und Backblech
mit ein wenig Seifenwasser und wischen
Sie danach alles trocken.
Garraum reinigen
– Schalten Sie zum Reinigen nur die Backo-
fenbeleuchtung ein.
– Reinigen Sie den Garraum und die Back-
blechträger mög lichst nach je dem Ge brauch mit war mem Spülwasser.
– Reinigen Sie die Türdichtung auf die gleiche
Weise, seien Sie dabei aber sehr vorsichtig,
da sie nur an einigen Stellen befestigt ist, im
Übrigen jedoch lose anliegt.
Dampfreinigung
Bei der Dampfreinigung handelt es sich um
ein Nassreinigungsverfahren, das mithilfe
von Wasserdampf leichte Verschmutzungen
anlöst. So reinigen Sie den Garraum materialschonend und energiesparend.
1. Nehmen Sie den Grillrost und das Backblech heraus.
2. Schieben Sie die Fettpfanne in den untersten Einschub und gießen Sie ca. 0,5 l
Wasser hinein.
3. Stellen Sie den Funktionsschalter auf
Ober- und Unterhitze, den Temperaturregler auf 100 °C.
4. Schalten Sie den Backofen nach 30-minütigem Betrieb wieder aus und lassen Sie
alles so weit abkühlen, dass die Backofenwände nur noch handwarm sind.
5. Nehmen Sie die Fettpfanne mit Topflappen oder Ähnlichem heraus und gießen
Sie das verbliebene Wasser weg.
6. Wischen Sie den Garraum mit einem
feuchten Tuch oder Schwamm ab.
7. Waschen Sie den Grillrost, das Backblech
und die Fettpfanne mit Spülwasser ab.
Gehäuseoberflächen reinigen
– Reinigen Sie die Oberflächen nach dem
Abkühlen gründ lich mit warmem Spülwasser oder All zweck rei ni ger.
– Für Edelstahloberflächen können Sie auch
Spe zi al pfle ge mit tel verwenden.
Page 20

Seite DE-20 Der Backofen
Backblechträger reinigen
HINWEIS
Beschädigungsgefahr!
Die Backblechträger können beschädigt werden, wenn Sie in der Spülmaschine gereinigt werden, da sie nicht
spülmaschinenfest sind.
■ Die Backblechträger nicht im Ge-
schirrspüler reinigen.
Um den Garraum gründlich zu reinigen, können Sie die Backblechträger (19) herausnehmen.
Backblechträger herausnehmen
und reinigen
1. Nehmen Sie den Grillrost (c), die Backbleche (d) und die Fettpfanne (e) aus dem
Backofen heraus.
(19)
2. Um den Backblechträger (19) zu entfernen, ziehen Sie zuerst die vordere Halterung an der vorderen Seite, an der die
beiden Haken mit dem angeschweißten
Plättchen sind, mit einem Ruck heraus.
Ziehen Sie danach die hintere Halterung
des Backblechträgers heraus.
3. Reinigen Sie den Backblechträger mit
warmem Wasser und mildem Spülmittel
oder Allzweckreiniger. Wischen Sie danach alles trocken.
Backblechträger einsetzen
1. Positionieren Sie den Backblech träger
so, dass die beiden Haken mit dem angeschweißten Plättchen vorne sind.
2. Drücken Sie zuerst die hinteren Haken in
die vorgesehenen Löcher in den Seitenwänden.
3. Drücken Sie abschließend die vorderen
Haken in die vorgesehenen Löcher in den
Seitenwänden.
Backofentür reinigen
HINWEIS
Bruch- und Verletzungsgefahr!
Die Back ofentür enthält schwere Glasscheiben, die bei unsachgemäßer Behandlung zerbrechen können. Die Glasscherben sind scharf und können zu
Schnittverletzungen führen.
■ Die Back ofentür oder einzelne Glas-
scheiben nicht fallen lassen.
■ Sicherstellen, dass Sie mit der Back-
ofentür und den einzelnen Glasscheiben nirgends anstoßen.
■ Den Backofen nicht benutzen, wenn
das Glas beschädigt ist, weil der Backofen dann nicht mehr sicher ist. Stattdessen unseren Service verständigen
(siehe Seite DE-32).
■ Wenn eine Glasscheibe gebrochen
ist, Kinder fernhalten und alle Scherben sorgfältig entsorgen.
Nehmen Sie die Backblechträger heraus, wenn Sie z. B. mehr Platz im Gar-
raum benötigen.
Page 21

Der Backofen
Seite DE-21
Back ofentür aushängen
Um bequem alle Bereiche Ihres Backofens
zu reinigen, können Sie die Back ofentür wie
folgt aushängen:
1. Öffnen Sie die Back ofentür ganz.
X
2. Klappen Sie an beiden Sei ten die Bügel X
ganz nach vorne. Nehmen Sie gegebenenfalls einen Schraubendreher zu Hilfe.
Back ofentür einhängen
1. Halten Sie die Back ofentür mit bei den
Händen in Schräg la ge.
2. Haken Sie die Scharniere in die Öffnungen der Seitenwände ein.
3. Öffnen Sie die Back ofentür ganz.
4. Klappen Sie die beiden Bügel X wie der
ganz nach hinten.
5. Schließen Sie vorsichtig die Tür. Die Tür
muss sich bündig schlie ßen las sen. Sollte
sich die Tür nicht bündig schließen lassen oder beim Schließen ein Knacken zu
hören sein, ist die Tür nicht richtig eingehängt.
6. Korrigieren Sie ggf. den Sitz der Scharniere und der Bügel, bis sich die Tür wieder
leichtgängig öffnen und schließen lässt.
Scheiben reinigen
Die Back ofentür enthält drei Glasscheiben, die
Sie hin und wieder beidseitig reinigen sollten.
Dazu benötigen Sie einen Schlitzschraubendreher Größe PH1.
3. Schließen Sie die Tür nur so weit, dass sie
noch ca. 10 cm geöffnet ist.
4. Heben Sie die Tür leicht an und lassen Sie
sie nach vorne herausgleiten.
1. Hängen Sie die Back ofentür aus (siehe
„Back ofentür aushängen“ auf Seite DE-21).
2. Entfernen Sie die beiden Schrauben, die
das obere Gitterblech fixieren.
3. Nehmen Sie das Gitterblech vorsichtig ab.
Page 22

Seite DE-22 Der Backofen
Seite an und drücken Sie es dann an der
rechten Seite, bis es einrastet.
13. Hängen Sie die Backofentür wieder ein
(siehe „Back ofentür einhängen“ auf Seite DE-21).
Backofenbeleuchtung
aus wech seln
Zur Backofenbeleuchtung benötigen Sie eine
hitzefeste Back ofen-Glüh lam pe vom Typ
230 V bis 240 V, 25 W, E 14, T 300 °C.
(21)
4. Nehmen Sie die obere Schei be aus der
Halterung unten am Scharnier heraus
und legen Sie sie sicher ab.
5. Nehmen Sie die mittlere Scheibe heraus
und legen Sie sie sicher ab.
6. Achten Sie auf die kleinen Abstandshalter (21) – verlieren Sie diese nicht.
7. Reinigen Sie alle Scheiben mit warmem
Spülwasser.
8. Trocknen Sie die Scheiben gründlich ab.
9. Setzen Sie die mittlere Scheibe wieder in
die Halterung im Scharnierbereich.
10. Bringen Sie die Abstandshalter (21) wieder seitlich an der mittleren Scheibe an.
WARNUNG
Stromschlaggefahr!
Unsachgemäßer Wechsel der Glühlampe
kann einen tödlichen Stromschlag oder Brandverletzungen zur Folge haben.
■ Vor dem Glühlampenwechsel unbe-
dingt den Netzstecker aus der Steckdose ziehen oder die Si che run gen für
die Steckdose ausschalten, an die der
Backofen angeschlossen ist.
■ Die Glühlampe erst auswechseln,
wenn der Backofen nicht mehr heiß
ist und keine Verbrennungsgefahr
mehr besteht.
1. Schalten Sie die Netzsicherung aus bzw.
drehen Sie sie heraus.
2. Legen Sie ein weiches Tuch in den abge-
kühlten Backofen, für den Fall, dass die
Glas ab de c kung oder die Glühlampe herunterfallen soll te.
11. Setzen Sie die obere Scheibe wieder
in die Halterung im Scharnierbereich.
Achten Sie darauf, dass die glatte Seite
außen ist.
12. Stecken Sie das Gitterblech wieder oben
auf die Tür – es passt nur in einer Richtung. Legen Sie es erst an der linken
Page 23

Der Backofen
Seite DE-23
3. Schrauben Sie die Glasabdeckung gegen
den Uhrzeigersinn ab und nehmen Sie sie
heraus.
4. Drehen Sie die defekte Glühlampe vor-
sichtig gegen den Uhrzeigersinn aus der
Fas sung und ersetzen Sie sie durch eine
neue Glühlampe desselben Typs.
5. Setzen Sie die Glasabdeckung wieder in
die Öffnung ein und schrauben Sie sie im
Uhrzeigersinn fest.
6. Schalten bzw. schrauben Sie die Siche-
rung wieder ein.
Page 24

Seite DE-24 Die Zeitschaltuhr
Die Zeitschaltuhr
Uhrzeit einstellen/ändern
Uhrzeit einstellen
Bei Erstinbetriebnahme oder nach Stromausfall blinkt im Display „ “. Dies zeigt an,
dass die Uhrzeit gestellt werden muss. Gehen
Sie dazu wie folgt vor:
1. Drücken Sie 1-mal die Taste „OK“.
Das Display zeigt das Symbol „ “, der
Punkt darunter blinkt.
2. Stellen Sie die Uhrzeit mit den Pfeiltasten
„<“ bzw. „>“ ein.
Kurze Zeit nach dem letzten Tastendruck
hört der Punkt zu blinken auf. Die Uhrzeit
ist damit gespeichert.
Uhrzeit ändern
Dies ist notwendig z. B. bei Umstellung von
Sommer- auf Winterzeit und umgekehrt.
Voraussetzungen:
– Die Zeitschaltuhr darf sich nicht im Automa-
tik-Betrieb befinden und
– der Kurzzeitwecker darf nicht aktiv sein.
Zum schnellen Vor-/Rücklauf können
Sie die jeweilige Taste länger gedrückt
halten.
Halb- und VollautomatikBetrieb
WARNUNG
Für den automatischen SchaltuhrBetrieb beachten Sie unbedingt Fol gen des:
■ Alle Haushaltsangehörigen informie-
ren, damit nie mand etwas in den
Backofen legt.
■ Backofen überwachen, um Überlau-
fen und An bren nen zu vermeiden.
■ Besondere Vorsicht beim Braten: Fett,
Öl und Alkohol können sich entzünden.
■ Niemals im Schaltuhr-Betrieb un be-
auf sich tigt grillen!
■ Die Zeitschaltuhr übernimmt nicht das
Ein- und Ausschalten des Kochfeldes
■ Nach dem Betrieb den Funktionswäh-
ler und den Temperaturregler auf »0«
stellen.
■ Bei Stromausfall werden alle Einstel-
lungen gelöscht.
.
1. Drücken Sie gleichzeitig kurz die beiden
Pfeiltasten „<“ und „>“.
Der Punkt unterhalb des Symbols „ “
blinkt.
2. Stellen Sie die Uhrzeit mit den Pfeiltasten
„<“ bzw. „>“ ein.
Voraussetzung ist die richtig eingestellte Uhrzeit.
– Sie können maximal 23 Stunden und 59
Minuten im Voraus programmieren.
– Die Gardauer kann zwischen 1 Minute und
10 Stunden eingestellt werden.
– Bei Stromausfall werden alle Programmie-
rungen gelöscht.
– Wenn ein Programm zu Ende ist, ertönt ein
Signalton, den Sie mit einer beliebigen Taste abschalten können.
Page 25

Die Zeitschaltuhr
Seite DE-25
Halbautomatik-Betrieb
Im Halbautomatik- Betrieb legen Sie während
des Betriebs die gewünschte Gar-Dauer oder
das gewünschte Gar-Ende fest.
Der Backofen schaltet nach Ablauf der
Gar-Dauer bzw. am Gar-Ende automatisch
ab.
Gar-Dauer festlegen
Die Gar-Dauer kann von einer Minute bis 10
Stunden betragen.
1. Drücken Sie bei eingeschalteten Backofen
die Taste „OK“ so oft, bis im Display „dvr“
blinkt.
2. Stellen Sie mit den Pfeiltasten „<“ bzw. „>“
die Rest-Gardauer ein.
3. Drücken Sie die Taste „OK“ 2-mal.
Ein Signal ertönt und die Rest-Gardauer
ist damit gespeichert. Das Symbol „avto“
leuchtet.
Nach Ablauf der eingestellten Zeit schaltet
der Backofen selbsttätig aus. Zusätzlich
ertönt ein Signal und im Display blinkt
„avto“.
4. Um das Signal auszuschalten und wieder
in den Normalbetrieb zurückzukehren,
drücken Sie eine beliebige Taste.
Das Display zeigt wieder die aktuelle Uhrzeit.
WARNUNG
Gar-Ende
Hier legen Sie während des Betriebs die Uhrzeit fest, zu der sich der Backofen ausschalten
soll. Die Ausschaltzeit kann maximal 10 Stunden nach der aktuellen Uhrzeit liegen.
1. Drücken Sie am eingeschalteten Backofen so oft die Taste „OK“, bis das Display
„En d “ zeigt.
2. Stellen Sie mit den Pfeiltasten „<“ bzw. „>“
die gewünschte Ausschaltzeit ein.
3. Drücken Sie 1-mal die Taste „OK“.
Ein Signal ertönt und die Ausschaltzeit ist
damit gespeichert. Das Symbol „auto“
leuchtet.
Beim Erreichen der Ausschaltzeit schaltet
der Backofen selbsttätig aus. Zusätzlich
ertönt ein Signal und im Display blinkt
„auto“.
4. Um das Signal auszuschalten und wieder
in den Normalbetrieb zurückzukehren,
drücken Sie eine beliebige Taste.
Das Display zeigt wieder die aktuelle Uhrzeit.
WARNUNG
Der Backofen ist nun wieder eingeschaltet und muss von Hand ausgeschaltet werden.
5. Stellen Sie den Temperaturregler und den
Funktionswähler zurück auf »0«.
Der Backofen ist nun wieder eingeschaltet und muss von Hand ausgeschaltet werden.
5. Stellen Sie den Temperaturregler und den
Funktionswähler zurück auf »0«.
Vollautomatischer Betrieb
Hier legen Sie die gewünschte Gar-Dauer fest
sowie die Zeit, zu der das Gericht im Backofen
fertig sein soll; die Uhr er rech net daraus automatisch die Einschaltzeit.
Page 26

Seite DE-26 Die Zeitschaltuhr
Der End-Zeitpunkt kann maximal 24 Stunden
ab der aktuellen Uhrzeit liegen.
Beispiel:
Die Gardauer soll 1 Stunde und 15 Minuten
betragen und Ihr Gericht soll um 13:00 Uhr
fertig sein.
1. Backofen ausgeschaltet lassen.
2. Drücken Sie die Taste „OK“ so oft, bis das
Display „dvr“ zeigt.
3. Stellen Sie mit den Pfeiltasten „<“ bzw. „>“
die Gar-Dauer ein (in unserem Beispiel 1
Stunde und 15 Minuten).
4. Drücken Sie 1-mal die Taste „OK“.
Das Display zeigt „En d“.
5. Stellen Sie mit den Pfeiltasten „<“ bzw. „>“
die Ausschaltzeit ein (in unserem Beispiel
13:00 Uhr).
6. Drücken Sie 1-mal die Taste „OK“.
Ein Signal ertönt und die Eingaben sind
gespeichert. Das Symbol „avto“ leuchtet.
7. Bereiten Sie den Backofen vor:
Legen Sie die Speisen in den Backofen
und stellen Sie den Funktionswähler und
den Temperaturregler auf die gewünschte
Position.
Der Backofen wird sich zur errechneten
Einschaltzeit selbsttätig einschalten.
Nach Erreichen der Ausschaltzeit wird
sich der Backofen wieder ausschalten.
Zusätzlich wird ein Signal ertönen und im
Display wird „avto“ blinken.
8. Um das Signal auszuschalten und wieder
in den Normalbetrieb zurückzukehren,
drücken Sie eine beliebige Taste. Das
Display zeigt wieder die aktuelle Uhrzeit.
WARNUNG
Der Backofen ist nun wieder eingeschaltet und muss von Hand ausgeschaltet werden.
9. Stellen Sie den Temperaturregler und den
Funktionswähler zurück auf »0«.
Zeitschaltuhr-Betrieb abbrechen
und Automatik-Einstellungen
löschen
1. Drücken Sie gleichzeitig beide Pfeiltasten
„<“ und „>“.
Das Symbol „auto“ erlischt. Der Zeit-
schaltuhr-Betrieb ist damit ausgeschaltet
und die Automatik-Einstellungen sind gelöscht.
2. Stellen Sie den Temperaturregler und den
Funktionswähler zurück auf »0«.
Kurzzeitwecker/Eieruhr
Sie sind dabei, ein Gericht im Back ofen zu
garen und möchten nach einiger Zeit erinnert
werden, das Gericht zu wenden, Flüssigkeit
nachzugießen etc.
Bitte beachten Sie, dass der Kurzzeitwecker
den Herd nicht ein- oder ausschaltet.
1. Drücken Sie 1-mal die Taste „OK“.
Das Glockensymbol
blinkt.
Page 27

2. Stellen Sie mit den Pfeiltasten „<“ bzw. „>“
die gewünschte Zeitdauer ein.
Kurze Zeit nach dem letzten Tastendurck
erscheint wieder die Uhrzeit und der Kurzzeitwecker beginnt mit dem Countdown.
Das Glockensymbol
Nach Ablauf der eingestellten Zeitdauer
ertönt ein Signal und das Glockensymbol
blinkt.
Um das Signal auszuschalten, drücken
Sie eine beliebige Taste.
ist eingeblendet.
Die Zeitschaltuhr
Seite DE-27
Countdown abbrechen
1. Drücken Sie 1-mal die Taste „OK“.
Das Glockensymbol
dauer wird angezeigt.
2. Drücken Sie gleichzeitig beide Pfeilasten
„<“ und „>“.
Das Glockensymbol verschwindet, der
Countdown ist abgebrochen.
blinkt und die Rest-
Signalton ändern
Sie können zwischen 3 verschiedenen Signaltönen wählen.
1. Drücken Sie gleichzeitig kurz die beiden
Tasten „<“ und „>“.
Der Punkt unterhalb des Symbols „
blinkt.
“
2. Drücken Sie 1-mal kurz die Taste „OK“.
Im Display erscheint „ton1“.
3. Ändern Sie mit der Pfeiltaste „<“ den Signalton.
Der aktuelle Ton wird abgespielt und auf
dem Display die Nummer angezeigt.
4. Drücken Sie die Taste „OK“.
Ein Signal ertönt und die Eingabe ist damit
gespeichert.
Page 28

Seite DE-28 Netzanschluss – Hinweise für den Installateur
Netzanschluss – Hinweise für den Installateur
WARNUNG
Stromschlag- / Brandgefahr!
Unsachgemäßer elektrischer Anschluss
kann zu elektrischem Schlag und/oder
Kurzschluss führen.
■ Der Anschluss an das Stromnetz darf
nur durch eine autorisierte Elektrofachkraft erfolgen, die beim örtli-
chen Energieversorgungsunternehmen zugelassen ist, z.B. unser Service
(siehe Seite DE-32). Nur so haben Sie
unsere Garantie und ausreichende Sicherheit.
■ Da das Gerät nicht über eine zugäng-
liche Trennvorrichtung allpolig vom
Netz getrennt werden kann, muss
eine allpolige Trennvorrichtung gemäß Überspannungskategorie III in
der Hausinstallation mit mindestens
3 mm Kontaktabstand vorgeschaltet
sein; hierzu zählen Sicherungen, LSSchalter und Schütze.
Anschlussbedingungen
Netzleitung anschließen
Die Klemmleiste und die Anschlusspläne befinden sich hinten auf der Oberseite.
1. Schalten Sie vor dem Zugang zu den Anschlussklemmen alle Versorgungsstromkreise aus und sichern Sie diese gegen
Wiedereinschalten.
2. Vergewissern Sie sich, dass die Anschlussleitungen allpolig spannungsfrei sind und
eine wirksame Erdung möglich ist.
3. Klemmen Sie die Adern und ggf. die beiliegenden Messingbrücken gemäß der
nachfolgend abgebildeten Schaltbilder an
die entsprechenden Kontaktklemmen der
Herdanschlussdose an.
4. Verlegen Sie das Anschlusskabel so hinter
dem Herd, dass es die Rückwand des Herdes nicht berührt. Während des Betriebs
des Herdes wird dessen Rückwand heiß.
Kleinster Querschnitt der Leiter
Bemessungsstrom
des Geräts in A
> 3 und ≤ 6 0,75
> 6 und ≤ 10 1,0
> 10 und ≤ 16 1,5
> 16 und ≤ 25 2,5
> 25 und ≤ 32 4
> 32 und ≤ 40 6
> 40 und ≤ 63 10
Nennquerschnitt
in mm
2
– Die zulässigen Bemessungsspannungen
und die Bemessungsaufnahme des Geräts
finden sich in Kapitel „Technische Daten“
auf Seite 55.
– Je nach erlaubter Anschlussart muss
– der Leitungsquerschnitt gewählt werden
– die Kontaktbrücken eingesetzt bzw. ent-
fernt werden
(siehe Tabelle und Schaltbilder rechts).
– Die verwendete Netzanschlussleitung
muss den Bestimmungen der DIN EN
60335-1 entsprechen (z.B. Typ H05RR-F).
– Es ist eine separate Stromversorgung er-
forderlich.
– Beim Anschluss müssen die VDE-
Bestimmungen sowie die „Technischen
Anschlussbedingungen“ beachtet werden.
Berührungsschutz muss gewährleistet sein.
230 V 1N~ / 50 Hz
3
2
L1NPE
1
400 V 2N~ / 50 Hz
3
L2L1N
2
PE
1
400 V 3N~ / 50 Hz
L3
3
L2
2
L1NPE
1
L1 – L3: Phase(n), N: Null-Leiter,
PE: Schutzleiter (Erde)
L1 an (gebrückt)
4
(gebrückt)
N an
5
(PE) an
L1 an
4
L2 an (gebrückt)
5
N an (gebrückt)
(PE) an
L1 an , L2 an , L3 an
4
(gebrückt)
N an
5
(PE) an
Page 29

Aufstellen
Aufstellen
Seite DE-29
Voraussetzungen
– Folgende Voraussetzungen müssen erfüllt
sein, um einen sachgerechten Betrieb zu
gewährleisten:
–Das Gerät entspricht bezüglich des
Schut zes gegen Feu er gefahr dem Typ Y
(EC 335-2-6). Geräte dieses Typs dür fen
nur auf einer Seite neben höheren Küchenmöbeln, Ge rä ten oder Wän den aufgestellt
werden.
– Herd nicht direkt neben einem Kühl- oder
Gefrierschrank aufstellen. Durch die
Wärme abgabe steigt dessen En er gie ver brauch unnötig. Der gün stig ste Platz ist
ne ben dem Spülzentrum. Sie ha ben eine
zu sätz li che Ab la ge flä che, und schmutziges
Ge schirr kann gleich gereinigt werden.
– Wenn der Herd auf einen Sockel gestellt
wird, müssen Maßnahmen ergriffen werden, die verhindern, dass das Gerät vom
Sockel gleitet.
Den Herd aufstellen
1. Stellen Sie Ihren Herd mit Hilfe einer Was ser waa ge so auf, dass das Kochfeld exakt
waa ge recht ausgerichtet ist.
2. Even tu el le Unebenheiten können Sie mit
den Schraubfüßen an der Un ter sei te des
Her des ausgleichen. Ziehen Sie da für den
Ge schirr wa gen ganz heraus. Zum Ver stel len verwenden Sie am be sten eine Münze, die Sie in den Ge win de schlitz stec ken
und drehen.
Kippschutz montieren
VORSICHT!
Wenn Sie den Kippschutz nicht montieren, kann der gesamte Herd nach vorne
kippen. Sie können dabei verletzt und
der Herd beschädigt werden.
■ Befestigen Sie den mitgelieferten
Kippschutz vor Gebrauch des Herdes
unbedingt an der Wand.
■ Verwenden Sie die Backofentür nicht
als Stütze, Sitzfl äche oder Trittbrett.
Wird die offene Backofentür mit
einem schweren Gewicht belastet,
wie z. B. einem großen Bratentopf,
kann das Gerät nach vorne kippen
und umfallen.
1. Stellen Sie den Herd wie zuvor beschrieben auf und richten Sie ihn exakt aus.
2. Zeichnen Sie von innerhalb des Gehäuses
entlang der Unterseite des mittleren Schlitzes eine waagerechte Linie an die Wand.
3. Ziehen Sie den Herd wieder hervor.
(h)
(g)
(f)
4. Halten Sie den Kippschutz (f) auf der
Linie so an die Wand, dass die Seite mit
den Löchern plan an der Wand aufliegt
und der hervorstehende Schenkel in den
Schlitz am Herd passt.
5. Markieren Sie die beiden Bohrlöcher
durch die Löcher im Winkel. Beachten Sie
dabei die Höhe der Bohrlöcher:
– (g): 6,0 cm über dem Boden
– (h): 10,3 cm über dem Boden.
Page 30

Seite DE-30 Aufstellen
6. Stellen Sie mit einem Metallprüfgerät
sicher, dass sich in den Bohrbereichen
keine Kabel oder Rohrleitungen befinden.
Wählen Sie gegebenenfalls eine andere
Stelle für die Montage.
7. Bohren Sie mit einem Steinbohrer an
den gekennzeichneten Positionen je ein
Dübel loch.
8. Bei einer massiven Wand: Stecken Sie
die mitgelieferten Dübel in die Bohrlöcher.
Schrauben Sie den Kippschutz mit den
mitgelieferten Schrauben fest.
Bei einer Leichtbauwand: Besorgen Sie
sich für die Wand geeignete Spezialdübel.
Lassen Sie sich ggf. von einem Fachmann
beraten.
Schrauben Sie den Kippschutz mit zu
den Dübeln passenden Schrauben an der
Wand fest.
Transportsicherungen
entfernen
• Falls noch nicht geschehen, vorhandene
Kunststoffstreifen von den Backblechseiten ent fer nen.
• Alle Schutzfolien abziehen.
9. Schieben Sie den Herd an seinen Platz
und prüfen Sie, ob der Kippschutz ein
Kippen des Herds nach vorn verhindert.
Nehmen Sie ggf. Korrekturen vor.
Page 31

Fehlersuchtabelle
Seite DE-31
Fehlersuchtabelle
Bei allen elektrischen Geräten können Störungen auf tre ten. Da bei muss es sich nicht um ei nen
Defekt am Gerät handeln. Prüfen Sie des halb bitte an hand der Ta bel le, ob Sie die Störung be sei ti gen können.
WARNUNG
Stromschlaggefahr bei unsachgemäßer Reparatur!
Nie mals versuchen, das de fek te – oder ver meint lich defekte – Ge rät selbst zu re pa rie ren. Sie kön nen sich und spä te re Be nut zer in Gefahr brin gen. Nur au to ri sier te Fach kräf te dürfen die se Re pa ra tu ren ausführen.
Problem Mögliche Lösungen / Tipps
Kochzonen ohne Funktion, das Display zeigt
nichts an.
Sprünge und Risse im
Kochfeld.
Backofen-Kontrollleuchte (8) erlischt.
Backofen ohne Funktion,
Anzeige „
Backofen-Kontrollleuchte (8) leuchtet nicht.
Backofenbeleuchtung ist
defekt.
“ blinkt.
Die Stromzufuhr ist unterbrochen. Prüfen Sie die Sicherung für den
Herd am Si che rungs ka sten innerhalb der Wohnung. Verständigen Sie
im Zweifelsfall unseren Service (siehe Seite DE-32).
Schalten Sie die Kochzonen sofort aus und benutzen Sie sie nicht
mehr. Verständigen Sie unseren Service (siehe „Unser Service“
auf Seite DE-32).
Die eingestellte Backofen-Temperatur ist erreicht. Die Leuchte schaltet sich bei sinkender Temperatur automatisch wieder ein.
Nach dem Anschließen oder einem Stromausfall muss die Uhrzeit
eingestellt werden, wie im Anschnitt „Die Uhr“ beschrieben.
Überprüfen Sie zunächst, ob das Gerät noch funktioniert (siehe oben).
Ist die Leuchte defekt, lassen Sie sie nur durch den Kundendienst
aus wech seln (siehe „Unser Service“ auf Seite DE-32).
Wechseln Sie die defekte Glühlampe aus, siehe Seite DE-22. Hinweis:
Defekte Lam pen fal len nicht unter unsere Ga ran tie lei stung.
Page 32

Seite DE-32 Unser Service
Unser Service
Damit wir Ihnen schnell helfen können, nennen Sie uns bitte:
Gerätebezeichnung Modell Farbe Bestellnummer
Privileg Standherd 5010CE2.313eETaDJXv Edelstahl 4673 2111
Beratung, Bestellung und
Reklamation
Wenden Sie sich bitte an die Produktberatung Ihres Versandhauses, wenn
– die Lieferung unvollständig ist,
– das Gerät Transportschäden aufweist,
– Sie Fragen zu Ihrem Gerät haben,
– sich eine Störung nicht mithilfe der Fehler-
suchtabelle beheben lässt,
– Sie weiteres Zubehör bestellen möchten.
Reparaturen und Ersatzteile
Kunden in Deutschland
– Wenden Sie sich bitte an unseren Technik-
Service:
Telefon 040 36 03 31 50
Kunden in Österreich
– Wenden Sie sich bitte an das Kundencenter
oder die Produktberatung Ihres Versandhauses.
Bitte beachten Sie:
Sie sind für den einwandfreien Zustand des Geräts und die fach ge rech te Benutzung im Haushalt
verantwortlich. Wenn Sie wegen eines Bedienfehlers den Kundendienst rufen, so ist der Besuch
auch während der Gewährleistungs-/Ga ran tie zeit für Sie mit Kos ten ver bun den. Durch Nichtbeachtung dieser Anleitung ver ur sach te Schäden können leider nicht anerkannt werden.
Page 33

Umweltschutz
Umweltschutz
Seite DE-33
Elektro-Altgeräte
umweltgerecht entsorgen
Elektrogeräte enthalten Schadstoffe
und wertvolle Ressourcen.
Jeder Verbraucher ist deshalb ge-
setzlich verpflichtet, Elektro-Altgeräte an einer zugelassenen Sammel- oder
Rücknahmestelle abzugeben. Dadurch werden sie einer umwelt- und ressourcenschonenden Verwertung zugeführt.
Sie können Elektro-Altgeräte kostenlos beim
lokalen Wertstoff-/Recyclinghof abgeben.
Für weitere Informationen zu diesem Thema
wenden Sie sich direkt an Ihren Händler.
Verpackung
Unsere Verpackungen wer den aus
um welt freund li chen, wie der ver wert ba ren Materialien hergestellt:
– Außenverpackung aus Pappe
– Formteile aus ge schäum tem, FCKW- freiem
Po ly sty rol (PS)
– Folien und Beutel aus Polyäthylen (PE)
– Spannbänder aus Po ly pro py len (PP)
– Auch Energie sparen schützt vor zu starker
Erwärmung unserer Erde. Ihr neues Gerät
verbraucht mit seiner modernen Technik
wenig Energie.
Entsorgen Sie die Verpackung bitte umwelt-
freundlich.
Tipps zum Energiesparen
– Heizen Sie den Backofen nur dann vor,
wenn es im Rezept oder in den mitgelieferten Gartabellen angegeben ist.
– Verwenden Sie möglichst dunkle Backfor-
men und -bleche. Sie nehmen die Hitze
besonders gut auf.
– Öffnen Sie die Backofentür während des
Garens bzw. Backens oder Bratens möglichst selten.
– Mehrere Kuchen sollten Sie schnell nachei-
nander backen, solange der Backofen noch
warm ist. Dadurch verkürzt sich die Backzeit für den zweiten Kuchen. Wenn Sie Kastenformen verwenden, schieben Sie beide
nebeneinander in den Backofen.
– Schalten Sie den Backofen bei längeren
Garzeiten schon 10 Minuten vor Ende der
Garzeit aus. Die Restwärme reicht zum
Fertiggaren aus.
– Lassen Sie beim Kochen möglichst immer
den Deckel auf dem Topf. Flüssigkeiten
werden mit Deckel schneller zum Kochen
gebracht als ohne.
– Verwenden Sie nur hoch- und neuwertige
Töpfe und Pfannen. Sie liegen plan auf dem
Kochfeld auf und haben dadurch eine bessere Energieleitfähigkeit als Kochgeschirr
mit verzogenem oder verbeultem Boden
(beachten Sie auch das Kapitel „Das richtige Kochgeschirr“).
– Schalten Sie die Kochstufe rechtzeitig zu-
rück und kochen Sie mit einer möglichst
niedrigen Einstellung weiter.
– Kochen Sie, wann immer es möglich ist,
mit Schnellkochtöpfen. Dadurch halbiert
sich der Garvorgang, und Sie sparen eine
Menge Energie.
– Nehmen Sie zum Garen nur so viel Wasser
wie Sie wirklich benötigen. Zur Erwärmung
von Wasser ist sehr viel Energie nötig.
Page 34

Seite DE-34 Tabelle Prüfgerichte
Tabelle Prüfgerichte
Diese Gerichte wurden gemäß den Normen DIN 44547 und EN 60350 zubereitet.
Speise
Anzahl
Bleche
Einschub höhe
1)
Beheizungsart
Spritzgebäck 1 4 Ober-/Unterhitze
Wasserbiskuit 1 2 Ober- /Unterhitze
Apfelhefekuchen 1 4 Ober-/Unterhitze
Temperatur
in °C
2)
150-160 20-30
2)
180-190 15-25
2)
185-195 25-40
Gardauer
in Min.
20 Muffins 1 2 Ober-/Unterhitze 160-170 15-25
Toast 1 3 Grill
12 Hacksteaks 1 4 Intensivgrill
Hähnchen 1 2
Schweinebraten 1 2
Gans 1 2
3)
3)
Intensivgrill mit
Umluft
Intensivgrill mit
Umluft
Intensivgrill mit
Umluft
240 1-3
240 15 + 6-8
180-195 50-65
180-195
6)
140 -160
180-195 75-90
4)
2) 7)
Pizza
1 3 Umluft 170 -175 20 -25
1)
Einschubhöhe von unten gerechnet
2)
vorgeheizt
3)
5 Minuten vorheizen
4)
1. und 2. Seite
1 3 Ober-/Unterhitze 220-230 18-23
5)
Universalpfanne oben
6)
abhängig von der Höhe des Bratens
7)
Zubereitungssangaben des Herstellers auf d
Verpackung befolgen
Page 35

Produktdatenblatt gemäß VO (EU) Nr. 65/2014
en
g
x
1
(
)
odus
ft
e
e
sch
en
60350
Produktdatenblatt gemäß VO (EU) Nr. 65/2014
Seite DE-35
Warenzeich
4673 2111 / 5010CE2.313eETaDJXv
Energieeffizienzinde
Energieeffizienzklasse auf einer Skala
A+++
Energieverbrauch konventionellen M
Energieverbrauch
Anzahl der Garräum
Wärmequell
Volum
Die oben angegebenen Werte sind unter genormten Laborbedingungen nach EN
emessen worden.
höchste Effizienz) bis D (geringste Effizienz
mlu
rivile
5,
A
,99kWh/Zyklus
,78kWh/Zyklus
lektri
Page 36

Seite DE-36 Produktinformationen gemäß VO (EU) Nr. 66/2014
g
des Backofens
d
g
e
e
sch
en
odus
dex
1
Produktinformationen gemäß VO (EU) Nr. 66/2014
odellkennun
Art
asse des Gerätes 35,0k
Anzahl der Garräum
Wärmequell
Volum
Energieverbrauch im konventionellen M
Energieverbrauch im Umluftmodus
EnergieeffizienzIn
Die oben angegebenen Werte sind unter genormten Laborbedingungen nach EN 603501
emessen worden.
4673 2111 / 5010CE2.313eETaDJXv
reistehen
lektri
,99kWh/Zyklus
,78kWh/Zyklus
5,
Page 37

Produktinformationen gemäß VO (EU) Nr. 66/2014
g
de
de
/
en
k
n
s
s
s
s
s
p
s
p
p
s
p
g
p
60350
Produktinformationen gemäß VO (EU) Nr. 66/2014
Seite DE-37
odellkennun
Art der Kochmul
Anzahl der Kochzonen und
iztechni
Kochzone vorne link
Kochzone hinten link
Kochzone vorne recht
Kochzone hinten recht
Energieverbrauch Kochzone vorne link
Energieverbrauch Kochzone hinten link
Energieverbrauch Kochzone vorne rechts 182,6 Wh
Energieverbrauch Kochzone
r Kochfläch
inten recht
4673 2111 / 5010CE2.313eETaDJXv
lektrische Kochmul
4
trahlungskochzone
12,0 / 18,0 cm
14,5 cm
14,5 cm
L 25,0 cm
W 14,0 cm
184,5Wh
182,4 Wh
186,8Wh
Energieverbrauch der Kochmulde je k
Die oben angegebenen Werte sind unter genormten Laborbedingungen nach EN
emessen worden.
184,1Wh
Page 38

Seite DE-38 Technische Daten
673
1
d
g
ofen
)
50
g
C
d
t
Technische Daten
Bestellnummer4
tandherd mit GlaskeramikKochfel
ll
Bemessungsspannun
Frequenz
BemessungsaufnahmeBack
erätemaßeH x B x T
ximal
Temperatur 2
Beleuchtun
BemessungsaufnahmeKochfel
Bemessungsaufnahmeesam
230
10CE2.313eETaDJXv
230V ~ / 400V 3N ~
240V, 25W, E14
x
211
z
W
100W
W
x
15, T
°
Page 39

5010CE2.313eETaDJXv
Manual/version:
197258_EN_20191220
Article no.: 4673 2111,
Reproduction, even of excerpts,
is not permitted!
User manual
Cooker with glass ceramic hob and
multifunctional oven
Page 40

Seite EN-2 Table of contents
Table of contents
You can fi nd more information
on assembly and installation
from page EN-27.
Delivery . . . . . . . . . . . . . . . . . . . . . . . . EN-3
Package contents . . . . . . . . . . . . . . . EN-3
Check the delivery . . . . . . . . . . . . . . EN-3
Packaging tips . . . . . . . . . . . . . . . . . EN-3
Controls and appliance parts . . . . . . . EN-4
Safety . . . . . . . . . . . . . . . . . . . . . . . . . EN-5
Intended use. . . . . . . . . . . . . . . . . . . EN-5
Definition of terms/symbols . . . . . . . EN-5
Safety notices . . . . . . . . . . . . . . . . . . EN-5
The hob . . . . . . . . . . . . . . . . . . . . . . . EN-10
Glass ceramic hob . . . . . . . . . . . . . EN-10
The right cookware . . . . . . . . . . . . . EN-10
Cooking zones + temperature
controller . . . . . . . . . . . . . . . . . . . . . .EN-11
Power indicator light . . . . . . . . . . . . EN-12
Cooking and energy-saving tips . . EN-12
Cleaning the hob . . . . . . . . . . . . . . EN-13
The oven . . . . . . . . . . . . . . . . . . . . . . EN-14
Preparation . . . . . . . . . . . . . . . . . . . EN-14
The right oven cookware . . . . . . . . EN-14
Proper handling of the oven . . . . . . EN-14
Baking tray and dripping pan . . . . . EN-14
Function switch . . . . . . . . . . . . . . . EN-15
Temperature controller . . . . . . . . . . EN-15
Oven indicator light . . . . . . . . . . . . EN-16
Oven lighting . . . . . . . . . . . . . . . . . EN-16
Switching off the oven . . . . . . . . . . EN-17
Special defrosting information . . . . EN-17
Special preparation information
for yeast dough . . . . . . . . . . . . . . . EN-17
Cleaning the oven . . . . . . . . . . . . . EN-17
Basic cleaning . . . . . . . . . . . . . . . . EN-18
Cleaning the housing surface . . . . EN-18
Cleaning the cooking compartment EN-18
Steam cleaning . . . . . . . . . . . . . . . EN-18
Cleaning the baking tray guides . . EN-19
Changing oven lighting . . . . . . . . . EN-22
The timer . . . . . . . . . . . . . . . . . . . . . . EN-23
Setting/changing the time . . . . . . . EN-23
Semi-automatic and fully automatic
operation . . . . . . . . . . . . . . . . . . . . EN-23
Fully automatic operation . . . . . . . . EN-25
Countdown timer/egg timer . . . . . . EN-26
Changing the audible signal . . . . . . EN-26
Connection to the power supply –
notes for the installer . . . . . . . . . . . . . EN-27
Connection conditions . . . . . . . . . . EN-27
Connecting to the mains . . . . . . . . EN-27
Positioning . . . . . . . . . . . . . . . . . . . . . EN-28
Requirements . . . . . . . . . . . . . . . . . EN-28
Setting up the cooker . . . . . . . . . . . EN-28
Mounting the tilt protection . . . . . . . EN-28
Removing transport locks . . . . . . . EN-29
Troubleshooting table . . . . . . . . . . . . EN-30
Our Service Centre . . . . . . . . . . . . . . EN-31
Advice, order and complaint . . . . . EN-31
Repairs and spare parts . . . . . . . . . EN-31
Environmental protection . . . . . . . . . EN-32
Disposing of old electrical devices
in an environmentally friendly
manner . . . . . . . . . . . . . . . . . . . . . . EN-32
Packaging . . . . . . . . . . . . . . . . . . . . EN-32
Tips for saving energy . . . . . . . . . . EN-32
‘Test report’ table . . . . . . . . . . . . . . . . EN-33
Product fiche concerning
Regulation (EU) No 65/2014 . . . . . . . EN-34
Product information concerning
Regulation (EU) No 65/2014 . . . . . . . EN-35
Technical data . . . . . . . . . . . . . . . . . . EN-37
Page 41

Delivery
Seite EN-3
Please read through the safety instructions and user man-
ual carefully before using the
appliance. This is the only way you can
use all the functions safely and reliably.
Be sure to also observe the national regulations in your country, which are valid in
Delivery
(a)
(b)
(c)
(d)
(e)
addition to the regulations specified in this
user manual.
Keep all safety notices and instructions for
future reference. Pass all safety notices and
instructions on to the subsequent user of
the product.
Check the delivery
1. Transport the appliance to a suitable location and unpack it there.
2. Check that the delivery is complete.
3. Check whether the appliance was damaged during transit.
4. If the delivery is incomplete or the appliance has been damaged during transport,
please contact our Service team, see
page EN-31.
Package contents
Cooker with
(a) 1× glass ceramic hob
(b) 1× oven
(c) 1× grilling rack
(d) 1× baking tray
(e) 1× dripping pan
(f) 1× tilt protection, see page EN-28
1× user manual
1× Quick start guide
1× “Baking, roasting and cooking” bro-
chure
WARNING!
Risk of electric shock!
Never use a damaged appliance.
Packaging tips
If you have sufficient space, we recommend keeping the packaging, at
least during the warranty period. If
the appliance needs to be sent out for repairs,
only the original packaging will provide sufficient protection.
If you would like to dispose of the packaging, please dispose of it in an environmentally
friendly way.
Page 42

Seite EN-4 Controls and appliance parts
0
y
)
g
)
)
Temperature controller for cooking
)
t
t
)
g
)
)
g
)
)
Function switch for oven heating type
)
Temperature controller for the oven
ood
e
)
(
9
Controls and appliance parts
(1) (2) (3) (4)
(5)
(6) (7)
(8)
(9) (10) (11)
1) Front left cooking zone,
2) Back left cooking zone,
3) Back right cooking zone,
4) Front right cooking zone,
5) Residual heat displa
6
7
8) Red oven indicator ligh
9) Yellow power indicator ligh
10
Temperature controller for cookin
one (1
one (2
Temperature controller for cookin
one (3
12.0 / 18.0 cm
14.5 cm
14.0 × 25.
14.5 cm
(14)
(12)(13)
(15)
(16)
(17)
11
12
13) Timer
14
15) Extraction h
16) Oven door with viewing window and door
17) Cookware trolleys
18) Screw feet (not seen here
19) Baking tray guides
Temperature controller for cookin
one (4
ndl
EN-1
(18)
Page 43

Safety
Safety
Seite EN-5
Intended use
This cooker is designed for cooking, frying,
baking, grilling, keeping food warm and defrosting food.
The oven should not be used to defrost raw
meat, poultry or fish.
The appliance is designed for use in private
households and is not designed for commercial use or multiple use (e.g. use by several
families in an apartment building).
Use the appliance solely as described in this
user manual. Any other use will be deemed
to be improper and may lead to damage to
property or even injury to persons. The manufacturer accepts no liability for damage
caused by improper use.
The oven is not suitable for heating a room.
The oven light is exclusively used for lighting
the cooking compartment and not for lighting
a room.
The oven door must not be used as a support
prop, seat or step.
Definition of terms/symbols
The following symbols can be found in this
user manual.
WARNING
This symbol indicates a hazard with a medium level of risk which, if not avoided, could
result in death or serious injury.
CAUTION
This symbol indicates a hazard with a low level of risk which, if not avoided, could result in
minor or moderate injury.
NOTICE
This symbol warns against possible damage
to property.
This symbol refers to useful additional
information.
Safety notices
In this chapter you will find general safety
notices which you must always observe for
your own protection and that of third parties.
Please also observe the warning notices in
the individual chapters on operation, set-up,
installation, etc.
WARNING
Risks in handling household
electrical appliances
Risk of electric shock!
Touching live parts may result in severe
injury or death.
■ Only use the appliance indoors. Do
not use in wet rooms or in the rain.
■ If the surface is cracked, turn the ap-
pliance off to avoid electric shock.
■ Do not operate or continue to oper-
ate the appliance if
– it shows visible signs of damage,
for example, the connection cable
is defective;
– starts smoking or there is a burning
smell;
– it makes unusual sounds.
In such cases, remove the mains plug
and contact our Service department
(see page EN-31).
■ Mains cord / mains plug
– Lay the mains cord so that it does
not pose a tripping hazard.
– Do not kink or pinch the mains cord
or lay it over sharp edges.
– If the mains cord of the appliance
is damaged, it must be replaced by
the manufacturer, through customer service or by a qualified specialist.
– Do not extend or modify the mains
cord.
Page 44

Seite EN-6 Controls and appliance parts
– Keep the mains plug and cord away
from naked flames and hot surfaces.
■ Connection to the mains supply may
only be made by an authorised electrician approved by the local energy
supply company (see „Our Service
Centre“ on page EN-31). Only then will
you benefi t from our warranty and a
suffi cient level of safety. Unauthorised persons may not connect the appliance to the mains supply. You can
endanger your life and that of subsequent users! This also applies to disconnection from the power supply
and dismantling the old appliance.
■ Since all poles of the appliance can-
not be disconnected from the mains
via an accessible disconnecting device, an all-pole disconnecting device
in accordance with overvoltage category III must be connected within
the house installation with at least 3
mm contact clearance; this includes
fuses, miniature circuit breakers and
protective devices.
■ Before connecting the device, switch
off the relevant electric circuit(s)
(switch off circuit breakers or unscrew
fuses).
■ Never open the housing.
■ Never try to repair a defective or sus-
pected defective appliance yourself.
You can put your own and future users’ lives in danger. Only authorised
specialists are allowed to carry out
this repair work.
■ Do not operate the appliance with an
external timer or an external remote
control system.
■ Do not put any objects in or through
the housing openings and also make
sure that children cannot insert any
objects through them.
■ Oven lighting:
– Before replacing the light ensure
that the appliance is switched off
to prevent the risk of electric shock.
– First switch off the oven then un-
screw and/or switch off the fuses.
– Replace the light bulb only when
the oven is no longer hot.
Risks to children
Risk of suffocation!
■ Do not allow children to play with the
packaging fi lm. They may get caught
up in this or suffocate.
■ Prevent children from pulling small
parts from the device or taking them
out of the accessory bag and putting
them in their mouths.
Risks for certain groups of people
Danger to children and persons with
reduced physical, sensory or mental
abilities (e.g. people with disabilities
to some extent, older persons with impaired physical and mental abilities)
or who lack experience and knowledge
(e.g. older children).
■ This appliance can be used by chil-
dren aged eight years and up, and by
persons with reduced physical, sensory or mental abilities, or who lack experience and/or knowledge, if they
are supervised or have been instructed in the safe use and understand the
risks associated with its use.
Page 45

Controls and appliance parts
Seite EN-7
■ Children should not be allowed to
play with the appliance nor should
they have access to the appliance
when left unattended.
■ Cleaning and user maintenance must
not be carried out by children unless
they are supervised.
■ Keep children away from the door
glass! The glass door can become
very hot during operation and pose a
risk of burning!
CAUTION
Risks when handling the
appliance
Risk of burns!
During its use, the device and its exposed parts can become hot.
■ Please avoid touching the heating el-
ements.
■ Children aged 8 years or younger
must be kept away from the device,
unless they are under constant supervision.
■ Hob
– The cooking zones get very hot dur-
ing operation and will remain hot
after they are switched off.
– Hot steam can flow from the ex-
traction hood (ventilation) when
the oven is in use.
■ Oven
– Never pour water directly into the
hot oven. The steam can cause
scalding and damage the enamel.
– Allow hot water from the oven to
cool before pouring it out.
– Never leave the oven unattended
while grilling. Keep children away!
■ Allow the cooking zones and oven to
cool completely before cleaning.
Fire hazard!
■ Hob
Unsupervised hob cooking with
grease and oil can be dangerous and
can cause fi res.
– NEVER attempt to extinguish a
fire with water; instead switch the
appliance off and then cover the
flames with, for example, a pan lid
or a fire blanket.
Page 46

Seite EN-8 Controls and appliance parts
– If you are preparing food with alco-
hol, do not leave the cooker unattended! Food may ignite of its own
accord.
– Never store objects on the cooking
area.
– The cooking process must be super-
vised. A short cooking process must
be constantly supervised.
– Only protective hob grilles or hob
covers made by the hob manufacturer, approved protective hob
grilles or covers which are listed in
the user manual, or pre-installed
protective hob grilles or hob covers
may be used. The use of unsuitable
protective hob grilles or hob covers
may lead to accidents.
■ Oven
– Only ever operate the oven with the
oven door closed.
– Do not cover cakes or roasts be-
ing cooked in the oven with baking
parchment. Do not allow food, baking parchment and aluminium foil
to come into contact with the heating elements.
– Do not place food to be grilled too
far back near the end of the heating element. It is particularly hot
there. Fatty foods can catch fire.
– Do not store temperature-sensi-
tive, combustible or flammable objects in the oven! If the appliance
is switched on unintentionally they
may deform or ignite.
– Do not use the oven for storage
purposes.
– In case of an oven fire: Do not open
the oven door!
■ Once the fi re has been extinguished,
have the appliance checked by our
service team (see page EN-31).
■ Timer
– Before starting the timer, please
make sure to inform all members of
the household so that they do not
put anything in the oven.
– Never leave anything to grill unat-
tended when using the timer!
– Monitor the oven while using the
timer in order to prevent spilling
and burning. Please note that fats,
oils and alcohol can catch on fire
when heated.
Health hazard!
■ Do not defrost meat, poultry and fi sh
in the oven. Take the frozen food out
of the freezer ahead of time, cover
and let it defrost in the refrigerator.
The fl uid from the frozen food must
be able to properly drain, otherwise
harmful microorganisms can form.
Acrylamide may be carcinogenic.
Acrylamide is produced when starch is
exposed to excessive heat, e.g. in potatoes (fries, chips), biscuits, toast, bread
etc.
■ Keep cooking times as short as pos-
sible.
■ Only brown the food slightly, do not
allow it to brown too much.
■ Cut larger-sized fries and then bake
at maximum of 180°C.
■ Brushing baked goods with egg
whites or egg yolks helps to reduce
the formation of acrylamide.
Page 47

Controls and appliance parts
Seite EN-9
Risk of tipping and injury!
If the oven door is loaded with a heavy
weight, the appliance can tilt forwards.
There is a risk of injury from falling objects.
■ The oven door must not be used as a
support prop, seat or step.
■ The supplied bracket must be at-
tached to the wall before the oven is
used to prevent the appliance tipping
over.
NOTICE
Risk of damage!
■ Use the hob as a work surface or some-
where to place objects only once the
cooking zone has completely cooled
off. Materials which are sensitive to
heat such as plastic dishes could become damaged if this is the case.
■ Do not use any aluminium foil or plas-
tic containers to cook on the cooking
zones as they can melt.
■ Turn the temperature controllers for
the double circle and roasting pan
cooking zones clockwise to turn them
on and counter-clockwise to turn
them off. Never turn past the double
zone symbol "
■ Do not place baking trays or alumini-
" by force.
um foil directly on the bottom of the
cooking compartment. It may cause
heat to build up inside and damage
the oven’s enamel. If you wish to
place dishes directly on the bottom of
the cooking compartment, the oven
temperature must not exceed 50°C.
Be careful when handling cookware
– the enamel can be easily scratched.
■ Turn the temperature controller
clockwise to turn the oven on and
counter-clockwise to turn it off. Never
force it past the fi nal position.
■ Cleaning: Do not use any harsh, abra-
sive cleaners or sharp metal scrapers
to clean the glass on the oven door,
as they can scratch the surface. This
can destroy the glass.
■ When cleaning do not use steel
wool, oven sprays, steam cleaners
or high-pressure cleaners! They can
damage the surface and destroy the
glass.
High-pressure cleaners can cause a
short circuit.
■ Do not clean baking tray guides and
telescopic rails in the dishwasher.
■ The oven door is heavy and has a
glass front. Do not allow the door to
fall open when taking it off its hinges!
■ If a trolley is used to move the appli-
ance, the appliance must be lifted as
shown on the packaging.
■ Do not use the door handle to lift the
oven! The handle is not designed to
carry the whole weight of the appliance.
■ When preserving, place only so many
jars in the dripping pan at the same
time that they do not touch. The jars
can burst.
Page 48

Seite EN-10 The hob
The hob
Glass ceramic hob
Unlike cast-iron hobs, your cooker has a flat
hob made from glass ceramic with clearly visible cooking zones. So that the glass ceramic
does not become damaged and lasts for a
long time, you need to care for it and maintain
it and use suitable cookware.
WARNING
Risk of electric shock!
Touching live parts may result in severe
injury or death.
■ Do not continue to cook if you fi nd
cracks in the glass ceramic. Water that
runs through cracks inside the device
may be live! If there are cracks in the
glass ceramic, disconnect the glass
ceramic hob from the mains supply
(switch off circuit breaker(s)/unscrew
fuse[s]) and then Contact our Service
Centre, see page EN-31.
NOTICE
Risk of damage!
Improper handling of the appliance
may result in damage.
■ Do not push heavy pans across the
appliance; The glass ceramic may become scratched.
■ Wipe the hob and the base of the
pots prior to use to wipe away any
dirt which may cause scratches.
■ Use the hob as a work surface or to
place objects on only once it has completely cooled off. Materials which
are sensitive to heat such as plastic
dishes could become damaged if this
is the case.
The right cookware
NOTICE
Risk of damage!
Glass is a poor heat conductor. Because
of this, thermal stress and breakages
may occur when using glass cookware
on the hob.
■ If possible, only use metal cookware
on the cooking zone.
The best thing to use is cookware for electric hobs
– with a completely even base, or if neces-
sary with very little curvature towards the
inside (base expands when heated!). This
allows heat to be transferred better and
more quickly.
– with a sufficiently thick base, for example
enamelled steel pans with 2-3 mm and
stainless steel pans with 4-6 mm, which
can be identified with the label ‘Base thickness in line with DIN 44904’ [Bodenstärke
nach DIN 44904].
– of a size that corresponds to the size of the
cooking zones.
The d1 diameter is always provided as a
pan and pot size. d2 base diameter is always around 2 cm smaller. Pots that are
too big can cause paintwork damage.
Page 49
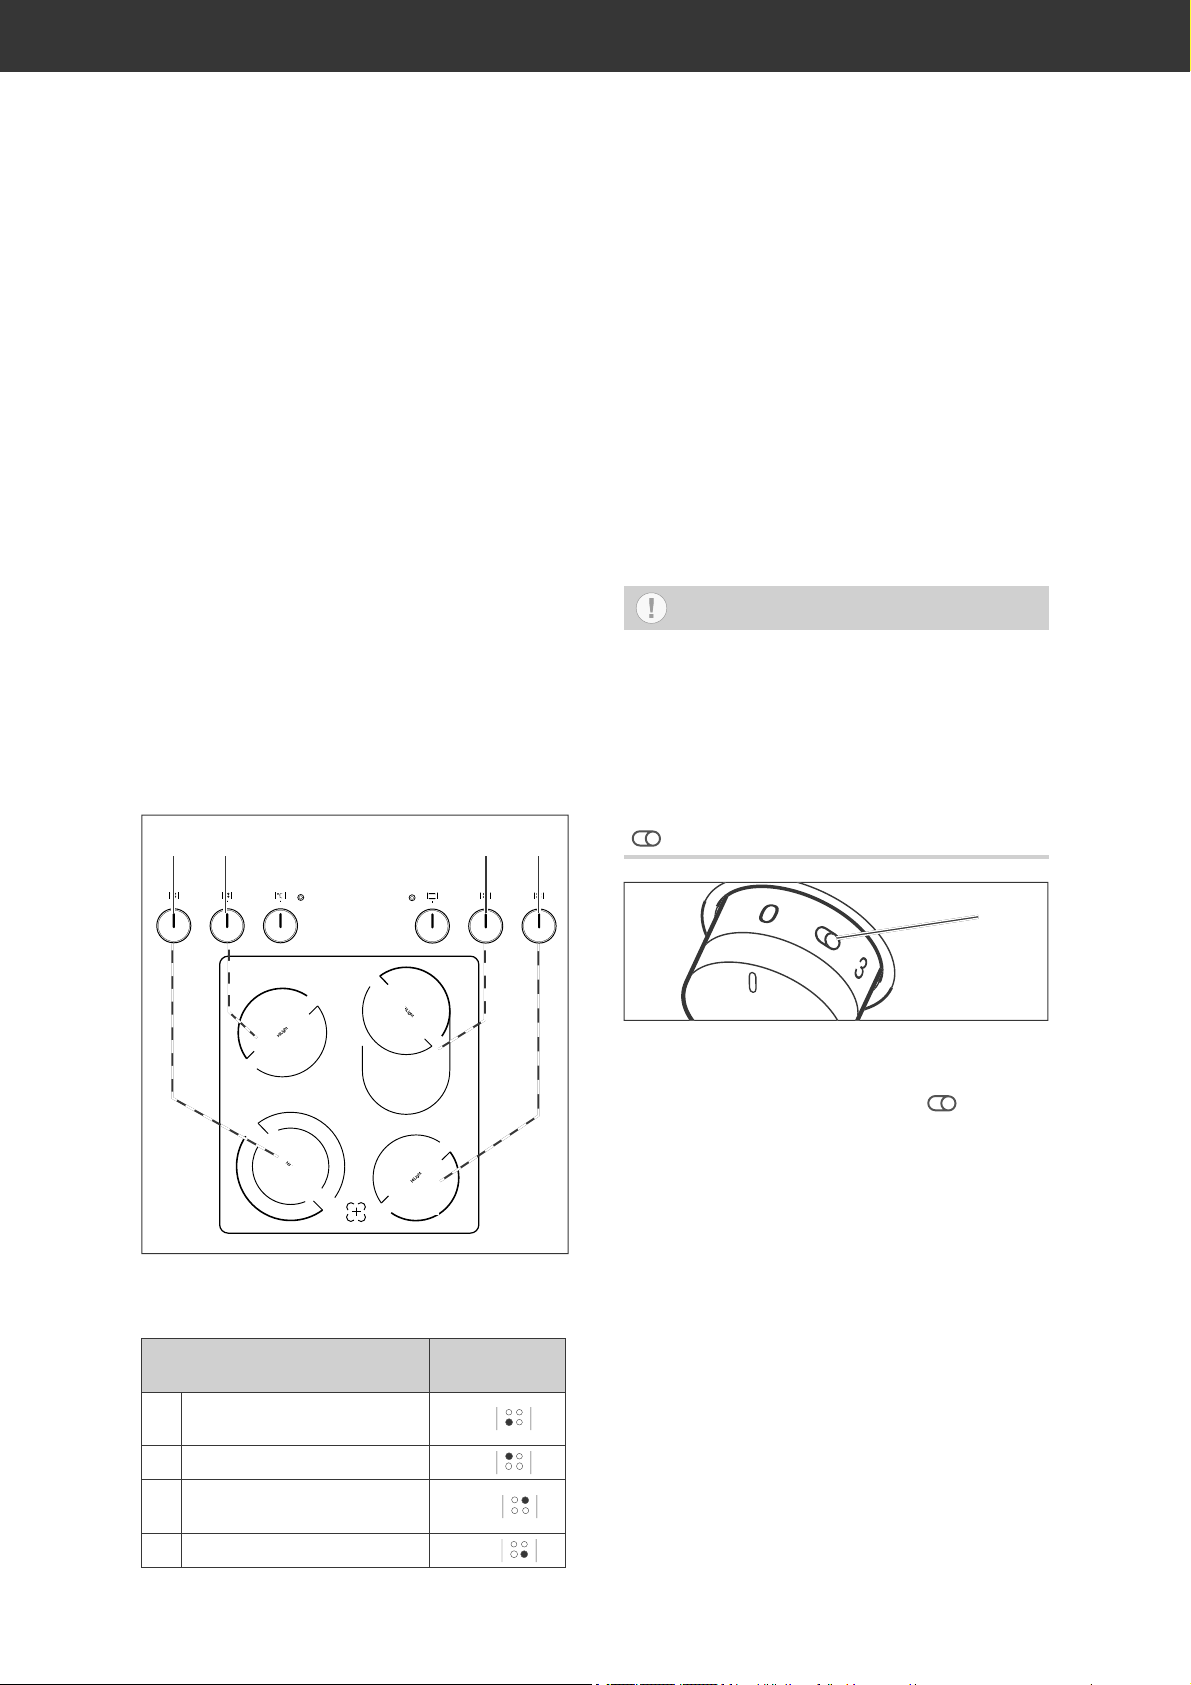
The hob
Seite EN-11
Energy and time-saving pressure
– cookers are also well-suited. The relative-
ly high purchase costs are quickly saved
again.
– Steel pots and pans as well as coated and
uncoated aluminium cookware with a thick
base. However, coated cookware must not
be overheated or scratched.
You should not use:
– Indented or battered pans.
– Pans with a rough base.
– Pans with a curved base.
– Coated cookware that is scratched inside.
Cooking zones + temperature
controller
(6)
(7) (10) (11)
• Turn the temperature controller to the desired level of heat as needed:
from gentle simmering to rapid bubbling.
The heat settings (0 - 3) can be seen on
the temperature controller.
• Turn the temperature controller to level
“0” to switch off.
Using double circle and roasting
pan cooking zones
NOTICE
Risk of damage!
Turn the temperature controllers for the
double circle and roasting pan cooking
zones clockwise to turn them on and
counter-clockwise to turn them off.
Never turn past the double zone symbol
"
" by force.
(2)
(1)
The hob has four cooking zones. Each cooking zone has its own temperature controller.
Cooking zone Temperature
Double circle cooking
(1)
zone
(2) Normal cooking zones
Roasting pan cooking
(3)
zone
(4) Normal cooking zones
(3)
(4)
controller
(6)
(7)
(10)
(11)
(20)
To extend the (1) or (3) cooking zone,
• turn the temperature controller briefly on
the double-zone symbol (20)“
then release it.
• Set the power as usual.
To reduce the size of the cooking zone
again,
• turn the temperature controller anti-clockwise to “0” and the turn the temperature
controller clockwise to the desired power.
” and
Page 50

Seite EN-12 The hob
Power indicator light
(9)
The yellow power indicator light (9) is illuminated as soon as at least one of the cooking
zones or the oven is switched on. It will switch
off again when all of the cooking zones and
the oven are switched off.
Residual heat display
Cooking and energy-saving
tips
Controller posi-
1)
tion
1
2-3
4-5
6-7
8 Intense frying for quick stir-frying
9
1)
For smaller quantities ½ level lower, for larg-
er quantities ½ level higher.
Application and Examples
Gentle boiling / keeping warm, for
soaking rice
Boiling most dishes such as
soups and vegetables
Gentle roasting / intense further
cooking for breaded items
Normal roasting for roast potatoes
Searing and parboiling, for potatoes, braised meat
(5)
The residual heat display (5)will remain illuminated for as long as a cooking zone is still
warm. It warns you of any possible burning
and lets you know that you can still use residual heat to cook.
CAUTION!
Risk of burns!
If a power failure occurs, the residual
heat indicator will go out and may not
indicate the presence of residual heat!
■ Do not touch a hot cooking zone af-
ter a power failure.
– To sear and parboil food, always select the
highest setting.
– Once the pot boils and steam forms or the
steak is brown on both sides, switch to a
lower level; for larger pots and pans use
the setting ‘2’, otherwise setting ‘1’ is sufficient.
– Roasts weighing more than 1 kilogram are
best cooked in the oven.
– Use the right dishes and a little water/oil to
cook; this helps to preserve the vitamins.
– Use the residual heat of the cooking zones.
The heat is sufficient enough for 5 to 10
minutes, e.g. for soaking rice.
Page 51
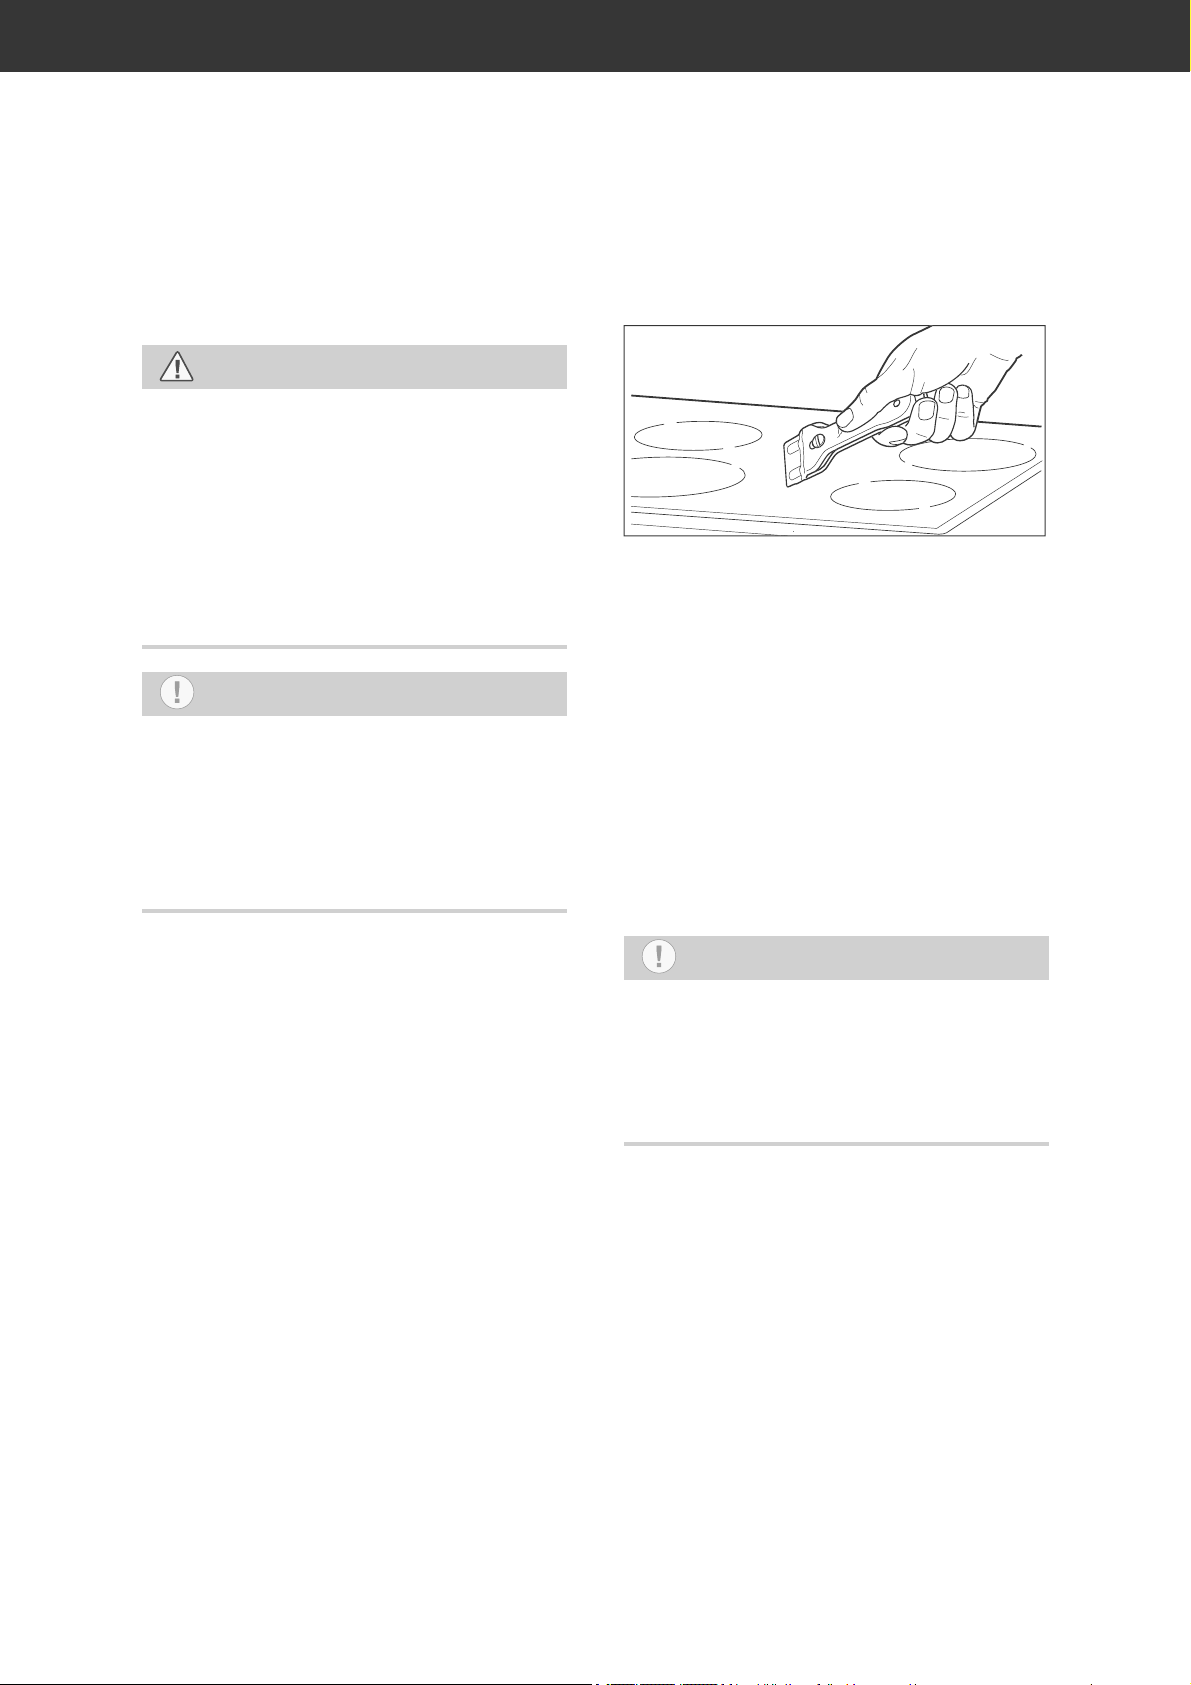
The hob
Seite EN-13
Cleaning the hob
CAUTION!
Risk of burns!
Improper handling may lead to burns.
■ Allow the cooking zones to cool com-
pletely before cleaning. Exception:
Immediately remove sugar or starchy
food particles, synthetic materials, or
aluminium foil (for further information see below).
NOTICE
For cleaning purposes, do not use any
harsh cleaning agents or scouring powders, steel wool, oven sprays, steam
cleaners or high-pressure cleaners! They
can damage the surface. High-pressure
cleaners can cause a short circuit.
• Clean and maintain the hob regularly
with a special care product containing a
special impregnating oil for glass ceramic
hobs. Such products can be found in specialist shops.
Slight soiling which is not burnt on
• After the appliance has cooled, use a
damp cloth with no cleaning agent to wipe
away dirt. Then use a soft cloth to dry the
surfaces to prevent lime stains.
• You can easily remove light stains having
a pearlescent colour (aluminium residues,
such as from aluminium foil) using a commercially available detergent that is specifically available for such cleaning.
• Vinegar is good for removing lime stains.
Hard, baked-on dirt
• Stubborn dirt is best removed after cooling with a scraper (not included in package contents).
• You will also find special cleaning cleaners in specialist shops.
Finally, wipe the surface with a damp
cloth.
• Treat the hob with a special care product
after cleaning.
Removing sugar or starchy food
particles, synthetic materials, or
aluminium foil
NOTICE
Immediately remove sugar or starchy
food particles and residues of plastics
or aluminium foil. Otherwise, these may
cause permanent and irreparable damage to the hob.
• Put protection on your hands before
cleaning, for example, oven mitts to protect against burns. Then remove the dirt
with a scraper (not included in package
contents).
• Once the hob has cooled off, you can remove residues using a specially designed
cleaning product which is available from
specialist shops.
• Treat the hob with a special care product
after cleaning.
Page 52

Seite EN-14 The oven
The oven
Preparation
1. Remove any polystyrene, cardboard and
plastic safety parts from the oven and
baking trays.
2. Remove all protective films.
3. Thoroughly clean the oven before first
use, see page EN-18.
The right oven cookware
– Pots with heat-resistant handles can be
recognised by the label indicating ‘heat resistant up to 280°C’.
– Fire-proof dishes made of glass, porcelain,
ceramic and clay or cast iron.
– In particular, ovens with top and bottom
heat require dishes and trays with good
heat transfer, preferably metals which have
been painted black, as these allow cakes
to brown nicely.
– Good results can also be achieved with
coated or non-coated aluminium trays.
NOTICE
Pent-up heat can damage the oven’s
enamel.
■ Do not place baking trays or alumini-
um foil directly on the bottom of the
cooking compartment.
■ If you wish to place dishes directly on
the bottom of the cooking compartment, the oven temperature must not
exceed 50°C. Be careful when handling cookware – the enamel can be
easily scratched.
Baking tray and dripping pan
Proper handling of the oven
CAUTION!
Fire hazard!
■ Only ever operate the oven with the
oven door closed.
■ In case of an oven fi re:
– Switch off the circuit break-
ers/unscrew fuses
– Do not open the oven door until
the fire is extinguished
■ Never extinguish burning oil or fat
with water! To extinguish the fi re, use
a suitable fi re extinguisher with the
designation ‘F’ or a fi re blanket.
■ Once the fi re has been extinguished,
have the appliance checked by our
Service team, see page EN-31.
(c)
(d)
(e)
The supplied baking tray (d) and the dripping
pan (e) both have an angled edge. Please ensure that this edge is facing forward on being
placed in the oven. The grilling rack (c) must
be inserted as shown.
Page 53

The oven
CO
Seite EN-15
Function switch
(12)
0
Use the oven dial to switch on the oven and
select the heating method. The oven light
will turn on.
Off
Rapid heating to preheat the oven.
Top and bottom heat, hot air and grill
are switched on.
Defrosting
Temperature controller
NOTICE
Risk of damage!
■ Do not force the temperature control-
lers past the fi nal position.
CAUTION!
Risk of burns!
Elements, sides, baking trays, etc. get
very hot during operation.
■ Accessible parts may become hot
during use. Keep small children away.
■ Avoid direct contact.
■ Only touch the oven door by the han-
dle.
■ Hot steam can fl ow from the extrac-
tion hood when the oven is in use.
Take care when opening the oven
door!
Intensive grill with convection
Intensive grill (infra-red grill with top
heat)
Infrared grill
Bottom heat
Top and bottom heat
Convection with top and bottom heat
Oven lighting
Optimised heating, energy-saving
cooking. The oven light remains
E
switched off.
Detailed information and tips on each
of the heating methods can be found
in the enclosed brochure “Baking, roasting
and cooking”.
CAUTION!
Fire hazard!
■ Never leave the oven unattended
while grilling!
■ Fatty foods can catch fi re.
■ Do not cover cakes or roasts with bak-
ing paper during cooking.
■ Do not allow food, baking parchment
and aluminium foil to come into contact with the heating elements.
■ Do not store temperature-sensitive,
combustible or fl ammable objects in
the oven.
■ Do not leave the oven unattended
while cooking food in oil and grease
or with alcohol. Food may ignite of its
own accord.
Page 54

Seite EN-16 The oven
(14)
(15)
Oven indicator light
(8)
The red oven indicator light (8) will illuminate as soon as you have selected a heating method and set the temperature. It will
light up while the oven is heating up and/or
re-heating. Once it goes out, the set oven
temperature has been reached.
The red oven indicator light goes on and off
repeatedly during the entire cooking time.
• After you have selected the heating meth-
od, set the desired oven temperature
using the temperature controller (14). The
oven can be set from 50 °C to 250 °C.
This means that the oven is switched off.
Hot steam can escape from the extraction
hood (15).
If the oven does not turn on
If the oven does not turn on, the display will
show the reason. There are two possible
reasons:
– The oven only works when the time is set.
Otherwise, the display flashes, see „Setting/changing the time“ on page EN-23.
– The oven is in automatic operation mode.
“AUTO” lights up in the display, see „The
timer“ on page EN-23.
For power indicator light see page EN-12.
Oven lighting
NOTICE
Only use the oven light to light up the
cooking compartment. It is not suitable
for lighting a room.
• Set the function switch (12) to the lamp
symbol to illuminate the oven.
• The lighting will also switch on as soon as
you open the oven door.
Information on changing the bulb is
available at page EN-22.
Page 55

The oven
Seite EN-17
Switching off the oven
1. Turn the temperature controller (14) anti-clockwise to “0”.
The red oven indicator light (8) switches
off.
2. Turn the function switch (12) back to “0”.
The oven light and the yellow power indicator light switch off (9).
Special defrosting information
WARNING
Health hazard!
Defrosting meat, poultry or fi sh in the
oven can cause dangerous microorganisms (such as salmonella) to multiply
rapidly, thereby This increases the risk
of food poisoning.
■ Do not defrost meat, poultry and fi sh
in the oven.
■ Only use the defrosting function to
defrost vegetables, pre-cooked food,
etc.
■ Take the frozen food out of the freez-
er ahead of time and let it defrost in
the refrigerator. The fl uid from the
frozen food must be able to properly
drain, otherwise harmful microorganisms can form.
Special preparation
information for yeast dough
1. If the baking dish does not fit in the
cooking compartment, you can remove
the baking tray guides to increase the
cooking compartment volume (see page
EN-19).
2. Pre-heat the oven to 50°C.
3. Switch the oven off when the temperature
has been reached.
4. Place the baking dish with the yeast
dough in the cooking compartment. You
can place the dish directly on the bottom
of the oven.
5. Close the oven door and leave the yeast
dough in the oven for the desired time
without further heating.
NOTICE
Pent-up heat can damage the oven’s
enamel.
■ If you wish to place dishes directly on
the bottom of the cooking compartment, the oven temperature must not
exceed 50°C. Be careful when handling cookware – the enamel can be
easily scratched.
Cleaning the oven
CAUTION!
Defrosting merely circulates unheated air
within the cooking compartment. This accelerates the defrosting process. No heat is applied during defrosting.
In order to make more room in the
cooking compartment, you can remove
the baking tray guides and defrost the frozen food container directly on the bottom of
the oven (see page EN-19).
Risk of burns!
■ Allow the oven to cool completely be-
fore cleaning.
■ Never pour water directly onto the
hot oven. The steam produced can
cause scalding and damage to the
enamel.
■ Allow hot water from the oven to cool
before pouring it out.
Page 56

Seite EN-18 The oven
NOTICE
Improper cleaning may lead to damage.
■ For cleaning purposes, do not use
any harsh, abrasive cleaning agents
or scouring agents, steel wool, metal
scrapers, oven sprays, steam cleaners
or high-pressure cleaners! They can
damage the surface and destroy the
glass.
■ High-pressure cleaners can cause a
short circuit.
Basic cleaning
The oven must be pre-cleaned to remove all
grease and oil residues from the manufacturing process, as well as tough dust deposits
left over from storage and transportation. This
not only helps protect your health but also ensures delicious cakes and roasts.
1. Operate the oven with dripping pan, oven
rack and baking tray for 60 minutes at
250 °C.
2. Allow the oven to fully cool down.
3. Clean the cooking compartment of the
oven, as well as the dripping pan, oven
racks and baking trays with a little soapy
water and then wipe everything dry.
Cleaning the cooking
compartment
– Only switch on the oven light for cleaning.
– Clean the cooking compartment and bak-
ing tray guides after every use, if possible,
and rinse with warm clean water.
– Clean the door seal in the same way, but
be very careful as it is only attached in certain places, and is otherwise loose.
Steam cleaning
Steam cleaning is a wet cleaning process
that uses steam to remove light stains
and dirt. That’s how you clean the cooking
compartment in an energy-efficient manner
while conserving materials.
1. Remove the oven rack and baking tray.
2. Slide the dripping pan into the lowest rack
level and pour about 0.5 litres of water
into it.
3. Turn the dial to top and bottom heat and
the temperature controller to 100°C.
4. After 30 minutes of operation, switch the
oven off again and allow everything to
cool down so that the oven walls are only
lukewarm.
5. Use oven gloves or something similar to
remove the dripping pan from the oven
and pour away the remaining water.
6. Wipe the cooking compartment off with a
damp cloth or sponge.
7. Rinse off the oven rack, baking tray and
dripping pan.
Cleaning the housing surface
– After cooling, thoroughly clean the surfac-
es with warm rinsing water or all-purpose
cleaner.
– For stainless steel surfaces, you can also
use special care products.
Page 57

The oven
Seite EN-19
Cleaning the baking tray
guides
NOTICE
Risk of damage!
The baking tray guides can be damaged if you clean them in a dishwasher,
as they are not dishwasher-safe.
■ Do not clean the baking tray guides
in the dishwasher.
You can remove the baking tray guides (19)
in order to clean the cooking compartment
thoroughly.
Removing and cleaning baking
tray guides
1. Remove the grilling rack (c), the baking
trays (d)and the dripping pan (e) from the
oven.
Inserting the baking tray guides
1. Position the baking tray guides so that
both hooks with the welded plates are at
the front.
2. First, push the rear hooks into the holes
provided in the side walls.
3. Then push the front hooks into the holes
provided in the side walls.
Cleaning the oven door
NOTICE
Risk of breakage and injury!
The oven door is equipped with heavy
glass panels that can break if handled
improperly. The glass shards are sharp
and can cause injury.
■ Do not let the oven door or individual
glass panels fall.
■ Do not hit the oven door and the indi-
vidual panels of glass anywhere.
■ Do not use the oven when the glass
is damaged because the oven is no
longer safe. Please contact our Service Centre instead (see page EN-31).
■ If a glass pane breaks, keep children
away from it and carefully collect all
the pieces of glass.
(19)
2. To remove the baking tray guides (19),
first pull out the front holder on the front
side, where the two hooks with the welded plates are. Then pull out the rear
mount of the baking tray guides.
3. Clean the baking tray guides using warm
water and mild dish soap or all-purpose
cleaner. Then dry everything off.
Remove the baking tray guides when
you need more space in the oven, for
example.
Page 58

Seite EN-20 The oven
Removing the oven door from its
hinges
The oven door can be removed from its
hinges to enable easy cleaning of all areas
of the oven:
1. Open the oven door completely.
X
2. Fold the clips X on both sides all the way
forward. Use a screwdriver if necessary.
Replacing the oven door on its
hinges
1. Hold the oven door at an angle using both
hands.
2. Hook the hinges into the holes in the side
panels.
3. Open the oven door completely.
4. Fold the clips X on both sides all the way
back.
5. Close the door carefully. The door must
sit flush when closed. If the door does not
sit flush when closed or if there is a cracking sound when closing it, the door is not
hung properly.
6. Correct the position of the hinges and
clips, if necessary, until the door opens
and closes smoothly again.
3. Close the door only so far that it is still
open about 10 cm.
4. Lightly lift and guide the door forward out
of its hinges.
Page 59

The oven
Seite EN-21
Cleaning the glass panes
The oven door contains three glass panels
that should occasionally be cleaned on both
sides. To do this you’ll need a PH1 flat-head
screwdriver.
1. Take the oven door off its hinges (see
„Removing the oven door from its hinges“
on page EN-20).
2. Remove both screws that secure the top
metal grid.
3. Carefully removed the metal grid.
4. Remove the upper pane from the
mounts below the hinges and carefully
set it down.
5. Remove the middle pane and carefully
set it down.
6. Please ensure not to lose the small
spacers (21).
7. Clean all panes with warm, fresh water.
8. Dry the panes thoroughly.
9. Reposition the middle pane in the
mounts at the hinges.
10. Replace the spacers (21) at the sides of
the middle pane.
11. Reposition the upper pane in the mounts
at the hinges. Make sure that the smooth
side is facing outwards.
12. Put the grid plate back on top of the door
– it only fits in one direction. First insert
it on the left-hand side and then press
down on the right-hand-side until it clicks
into place.
13. Replace the oven door (see „Replacing
the oven door on its hinges“ on page
EN-20).
(21)
Page 60

Seite EN-22 The oven
Changing oven lighting
For the oven lighting, you require a heat-resistant oven bulb of 230 V to 240 V, 25 W,
E 14, T 300 °C.
WARNING
Risk of electric shock!
Improper replacement of the bulb can
result in fatal electric shock or burn injuries.
■ Before changing the bulb, always dis-
connect the mains plug or switch off
the fuses for the socket to which the
oven is connected.
■ Replace the bulb only when the oven
is no longer hot and there is no risk of
burns.
1. Switch off and/or unscrew the mains fuse.
2. Place a soft cloth in the cooled oven in
the event that the glass cover or bulb
should fall.
3. Unscrew the glass cover anticlockwise
and remove it.
4. Carefully unscrew the defective bulb, anti-clockwise, and replace with a new bulb
of the same type.
5. Insert the glass cover back into the opening and screw it back on clockwise.
6. Switch on/screw the fuse back in.
Page 61

The timer
The timer
Seite EN-23
Setting/changing the time
Setting the time
During initial commissioning or after a power failure, the display flashes “ ”. This
indicates that the time must be set. To do so,
proceed as follows:
1. Press the “OK” button once.
The display shows the symbol “ ”, the dot
underneath flashes.
2. Set the time using the arrow buttons “<“
or ”>”.
Shortly after the last keystroke, the dot
stops flashing. The time is now saved.
Changing the time
This is necessary e.g. when changing to and
from summer time.
Requirements:
– The timer switch must not be in automatic
mode and
– the countdown timer must not be active.
1. Press the two arrow keys “<“ and ”>” simultaneously.
The dot beneath the symbol “ ” flashes.
2. Set the time using the arrow buttons “<“
or ”>”.
Semi-automatic and fully
automatic operation
WARNING
Please ensure that you always observe
the following when using the automatic timer:
■ Please make sure to inform all mem-
bers of the household so that they do
not put anything in the oven.
■ Monitor the oven in order to prevent
spills and burning.
■ Take special care when roasting: Fat,
oil and alcohol can ignite.
■ Never leave anything to grill unat-
tended when using the timer!
■ The timer does not control the switch-
ing on and off of the hob.
■ After use, set the function selector
and the temperature controller to
»0«.
■ All settings will be deleted in the case
of a power failure.
The correctly set time is a prerequisite.
– You can pre-programme up to 23 hours
and 59 minutes in advance.
– The cooking time can be set between 1
minute and 10 hours.
– Any programming will be deleted in the
case of a power failure.
– A tone sounds to signal the end of the pro-
gramme, which you can cancel by pressing
any button.
To quickly go forwards/backwards,
hold the corresponding button down.
Page 62
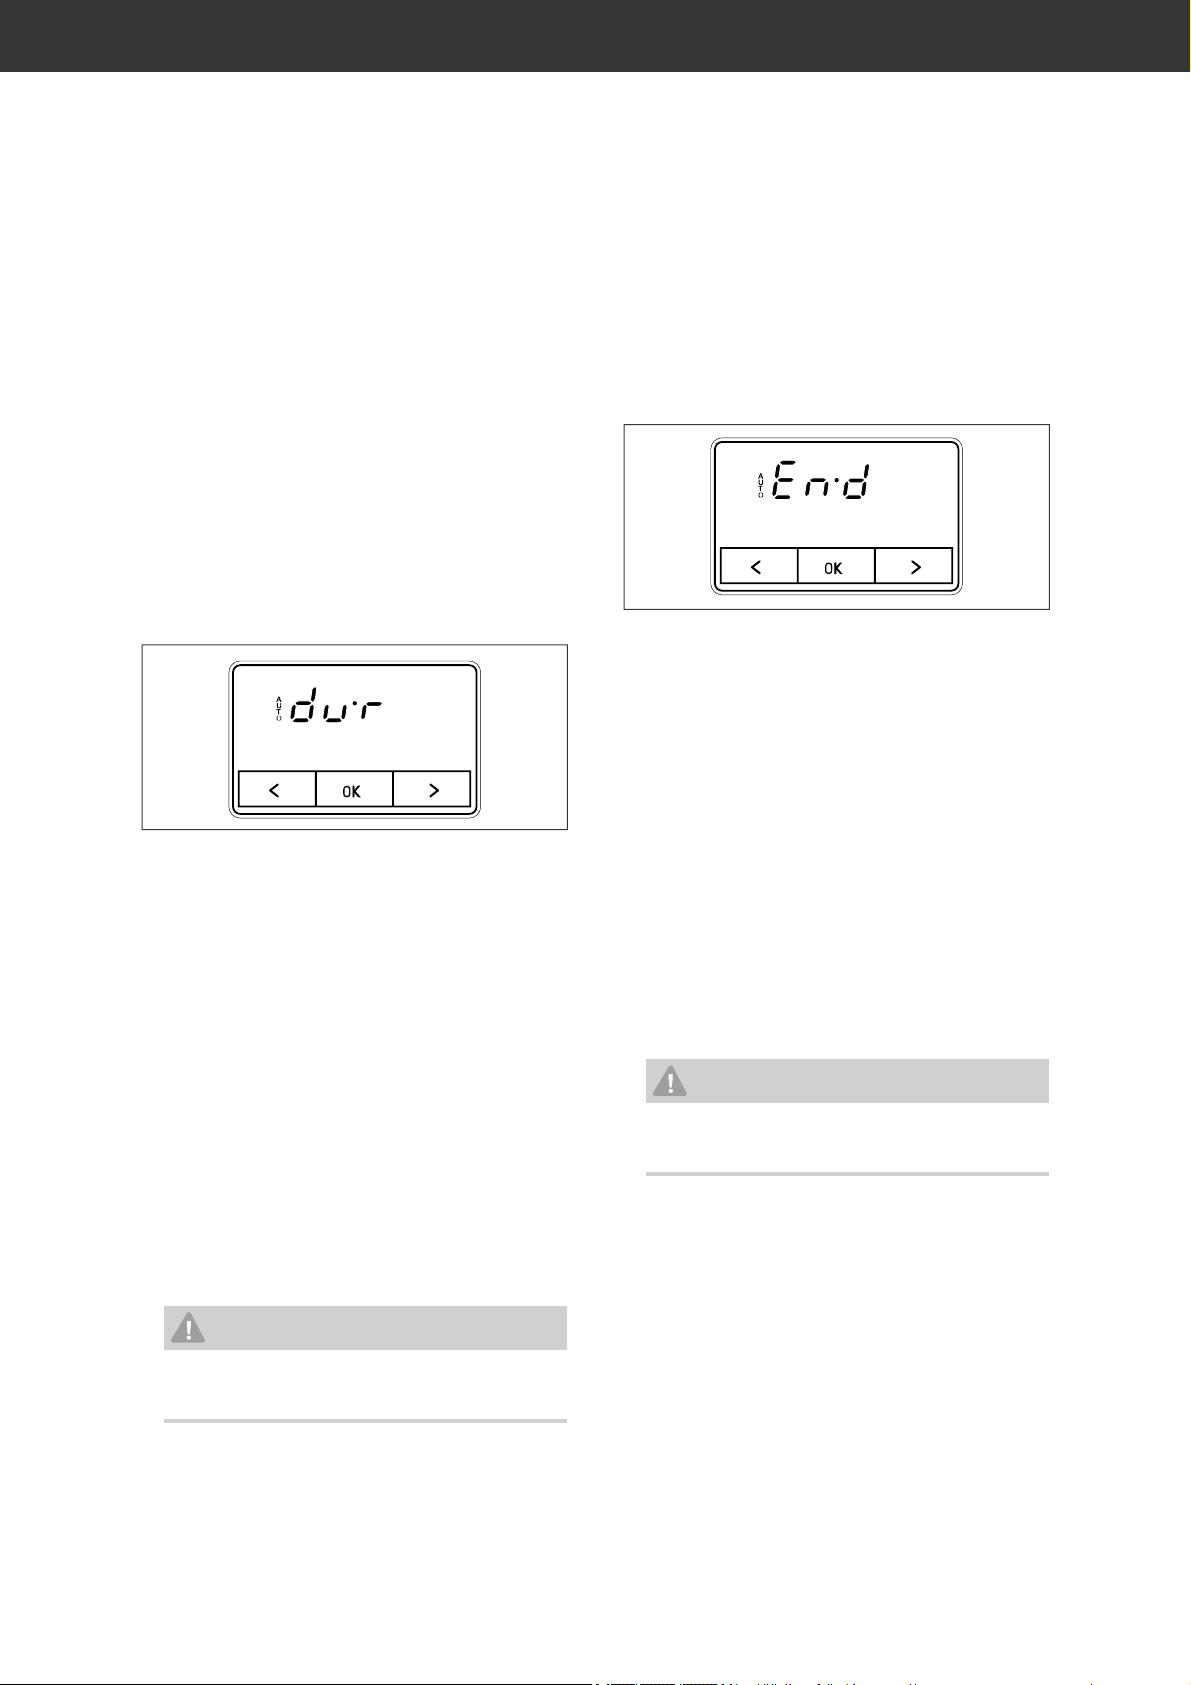
Seite EN-24 The timer
Semi-automatic mode
Semi-automatic operation allows you to specify the desired cooking duration or end time
during operation.
The oven switches off automatically when the
cooking duration has come to an end or the
cooking end time has been reached.
Setting the cooking time
The cooking time can be from one minute to
10 hours.
1. When the oven is switched on, press the
“OK” button several times until the display
flashes “dvr”.
2. Set the remaining cooking time using the
arrow buttons “<“ or ”>”.
3. Press the ‘OK’ button twice.
A signal sounds and the remaining cooking time is saved. The “auto” symbol
lights up.
Once the pre-set cooking time has expired, the oven switches itself off. A signal also sounds and the display flashes
“auto”.
4. Press any button to turn off the signal and
return to normal operation.
The display now once again shows the
current time.
Cooking end time
During operation, set the time when the oven
should switch off. The switch-off time can be
up to 10 hours from the current time.
1. With the oven switched on, press the
“OK” button repeatedly until the display
shows “End”.
2. Set the desired switch-off time using the
arrow buttons “<“ or ”>”.
3. Press the “OK” button once.
A signal sounds and the switch-off time
is saved. The symbol “auto” illuminates
permanently.
Once the switch-off time has expired,
the oven switches itself off. A signal also
sounds and the display flashes “auto”.
4. Press any button to turn off the signal and
return to normal operation.
The display now once again shows the
current time.
WARNING
The oven is now switched on again
and must be switched off manually.
5. Reset the temperature controller and the
function selector to “0”.
WARNING
The oven is now switched on again
and must be switched off manually.
5. Reset the temperature controller and the
function selector to “0”.
Page 63

The timer
Seite EN-25
Fully automatic operation
Specify the desired cooking time and the
time when cooking should be completed in
the oven; the clock automatically calculates
the switch-on time.
The end time can be up to 24 hours from the
current time.
Example:
The cooking duration should be 1 hour and
15 minutes and your dish should be ready by
1:00 pm.
1. Leave oven switched off.
2. Press the “OK” button several times until
the display shows “dvr”.
The oven will automatically switch on at
the calculated switch-on time.
When the switch-off time has been
reached, the oven will switch off again. In
addition, a signal will sound and the display will flash “auto”.
8. Press any button to turn off the signal and
return to normal operation. The display
now once again shows the current time.
WARNING
The oven is now switched on again
and must be switched off manually.
9. Reset the temperature controller and the
function selector to “0”.
Cancelling timer and deleting
automatic settings
1. Press the two arrow keys “<“ and ”>” simultaneously.
The “auto” symbol goes out. The timer
mode is switched off and the automatic
settings are deleted.
2. Reset the temperature controller and the
function selector to “0”.
3. Set the cooking duration using the arrow
buttons “<“ or ”>” (in our example, 1 hour
and 15 minutes).
4. Press the “OK” button once.
The display shows “End”.
5. Set the switch-off time using the arrow
buttons “<“ or ”>” (in our example 1:00
pm).
6. Press the “OK” button once.
A signal sounds and the entries are
saved. The “auto” symbol lights up.
7. Prepare the oven:
Place the food in the oven and set the
function selector and the temperature
controller to the desired position.
Page 64

Seite EN-26 The timer
Countdown timer/egg timer
You are in the middle of cooking a meal in
the oven and would like to be reminded after
a while to turn the food/top up the fluids, etc.
Please note that the countdown timer does
not switch the cooker on or off.
1. Press the “OK” button once.
The bell symbol flashes.
2. Set the desired duration using the arrow
buttons “<“ or ”>”.
Shortly after the last keystroke, the time
will reappear and the timer will start to
count down. The bell symbol is displayed.
After the set time has elapsed, an acoustic signal will sound and the bell symbol
will flash.
Press any button to turn off the signal.
Changing the audible signal
You can choose between 3 different audible
signals.
1. Press the two buttons “<“ and ”>” simultaneously.
The dot beneath the symbol “
2. Press the “OK” button once.
The display shows “ton1”.
3. Change the audible signal with the “<” arrow button.
The current sound is played and the number is shown on the display.
4. Press the “OK” button.
A signal sounds and the entry is saved.
” flashes.
Stopping the countdown
1. Press the “OK” button once.
The bell symbol
maining time is shown.
2. Press the two arrow keys “<“ and ”>” simultaneously.
The bell symbol
countdown is stopped.
flashes and the re-
disappears and the
Page 65

Connection to the power supply – notes for the installer
Seite EN-27
Connection to the power supply – notes for the installer
WARNING
Electric shock / fi re hazard!
Improperly installed electrical connections can cause electrical shocks and/or
short circuits.
■ Connection to the mains supply may
be made only by an authorised electrician approved by the local energy
supply company, e.g. our Service department (see page EN-31). Only then
will you benefi t from our warranty
and a suffi cient level of safety.
■ Since all poles of the appliance can-
not be disconnected from the mains
via an accessible disconnecting device, an all-pole disconnecting device
in accordance with overvoltage category III must be connected within
the house installation with at least
3mm contact clearance; this includes
fuses, miniature circuit breakers and
protective devices.
Connecting to the mains
The terminal block and connection diagrams
can be found on the rear side of the oven.
1. Before accessing the terminals, switch off
all supply circuits and secure them against
being switched on again.
2. Make sure that all poles of the connection
cables are disconnected and that effective
earthing is possible.
3. Connect the leads and, if necessary, the
enclosed brass bridges to the corresponding contact terminals of the cooker power
connection in accordance with the circuit
diagrams shown here.
4. Lay the connection cable behind the cooker so that it does not touch the rear wall of
the cooker. The rear cooker wall becomes
hot while it is in use.
Smallest conductor cross-section
Rated current of the
device in A
> 3 and ≤ 6 0.75
> 6 and ≤ 10 1.0
> 10 and ≤ 16 1.5
> 16 and ≤ 25 2.5
> 25 and ≤ 32 4
> 32 and ≤ 40 6
> 40 and ≤ 63 10
nominal cross section in mm2
Connection conditions
– The rated voltages allowed as well as the
rating of the device can be found in Chapter
„Technical specifications“ on page <?>.
– Depending on the type of connection al-
lowed, you must
– select the cross-section cable
– insert or remove contact bridges
(see table and circuit diagrams on the
right).
– The power cord used must comply with
the requirements of DIN EN 60335-1 (e.g.
H05RR-F model).
– A separate power supply is required.
– When connecting the appliance, VDE re-
quirements and the ‘Technical connec-
tion requirements’ must be observed.
Contact protection must be guaranteed.
230 V 1N~ / 50 Hz
3
2
1
400 V 2N~ / 50 Hz
3
2
1
400 V 3N~ / 50 Hz
3
2
1
L1 – L3: Phase(s), N: Neutral conductor,
PE: Protective conductor (earth wire)
L1NPE
L2L1N
L3
L2
L1NPE
4
5
4
5
PE
4
5
L1 to (bridged)
(bridged)
N to
(PE) to
L1 to
L2 to (bridged)
N to (bridged)
(PE) to
L1 to , L2 to , L3 to
N to (bridged)
(PE) to
Page 66

Seite EN-28 Positioning
Positioning
Requirements
– To ensure proper operation, the following
requirements must be met:
– In terms of fire protection, the appliance
conforms to Type Y (EC 335-2-6). Appli-
ances of this type may be installed on one
side only next to higher kitchen furniture,
appliances or walls.
– Do not place the cooker directly next to a
refrigerator or freezer. This will increase its
energy consumption unnecessarily due to
heat emission. The best place is next to the
sink. You have an additional work surface
and dirty dishes can be washed immedi-
ately.
– If the cooker is placed on a pedestal,
measures must be taken to prevent the
appliance slipping off.
Setting up the cooker
1. Adjust the stove with a spirit level so that
the cooking zone is perfectly level.
2. Any unevenness can be compensated for
using the screw feet on the underside of
the cooker. To do this, completely pull out
the dish trolley. The best way to do this is
to put a coin into the slot and turn it.
Mounting the tilt protection
CAUTION!
If you do not install the tilt protection
securely, the whole oven can tilt forwards. You could injure yourself and the
cooker could be damaged in the process.
■ Attach the supplied tilt protection
to the wall before use to prevent the
oven from tipping over.
■ Do not lean, sit or stand on the oven.
If the oven door is loaded with a
heavy weight e.g. a large pan, the appliance can tilt forwards and fall over.
1. Set up the cooker as described and align
it accurately.
2. Draw a horizontal line on the wall from the
inside of the housing along the underside
of the middle slot.
3. Pull out the cooker again.
(h)
(g)
(f)
4. Position the tilt protection (f) on the line on
the wall such that the side with the holes
lies flat against the wall and the protruding
limb fits into the slot on the cooker.
5. Mark both drill holes through the holes
in the bracket. Note the height of the drill
holes:
– (g): 6.0 cm from the floor
– (h): 10.3 cm from the floor.
Page 67

Positioning
Seite EN-29
6. Use a metal detector to make sure there
are no cables or piping in the area to be
drilled. If there are, select another location
for assembly.
7. Drill a dowel hole in each marked positions using a masonry drill.
8. For solid walls: Place the supplied dowels
into the holes. Screw the tilt protection
tight with the supplied screws.
For drywalls: Obtain suitable special dowels for the wall. If necessary, consult a
professional.
Screw the tilt protection to the wall with
suitable screws for the dowels.
Removing transport locks
• If you have not already done so, remove
any plastic strips from the sides of the
baking sheets.
• Remove all protective films.
9. Slide the cooker into place and check
that the tilt protection prevents the oven
from tilting forwards.
Make any adjustments necessary.
Page 68

Seite EN-30 Troubleshooting table
Troubleshooting table
Malfunctions can occur in all electrical appliances. This does not necessarily mean there is a
defect in the appliance. For this reason, please check the tables to see if you can correct the
malfunction.
WARNING
Risk of electric shock in case of improper repair!
Never try to repair a defective or suspected defective appliance yourself. You can put
your own and future users’ lives in danger. Only authorised specialists are allowed to
carry out this repair work.
Problem Possible solutions/tips
Cooking zones not
working, blank display.
Fissures or cracks in the
hob.
Oven indicator light (8)
goes out.
Oven not working, display flashes “
Oven indicator light (8)
does not illuminate.
Oven light is defective. Change the defective bulb, see page EN-22. Note: Defective bulbs do
”.
The power supply has been interrupted. Check the fuse for the cooker in the fuse box in the house. In case of doubt, connect our Service
Centre (see page EN-31).
Switch all cooking zones off immediately and cease to use the appliance. Contact our Service Centre (see „Our Service Centre“ on
page EN-31).
The oven temperature has been reached. The light switches on
again automatically when the temperature drops.
After connection or power failure, the clock must be set as described
in the “Clock” section.
First check that the appliance is still working (see above). If the light
is defective, only have it replaced by Customer Service (see „Our
Service Centre“ on page EN-31).
not fall under our warranty.
Page 69

Our Service Centre
Seite EN-31
Our Service Centre
In order for us to help you quickly, please tell us:
Name of appliance Model Colour Order number
Privileg Cooker 5010CE2.313eETaDJXv Stainless steel 4673 2111
Advice, order and complaint
Please contact your mail order company’s
customer service centre if
– the delivery is incomplete,
– the appliance is damaged during transport,
– you have questions about your appliance,
– a malfunction cannot be rectified using the
troubleshooting table,
– you would like to order further accessories.
Repairs and spare parts
Customers in Germany
– Please contact our technical service:
Telephone +49 (0)40 36 03 31 50
Customers in Austria
– Please contact your mail order company’s
customer service centre or product advice
centre.
Please note:
You are responsible for the condition of the appliance and its proper use in the household. If you
call out for customer service due to an operating error, you will incur charges, even during the
guarantee/warranty period. Damage resulting from non-compliance with this manual unfortunately cannot be recognised.
Page 70

Seite EN-32 Environmental protection
Environmental protection
Disposing of old electrical
devices in an environmentally
friendly manner
Electrical appliances contain harmful substances as well as valuable
resources.
Every consumer is therefore required by law to dispose of old electrical appliances at an authorised collection or return
point. They will thus be made available for
environmentally-sound, resource-saving recycling.
You can dispose of old electrical appliances
free of charge at your local recycling centre.
Please contact your dealer directly for more
information about this topic.
Packaging
Our packaging is made from environmentally friendly, recyclable materials:
– Outer packaging made of cardboard
– Moulded parts made of foamed, CFC-free
polystyrene (PS)
– Films and bags made of polyethylene (PE)
– Tension bands made of polypropylene (PP)
– Saving energy also protects against exces-
sive global warming. Your new appliance
uses little energy due to its modern tech-
nology.
Please dispose of packaging in an environmentally friendly manner.
Tips for saving energy
– Preheat the oven only if it is called for in the
recipe or stipulated in the cooking tables
provided.
– Use dark-coloured baking dishes and trays
when possible. They effectively absorb the
heat.
– Avoid frequently opening the oven door
during cooking, baking or roasting.
– Bake several cakes one after the oth-
er while the oven is still warm in order to
shorten the baking time for subsequent
cakes. If you use loaf tins, place both of
them side by side in the oven.
– In the case of longer cooking times, switch
the oven off 10 minutes before the end of
the cooking time. The residual heat is sufficient enough to complete the cooking.
– When cooking, always leave the lid on the
saucepan wherever possible. Liquids can
be brought to the boil more quickly with the
lid on than without.
– Only ever use high-quality, new sauce-
pans and pans. They lie flat on the hob
and therefore conduct energy more easily than cookware with a warped or dented
base (please note in the chapter “The right
cookware”).
– Turn the level down quickly and continue to
cook at the lowest possible setting.
– Always use pressure cooking saucepans
whenever possible. This will halve the
cooking process and you will save a lot of
energy.
– Only use as much water as you really need
to cook the food. A lot of energy is required
to warm up water.
Page 71

‘Test report’ table
Seite EN-33
‘Test report’ table
These dishes were prepared in accordance with DIN 44547 and EN 60350 standards.
Dish
Shortbread biscuits
Water sponge
cake
Leavened apple
cake
Number
of trays
Rack height
1)
Heating method
1 4 Top/bottom heat
1 2 Top/bottom heat
1 4 Top/bottom heat
Tempera-
ture in °C
2)
150-160 20-30
2)
180-190 15-25
2)
185-195 25-40
Cooking
time in min.
20 muffins 1 2 Top/bottom heat 160-170 15-25
Toast 1 3 Grill
12 patties 1 4 Intensive grill
Chicken 1 2
Roast pork 1 2
3)
3)
Intensive grill with
convection
Intensive grill with
convection
240 1-3
240 15 + 6–8
180-195 50-65
180-195
6)
140-160
4)
Goose 1 2
1 3 Top/bottom heat 220-230 18-23
2) 7)
Pizza
1 3 Convection 170-175 20-25
1)
Rack height calculated from below
2)
Pre-heated
3)
Pre-heat for five minutes
4)
1. and 2. 1 and 2
Intensive grill with
convection
5)
Universal pan above
6)
Depending on the height of the roast
7)
Follow the manufacturer's instructions on the
180-195 75-90
packaging
Page 72

Seite EN-34 Product fiche concerning Regulation (EU) No 65/2014
k
g
673
x
1
ass on a scale fro
(
)
e
e
ced
e
es
source
y
e
ues
above
suant
60350
Product fiche concerning Regulation (EU) No 65/2014
mar
l identifier4
ergy efficiency inde
nergy efficiency class
A+++
Energy consumption in conventional mod
Energy consumption in fanr
Number of caviti
Volum
The val
most efficient) to D (least efficient
t
indicated
r
toEN
l
ave been measured under standardised laboratory conditions
m
rivile
2111 / 5010CE2.313eETaDJXv
5,
A
,99kWh/cycl
,78kWh/cycl
lectricit
Page 73

Product information concerning Regulation (EU) No 65/2014
on
en
g
e
0
es
source
y
e
e
e
fanrced mode
e
x
1
60350
Seite EN-35
Product information concerning Regulation (EU) No 65/2014
l identificati
Type ov
ass of the applianc
Number of caviti
t
Volum
Energy consumption in conventional mod
Energy consumptionin
Energy Efficiency Inde
The values indicated above have been measured under standardised laboratory conditions
ursuant toEN
1.
4673 2111 / 5010CE2.313eETaDJXv
reestandin
5,
lectricit
,99kWh/cycl
,78kWh/cycl
5,
Page 74

Seite EN-36 Product information concerning Regulation (EU) No 65/2014
on
b
ob
gy
e
g
e
g
g
e
g
t
g
e
g
b
g
ues
suant
60350
Product information concerning Regulation (EU) No 65/2014
l identificati
Type of ho
Number of cooking zones and/or areas 4
eating technolo
Dimension
Dimension
Dimension
Dimension back right
Energy consumption
Energy consumption
Energy consumption
Energy consumption back rightooking zon
ront left
rontightooking zon
k left
ooking zon
ookin
ookin
rontt
k left
ron
ightooking zone 182,6 Wh pk
ooking zone 184,5Wh pk
ooking zon
4673 2111 / 5010CE2.313eETaDJXv
lectric h
adiant cooking zones
12,0 / 18,0 cm
14,5 cm
14,5 cm
L 25,0 cm
W 14,0 cm
182,4 Wh pk
186,8Wh pk
Energy consumption for the ho
The val
r
indicated above have been measured under standardised laboratory conditions
toEN
184,1Wh pk
Page 75

Technical data
673
1
e
b
ge
00 3
y
ed
n
)
e
50
g
30240
b
t
Technical data
Seite EN-37
Item number4
Name of applianc
ll
ated volta
Frequenc
t
ower input ove
veneasurements (H x W x D
aximum temperatur
Lightin
ated power input ho
Total rated power inpu
Electric cooker with glass ceramic ho
10CE2.313eETaDJXv
230V ~ / 4
x
2
V, 25W, E14
211
N ~
z
W
x
2
15, T
100W
W
Page 76

 Loading...