

Prism Medical UK A320B Owner's Manual
A320B Mobile Hoist
Introduction ................................................................... 2
Overview ....................................................................... 2
Components of the Floor Hoist ..................................... 3
Component List ............................................................. 4
Specifications ................................................................ 5
Cautions ........................................................................ 6
Assembly Instruction .................................................... 7
Operation
Charging...……………………………………………...14
Start……...……………………………………………...14
Forward movement….………………………………...15
Turning..………………………………………………...15
Leg Adjustment………………………………………...16
Raising and Lowering Boom………………………….16
Casters and Braking……….……………………….....16
Basics in transferring an individual…………………...….17
Emergency Stop & Lowering……………………………..19
Control Box-Usage Information………………….…….....20
Control Box-Service Information….....………………......21
Technical Specifications ……………………………….....22
Do’s and Don’ts ……………………………………….…...23
Fault finding……………………………………….………..24
General inspection and maintenance………..…………..25
Points of Attachment - Checklist …………….…………..26
Service record history……………………………..……....27
Warranty……………………………………………..……...31
Owner’s Manual
Use and Care
Trouble Shooting
Warranty Information
Prism Medical UK
Unit 4 Jubilee Business Park
Jubilee Way
Grange Moor
Wakefield
WF4 4TD
Tel: 0844 980 2260
Fax: 0844 980 2261
Website: www.prismmedical.co.uk
CAUTION: DO NOT ATTEMPT TO USE THIS EQUIPMENT
WITHOUT FIRST UNDERSTANDING THE CONTENTS OF
THIS MANUAL.
Introduction
Before using this equipment, and to ensure the safe operation of your A320B Mobile hoist, carefully read
this entire manual, especially the section on “Cautions”. The A320B is designed to be used in conjunction
with Prism Medical accessories and slings. Please refer to any user guides supplied with these components
and refer to them while reviewing this manual.
Should any questions arise from reviewing this manual contact your local authorized Prism Medical Representative. Failure to comply with warnings in this manual may result in injury to either the operator, or the individual being lifted/transferred. Damage to the floor hoist and/or related components may also occur. Be sure
that the contents of this manual are completely understood prior to using this floor hoist.
Store this manual with the documents included with the floor hoist and sling (s). Contents of this manual are
subject to change without prior written notice.
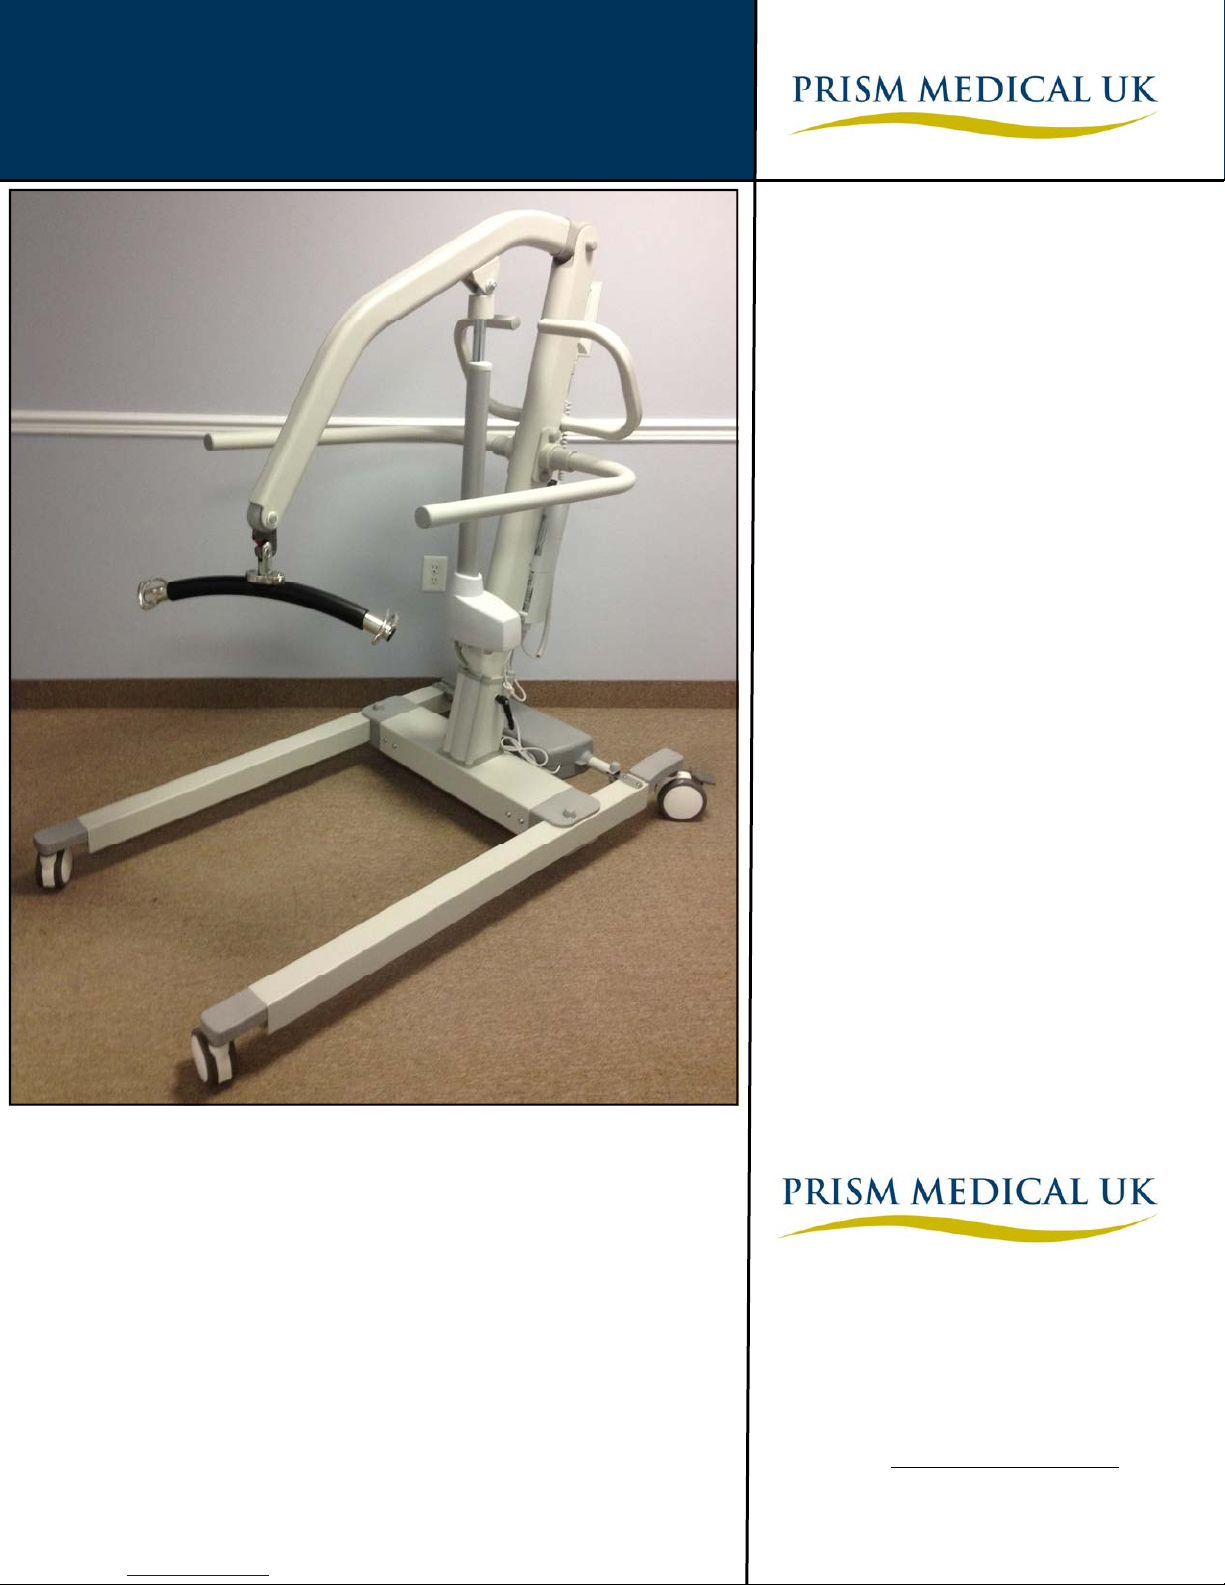
Overview of A320B Mobile hoist
The A320B is a lifting aid used by health care professionals to transfer clients. The floor hoist makes it possible to move mobility impaired individuals with minimal strain or risk to the caregiver, while providing complete safety, dignity and comfort for the client.
The A320B Mobile hoist is one of two components that make up this technology. The other component, the
sling, is a specially designed fabric accessory that attaches to the floor hoist by means of a carry bar and straps,
and holds an individual while the lift, or transfer takes place. The sling is generally supplied with the floor
hoist at the initial time of purchase. Please refer to any user guides supplied with the sling and reference them
while reviewing this manual.
The
A320B has the ability to lift an individual up from one location such as bed, then move the individual to
another location and finally lower the individual into a chair or bath. The functions of lifting up or down, or
opening and closing the legs on the hoist, are accomplished by pressing buttons on the hand control. The hand
control is attached to the floor hoist. Due to the design of the floor hoist system, it takes very little effort to
press a button to perform the desired motion.
Please familiarize yourself with the components of the
next page.
Following models are available for A320B floor hoist.
A320B Mobile hoist by referring to the diagram on the
Product Code Product Description
280400 A320B - Bariatric Alloy 318Kg (700 lbs).
280401 A320B - Bariatric Alloy 318kg (700 lbs). w/Prism QRS Carry Bar
280400 / 280401 - A320B - Owner’s Manual Rev: 07-2013 Page: 2
Models Table for A320B Floor Hoist
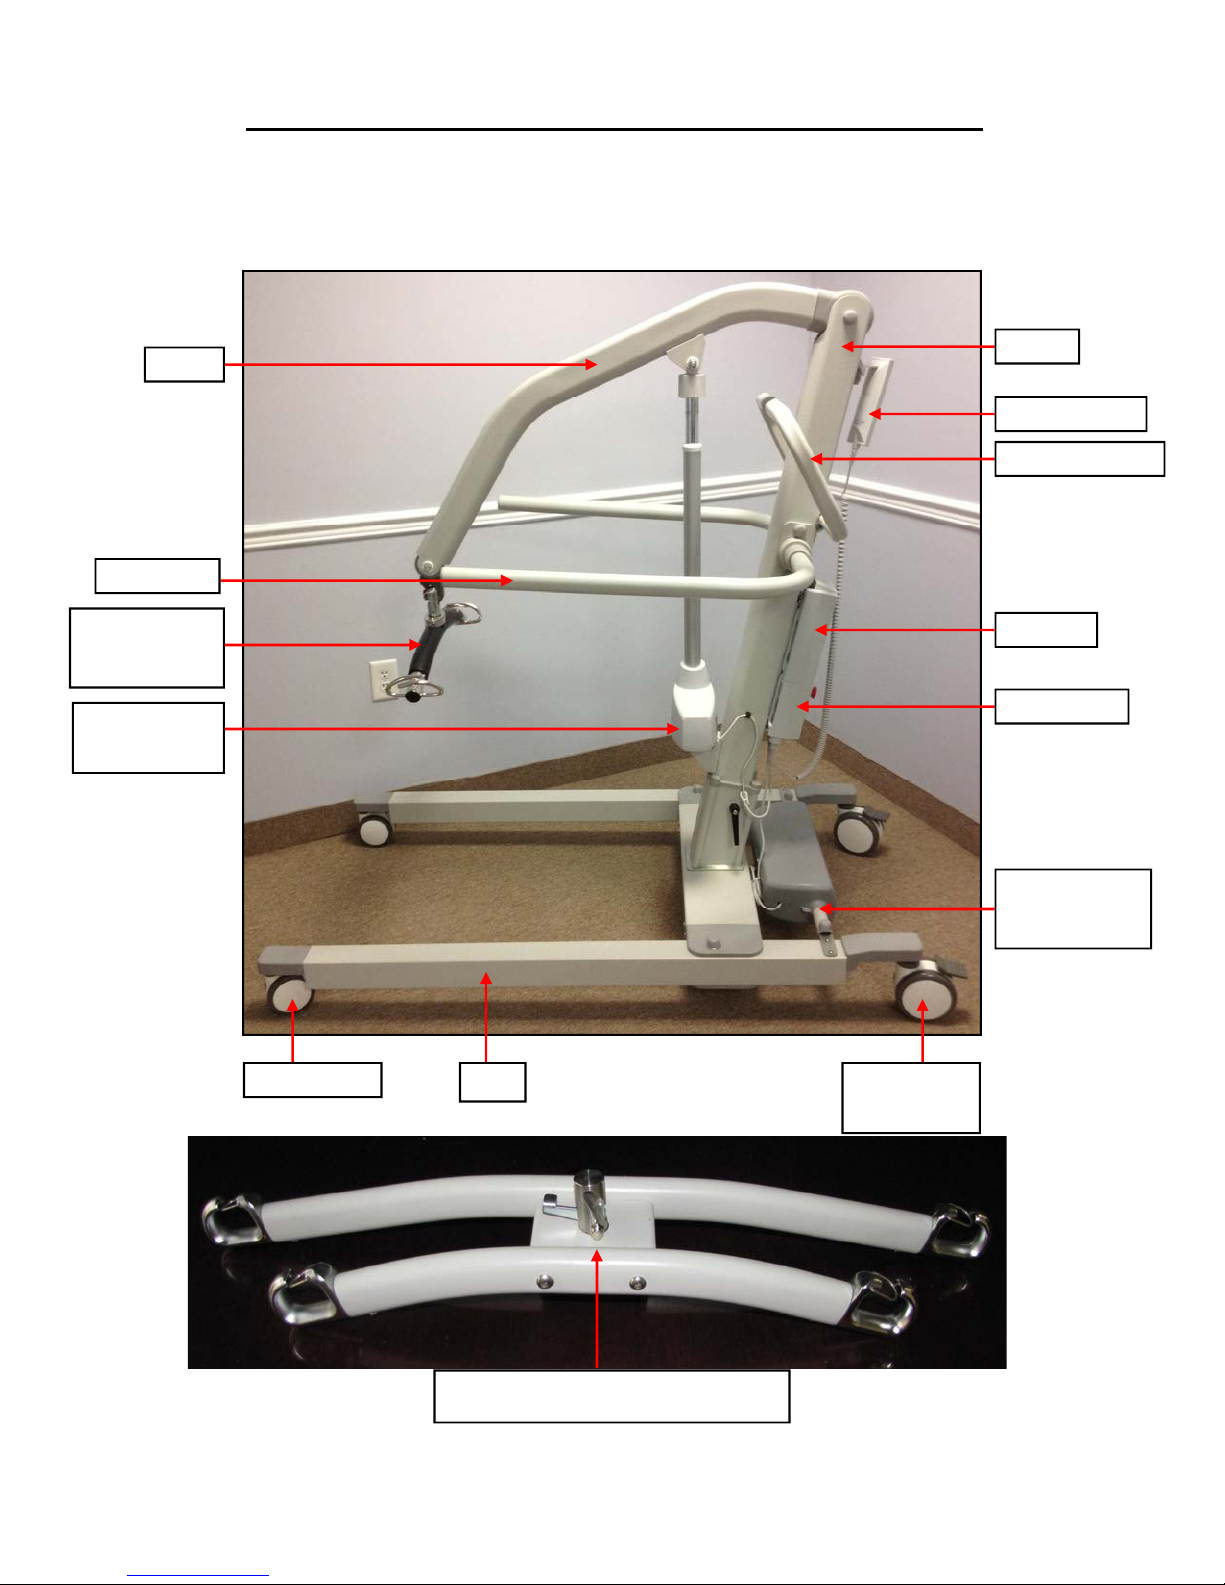
Components of the A320B Floor hoist
Boom
Arm Rest
Prism QRS
Carry Bar
Up & Down
Actuator
Mast
Hand Control
Push Handle
Battery
Control Box
Leg Spreading
Actuator
Front Caster Leg Rear Caster
280400 / 280401 - A320B - Owner’s Manual Rev: 07-2013 Page: 3
w/Brake
4 Point QRS Locking Carry Bar
Component List
The following components are included with your new A320B Mobile hoist system:
• A320B Mobile hoist
• Hand Control
• Floor hoist Integrated Charger
• Charger Cord
• Owner’s Manual
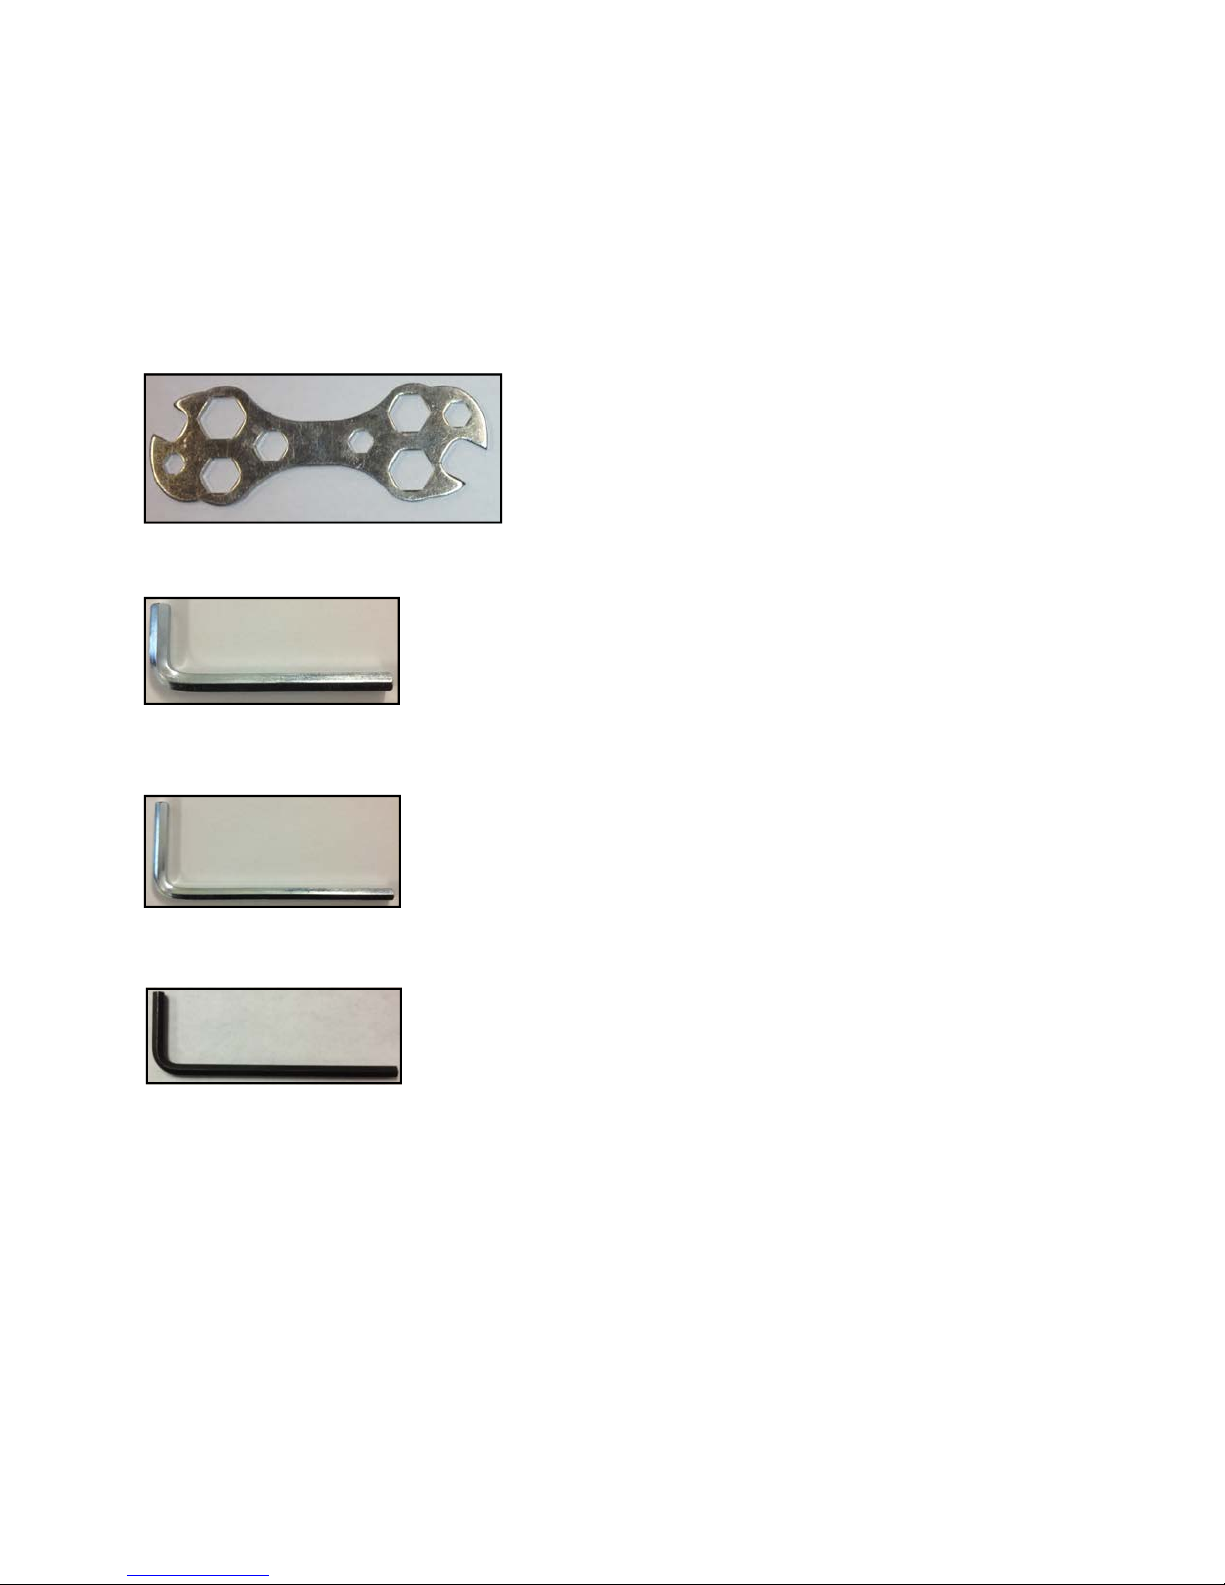
• Multi Function Wrench
mm Hex Allen Key (Short Arm)
• 5
• 4 mm Hex Allen Key (Short Arm)
• 3 mm Hex Allen Key (Short Arm)
SLINGS: If a sling has been supplied with floor hoist, then pl. refer to the instructions included with the
sling.
ACCESSORIES: If additional accessories such as a weigh scale have been supplied with the floor hoist,
then pl. refer to the instructions included with those items.
IMPORTANT: Before initial use, the floor hoist unit must be charged for 4 to 5 hours. Refer to section
titled “Charging Instructions”. The Hand control must also be connected to the floor hoist. If it is not
connected, then pl. refer to the section titled “Assembly Instructions”.
280400 / 280401 - A320B - Owner’s Manual Rev: 07-2013 Page: 4

Technical Specifications– A320B
(A) Dimensions and Weight - A320B hoist
Specification A320B
Maximum weight capacity 700 lbs. (318 kg.)
Maximum lifting height (See lifting height setting, see “Assembly”, page 8) 76.4 inches (194 cm)
Minimum lifting height (See lifting height setting, see “Assembly”, page 8) 25.2 inches (64 cm)
Height to top of legs 6.1 inches (15.5 cm)
Clearance from bottom of legs to floor 3.3 inches (8.5 cm)
Overall length 59 inches (150 cm)
Distance inside the legs (min.) 25.2 inches (64 cm)
Distance inside the legs (max.) 41.9 inches (106.5 cm)
Distance outside the legs (min.) 30.1 inches (76.5 cm)
Distance outside the legs (max.) 46.8 inches (119 cm)
Reach at maximum height 18.9 inches (48 cm)
Reach at minimum height 17.8 inches (45.3 cm)
Maximum Reach-Distance between center of carry bar to front of the mast 27.2 inches (69.1 cm)
Turning radius 62.8 inches (159.5 cm)
Front – 4” (101 mm)
Wheels (dual-wheel castors)
Rear – 5” (127 mm) w/brake
Weight of hoist 140.8 lbs (64 kgs)
Total Shipping Weight: WGS Box 172 lbs (78 kgs)
(B) Electrical Specifications - A320B hoist
Lift Motor: 24 VDC, 9.7 Amps Max.
Charger Input: 100-240 VAC, 50-60 Hz, 0.4 Amps Max.
Charger Output: 24 VDC, 0.65 Amps
Batteries: 24 VDC (2 x 12 VDC) 2.9 Ah, Sealed Lead Acid
Hand Control: Electric
Lifting Range: 21.3” to 72.5” (for Lowest Mast Setting)
Hoist Weight: 140.8 lbs.
Maximum Load: Standard maximum load 700 lbs.
Duty Cycle: 10% use, 90% rest
Rated Performance: 30 lifts at 700 lbs., 10% duty cycle.
Shipping/Storage Conditions:
Temperature: -40 to +70 ºC
Relative Humidity: 10 to 100% RH
Atmospheric Pressure: 500 to 1060 hPa
Normal Operating Conditions:
Temperature: +10 to +70 ºC
Relative Humidity: 30 to 75% RH
Atmospheric Pressure: 700 to 1060 hPa
Maximum load of the installed floor hoist is determined
by referring to the product label located on side of floor
280400 / 280401 - A320B - Owner’s Manual Rev: 07-2013 Page: 5

Cautions:
● Under no circumstance should the A320B Mobile hoist and sling (s) be put in control of a person
who has not been properly trained in the use and care of this equipment. Failure to adhere to this warning may result in serious injury to the operator, and/or the individual being lifted/ transferred.
● The A320B Mobile hoist and sling (s) are not toys. Do not use it for unsafe practices. Do
not allow children to play with the floor hoist or any of its components.
● The manufacturer's warranty is voided if persons unauthorized by Prism Medical Ltd. will perform
work on the A320B Mobile hoist.
● There are no user serviceable parts inside the actuator. Do not remove cover screws, or open the
unit, as this will VOID THE WARRANTY.
● In facilities where more than one operator will be responsible for using the A320B and sling (s),
it is imperative that all such members are to be trained in its proper use. A training program should be
established by the facility to acquaint new operators with this equipment.
● Never expose the A320B Mobile hoist directly to water. Warranty does not cover any misuse or
abuse of the floor hoist system.
● To maintain optimum function, the A320B should be inspected and maintained on a regular basis.
See the section titled “General Inspection and Maintenance”.
● Any accessories used with the A320B including sling (s), should be checked to ensure that they are
in good working order. Check for signs of wear or fraying prior to use. Report any unusual wear, or
damage immediately to your local authorized Prism Medical Service Provider.
● The A320B Mobile hoist and associated sling (s) are intended only for lifting and transferring of a
person. Prism Medical will not be responsible for any damage caused by the misuse, neglect or purposeful destruction of the hoist, and/or its associated components.
● In any circumstances do not exceed the maximum allowable load of this hoist. Refer to the
“Specifications” section of this manual, and/or the labels on the side of the hoist.
● There is a risk of explosion if the hoist is used in the precsense of flammable anaesthetics.
● Ensure that a clear space is maintained around the hoist. Move any obstacles out of the way before
opereating the floor hoist.
280400 / 280401 - A320B - Owner’s Manual Rev: 07-2013 Page: 6
Assembly Instructions:
1. Place the Carton/Packaging box in a clear working area, open carefully, and remove following items and
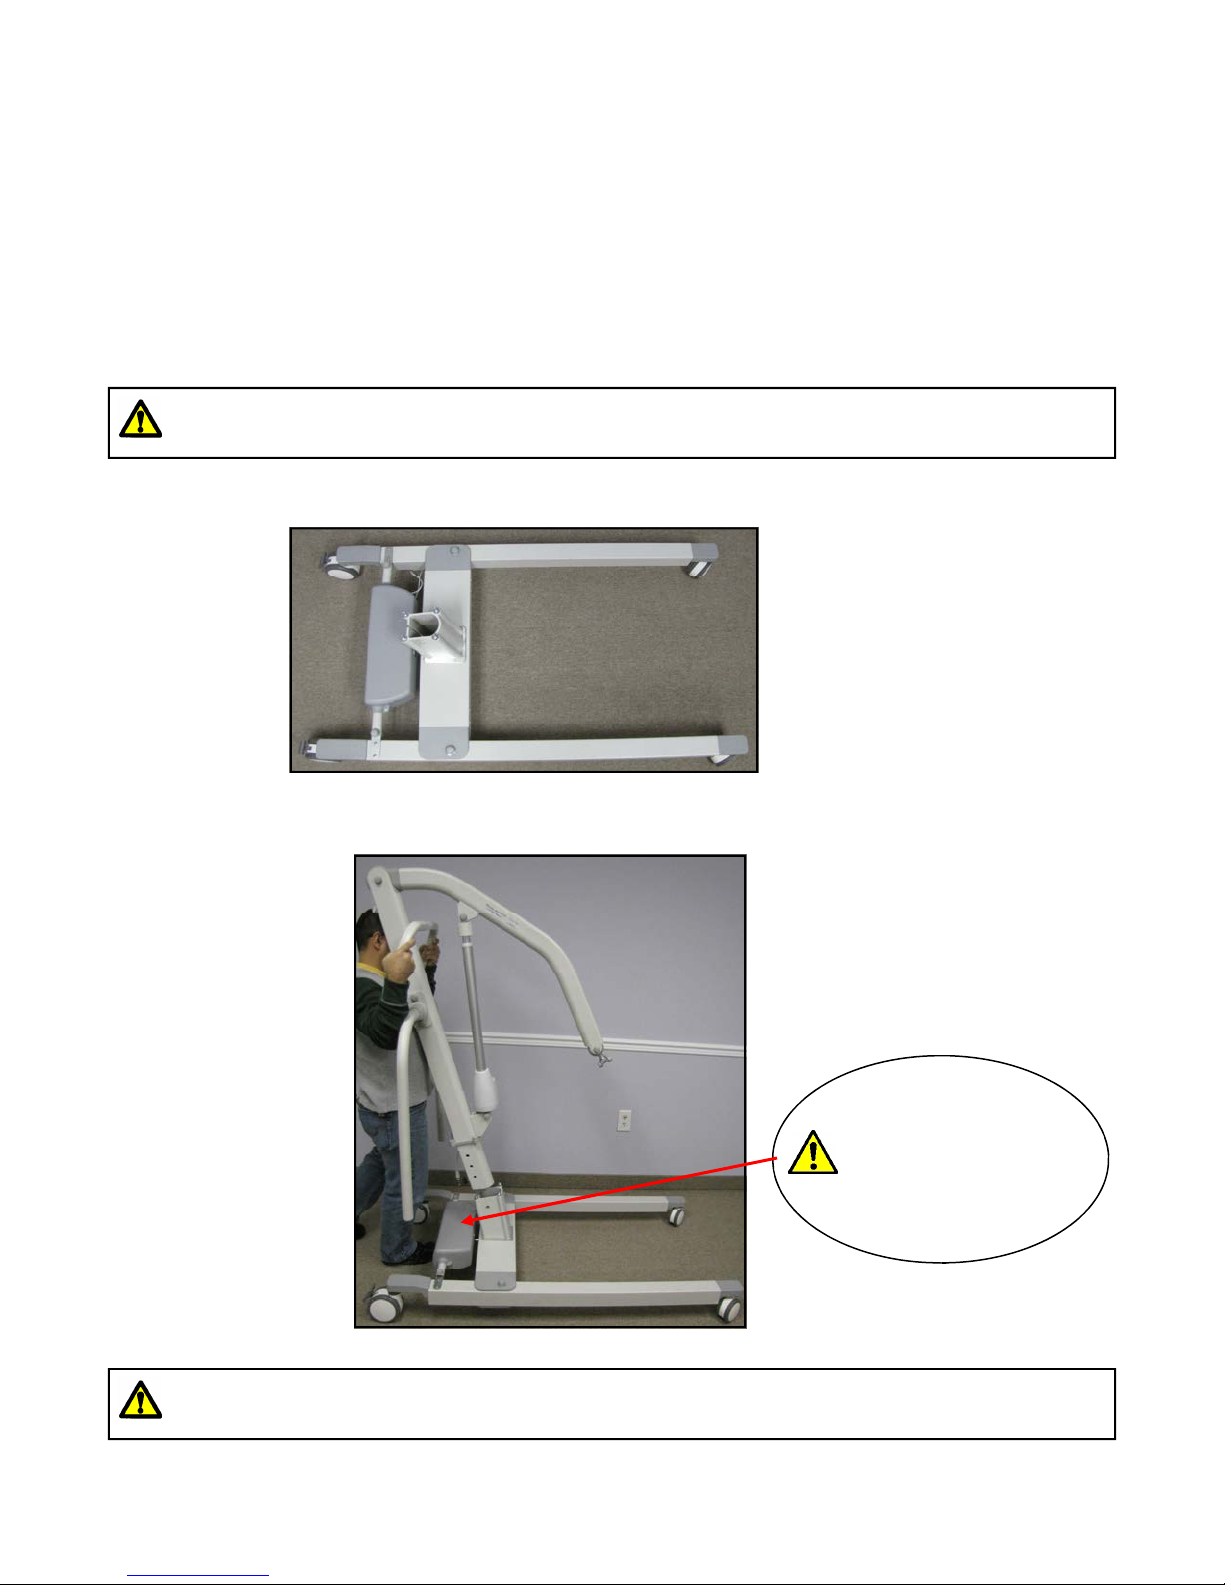
2. Place the Base with legs attached on the floor, and lock both rear casters as shown in Figure 1.
3. Place the Mast with Boom assembly upright in the tube on the Base assembly as shown in Figure 2.
place on the floor, taking care to protect the finish from damage.
• Mast with Boom assembly
• Base Assembly with Legs attached
• Battery Pack, and Charging Power Cord
• Hand Control
• Tool Kit
• User Manual, and Test Certificate
Caution: Hoist parts are heavy, and will need to be lifted with care.
Heavier items may need two people for assembly.
Figure 1
280400 / 280401 - A320B - Owner’s Manual Rev: 07-2013 Page: 7
Caution: Possible finger trap. Keep fingers away from the end of the mast when inserting
into the tube on the Base assembly.
ON COVER
Figure 2
DO NOT
STAND
Assembly Instructions:
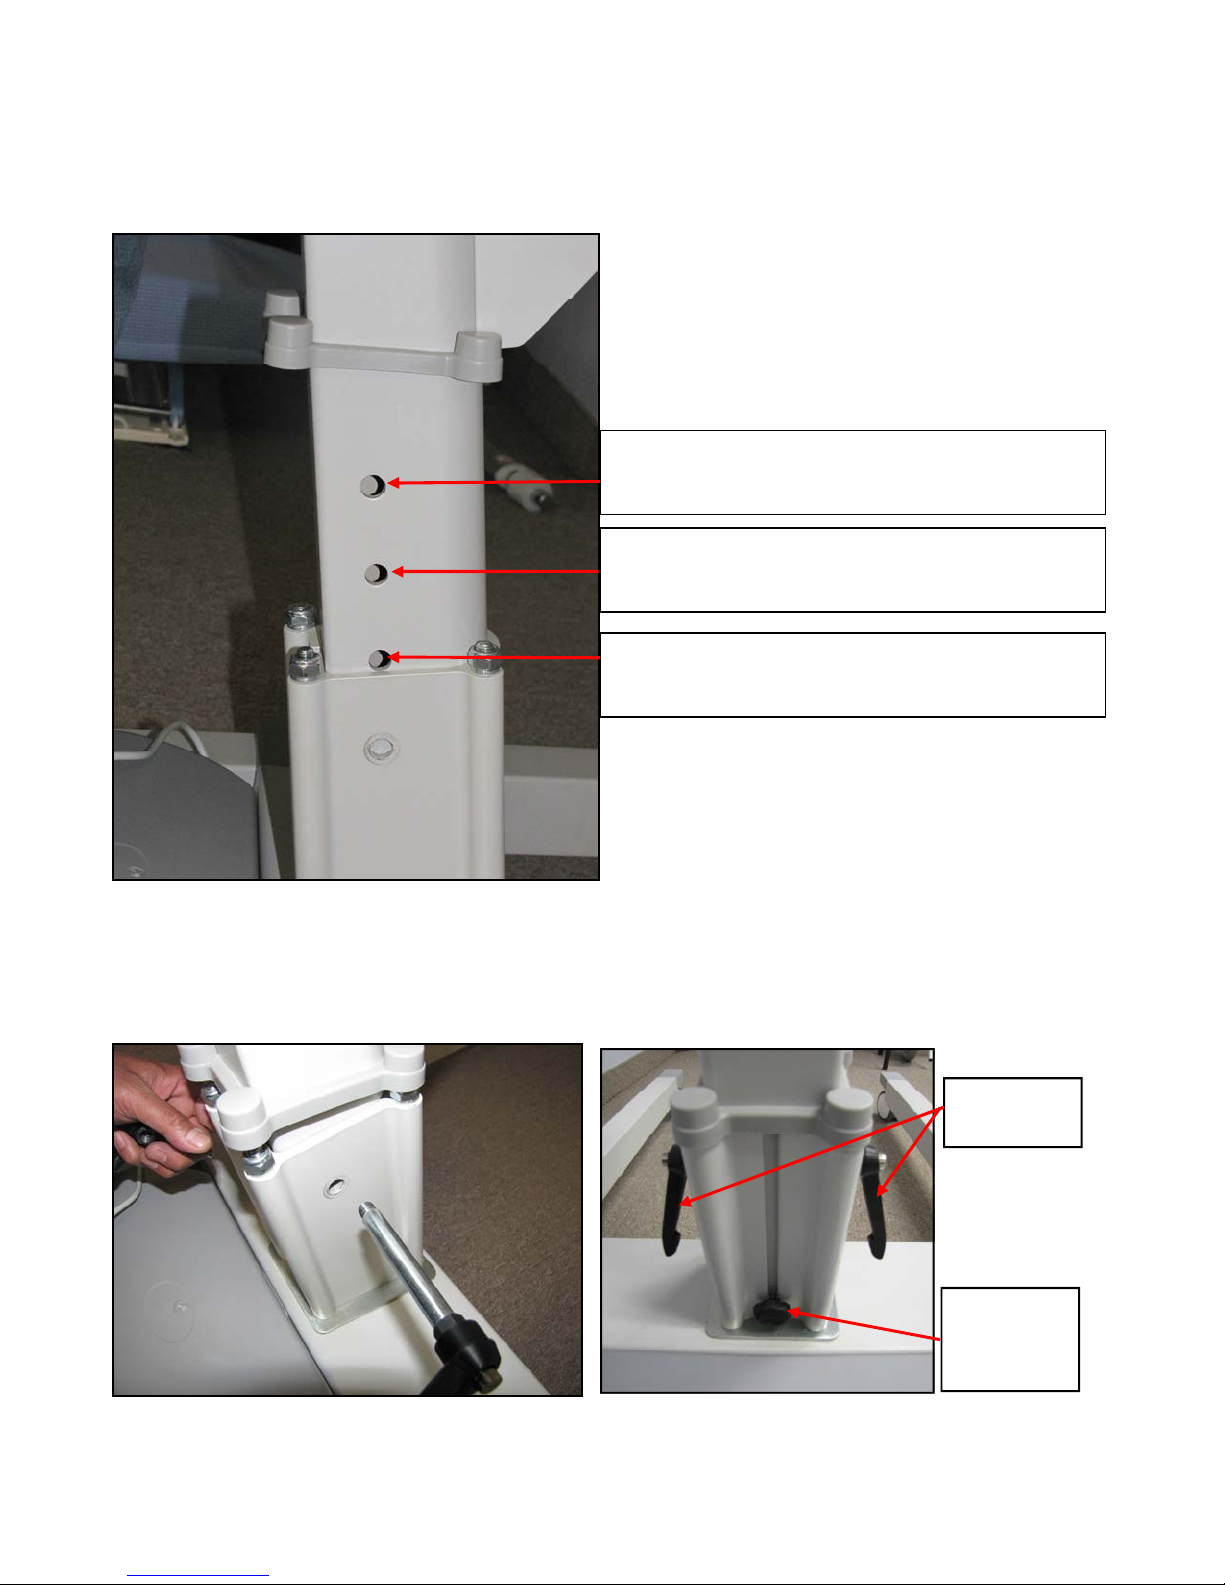
4. The lifting height can be set at three different levels as shown in Figure 3. In most cases, lifting height at
middle hole is recommended. For extra lifting height, the lower most setting (lower hole on the mast) is
recommended. For lower lifting height, the upper most setting (upper hole on the mast) is recommended.
The distance between two holes is 2 inch / 50mm.
For lower lifting height, upper hole on the mast
is recommended.
Lifting height at middle hole on mast is recommended in most cases.
For extra lifting height, lower hole on the mast is
recommended.
Figure 3
5. Using locking handles, secure the hoist mast in the desired position on the base as shown in Figure 4.
Tighten the mast locking knob as shown in Figure 5. Adjust the position of the locking handles pointing in
downward direction towards the base as shown in Figure 5.
280400 / 280401 - A320B - Owner’s Manual Rev: 07-2013 Page: 8
Locking
Handles
Mast
Locking
Knob
Figure 5 Figure 4
Assembly Instructions:
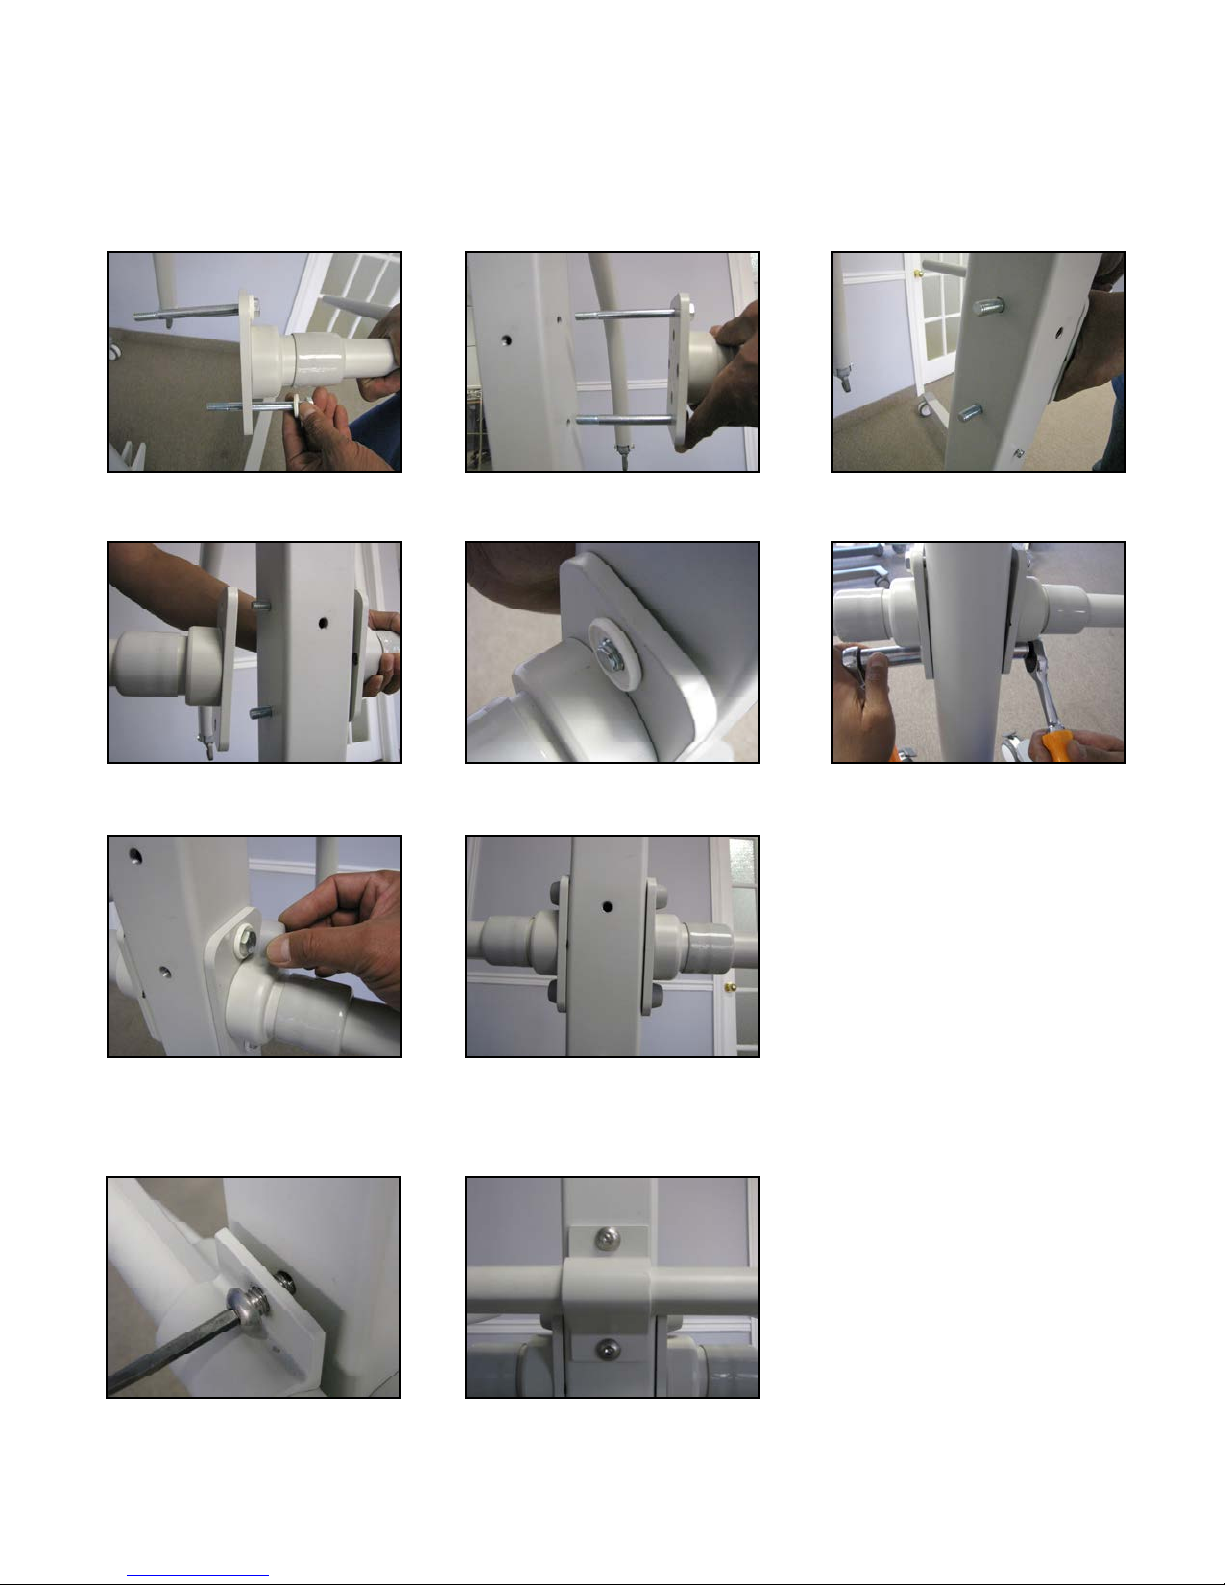
6. Insert the bolts, and plastic white washers into the Arm rest, and then pass through the two holes on Mast
assembly as shown in Figure 6, to 8. Insert other Arm rest into the bolts, and place plastic white washers as
shown in Figure 9, and 10. Tight the nuts using 17 mm wrench as shown in Figure 11. Place the bolt protector caps on the bolts, and nuts as shown in Figure 12, and 13.
Figure 6
Figure 8 Figure 7
Figure 9
Figure 11 Figure 10
Figure 13 Figure 12
7. Remove the screws from the mounting position of push handle on Mast assembly. Insert the screws
through the push handle bracket, and mount on the Mast assembly as shown in Figure 14, and 15.
Figure 14
280400 / 280401 - A320B - Owner’s Manual Rev: 07-2013 Page: 9
Figure 15

Assembly Instructions:
Attaching 4 Point QRS Locking Carry Bar to Hoist:
8. To attach 4 point locking carry bar (supplied along with the hoist) to the hoist, tilt the carry bar to almost
90°, and push the latch to the swivel mount holder bolt as shown in Figure 16, and 17. Make sure that
swivel mount of carry bar is perfectly sit onto the swivel mount holder bolt as shown in Figure 18.
Figure 16
Figure 17
Figure 18
Attaching 2 Point QRS Carry Bar to Hoist:
9. To attach 2 Point Quick Release Carry Bar to the Quick Release Hook, tilt the carry bar, and push the
dowel pin of carry bar to the latch of QRS hook so that latch will open and dowel pin will be inserted into
the QRS hook as shown in Figure 19. Make sure that latch is closed safely after the dowel pin sitting into
the QRS hook as shown in Figure 20.
280400 / 280401 - A320B - Owner’s Manual Rev: 07-2013 Page: 10
 Loading...