

Prism Medical FGA-330 Assembly Instructions Manual
Assembly Instructions:
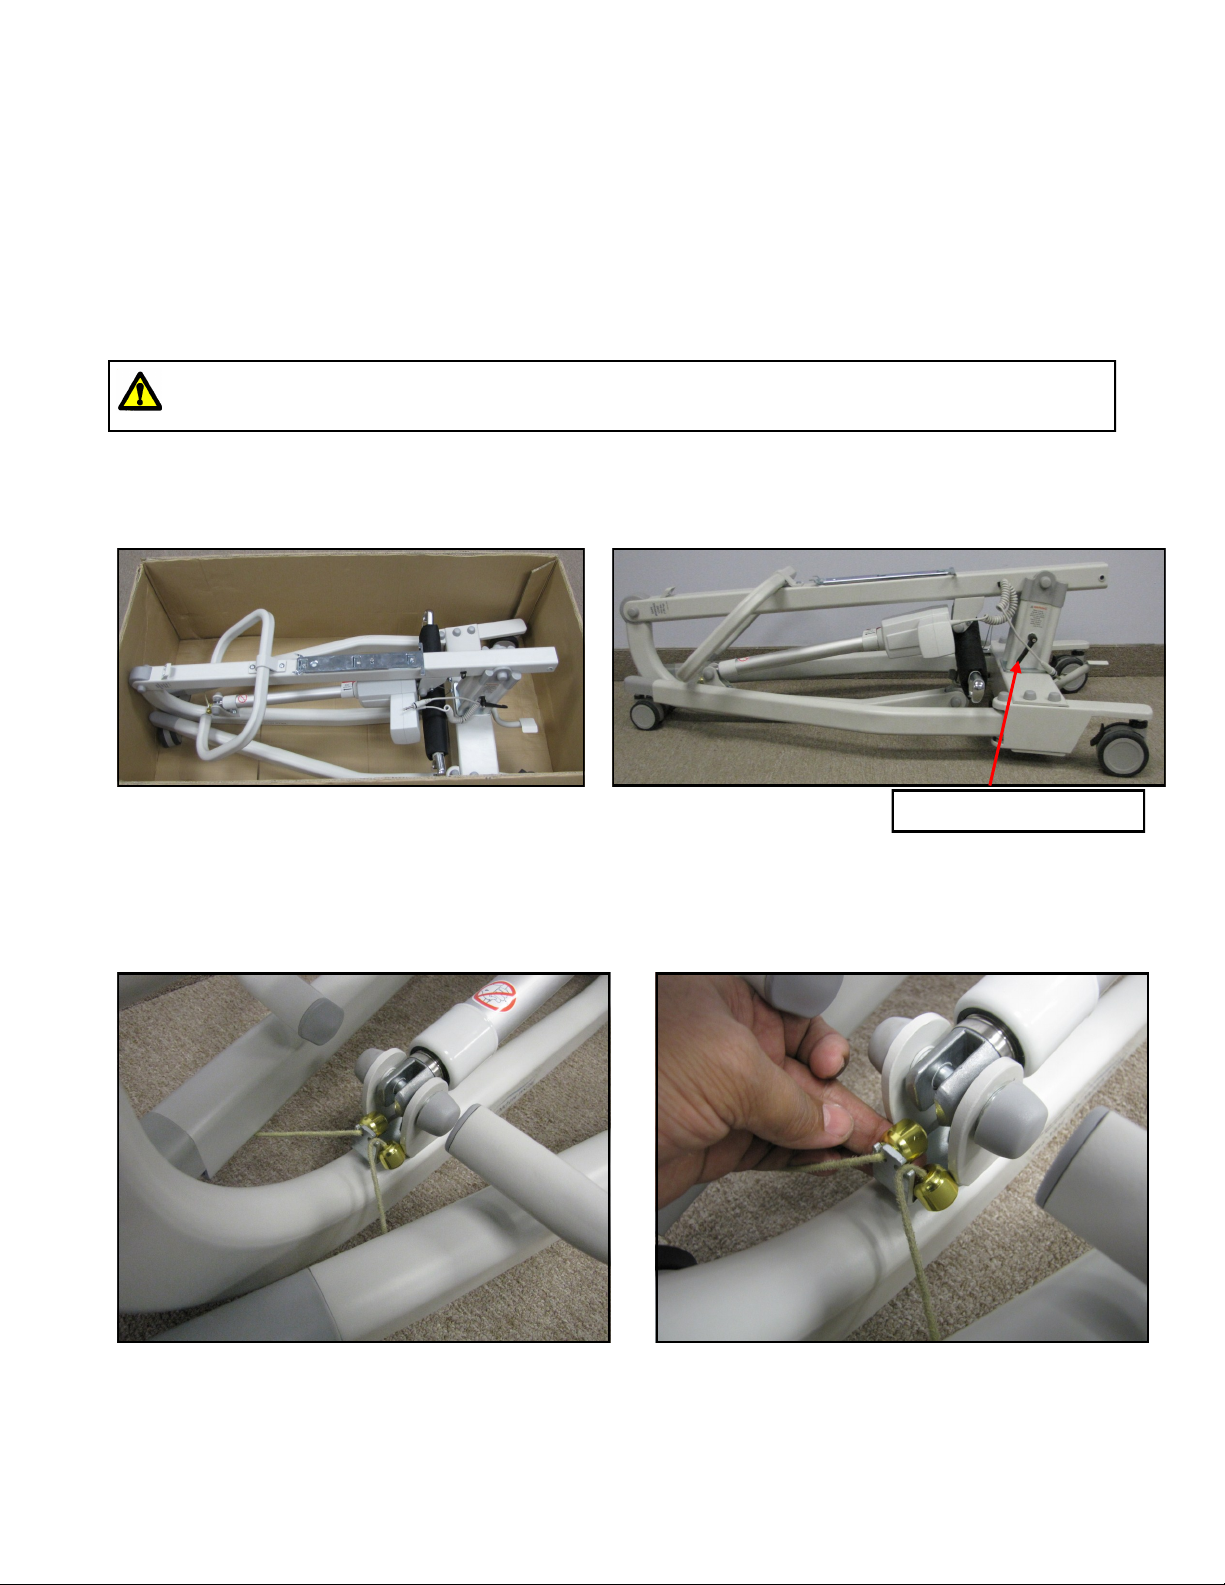
1. Place the Carton/Packaging box in a clear working area, open carefully, and remove following items and
place on the floor, taking care to protect the finish from damage.
FGA-330 portable lift in folded condition
Battery Pack, Control Box, and Charging Power Cord
Hand Control
Tool Kit
User Manual, and Test Certificate
Caution: Lift parts are heavy, and will need to be lifted with care.
Heavier items may need two people for assembly.
2. Lift the FGA-330 carefully from the carton and place on the floor as shown in Figure 1, and 2. Lock the
rear casters. Remove the mast locking handles from the base tube as shown in Figure 2.
Figure 1
Figure 2
Mast Locking Handles
3. Release the leg and mast assembly by unfastening the restraining string from the mast “L” bracket as
shown in Figure 3, and 4. This string will retract back into the bottom of the legs.
Figure 3 Figure 4
280420 FGA-330 - Owner’s Manual Rev: 11/18/12 Page: 7

Assembly Instructions:
4. Using push handle, lift the Mast with Boom assembly upright, and drop carefully into the base tube as
shown in Figure 5, 6, and 7.
Figure 7
Figure 5
Figure 6
Caution: Possible finger trap. Keep fingers away from the end of the mast when inserting
into the base tube.
5. Using mast locking handles, secure the lift mast in the upright position on the base assembly as shown in
Figure 8. Tighten the mast locking knob as shown in Figure 9. Adjust the position of the locking handles
pointing in downward direction towards the base of lift (or ground) as shown in Figure 9.
Figure 9 Figure 8
280420 FGA-330 - Owner’s Manual Rev: 11/18/12 Page: 8
Mast Locking Handles
 Loading...