

Prior Scientific PriorLab, PriorLux User Manual

PriorLux
™
1

2 Prior Scientific
1. Introduction
The PriorLab and PriorLux upright compound microscopes are high quality instruments
equipped with high resolution, chromatically corrected optics for excellent image quality.
The robust construction and hard wearing materials ensure long lasting and trouble free
operation. The instrument can be used with a number of accessories allowing brightfield,
dark ground, phase contrast and polarising contrast observations.
For documentation, both instruments are available with a trinocular head which permits
mounting of a video or digital camera system.
2. Unpacking
The PriorLab / PriorLux is shipped in protective bags within a pre-formed container. Each
component should be carefully unpacked and checked, cutting rather than tearing the plastic
bags. The head (binocular or trinocular) should be fitted to the dovetail on top of the stand
and locked in place with the head locking screw. The eyepieces then just drop into the
eyepiece tubes at the front of the head, these should be pushed in as far as they will go.
Remove each objective lens from its protective “pot” and screw into the free positions on
the nosepiece. Move the stage and the condenser carrier to the highest position and insert
the condenser from underneath with the diaphragm control facing to the front. This is
locked in position with the clamping screw, which is fitted from the side.

PriorLux
™
3
3. Specifications
PriorLab PriorLux
Eyepieces 10x 18mm field of view 10x 20mm field of view
Condenser Abbe NA 1.25 with iris
diaphragm and filter holder
Abbe NA 1.25 with iris
diaphragm and filter holder
Mechanical Stage Dimensions – 185mm x 145mm
Movement – 75mm x 55mm
Dimensions – 185mm x 145mm
Movement – 75mm x 55mm
Focusing
Mechanism
Co-axial fine and coarse
adjustment with tension control
and focus stop
Co-axial fine and coarse
adjustment with tension control
and focus stop
Viewing Head Interpupillary distance 55-
75mm
Interpupillary distance 5575mm
Kohler
Illumination
12V 30W halogen lamp with
variable brightness control
12V 30W halogen lamp with
variable brightness control
Power Supply 220/240 VAC 50Hz and 110
VAC 60Hz. Universal input
voltage
220/240 VAC 50Hz and 110
VAC 60Hz. Universal input
voltage
Objectives Mag. NA Tube
Length
Mag. NA Tube
Length
4x 0.12 160mm 4x 0.12
∞
10x 0.25 160mm 10x 0.25
∞
40x (S) 0.65 160mm 40x (S) 0.65
∞
100x (S) 1.25 160mm 100x (S) 1.25
∞
4 Prior Scientific
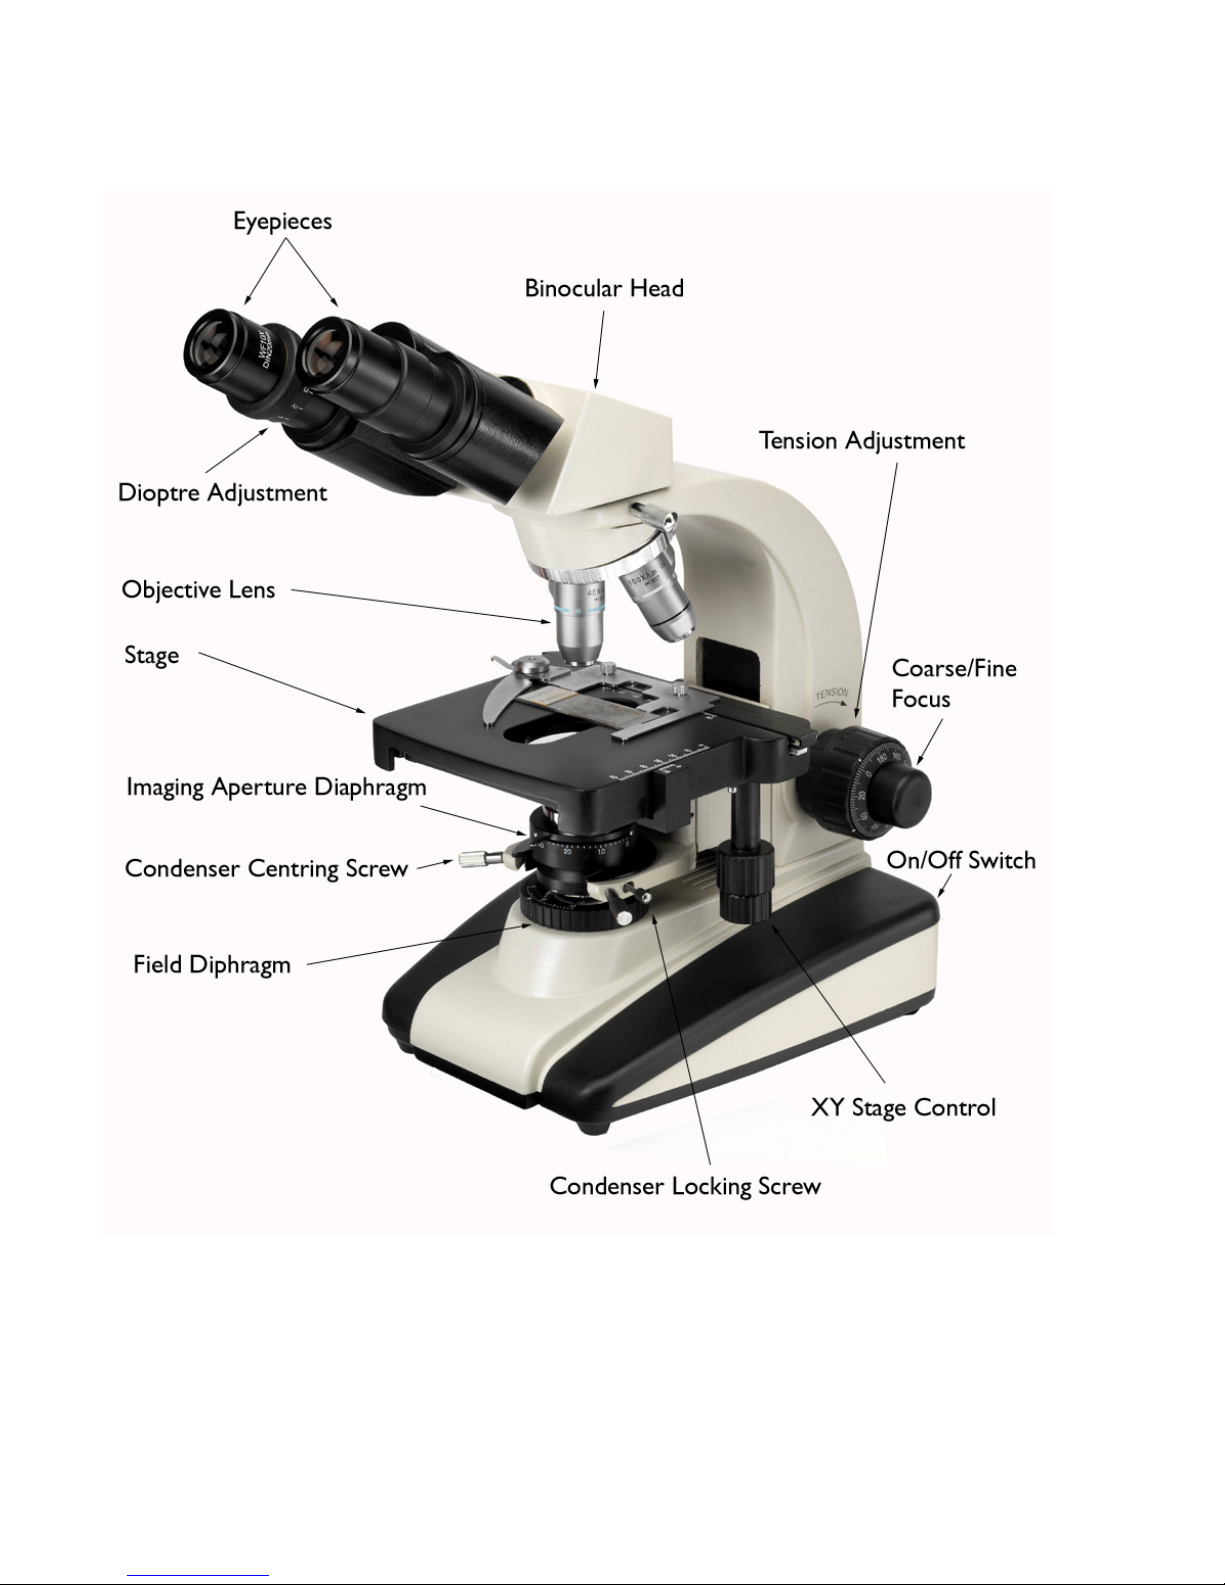
4. Component Parts

PriorLux
™
5
5. Electrical Connection and Safety
Stands are supplied with an operating voltage of either 220/240 VAC 50/60Hz or 110/120
VAC 50/60Hz. The instrument is supplied with a power lead complete with appropriate
plug for mains connection. UK plugs are fitted with a 3A fuse. This should only be
replaced with a similarly rated fuse. The instrument should ALWAYS be switched off and
isolated from the mains before any lamp or fuse is changed. The internal fuse is a T1.25A
type (replacement code W335). If necessary, replace only with this type of fuse.
6. Setting Up
Connect the power cable to the base of the microscope, at the rear, and before switching on
the power, reduce the lamp intensity control to its minimum setting. After switching on,
the intensity should be increased to a comfortable level. This procedure should be reversed
before switching off. Following this method will considerably prolong the life of the bulb.
Binocular/Trinocular Head
Interpupiliary distance should be set by rotating both eyepiece tubes in an arc until the two
images coincide and the view is perfectly circular to both eyes. Note the value on the scale
between the eyepieces so that the position can quickly be regained for future viewing.
Place a specimen on the stage and focus the image while looking through only the right
eyepiece. When the specimen is in focus close the right eye and adjust the dioptre on the
left eyepiece so that the image is perfectly focused. The instrument is now balanced for
your eyes.
 Loading...