

Page 1
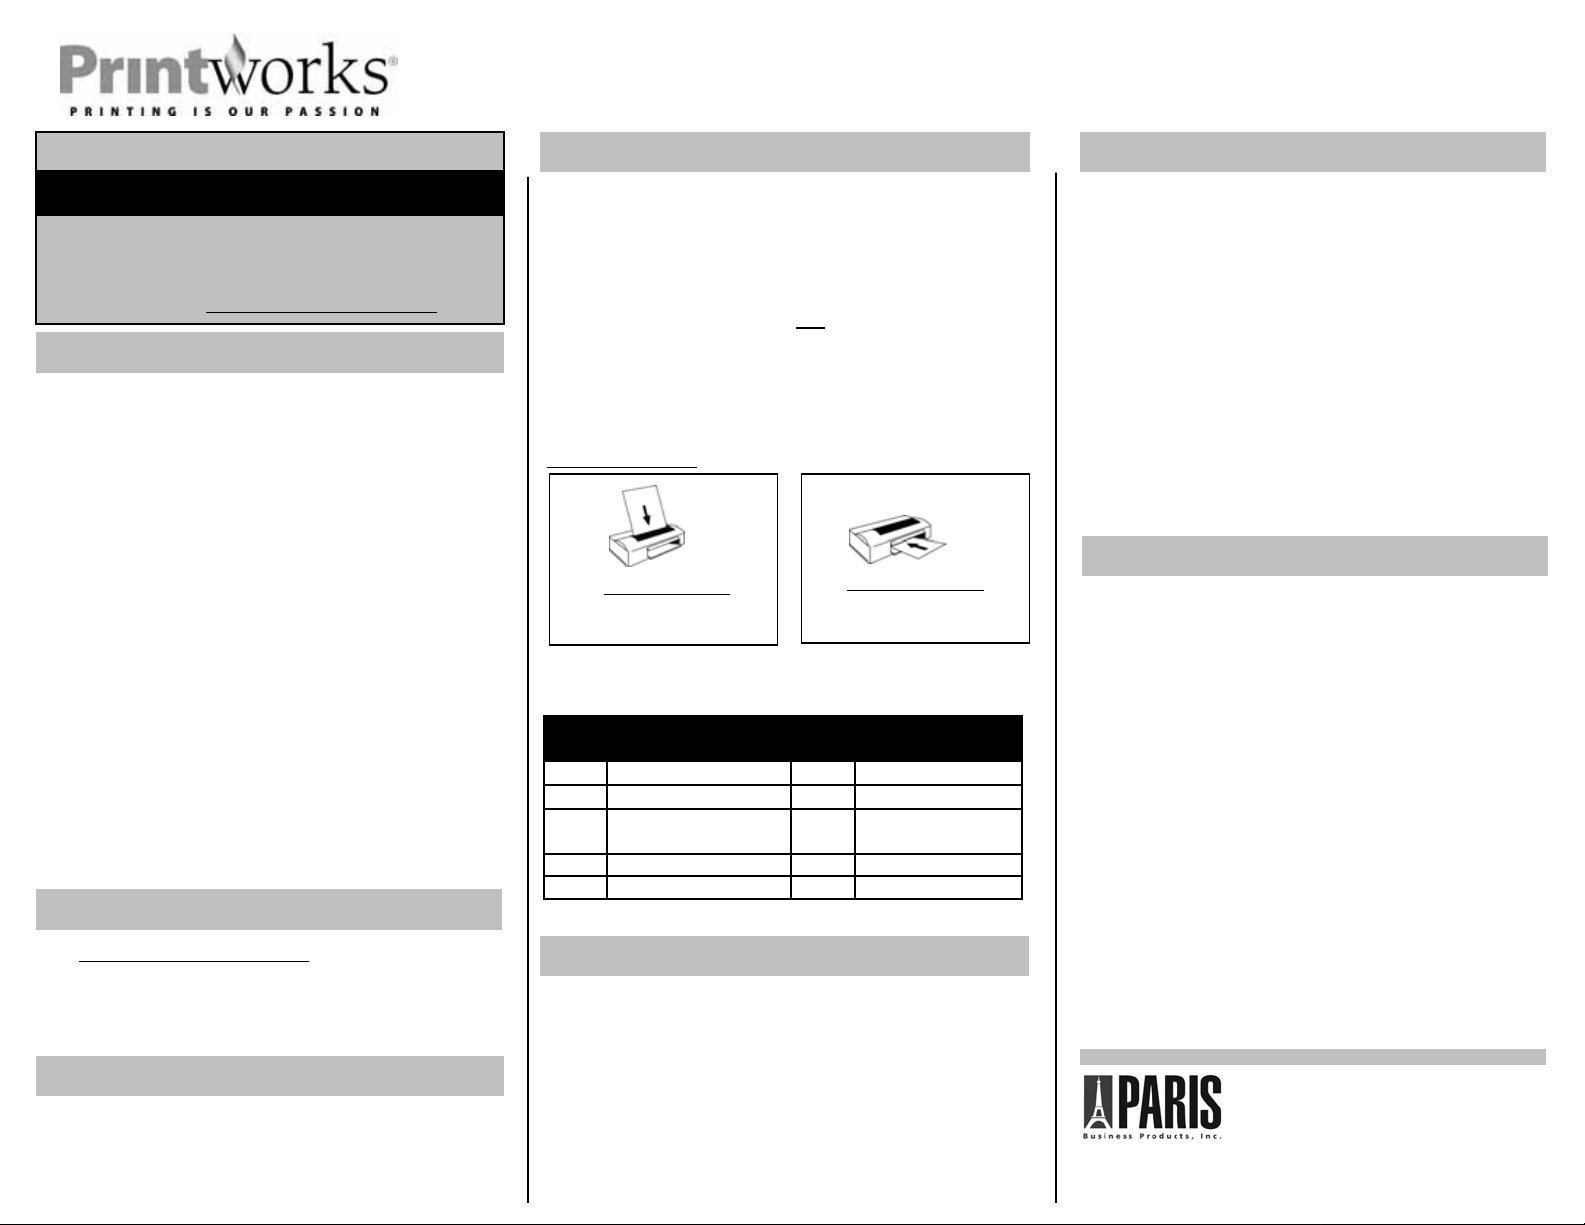
Portrait Studio™ Collection Watercolor Photo Paper Printing Instructions
Secure Download
NOTE: Only one software download per email address. Your
email address and this passcode entered in the online p roduct
registration will allow you secure access to the software
download. Go to www.myprintworks.com/downloads
Important
1. Handle the Portrait Studio Collection Watercolor Photo Paper on
the edges to avoid fingerprints.
2. For best results, test your image printed on regular paper. You
may notice minor color shifts from paper to Watercolor Photo
Paper depending on the porosity and quality of your test sheet.
See Printing Your Project section.
3. Portrait Studio Collection Watercolor Photo Paper is heavier and
thicker than regular photo paper. For best results, use single
sheet feeding. It may be necessary to hand feed to ensure that
the printer starts the feed process properly. Do not force
Watercolor Photo Paper through printer.
4. Drying time will depend on the inks used, the amount of ink
applied and environmental conditions such as humidity. Allow
prints to thoroughly dry before stacking or handling.
5. The raised textured side of the Watercolor Photo Paper is the
coated side. Be sure to only print on this side.
6. Store packaged paper flat and in a cool, dry place. Be sure
edges are flat before feeding into printer.
7. Only use an inkjet printer. Do not use a laser printer with this
paper.
Software Download
Go to www.myprintworks.com/downloads to download your free
copy of the ArcSoft® MediaImpression for Printworks Portrait Studio
Collection software. Note that there is one download per email
address. You must submit your passcode listed on the top of this
page to gain access.
Using the Software
The Software Quick Start Guide on the reverse will get you started. If
you need help, refer to the Help menu within the program. It is located
in the top right corner of the software window/page.
Printing Your Project
To achieve optimum results, please read instructions before printing.
IMPORTANT! Print a Test Page
Included in your Portrait Studio Collection package are two sheets of
matte photo paper to check your transformed image, printer settings and
size and location of image before you print on the Watercolor Photo
Paper. This test paper is printable on both
sides. To conserve your
printer ink, you can set the print quality to fast or draft mode. Image
quality will not be as good when printed in this mode so remember to
change the setting back to the recommended one.
Load Media – Load a single sheet of Watercolor Photo Paper i nto your
printer according to your printer type. Your image is to be printed on the
raised textured, coated
Top Load Printers
Load paper with raised textured
side facing out
side:
Front Load Printers
Load paper with raised textured
side facing down
Printer Settings – Printworks Portrait Studio Collection Watercolor Photo
Paper is compatible with all color inkjet printers. Select your printer’s
settings from the chart below:
Brand
HP
Canon
Epson Premium Presentation Paper
Kodak Auto Select Best
Lexmark Photo Glossy Best
For printer brands not shown here, refer to your printer’s operating manual for instructions
on specialty photo paper settings.
Paper Type
HP Premium Photo Paper
Matte Photo Paper
Matte
Print
Quality Additional Settings
Best
High Auto Color Adjustment
Best PhotoEnhance
Framing
Portrait Studio Collection photo media has been developed for framing.
Remember, there are no rules. Decide where the framed image will be
hung and choose materials: mat, glass and spacers (to fit between the
glass and print) with archival qual ities to increase image permane nce.
Lay the print over the frame backer to ensure a flat, even assembly.
Select a mat, if desired that highlights the frame and overall image. Use
a frame without glass for a gallery-quality, non-glare, watercolor look. Or
use glass to help protect the image from dust and harmful UV rays.
Care of Your Print
Printworks Portrait Studio Collection Watercolor Photo Paper is
made to exacting standards with archival quality materials. You can
expect brilliant colors and intense gradations in color when using this
paper. Because many inkjet printers use water-based dyes and
depending on environmental conditions, the print may f ade over
time. For more permanent protection of the printed image from
temperature, humidity, poor air quality, ultraviolet light and for best
overall results, finish your print with a non-yellowing, UV spray
lacquer that is solvent-based and readily available at art, craft and
photographic supply retailers. Avoid sprays that are latex based.
* To prolong the life of any print, it is recommended to seal the back
of the print with a solvent-based lacquer to protect from humidity,
moisture and mold. Many watercolor prints will be displayed without
glass or mat boards, however, when they are used, ensure that only
archival quality materials for mats and backings are used.
For Best Results
1. Select digital images with high resolutions. Most digital cameras
today take images that can be printed on 8.5” x 11” paper as long
as the camera settings for the original image are high quality, saved
in this software in high quality and printed on high quality settings.
Leave the Quality slider setting between 90 and 100 when sa ving
the image in ArcSoft MediaImpression for Printworks Portrait Studio
Collection software.
2. Select images with vibrant color, sharp detail and contrast. Many of
the artistic effects transform images with blocks of color but with a
lot of tonality to mimic a painterly effect.
3. The supplied test sheets – printable on both sides - will limit any
errors with sizing or layout; test often in the designing/editing
process to ensure the desired results. If you use all of the supplied
sheets, substitute with regular photo paper or inkjet paper.
4. The Helpscreen should address any software functionality
questions that you may have when editing, designing or printing
your images. The Helpbutton is in the top right corner in the
software and can be referenced during use.
Paris Business Products, Inc.
Westampton, New Jersey, USA
www.myprintworks.com
©2008, Paris Business Products, Inc.
P/N 51988, 1/08
Page 2
Software Quick Start Guide
Software Quick Start Guide
Getting Started
1. Go to www.myprintworks.com/downloads
copy of the ArcSoft® MediaImpression for Printworks® Portrait
Studio™ Collection software.
2. Follow the easy, download instructions. During the download
process, type your Software Download Pa sscode found on the
reverse side of this sheet.
NOTE: You do not have to use the ArcSoft MediaImpression
software to print on Printworks Portrait Studio Collection photo
media. You can simply use your existing photo editing software to
manipulate your digital images. However, the downloadable
ArcSoft MediaImpression for Printworks Portrait Studio Collection
software provides you with everything you need to quickly
transform and easily print your images with ‘wow’ results.
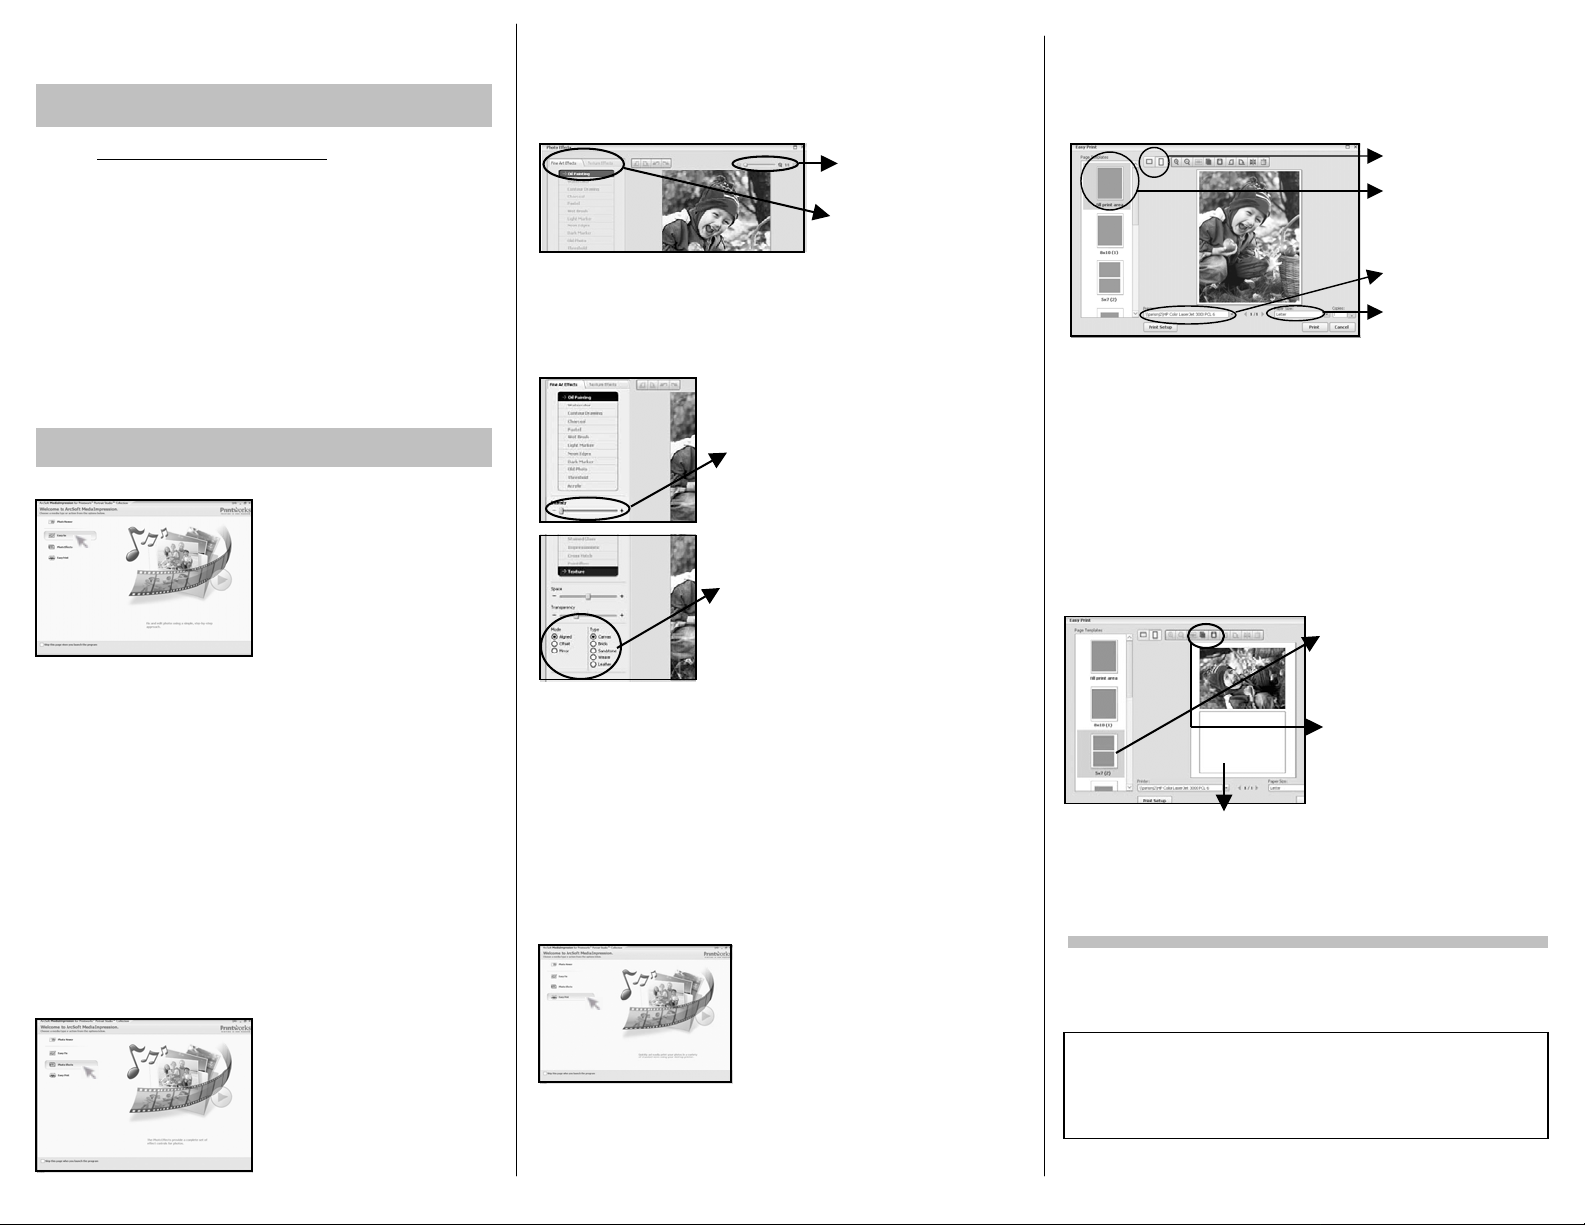
Creating Your Masterpiece in Just 3 Steps
Step 1. Easy Fix
This tool edits your image for
common photo ‘fixes’ su ch as redeye removal, cropping/sizing, color
adjusting, image sharpening, etc.
A. Click Easy Fix.
B. Image files within a selected folder will show on your monitor as
thumbnails. Select the appropriate file folder where image has
been saved in the file manager on the left side. Choose the image
to be transformed by double-clicking on the image.
C. Easy Fix will show the selected image along with the Easy Fix
options. Choose the appropriate editing tools by clicking inside the
box beside each description or select Ma ke All Fixes to execute
every tool. Note: You can reset any modification by simply clicking
the Resetor Undo button or move back to the previous tool by
clicking the Back button.
D. Click Save As when completed to rename the file for access later.
Important: Before saving, be certain to type a new file name or the
original digital image will be overwritten and cannot be retrieved.
Step 2. Photo Effects
This tool transforms your image using
dramatic or subtle effects easily and
quickly. You can just add texture or
layer several effects to create a real
masterpiece. The software offers full
creativity with your imagination being
the only limitation to what you can do.
to download your free
A. Click Photo Effects. Note: If you have not selected Go to Start Page to
see this screen, click Show More Actions in the bottom left corner. This
will present each of the available photo editing tools in the software,
including Photo Effects.
B. Select the file that you wish to transform by double-clicking on the image.
Zoom – Slide toolbar to the
right to view image with
more detail.
Tabs – Click on Fine Art
Effects or Texture Effectstabs.
C. On the top, left side click either the Fine Art Effects tab or the Texture
Effects tab to view and try different artistic effects within each. You
are not committed to saving the effects that you try. Each effect is
shown on-screen as you manipulate the image. There are Effects
Bars or Effects Optionsto manipulate the image.
Effects Bar –Slide the indicator to the right
to increase the intensity of the effect or to
the left to decrease the intensity. Note:
With each movement of the slider, there is
a slight delay in transforming the image.
Effects Options–Click within the circle to
implement the artistic effect. Click again to
remove the effect. Note: With each click of the
button, there is a slight delay in transforming
the image.
D. Click Apply when you are satisfied with the effect shown on screen.
Click Cancel if you do not like the effect and wish to try another.
E. Save the final, transformed image by clicking Save As. Type a new file
name when saving it to prevent overriding –and losing -t he original
image.
Be Creative – Double the Effect for Double the Wow
F. If desired, manipulate the transformed image some more with additional
artistic effects. The Textures artistic effects create more visual surface
dimension and offer even more similarity to realistic, gallery images.
Simply open the last, transformed image and repeat Step 2. The
creative possibilities are endless.
Step 3. Easy Print
This tool allows you to quickly print
your transformed image to your inkjet
printer, offering you a number of print
size options, templates, page
orientations and more.
A. Click Easy Print. Note: If you have not selected Go to Start Page to
see this screen, click Show More Actions in the bottom left corner.
This will present each of the available photo editing tools in the
software, including Easy Print.
B. Select the file that you wish to print, double-clicking on the image.
C. Select the Page Template that you wish to use within the scrolling
menu. Most printing with Printworks Portrait Studio Collection
Photo Media will be 8.5” x 11” but you can select any of the
available templates for different image sizes.
Select image orientation.
Select page template
by clicking on
desired layout.
Select printer model.
Select paper size.
D. Click on the appropriate image orientation: Portrait or Landscape
buttons within the top menu.
E. Select your inkjet printer modelfrom the dropdown menu.
F. Select the Paper Size from the dropdown menu. Most printing with
Printworks Portrait Studio Collection Photo Media will be Letter/
8.5” x 11”.
G. Because Printworks Portrait Studio Collection Photo Media is
thicker than traditional photo paper, print only one (1) copy at a
time. Do not change the number of print copies.
Duplicating the Wow
Print more than one image per page with simple Copy and Paste
commands in the available Page Templates.
1. Scroll down menu to select one
of the page templates with more
than one image block.
2. Click the Copy graphic to
automatically select the image on
screen. Click the Paste graphic to
automatically duplicate the image.
Repeat clicking the Pastegraphic
to fill the template if more than two
image blocks.Area for duplicating image.
H. Click the Print Setup button to show your inkjet printer’s Printer
Settings. Refer to the Printing Instructions on the reverse side of this
page to achieve the best printing results with your Printworks Portrait
Studio Collection Photo Media.
Note: The screen images above reflect a Microsoft Windows operating
system; Mac users will see some different screen layouts but the
functionality will be comparable.
System Requirements:
Windows –2000, XP, Vista – Pentium III 1 GHz or equivalent –512 MB RAM – 100
MB hard disk space – 16 bit color display
Mac –OS X 10. 3 or hi gh er – Power PC G4 800 MHz or Intel Processor – 512 MB RAM
– 100 MB hard disk space –16 bit color display
ArcSoft MediaImpression for Printworks Portrait Studio Collection is developed by ArcSoft, Inc.
©2007. All rights reserved.
 Loading...