

Princess auto EHS350A Operation And Parts Manual
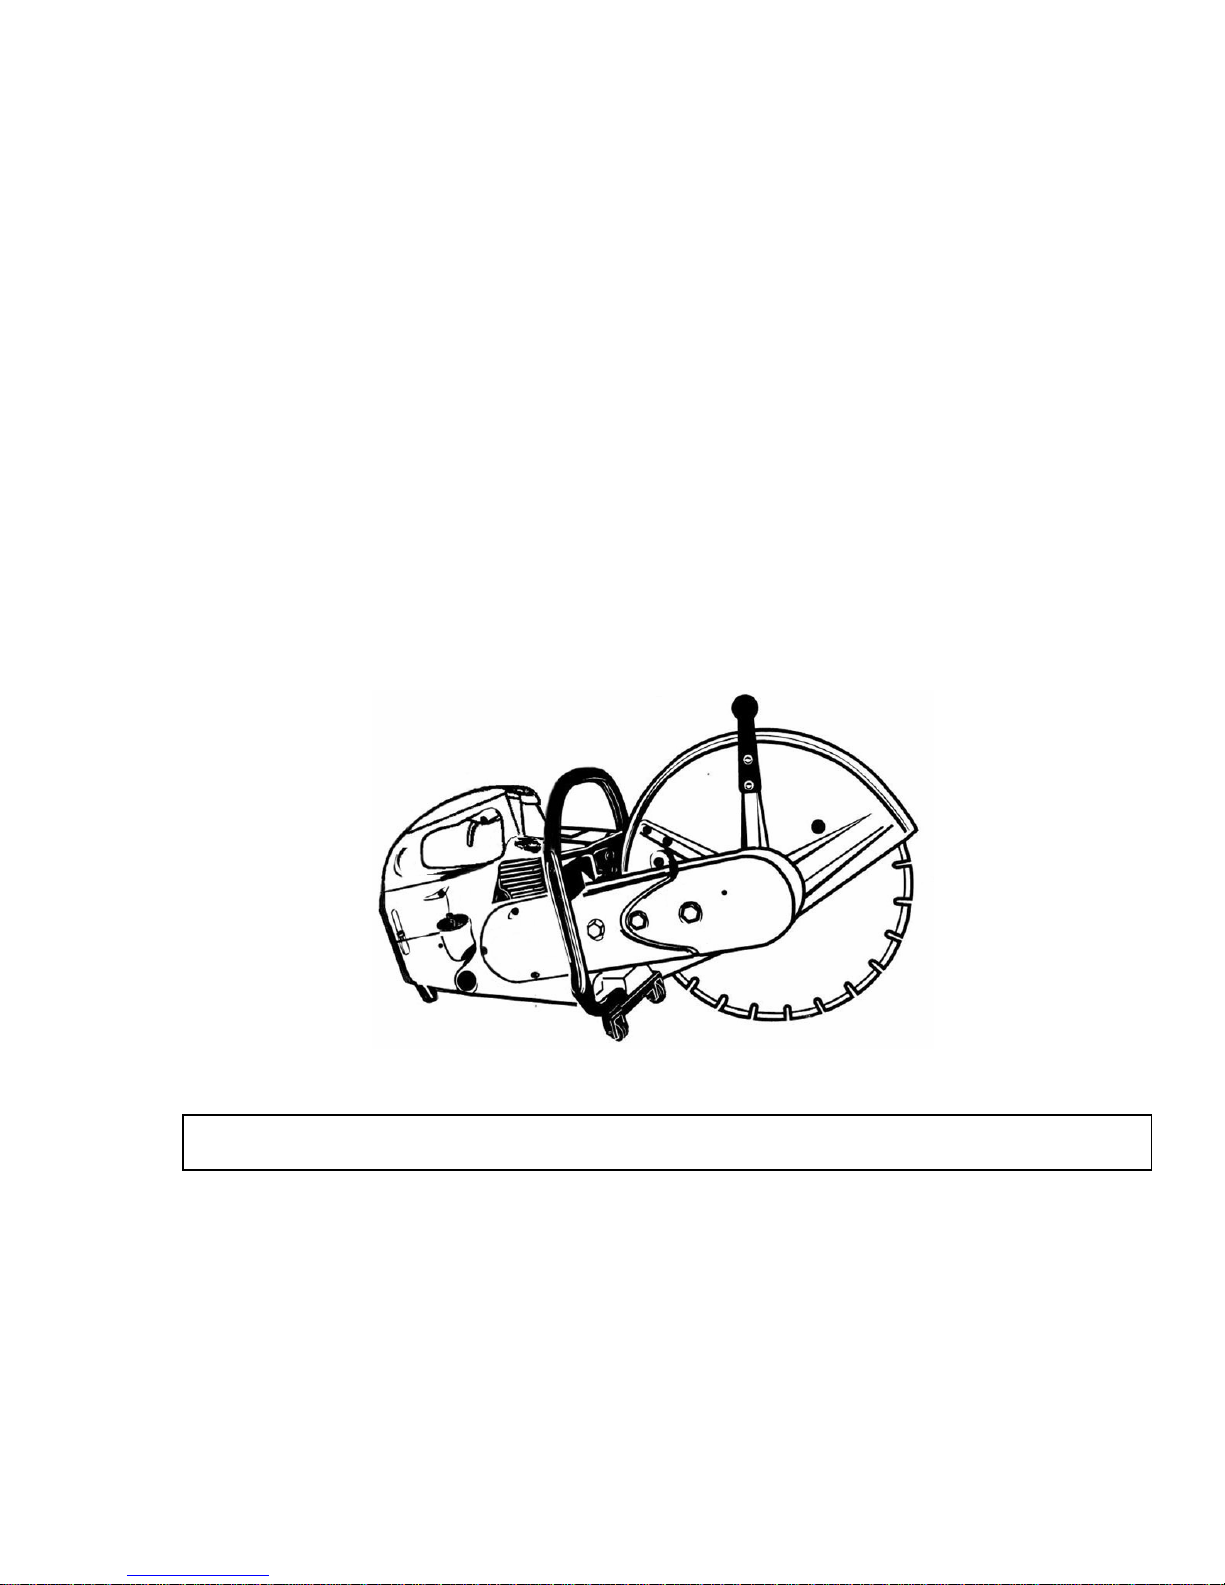
Portable Cut-off Saw
Model: EHS350A
Operation/Parts Manual
WARNING: For safety and efficient operation, always follow the instructions in this manual

Introduction
Thank you for purchasing our cutoff saw Model: EHS350A
This Manual contains operating and safety instructions for your Model EHS350A
cut-off saw.
To receive maximum performance and satisfaction from your cut-off saw model EHS350A,
it is important that you read and understand the maintenance and safety manual before
operating the saw. Contact your dealer or the distributor in your area if you do not
understand any of the instructions in this Manual.

Because the EHS350A operates at high speed, special safety precautions must be
observed before operating the saw. Careless or improper use could cause serious or
even fatal injury.
1

Table of Contents
Main parts of EHS350A and their functions………………………………………5- 9
Safety precautions…………………………………………………………………..10- 20
Specifications…………………………………………………………………………21- 22
Operation guide to EHS350A cut-off saw…………………………………………23- 32
1. Before starting……………………………………………………………………..23 - 26
2. Starting……………………………………………………………………………..27- 29
3. Operation……………………………………………………………………………30
4. Emergency Stopping……………………………………………………………….31
5. Notes on operation…………………………………………………………………31- 32
Adjustment of EHS350A cut-off saw………………………………………………..32- 34
1. Adjusting V-belt tension……………………………………………………………32
2. Adjusting carburetor………………………………………………………………..32- 34
3. Adjusting blade guard………………………………………………………………34
3

Maintenance & repair of EHS350A cut-off saw…………………………………..35- 41
1. Cleaning and maintenance of air filter………………………………………….35 - 36
2. Maintenance of spark plug……………………………………………………….36- 37
3. Replacing starter rope……………………………………………………………37 - 38
4. Replacing pawl…………………………………………………………………….39
5. Maintenance chart…………………………………………………………………40-41
Storing EHS350A cut-off saw……………………………………………………….42
Exploded parts views and parts lists…………………………………………….43- 58
1. Crankshaft Housing Assembly…………………………………………………..43-44
2. Crankshaft & Piston Assembly…………………………………………………..45-46
3. Cylinder & Muffler Assembly……………………………………………………..47-48
4. Fuel Tank & Carburetor…………………………………………………………..49-50
5. Handle & Main Cover Assembly………………………………………………….51-52
6. Air Filter Assembly…………………………………………………………………53-54
7. Cutter Assembly……………………………………………………………………55-56
8. Transmission Box Assembly……………………………………………………57-58
4

Main parts of EHS350A and their functions
This product is composed of two main sections: a gasoline powered 2-stroke engine and a
driving/cutting system. When engine speed is up to 3800 RPM, the cutting blade, driven by
the engine via belt transmission system, begins to rotate at high speed, and is ready for
cutting work.
Showed below are the main parts of the EHS350A cut-off saw and their corresponding
function descriptions (Ref. Fig 1):
5
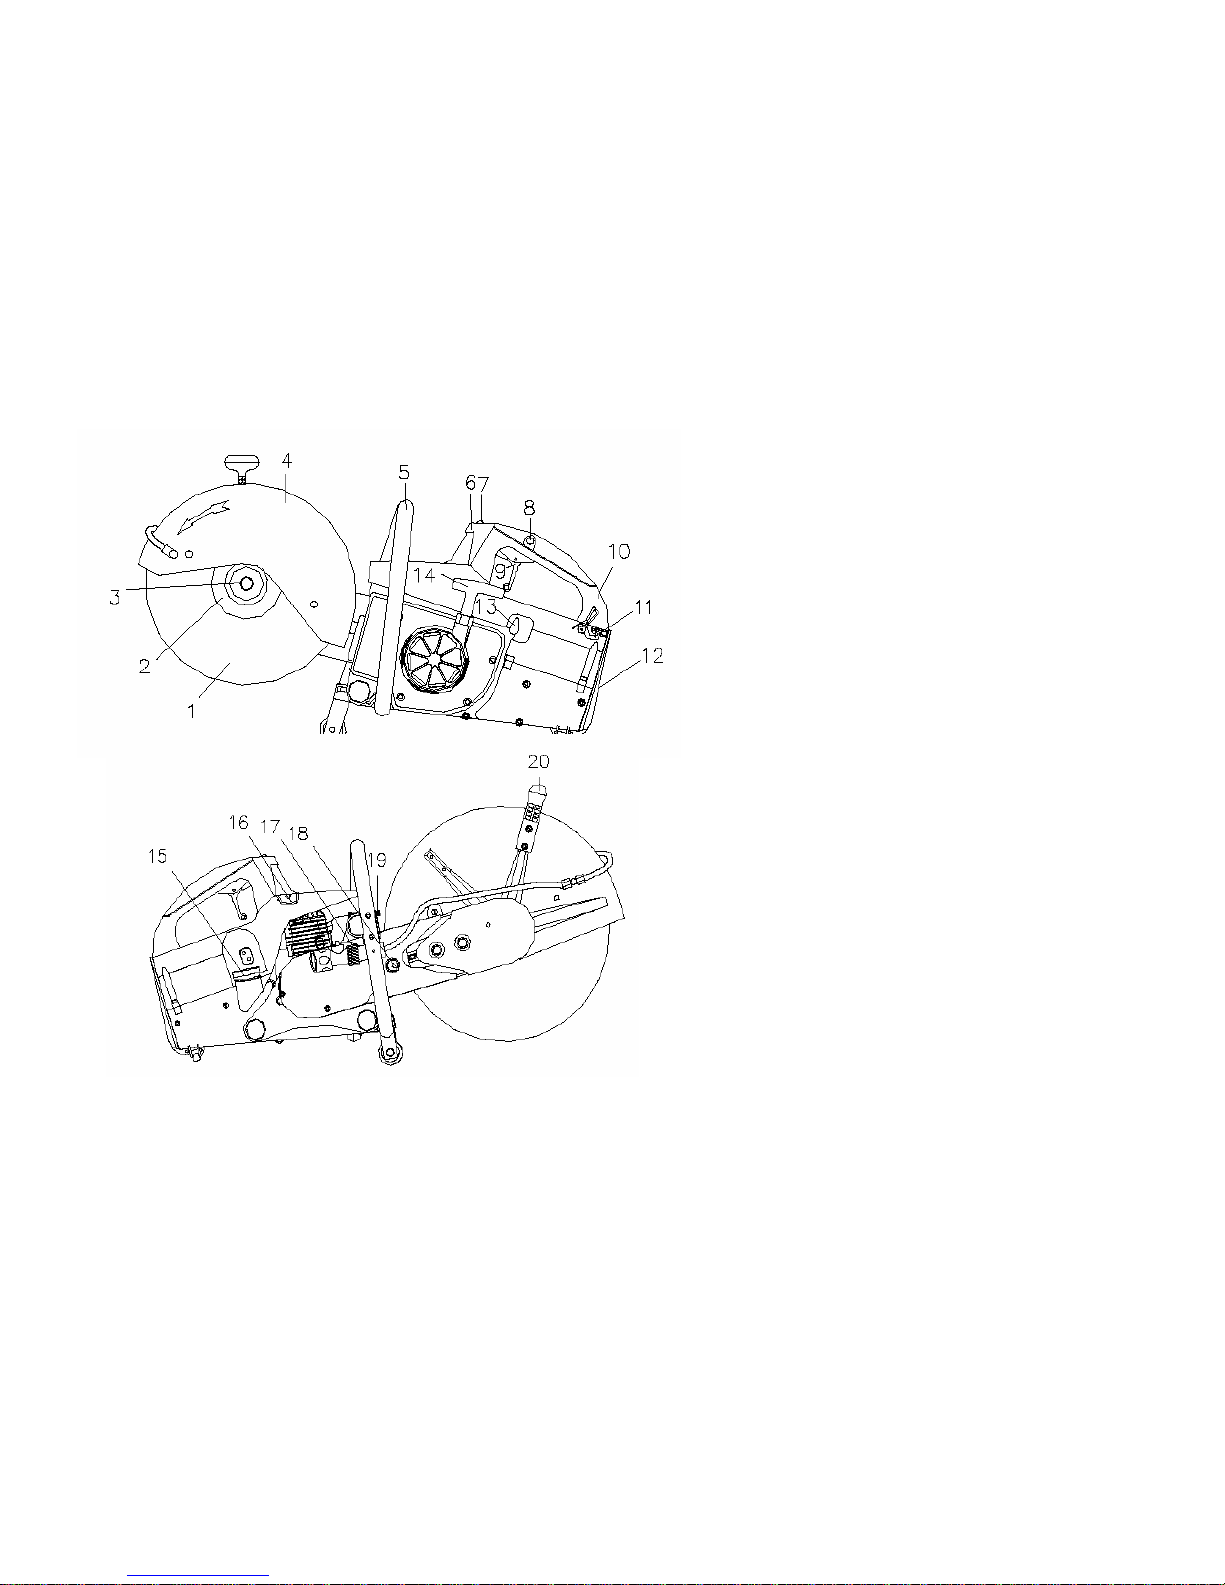
1. Blade
2. Flanges
3. Hexagon Bolt
4. Blade Guard
5. Front Handle
6. Spark Plug Cover
7. Kill Switch
8. Full Throttle Lock Button
9. Throttle Trigger
10. Rear Handle
11. Filter Cover Lock Lever
12. Air Filter
13. Choke Lever
14. Starter Grip
15. Fuel Tank Cap
16. Decompression Valve
17. Water Attachment
18. Tensioning Nut
19. Muffler
Fig. 1 20. Adjusting Lever of Blade Guard
6

1. Blade:
Diamond or abrasive blades. Depending on the material to be cut, these blades are
made of different materials. Be sure to choose right blade for the material being cut.
The maximum diameter of the blade for the saw is 14 inch. And the operating speed of
the blade should be above or equal to 5300 RPM.
2. Flanges:
Clamp and support the diamond or abrasive blade.
3. Hexagon Bolt:
Tightens blade flange.
4. Blade Guard:
Safety guard, directs sparks and dust away from operator.
5. Front Handle:
Used to securely hold the saw while under operation.
6. Spark Plug Cover:
A removable cover for access to the spark plug
7. Kill Switch:
Engine stops when this switch is pressed and held.
7

8. Full throttle lock button:
Locks the throttle in full open position by pressing this button while the trigger is fully
depressed. Pressing and releasing the trigger returns the throttle to idle position.
9. Throttle trigger:
Controls engine speed by manipulating the throttle. Pulling the trigger backward opens
the throttle and the engine accelerates. Releasing the trigger slows down the engine.
10. Rear Handle:
Used to securely hold the saw while under operation.
11. Filter Cover Lock lever:
Locks the air filter cover. Pull back on the lever to open the filter cover.
12. Air Filter:
Filters dirt and debris from entering carburetor.
13. Choke Lever:
Turning this lever counter clockwise closes the carburetor. Used to prime engine
(cold starting). Turn clockwise for normal operation.
14. Starter Grip:
Pull to start engine.
8

15. Fuel Tank Cap:
Open this cap for filling the fuel. Close the tank for starting and operation.
16. Decompression Valve:
Press down on this valve to make starting easier. When air pressure in the engine
reaches a preset value, it automatically closes.
17. Water Attachment:
Feeds water to both sides of diamond blade. Connect to water supply for wet cutting.
18. Tensioning Nut:
For V-belt tension adjustment. Turn this nut clockwise to loosen the V-belt, turn the nut
counter clockwise to tension the V-belt
19. Muffler:
Reduces both noise and emissions.
20. Blade Guard Adjusting Lever :
Allows adjustment of blade guard to direct dust away from operator.
9
Safety Precautions:
As the EHS350A cutoff saw is a high-speed power tool, improper use of this
saw might be hazardous. To avoid property damage or personal injury, it is
EXTREMELY IMPROTAN T to read, fully understand, and observe the following
safety precautions before operating this cut-off saw.
1. Worksite Requirements:
. The worksite should be free of any materials or objects that are flammable or
explosive.
. Surroundings should be in order, with no clutters, having sufficient visibility, and be
well ventilated. The ground operator stands on should be non-skid. Take extreme
care when working in wet and freezing weather (rain, snow, frost, ice).
. Bystanders should keep away from the saw when it is operating. Children, the
10

handicapped and animals should never be allowed in the work area.
. Loose objects may be thrown toward the operator by the cutting tool. So position the
object to be cut securely to ensure it won’t be pushed around by the blade when
cutting.
2. Blade:
Before installing a blade make sure that the maximum operating speed of the
blade is above or equal to the spindle speed of your cut-off saw. Inspect the
cutting blade frequently and replace immediately if the cutting blade is cracked
or warped. Cracked or warped blades may shatter or break and cause serious personal
injury. Failure to follow these directions may cause the blade to shatter or crack in use
causing serious or fatal injury.
Never use carbide-tipped, woodcutting or circular machine blades. They can cause severe
personal injury from reactive forces, blade contact or thrown objects.
11

Use of the wrong cutting blade for which it was not designed may cause that blade to
shatter causing serious or fatal injury.
Only use the cutting blade approved for the type of material to be cut.
Diamond blades have a much better cutting performance than standard abrasive blades.
The blades are steel centered and diamond particles are imbedded in their cutting edges.
Wet or dry cutting is possible. Cutting wet will extend the life of your diamond blades. A
water attachment comes as standard equipment with the EHS350A. Before using the
water attachment make sure that the screw that secures the outlet tube is tightened.
Always install the blade so that the arrow on the blade points in direction of the rotation of
the spindle.
Before carrying or transporting your cut-off machine the engine must be off. Never leave
the engine running whilst unattended, e.g. on the ground.
12

Proper tension of the V-belt is important. In order to avoid a false setting, the tensioning
procedure must be followed as described in your manual. Always make sure the hexagonal
collar nuts for the cast arm are tightened securely. Check V-belt tension after one hour of
operation and correct if necessary.
3. Operator:
. The cut-off saw is a one–person tool. So start and operate this saw without
assistance.
. Make sure you are in good physical condition and are not under the influence of any
substance such as drugs or alcohol which may impair vision or dexterity. Take
breaks as needed to prevent you from getting fatigued.
.
Never let the EHS350A saw run unattended. NO untrained personal should ever be
allowed to use a cut-off machine. Bystanders, especially children and animals
should not be allowed in the area where a cut-off machine is in use.
Do not lend or rent your cut-off machine without the Operation Manual. Employers
should establish a training program for operators of this saw to ensure safe operation
13

of the EHS350A.
Avoid loose – fitting jackets, scarf, neckties, jewelry, flared or cuffed pants,
unconfined long hair or anything that could become caught on any obstacles or
moving parts of the unit. Wear overalls or long pants to protect your legs. Do not wear
shorts.
Protect your hands with gloves when handing the cut-off saw. Heavy-duty, non-slip
gloves improve your grip and protect your hands.
Use EHS350A cut-off saw only with both hands, keeping a firm grip on the front and
rear handles.
Maintain good balance and footing at all times.
Good footing is most important. Wear sturdy boots with nonskid soles. Steel-toed
safety boots are recommended.
14
To reduce the risk of injury to your eyes, never operate the cut-off saw
unless wearing goggles or properly fitted safety glasses with adequate
top and side protection.
Proper eye protection is a must!
Wear an approved safety hard hat to protect your head. Cut-off machine noise could
damage your hearing. Earplugs or ear mufflers shall be worn at all times.
Cutting masonry, concrete, metal and other materials can generate dust,
mists and fumes containing chemicals known to cause serious or fatal
injury or illness, such as respiratory disease, cancer, birth defects or other
reproductive harm. Cutting masonry, concrete and other materials with silica in their
composition may give off dust containing crystalline silica. Silica is a basic
component of sand, quartz, brick clay, granite and numerous other minerals and
rocks. Use of an approved respirator is recommended.
. Do not cut materials containing asbestos as asbestos dust can cause severe physical
injury. Do not cut materials containing highly volatile or flammable substances.
15

4. Inspection of the cutoff saw before use:
. Make sure there are no loose objects on or near the saw.
. Except for the carburetor adjustment screws, all other bolts, nuts, screws and the
fuel tank cap should be securely tightened. Make sure all rubber hoses for oil flow
are tightly connected with no leaks.
. Make sure the blade rotates smoothly; the starter rope can be pulled through and
guided back without being tangled.
. Check to make sure the Throttle Trigger, the Full Throttle Lock Button, the Choke
Lever, the Decompression Valve and the kill Switch all function well without failure.
. Check to make sure the blade guard has no
visual damage. Adjust the guard as necessary
so the spark beam generated during cutting
can be directed away from the operator. (Ref.
Fig.2)
Fig 2
16
. Check to make sure the V-belt is properly tensioned.
. Make sure the saw is free of oil spillage.
. Make sure the main cover and the handles are dry and clean.
. Do not attempt to start the saw if damage is found or if it’s not completely and
securely assembled and properly adjusted.
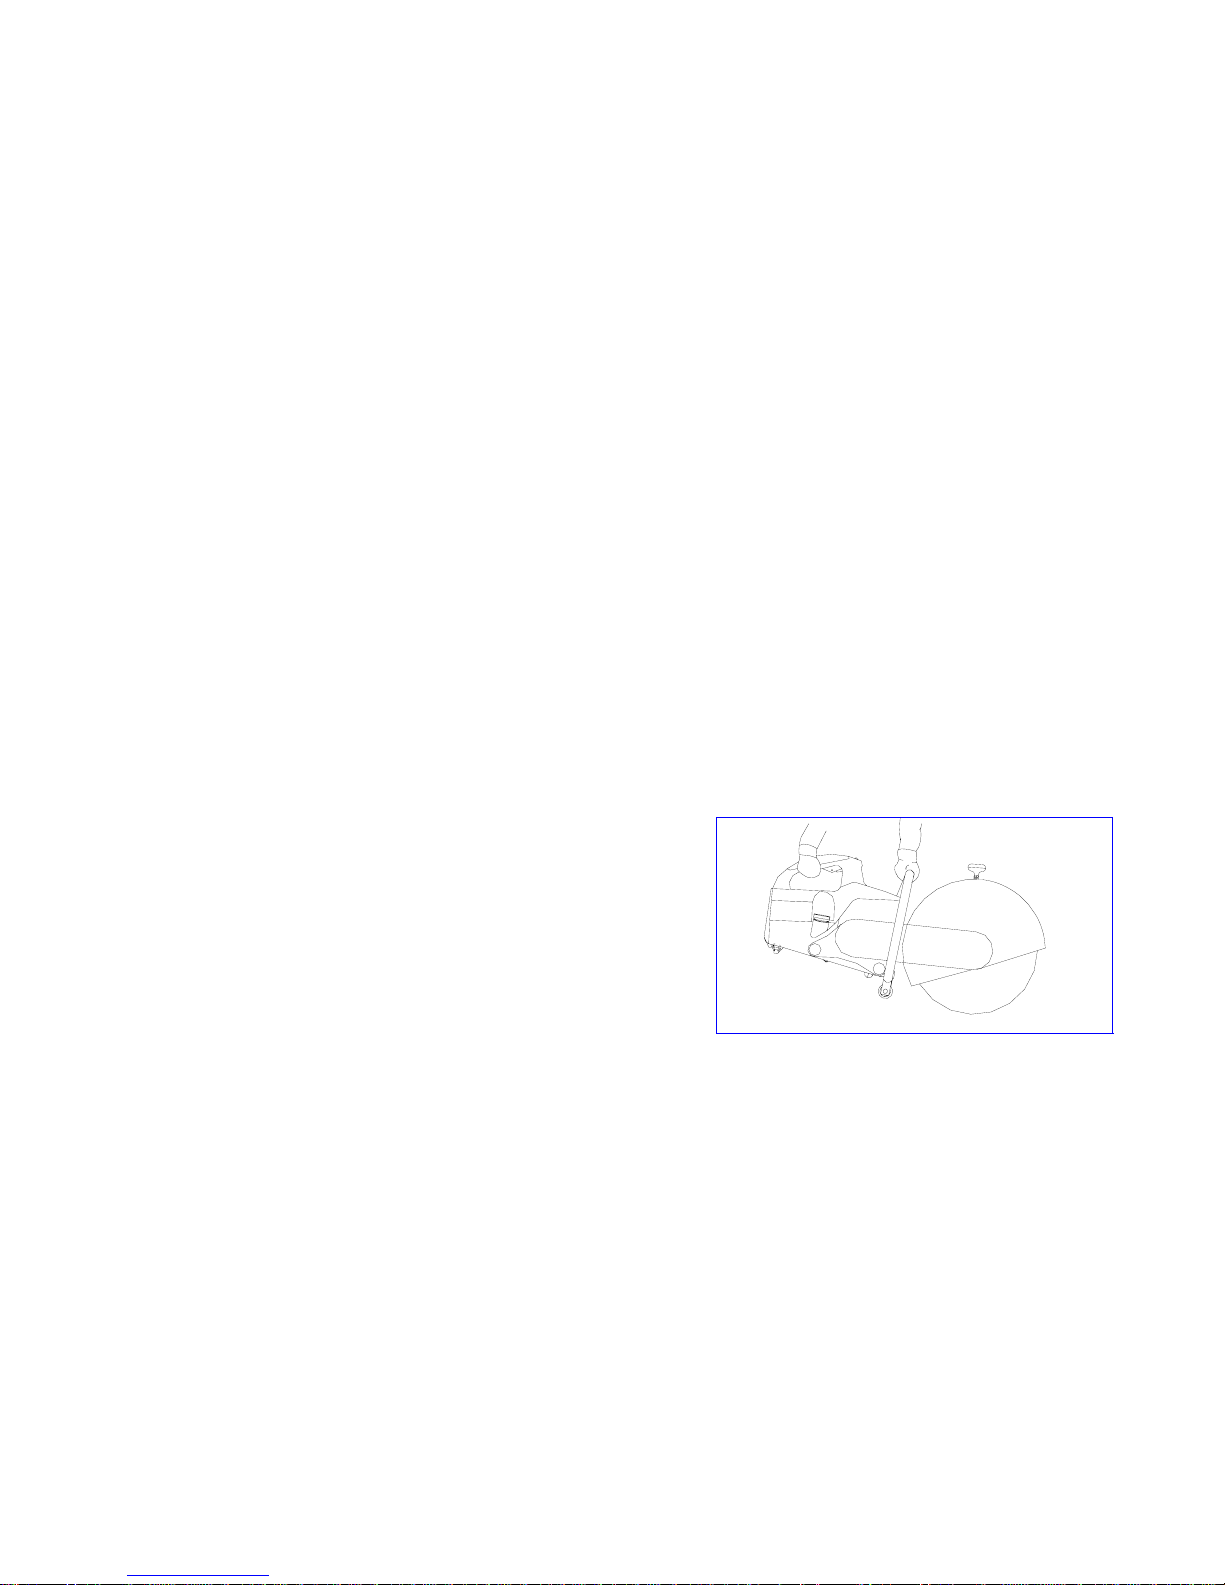
5. Precautions on starting:
. Keep a good balance and secure footing.
. Take hold of the starter grip firmly; do not wrap the rope around your hand.
. To start, place the machine firmly against
the ground and make sure the blade is not
in contact with the ground or the object to
be cut.
. Pull sharply on the rope and guide it back
slowly. Do not let go of the grip halfway
through the pull to prevent it from
snapping back.
Fig 3
17
 Loading...