

PRINCESS 283069 User Manual [fr]
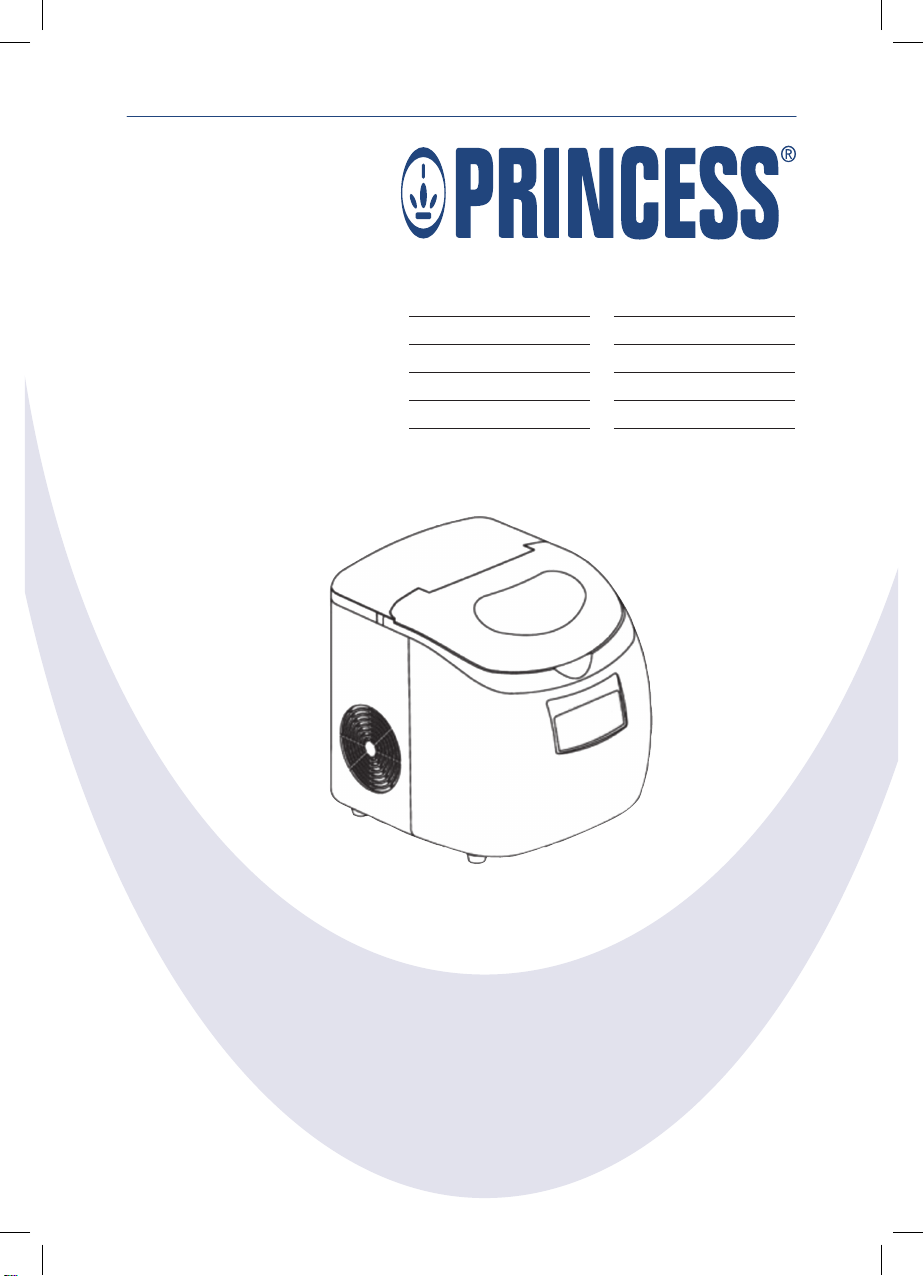
283069 Princess Ice Cube Maker
Nederlands 4
English 9
Français 14
Deutsch 19
Español 244
Italiano 29
Svenska 34
Norsk 39
Português 43
Polski 48

2
8
10
9
3
2
6
1
7
4
5
A

3
11
24
20c 20b 20a 23
15
19
18
17
22
21
13 16 14 12
B
4
NL
Veiligheidsinstructies
Algemene veiligheid
Lees voor gebruik de •
gebruiksaanwijzing
zorgvuldig door. Bewaar de
gebruiksaanwijzing voor
toekomstig gebruik.
Gebruik het apparaat en de •
accessoires uitsluitend voor
de beoogde doeleinden.
Gebruik het apparaat en de
accessoires niet voor andere
doeleinden dan beschreven
in de gebruiksaanwijzing.
Gebruik het apparaat niet als •
een onderdeel of een accessoire
beschadigd of defect is. Laat
een beschadigd of defect
onderdeel of een accessoire
door de fabrikant of een erkend
servicecentrum vervangen.
Het apparaat is niet bedoeld •
voor gebruik door personen
(inclusief kinderen) met een
lichamelijke, zintuiglijke of
geestelijke beperking of zonder
de benodigde ervaring en
kennis, tenzij ze onder toezicht
staan van een persoon die
verantwoordelijk is voor hun
veiligheid of instructies
hebben gekregen over het
gebruik van het apparaat.
Houd altijd toezicht op •
kinderen om te voorkomen
dat ze met het apparaat
spelen.
Gebruik het apparaat niet in •
de buurt van badkuipen,
douches, wastafels of andere
voorzieningen die water
bevatten.
Dompel het apparaat niet •
onder in water of andere
vloeistoffen. Verwijder het
apparaat niet met uw
handen als het apparaat is
ondergedompeld in water of
andere vloeistoffen. Haal
onmiddellijk de stekker uit
het stopcontact. Gebruik het
apparaat niet langer als het
in water of andere vloeistoffen
ondergedompeld is geweest.
Reinig het apparaat en de •
accessoires. Zie het gedeelte
"Reiniging en onderhoud".
Elektrische veiligheid
Controleer voor gebruik altijd •
of de netspanning overeenkomt
met de spanning op het
typeplaatje van het apparaat.
Bedien het apparaat niet •
door middel van een externe
timer of een apart
afstandsbedieningssysteem.
5
NL
Sluit het apparaat op een •
geaard stopcontact aan.
Gebruik indien nodig een
geaarde verlengkabel met
een geschikte diameter
(minimaal 3 x 1 mm
2
).
Installeer voor extra •
bescherming een aardlekschakelaar (RCD) met een
nominale reststroom van
maximaal 30 mA.
Zorg ervoor dat er geen •
water in de aansluitpunten
van het netsnoer en het
verlengsnoer kan komen.
Wikkel netsnoer en het •
verlengsnoer altijd volledig af.
Zorg ervoor dat het netsnoer •
niet over de rand van een
werkblad hangt, dat het niet
per ongeluk verstrengeld kan
raken en dat niemand erover
kan struikelen.
Houd het netsnoer uit de •
buurt van warmtebronnen,
olie en scherpe randen.
Gebruik het apparaat niet als •
het netsnoer of de stekker
beschadigd of defect is. Laat
een beschadigd of defect
netsnoer of een stekker door
de fabrikant of een erkend
servicecentrum vervangen.
Trek de stekker niet aan het •
netsnoer uit het stopcontact.
Haal de stekker uit het •
stopcontact als het apparaat
niet in gebruik is, voordat u
het gaat monteren of
demonteren en voordat u
reinigings- en onderhoudswerk zaamheden gaat
uitvoeren.
Veiligheidsinstructies voor
ijsblokjesmachines
Het apparaat is alleen geschikt •
voor huishoudelijk gebruik.
Gebruik het apparaat niet •
voor het opslaan of koelen
van eten of drinken.
Gebruik het apparaat niet •
buitenshuis.
Gebruik het apparaat niet in •
vochtige omgevingen.
Gebruik het apparaat niet in •
een omgevingstemperatuur
lager dan 5 °C.
Plaats het apparaat op een •
stabiel en vlak oppervlak.
Plaats het apparaat op een •
hittebestendig en spatvrij
oppervlak.
Plaats het apparaat niet op •
een kookplaat.

6
NL
Zorg ervoor dat er voldoende •
ruimte rondom het apparaat
is voor het ontsnappen van de
warmte en voor voldoende
ventilatie.
Bedek het apparaat niet. •
Plaats geen objecten boven
op het apparaat.
Zorg ervoor dat het apparaat •
niet in contact komt met
brandbaar materiaal.
Houd het apparaat uit de •
buurt van warmtebronnen.
Plaats het apparaat niet op
hete oppervlakken of in de
buurt van open vlammen.
Bedien het apparaat niet •
zonder dat het deksel op zijn
plaats zit.
Steek geen vreemde •
voorwerpen in het apparaat.
Verplaats het apparaat niet •
wanneer het is ingeschakeld.
Laat het apparaat niet •
onbeheerd achter tijdens
gebruik.
Berg het apparaat als het niet •
in gebruik is op een droge
plaats op. Zorg ervoor dat
kinderen geen toegang hebben
tot opgeborgen apparaten.
Reiniging en onderhoud
Waarschuwing!
- Schakel voor reiniging en onderhoud het
apparaat uit, verwijder de netstekker uit
het stopcontact en wacht totdat het
apparaat is afgekoeld.
- Dompel het apparaat niet onder in water
of andere vloeistoffen.
- Laat geen water in het apparaat voor een
lange periode om te voorkomen dat het
water wordt verontreinigd. Gebruik het
klepje op de waterafvoer om overtollig
water te verwijderen.
Voorzichtig!
- Reinig het apparaat niet met bijtende of
schurende reinigingsmiddelen.
- Gebruik geen scherpe voorwerpen om het
apparaat te reinigen.
Controleer het apparaat regelmatig op •
mogelijke schade.
Reinig de buitenkant van het apparaat met •
een zachte, vochtige doek. Droog de
buitenkant van het apparaat grondig met
een schone, droge doek.
Reinig de binnenkant van het apparaat •
met een zachte, vochtige doek. Droog de
binnenkant van het apparaat grondig met
een schone, droge doek.
Reinig de ijsblokjesschep in sop of in de •
vaatwasser. Spoel de ijsblokjesschep af onder
stromend water. Droog de ijsblokjesschep
grondig met een schone, droge doek.
Het wordt aanbevolen om het apparaat •
regelmatig te reinigen met een anti-algenen antibacterieel middel. Volg de instructies
op de verpakking.
Beschrijving (fig. A & B)
Uw 283069 Princess ijsblokjesmachine is
ontworpen voor het maken van ijsblokjes.
De maximale capaciteit van het waterreservoir
is 2,8 kg. De maximale capaciteit van het
ijsblokjesreservoir is 1 kg. Het apparaat is
uitsluitend geschikt voor gebruik binnenshuis.
Het apparaat is alleen geschikt voor
huishoudelijk gebruik.
7
NL
IJsblokjesmachine (fig. A)
1. Bedieningspaneel
2. Deksel
3. Kijkvenster
4. Waterreservoir
5. Waterniveau-indicator
6. IJsblokjesreservoir
7. Waterafvoer
8. Luchtinlaat
9. Luchtuitlaat
10. IJsblokjesschep
Bedieningspaneel (fig. B)
11. Aan/uit/standby-knop
12. Knop voor ijsblokjesformaat
13. Tijdknop
14. Pijlknop
15. Display
16. Tijdindicator
17. Real-time-indicator
18. Indicator voor inschakeltijd
19. Indicator voor uitschakeltijd
20a. Indicator voor ijsblokjesformaat (S)
20b. Indicator voor ijsblokjesformaat (M)
20c. Indicator voor ijsblokjesformaat (L)
21. Indicator voor ijsblokjes maken
22. "Waterreservoir leeg"-indicator
23. "IJsblokjesreservoir vol"-indicator
24. Foutindicator voor vallen ijsblokjes
Eerste gebruik
Waarschuwing!
- Laat het apparaat voor het eerste gebruik
minstens 3 uur ongebruikt staan. De
koelvloeistof in het koelelement moet eerst
tot rust komen.
Reinig het apparaat. Zie het gedeelte •
"Reiniging en onderhoud".
Reinig de accessoires. Zie het gedeelte •
"Reiniging en onderhoud".
Gebruik
Instellen van de tijd (fig. B)
Real time
Druk 1x op de tijdknop (13) om de uren in •
te stellen. De real-time-indicator (17) gaat
branden. De urencijfers op de tijdindicator
(16) beginnen te knipperen. Druk op de
pijlknop (14) om de uren aan te passen.
Druk 2x op de tijdknop (13) om de minuten •
in te stellen. De minutencijfers op de
tijdindicator (16) beginnen te knipperen.
Druk op de pijlknop (14) om de minuten
aan te passen.
Inschakeltijd
Druk 3x op de tijdknop (13) om de uren in •
te stellen. De indicator voor de inschakeltijd
(18) gaat branden. De urencijfers op de
tijdindicator (16) beginnen te knipperen.
Druk op de pijlknop (14) om de uren aan
te passen.
Druk 4x op de tijdknop (13) om de minuten •
in te stellen. De minutencijfers op de
tijdindicator (16) beginnen te knipperen.
Druk op de pijlknop (14) om de minuten
aan te passen.
Uitschakeltijd
Druk 5x op de tijdknop (13) om de uren in •
te stellen. De indicator voor de uitschakeltijd
(19) gaat branden. De urencijfers op de
tijdindicator (16) beginnen te knipperen.
Druk op de pijlknop (14) om de uren aan
te passen.
Druk 6x op de tijdknop (13) om de minuten •
in te stellen. De minutencijfers op de
tijdindicator (16) beginnen te knipperen.
Druk op de pijlknop (14) om de minuten
aan te passen.
Instellen van het ijsblokjesformaat
(fig. B)
Druk 1x op de knop voor het •
ijsblokjesformaat (12) om grote ijsblokjes
te maken. De indicator voor het
ijsblokjesformaat (20a) gaat branden.
Druk 2x op de knop voor het •
ijsblokjesformaat (12) om middelgrote
ijsblokjes te maken. De indicator voor het
ijsblokjesformaat (20b) gaat branden.

8
NL
Druk 3x op de knop voor het •
ijsblokjesformaat (12) om kleine ijsblokjes
te maken. De indicator voor het
ijsblokjesformaat (20c) gaat branden.
Aanwijzingen voor gebruik (fig. A & B)
Voorzichtig!
- Schakel het apparaat niet in binnen 3 uur
dat het apparaat is verplaatst.
- Zorg ervoor dat er voldoende ruimte rondom
het apparaat is voor het ontsnappen van
de warmte en voor voldoende ventilatie.
Minimale afstand tot de luchtinlaat en de
luchtuitlaat: 20 cm.
- Vul het waterreservoir uitsluitend met
kraanwater.
- Vul het waterreservoir niet verder dan de
maximummarkering (5, "H-MAX").
Plaats het apparaat op een stabiel en vlak •
oppervlak.
Open het deksel (2).•
Vul het waterreservoir (4) met de •
gewenste hoeveelheid water.
Let op: Het wordt aanbevolen om iedere keer
dat u het waterreservoir vult 1 eetlepel citroensap
toe te voegen. Het citroensap geeft een frisse
citrusgeur in uw hele huis. Het zuur in het
citroensap zal de groei van bacteriën, schimmels
en allergenen in de lucht bestrijden.
Plaats het ijsblokjesreservoir (6) in het •
apparaat.
Sluit het deksel (2).•
Plaats de netstekker in het stopcontact. •
De display (15) gaat branden.
Indien u de timerfunctie wilt gebruiken, stel •
dan de inschakeltijd en de uitschakeltijd in.
Zie het gedeelte "Instellen van de tijd".
Stel het gewenste formaat van de ijsblokjes •
in. Zie het gedeelte "Instellen van het
ijsblokjesformaat".
Druk op de aan/uit/standby-knop (11) om •
het apparaat in te schakelen. De indicator
voor ijsblokjes maken (21) begint te knipperen.
Het apparaat begint ijsblokjes te maken.
Binnen 15 minuten is het apparaat op de •
juiste temperatuur en zijn de eerste
ijsblokjes klaar. Zolang het apparaat
ingeschakeld is, blijft het iedere 9-13 minuten
12 ijsblokjes produceren (afhankelijk van
het formaat).
Kijk regelmatig door het kijkvenster (3) om •
te controleren of het proces van ijsblokjes
maken soepel verloopt.
Druk op de aan/uit/standby-knop (11) om •
het proces te onderbreken.
Indien het ijsblokjesreservoir (6) vol is, zal •
de "ijsblokjesreservoir vol"-indicator (23)
gaan branden.
Druk op de aan/uit/standby-knop (11) om •
het apparaat uit te schakelen.
Verwijder de netstekker uit het stopcontact. •
De display (15) gaat uit.
Laat het apparaat volledig afkoelen.•
9
EN
Safety instructions
General safety
Read the manual carefully •
before use. Keep the manual
for future reference.
Only use the appliance and •
the accessories for their
intended purposes. Do not
use the appliance and the
accessories for other purposes
than described in the manual.
Do not use the appliance if •
any part or any accessory is
damaged or defective.
If a part or an accessory is
damaged or defective,
it must be replaced by the
manufacturer or an
authorised repair agent.
The appliance is not intended •
for use by persons (including
children) with reduced
physical, sensory or mental
capabilities, or lack of
experience and knowledge,
unless they have been given
supervision or instruction
concerning use of the
appliance by a person
responsible for their safety.
Children should be supervised •
to ensure that they do not
play with the appliance.
Do not use the appliance near •
bathtubs, showers, basins or
other vessels containing water.
Do not immerse the appliance •
in water or other liquids. If
the appliance is immersed in
water or other liquids, do not
remove the appliance with
your hands. Immediately
remove the mains plug from
the wall socket. If the
appliance is immersed in
water or other liquids, do not
use the appliance again.
Clean the appliance and the •
accessories. Refer to the section
"Cleaning and maintenance".
Electrical safety
Before use, always check that •
the mains voltage is the same
as the voltage on the rating
plate of the appliance.
The appliance is not intended •
to be operated by means of
an external timer or separate
remote-control system.
Connect the appliance to an •
earthed wall socket.
If necessary, use an earthed
extension cable of a suitable
diameter (at least 3 x 1 mm
2
).
For additional protection, install •
a residual current device

10
EN
(RCD) with a rated residual
operating current that does
not exceed 30 mA.
Make sure that water cannot •
enter the contact plugs of
the mains cable and the
extension cable.
Always fully unwind the mains •
cable and the extension cable.
Make sure that the mains •
cable does not hang over the
edge of a worktop and
cannot be caught
accidentally or tripped over.
Keep the mains cable away •
from heat, oil and sharp edges.
Do not use the appliance if •
the mains cable or the mains
plug is damaged or defective.
If the mains cable or the
mains plug is damaged or
defective, it must be replaced
by the manufacturer or an
authorised repair agent.
Do not pull the mains cable •
to disconnect the mains plug
from the mains.
Disconnect the mains plug •
from the mains when the
appliance is not in use,
before assembly or
disassembly and before
cleaning and maintenance.
Safety instructions for
ice-cube makers
The appliance is suitable for •
domestic use only.
Do not use the appliance to •
store or refrigerate food or
beverages.
Do not use the appliance •
outdoors.
Do not use the appliance in •
humid surroundings.
Do not use the appliance in •
ambient temperatures lower
than 5 °C.
Place the appliance on a •
stable and flat surface.
Place the appliance on a •
heat-resistant and splashproof surface.
Do not place the appliance •
on a hob.
Make sure that there is •
sufficient space around the
appliance to allow heat to
escape and provide sufficient
ventilation.
Do not cover the appliance. •
Do not place objects on top
of the appliance.
Make sure that the appliance •
does not come into contact
with flammable material.
11
EN
Keep the appliance away •
from heat sources. Do not
place the appliance on hot
surfaces or near open flames.
Do not operate the appliance •
without the lid in place.
Do not insert foreign objects •
into the appliance.
Do not move the appliance •
while it is switched on.
Do not leave the appliance •
unattended during use.
Store the appliance in a dry •
place when not in use. Make
sure that children do not have
access to stored appliances.
Cleaning and maintenance
Warning!
- Before cleaning or maintenance, switch off
the appliance, remove the mains plug from
the wall socket and wait until the appliance
has cooled down.
- Do not immerse the appliance in water or
other liquids.
- Do not leave water in the appliance for a
long period to prevent the water from
being contaminated. Use the valve on the
water outlet to remove any excess water.
Caution!
- Do not use aggressive or abrasive cleaning
agents to clean the appliance.
- Do not use sharp objects to clean the
appliance.
Regularly check the appliance for possible •
damage.
Clean the outside of the appliance with a •
soft, damp cloth. Thoroughly dry the outside
of the appliance with a clean, dry cloth.
Clean the inside of the appliance with a •
soft, damp cloth. Thoroughly dry the inside
of the appliance with a clean, dry cloth.
Clean the ice cube scoop in soapy water or •
in the dishwasher. Rinse the ice cube scoop
under running water. Thoroughly dry the
ice cube scoop with a clean, dry cloth.
It is recommended to regularly clean the •
appliance with an anti-algae and antibacterial agent. Follow the instructions on
the packaging.
Description (fig. A & B)
Your 283069 Princess ice-cube maker has been
designed for making ice cubes. The maximum
capacity of the water reservoir is 2.8 kg. The
maximum capacity of the ice-cube reservoir is 1 kg.
The appliance is suitable for indoor use only.
The appliance is suitable for domestic use only.
Ice-cube maker (fig. A)
1. Control panel
2. Lid
3. Viewing window
4. Water reservoir
5. Water level indicator
6. Ice cube reservoir
7. Water outlet
8. Air inlet
9. Air outlet
10. Ice cube scoop
Control panel (fig. B)
11. On/off/standby button
12. Ice-cube size button
13. Time button
14. Arrow button
15. Display
16. Time indicator
17. Real-time indicator
18. Power-on time indicator
19. Power-off time indicator
20a. Ice-cube size indicator (S)
20b. Ice-cube size indicator (M)
20c. Ice-cube size indicator (L)
21. Ice-cube making indicator
22. "Water reservoir empty" indicator
23. "Ice cube reservoir full" indicator
24. Ice-dropping fault indicator

12
EN
Initial use
Warning!
- Before first use, allow the appliance to sit
for at least 3 hours. The coolant first has to
settle in the cooling element.
Clean the appliance. Refer to the section •
"Cleaning and maintenance".
Clean the accessories. Refer to the section •
"Cleaning and maintenance".
Use
Setting the time (fig. B)
Real time
Press the time button (13) 1x to set the •
hours. The real-time indicator (17) comes
on. The hour digits of the time indicator
(16) start to flash. Press the arrow button
(14) to adjust the hours.
Press the time button (13) 2x to set the •
minutes. The minute digits of the time
indicator (16) start to flash. Press the arrow
button (14) to adjust the minutes.
Power-on time
Press the time button (13) 3x to set the •
hours. The power-on time indicator (18)
comes on. The hour digits of the time
indicator (16) start to flash. Press the arrow
button (14) to adjust the hours.
Press the time button (13) 4x to set the •
minutes. The minute digits of the time
indicator (16) start to flash. Press the arrow
button (14) to adjust the minutes.
Power-off time
Press the time button (13) 5x to set the •
hours. The power-off time indicator (19)
comes on. The hour digits of the time
indicator (16) start to flash. Press the arrow
button (14) to adjust the hours.
Press the time button (13) 6x to set the •
minutes. The minute digits of the time
indicator (16) start to flash. Press the arrow
button (14) to adjust the minutes.
Setting the ice cube size (fig. B)
Press the ice-cube size button (12) 1x to •
make small ice cubes. The ice-cube size
indicator (20a) comes on.
Press the ice-cube size button (12) 2x to •
make medium ice cubes. The ice-cube size
indicator (20b) comes on.
Press the ice-cube size button (12) 3x to •
make large ice cubes. The ice-cube size
indicator (20c) comes on.
Hints for use (fig. A & B)
Caution!
- Do not switch on the appliance within
3 hours after moving the appliance.
- Make sure that there is sufficient space
around the appliance to allow heat to
escape and provide sufficient ventilation.
Minimum distance from the air inlet and
the air outlet: 20 cm.
- Only use tap water to fill the water reservoir.
- Do not exceed the maximum mark (5,
"H-MAX") when you fill the water reservoir.
Place the appliance on a stable and flat •
surface.
Open the lid (2).•
Fill the water reservoir (4) with the •
required amount of water.
Note: It is recommended to add 1 tablespoon
of lemon juice each time you fill the water
reservoir. The lemon juice releases a fresh citrus
smell throughout your home. The acid in the
lemon juice will combat the growth of bacteria,
mould and airborne allergens.
Place the ice cube reservoir (6) into the •
appliance.
Close the lid (2).•
Insert the mains plug into the wall socket. •
The display (15) comes on.
If you want to use the timer function, set •
the power-on time and the power-off time.
Refer to the section "Setting the time".
Set the required ice cube size. Refer to the •
section "Setting the ice cube size".
To switch on the appliance, press the •
on/off/standby button (11). The ice-cube
making indicator (21) starts to flash. The
appliance starts making ice cubes.
Within 15 minutes, the appliance is at the •
correct temperature and the first ice cubes
are ready. As long as the appliance is switched
on, it will continue to produce 12 ice cubes
every 9-13 minutes (depending on the size).
13
EN
Regularly look through the viewing window •
(3) to check whether the ice-cube making
process runs smoothly.
To interrupt the process, press the •
on/off/standby button (11).
If the ice cube reservoir (6) is full, the "ice cube •
reservoir full" indicator (23) will come on.
To switch off the appliance, press the •
on/off/standby button (11).
Remove the mains plug from the wall socket. •
The display (15) goes off.
Allow the appliance to cool down •
completely.

14
FR
Instructions de sécurité
Sécurité générale
Lisez avec soin le manuel •
avant utilisation. Conservez le
manuel pour référence future.
Utilisez l'appareil et ses •
accessoires uniquement pour
leurs fins prévues. N'utilisez
pas l'appareil et ses accessoires
pour tout autre objet que
celui exposé dans le manuel.
N'utilisez pas l'appareil si une •
pièce ou un accessoire
quelconque est endommagé
ou défectueux. Si une pièce
ou un accessoire quelconque
est endommagé ou
défectueux, il doit être
remplacé par le fabricant ou
par un réparateur agréé.
Cet appareil n'est pas destiné •
à être utilisé par des personnes
(notamment des enfants)
présentant des capacités
physiques, sensorielles, mentales
ou motrices réduites voire
dépourvues des connaissances
et de l'expérience nécessaires,
sauf sous la surveillance ou
après avoir reçu des
instructions d'usage de cet
appareil par une personne
responsable de leur sécurité.
Les enfants doivent toujours •
être surveillés pour s'assurer
qu'ils ne jouent pas avec
l'appareil.
N'utilisez pas l'appareil •
à proximité d'une baignoire,
d'une douche, d'un lavabo ou
d'autres récipients contenant
de l'eau.
Ne plongez pas l'appareil •
dans l'eau ou autres liquides.
Si l'appareil est plongé dans
l'eau ou d'autres liquides, ne
retirez pas l'appareil avec vos
mains. Débranchez
immédiatement la fiche
secteur de la prise murale.
Si l'appareil est plongé dans
l'eau ou autre liquide, ne
l'utilisez pas à nouveau.
Nettoyez l'appareil et les •
accessoires. Consultez la section
"Nettoyage et entretien".
Sécurité électrique
Avant toute utilisation, •
vérifiez que la tension du
secteur correspond à celle
indiquée sur la plaque
signalétique de l'appareil.
L'appareil n'est pas conçu pour •
être utilisé avec une minuterie
externe ou un système de
télécommande séparé.
15
FR
Connectez l'appareil à une •
prise murale mise à la terre.
Si nécessaire, vous pouvez
utiliser une rallonge d'un
diamètre adapté (au moins
3 x 1 mm
2
).
Pour maximiser la protection, •
installez un dispositif de
courant résiduel (RCD)
présentant une intensité de
service résiduelle nominale
inférieure ou égale à 30 mA.
Assurez-vous que l'eau ne •
peut pas s'infiltrer dans les
contacts de prise du cordon
d'alimentation et de la rallonge.
Déroulez toujours •
complètement le cordon
d'alimentation et la rallonge.
Assurez-vous que le cordon •
d'alimentation ne pend pas
sur le bord d'un plan de
travail et ne peut pas être
happé ou faire trébucher
quelqu'un accidentellement.
Maintenez le cordon •
d'alimentation à l'écart de la
chaleur, de l'huile et des
bords tranchants.
N'utilisez pas l'appareil si le •
cordon d'alimentation ou la
fiche secteur est endommagé
ou défectueux.
Si le cordon d'alimentation
ou la fiche secteur est
endommagé ou défectueux,
il doit être remplacé par le
fabricant ou par un
réparateur agréé.
Ne tirez pas sur le cordon •
d'alimentation pour
débrancher la fiche secteur
du secteur.
Débranchez la fiche secteur •
du secteur lorsque l'appareil
n'est pas utilisé, avant le
montage ou le démontage
de même qu'avant le
nettoyage ou l'entretien.
Instructions de sécurité pour
machines à glaçons
L'appareil est réservé à un •
usage domestique.
N’utilisez pas l’appareil pour •
conserver ou réfrigérer des
aliments ou des boissons.
N'utilisez pas l'appareil à •
l'extérieur.
N'utilisez pas l'appareil dans •
un environnement humide.
N'utilisez pas l'appareil à une •
température ambiante
inférieure à 5 °C.
Placez l'appareil sur une •
surface stable et plane.
16
FR
Placez l'appareil sur une •
surface résistante à la chaleur
et aux projections.
Ne placez pas l'appareil sur •
une plaque de cuisson.
Assurez-vous que l'appareil •
dispose d'un dégagement
suffisant pour que la chaleur
se dissipe tout en assurant
une ventilation satisfaisante.
Ne couvrez pas l'appareil. •
Ne placez pas d'objets au
sommet de l'appareil.
Assurez-vous que l'appareil •
n'entre en contact avec
aucune matière inflammable.
Maintenez l'appareil à l'écart •
des sources de chaleur. Ne
placez pas l'appareil sur une
surface chaude ou à proximité
de flammes nues.
N’utilisez pas l’appareil sans •
le couvercle en place.
N'insérez pas de corps •
étrangers dans l'appareil.
Ne déplacez pas l’appareil •
lorsqu’il est en marche.
Ne laissez jamais l'appareil sans •
surveillance pendant l'utilisation.
Rangez l'appareil dans un •
endroit sec lorsqu'il n'est pas
utilisé. Assurez-vous que les
enfants ne puissent pas
accéder aux appareils rangés.
Nettoyage et entretien
Avertissement !
- Avant le nettoyage ou l'entretien, arrêtez
l'appareil, débranchez la fiche secteur de la
prise murale et attendez que l'appareil
refroidisse.
- Ne plongez pas l'appareil dans l'eau ou
autres liquides.
- Ne laissez pas d'eau dans l'appareil
pendant une période prolongée afin
d'éviter qu'elle ne se contamine. Utilisez la
valve sur la sortie d'eau pour éliminer tout
excès d'eau.
Attention !
- N'utilisez pas de produits de nettoyage
agressifs ou abrasifs pour nettoyer l'appareil.
- Ne nettoyez pas l'appareil avec des objets
coupants.
Contrôlez régulièrement les éventuels •
dommages sur l'appareil.
Nettoyez l'extérieur de l'appareil avec un •
chiffon doux et humide. Séchez
soigneusement l'extérieur de l'appareil avec
un chiffon propre et sec.
Nettoyez l'intérieur de l'appareil avec un •
chiffon doux et humide. Séchez
soigneusement l'intérieur de l'appareil avec
un chiffon propre et sec.
Nettoyez la cuillère à glaçons à l'eau •
savonneuse ou au lave-vaisselle. Rincez la
cuillère à glaçons sous l’eau courante.
Séchez soigneusement la cuillère à glaçons
avec un chiffon propre et sec.
Nous vous recommandons de nettoyer •
régulièrement l'appareil avec un agent
antialgue et antibactérien. Suivez les
instructions de l'emballage.
Description (fig. A & B)
Votre machine à glaçons 283069 Princess a été
conçue pour faire des glaçons. Le réservoir
d'eau présente une capacité maximum de
2,8 kg. Le réservoir à glaçons présente une
capacité maximum de 1 kg. L'appareil est
réservé à un usage à l'intérieur. L'appareil est
réservé à un usage domestique.
17
FR
Machine à glaçons (fig. A)
1. Panneau de commande
2. Couvercle
3. Hublot
4. Réservoir d'eau
5. Indicateur de niveau d'eau
6. Réservoir à glaçons
7. Sortie d'eau
8. Entrée d'air
9. Sortie d'air
10. Cuillère à glaçons
Panneau de commande (fig. B)
11. Bouton marche/arrêt/veille
12. Bouton de taille de glaçons
13. Bouton de minuterie
14. Bouton fléché
15. Écran
16. Indicateur d'heure
17. Indicateur de temps réel
18. Indicateur d'heure de mise en marche
19. Indicateur d'heure d'arrêt
20a. Indicateur de taille de glaçons (S)
20b. Indicateur de taille de glaçons (M)
20c. Indicateur de taille de glaçons (L)
21. Indicateur de préparation de glaçons
22. Témoin "réservoir d'eau vide"
23. Indicateur « réservoir à glaçons plein »
24. Indicateur de panne de chute de glaçons
Utilisation initiale
Avertissement !
- Avant la première utilisation, laissez l'appareil
au repos pendant au moins 3 heures. Le
réfrigérant doit d'abord se reposer dans
l'élément de réfrigération.
Nettoyez l'appareil. Consultez la section •
"Nettoyage et entretien".
Nettoyez les accessoires. Consultez la •
section "Nettoyage et entretien".
Utilisation
Réglage de l'heure (fig. B)
Temps réel
Appuyez sur le bouton de minuterie (13) •
pour régler les heures. L'indicateur de
temps réel (17) s'allume. Le chiffre des
heures de l'indicateur d'heure (16)
commence à clignoter. Appuyez sur le
bouton fléché (14) pour régler les heures.
Appuyez sur le bouton de minuterie (13) •
2x pour régler les minutes. Le chiffre des
minutes de l'indicateur d'heure (16)
commence à clignoter. Appuyez sur le
bouton fléché (14) pour régler les minutes.
Heure de mise en marche
Appuyez sur le bouton de minuterie (13) •
3x pour régler les heures. L'indicateur
d'heure de mise en marche (18) s'allume.
Le chiffre des heures de l'indicateur d'heure
(16) commence à clignoter. Appuyez sur le
bouton fléché (14) pour régler les heures.
Appuyez sur le bouton de minuterie (13) •
4x pour régler les minutes. Le chiffre des
minutes de l'indicateur d'heure (16)
commence à clignoter. Appuyez sur le
bouton fléché (14) pour régler les minutes.
Heure d'arrêt
Appuyez sur le bouton de minuterie (13) •
5x pour régler les heures. L'indicateur
d'heure d'arrêt (19) s'allume. Le chiffre des
heures de l'indicateur d'heure (16)
commence à clignoter. Appuyez sur le
bouton fléché (14) pour régler les heures.
Appuyez sur le bouton de minuterie (13) •
6x pour régler les minutes. Le chiffre des
minutes de l'indicateur d'heure (16)
commence à clignoter. Appuyez sur le
bouton fléché (14) pour régler les minutes.
Réglage de la taille des glaçons
(fig. B)
Appuyez sur le bouton de taille des glaçons •
(12) 1x pour faire des petits glaçons.
L'indicateur de taille de glaçons (20a)
s'allume.
Appuyez sur le bouton de taille des glaçons •
(12) 2x pour faire des glaçons moyens.
L'indicateur de taille de glaçons (20b)
s'allume.
 Loading...