

Page 1
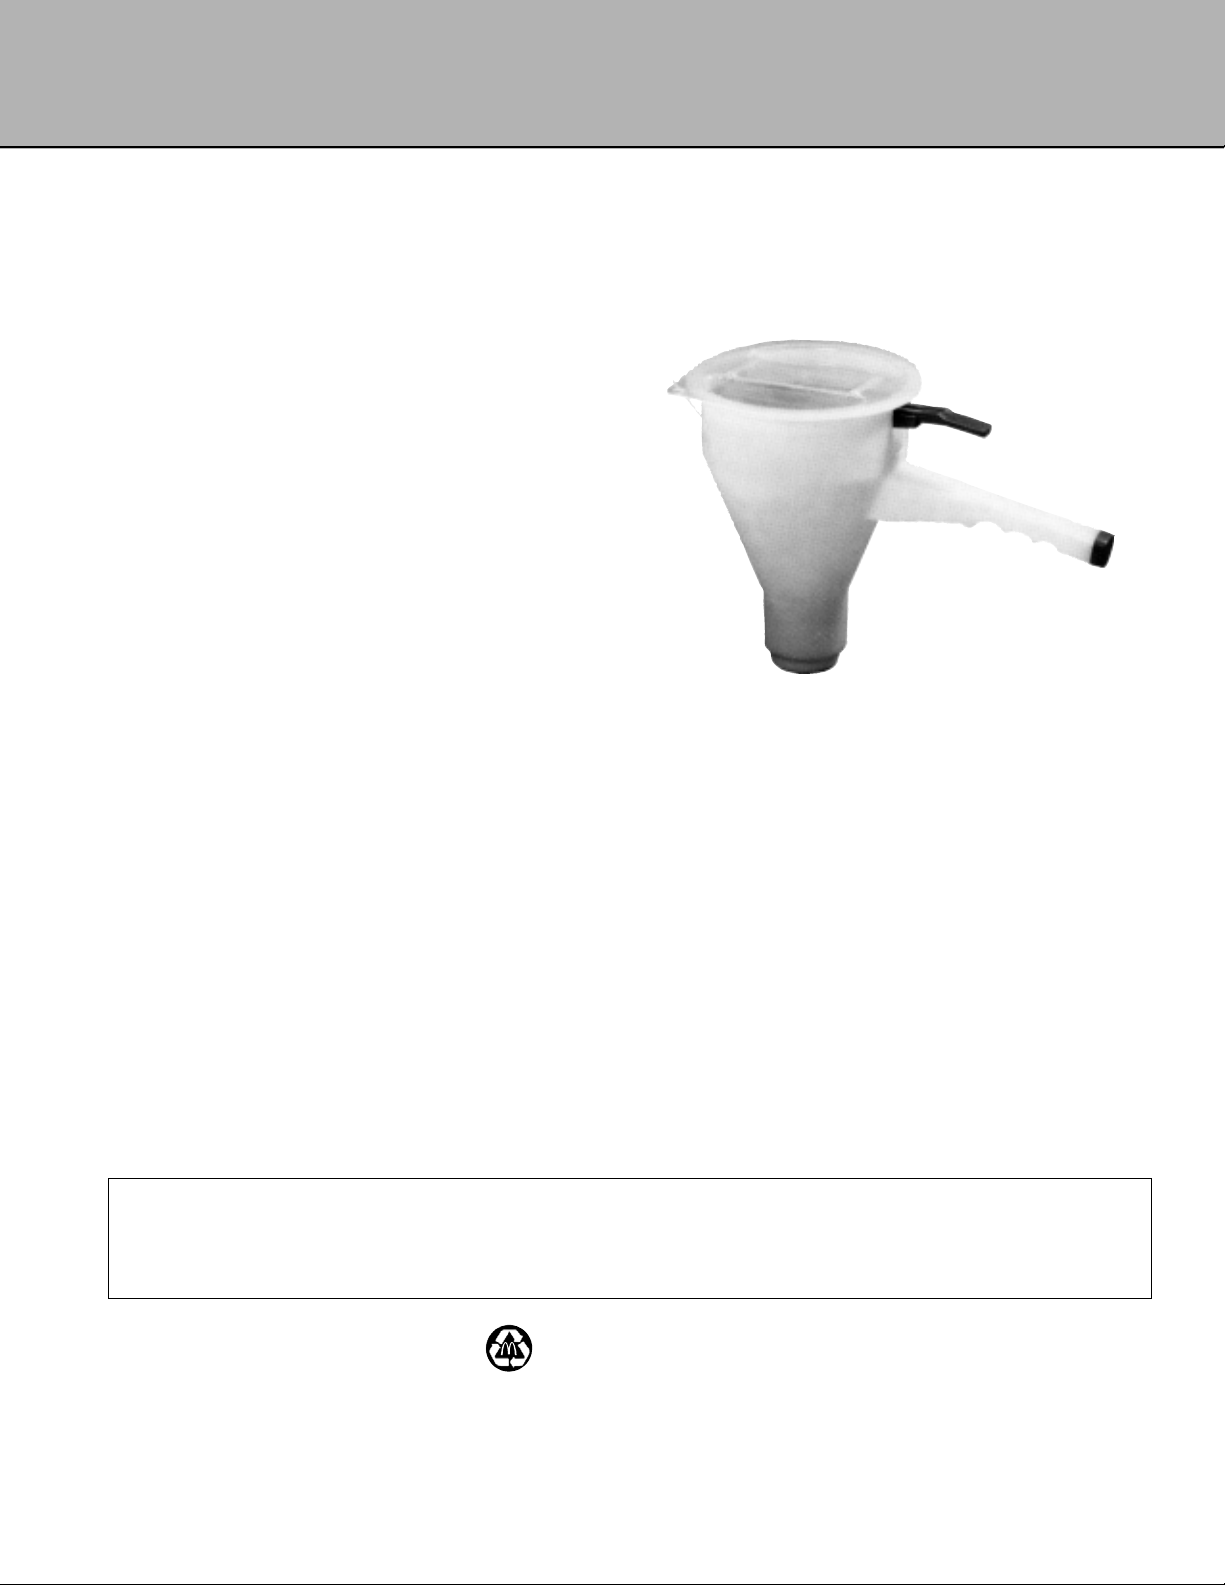
KETCHUP DISPENSER
PRINCE CASTLE MODEL NO. 406-A
Place this chapter in the Small Equipment/
Miscellaneous Section of your Equipment
Manual.
MANUFACTURED
BY
PRINCE CASTLE INC.
CAROL STREAM, IL 60188 USA
PHONE 1-800-323-2930
TOLL FREE NUMBER
1-800-323-2930
FAX: 1-630-462-1460
TABLE OF CONTENTS
WARRANTY . . . . . . . . . . . . . . . . . . . . . . . . . . . . . . . . . . . . . . . . . . . . . . . . . . . . . . . . . . . . . . . . . . . . . . . . . . Page 1
INTRODUCTION . . . . . . . . . . . . . . . . . . . . . . . . . . . . . . . . . . . . . . . . . . . . . . . . . . . . . . . . . . . . . . . . . . . . . . Page 2
PARTS IDENTIFICATION/FUNCTION . . . . . . . . . . . . . . . . . . . . . . . . . . . . . . . . . . . . . . . . . . . . . . . . . . . . Page 2
EXPLODED VIEW . . . . . . . . . . . . . . . . . . . . . . . . . . . . . . . . . . . . . . . . . . . . . . . . . . . . . . . . . . . . . . . . . . . . . Page 3
EQUIPMENT SET-UP AND CLOSE PROCEDURES . . . . . . . . . . . . . . . . . . . . . . . . . . . . . . . . . . . . . . . . . Page 4
TROUBLESHOOTING . . . . . . . . . . . . . . . . . . . . . . . . . . . . . . . . . . . . . . . . . . . . . . . . . . . . . . . . . . . . . . . . . . Page 6
ORDERING/SERVICE INFORMATION . . . . . . . . . . . . . . . . . . . . . . . . . . . . . . . . . . . . . . . . . . . . . . . . . . . . Page 6
NON-SCHEDULED MAINTENANCE . . . . . . . . . . . . . . . . . . . . . . . . . . . . . . . . . . . . . . . . . . . . . . . . . . . . . . Page 6
WARRANTY
This product is warranted to be free from defects in material and/or workmanship for a period of one year
from the date of original installation. Any component which proves to be faulty during the warranty period
will be replaced without cost to the customer.
Printed on recycled paper
using a soya based ink product.
Part No. 406-503 Rev A
Printed in March
EM MISC 34
Printed in
The United States of America
Page 2
INTRODUCTION
This dispenser is used for portion control of ketchup
being dispensed on toasted buns.
After buns are separated and placed on the dress table,
hold dispenser approximately 1” (25 mm) above toasted
bun.
For regular buns, press the lever straight down to dispense ketchup. For quarter buns, press the lever to the
left and down to dispense ketchup. This is repeated on
all buns which require ketchup. See example below.
For Regulars
10:1
For Quarters
1:4
PARTS IDENTIFICATION/FUNCTION
PART
ITEM
NO.
DESCRIPTION
QTY.
The ketchup dispenser has a RED cap on the end of the
handle for easy identification.
Hazard Communication Standard (HCS)–
Procedure s) in this equipment manual include the
use of chemical products. These chemical products
will be highlighted with bold face letters followed
by the abbreviation (HCS) in the text of the manual.
See the Hazard Communication Standard (HCS)
Manual for the appropriate Material Safety Data
Sheet(s) (MSDS).
FUNCTION
1 406-144 Container 1 Holds all internal parts in proper position and
provides a reservoir for ketchup.
2 404-7 Check Valve Spring 1 Returns check valve to the closed position
3 404-8 Check Valve 1 Works in conjunction with piston.
4 404-9 Cylinder 1 Holds ketchup.
5 404-10 Piston Spring 1 Returns the piston slide, piston rod and lever to the
up position.
6 404-11 Piston Slide 1 Retains the piston and attaches to the push rod
while retaining the spring.
7 404-12 Piston 1 Pumps ketchup through the check valve and
out the 5 diffuser holes on the bottom of the container.
7a 404-15 Piston Valve and 1 Consists of items 2,3,4,5,6 and 7.
Spring Assembly
8 404-6 Push Rod 1 Pushes the piston down when the lever is
pressed.
9 404-4 Adjusting Cam 1 Calibrates the dispenser for proper volume
of ketchup to be dispensed.
10 404-3 Lever 1 Pushes plunger rod down and forces piston to
push ketchup through diffuser holes located on
bottom of container.
10a 404-16 Cam and Lever 1 Consists of items 9 & 10.
Assembly
11 404-13S Tether (pkg. of 6) 1 Attaches the lid to the container.
12 404-2S Lid w/Tether (pkg. of 3) 1 Keeps foreign particles out of container and
keeps ketchup from drying out.
*13 404-14 Parts Kit 1 Conisists of items 2, 3, 4, 5, 6, 7, 8, 9, 10, 11, 12.
* Not Shown
2
Page 3

EXPLODED VIEW
12
8
7
6
5
7A
11
4
3
2
10
10A
1
3
9
Page 4

EQUIPMENT SET-UP, CALIBRATION,
CLEANING AND CLOSE PROCEDURES
4. Place adjusting cam on top of piston push rod so
push rod enters hole #3 in adjusting cam.
See figure 3.
Set-up
1. Place dispenser container in prep table pan (without
internal parts).
2. Assemble all internal parts of the spring assembly.
See figure 1.
figure 1
PISTON PUSH ROD
PISTON
PISTON SLIDE
PISTON SPRING
CYLINDER
CHECK VALVE
CHECK VALVE SPRING
IMPORTANT: Make sure that the arrow located on the
side of the adjusting cam points to the handle of the
dispenser and numbers are facing up.
figure3
5. Attach lever with rounded corners facing down
towards the adjusting cam. See figure 4.
a. Slide the lever through the hole in the con-
tainer located above the handle of the dispenser.
3. Place assembled internal parts into dispenser
container. See figure 2.
figure 2
b. Continue to slide the lever forward until the
push rod falls into the hole located in the lever.
c. Continue pressing adjusting cam and push rod
while sliding the lever forward until the front
end enters the “T”- shaped hole on the other
side of the container.
figure 4
4
Page 5

6. Dispenser is now fully assembled. Pour ketchup
into the container up to the Fill Line. Place the lid
on top of the container before using the dispenser.
See figure 5.
figure 5
Close
1. Empty ketchup from dispenser and discard.
2. Fill dispenser with warm water. Repeatedly press
actuating lever to pump water and flush out dispenser.
3. Remove internal parts from container by pushing
down the lever and the push rod. Slide the lever out of
the “T” shaped hole in the container. Remove the
adjusting cam.
4. Lift the push rod and spring assembly straight up and
out of the container.
5. Separate all internal parts to thoroughly clean. Wash
the container and all loose internal parts in a solution
of warm water and detergent.
FILL LINE
7. The ketchup dispenser must be primed before using.
8. Press down on the lever several times (approximately 10 to completely prime).
9. Wipe the bottom of the dispenser with a clean, moist
hand towel after priming.
Calibration
Set Brix cup under dispenser and dispense 6 shots
of ketchup into cup. Allow the lever to return fully
after each shot. 6 shots will dispense 2 fl.oz. (60
ml) of ketchup for regulars and 3 fl.oz. (90 ml) for
quarters. If the amount of ketchup dispensed into
the cup is above or below the ounces required, move
adjusting cam from hole #3 to hole #2 to DECREASE volume, or move to hole #4 to INCREASE
the amount of ketchup dispensed. Repeat this
adjustment until dispenser is properly calibrated.
6. Rinse all loose parts and the container with running
water.
7. Sanitize dispenser (use 1 packet of McDonald’s
Sanitizer (HCS) to a 2-1/2 gallons (8.5 l) of warm
water).
8. Let air dry.
IMPORTANT: Do not reassemble ketchup dispenser
until it is ready to be used the next day.
IMPORTANT: The lower numbered holes dispense less
ketchup. The higher numbered holes provide more
ketchup. For all hole number settings, the arrow mark
on the side of the adjusting cam must always point
towards the handle of dispenser. Because the dispenser
can only have one cam setting, that setting might not
provide the exact calibration for both quarters and
regulars. The calibration should always be set for
regulars.
5
Page 6

TROUBLESHOOTING CHART
PROBLEM
Will not dispense. Plastic parts broken. Replace broken parts.
Does not dispense Out of calibration. Re-calibrate (See calibration
full portion. instructions).
Ketchup pattern is Holes plugged in bottom Disassemble and clean holes by
irregular. of container. flushing water through holes.
ORDERING/SERVICE INFORMATION
1. WHERE AND HOW TO ORDER
REPLACEMENT PARTS
To order replacement parts, look on the back of your
Prince Castle Price List for the name and phone
number of your local Prince Castle Service Center.
You may also call Prince Castle at 1-800-323-2930
(or fax us at 630-462-1460) for the name of your local
Service Center.
2. PARTS RETURNS
To return parts to your Service Center for credit, you
must obtain authorization from your Service Center.
PROBABLE CAUSE
Not assembled properly. Assemble properly.
Not primed. See set-up procedure.
Parts missing. Check for proper assembly and
Diffuser holes plugged in Disassemble and clean diffuser holes
bottom of container. by flushing water through holes.
3. PRICES:
A. All prices are F.O.B. Prince Castle Service
Center or F.O.B. factory, Carol Stream, Illinois.
B. All prices are subject to change without notice.
These prices are exclusive of all sales taxes or any
special taxes which may be levied by federal, state,
or city governments.
Contact your kitchen equipment supplier or designated
repair facility for parts and service.
Not applicable.
CORRECTIVE ACTION
placement.
OUTSIDE THE U.S.
NON-SCHEDULED MAINTENANCE
MPORTANT: All warranty situations should be handled
by your center.
6
 Loading...