

Page 1
Operation
Toaster Grills
Manual
Product Identification
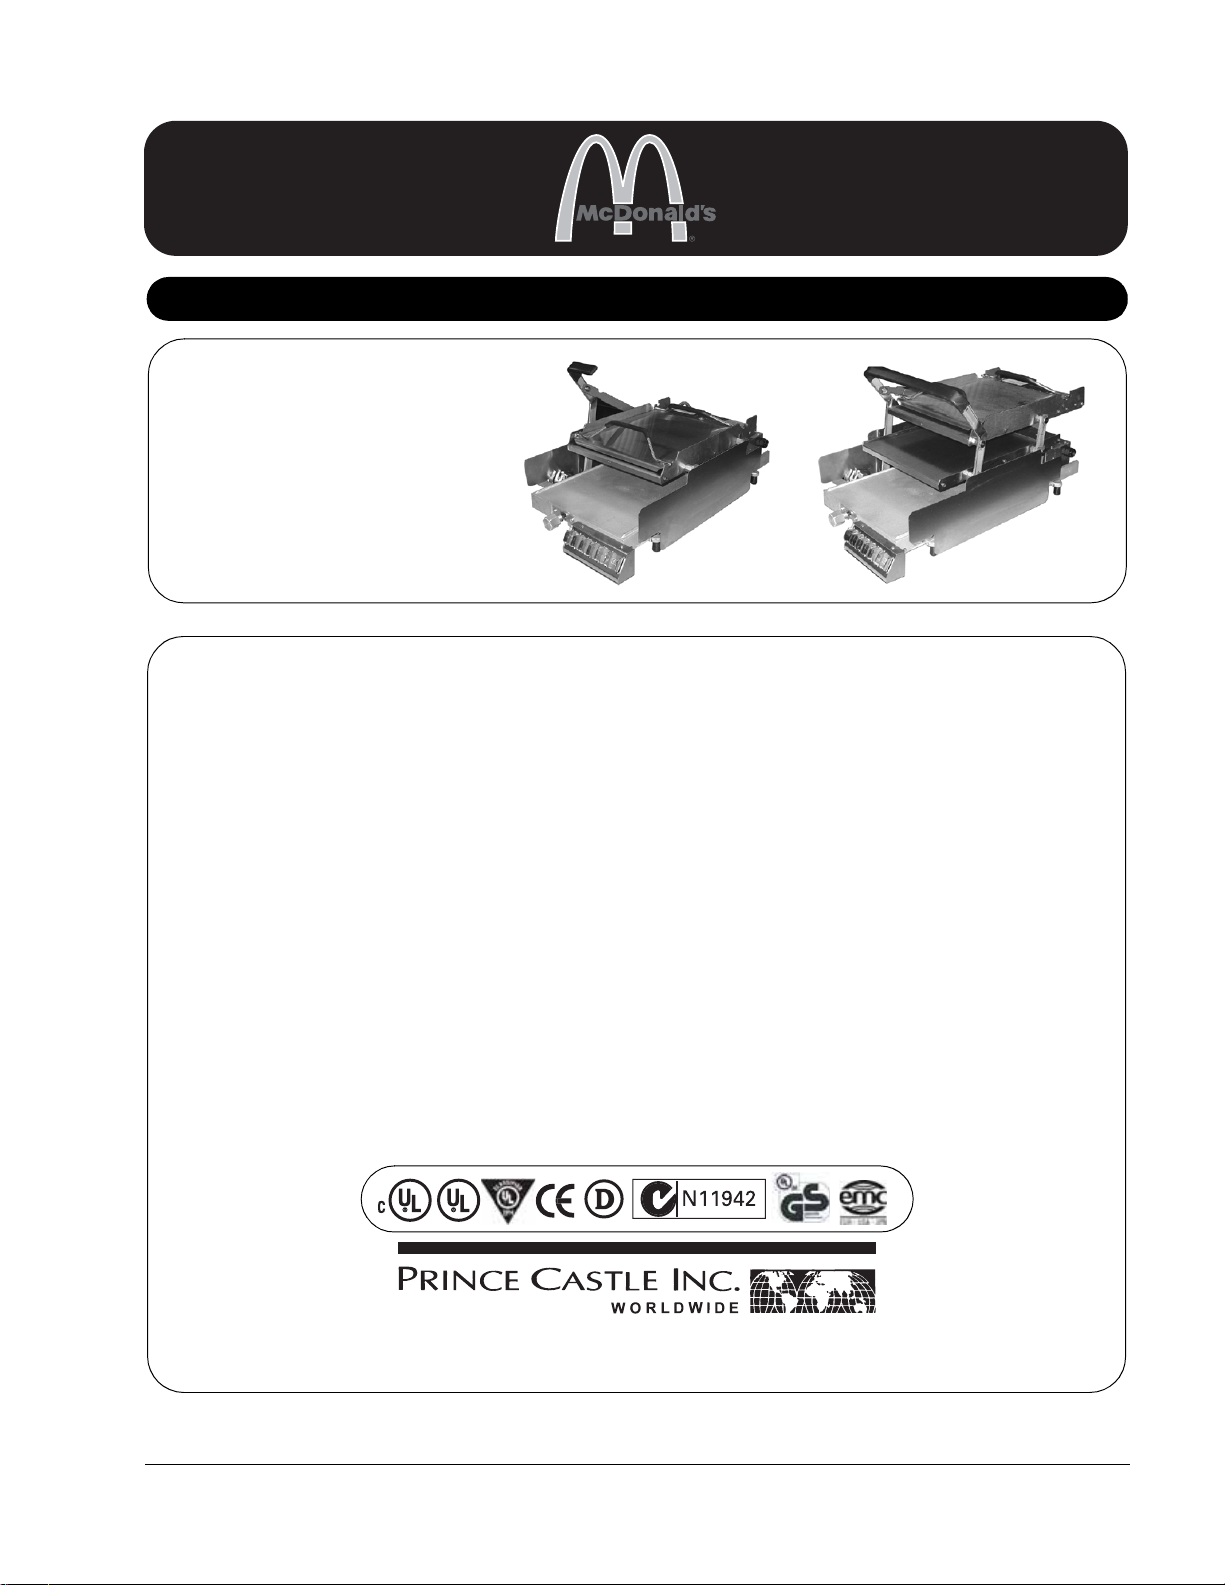
The Prince Castle 247 & 248 Toaster Grill
Series offers two practical options for quickand-easy bread product toasting. Both
models have pivoting sides allowing for easy
access to the platens for cleaning. The 248
Model has the added feature of a Club
sandwich level.
LIMITED WARRANTY
This product is warranted to be free from defects in material and/
or workmanship for a period of two (2) y ears f rom date of original
installation, not to exceed 30 months from date of shipment from
our factory. This warranty covers on location service for 2 years
(i.e. trip charges and/or mileage). Travel mileage is limited to
100 miles (200 kilometers) round trip (one trip per warranty) from
an authorized service agency or its sub-service agency. Any
component which proves to be faulty in material and/or
workmanship will be replaced or repaired (at the option of Prince
Castle, Inc.) without cost to the customer for parts or labor.
Models 247 & 248
247 Series
This warranty is subject to the following exceptions/conditions:
• Use of any non-genuine Prince Castle parts voids this
warranty.
• All labor shall be performed during regular work hours.
Overtime premium will be charged to the buyer.
• Damage caused by carelessness, neglect, and/or abuse (e.g.,
dropping, tampering or altering parts, equipment damaged in
shipment, by fire, flood or an act of God) is not covered under
this warranty.
• The power cord on this product is rated for a maximum surface
temperature of 194°F (90°C). If the cord comes into contact
with any heated surface, it may be damaged and/or cause
damage to the product and/or injury to the user. Damage
resulting from any such misuse may result in a voided
Warranty at the sole discretion of the manufacturer.
248 Series
355 East Kehoe Blvd. • Carol Stream, IL 60188 USA
Telephone: 630-462-8800 • Toll Free: 1-800-PCASTLE
Fax: 630-462-1460 • www.princecastle.com
247-500revB-EN Printed in USA 2/06 © 2006
Page 2
Toaster Grills
Models 247 & 248
Table of Contents
Product Identification. . . . . . . . . . . . . . . . . . . . . . . . . . . . . 1
Safety Informat io n . . . . . . . . . . . . . . . . . . . . . . . . . . . . . . . 2
Accessor i e s. . . . . . . . . . . . . . . . . . . . . . . . . . . . . . . . . . . . 2
Installat ion . . . . . . . . . . . . . . . . . . . . . . . . . . . . . . . . . . . . . 3
Setting the Con trols. . . . . . . . . . . . . . . . . . . . . . . . . . . . . . 3
View/Change Set Temperature . . . . . . . . . . . . . . . . . . . . . 5
View/Change Set Toasting Time. . . . . . . . . . . . . . . . . . . . 6
View/Change Duty Time Alarm. . . . . . . . . . . . . . . . . . . . . 8
Standby (Energy Saving) Mode . . . . . . . . . . . . . . . . . . . . 8
View/Calibrate Platen Temperature. . . . . . . . . . . . . . . . . . 9
Change Product Name (Product Mode Only) . . . . . . . . . . 11
Set Volume Levels (All Models). . . . . . . . . . . . . . . . . . . . . 11
Adjusting Bun Crush Settings . . . . . . . . . . . . . . . . . . . . . . 12
Adjusting for Bun Thickness . . . . . . . . . . . . . . . . . . . . . . . 12
Conditioning the Platens. . . . . . . . . . . . . . . . . . . . . . . . . . 13
Cleaning . . . . . . . . . . . . . . . . . . . . . . . . . . . . . . . . . . . . . . 14
Troubleshooting Guide . . . . . . . . . . . . . . . . . . . . . . . . . . . 15
Ordering Parts and Service. . . . . . . . . . . . . . . . . . . . . . . . 16
Model 247 Exploded View. . . . . . . . . . . . . . . . . . . . . . . . . 17
Model 248 Exploded View. . . . . . . . . . . . . . . . . . . . . . . . . 18
Model 247 Wiring Diagram . . . . . . . . . . . . . . . . . . . . . . . . 19
Model 248 Wiring Diagram . . . . . . . . . . . . . . . . . . . . . . . . 20
Maintenance Card. . . . . . . . . . . . . . . . . . . . . . . . . . . . . . . 21
Safety Information
WARNING
Indicates information important to the proper operation of
the unit. Failure to observe may result in damage to the
equipment and/or severe bodily injury or death.
CAUTION
Indicates information important to the operation of the unit.
Failure to observe may result in damage to the equipment.
Accessories
Use standard full-size spatulas with the 247 or 248 Toaster
Grills. Also, use the full-size plastic or metal trays under the
bottom Platen. You may also use the new nine-bun trays as
they become available.
Important!
Prince Castle reserves the right to change specifications and
product design without notice. Such revisions do not entitle the
buyer to corresponding changes, improvements, additions or
replacements for previously purchased equipment.
Printed in USA 2/06 © 2006 2 247-500revB-EN
Page 3
Installation
Toaster Grills
Models 247 & 248
Remove the unit from the carton and inspect for signs of
damage. If there is damage to the unit:
• Notify the carrier within 24 hours of delivery.
• Save carton and packaging materials for inspection purposes.
• Contact your local dealer, or if purchased directly, the Prince
Castle Sales Department at 1-800-722-7853 or 630-462-8800
to arrange for a replacement unit.
Before first use, clean and condition the platens (see
Conditioning Platens).
Setting the Controls
The model 247 & 248 Toaster Grills provide two modes of
operation: DEDICATED MODE and PRODUCT MODE.
• DEDICATED MODE is a simple mode of operation for toasting
buns that is similar to the 213, 411 & 416 Series T oaster Grills,
with a set toast time and temperature for one product “BUN1”.
• PRODUCT MODE allows you to set both the t oasting time and
temperature individually for four additional products. Note that
it may take several minutes for the platen to heat up or cool
down to a new temperature setting. You can also change the
display to any four character name of your choice for each of
the products to indicate which product is being toasted.
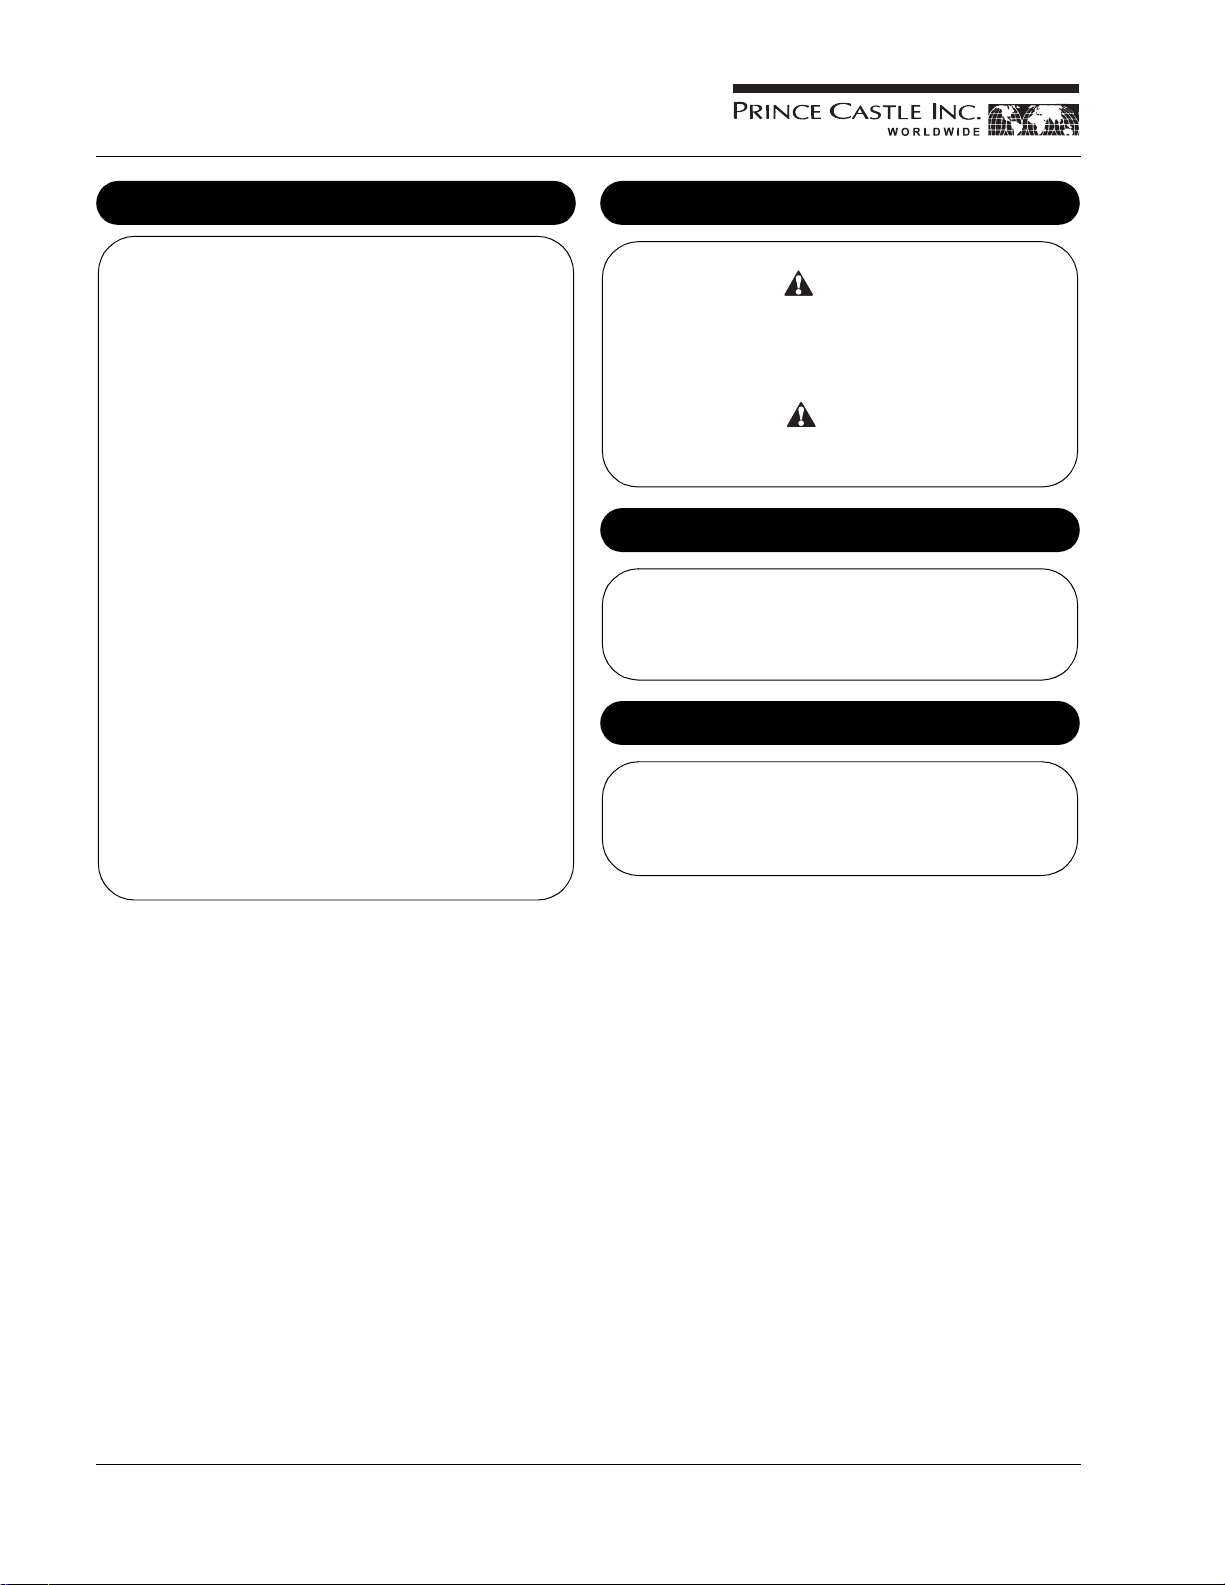
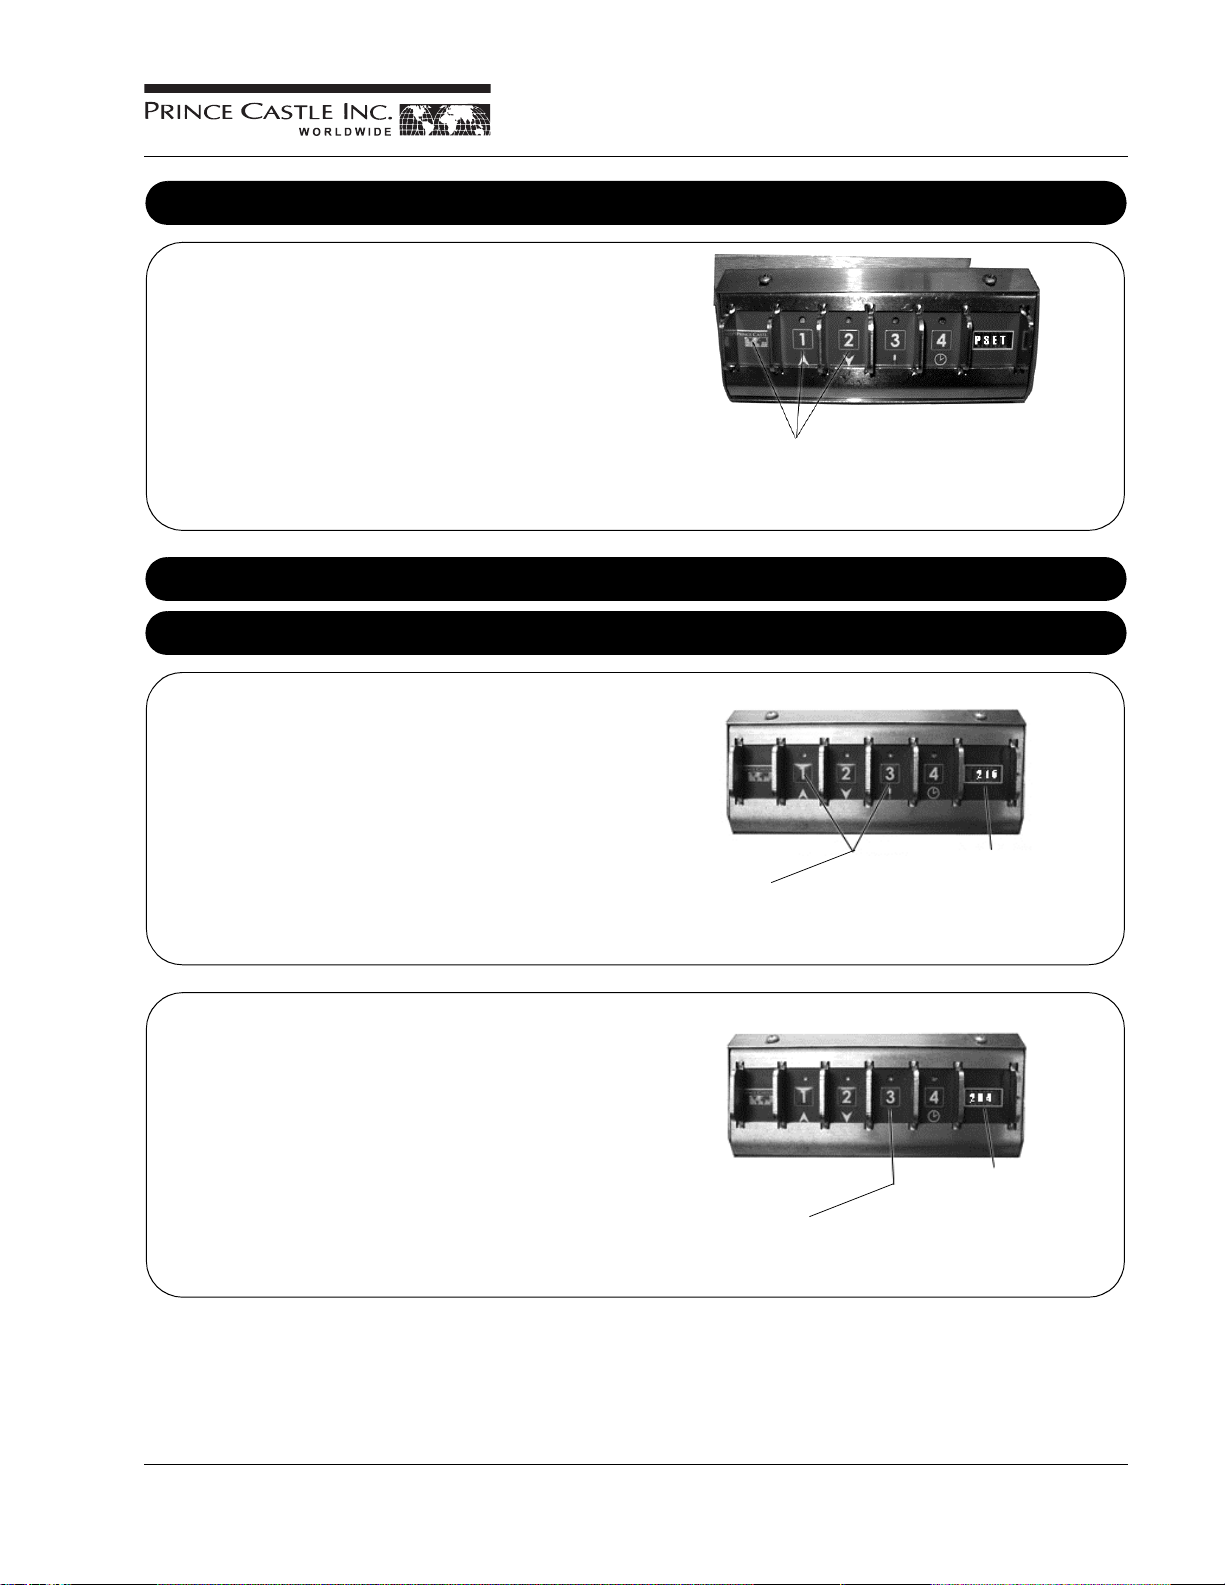
• Furthermore, 247 and 248 T oaster Grills allow you to manually
initiate the power-saving mode. (See Figure 1.)
NOTE: When using this unit, the ambient temperature at the
mounting site should not exceed 43°C (110°F).
CAUTION
All electrical connections must be in accordance with local
electrical codes and any other applicable codes.
Plug the unit into an applicable electrical receptacle.
UP Arrow
DOWN Arrow
TEMPERATURE Button
Figure 1
TIME Button
When the Toaster Grill is in Dedicated Mode:
1
Press and release both the UP and DOWN arrows
at the same time. This will change the Toaster Grill
to Product Mode. Products 1 through 4 will be
available.
When the Toaster Grill is in Product Mode:
2
Press and release both the UP and DOWN arrows
at the same time. This will change the Toaster Grill
to Dedicated Mode. BUN1 will be the only product
available.
NOTE: While the unit is adjusting to the new set temperature,
the product name flashes in the display. In the Dedicated
Mode this is “BUN1”. In the Product Mode, the name will be
the currently selected product.
When the unit reaches set temperature, the product’s name
is displayed steadily in Product Mode, or the display shows
“RD Y” in Dedicated Mode.
The adjustment time necessary will depend on the set
temperature.
247-500revB-EN 3 Printed in USA 2/06 © 2006
Page 4
Toaster Grills
Models 247 & 248
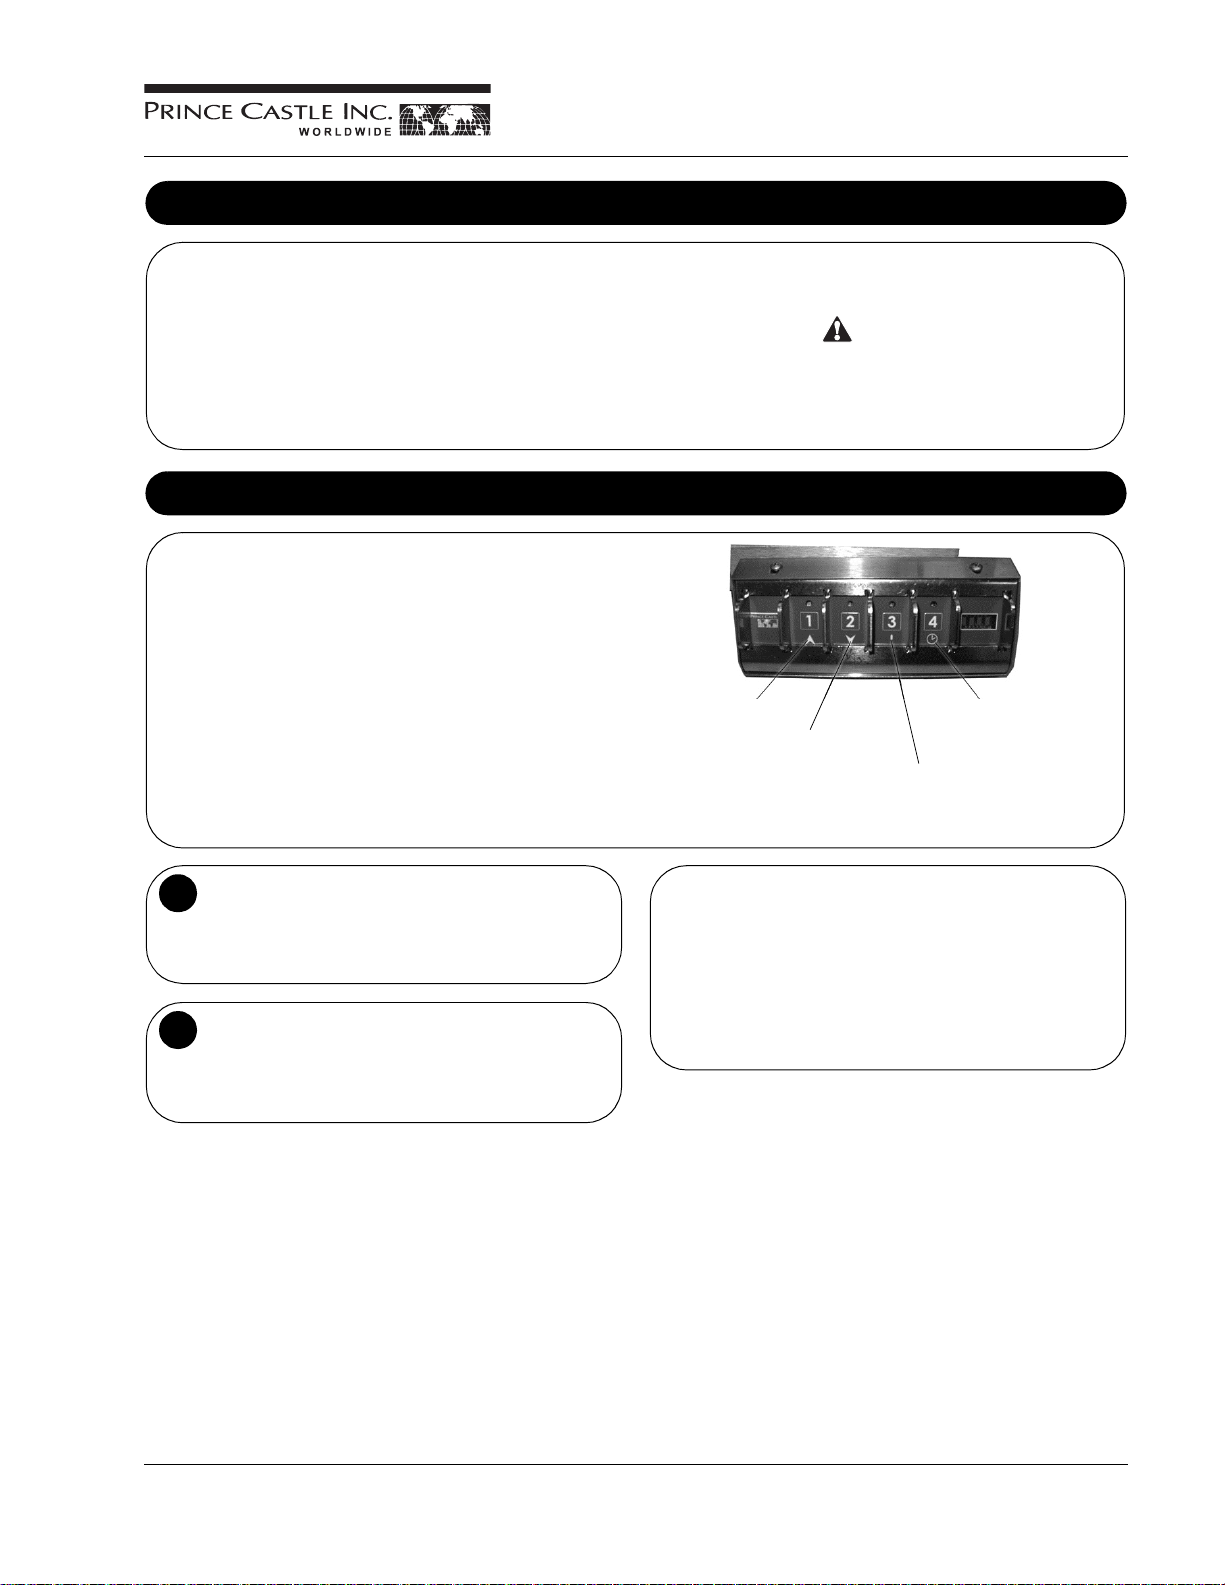
Product Selection (Product Mode Only)
Press and release any of the four numbered buttons (i.e., 1, 2,
3 or 4) to select the product associated with that button.
(See Figure 2.)
The LED above the selected Product button glows steady green
to indicate the current selection and the display will show the
selected product’s name.
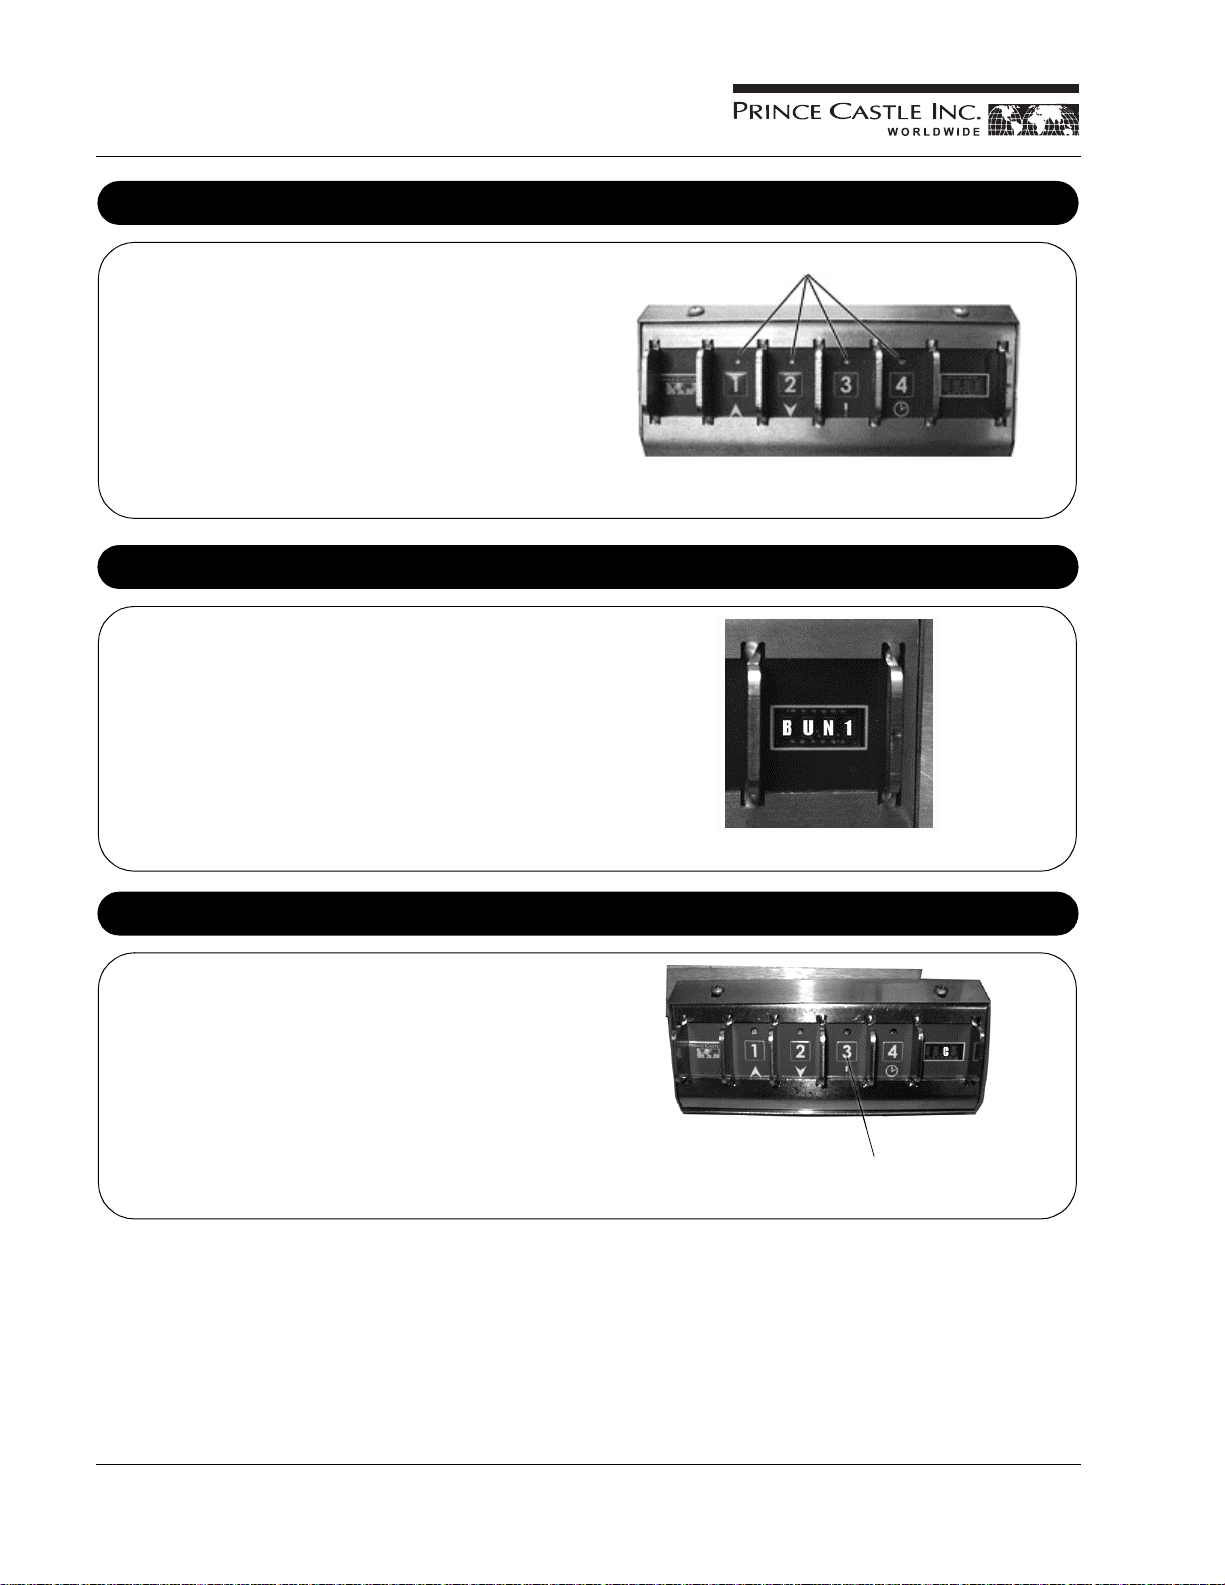
Ready-to-Toast Indication
While the unit is warming up, a product name flashes in the
display. In the Dedicated Mode this is “BUN1”. In the Product
Mode, the name will be the currently selected product.
(See Figure 3.)
When the unit reaches set temperature, the product’s name is
displayed steadily in Product Mode, or the display shows “RDY”
in Dedicated Mode.
LEDs
Figure 2
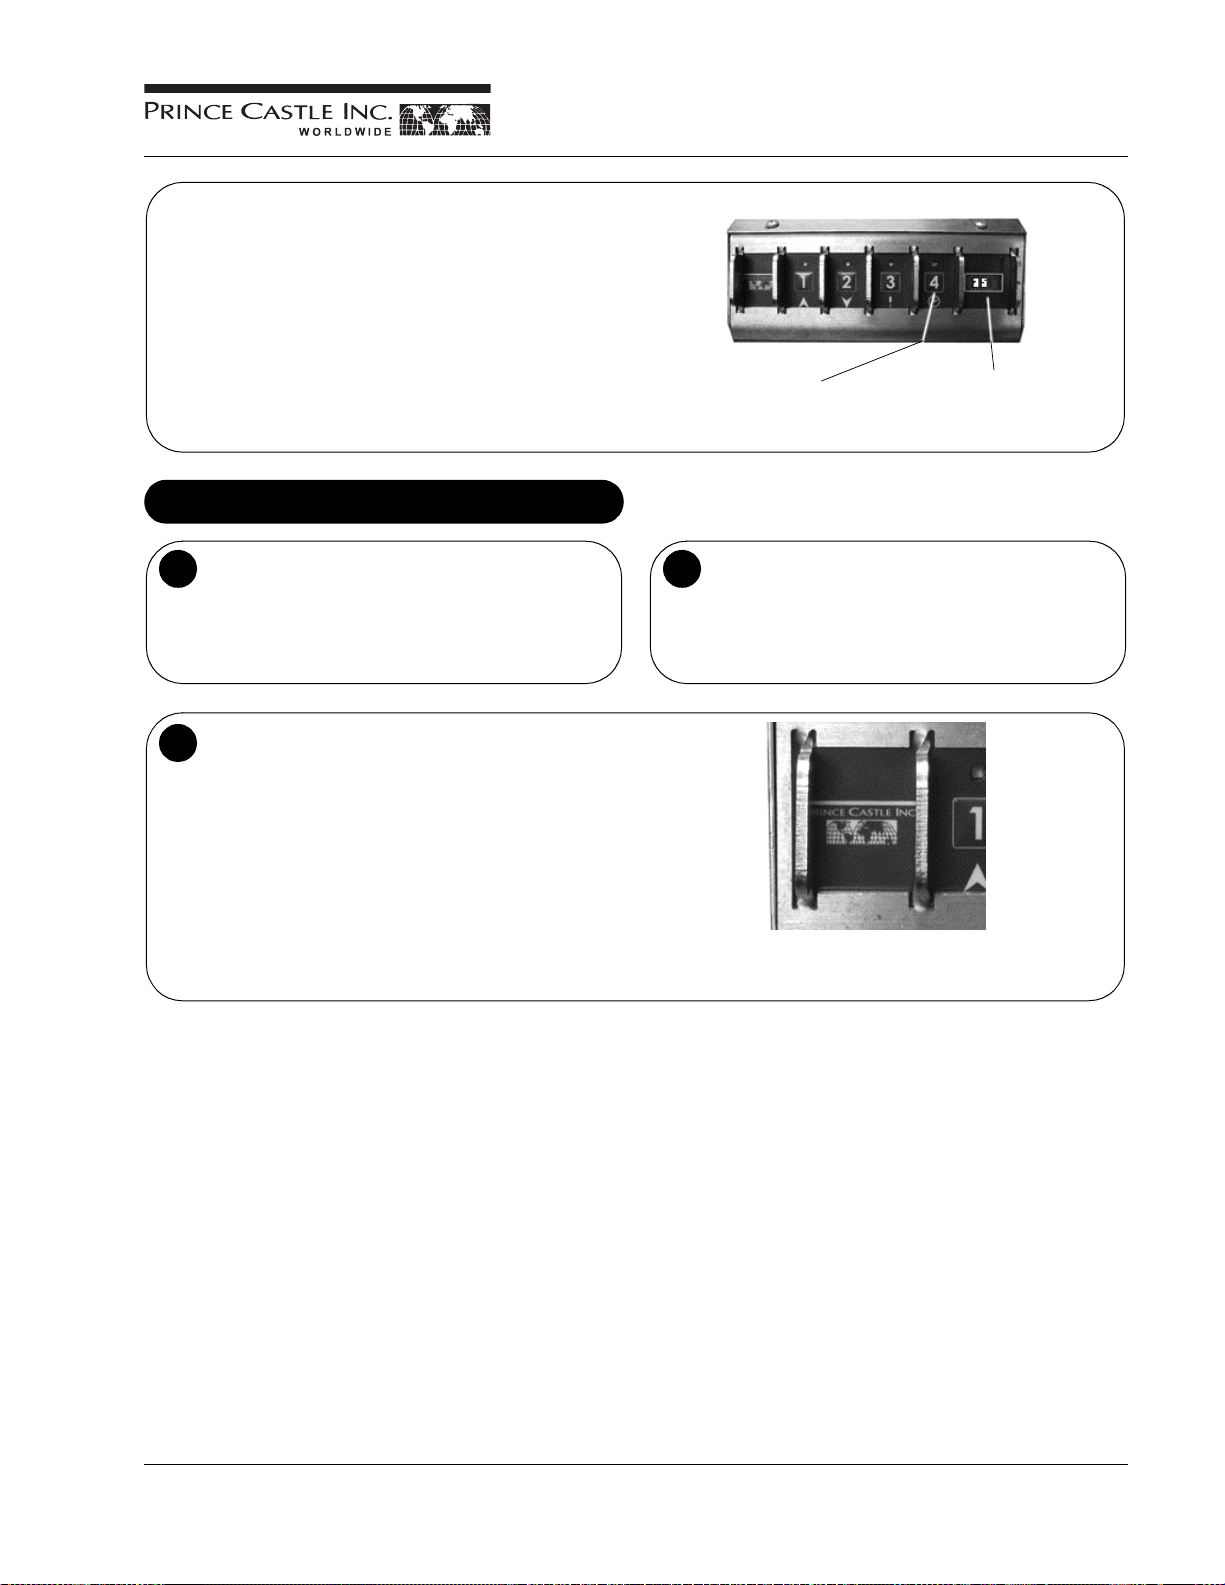
Temperature Mode (F/C) Display Selection
TEMPERATURE MODE: To toggle between Fahrenheit (F) and
Celsius (C), at power-on immediately press and release button 3
within 3 seconds. (See Figure 4 .)
If the unit was set to display temperatures in “C”, it changes
to display in “F”, and vice versa. The display shows “F” or “C”
to indicate which mode has been selected. Repeat within
3 seconds to change the display again.
The default Temperature Mode is Celsius.
Figure 3
Press Button 3
Figure 4
Printed in USA 2/06 © 2006 4 247-500revB-EN
Page 5
Resetting to Factory Presets
Product Mod e
Dedicated Mode
To reset all settings to factory presets, at power-on immediately
(within 3 seconds) press and hold the LOGO, UP and DOWN
buttons simultaneously until the display shows “PSET”. Release
all buttons. After about 10 seconds, the unit will operate with
factory preset temperature, time and display name values.
(See Figure 5.)
All previously saved settings are lost upon resetting the defaults.
View/Change Set Temperature
To View the Current Set Temperature
Figure 5
Press These Buttons
at the Same Time
Toaster Grills
Models 247 & 248
In Product Mode:
Press and hold the currently selected product’s button and
immediately press the TEMPERATURE button. Release both
buttons.
The display will show the pre-set toasting temperature for the
selected product. (See Figure 6.)
In Dedicated Mode:
Press and release the TEMPERATURE button. The display
will show the pre-set toasting temperature for “BUN1”.
(See Figure 7.)
Press PRODUCT Button and
TEMPERATURE Button
Figure 6
Press
TEMPERATURE Button
Product’s
Set Temperature
Is Displayed
Display Shows BUN1
Set Temperature
Figure 7
247-500revB-EN 5 Printed in USA 2/06 © 2006
Page 6

Toaster Grills
Product Mod e
Models 247 & 248
To Change the Set Temperature
Press the button(s) used to view the set temperature.
1
Hold the button(s) for 6 seconds.
The LED above the TEMPERATURE butt on will
flash yellow, indicating that the unit is now in settemperature programming mode. Release all
buttons.
Press and release the UP or DOWN buttons to change
2
the currently selected product’s toasting temperature.
Holding either button for 3 seconds will allow
automatic “fast scrolling” for easier programming.
The temperature can be set from 37°C to 287°C
(100°F to 550°F).
When finished, press and release the TIME button to
3
save the new value and return to toasting.
Press and release the LOGO button at any time to
exit the programming mode without saving any
changes made.
NOTE: While the unit is adjusting to the new set temperature,
the product name flashes in the display. In the Dedicated
Mode this is “BUN1”. In the Product Mode, the name will be
the currently selected product.
When the unit reaches set temperature, the product’s name
is displayed steadily in Product Mode, or the display shows
“RD Y” in Dedicated Mode.
The adjustment time necessary will depend on the set
temperature.
LOGO Button
Figure 8
View/Change Set Toasting Time
To View the Set Toasting Time
In Product Mode:
Press and Hold the currently selected product’s button and
immediately press the TIME button. Release both buttons. The
display will show the present toasting time for the selected
product. (See Figure 9.)
Press PRODUCT Button
and TIME Button
Figure 9
Product’ s Se t Time
Is Displayed
Printed in USA 2/06 © 2006 6 247-500revB-EN
Page 7
In Dedicated Mode:
Dedicated Mode
Press and release the TIME button. The display will show the
present toasting time for “BUN1”.
In either mode, after 3 seconds the display will ret urn to showing
the currently selected product time. (See Figure 10.)
Toaster Grills
Models 247 & 248
To Change the Set Toasting Time
To change the toasting time of the currently selected
1
product, press the same button(s) used to view the
toasting time. Hold the button(s) for 6 seconds.
The LED above the TIME button will flash yellow,
indicating that the unit is now in set-time
programming mode. Release all buttons.
When finished, press and release the TIME button to
3
save the new value and return to toasting.
Press and release the LOGO button at any time to
exit the programming mode without saving any
changes. (See Figure 11.)
Press the TIME Button
Figure 10
Press and release the UP or DOWN buttons to change
2
the currently selected product’s toasting time. Holding
either button for 3 seconds will allow automatic “fast
scrolling” for easier programming.
Display Shows
BUN1 Set Time
The time can be set from 1 sec. to 9 minutes,
59 seconds.
LOGO Butto n
Figure 11
247-500revB-EN 7 Printed in USA 2/06 © 2006
Page 8
Toaster Grills
Models 247 & 248
View/Change Duty Time Alarm
A. Press and hold the LOGO button. Immediately press
1
the TIME button.
B. Release all buttons. The display will show the present
duty time for “BUN1” in Dedicated Mode and for
whichever product is selected in Product Mode.
To change the duty time of the currently selected product,
2
press and hold the buttons in Step 1 for 6 seconds.
The LEDs above the TIME and UP Arrow button will
flash yellow, indicating that the unit is now in the duty
time programming mode.
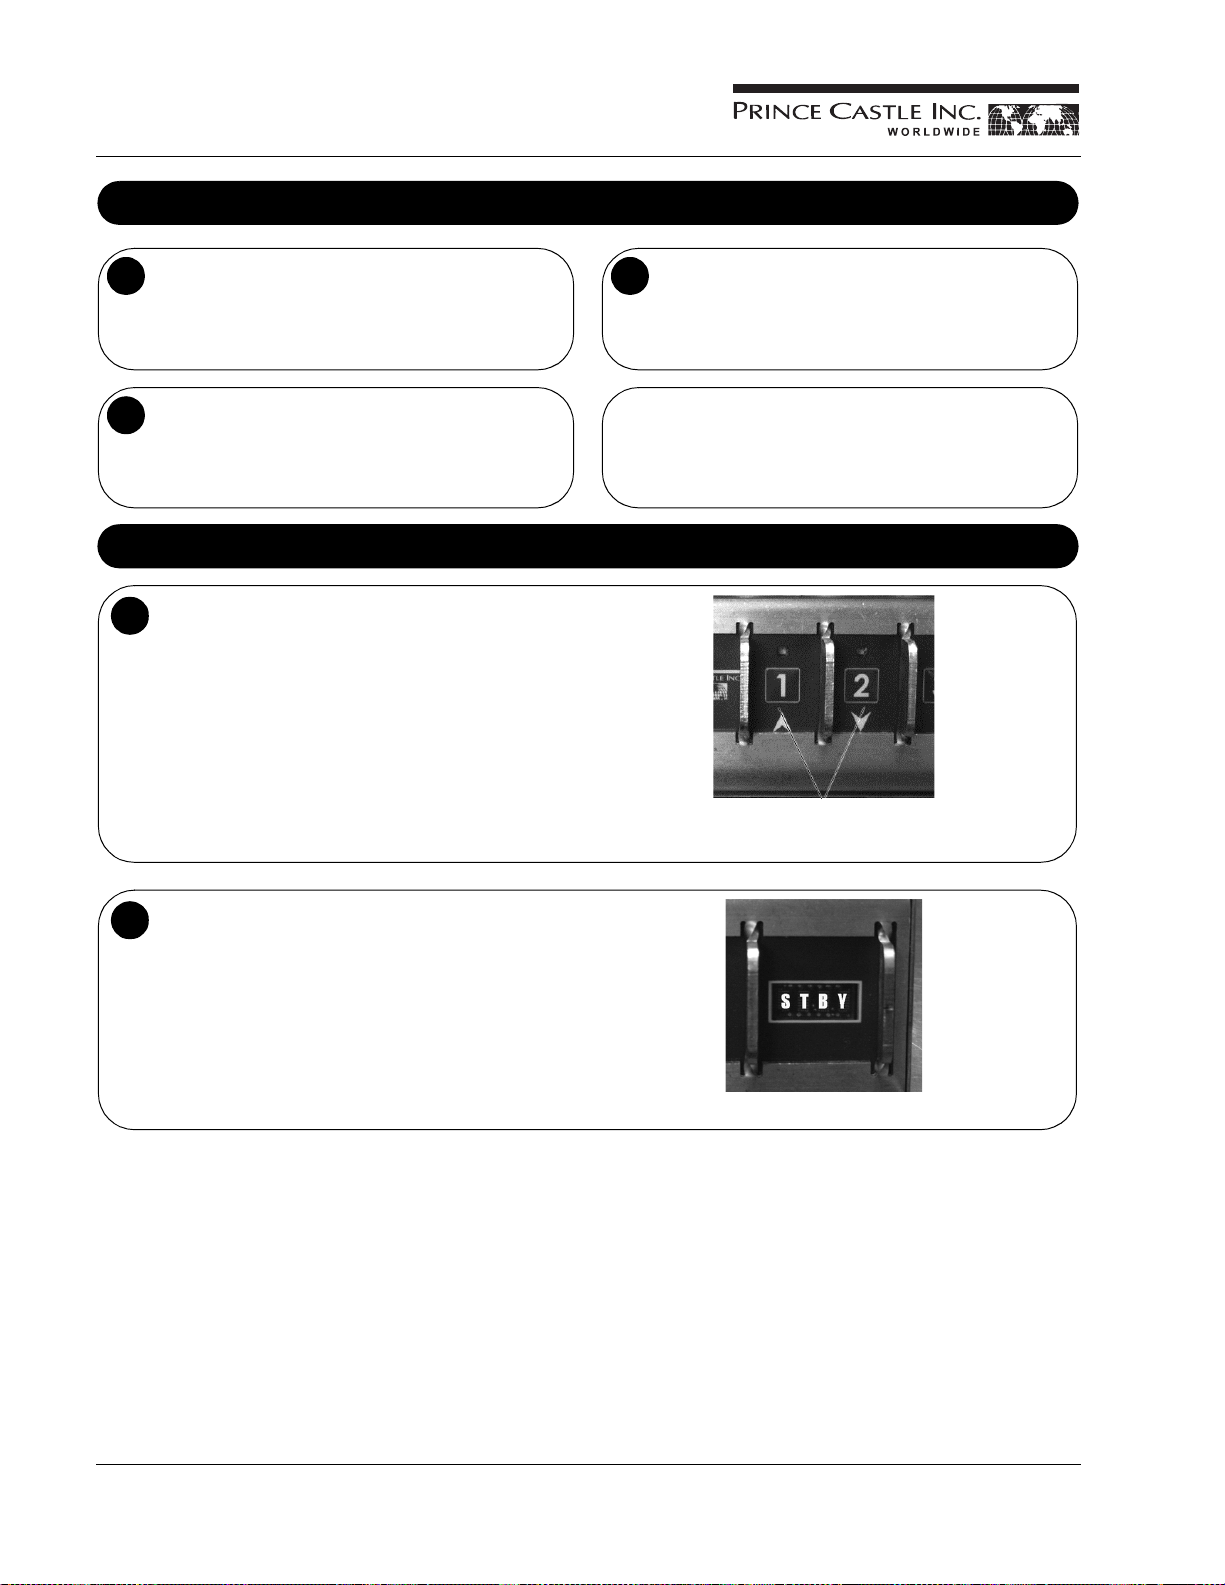
Standby (Energy Saving) Mode
Direct Method: To place the unit in Standby Mode,
1
close the platen and press and hold the UP and
DOWN buttons together for 3 seconds. The unit will
stop timing and the display will indicate “STBY”. Open
the platen to cancel Standby mode. (See Figure 12.)
Press and release the UP or DOWN buttons to change
3
the currently selected product’s duty time.
When finished, press and release the TIME button to sa ve
the new value and return to toasting.
To exit the programming mode without saving any
changes, press and release the LOGO button.
NOTE: The duty time may be set to OFF or 15 – 20
seconds. If not off, the duty alarm will sound the
programmed number of seconds after toasting is started.
UP and DOWN Arrows
Figure 12
After Toasting: After toasting is complete, the Done
2
Alarm will sound for 7 seconds. If the platen is left
closed, the Toaster Grill will automatically enter the
Standby Mode and the display will read “STBY”. Open
the Toaster Grill to reactivate it from Standby Mode.
(See Figure 13.)
Figure 13
Printed in USA 2/06 © 2006 8 247-500revB-EN
Page 9

View/Calibrate Platen Temperature
Important!
Do NOT perform this procedure until the Toaster Grill has been
on for at least 45 mins. and the temperature has stabilized. Do
NOT use the Toaster Grill during the first 45 minutes.
Temperature can only be adjusted ±10°C (±18°F) during
calibration.
Important!
Toaster Grills
Models 247 & 248
If the temperature reading from the external temperature port is
greater than ±3°C (±5°F) compared to the Toaster Grill
temperature display, proceed with the following. If temperature
reading is within ±3°C (±5°F), the Toaster Grill is functioning
properly and does not need calibration.
Upper Platen (248 Models Only)
A. Plug an external temperature meter into the external
1
port (Type K mini-jack) of the heater platen.
B. Using the external temperature meter as a standard,
adjust the Toaster Grill’s temperature display to match
the meter’s temperature display by the following
procedure.
NOTE: Yellow Type K Thermocouple mini-jack temperature
ports are located on the back of the 248 Model, behind each of
the two platens. (See Figure 14.)
Upper External
Figure 14
A. To view and/or calibrate the platen temperature, press
2
and hold the LOGO button.
B. Immediately press the UP button to view the Upper
Platen temperature on 248 Models.
C. Release both buttons. (See Figure 15.)
The display shows the Upper Platen’s temperature.
After 3 seconds, the display returns to showing the
currently selected product.
Press LOGO Button
and UP Arrow
Figure 15
Lower External
Displa y Shows the
Upper Platen
Temperature (248 Only)
247-500revB-EN 9 Printed in USA 2/06 © 2006
Page 10

Toaster Grills
Models 247 & 248
To calibrate the Upper Platen, press and hold the LOGO
3
and UP buttons, as in Step 2, but continue holding them
for 6 seconds.
The LEDs above to buttons 1 & 3 flash, indicating that
the unit is now in Upper Platen temperature calibration
mode.
Release all buttons.
To change the Upper Platen’s displayed temperature,
4
press and release button UP or DOWN Arrow.
After changing the value, be sure to wait for the di splay
to show the temperature change.
To save the new value and return to toasting, press and
5
release button 4.
To exit programming without saving any changes
made, press and release the LOGO button.
Lower Platen (All Models)
A. Plug an external temperature meter into the external
1
port of the heater platen.
B. Using the external temperature meter as a standard,
adjust the Toaster Grill’s temperature display to match
the meter’s temperature display, by the following
procedure.
A. To view the Lower Platen’s temperature, press and
2
hold the LOGO button.
B. Immediately press the DOWN button. Release all
buttons.
The display shows the Lower Platen’s temperature.
After 3 seconds, the display returns to showing the
currently selected product. (See Figure 16.)
Press LOGO Button
and DOWN Arrow
Figure 16
To calibrate the Lower Platen, press and hold the LOGO
3
button and DOWN arrow, as in Step 2, but continue
holding them for 6 seconds.
The LEDs above buttons 2 & 3 flash, indicating that the
unit is now in Lower Platen temperature calibration
mode.
Release all buttons.
NOTE: A yellow temperature port is located on the back of the
247 Model, behind the platen (same as the Lower External Port
in on 248 Model figure above). (See Figure 16.)
To change the Lower Platen’s displayed temperature,
4
press and release UP or DOWN arrows.
After changing the value, be sure to wait for the display
to show the temperature change.
When finished, press and release button 4 to save the
5
new value and return to toasting.
To exit programming without saving any changes
made, press and release the LOGO button.
Displa y Shows the
Lower Platen
Temperature
Printed in USA 2/06 © 2006 10 247-500revB-EN
Page 11

Change Product Name (Product Mode Only)
Toaster Grills
Models 247 & 248
Place the Toaster Grill in PRODUCT MODE (refer to
1
“Mode Selection”).
Press one of the four numbered buttons (i.e., 1, 2, 3 or 4)
to select the product name you wish to change.
Press and hold the LOGO button and button 3 for
2
6 seconds.
The LED next to the currently selected Product flashes
and the first character of its displayed name blinks.
A. Use UP or DOWN arrows to scroll through the available
3
characters for the display.
B. Hold either button for 3 seconds to allow automatic
“fast scrolling” for easier programming.
Set Volume Levels (All Models)
To view the current volume level, press and hold the
1
LOGO button. Immediately press and hold the TIME
button and TEMPERATURE button to view the present
Volume Level .
Release all buttons.
The display will return to showing the currently
selected product.
When the desired character is displayed in the first
4
position, release the UP or DOWN arrow, and press and
release button 3 to move on to the second display
character.
A. Repeat steps 3 & 4 to program each character as
5
desired.
B. When in the fourth position, press and release button 3
to return to the first displa y c h a r a cter.
When the display name is changed as desired, press and
6
release button 4 to save it.
To exit programming without saving any changes
made, press and release the LOGO button.
Press and release the UP or DOWN arrows to adjust the
3
volume level.
When finished, press and release the TIME button to
save the new value and return to toasting.
To change the volume level, press and hold the buttons in
2
Step 1 for 6 seconds. The display will continue to show
Volume Le v el and a tone will sound indicating that the unit
is now in Volume Setting Mode.
247-500revB-EN 11 Printed in USA 2/06 © 2006
Page 12

Toaster Grills
Models 247 & 248
Adjusting Bun Crush Settings
To adjust the bun crush settings, use the knob located on the
front of the unit’s base. There are 10 incremental settings, each
increasing the center gap by approximately 2 mm.
(See Figure 17.)
• To set the thickness from 1 to 5, lift and slide the knob to the
left-most position. Then, rotate the knob until the desired
setting is in the “window”.
• To set the thickness from 6 to 10, lift and slide the knob to the
right-most position. Then, rotate the knob, until the desired
setting is in the “window”.
Adjusting for Bun Thickness
The 248 model has two sets of notches in the side bun fences.
(See Figure 18.)
• Put the bun board in the front, lower notches for REG or QTR
buns.
• Use the rear, upper notches for MAC or RIB buns.
Figure 17
Figure 18
Printed in USA 2/06 © 2006 12 247-500revB-EN
Page 13

Conditioning the Platens
Toaster Grills
Models 247 & 248
To minimize bun-sticking, the platens should be wiped
1
weekly with McD Bun Toaster Grill Release Agent.
CAUTION
Use only McD Bun Toaster Grill Release Agent on bun
Toaster Grills. Other products may cause damage and
void the Warranty.
A. Dust all loose crumbs from Toaster Grill surfaces.
B. Apply McD Bun T oaster Grill Release Agent to cool or
warm Toaster Grill platens.
To coat the platen surface, thoroughly wet a clean, folded
2
customer napkin or paper towel with Toaster Grill Release
Agent, and place it on No. 257 cleaning tool.
A. Rub a generous amount of the Release Agent over the
3
entire surface of the platen until well coated.
B. Repeat Steps 2 & 3 for other platens, including
undersides.
WARNING
BURN HAZARD! Use protective gloves and No. 257
cleaning tool when con ditioning hot platens.
IMPORTANT! Do NOT wipe Toaster Grill with a damp cloth
after Release Agent is applied. Doing so removes Agent and
causes sticking.
Toaster Grill platens must be clean and dry.
Reapply Release Agent weekly to all platen surfaces
4
while Toaster Grill is cold.
If sticking occurs between weekly applications, reapply
Release Agent more frequently as described in
Steps 1 – 3.
247-500revB-EN 13 Printed in USA 2/06 © 2006
Page 14

Toaster Grills
Models 247 & 248
Cleaning
A. Periodically and upon shutdown, use a clean, dry soft
1
cloth to wipe down the Toaster Grill unit.
B. W hen the platens are cool, you may also use a mild
soap solution on a damp soft cloth to remove stubborn
food remains, if necessary.
Do NOT use any unapproved agents or cleaning solutions
inside or on surfaces of Toaster Grill unit. Such misuse
could void the warranty.
Remove the side covers, as shown, for further cleaning.
2
(See Figure 19.)
Replace side covers when finished. (See Fi gur e 2 0.)
3
WARNING
Do Not Clean with Water Jet.
Figure 19
Figure 20
Printed in USA 2/06 © 2006 14 247-500revB-EN
Page 15

Troubleshooting Guide
Toaster Grills
Models 247 & 248
WARNING
SHOCK HAZARD! Live circuits are exposed! Use extreme
care during electrical circuit tests. Do NOT attempt any
troubleshooting without proper authorization to do so.
PROBLEM PROBABLE CAUSE SOLUTION
Platen loose. Platen bolts loose. Tighten platen bolts.
No alarm. Defective timer switch. Replace timer switch.
Activation magnet is missing. Two magnets are required.
Buns being crushed. Stop blocks not adjusted properly. Adjust stop blocks.
Warped bun trays. Straighten or replace bun trays.
Buns cut improperly. Contact bakery.
Warped bun board. Straighten or replace bun board.
Platen does not heat. No power. Check power source.
Power switch defective. Replace power switch.
Loose writing. Correct as necessary.
Defective temperature probe. Replace temperature probe.
Platen burned out or shorted. Replace platen; call Service Agency.
Buns sticking to
platen.
Cold platen. Loose electrical connection. Reconnect wires from solid-state relay to printed circuit boards.
Excessive heat due to reversed upper and lower
temperature probe connections.
Build up of sugar on platen. Clean platen.
Inspection, testing and repair of electrical equipment are to
be performed by qualified service personnel ONLY. Unplug
unit during testing, except as electrical tests are required.
Reverse connections of upper and lower temperature probe
connections in electrical box.
WARNING
247-500revB-EN 15 Printed in USA 2/06 © 2006
Page 16

Toaster Grills
Models 247 & 248
Ordering Parts and Service
To Order Replacement Parts or Service —
INTERNATIONAL: Contact your kitchen Equipment Supplier or
designated repair facility for parts and service.
Printed in USA 2/06 © 2006 16 247-500revB-EN
Page 17

Part
No.
No. Description
1 248-141S Overlay K it
2 248-140S Display Printed Circuit Board Kit
3 66-017S Strain Relief Kit
4 248-055S Stop Block Kit
5 411-149S Front Lever Kit *
6 411-60S Lower Platen Stud (Pkg. of 2)
7 411-113S Base Spacer (Pkg. of 7)
8 248-019S Lower Platen Fence Kit, LH *
9 48-018S Lower Platen Fence Kit, RH *
10 411-461S Rear Upper Lever Assembly *
11 411-459S Rear Lower Lever Assembly
12 248-044S Side Panel Kit, LH *
13 248-109S Side Panel Kit, RH *
14 65-058S Relay
15 66-045S Strain Relief
16 78-196S Switch Kit
17 411-61S Lower Platen Stud (Pkg. of 2) *
18 411-57S Platen Spacer (Pkg. of 2) *
19 411-221S Spacer Kit (Pkg. of 4)
20 248-099S Base Spacer Kit (Pkg. of 2) *
* Not shown.
Exploded Views
Parts Breakdown
Part
No.
No. Description
21 411-147S Upper Platen Stud (Pkg. of 2)
22 248-048S Safety Latch Kit *
23 248-114S Knob Kit
24 248-045S Rear Bun Fence Kit
25 72-416A Power Cord Kit
26 88-497S Mini Jack, Type K
27 89-959S Rubber Foot (Pkg. of 4)
28 248-095S Temperature Probe
29 248-038S Bun Board *
30 248-079S Reed Switch Kit
31 248-067S Main Printed Circuit Board Assembly
32 248-111S Upper Bun Fences Kit *
33 248-090S Lower Platen Kit
34 248-091S Upper Platen Kit *
35 247-006S LH Bun Fence Assembly
36 247-004S RH Bun Fence Assembly
37 411-347S Replac eme nt St ud Kit
38 411-114S Safety Latch Kit
39 247-032S Front Lever Assembly
40 411-241S Safety Latch Spacer (Pkg. of 2)
41 247-014S Bun Board
* Not shown.
Toaster Grills
Models 247 & 248
Model 247
41
30
36
21
37
11
40
38
6
37
39
19
4
23
7
33
4
31
14
16
15
25
19
7
11
19
6
37
37
6
35
28
24
26
27
3
2
1
247-500revB-EN 17 Printed in USA 2/06 © 2006
Page 18

Toaster Grills
Models 247 & 248
Part
No.
No. Description
1 248-141S Overlay K it
2 248-140S Display Printed Circuit Board Kit
3 66-017S Strain Relief Kit
4 248-055S Stop Block Kit
5 411-149S Front Lever Kit *
6 411-60S Lower Platen Stud (Pkg. of 2)
7 411-113S Base Spacer (Pkg. of 7)
8 248-019S Lower Platen Fence Kit, LH
9 48-018S Lower Platen Fence Kit, RH
10 411-461S Rear Upper Lever Assembly
11 411-459S Rear Lower Lever Assembly
12 248-044S Side Panel Kit, LH
13 248-109S Side Panel Kit, RH
14 65-058S Relay
15 66-045S Strain Relief
16 78-196S Switch Kit
17 411-61S Lower Platen Stud (Pkg. of 2)
18 411-57S Platen Spacer (Pkg. of 2)
19 411-221S Spacer Kit (Pkg. of 4)
20 248-099S Base Spacer Kit (Pkg. of 2) *
* Not shown.
Parts Breakdown
No.
21 411-147S Upper Platen Stud (Pkg. of 2)
22 248-048S Safety Latch Kit
23 248-114S Knob Kit
24 248-045S Rear Bun Fence Kit
25 72-416A Power Cord Kit
26 88-497S Mini Jack, Type K
27 89-959S Rubber Foot (Pkg. of 4)
28 248-095S Temperature Probe
29 248-038S Bun Board
30 248-079S Reed Switch Kit
31 248-067S Main Printed Circuit Board Assembly
32 248-111S Upper Bun Fences Kit
33 248-090S Lower Platen Kit
34 248-091S Upper Platen Kit
35 247-006S LH Bun Fence Assembly *
36 247-004S RH Bun Fence Assembly *
37 411-347S Replac eme nt St ud Kit *
38 411-114S Safety Latch Kit *
39 247-032S Front Lever Assembly *
40 411-241S Safety Latch Spacer (Pkg. of 2) *
41 247-014S Bun Board *
* Not shown.
Part
No. Description
Model 248
29
12
6
17
21
10
11
32
7
6
22
22
17
17
19
18
3
7
34
7
33
23
31
30
8
3
9
7227
4
18
19
17
17
16
14
15
7
7
6
21
17
6
26
25
28
24
27
2
1
13
3
Printed in USA 2/06 © 2006 18 247-500revB-EN
Page 19

Wiring Diagrams
Model 247
Toaster Grills
Models 247 & 248
247-500revB-EN 19 Printed in USA 2/06 © 2006
Page 20

Toaster Grills
Models 247 & 248
Model 248
Printed in USA 2/06 © 2006 20 247-500revB-EN
Page 21

Maintenance
Batch-Toasters
Card
Planned Maintenance
System: Maintenance
Requirement Card
(MRC)
Pictures and additional
information; Corresponding
Chapter of Equipment Manual
When:
Weekly
Tools:
McD Bun Toaster Release Agent
(HCS), Customer paper napkins or
paper towels, Protective gloves,
No. 257 cleaning tool.
247/248 Series
Prince Castle: Bun Toasters
Precaution
During some checks, live electrical circuits are exposed, and hot toasting surfaces are
uncovered.
WARNING!
BURN HAZARD! The procedures on this card often include the use of
chemical products. These chemicals are highlighted with boldface letters,
followed by the abbreviation “HCS” (Hazard Com m unication Standar d) in
the tools portion of the procedure. See the Hazard Communication Standard
(HCS) Manual for the appropriate Material Safety Data Sheet(s) (MSDS).
Applying Bun Toaster Release Agent
To minimize bun sticking, the Platens should be wiped weekly with McD Bun Toaster
Release Agent.
CAUTION!
Use only McD Bun Toaster Release Agent on bun toasters. Other products
may damage toasters.
1. Dust all loose crumbs from toaster surfaces.
2. Apply McD Bun Toaster Release Agent to hot toaster Platens. Toaster does not
need to be cooled down before applying Toaster Release Agent.
247-500revB-EN
CAUTION!
BURN HAZARD! Use protective gloves and No. 257 c leaning tool when
conditioning hot Platens.
IMPORTANT!
Do NOT wipe toaster with a damp cloth after Release Agent is applied. Doing
so removes Agent and causes sticking.
Toaster Platens must be well rinsed and dry.
✍
3. To coat top Platen surface, thoroughly wet a clean, folded customer napkin or
paper towel with Toaster Release Agent, and place it on No. 257 cleaning tool.
Platen undersides and difficult to reach areas can be coated by placing a
✍
customer napkin or paper towel on No. 257 to apply Release Agent to
Platen surface.
4. Rub a gener ous a mount of the Relea se Age nt o v er the en tire surface of the Platen
until well c oated.
5. Repeat Steps 2 and 3 for other Platens, including undersides.
6. Reapply Rele as e Agent we ekl y to all Plat en surfaces while toaster is cold.
7. If sticking occurs between weekly applications, reapply Release Agent more
frequently as described in Steps 1-3.
21
Printed in USA 2/06 © 2006
Page 22

Batch To asters
247/248 Series
When:
Monthly
Check Calibration of Temperature
Tools:
Digital thermometer with male-tomale lead extension for “Type K”
temperature probe.
IMPORTANT!
Do NOT perform this pr oc edure until the toaster has been on f or at least
45 minutes and the temperature has stabilized. Do NOT use the toaster
during this period!
IMPORTANT!
If the temperature reading on the Platen is greater than ±3°C (±5°F)
compared to the toaster temperature display, proceed with the following. If
temperature reading is within range, toaster is functioning properly and
does not need calibration.
Upper Platen (248 Models Only)
1. Plug an external temperature meter into the external port of the heater Platen.
2. Using the external temperature meter as a standard, adjust the toaster’s
temperature display to match the meter’s temperature display by the following
procedure.
Y ello w temperature ports are located on the back of the 248 Model, behind
✍
each of the two Platens.
3. To view and/or calibrate the Platen temperature, press and hold the LOGO button.
4. Immediately press the UP button to view the Upper Platen’s temperature on 248
Models.
5. Release all buttons. The display shows the Upper Platen’s temperature. After
3 seconds, the display returns to showing the currently selected product.
6. To calibrate the Upper Platen, press and hold the LOGO and UP buttons for
6 seconds. The LEDs above 1 and 3 flash, indicating that the unit is now in Upper
Platen temperature calibration mode.
7. To change Upper Platen’s displayed temperature, press and release button 1 or 2.
Be sure to wait after changing the value for the display to “catch up.”
✍
8. When finished, to save the new value and return to toasting, press and release
button 4.
9. To exit programming without saving any changes made, press and release the
LOGO button.
Lower Platen (All Models)
1. Plug an external temperature meter into the external port of the heater Platen.
2. Using the external temperature meter as a standard, adjust the toaster’s
temperature display to match the meter's temperature display, by the following
procedure.
A yellow temperature port is located on the back of the 247 Model, behind
✍
the Platen (same as the Lower External Port in on 248 Model figure above).
3. To view the Lower Platen’s temperature, press and hold the LOGO button.
4. Immediately press the DOWN button to view the Lower Platen temperature.
Release all buttons.
5. The display shows the Lower Platen’s temperature. After 3 seconds, the display
returns to showing the currently selected product.
6. To calibrate the Lower Platen, press and hold the LOGO button and DOWN arrow
for 6 seconds. The LEDs above 2 and 3 flash, indicating that the unit is now in
Lower Platen temperature calibration mode.
Printed in USA 2/06 © 2006 22
247-500revB-EN
Page 23

Batch Toasters
247/248 Series
7. To change Lower Platen’s displayed temperature, press and release button 1 or 2.
Be sure to wait for the display to “catch up” after changing the value.
✍
8. When finished, press and release button 4 to save the new value and return to
toasting. To exit programming without saving any changes made, press and
release the LOGO button.
When:
Monthly
Tools:
McD Hi Temp Grill Cleaner (HCS),
McD Bun Toaster Release Agent
(HCS), McD No-Scratch Pad, Base
of Big Breakfast container, No. 257
cleaning tool, Clean grill cloths
(qty. 6-8), Customer paper napkins
or paper towels, Protective gloves
Clean Nickel Platen
PREPARING BUN TOASTER
1. If toaster is cool, heat to operating temperature.
IMPORTANT!
Bun toaster must be operating temperature for cleaning.
2. Turn toaster switch to OFF position and unplug cord.
WARNING!
SHOCK HAZARD! Failure to unplug cord before cleaning may cause
electrical shock.
CAUTION!
BURN HAZARD! Use protective gloves during the entire cle aning pr ocess.
3. Remove all buns, bun trays and bun tray liners from the bun toaster stand.
4. Turn on the grill exhaust fan, and move toaster stand in front of grill.
HOW TO CLEAN
1. Firmly attach McD No- Scratc h Pad to cleaning tool. U se o nly n onabr asiv e b lue N oScratch Pads designed for grill cleaning.
IMPORTANT!
Do NOT use a green pad. It damages the Platen surface.
247-500revB-EN
2. Pour one packet of McD Hi-Temp Grill Cleaner into breakfast container base.
3. Turn bun board upside-down and lay on upper Platen or plate.
4. Dip No-Scratch Pad into Hi-Temp Grill Cleaner.
5. Spread cleaner over bun board and lightly scrub until clean. Apply additional
cleaner, as needed. Place bun board in the back sink area for cooling and rinsing.
6. If toaster is equipped with an aluminum plate, repe at Step 5 to clean both sides of
the plate.
7. Dip No-Scratch Pad into cleaner and lightly spread a coasting of cleaner onto top
surface of Platen.
IMPORTANT!
Do NOT pour cleaner onto surface. Apply only with No-Scratch Pad and
Cleaning T ool. Do NOT scrub while applying cleaner.
8. Repeat Step 7 for all Platen surfaces, including undersides.
9. After repeating c leaner , lightly scrub all Platen surf aces (inclu ding undersides) w ith
No-Scratch Pad until all soil liquefies. Apply additional cleaner to cleaning, as
needed.
23
Printed in USA 2/06 © 2006
Page 24

Batch To asters
247/248 Series
10. Remove No-Scratch Pad from cleaning tool. Fold a clean, damp grill cloth
lengthwise and lay it over the end of the cleaning tool. Thoroughly rinse Platens,
including undersides, by wiping with a damp grill cloth. Before wiping Platens,
always rinse grill cloth in clear water and wring it out until no soil is seen.
IMPORTANT!
Thorough rinsing of the Platen is required to ensure proper release agent
performance. Rinse Platens with clean grill cloths until no soil is seen on the
cloth.
WARNING!
SHOCK/DAMA GE HAZARD! Do NOT pour water onto the Platens or use
dripping wet grill cloths.
11. Repeat the rinsing procedure in Step 10 with a fresh, clean, damp grill cloth to
ensure all cleaner and soil are removed from Platens.
12. Wipe remaining parts of the toaster with a clean, damp cloth.
13. Take bun tray platform, bun board and aluminum plate to back sink. Scrub with a
pot brush or No-Scratch Pad in a solution of McD All Pu rpose Concentr at e. Do not
use abrasive pads. Rinse parts under running water and let air dry.
When:
Monthly
Tools:
Adjustable wrench, Flatblade
screwdriver
When:
Monthly
Tools:
Pliers, Hammer, File
Tighten Platen Bolts
1. Turn the power switch to the OFF position and unplug cord.
WARNING!
SHOCK HAZARD! Failure to unplug cord before the tightening process may
cause electrical shock.
2. Allow toaster to cool before proceeding.
3. Using an a djusta b le w rench, tighte n the plat en bo lts th at hol d the handle in u pright
position.
Check Bun Tray Platfor ms, Bun Board, Bun Trays & Spatulas
IMPORTANT!
This check procedure should be conducted while the platforms, trays and
spatulas are cold. It should be done for all spatulas, trays and platforms.
BUN SPATULA
1. Lay the spatula on a flat worktable top.
2. Ensure that the entire surface is flat, including the front edge. The front end of the
bun spatula must be free from nicks and burrs.
3. Using a file, sharpen front edge of spatula so all nicks and burrs are removed.
BUN BOARD
1. Remove the bun board from the toaster.
2. Lay the bun board on a flat worktable top and inspect for flatness.
3. Measure the distance between the tabletop and the bottom side of the bun board
in the front, center and rear. It should be approximately 1/2" (13 mm) for all
toasters, ex ce pt Big Ma c 412 and 416 Series, and approximatel y 3/4 " (19 mm) for
Big Mac Toasters.
4. Bend as necessary to maintain flatness.
Printed in USA 2/06 © 2006 24
247-500revB-EN
 Loading...