

Prince Castle 212-G Installation Manual
OPERATING
INSTRUCTIONS
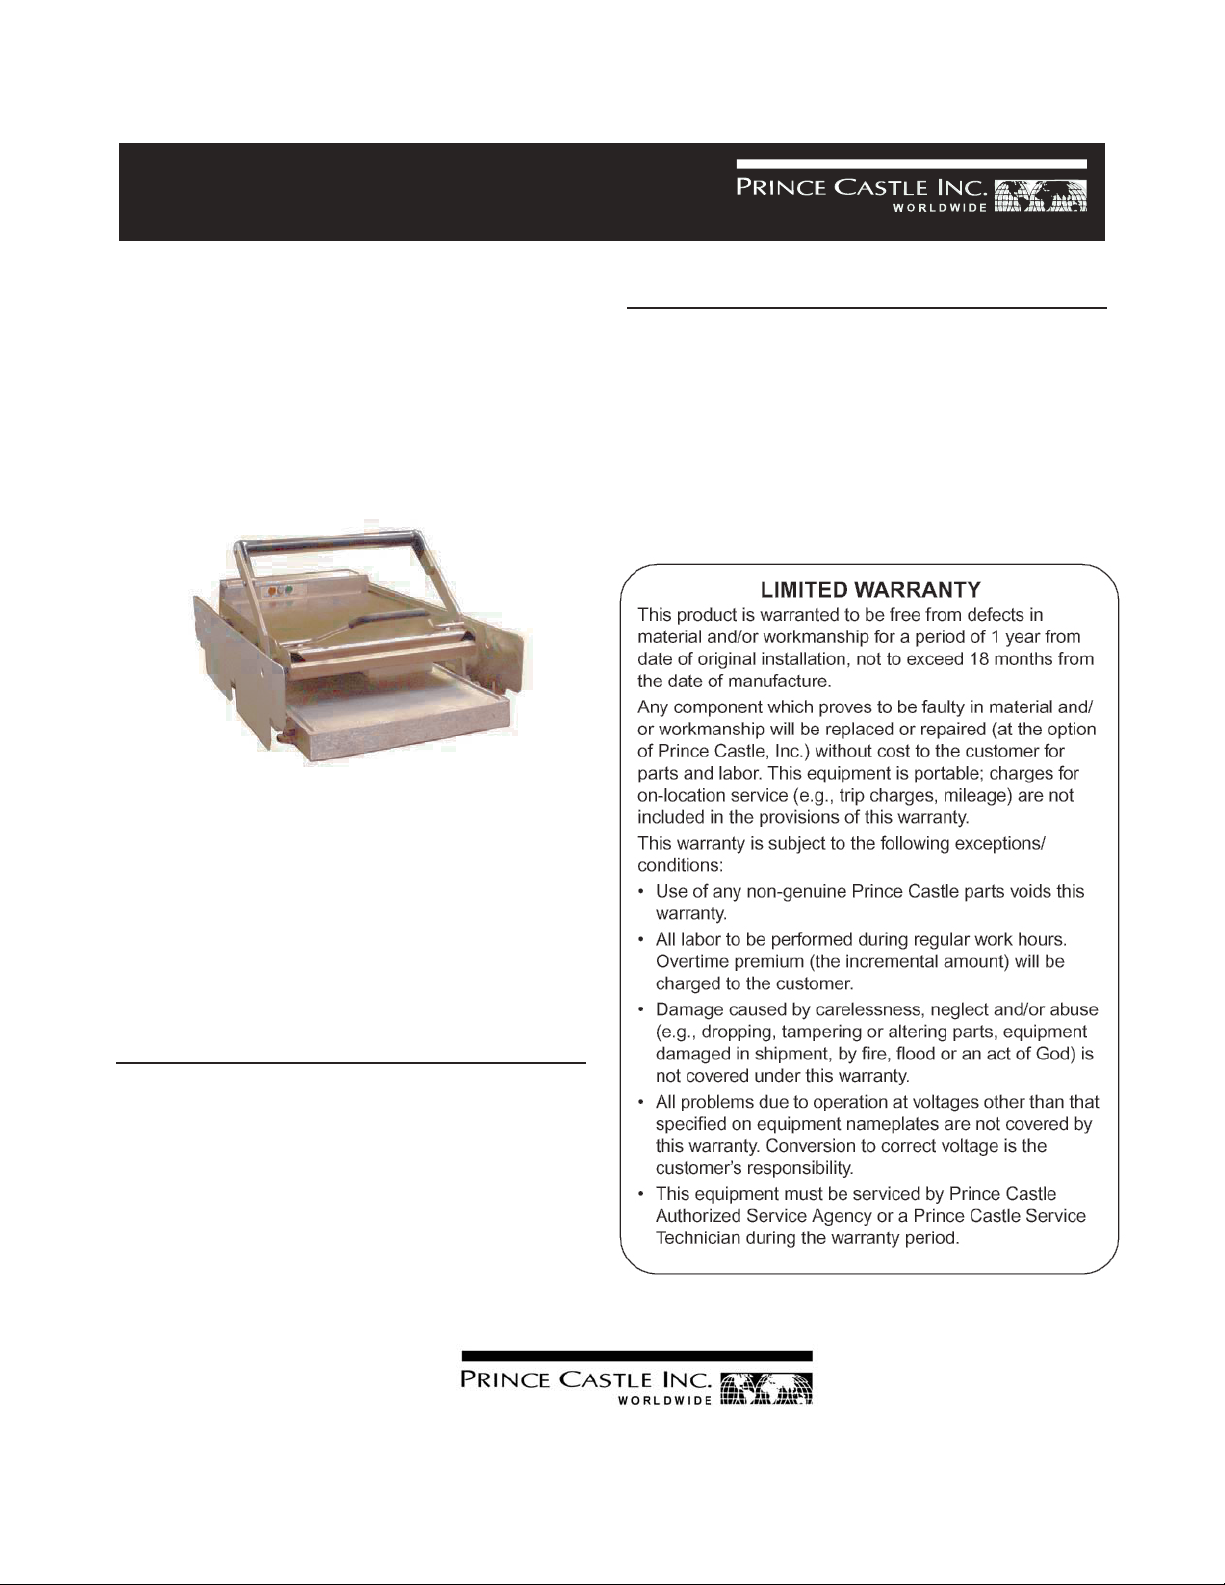
Bun Toaster Grill
Model No. 212-G, 212-GF
212-GFC,
212-GFCE,
212-GFCCE
SPECIFICATIONS
212-G/GC Dimensions
Width 16' (40.6 cm)
Depth 26' (66.0 cm)
Height 11 1/2'' (29.2 cm)
Shipping Weight 70 lbs. (31.7 kg.)
TABLE OF CONTENTS PAGE
Installation...........................................................
Operating............................................................
Cleaning..............................................................
Electrical Repairs................................................
Troubleshooting...................................................
Parts List..............................................................
Exploded View.....................................................
Wiring and Electrical Information........................
10
2
2
3
4
7
8
9
ELECTRICAL
212-G 212-GH 212-GF, 212-GFCE
212-GFC 212-GFCCE
110/120V
60 Hz
*All units are single phase with grounded outlet.
Printed in USA 1/06 ©2006
110/120V
60 Hz
220V
50 Hz
220V
50 Hz
355 E. Kehoe Blvd. • Carol Stream, IL 60188
Tel: (630) 462-8800 • Fax: (630) 462-1460
Toll Free: 1-800-323-2930
212-560revB-EN
INSTALLATION
1. After you have removed the toaster from the carton,
inspect the unit for signs of damage. If there is
damage to the unit:
• Notify carrier within 24 hours after delivery.
• Save carton and packaging materials for
inspection purposes.
• Contact Prince Castle Customer Sales
Department at 1-800-323-2930 to arrange for a
replacement to be sent.
2. Verify that all parts have been received.
3. Insert the power cord into proper receptacle.
IMPORTANT: Improper electrical installation causing
damage to parts of this toaster will void the
warranty. Make sure toaster plug is compatible with
outlet before inserting. Outlet must be wired to
match plug. Refer to wiring diagram on page 10.
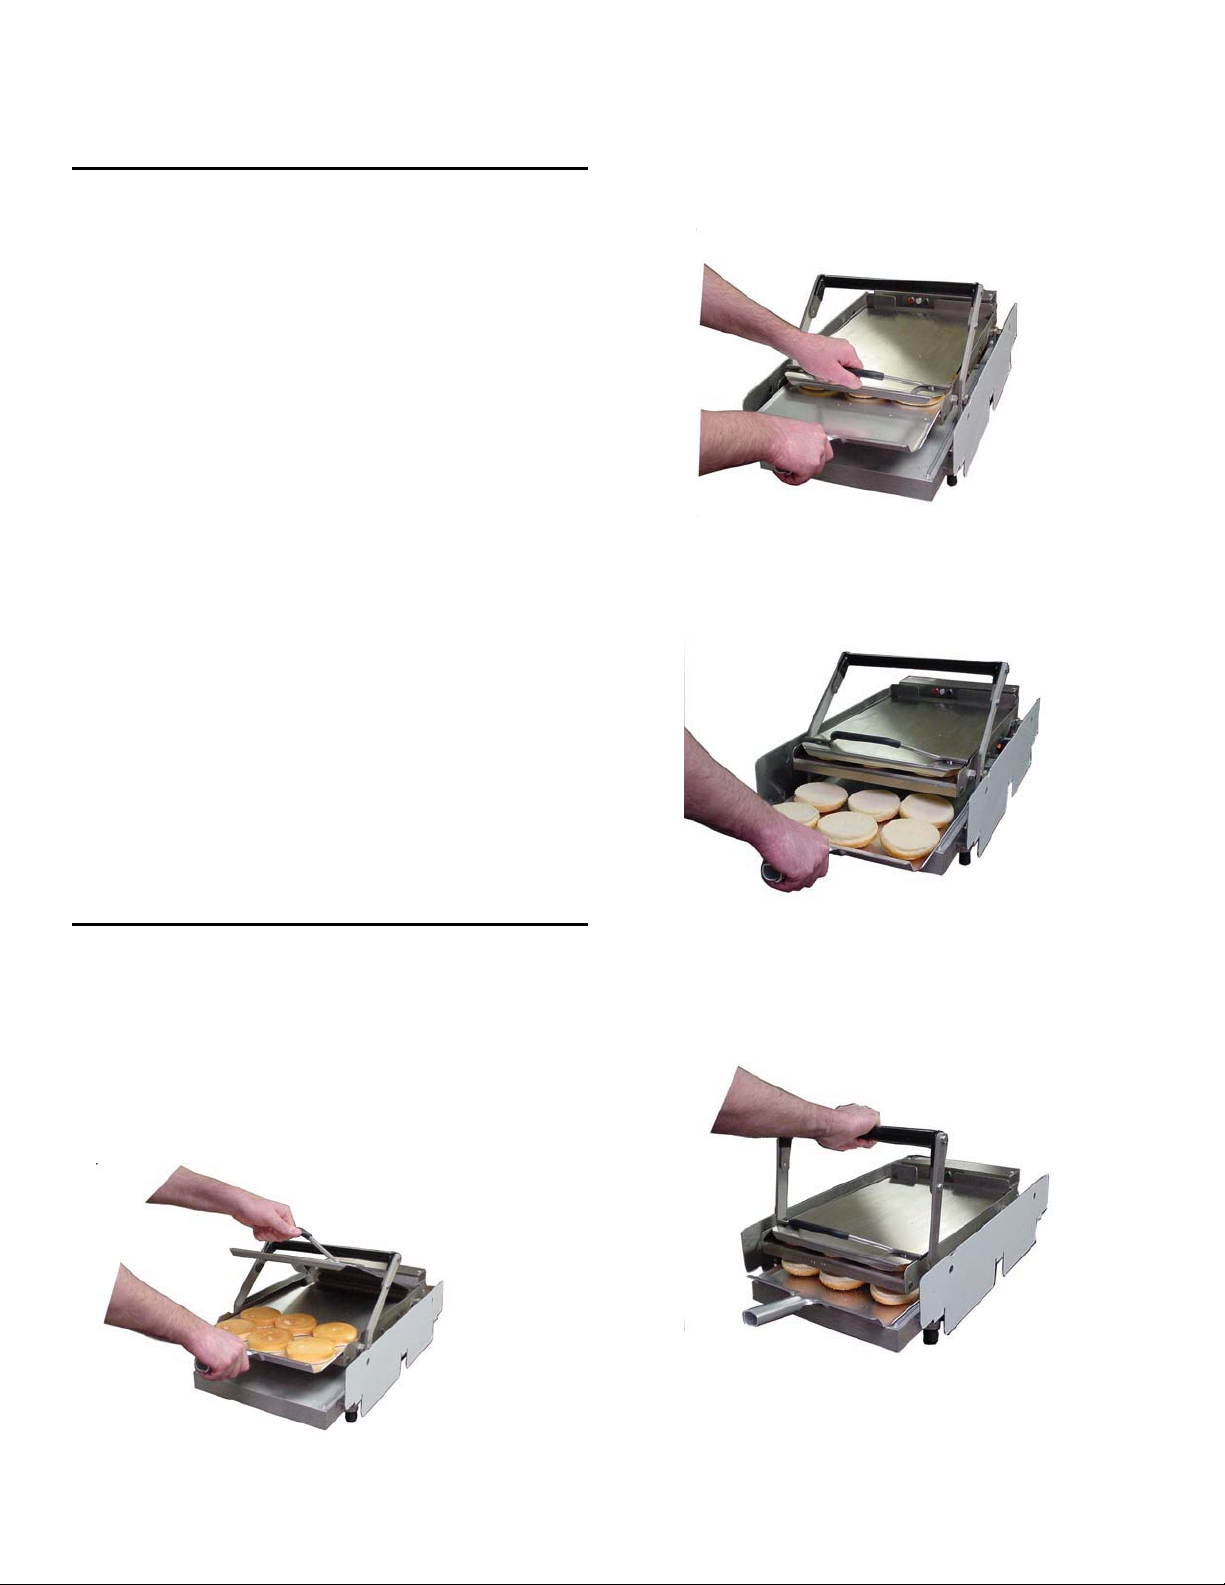
4. Lower bun board on spatula and slide spatula out.
See Figure 2.
figure 2
5. Insert spatula (or bun tray), with crowns, into lower
compartments of the toasters. See Figure 3.
figure 3
4. Flip on/off switch to ON position. The “power on” light
and “thermostat cycle” light will come on. Allow 30
minutes for the heating platen to reach to proper
temperature.
OPERATION
1. Using a bun spatula or optional bun tray, place 12 cut
crowns face up.
2. Place 12 heels on spatula face down.
3. Lift bun board and insert spatula with heels. See
Figure 1.
figure 1
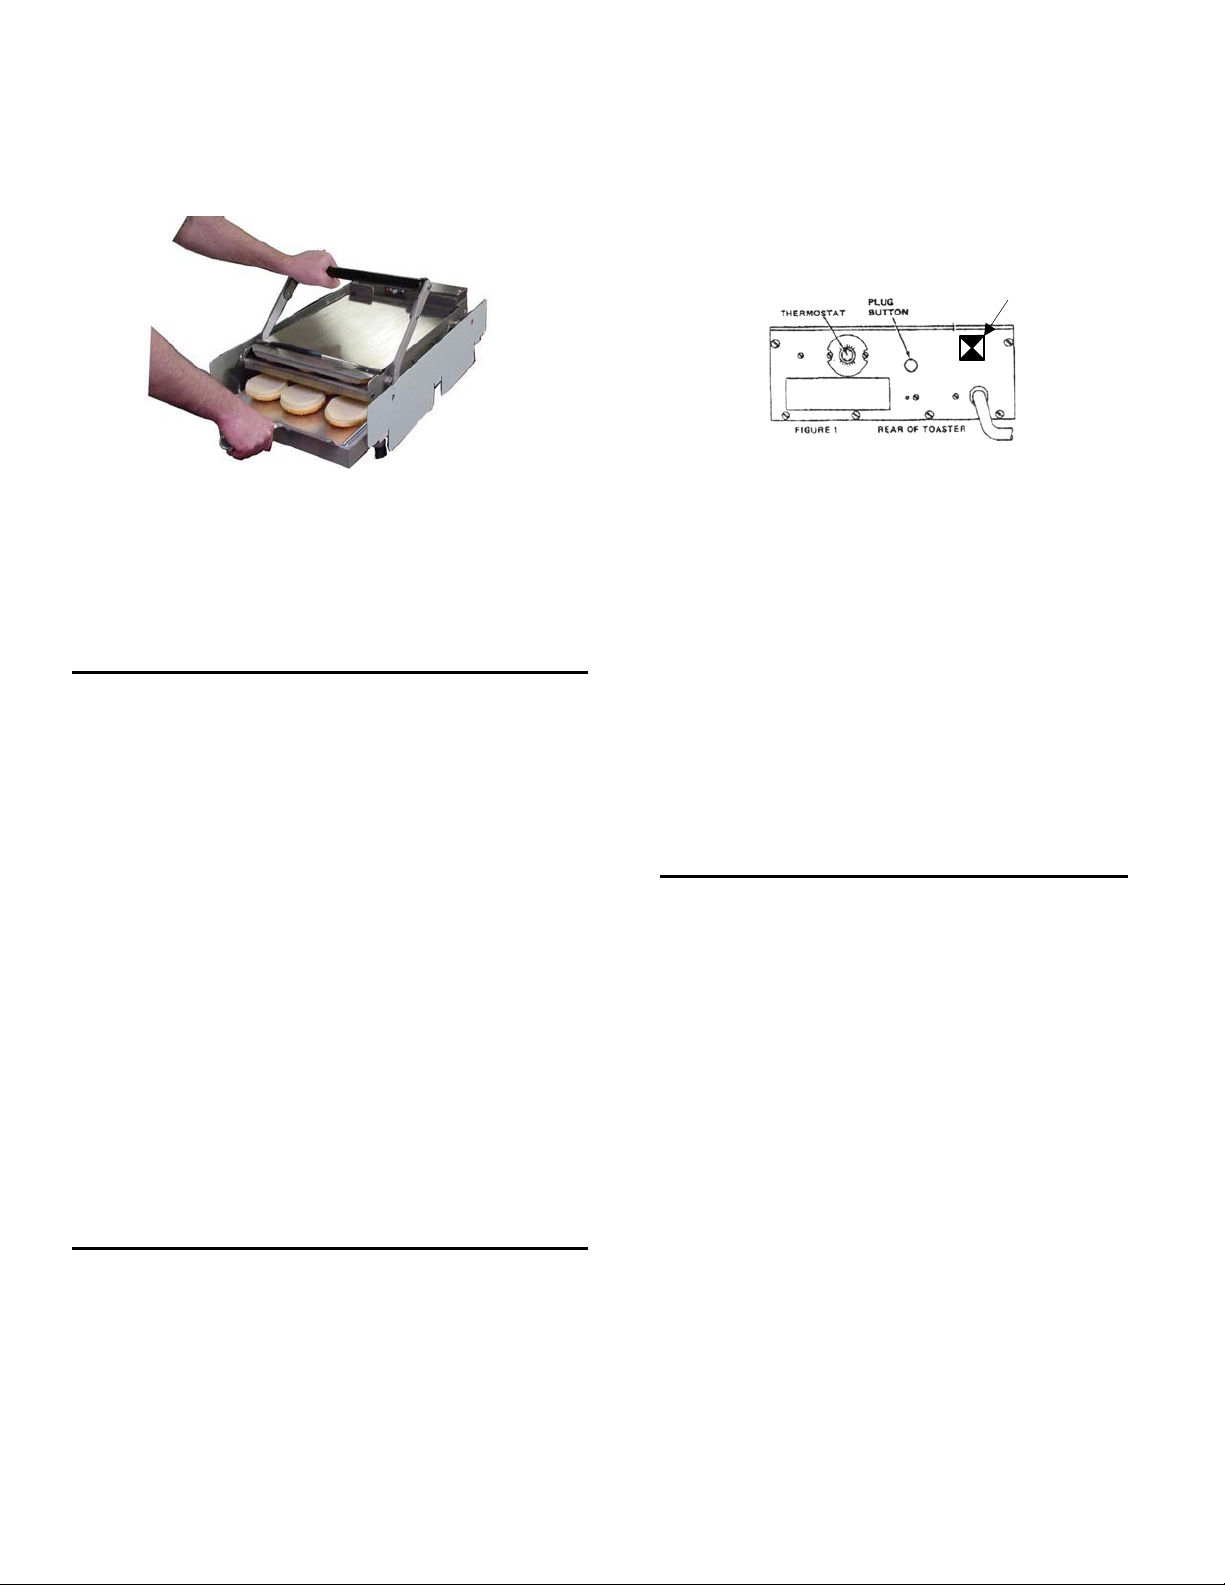
6. Pull handle forward to move heating platen on top
of crowns. Timer is automatically activated.
See Figure 4.
figure 4
2
7. When buzzer sounds and the done light comes on,
immediately push handle back to release crowns from
heating platen. Remove spatula from toaster.
See Figure 5.
figure 5
8. Lift bun board and slide spatula in under the heels
and remove.
CLEANING
1. Unplug toaster and allow it to cool down.
2. Shake a small amount of cleanser on platen.
3. Dampen toaster platen cleaning pad and wipe off
top and bottom of platen.
small adjusting screw will be exposed. Using a small
screwdriver and a stop watch or clock with a
second hand, turn the screw clockwise to increase
the time, or counterclockwise to decrease the time.
After adjusting the screw, check the timing with the
stop watch or the clock with the second hand.
Replace the plug button when finished. See below.
ON/OFF
SWITCH
THERMOSTAT
2. The thermostat is set by the factory at 204°C.If
for any reason temperature has to be changed,
there is an adjustment located on the rear of the
toaster. Turn the knob clockwise to raise the
temperature or counterclockwise to lower the
temperature.
PLATEN HEIGHT
3. To set height of platen, turn either right or left stop
block located on the side of the toaster to desired
number – number 1 being the lowest setting for
thin buns and number 5 being the highest setting
for thick buns.
IMPORTANT: Using a cleaning pad other than the
one provided may be too abrasive and take off the
nickel plating, causing buns to stick. Replacement
pads should be purchased from your local Prince
Castle Service Center. Order part # 167-2.
CAUTION: Do not pour water on the
platen. This may cause an electrical
hazard and damage switches, linkage,
etc., voiding the warranty.
4. Starting from the center, proceed to clean platen by
wiping in a front to back motion with grain of platen.
5. Using a moist cloth, wipe off platen to remove all
cleaning materials.
6. After cleaning, season toaster platen with light coat
of shortening.
ADJUSTMENTS
TIMER
1. The timer is preset at the factory for 55 seconds. If
for any reason the time has to be changed, remove
the plug button from the rear of the toaster. A
GENERAL INSTRUCTIONS
When disconnecting electrical wires, mark them in
some way that will indicate which terminal they
came from. Do not disconnect too many electrical
connections at one time. Refer to the individual
wiring diagrams for particular controls that need
repair.
There are 3 basic methods of affixing wires to their
terminals:
1. Closed eye
2. Spade
3. Knife and blade
IMPORTANT: Do not wrap a bare wire under a terminal head screw.
1. Disconnect electrical supply.
2. Permit the unit to cool completely.
IMPORTANT: Make good use of the parts pictures in
this chapter for further aid in understanding the physical makeup of your toaster and the reassembling of its
3
components.
 Loading...