

Page 1
MANUAL DE USUARIO
Para más información visite nuestra web www.primux.es
ESPAÑOL / ENGLISH
Page 2

1
Page 3

Detalles del producto
1 Botón de encendido 6 Bajar volumen
2 Jack del auricular 7 Tarjeta Micro SD
3 Ranura del Micro USB 8 Reset
4 Jack DC 9 Cámara frontal
5 Subir volumen
2
Page 4

Instrucciones generales de seguridad
Lea este manual atentamente antes de usar el dispositivo por primera vez y conserve el contrato de garantía,
el recibo de compra y la caja de cartón del producto para posibles percances futuros. Las precauciones de
seguridad para reducir el riesgo de incendio, shocks eléctricos y lesiones, están incluidas en este manual en
páginas posteriores.
• Medio ambiente: No usar el producto en lugares extremadamente calientes, fríos, polvorientos o húmedos,
así como en zonas expuestas a campos magnéticos fuertes o largos periodos al Sol.
• Agua: No exponer el producto al agua ni a lugares donde pueda caer al agua (tales como piscinas, bañeras,
estanques etc).
• Manejo: No dejarlo caer o exponerlo a fuertes vibraciones o golpes para evitar dañarlo.
• Volumen: Seleccione el volumen apropiado al usar las funciones de música y video. El volumen no debe de
estar demasiado alto cuando se usen los auriculares. Si hay distorsión, baje el volumen o apague el
reproductor.
• Batería: Notificar que el máximo nivel de duración de la batería será alcanzado después de haber cargado y
agotado la misma entre dos o tres veces.
• Copias de seguridad: Para evitar pérdidas de datos, recomendamos realizar copias de seguridad de
información importante, especialmente antes de actualizar el hardware. Nosotros no nos hacemos cargo de
cualquier daño y/o pérdida de información causado por falta de estas copias.
• Accesorios: Usar el producto únicamente con la batería y el cargador del proveedor. El uso de otros
accesorios no recomendados en este manual pueden causar daños en la unidad y la garantía se cancelaría
instantáneamente.
• Uso: Opere su Tablet de acuerdo con las instrucciones de este manual. No asumiremos responsabilidad por
uso inapropiado.
• Uso: El equipo no está previsto para ser usado por personas con capacidad física o mental reducida o con
carencia de experiencia y conocimientos, a no ser que ellos hayan recibido supervisión o instrucciones de uso
por parte de una persona que esté a cargo del cuidado de ellos.
• Niños: Vigilar a los niños para que estos no jueguen con el artilugio. El manejo llevado a cabo por ellos debe
ser supervisado por una persona adulta.
• Las especificaciones están sujetas a cambios y mejoras sin previo aviso.
• Limpieza: Limpiar la carcasa del dispositivo ligeramente con un paño de algodón seco o húmedo. No utilice
alcohol, disolventes, bencina o cualquier otro limpiador químico.
• Reparación: Este dispositivo es un producto electrónico de alta precisión. No contiene
piezas que el usuario pueda reparar. No intente desmontar, modificar o repararlo usted mismo.
• Daño: En caso de avería, póngase en contacto con la línea de soporte post-venta.
3
Page 5
Instrucciones generales de seguridad (Cont.)
• Eliminación del dispositivo: Cuando se deshaga del dispositivo, observe la normativa local, y se deshaga
de él de la manera apropiada para su reciclaje. Comuníquese con las autoridades locales para que le
aconsejen.
Mantenimiento
• Mantenga el dispositivo seco. No permita que el dispositivo, la batería o el cargador entren en contacto con el
vapor de agua ni operarlo con las manos mojadas. Ponerse en contacto con el agua provocará cortocircuito en el
aparato, que se corroiga y provocar también descargas eléctricas.
• No golpee el equipo, las baterías y el cargador, ya puede causar fallo en el dispositivo o en la batería, fuego o
explosión.
• No exponer el aparato a temperaturas muy bajas o muy altas, ya que puede causar fallo en el dispositivo o en
batería, fuego o explosión.
• No desmonte ni el dispositivo ni los accesorios. Desmontaje por parte de personas no autorizadas anulará la
garantía.
Seguridad
• No utilice el dispositivo mientras conduce, con el fin de no entorpecer las normas de circulación
• En los centros de salud, respete las normas y reglamentos pertinentes. Apague el aparato si se encuentra cerca
de dispositivos médicos.
• Apague el Tablet al abordar un avión con el fin de evitar interferencias con las señales de radio de la aeronave.
• Manténgase alejado de equipos magnéticos. La radiación puede borrar la información almacenada en el
dispositivo.
• Abreviaturas / terminología
Wi-Fi Wireless Fidelity (basado en IEEE 802.11b/g/n)
Tarjeta SD Tarjeta Trans Flash (también llamado Micro SD)
4
Page 6

Índice
1. Presentación ..................................................................................................................................................... 6
2.
Batería
3. Tarjeta SD ......................................................................................................................................................... 7
4. Pantalla de inicio y lista de aplicaciones .......................................................................................................... 8
5. HDMI&Host ...................................................................................................................................................... 9
6. Idioma & Input ................................................................................................................................................. 9
.............................................................................................................................................................. 6
7. Manejo de Aplicaciones
8. Música .............................................................................................................................................................. 11
9. Fotos
10.
11. Wi-Fi ............................................................................................................................................................... 13
12. Buscador ......................................................................................................................................................... 13
13. Gmail
14. Mapas ............................................................................................................................................................. 15
15.
16. Grabadora ....................................................................................................................................................... 17
17.
18. FAQs y Soluciones ........................................................................................................................................... 19
19. Especificaciones ..............................................................................................................................................
................................................................................................................................................................. 12
Vídeo .............................................................................................................................................................. 12
.............................................................................................................................................................. 14
Market
Camara ........................................................................................................................................................... 18
............................................................................................................................................................ 17
.................................................................................................................................... 10
19
5
Page 7
1. Presentación Tablet
Características:
Tecla de encendido Mantenga presionado la tecla de encendido/apagado del aparato.
Tecla subir volumen Presione para incrementar el volumen.
Tecla bajar volumen Presione para reducir el volumen.
Tecla Volver Pulse para volver a la pantalla anterior o para salir de un dialogo o del Menú.
Tecla de Inicio Pulse esta tecla para volver a la pantalla de Inicio desde cualquier lugar.
Tecla Daemon Púlsela para mostrar las aplicaciones que se están ejecutando.
Tecla de bloqueo Deslice el icono de bloqueo para desbloquear la pantalla.
Tecla Lista de aplicaciones Púlsela para entrar en la lista de los programas de las aplicaciones.
2. Batería
Pulse esta tecla para poner la Tablet en modo suspendido. Pulse otra vez para
volver a su funcionamiento habitual.
Podrás cargar tu Tablet a través de tu cargador. Su Tablet tiene una batería interna. Sugerimos la cargue
cuando esté a punto de agotarse.
Recargar a través del cargador
1. Conecte el adaptador de alimentación al puerto de alimentación del adaptador del dispositivo. El
procedimiento de carga se completará una vez que el símbolo de la batería en la pantalla se vuelve verde
2. Durante la carga de la batería, puede operar su Tablet. El proceso de carga será más largo si estamos
operando con él durante al mismo tiempo.
Vista del estado de la batería
1. Pulse Ajustes.
2. Pulse Batería
6
Page 8
3. Tarjeta SD
El Tablet viene con un slot para tarjetas MicroSD donde podrás almacenar archivos multimedia como
videoclips, canciones e imágenes.
Copia de archivos a la tarjeta de memoria
Podrás transferir archivos tales como música e imágenes de tu Tablet a tu ordenador personal. Para
ver los archivos en la Tablet, simplemente abra la apropiada aplicación y dirija el archivo con esta
aplicación
1. Conecte la Tablet a tu ordenador usando el cable USB.
2. En la pantalla de Inicio, presione la tecla Menú.
3. Pulse Notificaciones y, a continuación, pulse en USB conectado.
4. Pulse encender el almacén del USB.
5. En su ordenador, vaya a la carpeta de Disco extraíble.
6. Localice los archivos deseados en el ordenador y cópialos en su Tablet.
7. Copie y pegue los archivos en el lugar deseado en la carpeta del Disco extraíble.
Borrar archivos en la tarjeta de memoria
1. Localice el archivo que quiera eliminar.
2. Pulse de forma mantenida el nombre del archivo.
3. Pulse Eliminar.
Ver el espacio de la memoria disponible
Pulse Ajustes y, a continuación, Almacenamiento para ver el espacio de memoria disponible en la
Tarjeta de memoria y Tablet.
7
Page 9
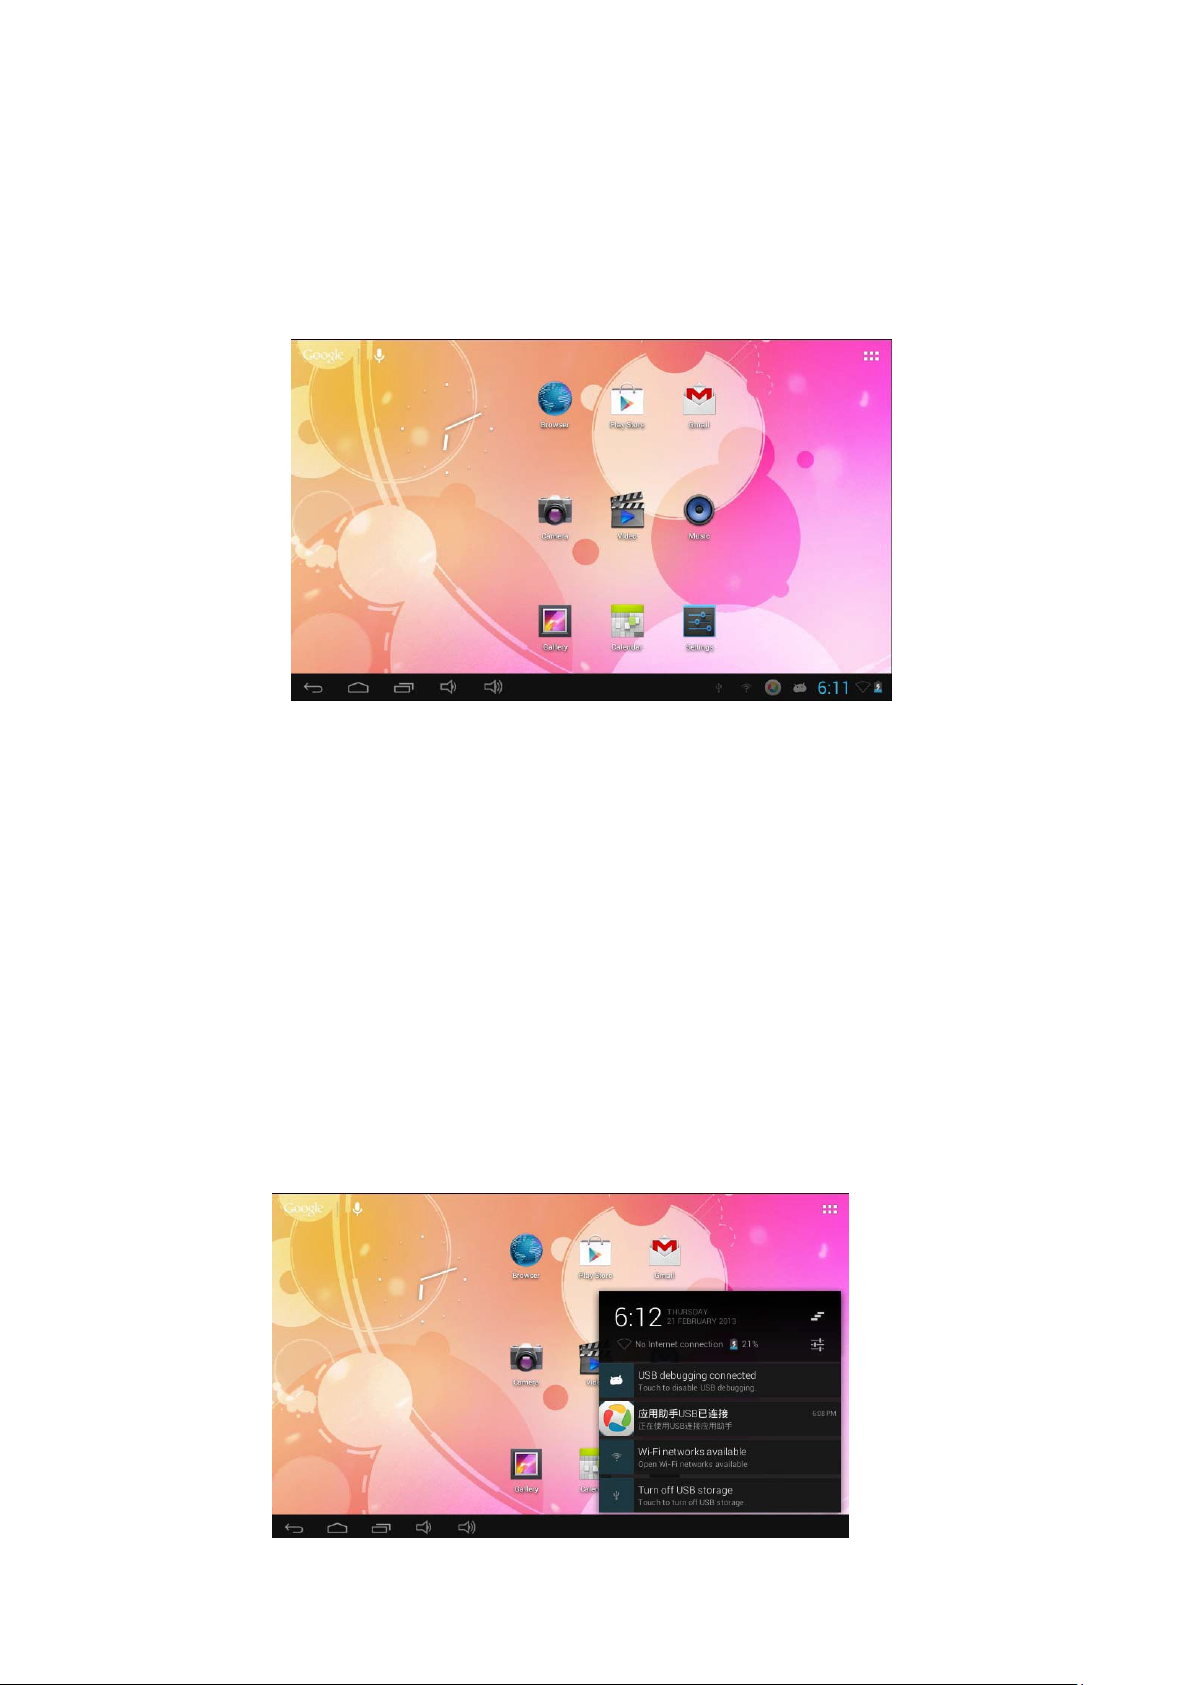
4. Inicio y Lista de aplicaciones
La página de Inicio es el punto de partida para usar todas las aplicaciones de su Tablet. Usted podrá
personalizar la página de Inicio, los accesos directos y widgets. Para abrir la Lista de aplicaciones, pulse en la
página de Inicio.
Notificaciones e iconos de conexión
En la parte inferior de la pantalla se encuentra la barra de estado. En la parte izquierda, aparecerán los iconos
y se le notificará de nuevos mensajes, eventos próximos del calendario, alarmas y más. En el lado derecho de
la barra de estado, verá los iconos de estado de conexión.
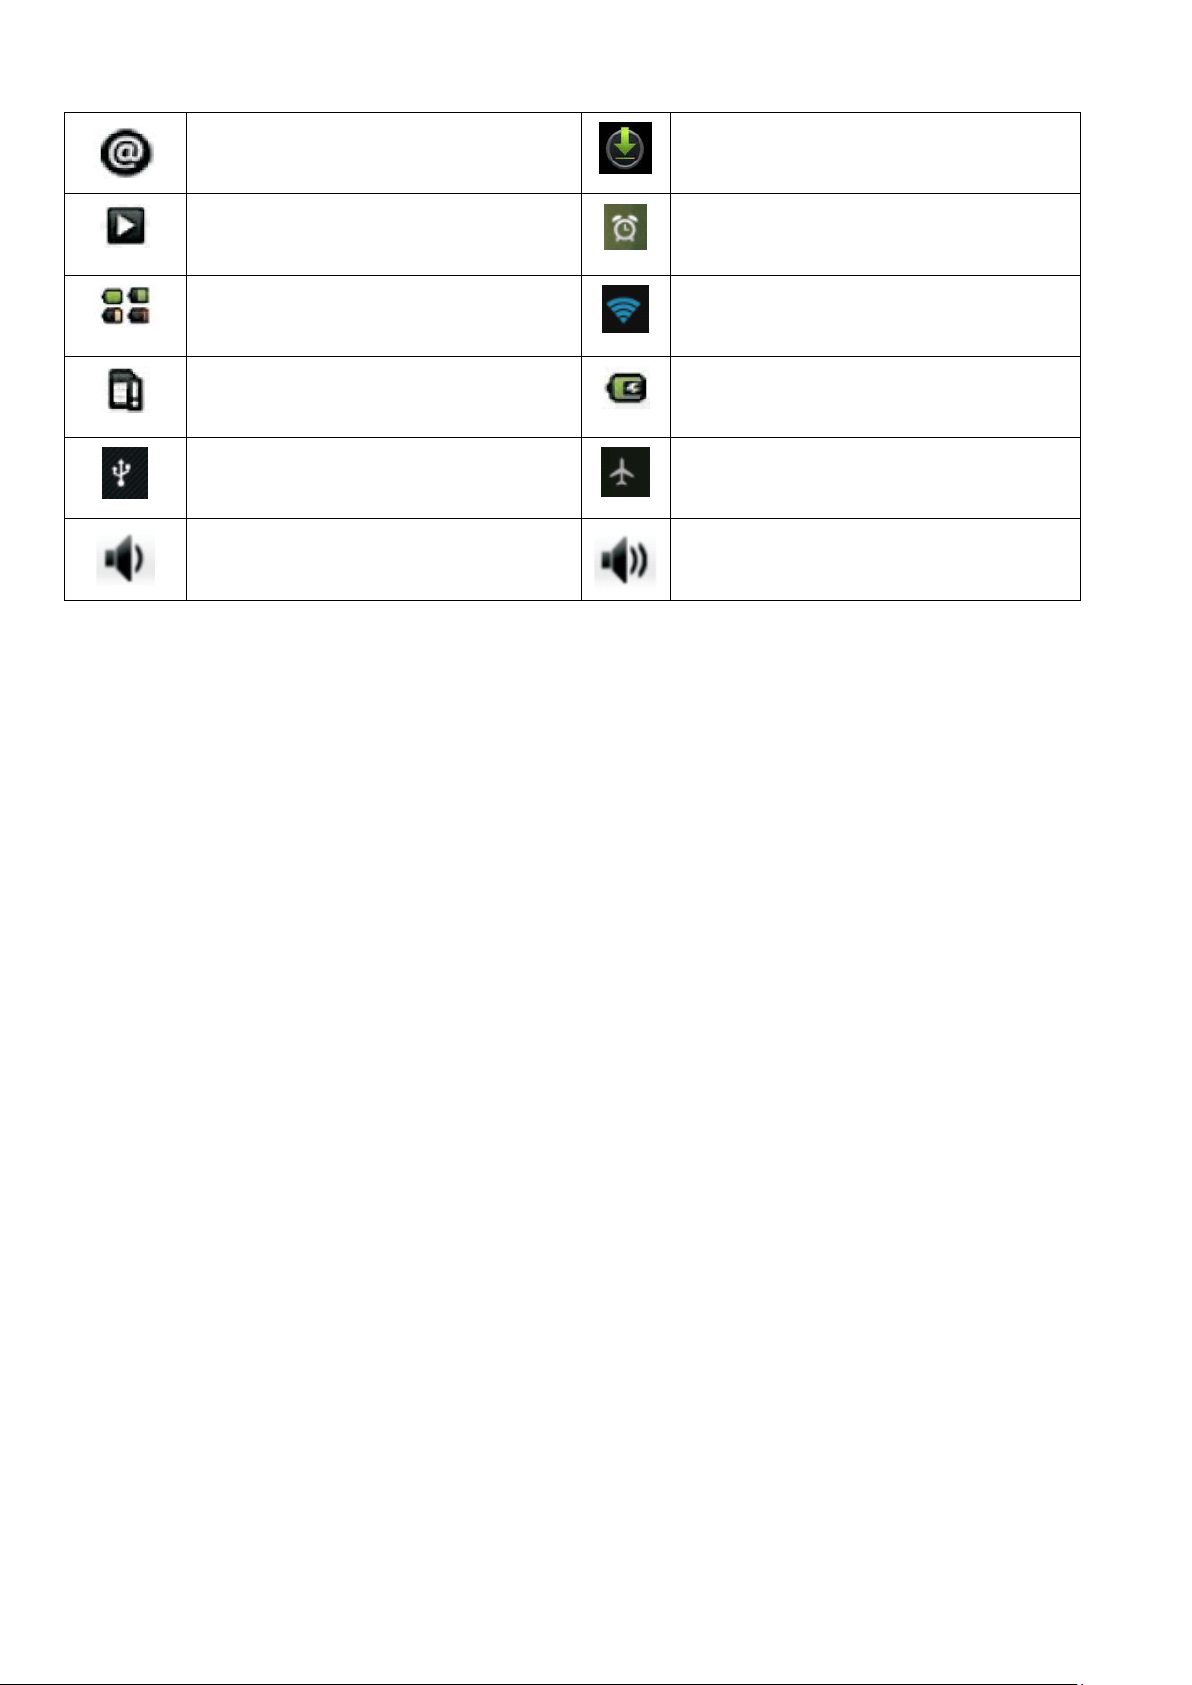
Leer notificaciones
Cuando aparezca una notificación en la barra de estado, toque en la barra y deslice el dedo hacia abajo para
abrir la lista de notificaciones. Para abrir la notificación, puntee en los elementos. Para borrar las
notificaciones, toque Borrar en la parte superior de la ventana de notificación.
Para cerrar la ventana de notificaciones, deslice su dedo sobre la pantalla hacia arriba.
8
Page 10
Iconos
Nuevo correo
Reproducir
Indicador estado batería
No Tarjeta SD
USB
conectado
Reducir volumen
5. HDMI&Host
Descargando
Alarma seleccionada
Wi-Fi conectado
Batería cargando
Modo avión
Aumentar volumen
Uso del HDMI
Conecte su Tablet al monitor usando el cable HDMI directamente.
USB
Host
USB Host incluye USB-ratón, USB-teclado,3G Modem y otros periféricos.
output
6. Idioma y tipos de teclado
Idioma
Usted podrá ajustar el idioma deseado siguiendo los pasos que le mostramos a continuación:
1. Pulse en Ajustes y, a continuación, en Idioma y texto.
2. Pulse Seleccionar idioma.
3. Pulse el idioma que desee.
Tipos de teclado
Usted podrá ajustar el tipo deseado de teclado para su Tablet siguiendo los pasos que le mostramos a
continuación:
1. Pulse en Ajustes y, a continuación, en Idioma y texto.
2. Pulse el tipo de teclado que desee para introducir los datos en su Tablet.
9
Page 11

Tiene la opción de instalar en el aparato otros teclados.
7. Manejo de aplicaciones
Permite instalar otras aplicaciones
1. Pulse Ajustes.
2. Pulse Aplicaciones.
3. Pulse Fuentes desconocidas.
Desinstalar aplicaciones
1. Pulse Ajustes.
2. Pulse Aplicaciones.
3. Pulse Todas.
4. Pulse la aplicación que desee eliminar.
5. Pulse Eliminar/Deshacer.
6. Pulse OK.
10
Page 12
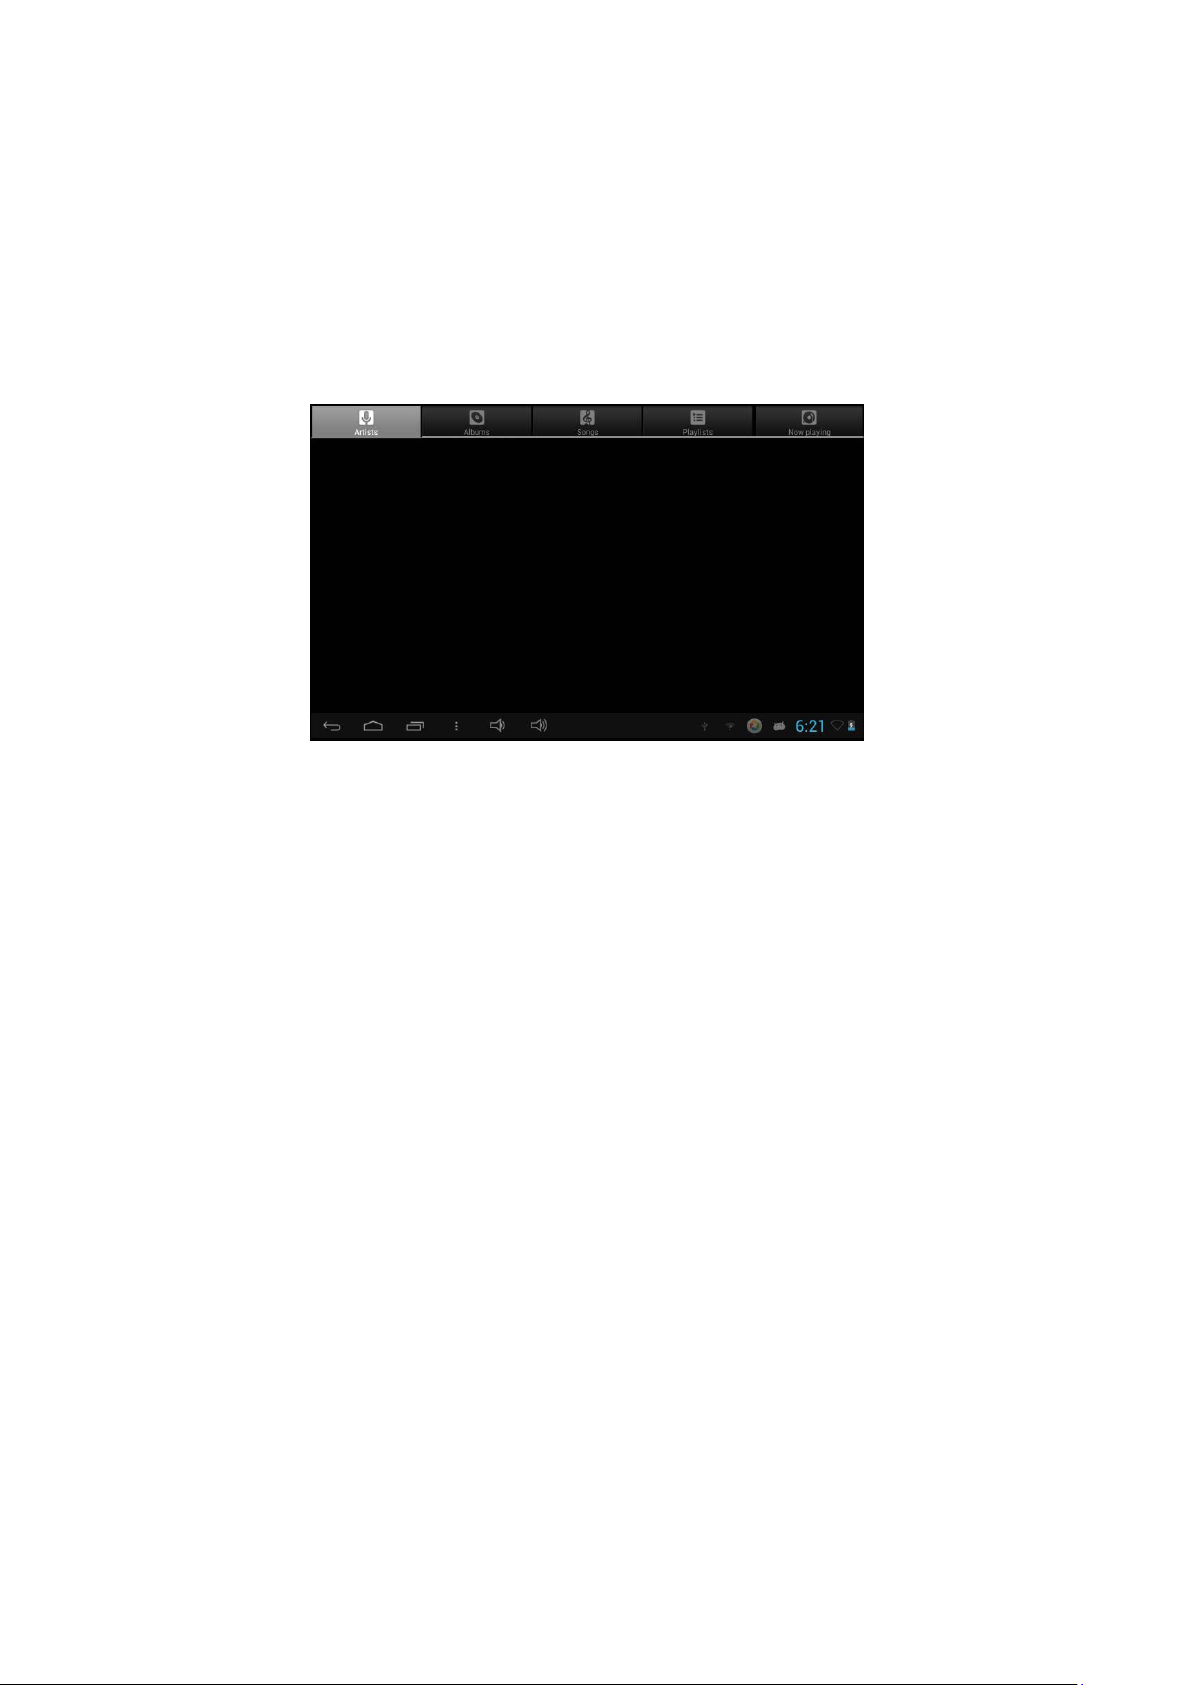
8. Música
La música está organizada en cinco categorías: Artistas, Albums, Canciones, Lista y Reproducción.
Seleccione una categoría para ver el contenido que hay en cada una. Para seleccionar una canción
busque a través de las categorías hasta que encuentre la deseada. Por ejemplo, si selecciona la
categoría de Artistas, verá la lista de los artistas de la A a la Z. Si pulsa en uno de ellos, aparecerán
los albums de dicho artista. Al seleccionar un álbum, aparecerán sus canciones, y desde aquí
podremos seleccionar la canción deseada para ser reproducida. La Tablet podrá ejecutar archivos
de música con los siguientes formatos: MP3, WMA, OGG, WAV y MIDI cambiado a WAV.
Acceder y reproducir música
1. En la página de Inicio pulse el botón de Aplicaciones.
2. Pulse Música y luego Canciones. Podrá pulsar en Artistas, Albums y Lista de reproducción
también.
3. Pulse la canción a reproducir.
Añadir canciones a una nueva lista
1. En la pantalla de inicio, toque el botón de la aplicación.
2. Pulse Música y, a continuación, Canciones.
3. Mantenga presionada la canción que desea agregar a la lista de reproducción.
4. Pulse Añadir a la lista.
5. Pulse Nuevo.
6. Tipo el nombre de la lista de reproducción.
7. Pulse Guardar.
11
Page 13
Borrar Lista de reproducción
1. Pulse el botón de Aplicación en la página de Inicio.
2. Pulse Música y, a continuación, Lista de reproducción.
3. Mantenga pulsado la Lista de reproducción que quiera borrar.
4. Pulse Borrar.
9. Fotos
La Tablet puede visualizar fotos con los siguientes formatos: JPG, BMP, PNG, GIF. Podrá mantener
estos archivos en la tarjeta SD.
Funcionamiento del pase de diapositivas:
1. Copia la foto a la tarjeta SD.
2. En Inicio, pulse el botón de Aplicación.
3. Pulse Galería de Fotos.
4. Pulse la carpeta de fotos y luego, elija la foto.
5. Pulse Presentación de fotos.
10. Video
La Tablet puede visualizar archivos de vídeo con los siguientes formatos: RMVB, RM, AVI, MP4 en la
tarjeta SD
Reproducir un
vídeo:
1. Copia el vídeo a la Tarjeta SD.
2. En Inicio, pulse el botón de Aplicación.
3. Pulse UT
4. Pulse en el vídeo.
Play.
12
Page 14

11. Wi-Fi
Podrá conectarse a redes Wi-Fi.
Para ello, siga estos pasos:
1. Pulse Ajustes y, a continuación, Wireless & Redes.
2. Pulse Wi-Fi para encenderlo. Pulse ajustes de Wi-Fi. El dispositivo analizara las redes Wi-Fi
disponibles.
3. Pulse la red Wi-Fi a la que desee conectarse.
4. Pulse Conectar. Alguna red le pedirá que introduzca una contraseña.
12. Buscador
Vaya a la página de Inicio
El Buscador siempre abrirá la última página web que usted estuvo viendo. La primera vez que
entre después de encenderlo, se ejecutará la página de Inicio.
Cambio de la página de Inicio
1. Pulse Buscador.
2. Presione la tecla de Menú.
3. Presione Más, Ajustes y finalmente configure la página de Inicio.
4. Escriba la dirección deseada y presione OK.
13
Page 15

Visite páginas Web
1. Pulse en el buscador.
2. Presione la tecla de Menú.
3. Pulse la barra de direcciones.
4. Escriba la dirección de la Web a la que quiere entrar y pulse Ir.
13. Gmail
En la aplicación de Gmail, todos los mensajes sobre el mismo tema son tratados como
conversaciones. Para leer los mensajes de una conversación, abra la conversación y desplácese a
través de los mensajes individuales. El mensaje más reciente aparecerá en la parte inferior. Todos los
correos de Gmail que lleguen a su Tablet son enviados a la Bandeja de entrada y esta misma será la
vista predeterminada de la aplicación. El número total de mensajes no leídos aparecerá en la barra
del título y los mensajes no leídos se muestran en negrita. Si etiquetó un mensaje, en su etiqueta
aparecerá un rectángulo de color a la izquierda de la fecha.
Leer mensajes nuevos
1. En la página de Inicio, pulse Gmail para ejecutar la Bandeja de entrada.
2. Pulse Leer mensaje.
Escribir mensajes nuevos
1. Pulse Gmail en la página de Inicio para ejecutar la Bandeja de entrada.
14
Page 16

2. Presione la tecla de Menú.
3. Presione Redactar/Escribir.
4. Escriba el nombre o la dirección de correo deseado en el campo pertinente. Empareje los
contactos que le aparecerán. Seleccione el contacto o escríbalo.
5. Escriba el asunto y el mensaje.
6. Para adjuntar fotos, presione la tecla de Menú y pulse en la foto deseada.
6. Pulse Enviar.
14. Mapas
Encontrar una localización
1. Abra la conexión Wi-Fi.
2. Pulse el botón de la aplicación de Mapas en su página de Inicio.
3. Pulse Mapas.
4. Presione la tecla Menú.
5. Pulse Buscar.
6. Escriba una dirección y pulse Ir.
7. Pulse para ver el resultado en el mapa.
Debe seleccionar en una de las dos siguientes opciones para obtener el lugar de posicionamiento en
el mapa.
15
Page 17

Conseguir una dirección
1. Pulse el botón de Lista de aplicaciones en la página de Inicio.
2. Pulse Mapas.
3. Pulse Direcciones después de haber pulsado la tecla de Menú.
4. En el campo De escriba su dirección de inicio, y en el segundo campo escriba la dirección de
destino. Finalmente, pulse Ir.
Cambiar la modalidad del mapa
Mapas te ofrece la posibilidad de mostrar la zona que quieres observar a través de dos
modos: mapa y satélite. También podrás ver el tráfico y el terreno.
1. En Inicio, pulse Aplicaciones.
2. Pulse Mapas.
3. Pulse la tecla de Menú.
4. Pulse el modo Mapa.
5. Pulse satélite, tráfico o terreno.
15. Google Play
Google Play le proporciona acceso directo a aplicaciones desarrolladas en todo el mundo. Es el lugar
ideal para buscar juegos y aplicaciones de entretenimiento.
Navegador
Cuando entras por primera vez en Google Play, podrás ver las características de los artículos, una
16
Page 18

lista de categorías de artículos, un enlace para buscar, y un enlace a Mis descargas. Desplácese por
los elementos destacados o seleccione una categoría y, a continuación, seleccione una subcategoría.
Dentro de cada una de éstas podrá seleccionar para ver los elementos ordenados por popularidad o
por fecha. Tenga en cuenta que todos los elementos de las subcategoría figuran en cada pestaña, la
de Por popularidad se ordenan de más popular a menos popular, y los de la pestaña Por fecha se
ordenan de más nuevo a más viejo
16. Grabadora
Grabar y reproducir un sonido
1. Pulsar el botón Aplicaciones en la pantalla de Inicio.
2. Pulsar Grabadora de sonidos.
3. Pulsar Grabar y cuando considere oportuno, pulse Stop para parar el proceso de grabación.
4. Pulse Usar esta grabación.
5. En la página de Inicio pulse el botón de Aplicaciones.
6. Pulse Música.
7. Pulse reproducir lista y, después, Mis Grabaciones.
17. Cámara
Grabar y reproducir vídeo:
1. En Inicio, pulsar Aplicaciones.
2. Pulse Cámara.
3. Arrastre el botón al modo Filmar.
4. Pulse Filmar/Grabar. Cuando haya finalizado presione Stop.
17
Page 19

5. En Inicio, pulsar Aplicaciones.
6. Pulse Galería y encuentre el vídeo que ha grabado con anterioridad.
7. Pulse en el vídeo que desee y seleccione el reproductor de vídeo que lo ejecutará.
Sacar una foto
1. En Inicio, vaya a Aplicaciones.
2. Pulse Cámara.
3. Arrastre el botón hasta el modo Foto.
18
Page 20

18. FAQs y Soluciones
Mantenga presionado el botón de Encendido unos 20
Síntoma Solución
No puedo encender el aparato, incluso cuando está
conectado a la fuente de alimentación.
No puedo apagarlo. ●
Falla al leer la tarjeta MicroSD ● Revise si la Tarjeta de memoria está insertada
La pantalla está demasiado oscura. ● Revise si el brillo de la pantalla está configurado en
● Revise si el cargador AC funciona correctamente y
revise si el aparato está conectado de forma segura a
la toma de corriente.
segundos aproximadamente.
correctamente. La ranura debe coincidir con la tarjeta
del dispositivo.
Ajustes.
19. Especificaciones
Procesador y Memoria
OS
Google Android
CPU
Rockchip
RAM
Memoria
LCD
Panel táctil
Wi-Fi
Cámara
Formato música MP3 WMA FLAC AAC OGG WAV
Formato vídeo
7" 800*480
Pantalla multi-touch con 5 puntos de capacidad
4.1
RK2926
512MB
4GB
802.11b/g/n
0.3-megapixel
VP8,RMVB,RM,MOV,MPG,MP4,AVI,3GP,DAI,FLV,MKV
panel
APE
Formato foto
JPEG,BMP,GIF,PNG
19
Page 21

U S E R M A N U A L
ENGLISH
20
Page 22

21
Page 23

Parts List
1 Power button 6 Volume down
2 Headphone Socket 7 Micro SD CARD
3 Micro USB Slot 8 Reset
4 DC input scoket 9 Front Camer
5 Volume up
22
Page 24

General Safety Instructions
Read this manual thoroughly before first use and keep it in a safe place for
completed warranty card, purchase receipt and carton.
risk of fire, electric shock and injury
• Environment: Do not use this product where it is excessively hot, cold, dusty or
exposed to strong magnetic fields or long periods of
• Water: Do not expose this device to water; do not use it where it can fall into
pond, bath
• Handling: Do not drop this product or shake it vigorously to avoid damaging
• Volume: Always select the appropriate volume when using the music or video
not be too loud when using earphones. If the sound distorts,
• Battery: Please note that the battery can only reach top performance level after it
and discharged two or three
• Back-up: To avoid loss of data, we recommend always backing up any
before upgrading the hardware. We assume no liability for
up.
etc.).
times.
when
correctly adhered
The
safety precautions enclosed herein reduce the
sunshine.
any
to.
turn
down the volume or turn off the
damage and/or data loss due to lack of
future
water
it.
important
reference, along with the
humid,
function.
or where it is
(such as near a pool,
The volume should
player.
has
been fully charged
information, especially
back-
• Accessories: Only use the device with the battery and power adaptor supplied. Use
recommended in this manual may cause damage to the unit
• Usage: Only operate the Tablet according to the instructions
faulty use or inappropriate
• Usage: The equipment is not intended for use by persons (including children)
or mental capabilities, or lack of experience and
instruction concerning use of the
• Children: Supervise young children to ensure they do not play with the device.
necessary when the device is used by or near
• Specifications are subject to change and improvement without
• Cleaning: Clean the housing of the device lightly with a dry or moist cotton cloth. Do
thinners, benzene or any other chemical
• Repair: This device is a high precision electronic product. It contains
try to dismantle, modify or repair it
• Damage: In case of damage, contact the after sales support line for
handling.
equipment
cleaner.
yourself.
knowledge,
by a person responsible for their
children.
and
will void your
in
this manual. We assume no responsibility for
unless they have been given supervision or
notice.
no
advice.
warranty.
with
reduced physical, sensory
safety.
Close
user-serviceable parts inside. Do not
of
other accessories not
supervision is
not
use alcohol,
23
Page 25

General Safety Instructions (Cont.)
• Disposal: When discarding this device, observe local regulations and dispose of it appropriately for
recycling. Contact your local authorities for advice on facilities.
Maintenance
• Keep the device dry. Do not let the device, battery or charger come into contact with water vapour or
operate it with wet hands. Contact with water will cause the device to short-circuit, corrode or cause electric
shock.
• Do not shock the equipment, batteries and charger, which may cause device or battery failure, fire or
explosion.
• Do not expose the device to very low or very high temperatures, which may cause device or battery failure,
fire or explosion.
• Do not disassemble the device and accessories. Disassembly by unauthorised persons will void the
warranty.
Safety
•Do not use the device while driving, so as not to impede safe driving regulations.
•In health facilities, observe the relevant rules or regulations. Turn off the Tablet in the vicinity of medical
devices.
•Turn off the Tablet when boarding an airplane in order to avoid interference with aircraft radio signals.
•Stay away from magnetic equipment; Tablet radiation may erase the information stored on the device.
•
Abbreviations/terminology
Wi-Fi Wireless Fidelity (based on IEEE 802.11b/g/n)
SD Card Trans Flash (also called Micro SD) card
24
Page 26

Index
1. Introducing your Tablet
2.
Battery
3. SD card
4. Home screen and Application list
5. HDMI&Host
6. Language & Input
7. Manage
8. Music
9. Photo
10.
11. Wi-Fi
12. Browser
13. Gmail
.............................................................................................................................................................. 26
.............................................................................................................................................................. 27
...................................................................................................................................................... 29
Apps .................................................................................................................................................... 30
................................................................................................................................................................ 31
................................................................................................................................................................ 32
Video .............................................................................................................................................................. 32
............................................................................................................................................................... 33
.......................................................................................................................................................... 33
.............................................................................................................................................................. 34
.................................................................................................................................... 26
..................................................................................................................... 28
............................................................................................................................................. 29
14. Maps
15.
16. Recorder (sound recording and playback) ..................................................................................................... 37
17.
18. Troubleshooting .............................................................................................................................................
19. Specifications .................................................................................................................................................. 39
............................................................................................................................................................... 35
Google Play
Camera ........................................................................................................................................................... 38
..................................................................................................................................................... 37
39
25
Page 27

1. Introducing your Tablet
Features:
Power key Press and hold to power on/off the Tablet.
Volume up
Volume down
Back virtual key Touch to go back to the previous screen or to dismiss a dialog box or menu.
Home virtual key Touch to return to the Home screen from anywhere.
Daemon virtual key Touch to show the applications run in
Unlock virtual
App list virtual
2. Battery
You can charge your Tablet via charger. Tablet has an internal charging battery.
the battery when the battery power is
Short press to put the Tablet into sleep mode. Press power key will awaken
your Tablet.
key
Press to increase the
key
Press to reduce the
key
Slide the locked icon to the unlocked icon to unlock the
key
Touch to enter the application program interface
low.
volume.
volume.
background.
screen.
list.
We
suggest to charge up
Charge via the
1. Plug in the Power adapter to Power adaptor port of device, Charging procedure
the battery symbol on the screen turns
2. During battery charging, you can operate with your
operating and charging at same
Battery Status
1. Touch
2. Touch
charger
view
settings.
Battery.
green
Tablet.
time.
The charging time will be longer when
will
be completed once
26
Page 28

3. SD card
Your device comes with a removable MicroSD memory card where you can
such as video clips, music tracks, sound files, and
Copy files to the memory
You can transfer files such as music and pictures between your Tablet and
files on your Tablet, just launch the appropriate application
application.
1. Connect your Tablet to your computer using the USB
2. On the home screen, press the Menu
3. Touch Notifications, touch USB
4. Touch Turn on USB
5. On your computer, go to the Removable Disk
6. Locate the files on the computer that you want to copy to your Tablet.
7. Copy and paste files to the desired location in the Removable Disk
card
storage.
key.
connected.
images.
folder.
cable.
and
navigate to the file within that
folder.
store
multimedia files,
your
computer .To view
Delete files on the memory
1. Locate the file that you want to
2. Touch and hold the file
3. Touch
View available memory
Touch settings, Touch storage to view available memory space for your
Delete.
card
name.
space
delete.
memory
card and Tablet.
27
Page 29

4. Home screen and Application list
The Home screen is your starting point for using all the applications on your Tablet
Home screen to display applications, shortcuts, and widgets. To
screen.
open
the application list, tap on the Home
.You
can customize your
Notification and connection
Along the bottom of your screen is the status bar. On the left side, icons will
messages, upcoming calendar events, alarms, and more. On the
connection status
Read
notifications
When you see a notification in the status bar, tap the bar and
list of notifications. To open the notification,
notification
icons.
window.
icons
right
side of the status bar, you will see the
slide
your finger down the screen to open the
tap
the item. To clear notifications, Touch Clear at the top of the
appear,
notify you of new
To close the notification window, slide your finger up the
28
screen.
Page 30

Icons Of Status
Bar
New e-mail
Song is
Battery change
No SD
USB
connected
Volume
5. HDMI&Host
message
playing
Card
reduction
indicator
Downloading
Alarm is
Wi-Fi service
Battery is
Wireless services are
Volume is
set
connected
charging
increase
off
Using the HDMI
Connect your Tablet to your display using the HDMI cable
USB
Host
USB Host supports USB-mouse, USB-keyboard,3G Modem and other
output
directly.
6. Language & Input
Language
You can setting language for Tablet to
1. Touch settings, touch language &
2. Touch Select
3. Touch the language that you want
language.
setting
keyboard.
to.
peripherals
Input
You can setting keyboard for Tablet
1. Touch settings, touch language &
2. Touch the keyboard that you want to
setting
keyboard.
use.
29
Page 31

You can install other keyboard for Tablet
7. Manage Apps
Allow install of non-Market
1. Touch
2. Touch
3. Touch unknown
Uninstall
1. Touch
2. Touch
3. Touch
4. Touch the application that you want to
5.Touch
6.Touch
settings
applications
Application
settings.
Apps.
ALL.
Disable.
OK.
sources
application
30
Page 32

8. Music
Your music is organized into five categories: Artists, Albums, Songs, Playlists and
a category to view the lists within each. Once in a category,
you want to play. For example, if you select
order, the list opens to display
displays. Your Tablet
change to
WAV.
will
that
artist's albums. Select an album, and the album's song list
play the following music file formats: Mp3, WMA, OGG, WAV and MIDI
the
Artists category, you will see a list of artists in A-Z
keep
selecting until you reach the music
Now
playing. Select
Access and play
1. On the home screen touch the Application
2. Touch Music, Touch Songs. You can also touch Artists, Albums, Playlists
3. Touch the song to
Add songs to new play
1. On the home screen, touch the Application
2. Touch Music. Touch
3. Touch and hold the song that you want to add to the play
4. Touch Add to
5. Touch
6. Type the name for the play
New.
music
playlist.
play.
list
Songs.
button.
button.
list.
list.
or Now Playing
7. Touch
Save.
31
Page 33

Delete play
lists
1. On the home screen, touch the Application
2. Touch Music, touch
3. Touch and hold the play list you want to
4. Touch
Delete
Playlist.
button.
delete.
9. Photo
Your Tablet can play the photo file formats as follows: JPG、BMP、PNG、GIF. You can
files in SD card.
Slideshow the
1. Copy the photo to SD
2. On the home screen touch the Application
3. Touch Photo
4. Touch the folder of photos. Touch the
photos:
Gallery.
card.
button.
photo.
keep
these
5. Touch
Slideshow.
10. Video
Your Tablet can play the video file formats as follows: RMVB, RM, AVI, MP4 on
Play a
1. Copy the video to SD
video:
card
SD card.
2. On the home screen touch the Application
3. Touch UT
4. Touch the
Play.
video.
button.
32
Page 34

11. Wi-Fi
Your Tablet can connect to Wi-Fi networks. To
1. Touch settings, touch wireless &
2. Touch Wi-Fi to turn it on. Touch Wi-Fi settings. Your Tablet scans for available
3. Touch the Wi-Fi network that you want to connect
4. Touch Connect. Some network may need you input the
networks.
connect
to.
password.
Wi-Fi networks.
12. Browser
Go to your home
The Browser always opens to the last Web page you were viewing. First time
Browser after powering on, your home page will
Change your home
1. Touch
2. Press the Menu
3. Touch more, touch settings, touch Set home
4. Type the site address and touch
Browser.
page
page
key.
display.
page.
OK
you
enter the
Visit Web
pages
33
Page 35

1. Touch
Browser.
2. Press the Menu
3. Touch address
4. Type the Web address, touch
key.
bar.
Go.
13. Gmail
With Gmail, all your messages on the same subject are threaded together
read the messages in a conversation, open the conversation and
messages. The most recent message appears at the
Tablet is delivered to your Inbox and the Inbox is
unread messages displays in the title bar
labeled a message, its
label
appears in a colored rectangle to the left of the
and
individual unread messages display in bold. If you have
bottom. All
your
default Gmail view. The total number of
scroll
through the individual
the Gmail that you fetch to your
into
conversations. To
date.
Read new
1. On the home screen, touch Gmail to display your
2. Touch a message to
messages
read.
inbox.
Write new
messages
34
Page 36

1. On the Home screen, touch Gmail to display your
Inbox.
2. Press the Menu
3. Touch
4. Type a name or e-mail address in the To field. Matching contacts will appear.
continue
5. Type the subject and
6. To attach pictures, press the Menu key and touch the picture to
7. Touch
Compose.
typing.
Send.
key.
message.
attach.
14. Maps
Find a
1. Open WI-FI
2. Touch the home screen, touch the application
3. Touch
location
Maps.
connection
button.
Select
the contact or
4. Press the menu
5. Touch
6. Type an address, touch Go
7. Touch to see the result on a
You should select on the following two to achieve the location positioning in the
Search.
Key.
map.
Map
35
Page 37

Get
direction
1. On the home screen, touch the application list
2. Touch
3. Press the menu key, touch
Maps
Directions.
4. At From field, type your starting address, at To Field, type your
Change map
mode
button.
destination
Maps give you both map and satellite of the area you are viewing. To
address. Touch
view
satellite, traffic or te
Go.
rrain.
1. On the home screen, touch the application
2. Touch
3. Press the Menu
4. Touch Map
5. Touch satellite, traffic, or
Maps.
key.
mode.
Terrain.
button.
36
Page 38

15. Google Play
Google Play provides you with direct access to software developers throughout the world.
place to go find fun games and cool
Browse
When you first enter Market, you will see featured items, a list of item categories, a
and a link to My downloads. Scroll through the featured items or select a category to browser its
contents, then select a subcategory. Within each
popularity or By date. Note that all items in s subcategory are listed in each tab, those in the By
popularity tab are sorted
newest
contents
oldest.
most
applications.
subcategory
popular to least popular, and those in the By date tab are sorted
you can select to view items sorted By
link
to search,
It
is the
16. Recorder
A sound recording and
1. On the Home screen, touch the Application
2. Touch Sound
Recorder.
playback:
button.
3. Touch Record and Touch Stop when the sound recording is
4. Touch Use this
5. On the Home screen, touch the Application
6. Touch
7. Touch Playlists, touch My
Music.
recording.
recordings.
button.
completed.
37
Page 39

17. Camera
Shooting and playback a
1. On the Home screen, touch the Application
2. Touch
3. Drag the button to the shooting
4. Touch Shooting. When finish recording press
5. On the Home screen, touch the Application
6. Touch Gallery and found this video just
7. Touch the video and Select a video player to
Photo
1. On the Home screen, touch the Application
2. Touch
3. Drag the button to the photo
Camera.
shoot
Camera.
video:
mode.
mode.
taken.
button.
Stop.
button.
play.
button.
38
Page 40

18. Troubleshooting
Symptoms Solutions
Cannot power on, even when the device
connected to an electrical
Cannot turn
Fail to read TF memory
Screen is to off or too
off
● Long press POWER button for about 20
outlet.
card
dark
●Check whether the screen brightness is
● Check whether memory card is
19. Specifications:
is
● Check whether the AC power
correct, and it is securely
to an electrical
The notch should match the
not force the
outlet.
memory
card
plugged
in.
adapter
label
rating is
to the device and
inserted
on the device. Do
set
properly.
Processor&Memory
OS
Google Androld
CPU
Rockchip
RAM
Memory
LCD
Touch
Wi-Fi
Camera
Music
Video
Photo
7" 800*480
Panel
5 Point Capacitance multi-touch
format
format
format
MP3 WMA FLAC AAC OGG WAV
512MB
4GB
802.11b/g/n
0.3-megapixel
VP8,RMVB,RM,MOV,MPG,MP4,AVI,3GP,DAI,FLV,MKV
JPEG,BMP,GIF,PNG
RK2926
panel
4.1
screen
APE
39
Page 41

40
Page 42

41
 Loading...