

Page 1
MANUAL DE USUARIO
Español / English
www.primux.es
Page 2

Page 3

Indice
Características del producto.................................................P2
A simple vista .......................................................................P3
Comenzar a usar el producto................................................P4
Bloqueo de Pantalla..............................................................P5
Aplicaciones preinstaladas....................................................P6
Conectar a una red inalámbrica......................................P7-P8
Conexiones opcionales..........................................................P9
Especificaciones...................................................................P10
1
Page 4

Características del producto
Utiliza el navegador. Visita tus páginas web
favoritas.
Revisa tu correo electrónico. Mantén el contacto
con tus amigos y familiares.
Visualiza vídeos de YouTube. Comparte tus vídeos
y navega a través de la comunidad más popular del
mundo.
Lee tus libros favoritos. Descarga miles de libros.
Descubre miles de juegos Android, aplicaciones,
y mucho más con Google Play, que viene
preinstalado por defecto en el dispositivo.
Conéctate a internet a través de una red de alta
velocidad Wi-Fi 802.11 b/g/n.
Salida HDMI para conectar a la televisión.
Disfruta de internet a través de una gran pantalla.
Disfruta de tu biblioteca virtual en cualquier parte.
2
Reproduce cualquier formato de música, vídeo, y
foto a través de un lector de tarjeta microSD.
Incrementa tu capacidad de almacenamiento (hasta
32 GB)
El dispositivo lleva incorporada dos cámaras.
Detecta automáticamente tu posición. Lee en el
sentido que prefieras (horizontal o vertical). La
pantalla se ajusta automáticamente.
Para leer los libros electrónicos en formato ePub,
es necesario tener descargada la aplicación
E-reader.
Para conectar el dispositivo a la televisión, es
necesario un cable HDMI (Tipo A a Tipo C). Para la
reproducción de vídeos en 1080p HD se necesita
un formato de vídeo codificado en 1080p. La
calidad de retransmisión de vídeos se verá
afectada por la fuente de la que proceda, y la
calidad y condiciones de tu conexión.
Page 5
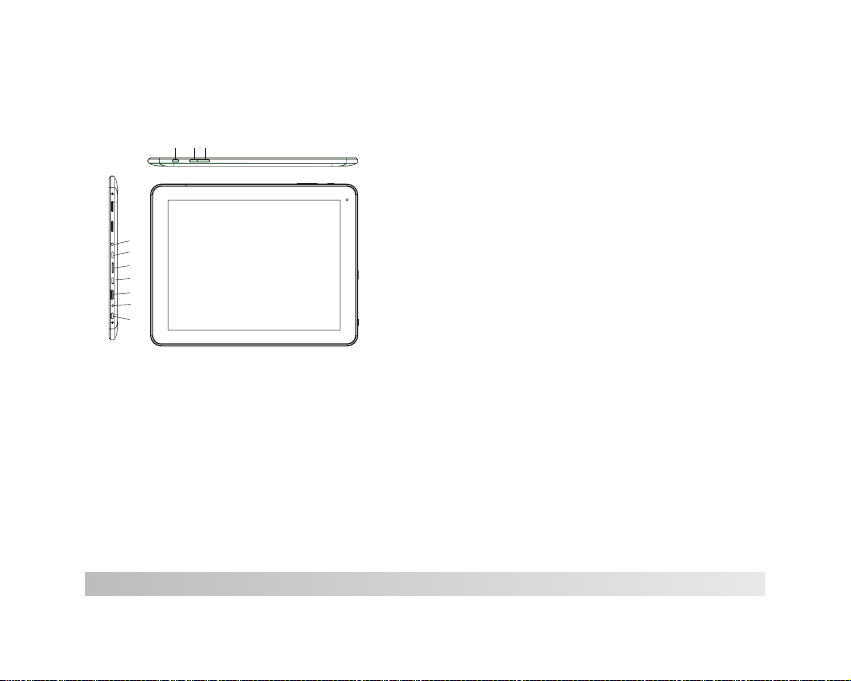
A Simple Vista
1
2
3
4
5
6
7
8
9
10
1. ESC
Botón para volver a la pantalla anterior
(función escape).
2/3. VOL+/VOL Presiona ligeramente VOL+ para función escape.
Presiona durante 2 segundos VOL+ para subir
el volumen de la tablet.
Presiona VOL- para bajar el volumen de la
tablet.
4. Auriculares
Salida de conexión de audio para auriculares.
5.Dispositivo USB
Conéctate un dispositivo USB o a un portátil para transferir
datos (música, vídeo, fotos, archivos…)
6. Micro SD
Lee tarjetas externas microSD
7. Puerto USB
Conecta un dispositivo USB
8. HDMI
Conecta tu dispositivo a una televisión u otras pantallas
9. DC en 9V
Recarga la batería de la tablet con el adaptador de corriente
10. Botón de encendido
Presiona para encender el dispositivo, ponerlo en modo
reposo o apagar. Presiona durante más tiempo para bloquear
el acceso al dispositivo.
3
Page 6
Comenzar a usar el producto
Para encender:
Presiona y mantén pulsado el botón de encendido
hasta que la pantalla LCD se encienda. Espera
hasta que aparezca la pantalla de inicio; a partir
de entonces la Tablet ya está lista para usar.
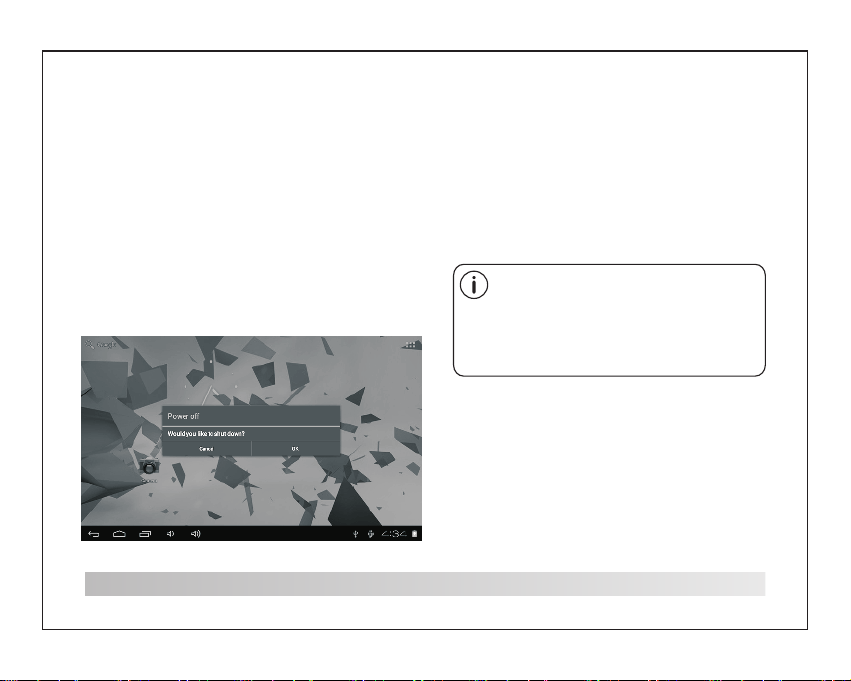
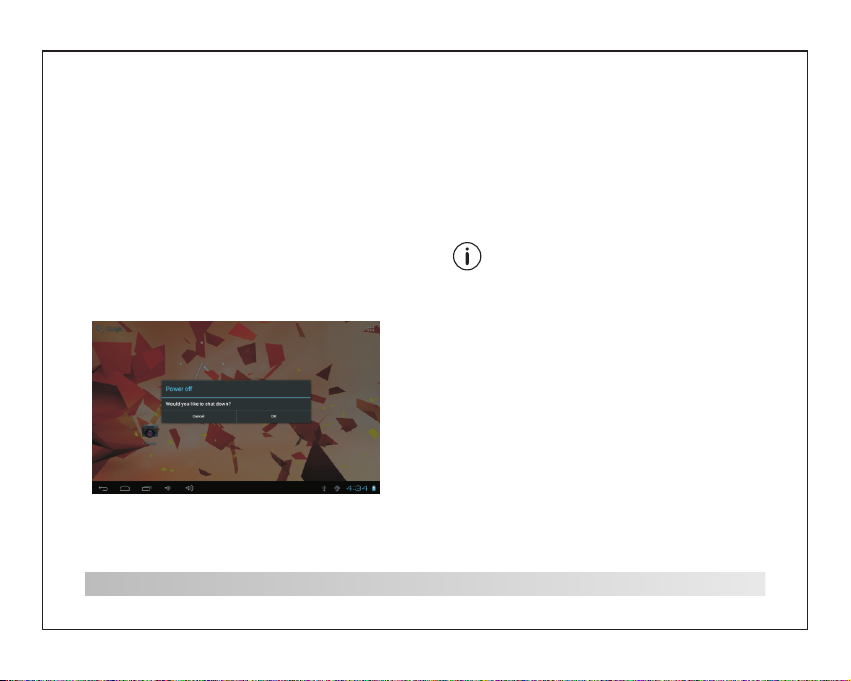
Para apagar el dispositivo:
Presiona y mantén pulsado el botón de encendido
hasta que aparezcan las opciones del menú del
dispositivo. Presiona ok en la pantalla para apagar
el dispositivo.
4
Standby:
Cuando el dispositivo está encendido, puedes apagar
la pantalla y así mantener el nivel de batería sin cambios.
Simplemente, presiona el botón de encendido una vez
para apagar la pantalla. Para volver a encenderla,
pulsa el botón de encendido de nuevo.
Para conservar la batería, se puede
configurar el apagado de pantalla
automáticamente cuando no se está
usando (entre 1 minuto y 30 minutos).
Esta opción la puedes encontrar en el
menú de la pantalla.
Page 7
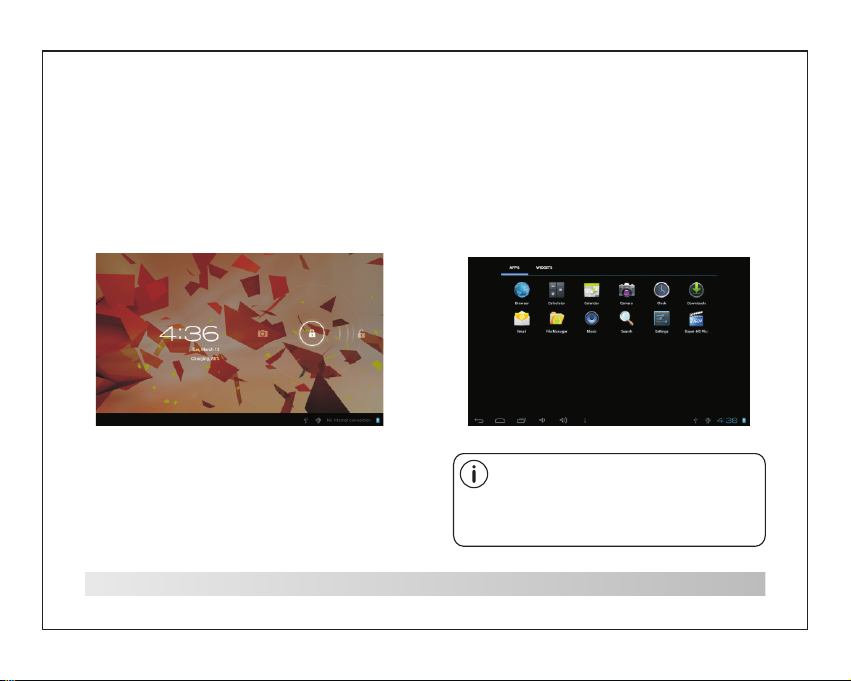
Desbloqueando la pantalla
Desbloqueando la pantalla
Cuando apagas la pantalla, tendrás que
desbloquearla para volver a usar el dispositivo,
para hacerlo, arrastra el icono de bloqueo a lo
largo de la pantalla hasta el candado.
Para abrir una aplicación, pulsa el icono de la aplicación
en el menú o en la pantalla de inicio.
Pantalla de inicio:
La pantalla que se muestra a continuación
sirve simplemente como ilustración. El
usuario puede modificar e incrementar la
lista final de aplicaciones disponibles
en la tablet.
5
Page 8

Aplicaciones
Aplicaciones preinstaladas
Algunas aplicaciones se han instalado por defecto
en tu tablet. Incluyen:
Navegador web
Calculadora
Cámara y vídeos.
Correo electrónico.
Reproductor de música
Ajustes. Personalización de los parametros
de la tablet.
6
Instalar aplicaciones
También puedes descargar e instalar aplicaciones
desde el Google Play (Android Market), el navegador
web u otras fuentes.
Debe configurarse el permiso de instalación de
aplicaciones que provengan de fuentes distintas
a Google Play (Android Market).
Esta opción se puede configurar a través de los
ajustes en el menú de aplicaciones.
Page 9

Conectarse a una red Wi-Fi
La barra de notificaciones de la pantalla lleva
incluida un icono que indica en estado de su
conexión Wi-Fi
Notificación de que se encuentra una red
Wi-Fi abierta
Conectado a una red Wi-Fi (las ondas indican
la potencia de la conexión).
[no aparece el icono] No hay redes Wi-Fi en el área,
o el Wi-Fi del dispositivo está desactivado.
1) Enciende la conexión Wi-Fi si no está encendida
todavía. Para hacerlo, ve a la pantalla principal
y presiona el botón de Inicio.
2) Abre el menú de ajustes y selecciona el icono de
Wi-Fi. Arrástralo a la pantalla de inicio, pulsa el
icono de ajustes.
3) Abre el menú de Conexiones inalámbricas y redes.
Desliza el icono hacia ON para encenderlo
Cuando la red Wi-Fi esá activada, se desplegará un
menú de redes inalámbricas disponibles a través del
icono Wi-Fi.
Si se detecta una red a la que te has
conectado con anterioridad, el dispositivo
se conectará automáticamente a ella.
Si no visualizas tu red en la lista, puedes
forzar al dispositivo a realizar una nueva
búsqueda. Para hacerlo, entra en el menú
y pulsa explorar.
7
Page 10

Conectarse a una red Wi-Fi
Seleccionar una red inalámbrica disponible
para conectarse.
En los ajustes de Wi-Fi que aparecen, pulsa la red
Wi-Fi a la que desees conectarte.
Si la red inalámbrica está abierta, el dispositivo te
confirmará con rapidez la conexión. Pulsa conectar
para confirmar.
Si la red inalámbrica está bloqueada (como se indica
a través del icono de bloqueo), la tablet indicará que
es necesario introducir una contraseña u otras
credenciales. Introduce la contraseña de la red
inalámbrica y presiona conectar para confirmar.
8
Cuando te hayas conectado a una red Wi-Fi, la barra
de notificaciones te indicará el nivel de señal de la red.
Page 11

Otras conexiones opcionales
Conectarse a un PC para transferir archivos.
1.Conecta tu tablet al ordenador con el cable USB
Introduce el extremo pequeño del cable en la
salida USB 2.0 de la Tablet y el extremo más
grande en puerto USB 2.0 del ordenador.
2. Cuando el dispositivo esté conectado, desliza
el icono USB y después pulsa el icono de USB
conectado.
3. Montaje del Almacenamiento
Presiona el botón de USB para Almacenamiento
para compartir la información del dispositivo.
Cuando esté preparado, puedrás copiar archivos
desde tu tablet al PC o a desde el PC a tu tablet.
Conectar el dispositivo a la TV.
1. Coloca el extermo pequeño del cable HDMI en
el conector de la Tablet y el grande en el
puerto HDMI de la televisión.
2. Enciende la televisión y configura el modo de
puerto HDMI al que está conectada la Tablet.
Si necesitas ayuda para configurar el
modo de pantalla de la televisión, por
favor consulta la guía de uso del televisor.
Si no se escucha el sonido, puede que
necesites configurar las opciones HDMI
de sonido de la televisión.
9
Page 12

Especificaciones
Pro ces ador
RAM
Almacenamiento
Pantalla
Capac tiva Multi-táctil
WIFI
Boxchip A10 (Cortex A8 + Mali400)
1G DD R3
8 GB (memoria interna)
ranura tarjetas microSD
(ma x.3 2GB )
9.7 ” TFT LCD (1024x768 ),
IEE E 802 .11 b/ g/n
El diseño, las especificaciones, y el manual de usuario
están sujetas a cambios sin previo aviso
Por favor visita la página web www.primux.es
para más información sobre el producto y
actualizaciones del mismo.
Vid eo
Adicional
Sistema
Pow er
Min i HDMI,type C(1080p y
720 p
entrada para auriculares mm5.3 oiduA
deeps hgih 0.2 BSU ecafretnI CP
Micrófono frontal
Cámara Frontal (0,3Mpx)
Cámara Trasera (2Mpx)
Altavoces 2x1w
And roi d™ 4.0
Batería recargable Li-poly
Adaptador (DC 9V,2A)
*Nota: La duración de la batería podrá variar dependiendo el tipo
de archivo que se reproduzca, el brillo de la pantalla,
volumen, colores, etc..
www.primux.es
Page 13

ENGLISH
USER'S MANUAL
Page 14

Unit at a Glance
12
3
4
TF CARD USB HOS T
5
6
HDMI
7
DC IN 9V
8
9
1. VOL- /VOL+
Press t o decre ase the v olume l evel.
Press t o incre ase the v olume l evel.
2. HOME
back to h ome int erfac e.
3. Head phone
Audio o utput c onnec tion fo r headp hones
2
4.USB OTG
Connect to a USB device or a computer to transfer
data (e.g. music, videos,photos, files).
5. TF card slot
Load external microSD memory cards here.
6.USB HOST
Connect to a USB device
7. HDMI
Connect to a TV or other displays.
8. DC IN 9V
Charge and power the tablet with the
included power Adapter.
9. POWER
Press to turn the unit on,
or to turn the screen on and off.
Press and hold to access the Power Off menu
Page 15
Getting Started
Turning the Tabl et on or off
To turn the t ablet o n:
Press a nd hold t he Powe r key unt il the LC D
scree n turns o n. Wa it unti l the H om e scr ee n
appea rs; the t ablet i s now rea dy for us e.
To turn the t ablet o ff:
1.Pres s and hol d the Pow er key un til the
Devic e Optio ns menu a ppear s.
2. Touc h ok t he sc re en to t urn off t he ta bl et.
Turning the Screen On or
off (Standby)
When th e table t is on, yo u can tur n off t he
scree n to cons erve ba ttery p ower. Si mply
press t he Powe r key onc e to turn t he scre en
off . Pr ess t he Powe r key aga in to tur n the
scree n back on .
To cons er ve ba tt ery p ower, th e scree n
can be se t to turn o ff au tomat icall y when th e
table t is not in u se (bet ween 15 s econd
and 30 mi nutes ).
This Sc reen ti meout o ption c an be fou nd in the
Displ ay menu .
3
Page 16

Getting Started
Unlocking the Screen
When th e scree n turns o ff, y ou will h ave to
unloc k the scr een,w hen you t urn it ba ck on.
To unlock t he scre en, dra g the loc k icon
acros s the scr een tow ards th e unloc k icon.
4
About Applications
To open an ap plica tion, t ouch th e appli catio n
icon on t he home s creen o r in the La unche r
where y ou can ta p the ico n right u p on the
home sc reen to g et in..
Launc her scr een:
The s cr een s ho wn ab ove is fo r illus trati ve
purpo ses onl y. Res erves t he righ t to modi fy
and imp rove th e final l ist of ap plica tions
avail able on t he tabl et.
Page 17

About Applications
Preinstalle d Applic ations
Preinstalled Applications
Installing Applications
Some ap plica tions h ave bee n insta lled on
your ta blet fo r your co nveni ence.
These a pplic ation s inclu de:
Brows e the web .
Perfo rm simp le math emati cal
opera tions .
Take pict ures or v ideos w ith the
front facin g camer a.
Check y our e-m ail.
Play mu sic
Acces s the Set tings m enu to ad just th e
table t’s o ption s.
You ca n also do wnloa d an inst all add ition al
appli catio ns from t he devi ce’s appli catio ns
marke tplac e, the we b brows er, or oth er
sourc es.
5
Page 18

Connect to a Wi-Fi network
The Not ifica tion ba r displ ays ico ns that
indic ate you r table t’s W i-Fi st atus.
Notif icati on that a n open
Wi-Fi n etwor k is in ran ge.
Conne cted to a W i-Fi ne twork
(wave s indic ate con necti on stre ngth) .
[no i con]
The re a re no W i-Fi ne twork s in rang e,
or the Wi -Fi rad io is off.
1. Turn on t he Wi-F i radio i f it is not a lread y on.
To turn on Wi -Fi:
a.Go to t he Home s creen : Press t he Home k ey.
b.Ope n the Set tings m enu: ta p the ico n right
up on the h ome scr een to ge t into th e launc her,
then to uch Set tings i con.
c.Ope n the Wir eless & n etwor ks menu : Slide
the ico n to ON sta tus.
6
When Wi -Fi is on , the tab let wil l look fo r and
displ ay a list o f avail able Wi -Fi net works .
If a netw ork tha t you hav e conne cted to
previ ously i s found , the tab let wil l conne ct to it.
If you do n’t see y our net work in t he list , you
can for ce the ta blet to r e-sca n. To sca n for
netwo rks, ta p the Men u key, and then t ouch
Scan.
Page 19

2. Sele ct an ava ilabl e Wi-Fi n etwor k to
conne ct to: In t he same W i-Fi se tting s menu
above ,touc h a netwo rk in the l ist.
If the ne twork i s open, the tab let wil l promp t
you to co nfirm c onnec tion to t he netw ork.
Touch Con nect to c onfir m.
If the ne twork i s secur ed (as in dicat ed by a
Lock ic on),t he tabl et will p rompt y ou to ent er a
passw ord or ot her cre denti als.Tou ch the
Wirel ess pas sword b ox to sho w the on- scree n
keybo ard and t hen use i t to ente r the pas sword .
Touch Con nect to c onfir m.
When yo u have su ccess fully c onnec ted to a
Wi-Fi n etwor k, the No tific ation s bar at th e the
low of th e scree n will sh ow a Wi-F i signa l
indic ator.
To lear n ab out h ow t o add a W i-Fi ne twork
when it i s not in ra nge or wh en the ro uter is s et
to obsc ure the n etwor k name (S SID); o r to
confi gure ad vance d Wi-Fi o ption s, plea se
refer t o the man ual.
Optional Connections
Connecting to a Computer
Conne ct the ta blet to a c omput er to tra nsfer
files .
1.Con nect yo ur tabl et to the c omput er.
With th e inclu ded USB c able: P lug the s mall
end of th e cable i nto the U SB 2.0 hi gh spee d
conne ctor of t he tabl et. Plu g the lar ge end of
the cab le into a n avail able US B 2.0 hig h speed
port on t he comp uter.
2.Whe n your ta blet is c onnec ted, sl ide up th e
USB ico n right d own on th e scree n and the n
touch i con USB c onnec ted.
7
Page 20

3.Mou nt the st orage .
Touch but ton Turn o n USB sto rage to m ount
the tab let’s b uil t-in st orage . When it i s
mount ed, you c an copy f iles to o r from yo ur
table t.
8
To connec t the tab let to th e TV:
1. Plug t he smal l end of th e HDMI ca ble int o
the min i HDMI co nnect or on the t ablet .
2. Plug t he larg e end of th e HDMI ca ble int o
the HDM I port on t he TV.
3. Turn on t he TV, and se t its dis play mo de to
the HDM I port th at the ta blet is c onnec ted to.
If you ne ed help s ettin g the dis play mo de
of the TV, pl ease re fer to th e docum entat ion
provi ded by th e TV ma nufac turer. I f there i s no
sound f rom the t ablet o n your TV, yo u may
need to s et the HD MI swit ch soun d setti ngs.
Page 21

S peci
Capact ive t ouch sc reen
cations
Pro ces sor
RAM
mic roS
Storag e
(ma x.3 2GB s upport ed)
Display
Wi- Fi Net working IEE E 802.11 b /g/ n
Boxchip A10 (Cortex A8 + Mali400)
1G DDR3
8 GB (opti on) f las h bui lt- in;
D car d slo t
9.7 ” TFT LCD (1024x768),
Please, visit www.primux.es website for more information
Vid eo Ou tpu t
720 p support ed)
Front f aci ng ca mer a(0.3 MP) ,
Add itional
rea r camer a(2 MP)
F
eat ures
2x1 W spe ake r
Ope rat ing
Sys tem
pow er
Pow er
Adapte r(D C 9V,2 A)
Min i HDMI,type C(1080p a nd
enohpdaeh mm5.3 tuptuO oiduA
deeps hgih 0.2 BSU ecafretnI CP
Bui lt-in microphone
And roi d™ 4.0
Rechargeabl e Li-po ly ba tte ry
9
Page 22

Page 23

 Loading...