


ii
© 1994–2001 MicroVision Development, Inc. All Rights Reserved.
No part of this publication may be reproduced, transmitted, transcribed, stored in a
retrieval system, or translated into any language in any form by any means without the
written permission of MicroVision Development, Inc.
MicroVision Development, Inc.
P.O. Box 130023
Carlsbad, CA 92009
The Sentry Spelling-Checker Engine © 1993 Wintertree Software, Inc.
MicroVision™ and the SureThing logo are trademarks, and SureThing® is a registered
trademark of MicroVision Development, Inc. Other brands or products are trademarks or
registered trademarks of their respective holders and should be treated as such.
Restrictions
You are encouraged to make a reasonable number of backup copies of the Software for your
own use. You are not allowed to make unlimited copies. The Software is protected by the
copyright laws and international treatises that pertain to computer software. It is illegal to
make copies of the Software except for backup purposes. It is illegal to give copies to
another person, or to duplicate the Software by any other means, including electronic
transmission. The Software contains trade secrets, and in order to protect them you may
not decompil e, reverse engineer, disassemble, or otherwise reduce the Software to humanperceivable form. You may not modify, adapt, translate, rent, lease, or create derivative
works based upon the Software or any part thereof.
Warranty
MicroVision warrants that the original disks are free from defects in material and work-
manship, assuming normal use, for a period of ninety (90) days from the date of purchase.
If a defect occurs during this period, you may return your faulty disk to MicroVision, along
with a dated proof of purchase, for a free replacement.
EXCEPT FOR THE EXPRESS WARRANTY OF THE ORIGINAL DISKS SET FORTH ABOVE, MICROVISION GRANTS NO
WARRANTIES, EXPRESS OR IMPLIED, BY STATUTE OR OTHERWISE, REGARDING THE DISKS AND
OTHER
MATERIALS, THEIR FITNESS FOR ANY PURPOSE, THEIR QUALITY, THEIR MERCHANTABILITY, OR
RELATED
OTHERWISE
TO
FOR
. THE LIABILITY OF MICROVISION UNDER THE WARRANTY SET FORTH ABOVE SHALL BE LIMITED
THE AMOUNT PAID BY THE CUSTOMER FOR THE PRODUCT. IN NO EVENT SHALL MICROVISION BE LIABLE
ANY SPECIAL, CONSEQUENTIAL, OR OTHER DAMAGES FOR BREACH OF WARRANTY.

Credits
Engineering Robert B ushner
Jim Mayall
John H. Gaby
Patrick Wright
User’s Guide Sean Cavanaugh
Jim Mayall
Online Help Jim Law
SmartDesig ns Garvey
Jim Mayall
Sean Cavanaugh
Testing & Support Ben Dougl as
Pete Calkins
Tony Tran
Nyeland Newel
David Rast
Sean Kelley
iii
Editing & Misc Robin Ralston
Paul Cary

iv
Con t e n ts
Introducing SureThing CD Labeler 6
About this manual 6
System requirements 6
Installing SureThing CD Labeler 7
Registration 7
Getting Help 7
Technical Support 7
The SureThing Environment 9
Label Blocks 12
Turning blocks on and off 12
Selecting Tools 14
Using Object Tools 14
Setting Program Options 14
Entering User Information 15
Internet Ta b 15
Appearance Ta b 15
Zooming In and Out 15
Working with the Software 17
Starting SureThing 17
Creating a New Label 17
SmartDesign Basics 19
Working with Text 20
Editing T ext Frames 20
Adding a New Text Frame 22
Changing the Size and Position of a Text Frame 22
Inserting Merge Fields in Text Frames 23
Formatting Text in a Text Frame 24
Editing T ext Effects 24
Selecting different types of Text Effects 25
Adding a New Text Effect 26

Working with the Software (continued)
Working with Logos and Clipart 27
Editing a Logo 27
Adding Clipart to Your Label 28
Working with Backgrounds 29
Using Y our Own Backgrounds 30
Using a Background Color 30
Acquiring Images 31
Changing the Label Stock 31
Duplicating a Label Design 31
Saving Y our Label 33
Saving a design with a new filename 33
Calibrating Y our Printer 34
Printing 34
Working with Label Templates 35
Creating Customized Layouts using the Template Creation Wizard 35
Saving Existing Designs as Templates 37
Deleting Templates 38
Introduction to Playlists 39
The Playlist Manager 39
A Quick Walk-Through 40
Compilation Music CDs 41
For Advanced Users 41
Working with Playlists 42
Importing a Playlist Using the New CD Wizard 42
Importing a Playlist to an Existing Design 43
Applying a Playlist from Your Playlist Database 44
Creating a Custom Playlist with the Playlist Database 44
Creating Your Own Playlist Data 45
More Info on the Playlist Manager 46
Displaying Playlists Fields or Data 47
v

6
In tr oduci ng S ur eThin g CD Labeler
elcome to SureThing CD
Labeler–intelligent labeling
W
to creat e attractive labels q uic kly and
efficientl y.
You can use SureThing CD Labeler to
create any type of CD label. Our Smart-
Design system is perfect for m usic CDs,
interactive mul timedia titles, Pho toCDs, or
even simple backups, for example. It
doesn’t matter whether you’re a novice
designer or an art director, SureThing CD
Labeler gives you ease of use and professional results at the same time. Smart-
Designs are capable of building jus t about
any type of layout simply by clicking your
choices. You can also modify them or even
build your own layouts from scratch.
There’s no need to worry about measurements or lin in g things up proper l y because
SureThing CD Labele r ha ndles th a t for you
autom atica lly. It’s pre-configured to work
with many popular label stocks, leaving
you free to be creative and focus on your
designs.
SureThing CD Labeler also comes with a
large collection of backgrounds, textures
and clipart you can use in your labels and
designs, an d o f course yo u can also
incorporat e your existing images and
artwork into any label design.
You can even merge information from CD
playlists, a database or CSV file, and print
sets of labels, or numbered series.
software that gives you the tools
About this manual
The SureThi ng CD Labeler User Guide
pro vides the essential information you
need to get u p and running as quickly as
possible. The goal of this manual is to give
you a go od overvi ew of the p ro gram’s
features and functionality. It’s not so much
a command re fe rence as it is a general
reference. The program’s built-in Help
system is the best place to find typical
command reference information. The Help
system also contains a number o f useful
mini-tutorials, tips and techniques for
using SureThing.
We assume you have a basic working
knowledge of your computer and operating
system, including ho w t o choose menu
commands, operate the mouse, select text,
and work with files (opening, closing and
saving, for example).
System requirements
Here are the bare bone requirements
needed to run SureThing:
• PC with 486 or faster proce ssor
• Window s 95, 98, ME or 2000
• 16 MB RAM (64 MB for Windows 2000)
• 64 MB of available hard disk space
• Inkjet or Laser printer recommended

SURETHING CD LABELER
User’s Guide
7
Installing SureThing
This section describes how to install the
SureThing CD Labeler software on your
computer.
We recommend that you quit all currently
runn ing prog rams. Doin g so frees up
memory and resources and minimizes the
chance of installation errors.
1 Insert the Sur eThin g installa tion CD in to
your CD-ROM drive.
2 Double-click the file named Setup.exe.
This launches the installation that will walk
you through the process of installing
SureThing CD Labeler on your hard disk.
If Au t o-run is turned on, the Setup
program will load automatically when you
insert the SureThing CD.
Registration
Please take a moment to register SureThing. Regist ering the software en titles y o u
to technical support as well notification of
program updates and upgrades. To register
the software choose Register SureThing
from the Help menu to go directly to our
reg is tr at io n web p ag e. If you don’t have
access to the Internet, you can register by
calling MicroVi sion a t 800.998.4555, or
760.438.7781.
Getting Help
sensitive. In other words, it will jump
directly to the specific topic related to the
feature or command you are working
with. When no specific feature or command is detected, choosing Help takes you
to the help system’s index or topic list. The
Help system also contains a number of
helpful tutorials, tips and techniques.
To access help:
• Press the F1 key any time you are using
SureThing CD Labeler, or choose the
Contents command from the Help menu.
• In many dialog boxes you can press a
Help button, which opens the help topic
for that dialog box (and even if you don’t
see a Help button in a dialog box, you can
still press F1).
Technical Support
If you have a question or problem with
SureThing CD Label er that you ca nnot
adequat ely an s we r or solve using th e
manual or help syste m, technical su ppo rt is
available from MicroVision Development.
SureThing on the Web
If you have access to the Internet, this is
definitely the best option. Our web si t e is
kept current with answer s to fr eque n t ly
asked questions (FAQs), pr ogram updates
and patches, and a user-to-user support
forum. Visit our website at
www.surething.com
SureThing CD Labeler has a complete help
system accessible anytime the program is
running. Much of the help is context-
You can access our web site directly from
SureThing’s Help menu. Options are
available to register the software, order
8 CHAPTER 1
Introduction
label supplies, and check for software
updates. Choose SureThing on the Web
from the Help menu at any time to
automatically launch your web browser
and go to our site.
Online support
Online support, including e-mail, FAQs
and user-to-user forums are just a click
away. Set your web browser to the
following URL and follow the links to our
support section:
www.surething.com
Fax or mail support
You can mail or fax questions to us at the
following:
MicroVision Dev elopment
P.O. Box 130023
Carlsbad, CA 92009
Fax line: 760-438-7406
Telephone support
You can also phone us directly and speak
with a technical support representative.
Telephone support is available Monday–
Friday 9:00am–4:30pm P aci fic time.
Support line: 760-438-0305

The Sur eThing Enviro nment
9
he SureThing environment is not
too diff erent from wh at you’re
T
already familiar with in other
Windows applications. It includes a menu
bar at the top of the screen, the tabbed
label window (the number of tabs depends
on the brand of label you are using), and
Menu bar
a collection of tools for creating and
editing elements such as label text, text
effects, backgrounds, images, borders, etc.
At the bottom of the screen are buttons
you click to cycle through the various
SmartDesigns.
Command bar
Control Strip
Speed Tools*
Design bar
* Speed Tools are turned off by default, but you can turn them on by choosing View Options from the V iew menu.
Variation bar
10 CHAPTER 2
The SureThing Environment
Design bar Speed Tools (default set)
Calibrate Printer
Print
The icons along the left of the
Printer Setup
screen are shortcut menus to
commonly performed tasks.
Click the arrow to toggle the
display of the Design bar on
and off. Turning it off gives
more room to the design
window.
Undo/Redo
Cut, Copy & Paste
Text F rame tool
Picture tool
Text Effect tool
Find
Replace
Find Next
Bring to Front
Send to Back
Select All
Set Program Options
Show Item
Set Merge File
Change Label Stocks
Template Info
Control Strip
Text mode
Object mode
Rotate tool
Transparency tool
Font color menu
Bold, Italic, Underline options
Text alignment menu
Vertical text alignment menu
Get contents from CD
Select a playlist for this design
Font menu
Font Size menu
Zoom In
Zoom Out
Fit in Window
Object tools list:
• Text Frame tool
• Picture tool
• T ext Effects tool
• Line tool
• Rectangle tool
• Round-Corner Rectangle tool
• Ellipse tool
• Insert OLE Object tool
• Text tool
• Object selection tool
• Rotate tool
• Transparency tool
• Crop Picture tool
SURETHING CD LABELER
User’s Guide
11
Label Design Area
Rulers (click and drag to create
alignment guide lines).
Tabs for each component of
the label sheet (referred to as
“Blocks”)
Sample
Text Effect
Sample
Text Frame
Label edge
Bleed area
Non-printing area
(Clip to Label)
In T ext Mode, the horizontal ruler
changes to a paragraph indent
and tab ruler corresponding to the
currently selected text frame.
The Label Design Area is where you create
and edit your label. Each label block has its
own tab at the top of the design area. The
number of tabs displayed here depends on
the label stock you are using (specific to
each label sheet). The example above
contains blocks for the CD label itself and
a jewel case spine. By default, only the CD
Label block is active – the others appear in
parentheses. Clicking a tab activates the
block, however, and also turns it on in the
Pri n t dialo g box. If you don’t want to edit
and/or print these blocks, you can turn
them off again by choosing the Blocks
command from V iew menu, and then
selecting Show/Hide.
The area displayed in crosshatch indicates
the area outside of the label. If you place
an object, such as a text frame or logo,
over the crosshatch, the portion that overlaps the crosshatch will not be displayed
on screen. You can turn off crosshatching
by toggling the Clip to Label command
under the View menu. When Clip to Label is
turned off, all objects are displayed regardless of their placement on the label.
12 CHAPTER 2
The SureThing Environment
Label Blocks
We ment ion ed th e con ce pt of “block s” in
the preceding section. A block is a group of
identical labels found on a label sheet. For
example, all of the CD labels on a sheet
form a block of CD labels.
On many label sheets, you will find multiple blocks of labels on the same sheet
where each block of labels is intended for
a different purpose. For example, SureThing CD Labels include two blocks: CD
labels for the CD itself and spine labels to
go on the spine of a CD jewel case.
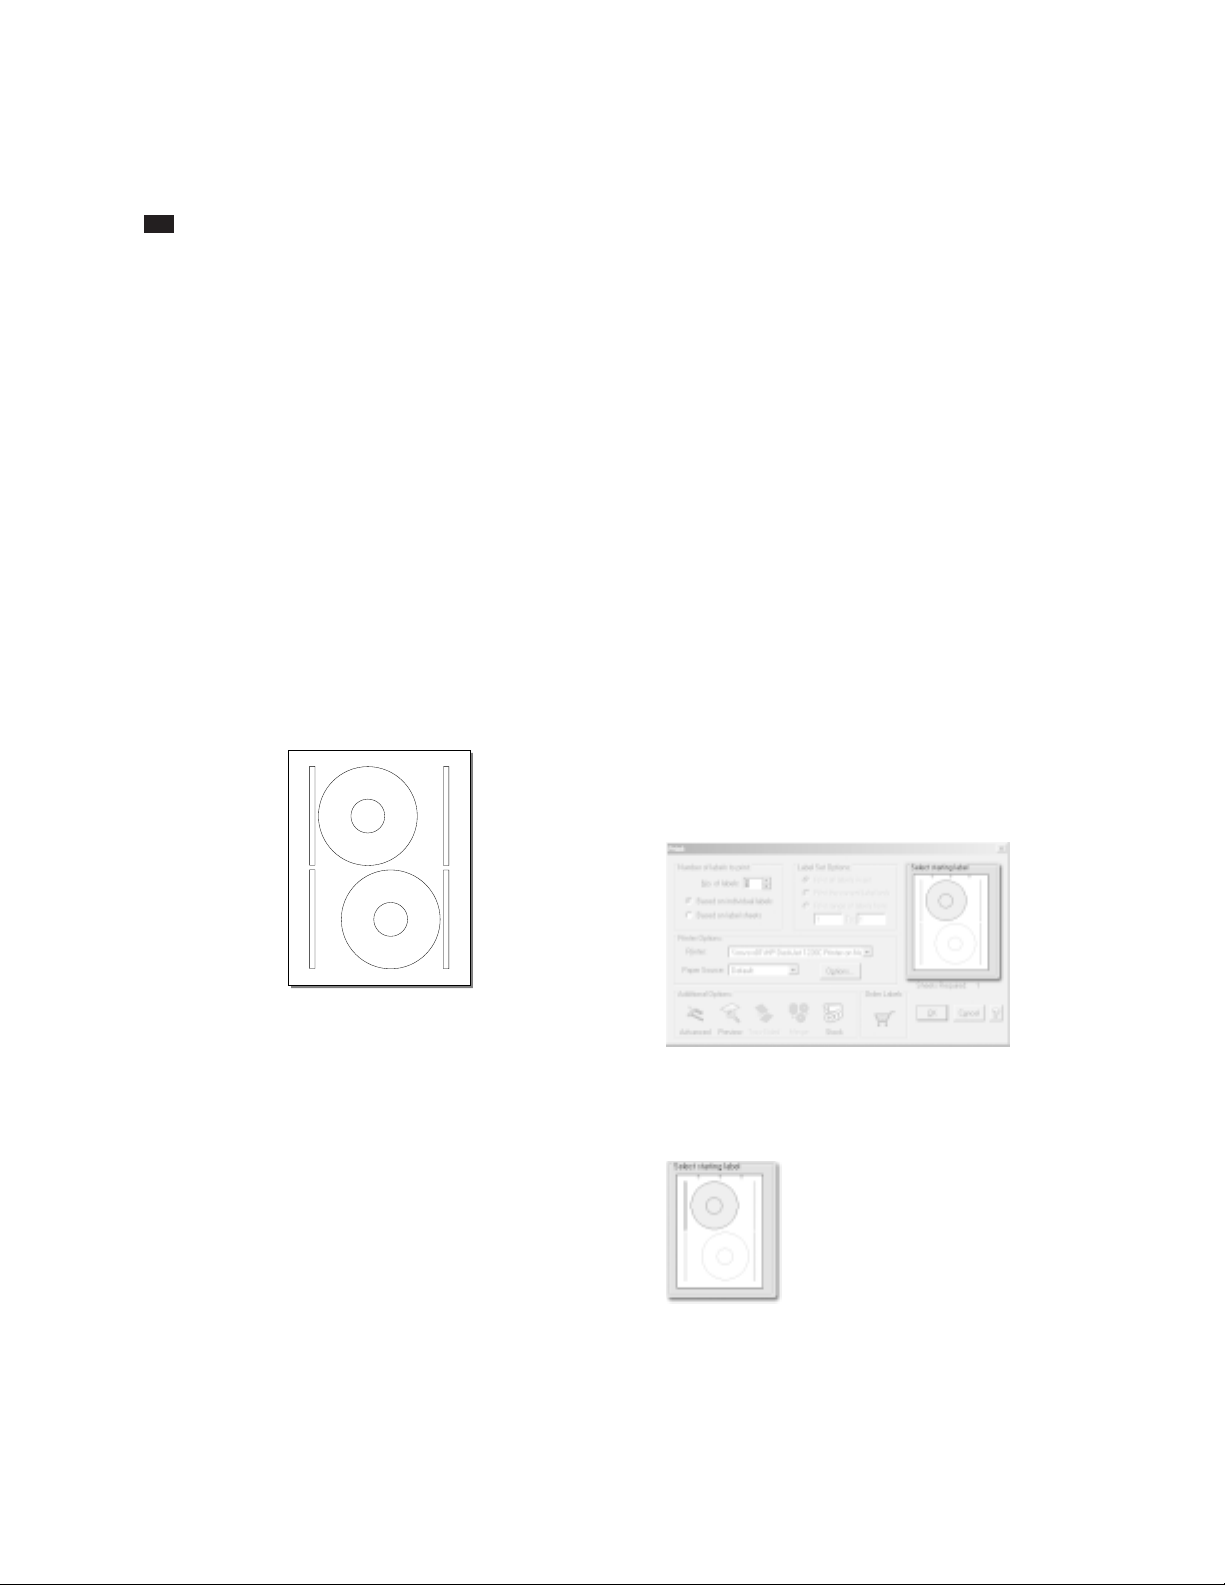
Consider the following example:
Turning blocks on and off
You select the blocks you want to design
and edit by clicking their corresponding
tabs at the top of the design window. This
turns on a block and activates its design
window if it wasn’t already activated. You
can turn off blocks using the Blocks >
Show/Hide command under the View
menu. When you turn a block off, its tab
appears in parentheses, and it’s no longer
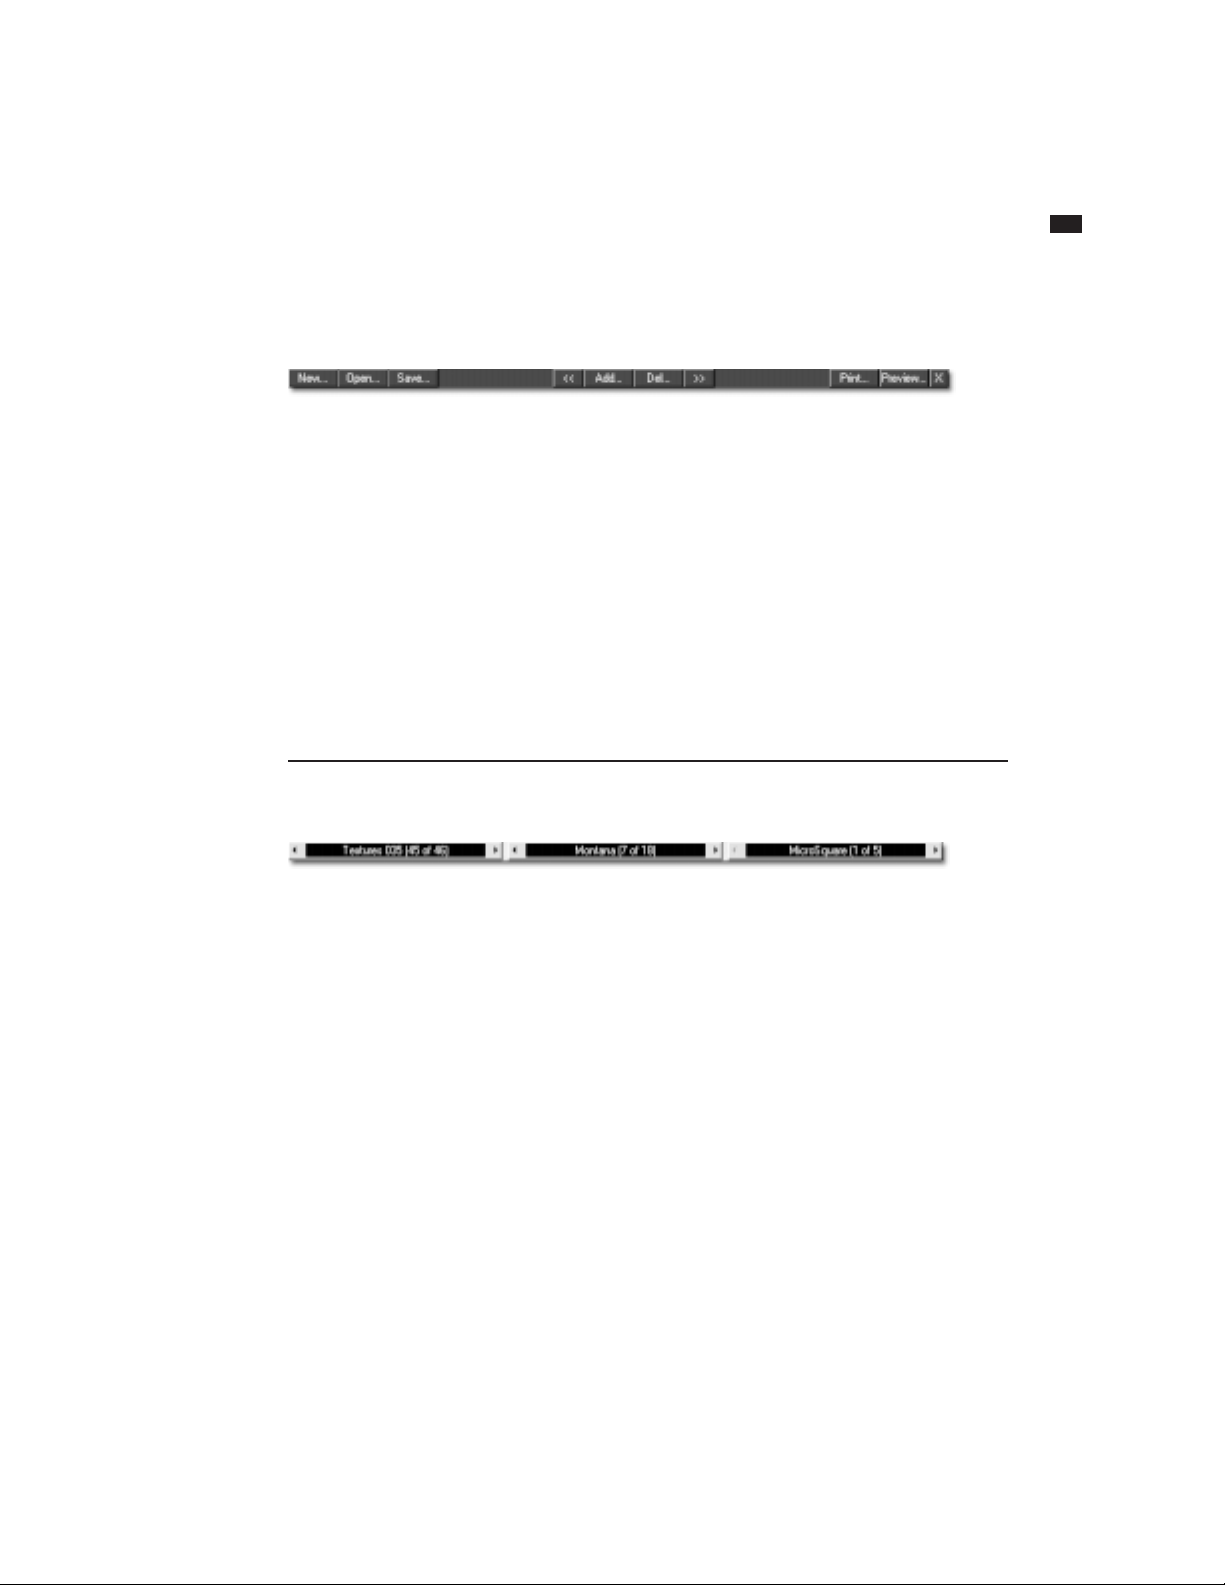
displayed in blue in the Print dialog box,
indicating that it will not be printed. If it is
on, however, it will be printed.
In the following Print dialog box, you can
tell that only the CD label block has been
turned on, because it’s the only block that
appears in blue. The blue areas indicate
active blocks, letting you know which ones
will be printed.
A typical label sheet (SureThing CD Labels)
The circles in the center are, of course, the
CD labels. The first tab in the design window corresponds to this block. The thin
rectangles to the left and right of the CD
labels are jewel case spines, and correspond to the second tab in the design
window.
After activating the other blocks, notice
that they now also appear in blue:
Command Bar
SURETHING CD LABELER
User’s Guide
13
The buttons along the top of the design
area (New, Open, Save, etc.) perform the
same function as some commonly used
menu commands. They’re located here for
your convenience.
The Add button makes a copy of the
current design. You can then edit the copy,
changing background, text, and layout, for
example, leaving the original intact. The
Add button provides an easy way to
produce a series of labels with different
layouts and data. The Del button deletes
Variation Bar
The Variation Bar lets you cycle through
the various SmartDesigns available to a
particular label stock. The first button,
Background, lets you choose from various
backgrounds for your label design. The
second button controls the overall layout
the current label. The << (previous) and
>> (next) buttons let you navigate between labels. All four buttons correspond
to the Designs commands under the Tools
menu.
(Note: The Add command is not the
method you use to print multiple copies of
a label – use the Print command and enter
the number of copies you want to print for
that – but rather a means to create different layouts, backgrounds, text, etc., within
the same file.)
of your label. The third button contains
font variations appropriate for each layout.
Click the arrows to the left or right of a
button to move back and forth between
the variations, or click in the center of the
button for a pop-up menu.
14 CHAPTER 2
The SureThing Environment
Selecting Tools
You select a tool by clicking it with the
mouse. Some tools bring up dialog boxes
(such as the Picture tool, for example),
others change the shape of the cursor,
indicating you can create an object based
on the type of tool you selected. These are
also kn o wn a s th e Object Tools.
When you move the mouse over a tool
without clicking it, the name of the tool is
displayed. For an overview of each tool,
see the online Help.
Using Object T ools
The tools used to create objects work in
the following fashion:
1 Select the tool (either from the tool
menu on the Control Strip, or from the
Obje c t Tools l is t un de r th e Tools me nu) .
2 Click and continue holding down the
mouse button at the location in the label
design area where you want to create the
object.
Setting Program Options
A numb e r of Sure Th i ng’s se tt i ng s ca n b e
customized. These include startup options,
display options, toolbar and ruler settings,
etc. Some of these options are set in the
Options dialog box (choose the Program
Options command from the Too ls menu),
others are turned on and off under the
View menu. These settings are saved each
time you exit SureThing.
To change V iew Options:
• Choose View Options from the View
menu to turn the display of selected items
on or off. The commands under this submenu toggle on and off – a check mark
next to an op t i on in di c ate s it’s on; s ele c t it
again to turn it off.
3 While still holding down the mouse
button, drag the size you want the object
to appear.
4 When you are satisfied with the size of
the object, release the mouse and the
object is created.
Most object tools work in the manner
described above. Some tools display dialog
boxes where you can open and insert files,
enter text, etc.
To change settings in the Options dialog bo x:
1 Choose the Program Options command
from the Tools menu, or click the
button at the bottom of the Design bar.
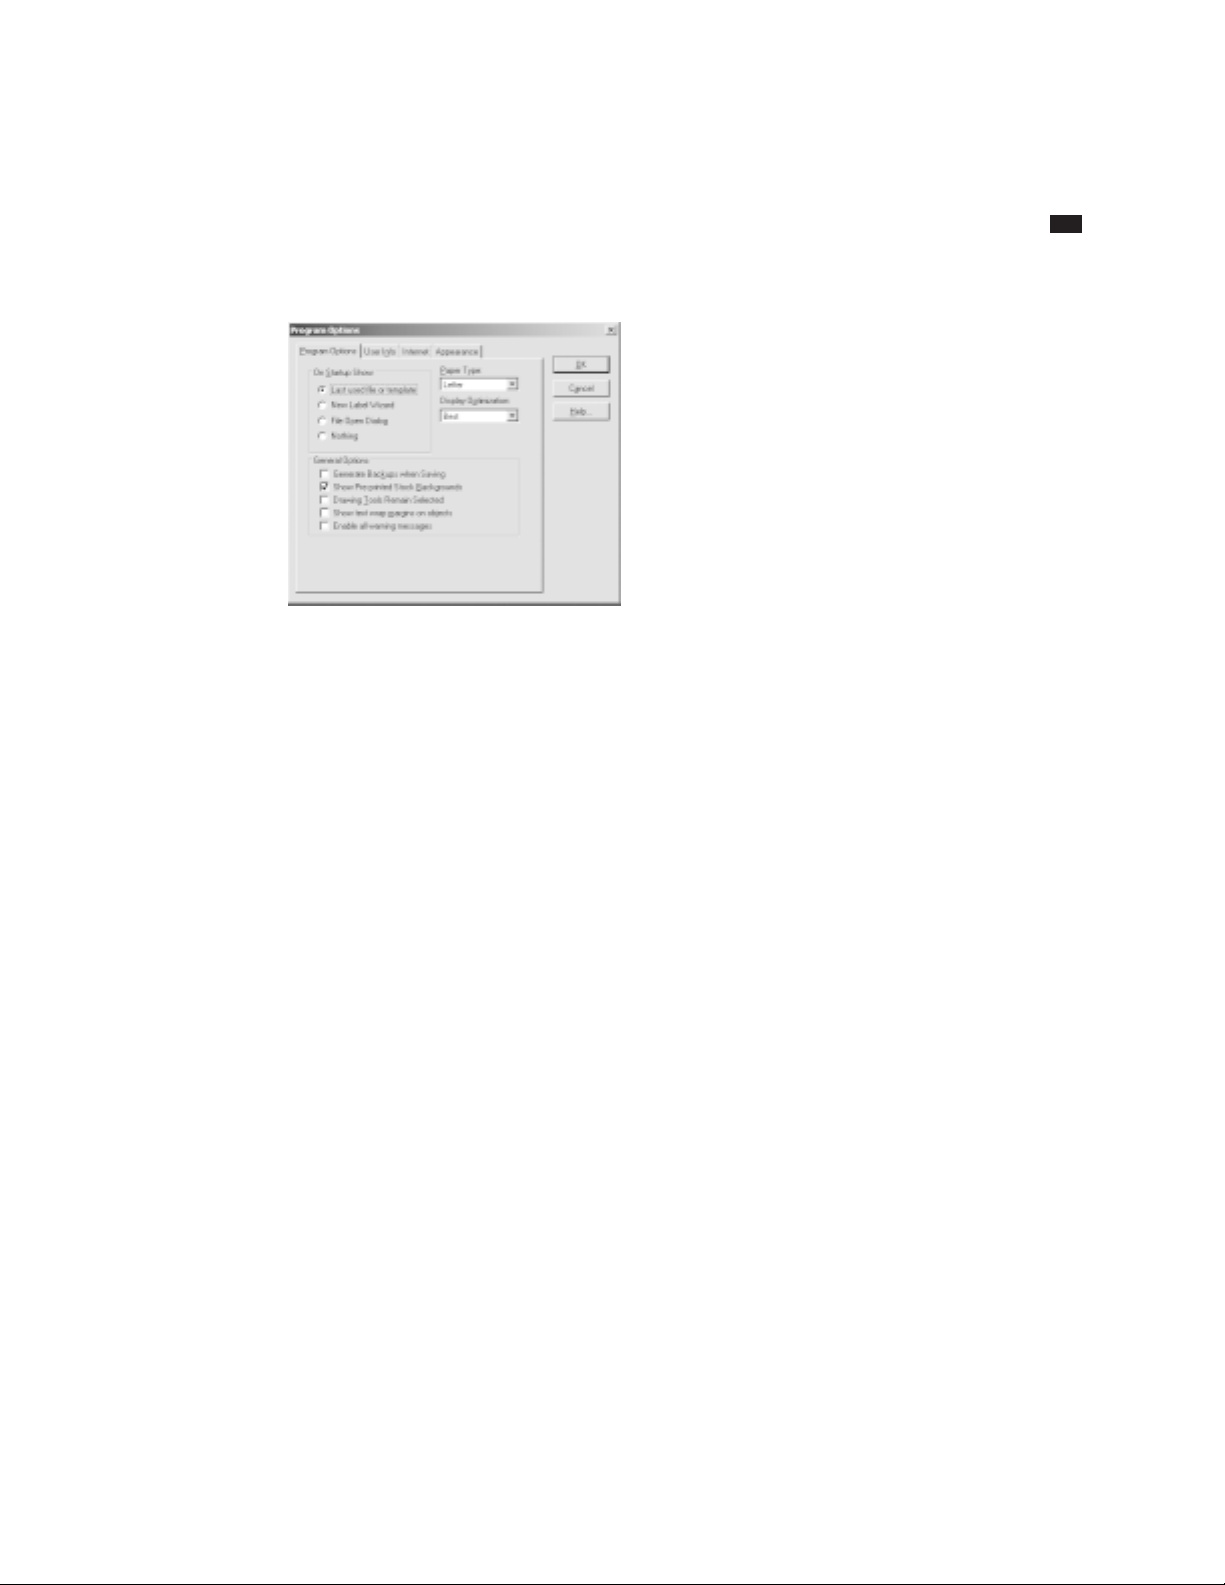
Program Options dialog box
2 Make any changes you see fit. Press
Help for more information about a specific
option.
3 Click OK to save your settings and close
the Program Options dialog box.
SURETHING CD LABELER
User’s Guide
Internet Tab
The Internet tab of the Program Options
dialog box lets you select an Internet
Playlist Server , enable reading of CD Text,
and configure a proxy server.
Internet Playlist Server
SureThing defaults to the server
www2.freedb.org/cgi-bin/cddb.cgi, but you
can change this to another server that
prov i de s pl ay l ist info r m at i o n. To ch a ng e
the program back to the default server,
click th e Use Defaul t Server option.
The Connect to server without prompting
option is primarily intended for users who
are online all the time, such as those who
use cable modem systems or LAN connections for example. If you connect to the
Internet via a dial-up service, you may
wish to be prompted.
15
You can als o t urn on or of f the dis pl ay of
certain items by choosing View Options
under the View menu.
User Info Tab
SureThing labels can be designed to use
merge fields from databases or from the
User Info tab of the Progra m Options dialog
box. We encou rag e you to t ake a m ome nt
to fill this information out.
Fill in information in any of the fields that
are appropriate for you. Leave any
unnecessary fields blank (you should
delete the sample text).
Enable CD Text
CD Text is a recent addition to the CD
audio specification allowing disc and track
related information to be added to standard audio CDs for playback on suitably
equipped CD audio players.
If the Enable Rea d i n g CD Text option is
turned on, SureThing will first attempt to
read CD Text when gathering playlist information. If no CD Text is detected, SureThing will then search the Internet Playlist
Server for information about the CD.
Proxy Server
Enter the address and port number of the
proxy server you wish to connect to. If
you’re unsure about proxy server settings,
chance are you are not using one.

16 CHAPTER 2
The SureThing Environment
Appearance Tab
The “Appearance” tab of the Program
Options dialog box lets you personalize the
look and feel of the SureThing interface.
Zooming In and Out
You c an ma g nify or re duc e you r v iew of
the design area using a couple of different
methods. When you first open a file, or
when you create a new one, the zoom level
is set to fit within the current window. This
means that the view size of the label is
dependent upon the size of the window;
increasing or decreasing the SureThing
window zooms in or out of the label.
You can also set the view size to a specific
zoom percentage, such as 50% to view it at
half the actual size, or 300% to view it at
three times the actual size, for example.
When you choose a specific zoom level,
the size of the current window does not
affect the view size of the label.
To zoom out:
• Click the Zoom Out button on the
Control Strip. Each time you click it
decreases the zoom level.
• Press Ctrl+Minus key (on the numeric
keypad)
• Choose Custom Zoom from the Zoom
sub-menu under the View menu and select
a zoom level from the list, or enter your
own zoom level (must be between 30%
and 400%).
You can return the zoom level to the actual
print size or to the size of the current
windo w by choos ing Actual Size or Zoom to
fit in Window from the Zoom sub-menu
under the View menu. Clicking the
button on the Control Strip does the same
thing.
To zoom in:
Do one of the following:
• Click the Zoom In button on the
Control Strip. Each time you click it
increases the zoom level.
• Press Ctrl+Plus key (numeric keypad)
• Choose Custom Zoom from the Zoom
sub-menu under the View menu and select
a zoom level from the list, or enter your
own zoom level (must be between 30%
and 400%).

Working with the Software
17
n this chapter, you’l l learn how to
create a new SureThing label design, as
I
well as the basics of editing, saving and
printing labels. The information is often
presented in a step-by-step format intended to give you a good overview of
SureThing’s features and capabilities. To
learn more about a specific command or
feature, please refer to the Online Help.
Topic Page
Starting SureThing 17
Creating a New Label 17
SmartDesign Basics 19
Working with Text 20
Editing Text Frames 20
Adding a New Text Frame 22
Changing the Size and Position of a Text Frame 22
Inserting Merge Fields in Text Frames 23
Formatting Text in a Text Frame 24
Editing Text Effects 24
Selecting different types of Text Effects 25
Adding a New Text Effect 26
Working with Logos and Clipart 27
Editing a Logo 27
Adding Clipart to Your Label 28
Working with Backgrounds 29
Using Your Own Backgrounds 30
Using a Background Color 30
Acquiring Images 31
Changing the Label Stock 31
Duplicating a Design 31
Saving Your Label 33
Calibrating Your Printer 34
Printing 34
Working with Label Templates 35
Playlists & The Playlist Manager 39
Starting SureThing
Double-click the SureThing icon on the
desktop, or launch it from the Start menu
(look under Programs > SureThing >
SureThing CD Labeler).
If this is the first time you’ve started
SureThing, the “SureThing First Time
Wizard” appears. If this is not the first time
you’ve started SureThing, depending on
how you’ve configured your startup
options (choose the Program Options
command under the Tools menu), you
may or may not see this wizard. If it
doesn’t appear automatically, choose the
New command from the File menu.
Creating a New Label
The New Label wizard steps you through
the process of selecting a label stock and
specifying design characteristics such as a
background image.
Select a label stock

18 CHAPTER 3
Working with the Software
Select a product type and label stock from
the lists on the right side of the wizard. The
preview image should match your actual
label stock. (Note: Deluxe Edition users can
change the stock later with the Change
Label Stock command under the Edit
menu.) Click the Next butt on w he n yo u’re
satisfied with your choice.
Select a background for your label
You have the option to select a background image for your label. To see a list of
available backgrounds specially designed
for SureThing, click the Browse button and
select an image. A preview of it will appear
in the wizard. If you change your mind,
click the Clear button to use no background, or click the Browse button again
and select a different background. You can
select backgrounds for your CD label or
jewel case spine by clicking the drop-down
list before you browse the backgrounds.
Click the Next butt on whe n yo u’re sati sf ie d
with your choices.
The next step of the wizard presents you
with the option of using SmartDesign
templates, or designing a blank label from
scratch. We recommend you choose Use
SmartDesigns.
Select an initial SmartDesign
There are three categories of SmartDesigns: A ud io CD, Data CD and General
Purpose. These categories determine the
type of information, such as playlist track
titles, that will be part of your design.
If you select the General Purpose
;
either Audio CD or Data CD if you choose
to apply a playlist to your design.
This step lets you change the SmartDesign
opti ons for yo ur lab el. You c a n cha n ge
many of these options after you’ve created
a label, so don’t worr y about being locked
into a particular SmartDesign or background.
Click the Finish button to complete the
wizard and start editing your label. Or...
Click the Next button to add playlist
information to your design if you are
creating an Audio CD or Data CD design.
option, you can later switch to

Tip: SureThing remembers all
©
selectio ns yo u’ve made in the
wizard. If nothing changes for the next
label you want to create, click Finish on the
first screen of the wizard.
The Design window appears with the label
you just created using the wizard, and is
now ready for editing. The text you see is
the initial sample text, and the background
is the same one you selected in the wizard.
The Design Wi ndow
By default, all new labels start out with a
SmartDesign for the product type and label
stock you chose in the New Label wizard.
SmartDesigns are templates that act like a
design assistant. They provide a variety of
layout choices, sample text, and font and
point size suggestions.
SURETHING CD LABELER
User’s Guide
The sample text included in a SmartDesign
is intended to give you ideas about the
type of information you might use in your
design. You can, of course, enter anything
you like in each field. Several of the
SmartDesign layouts also include sample
images to use as placeholders until you
insert your own graphics, logos, etc.
If you ch o s e Audio or D ata CD in t he
Wizard, please refer to the section titled
“Working with P lay lists” late r in this
chapter .
SmartDesign Basics
SmartDesigns are interactive design
templates built into Sure Th in g. Unlike
traditional templates that simply place a
few objects on a page and leave the rest up
to you, SmartDesigns allow you to modify
many aspects of the design with a few
mouse clicks. We call them ‘smar t’ because
they’re designed for specific label stocks
by people with a good eye for graphic
design. SmartDesigns let you put together
attractive label designs without actually
having to do anything more than click the
mouse.
SmartDesigns display sample text, a variety
of layouts, and a series of font selections
for each layout. SmartDesigns don’t require you to draw and align objects (lines,
rectangles, gradient fills, etc.) or format
19
The V a riation Bar

20 CHAPTER 3
Working with the Software
text. You simply browse the SmartDesign
for a look that fits your taste and use it.
And of course, you can override or modify
the SmartDesigns at any time; you’re not
locked in to any designs.
SmartDesign Tip: Use the Variation
©
Bar to find a background, layout
and font that suits your tastes before
customizing the label.
SmartDesigns are manipulated using the
Variation Bar at the bottom of the window.
The Variat i on Ba r con sis t s of menu s fo r
Background, Layout and Font variations.
To use SmartDesigns:
• Click the left or right arrows on one of
the three Variation menus. You can also
click in th e midd l e of a Va riati o n menu to
display a pop-up list of choices.
Background menu with pop-up list
The first Var iation menu controls the
various backgrounds you can select. The
second menu contains several predesigned layouts appropriate for each of
the backgrounds included with SureThing.
The third menu lists font variations for
each of the layouts from the second menu.
When yo u’re sat isf i e d with a ba c kgroun d
and layout , you’re rea dy to move on t o
editing the various objects and text fields
in the label.
Working with T ext
Text can ta ke a couple of different forms
in SureThing: text frames and text effects.
Te xt in text f ram e s beh aves much li ke it
would in a word processing program, for
instance – with characters, paragraphs,
tabs, indents, etc. Text effects, on the other
hand, behave more like graphic objects –
you can bend, warp, and twist the text, add
drop shadows and fill patterns, etc. You’ll
want to know how to work with both
types while designing your labels.
Editing Text Frames
Text in SureThing is displayed in boxes
called text frames that function much like
fields in a database. The sample text
frames you see are a bit different from the
ones you create yourself – the sample text
is linked to the underlying SmartDesign to
allow SureThing to automatically generate
new layouts and font variations.
Selecting text in frames
When editing a SmartDesign layout, the
text frames have been arranged so that
replacing the sample text is like filling in
fields in a database.
• Press the Tab key to move to the next
text frame in the design.

SURETHING CD LABELER
User’s Guide
21
• Press Shift-Tab to move to the previous
text frame.
Maybe you’re wondering how to enter a
tab in a text frame? Press Ctrl-Tab to insert
a tab without moving the cursor to the
next text frame.
Moving between text frames with the Tab
key only works in text frames that were
created with SmartDesigns. For new text
frames you create yourself, you must click
into the frame with the mouse. Pressing
the Tab key in a manually-created text
frame inserts a tab (like Ctrl-Tab).
The fields are sometimes logically grouped
together. For example, an address may
consist of a street address, city, state and
zipcode fields. So that they can be moved
as a unit, they are grouped together. When
you select one with the Object Tool, you
select the entire group.
The fields in each SmartDesign reflect the
typical use for the label, but you can use
them any way you like. You can even turn
off selected fields if you find them
unnecessary by simply deleting them with
the Del key or the Cut command under
the Edit menu.
Typical text frames. The frame on the left is
actually an insert field containing the label’s
creation date.
A text frame group consisting of two text frames:
the CD title and subtitle.
To edit the text in a tex t frame:
1 Select the Text tool if it’s not already (it’s
the one that looks like an I-beam). You can
easily switch between the Text and Object
tools by clicking the right mouse button
and selecting the tool.
2 Click the mouse in the text field you
want to edit. Either backspace over the
default text, or press Ctrl-A to select all
and hit the Del key.
3 Ty p e th e ne w te x t i n th e f i el d.

22 CHAPTER 3
Working with the Software
Adding a New Text Frame
In the preceding section you learned how
to change the default text that appears in a
SmartDesign template, but you can also
add your own text frames. SureThing
provides a couple of ways to do this.
To create a ne w t ext frame:
1 Click the “Adding Text” icon on the
Design Bar located on the left of the
window. Doing so displays a menu.
2 Choose Create New Text Frame from the
menu. A text frame is drawn near the top
of the CD label containing the default text
“Your Text Here.”
3 Enter the text you want to appear in the
frame. You can enter as little or as much
text as you want. Notice how the text
frame expands (or shrinks) to accommodate the text you ty pe. You can use the Tab
and Return keys to insert tabs and line
breaks. If you don’t press the Return key,
line breaks will occur automatically as they
would in a word processor.
To create a ne w text fr ame (Method #2):
This method of creating a text frame is
similar to the one above, but with a couple
of subtle differences that highlight some
important SureThing features.
1 Click the “Adding Text” icon on the
Design Bar.
2 Choose Use Text Frame Tool from the
menu. The text frame tool appears.
3 Click and drag to create the frame.
When you release the mouse, the frame is
drawn and the text cursor blinks inside it
waiting for you to enter your text.
4 Enter the text you want to appear in the
fr am e . Unlike t he f i rst met h o d, the tex t
frame does not expand to accommodate
the text you type. If you type more text
than can be displayed in the frame, you’ll
see a red bar in the bottom of the frame,
letting you know you’ll need to either
make the frame larger, or decrease the
font size of the text.
Under ce r t ai n c irc u ms ta nce s, th e red ba r
can occur in the default text fields created
by a SmartDesign. The default text frames
can grow to a point, but it is possible to
receive a red bar in a frame if you enter
too much text or set the font size too large.
Re-size the frame, delete some text, and/or
change the font size until you can see all
the text in the frame.
Changing the Size and Position of a
Text Frame
First select the object (pointer) tool from
the Control Strip, or right-click the mouse
and select Object Mode, then click the text

SURETHING CD LABELER
User’s Guide
23
frame to select it. You can drag the fr ame
to any location on your label. To change
the size of the frame, click one of the red
squares on the perimeter of the frame and
drag it to the desired size.
A selected text frame.
Inserting Merge Fields in Text Frames
SureThing lets you insert many different
types of merge fields in text frames.
Examples of merge fields are date and
time, auto-incrementing serial numbers,
your name, company and address from
the User I n for m at io n t a b of the Pr og r a m
Options dialog box, audio playlist information, or even fields from an external
database (dBASE or CSV text file).
To insert a merge field into your design:
1 Place the text cursor in the text frame
where you want the merge field to appear.
2 Choose Insert Field from the Insert
menu. The Insert Field dialog box appears.
3 Select the tab for the type of merge
field, such as Special Fields.
4 Select the type of field you want to
merge from the scroll list on the left, and
any field options from the list on the right.
4 Click OK to insert the field into the
frame.
If t h e “Show Fi el d Code s” option i s on
under the View menu, the field appears as
a code, with the field name enclosed in
brackets. If this option is off, you will see
the actual data (except for fields from an
external database, which will always show
the record you specify using the Set Merge
Record command under View Options)
The same field viewed with Field Codes off (left), and Field Codes on
(right). Field Codes are turned on and off under the View menu.
A popular example of using merge fields is
the Serial Number function. Say for
example you were printing several CD
labels for a software product, and wanted
a unique serial number printed on each
label. A typical serial number might be
something like “MVD300-010-AC0001,”
with only the last four digits incrementing.
You would type the text “MVD300-010AC” and insert a Serial Number merge
field immediately after it (choose the Zero
Fill option and set the maximum number
to 1000 to create a four-digit repeating
field beginning with “0001.”
The frame containing the serial number
field might look something like this.
An example of a Serial Number field viewed with Field Codes off (left),
and Field Codes on (right).

24 CHAPTER 3
Working with the Software
Formatting Text in a Text Frame
You ca n for mat tex t i n tex t f r ame s mu ch
as you would in a word processor or page
layout program:
1 Select the text you want to format with
the text tool.
2 Choose the Character command from
the Fo rmat menu . You are pr esent ed w ith
several options for formatting your text,
includin g fon t, si ze, colo r, style, underli ning,
and spacing options. Many of these
options can also be changed directly from
the Control Strip.
Character formatting commands on the
control strip.
3 Choose the Paragrap h command from
the Format menu. The Paragraph dialog
box lets you change indents, line spacing,
alignment, and tab positions, as well as
other options such as border lines and fill
patterns.
Note that when you click the text cursor
within a text frame, you can change many
of the paragraph formatting options from
the ruler bar at the top of the design
window. If you don’t currently see ruler
bars to the top and left of your CD label,
you can turn them back on by choosing
View Options from the View menu, and
then selecting the Show Rulers command.
Format Character dialog box
Character formatting applies only to the
selected text in the frame. If you want it to
apply to all text in the frame, press Ctrl-A
to select all text. You could also switch to
Object mode (click the pointer tool on the
Control Strip, or right-click the mouse)
and select the frame. Now the formatting
options you choose will be applied to the
entire text frame.
Editing Text Effects
Text Effects in SureThing let you apply
special effects to text, such as circular text,
slanted text, perspective text, drop
shadows and more. Text Effects add spice
to CD titles, for example, but are also
usef ul for mo re ordi nar y t ask s su ch a s
copyright notices, trademarks or even
track titles.

A sample Text Effect
SURETHING CD LABELER
User’s Guide
2 Edit the sample text (under the Effect
tab). Click OK when you are done.
Adding line brea k s in the Text Effect dialog
box causes text in the effect to align in
different ways. For example, notice how the
first line wraps around the top of the CD,
and the second line wraps around the
bottom. Actually there are three line breaks:
the first line will be on top; the second line
(in this example a blank line) will be in the
center of the CD; and the third line will wrap
around the bottom. You can experiment
with your text to see how it will appear in
the label.
25
To edit a text eff ect:
1 Double-click the Text Effect object in
the design window (or right-click it with
the mouse and choose Object Properties).
Note: You must c li ck th e te xt p o r t i on of
the effect to select it. This is different from
previous versions, allowing you to more
easily select other objects in your design,
especially any objects that are behind a
text effect.
Selecting different types of Text
Effects
There are several types of Text Effects you
can choose from. To select a different style,
click the Type tab in the Text Effect dialog
box.

26 CHAPTER 3
Working with the Software
Click the button to see the available
categories of text effects. If this button is
grayed, you are already viewing categories.
Click the button to view variations on
the selected categor y. Double-click on a
variation to select it.
If you select another layout from
a
the Variation Bar after you ’ ve
formatted text in any of the sample Text
Effects or Text Frames, SureThing warns
you that your edits will not be included in
the next variation. This only applies to the
samp l e t ext fr ame s & effe cts, ho wever. New
frames and effects are not affected.
Adding a New Text Effect
In a preceding section you learned how to
change the sample text that appears in a
text effect object. Here you’ll learn how to
create a new text effect object from
scratch.
3 Select the type of effect you want to
create, then click the Next button.
1 Click the “ Text Effects” icon on the
Design Bar located on the left of the
window. Doing so displays a menu.
2 Choose Use Text Effect Wizard from the
menu. The wizard guides you through the
process of creating a text effect.
4 Select a variation on the type you chose
in step 3, then click Next.

SURETHING CD LABELER
User’s Guide
27
5 Select from a list of preset colors. The
check boxes at the bottom of the wizard
let you turn certain characteristics on or
off. You can alwa ys change your mind later.
Click Next when you’re satisfied with your
choices.
6 Enter the text you want to appear in the
text effect (first delete the sample text).
7 Change the font and style options to
suit your tastes. For certain types of
effects, you can also choose whether or
not they are to be created with perspective, stretched to a curve, or drawn flat
(Normal). Click the Preview button to view
your edits in the wizard. Click the Finish
button when you are ready to create the
effect.
The effect is created on your label. The
next thing you’ll need to do is adjust its size
and position.
You can edit the text effect later simply by
double-clicking it.
Why does te xt appe ar ja gged in Text
?
Effe cts on scr e en? Text appears jagge d
in text effects because the software has to
work with it as if it were a graphic. Even
though the text in text effects does not
always appear very legible on screen, it will
print crisp and clear.
Working with Logos, Pictures
and Clipart
There are a couple of ways of working
with graphics in SureThing. Some of the
SmartDesigns include placeholders for
graphics (such as a company logo,). You
can easily substitute your own graphics for
the placeholders simply by double-clicking
them and selecting your own file.
For SmartDesigns that don’t include
placeholders, you can easily import
graphics and clipart yourself using the
pic tu re too l ( und er th e Tool s me nu) , or by
selecting a file from the Clipart menu on
the Design Bar.
We’ll discuss editing exis ting graphics in
SmartDesigns first, then move on to
importing your own graphics and clipart.
Editing a Logo
Many of the SmartDesigns contain
placeholder logos. These placeholders
have been sized and positioned in such a
way to look good with the other text
elem ents of the l a bel des i gn, but it’s high l y

28 CHAPTER 3
Working with the Software
unl ikely you’d want to le ave t he place holder in your design. Replacing the logo
wit h one of you r ow n, howe ve r, is a piec e
of cake.
The following SmartDesign layout contains
a placeholder logo:
To change a logo or clipart image:
1 Double-click the image or logo you
want to change. The New Picture dialog
box appears where you can choose a
different image file. Several useful images
are provided with SureThing.
2 Select an image from the list, or choose
a different directory and select an image
of your own.
3 Click OK. The image you just selected
replaces the placeholder image.
Adding Clipart to Your Label
Adding graphic images such as logos,
clipart and symbols to your labels is a snap
with SureThing. A number of useful images are included with SureThing, and
were copied to your hard drive during
installation.
1 Click the “Photos/Clipart” icon on the
Design Bar located on the left of the
window. Doing so displays a menu.
2 Choose Browse for Logos/Clipart from
the menu. A dialog box is displayed where
you can choose from a selection of readyto-use images, or to other drives and
directories.
3 Click an image, then click OK.
The image is placed on your label, at which
point you can change its size and position
to fit within your design.
Adding your own images
If you’d li ke to a dd you r ow n c l ip a r t to a
labe l desig n , click the “Photos / C l i p a rt”
icon on the Design Bar, and choose Use
Pict ure Tool from the menu. The Picture
tool appears.
Click and drag to create a rectangle about
the size of the image you want to insert.
When you release the mouse, a dialog box
appears prompting you to select an image
file. Many popular graphics formats are
support ed (BMP, JPEG, TIF, EPS, etc.).
Select the drive and directory where your
image is located, choose it from the list
and click OK. The picture appears in your
label. You can change its size and position
to fit your design (and your fancy).

SureThing does not support the GIF
a
image format. If you have GIF
images you would like to include in your
label designs, we suggest converting them
to another popular image format such as
BMP or TIF.
Working with Backgrounds
SURETHING CD LABELER
User’s Guide
29
Backgrounds are images SureThing places
in the background of a label design. All
other objects – text frames, text effects
and clipart – appear on top of the background image.
You can select a background from the
New La b el Wizar d, but you c a n a lways
chan ge you r min d late r. A numb er of
background images are included with
SureThing that have been specially
designed for CD labels. You can choose
your own images to use as backgrounds as
well. Or you can decide to use no background at all.
To change the background image:
1 Click the “Backgrounds” icon on the
Design Bar:
2 Choose Browse SmartDesign Back-
grounds from the menu. The following
dialog box appears:
3 Select a category in the left pane, which
displays the folders where backgrounds
are stored. Expand or collapse the tree
structure as needed.
4 Select a background image from the
dialog box by clicking it, then click OK.
To help sort through the many backgrounds that come with SureThing, the
Background Browser includes a Favorites
Folde r. When yo u s ee an im ag e you li ke
and might want to use again, click the Add
to Favorites button.
Here’s an other way to change backgroun ds:
The Variation Bar at the bottom of the
window provides a quick way to change
backgrounds, layouts and font choices.
The left-most variation bar lets you select
backgrounds.
• Click the mouse in the middle of the
Vari at i o n Bar o n th e left. A lis t of ba ck grounds appears.
• You can als o cl ic k t h e lef t - an d rig ht pointing arrows on either side of the
variation bar to cycle through the images.

30 CHAPTER 3
Working with the Software
Using Your Own Backgrounds
The background images supplied with
SureThing have been sized correctly to fit
the CD label area. Before using your own
backgrounds, you should make sure that
they have been sized properly in an image
editor such as Photoshop or Paint Shop
Pro. In other words the aspect ratio, i.e.,
the ratio of height to width, should be
roughly equal. Images should be no larger
in file size than 4 megabytes (and even that
would be whopping big). The images we
supply are generally no larger than half a
megabyte and they look great when
printed.
If you wish to use your own backgrounds,
you’ll also need to know the directory, or
folder, they’re stored in.
To use your own Background image:
1 Click the “Backg rounds” icon. A me nu
is displayed.
2 Select Use You r Own B ackground. The
Backgrounds dialog box appears.
3 Select the drive and directory where the
image you want to use as a background is
located, Click the Browse button to view
thumbnails of any images in a directory.
4 Choose an image from the list and click
OK. The image appears as a background
in your label.
Using a Background Color
If you decide not to use a background
image, you can specify a background color.
You can even create interesting fill
patterns, shades, and gradients (blends).
To change the background color:
1 If you are currently using a background
image, you must first clear it. Click the
“Backgrounds” icon on the design bar,
then choose Clear Background Image from
the menu.
2 Click the “Backgrounds” icon on the
design bar, then choose Se t Back g round
Color from the menu. A dialog box
appears.
3 Choose shades or patterns, and/or pick
colors from the color menus. You can mix
colors and shades, or colors and patterns.
To create a gradient blend, choose a
foreground color and a background color,
then choose the type of gradient you want
to create from the Blend menu (you can
also click the Blend button for a dialog
with more specific options).
4 Click OK.
The background color options you
selected are applied to the label. If you
later apply a background image, the color
options you specified will no longer be
displayed, but you can get back to them by
choosin g the “No Ba ckground” option
from the background menu on the
Variation Bar.

SURETHING CD LABELER
User’s Guide
31
Background color options also affect
SmartDesign layouts. Many SmartDesigns
include solid areas of black or white, either
alone or superimposed on background
images. Background color options change
the way these items appear.
The SmartDesign on the left has a solid black
area superimposed on a background image. The
same design on the right after changing the
background color to a black-to-white gradient..
Acquiring Images
SureThing supports TWAIN, an interface
that lets you create images using a device
such as a scanner or digital camera
attached to your computer and import the
images without leaving SureThing. Your
device must support TWAIN in order for
you to take advantage of this feature.
You can acquire images for use as regular
graphics or as backgrounds.
Changing the Label Stock
don’t have to re-create your designs to
work with the Avery labels, but rather
change the stock. SureThing adjusts your
design to print properly on the new labels.
To change the label stock:
1 Choose the Change Label Stock com-
mand from the Edit menu. A dialog box
appears.
2 Select the stock you want to use from
the New Stock list.
3 Click OK.
Yo u have th e opt i on to apply th e st ock
only to selected blocks. For example, you
could apply the Aver y stock to the CD
label face, but keep the spine and jewel
case blocks set to a stock from a different
label manufacturer. In the Blocks to apply
list, click a block to deselect it; click it
again to re-select it.
The Deluxe version of SureThing lets you
change the label stock at any time. Say, for
inst anc e, you’ve created some lab el de sig ns
for Memorex CD labels, but you later
purchase a box of Avery CD labels. You
Duplicating a Label Design
The Add button on the Command Bar can
be used to make copies of the current
label design. You can then edit the copies,

32 CHAPTER 3
Working with the Software
changing background, text, and layout, for
example, on each copy while leaving the
original intact.
Some users have mistakenly assumed the
Add command is how you print multiple
copies of a label. While you could in fact
use it that way, it’s much simpler to set the
number of copies you want to print from
the Print dialog box. So when should you
use the Add command?
The Add command provides an easy way
to produce a series of labels based on a
comm on des ig n. S ay you’re cre at in g l abe l s
for a clipart CD collection – the first CD
contains clipart of animals, the second
sports, and the third cartoons. Let’s also
say you want a different title and logo on
each label to identify each collection.
Design the first label, “Animals” in this
example, then click the Add button. The
Add Designs dialog box appears:
next. (If you are currently on the last label,
click i n g th e > > bu tto n a sk s you if you’d
like to duplicate the label.)
The Designs command under the Tools
menu lets you add, delete and navigate
labels in case you’ve turned off the display
of the Command Bar.
Deleting duplicate labels
If you want to delete any duplicate designs
you’ve crea ted , cli ck t he Del button on the
Command bar and specify which designs
you want to delete.
Enter “2” in the No. of copies field and click
OK. You now have three copies of the
same design. You can then change the title
and logo on duplicate labels #2 (“Sports”)
and #3 (“Cartoons”) accordingly.
Click the << and >> (previous and next)
buttons to move from one label to the
The No. of designs to delete field tells
SureThing how many duplicates to get rid
of; the Beginning with design field specifies
the first duplicate to be deleted. The tab at
the top of the Design Area indicates the
number of the current design:

SURETHING CD LABELER
User’s Guide
33
Saving Your Label
Saving a design in SureThing is a very
simple process, and one you should do
wit h regularity. Ever y fe w minutes i s
recommended. That way, if anything
unexpected happens (e.g., power outage,
meteor impact, etc.), you’ll always have a
recent version of your label.
To save a label choose the File > S av e (or
Save As) command. Select the drive and
directory where you want the file to be
saved, give it a name and click the Save
button. You don’t have to ent er a filename
extension; one will be added automatically
if you don’t. Following are the specific
steps.
To sav e a new document:
1 Choose the Save (or Save As) command
from the File menu. If it’s the first time
you’ve saved the label, the Save As dialog
box appears:
3 Ty pe a n ame for you r l ab e l in t h e File
name box.
You don’t have to ty pe an extension
because SureThing automatically gives all
labels the extension std.
4 Click Save.
The design is saved to your hard disk with
the filename you typed, and you can
resume working with it.
After saving your design the first time, you
st ill ne ed to sav e yo u r work p e riod i call y.
Choose Save from the File menu, or press
Ctrl+S. The label is saved, with all of your
updates.
Saving a design with a new filename
There are times when you want to give a
SureThing label design a new name, such
as when you want to edit an existing
design, but keep an unchanged copy of the
original. If you were to open the label, edit
it, and use the Save command, the edited
version would replace the original. The
Save As command provides a way to save
your changes as well as retain a copy of
the original. After opening the original
label design, choose the Save As command
from the File menu and enter a different
filename, or the same filename but a
different location on your hard disk (or a
different disk).
2 Select the drive and folder where you
want the label to be saved from the Save In
list. If you want to create a new folder, click
the new folder button and give it a name.

34 CHAPTER 3
Working with the Software
Calibrating Your Prin ter
Because each printer is full of working
parts, the precision in each is slightly
different. Sometimes this may cause
SureThing to slightly miss the mark when
printing. If this happens, you need to
cal ibrate your pr inter.
To calibrate the prin ter:
1 Choose the Calibrate Printer command
from the File menu. The Calibrate Printer
dialog box appears.
2 Confirm that the correct printer is listed
in the Printer field.
3 Press the Print Calibration Sheet button.
4 Fold the Calibration Sheet according to
the printed instructions and enter the
values in the Offset fields.
Your printer will now be offset by these
values to accommodate for any errors in
precision.
Before calibrating, be sure that you are
printing the correct template for the paper
you ar e using. Select About Template from
the Help menu if you’re not sure.
Printing
To print a label design:
1 Put the correct paper in the paper tray
of yo ur printer. Use pl ai n p a p er i f you a re
doing a test-print; use your label stock if
you are printing final output.
2 Choose Print from the File menu, or
click the Print button on the Command
bar. The Print dialog box appears.
3 Make sure that the correct printer is
selected, and that the printer is setup
properly .
4 Enter the number of copies you want to
print in the No. of Labels field. You can
specify the number of designs to print
based on either individual labels or label
sheets. Whether you choose Labels or
Sheets, SureThing tells you how many
sheets of label stock you will need (listed
below the Sample window).
Printing your label designs is simple.
SureThing manages the actual layout of
the designs on the page, and sequences
them as they print. All you need to do is
tell it how many copies to print, and on
which label to start.
5 Under Label Set Option s, ch oose Print A ll
Labels in Set to print all of the designs (i.e.,
any designs you’ve created using the Add
command); choose Print the current label
only to print only the current design;
choose Print range of labels and identify the
beginning and ending design to be printed
if you want to print more than one, but not

SURETHING CD LABELER
User’s Guide
35
all of the designs, or to print one design
which is not the current design.
Note: If your document only contains a
single design, the Label Set Options will
appear grayed out.
6 In the Sample window, click the label
position where you want printing to begin.
Normally this would be the first label on
the pa g e , but if you’ve a lre a dy pr i n ted a
label in the first position, you’ll want to
click a different position. The beginning
position is indicated in blue. Also, only the
active blocks appear in blue (use the Blocks
> Show/Hide command under the View
menu to turn blocks on or off prior to
printing).
7 If you are not going to print from the
default paper source, you can specify
which bin the paper should come from.
This is useful if you have more than one
bin or want to force the printer to use the
manual feed (if available).
8 Click OK to print.
Choose All to print all of the records in the
database. Choose Range and identify the
beginning and ending records from the
database you want to print.
Unless you have chosen None, the number
of copies represents the number of sets to
print. If you select two, you will get two
copies of each design for each record in
the database.
Working with Label
T emplates
Templates in SureThing are designed for
two primary uses:
. You can create customized layouts for
labels not found within SureThing using
the Template Creation Wizard under the
File menu (Deluxe version only).
. You can save your existing label designs
as templates and use them as the starting
point for new labels.
We recommend that you do not
a
run label sheets through your
printer after you have peeled off any labels.
Doing so may dam age your printer.
Printing Merge Jobs
If you’ve s e t a m e rg e f i le for you r de s i g n ,
you can control which records from the
merged database will print. The Merge
button is available to select a range of
records from the database you’re merging.
Choose None to print the current design as
you see it on the screen without merging.
Creating Customized Layouts using
the Template Creation Wizar d
If you need to print labels not found within
SureThing, u se the Template Creation
Wizard located under the File menu
(Deluxe version only). The wizard steps
you through the process of creating a new
label type.
Before proceeding with the wizard, you
will need to know the precise measurements for the type of label you are
creating, including:
• page size

36 CHAPTER 3
Working with the Software
• height and width of each label
• starting position of the first label
(measured from the top and left edges
of the page)
• number of labels across and down the
page
• horizontal and vertical span (horizontal
span is the distance from the left edge
of the first label to the right edge of the
last label across the page or block;
vertical span is the distance from the
top edge of the first label to the bottom
edge of the last label down the page or
block)
To create a new la yout template:
1 Choose Template Creation Wizard from
the File menu.
2 Click the Next button.
3 Enter the page dimensions and orienta-
tion of the label sheet and click Next when
you are ready to proceed.
You can optionally specify bleed settings
(the amount of space outside the bounds
of the label into which SureThing will
print), and choose from a list of template
SmartDesigns. Selecting a SmartDesign
from the list will initially set the height and
width of the label size, but you can change
it. This is useful if the label template you
are creating is similar to one that already
exists in SureThing, but has slightly
diff erent me asure ments . If you don’t wish
to use SmartDesigns, choose “(Ot her)”
from the list.
Click Next when you are ready to proceed.
5 Enter the number of labels across and
down the sheet, the position of the first
label, measured from the left and top of
the page, and the horizontal and vertical
span.
4 Enter a description for the layout, select
its shape (rectangular or circular), and the
size of individual labels on the sheet.
Why measure span instead of the space
between labels? This is done to minimize
rounding errors. If you measured the
space between individual labels, and were
off by one-tenth of an inch, for example,
this error would be applied to each label.
But by measuring the label span, i.e., the

distance from the left/top edges of the first
label to the right/bottom edges of the last
label, if you were off by one-tenth of an
inch, this error would be divided by the
number of labels. If you had six labels
across a sheet, an error of one-tenth of an
inch for span would amount to one-fiftieth
of an inch for each label.
Click Next when you are ready to proceed.
6 Enter a name for the template, and
choose a category.
SURETHING CD LABELER
User’s Guide
For more information about creating
?
templa te s, ch oo se Sur eT hi ng Tutorials
from the Help m en u, and select “Creati n g a
Custom Label Template. ”
Saving Existing Designs as Templates
You can save your existing label designs as
templates that can be used as the starting
point for new labels.
To save a design as a t empla te:
1 Open or create the design you want to
use as a template.
2 Choose Save As from the File menu.
3 Enter a name for the template.
4 From the Save As Type list, select
“Template (*.stt)”.
37
The category you select is where the new
label will appear when you create new
designs in SureThing. If you don’t want the
label to appear under the listed categories,
select “Other” from the list. You will be
prompted to enter a name for the new
category – “My Labels,” for example.
Click Next when you are ready to proceed.
7 Click Finish.
Now, w henever you choos e the New
command from the File menu, you will be
able to choose the label template you just
created from the list of label types.
Optionally select a category for the
template. The category you select is where
the new label will appear when you create
new designs in SureThing. If you don’t
want the label to appear under the listed
categories, select “Other” from the list. You
will be prompted to enter a name for the
new category – “My Labels,” for example.
5 Click Save to save the label as a tem-
plate.
When you start a new label using the New
command under the File menu, you can
select the template you just created from
the list of label types.

38 CHAPTER 3
Working with the Software
Deleting Templates
Templates you create are stored in a folder
named “User Templates” loc ated w ithi n the
folder where SureThing is installed. If you
accepted the default settings when you
installed SureThing, you would open the
following folders to locate the templates:
To delete a template, open the User
Templates folder, se lect the f ile you want to
remove and delete it (or move it out of the
User Templa tes fold er).
SureThing templates have the extension
STT.

SURETHING CD LABELER
User’s Guide
39
Introduction to “Playlists”
SureThing makes it easy to use playlists to
create labels for your audio CD collection.
A playlist is a set of information describing
the contents of an audio CD. A playlist
typically consists of things like the album
title, the name of the artist and the titles of
each audio track. Sometimes this information is recorded directly on the CD (CDText), but more commonly a playlist can
be found in a database on the Internet.
The beauty of using playlists is you don’t
have to type the information on to your
label. You simply insert the CD in to your
drive, and SureThing takes care of the rest.
Playlists are most commonly associated
with audio CDs. The concepts, however,
apply equally well to a data CD where you
might want to list the files included on the
CD. SureThing uses playlists for both ty pe s
of CDs.
SureThing makes using playlists easy in a
number of ways. It will read your CDs and
find the playlist information automatically
(if available). Using SmartDesigns, it will
automatically place the playlist on your
label in a number of attractive layouts.
Finally, there is a Playlist Manager which
helps organize your playlists and allow you
to re-use them on future labels.
The Playlist Manager
The Playlist Manager serves as the nerve
center for all playlist activity within
SureThing. Whenever you read a playlist
directly from a CD, the playlist is added to
the playlist manager building up a data-
base of playlist selections stored on your
computer. You can then use these saved
playlists in the future, even when you’re
not connected to the Internet.
In fact, we refer to inserting your CD into
your drive throughout this section. But
once you have an entry in t he Playlist
Manager, you don’t even need the CD in
your drive to make a label for it. Just open
the Playlist Manager, select the desired CD
and click OK. You can use these selections
on any label.
In addition to using the Playlist Manager to
select playlists for use in labels, it also
allows you to create custom playlists for
CDs which may not be included in the
playlist database located on the Internet.
You can add a new playlist, edit an existing
playlist, delete a playlist or read a CD into
the playlist database.
For convenience, many people like
©
to open the Playlist Manager and
quickly read several CDs into the database
at one sitting. This allows dial-up users to
store their music collection in one online
session and use the playlist features later
without connecting to the Internet.
There are actually two groups of playlists
being managed by the Playlist Manager at
all times. The first is the playlist database,
which, as has been discussed, is a collection of all your audio CDs. The second is a
set of active playlists used by the current
document. SureThing makes a copy of a
playlist to be saved within a document so
that it can be customized specifically for
that document. SureThing makes this

40 CHAPTER 3
Working with the Software
almost entirely transparent to you, but you
will see mention of it in the software so we
thought it should also be mentioned here.
SmartDesigns
SmartDesigns are our interactive design
tools to help make creating great looking
labels easier . When used with playlists, you
make a couple of choices, insert your CD
and you're done. That’s why we highly
recommend using SmartDesigns for all
your playlist labels, even if you just use
them as a starting point for creating
custom designs.
We have created a number of SmartDesigns specifically to be used when
creating audio or data CDs. These
SmartDesigns have specified where things
like the CD title, ar ti st’s name, and track
listings will be placed. When you insert a
CD into your drive, SureThing automatically reads the playlist and places the data
into these designs. You can then click your
way through the SmartDesign choices to
find the look you’re after.
You choose the type of SmartDesign you’d
like to us e i n the New L a b e l Wizard . You
will see thre e choices: Audio CD, Data CD
or General Purpose. The General Purpose
layouts are free form and do not place any
playlist information. The other two include
designs which match their purpose.
A Quick Walk-Through
We’ve now g i ve n you a goo d o ve rvi e w of
playlists and how they are used in SureThing. But nothing really shows how easy
it is like a quick exercise. So follow these
steps and create your first label using
playlists.
1 Select New from the File Menu or click
the New button in the Command Bar.
2 Choose SureThing CD Labels 2-U p,
click Next.
3 Choo s e a ba ckgroun d i f you’d like , or
simply click Next.
4 Make sure “Use SmartDesig ns” is
checked and select Audio CD in the
SmartDesigns list. You can quickly click
through the available SmartDesign layouts.
When you’re rea dy, click Nex t .
5 On the final screen, select “Use Playlist
Manager.” We have a sample playlist
already set up just for this exercise. Click
Finish.
6 You will now be presented with the
Playlist Manager. In the list of playli st
selections, select Follow the Sun by Team
SureThing. Click OK.
You are now looking at a fully completed
label ready to print. It’s that easy! You can
now browse through backgrounds, change
the SmartDesign layout, or change the
fonts to get the look just right for you.
Have fun!
In real life, you may want to select “Read
from CD” on the Finish screen of the New
Label Wizard to grab a playlist from the
CD you just recorded. So metimes you’ll
want to play with font sizes, move text
blocks slightly, or delete unwanted fields
from the design of the label. It’s all easy,

SURETHING CD LABELER
User’s Guide
41
and we’ve ju st save d you a w ho le lot of
typing and formatting!
Compilation Music CDs
The database of CD playlists on the
Internet usually only applies to CDs you
buy in stores. Someone has previously
submitted the playlist to the database,
hence it is available for you to access when
you insert your CD.
Thi s do e sn’t help w h en m ak in g c ompi la tion CDs of your favorite songs, for
example. A compilation CD is your own
personal collection, so no one could have
previously submitted it to the Internet.
SureThing still makes it easy in one of two
ways to use playlists with compilation CDs.
The first is to make sure you recorded the
CD with the CD-Text option turned on in
your CD recording software (e.g., Easy CD
Creator or Nero). This will record the
playlist information directly to your CD,
and will eliminate the need for SureThing
to look for it on the Internet. Most CD-R
drives and recording software support
CD-Text but not all, consult the respective
user guides for more information on
recording CD-Text.
The second is to use the Playlist Manager
to create a custom playlist from its
database. You would first insert each of the
master CDs from which your compilation
will be created, and then select each song
to be added to your new playlist. You can
then save the compilation playlist in the
play l is t d ata b as e for future u s e. You will
find step by step instructions for this
below.
For Advanced Users
For those of you who want to know how
every thing works, read on. For others, the
following might be interesting reading, but
not essential. The important thing to
remember is that for most typical playlist
designs, SureThing and SmartDesigns will
take of the details for you.
A label design with playlists is much like a
ma il merge do cu men t in a wo rd pr oc es so r.
You insert fields into the document which
are placeholders. At some point, the
inserted fields are replaced with the actual
data you want to print.
In SureThing, you can view a playlist
design at any time showing either the
playlist fields, or the actual playlist data
from a CD (title, artist name, song titles,
etc). This essentially gives the label design
two modes: Playlist Field mode and Playlist
Data mode.
Display Playlist Fields mode is like creating
a template or a blueprint. Anything you do
here, like formatting text, changing
headers, inserting new playlist fields,
affects how the Playlist data will appear
once it is merged into the document. You
only need to switch to this mode if you feel
such a change is necessary.
In the example below, note that Playlist
fields are set off with curly brackets { }.

42 CHAPTER 3
Working with the Software
The information inside the brackets is the
name of the field from the Playlist.
Display Playlist Data mode is the finished
product. You’ve read in a playlist from a
CD and the playlist information is being
displayed as if you typed it all in yourself.
At this point you’re putting on the finishing
touches and getting ready to print.
Your old Pla ylist Data will be thro wn out,
and the new Playlist Data will replace it, so
any changes you made while in Display
Playlist Data mode will be lost.
You can easily switch between the two
modes from the Playlist menu. There are
also a few instances where SureThing will
automatically switch between the two
modes. For example, when you want to
insert a playlist field, you must be in
Playlist Field mode so SureThing switches
to it.
In summary, SmartDe signs take care of
most, if not all, of the underlying details for
playlist designs. It helps, however, to
understand how things work so if and
when you want to tweak the designs, you'll
know what you're doing.
Wor king with Playlists
SureThing CD Labeler lets you add and
edit audio and data CD information in
your design with just a few mouse clicks.
SureThing automatically maintains a CD
information database.
This brings up another important point to
remember: Whenever you start a new
design, read a new playlist from a CD,
switch to a new playlist in the Playlist
Manager or edit the contents of a playlist,
SureThing regenerates the Playlist Data.
Importing a Playlist Using the New
CD Wizard
SureThing lets you select between audio
and data labels when you create a new
design, or later if you have created a
General Purpose design.
. Audio fields are related to audio
information on your CD or from the
Internet.

. Data fields are related to filename,
filesize, and so on.
. General Purpose designs do not use
playlist fields.
SURETHING CD LABELER
User’s Guide
43
Importing a Playlist to an Existing
Design
If you didn’t import the playlist information when you created your design, you
can still add it to an existing design. You
can import either audio or data information.
To add an audio playlist t o an existing design:
1 Insert the CD you wish to read into the
CD ROM drive.
2 From the Design Bar, click the Playlist
icon and choose Get Playlist Contents from
CD.
If you already have a playlist in your
design, you’ll be asked if you wish to
replace the current one. If you do, click
Yes.
3 When A udio CD information cannot be
foun d on the C D, you’ll have th e op t io n of
searc h in g for it on l in e . You must b e
connected to the Internet to do this. If you
see this message, click OK.
In cases where you want SureThing to
always check online (especially if you’re
always connected to the Internet), you can
check the “Don’t prompt me ” checkbox.
4 If CD information is found, it is added
to your d esign. It is a ls o automatically
added to your playlist database.
To add a data playlist to an existing design:
1 From the Design Bar, click the Playlist
icon and choose Get Playlist Contents from
CD.
If you already have a playlist in
a
your design, you ’ll be asked if you
wish to replace the current one. If you do,
clic k Yes.
2 Use the General, File List and Files tabs
to select data from the CD. You can edit
this information if you wish on the General
and File List tabs.
3 Click OK.

44 CHAPTER 3
Working with the Software
Applying a Playlist from Your Playlist
Database
You can quickly apply any existing playlist
from your playlist database, which makes
it easy to use your design for different
CDs. You won’t have to create a separate
design for each CD.
To apply a playlist from your database:
1 From the Design Bar, click the Playlist
icon and choose Playlist M an ag er.
2 The Playlist Manager dialog box displays
all the playlists already stored in your
dat aba se . To sel e ct th e play l is t yo u w is h to
apply, click it in the list.
Creating a Custom Playlist with the
Playlist Database
Need a label for your CD of favorite
songs? SureThing lets you choose the
songs from your existing playlist database
to create a custom playlist.
To creat e a custom pla ylist with the Playlist
Manager:
1 From the Design Bar, click the Playlist
icon and choose Edit Active Playlist.
2 Enter information about the CD on the
General tab.
3 Click OK.
3 Click the Database tab.

4 Double-click an album title in the CDs
column to see its songs. Click on the song
you wish to add to the Current Tr acks
column and click the button, or simply
double-click the song to add it.
SURETHING CD LABELER
To change the track order in your playlist:
1 Click the Tracks tab.
2 Do one of the following:
45
User’s Guide
If you wish to remove a song from the
playlist, click it in the Current Tracks
column, and click the Remove button.
This just removes the track from the active
playlist; it does not delete it from the
database.
If you wish to clear the Current Tracks
column of all songs, click the Remove All
button. This removes all the tracks
from the active playlists in document; it
does not delete them from your database.
5 Repeat step 4 to add additional songs.
6 When you’re finished, click OK.
. Click the Move Up button to move
the highlighted track up once each time
you click this button.
. Click the Move Down button to
move the highlighted track down once
each time you click this button.
Creating Your Own Playlist Data
You can create new playlists or edit
existing ones for either audio or data CDs.
The steps below describe how to create an
audio playlist.
Creating a data playlist is done the
?
same way but has a few different
options. See Data Playlist Options for the
options that apply to a data playlist.

46 CHAPTER 3
Working with the Software
To create your own pla ylist data:
1 From the Design Bar, click the Playlist
icon and choose Playlist M an ag er.
2 Click the New button.
3 Enter information about the CD on the
General tab.
4 Click the Tracks tab and enter the track
information. Click the Add button to add
each track.
As you continue to do this, your tracks will
be added to the list.
. If you wish to delete a track, click it in
the list and click the Delete button.
. If you wish to edit a track, click it, make
your changes and then click the Change
button.
. If you wish to clear the track info fields,
click the New button.
5 When you’re finished, click OK. You are
returned to the Playlist Manager dialog.
6 Click OK to apply the custom playlist to
the design.
Acti ve P layl ists in Docum ent are p la ylists in
use in the current document only. They’re
not available to other documents or to
new documents you create unless you
choose to save them by clicking the Add
button, which adds them to the Playlist
Database Selections list, available to all
SureThing documents. They’ll always be
part of the current document whether you
save them or not, however (unless you
delete them, of course).
Playlist Database Selections are global
playlists, available to all SureThing
documents.
More Info on the Playlist Manager
The Playlist Manager lets you create, edit,
and app l y p l ay lists to your d e s igns. You can
open the Playlist Manager either from the
top menu bar or from the Design bar.
The first thing you’ll notice is that there are
two primary lists: Activ e Play lists in
Document (the top-most list), and Playlist
Database Selections.
Following is a description of the buttons
along the bottom of the Playlist Manager
dialog box;
Contents
Reads info from the CD in your CD-ROM
drive, or searches online CD databases.

SURETHING CD LABELER
User’s Guide
47
Add
Adds selected playlist from Active Playlists
in Document to the playlist database.
New
Creates a new playlist in either the Active
Playlists in Document, or in the Playlist
Database, depe nding on whi ch list yo u’ve
sel ecte d pr ior to cli ck ing New.
Edit
Edits the selected playlist (can be either a
document playlist or one from the playlist
database).
Delete
Close
Closes the Playlist Manager dialog box
without applying a playlist to the current
design.
Displaying Playlist Fields or Data
You can toggle between displaying playlist
fields and the actual data contained in the
fields.
If you have playlist data displayed
a
and want to display playlist fields,
you will be asked to confirm this choice. If
you have changed text in the playlist
information, these changes will be lost
when you display playlist fields.
To display playlist fields or pla ylist data:
1 From the Design Bar, click on the
Playlist icon and choose Display Playlist
Data.
If your design is already displaying data,
this Playlist menu changes to Display
Playlist Fields.
Deletes the selected playlist (either a
document playlist or one from the
database).
OK
Accepts any changes you’ve made and
applies the selected playlist to the current
design.

48 CHAPTER 3
Working with the Software
 Loading...