

Page 1
Page 2
Thank you
3
Dear PrimeLab user,
We are pleased that you have decided to purchase a PrimeLab 1.0 Multitest kit to
analyse your water.
With this kit you have acquired a device “Made in Germany”; developed by
Water-i.d. GmbH in collaboration with JENCOLOR.
Your PrimeLab is like a modern Smartphone: small and handy, but packed with
innovative technology and features you will soon not want to miss anymore.
For the first time ever a device has been developed, combining the unique
Jencolor sensor technology with the experience of Water-i.d. GmbH and DTK
Water (UK) in the field of reagents and water analysis, to produce a single sensor
with only one light source to determine all water characteristics whose colour
changes due to the addition of a reagent in the visible range of 380nm - 780nm.
®
Using the built-in Bluetooth connectivity to the “PrimeLab Desktop Assistant” you
can very easily manage measurement data and the respective customer data and
develop your own recommendation system.
Register now as a PrimeLab user in the online PrimeLab community at
www.primelab.org to receive valuable information and support by the PrimeLab
Community.
We hope you will be very happy with
YOUR PrimeLab!
3
Page 3

Table of Contents
4
Parts list / Accessories
The PrimeLab
Front and Back
Replacing Batteries
Display symbols
Operating PrimeLab
Menu: SET (Setup)
Set device language
®
Activate / deactivate Bluetooth
Set date / time
Set ideal ranges (parameters)
Calibration
Set display contrast
Set Auto-Off time
Menu: MEM (Memory)
View test results
Delete test results
Menu: INFO
Device and support info
Menu: TEST
Parameters list / test procedures
Test process for all parameters / test procedure
Important notes for accurate testing
Test procedures per parameter
Appendix
Technical Details
Troubleshooting
Cleaning the device
CE-Conformity Declaration
Guarantee policy
Disposal (device and batteries)
6
7
7
8
SET 1
SET 1
SET 2
SET 3
SET 4 - 6
SET 7
SET 7
MEM 1 - 2
MEM 3 - 4
INFO 1
TEST 2 - 6
TEST 7
TEST 8 - 9
1 - 274
A 1
A 2
A 3
A 4
A 5
A 6
4
Page 4
55
Table of Contents
PrimeLab-Desktop-Assistant
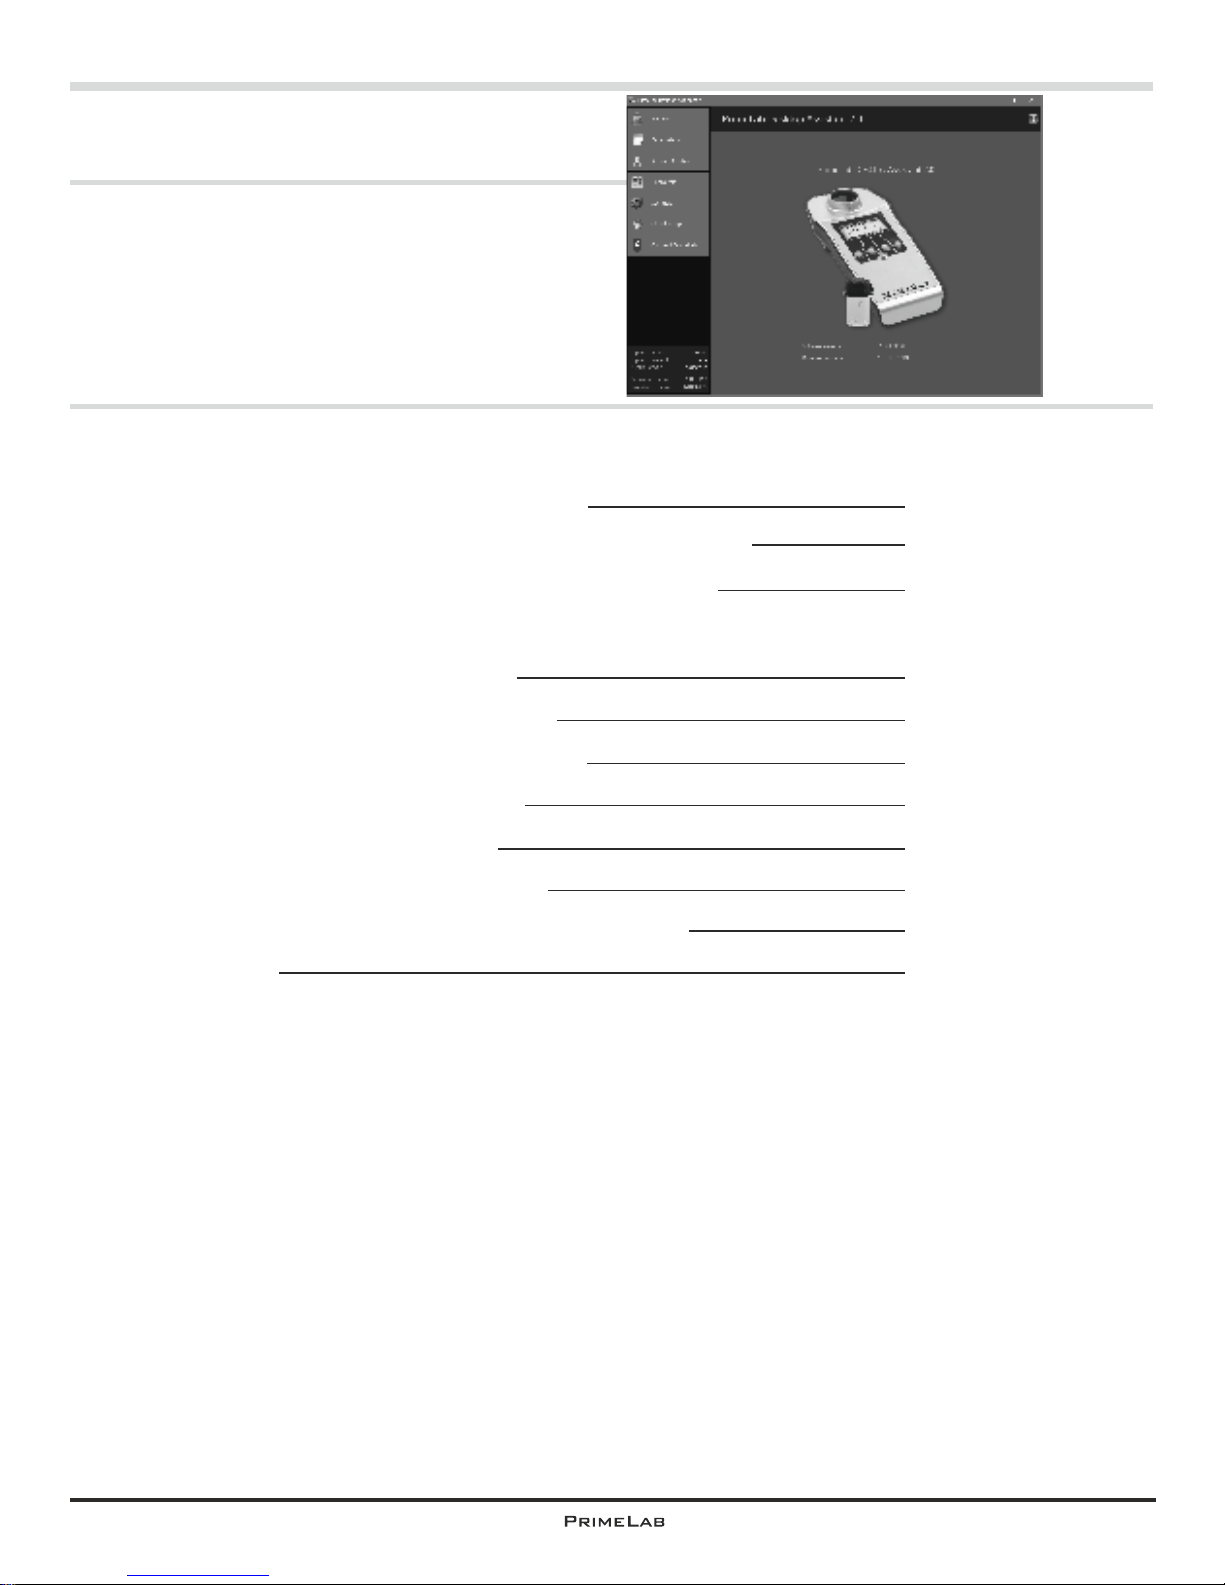
The “PrimeLab Desktop Assistant” is a
powerful tool to manage and evaluate
your test results, to update your
PrimeLab, for an upgrade installation of
additional test methods and to develop
dosage recommendations.
Menu Items Parameters
Preparation / Installation
®
Install Bluetooth USB dongle
First connection of PrimeLab with PC (pairing)
Installing the “PrimeLab Desktop Assistant“
Main screen & screen symbols
Menu Item Accounts
PDA 1
PDA 2-3
PDA 4-5
PDA 6 - 8
PDA 9 - 10
Menu Item Remote Control
PDA 11
PDA 12
Menu Item Chemicals
PDA 13 - 14
Menu Item Settings
PDA 15 - 16
Menu Item Cloud-Setup
PDA 17
Menu Item Connecting to PrimeLab
Error messages
PDA 15 - 16
Page 5
Parts list / Accessories
6
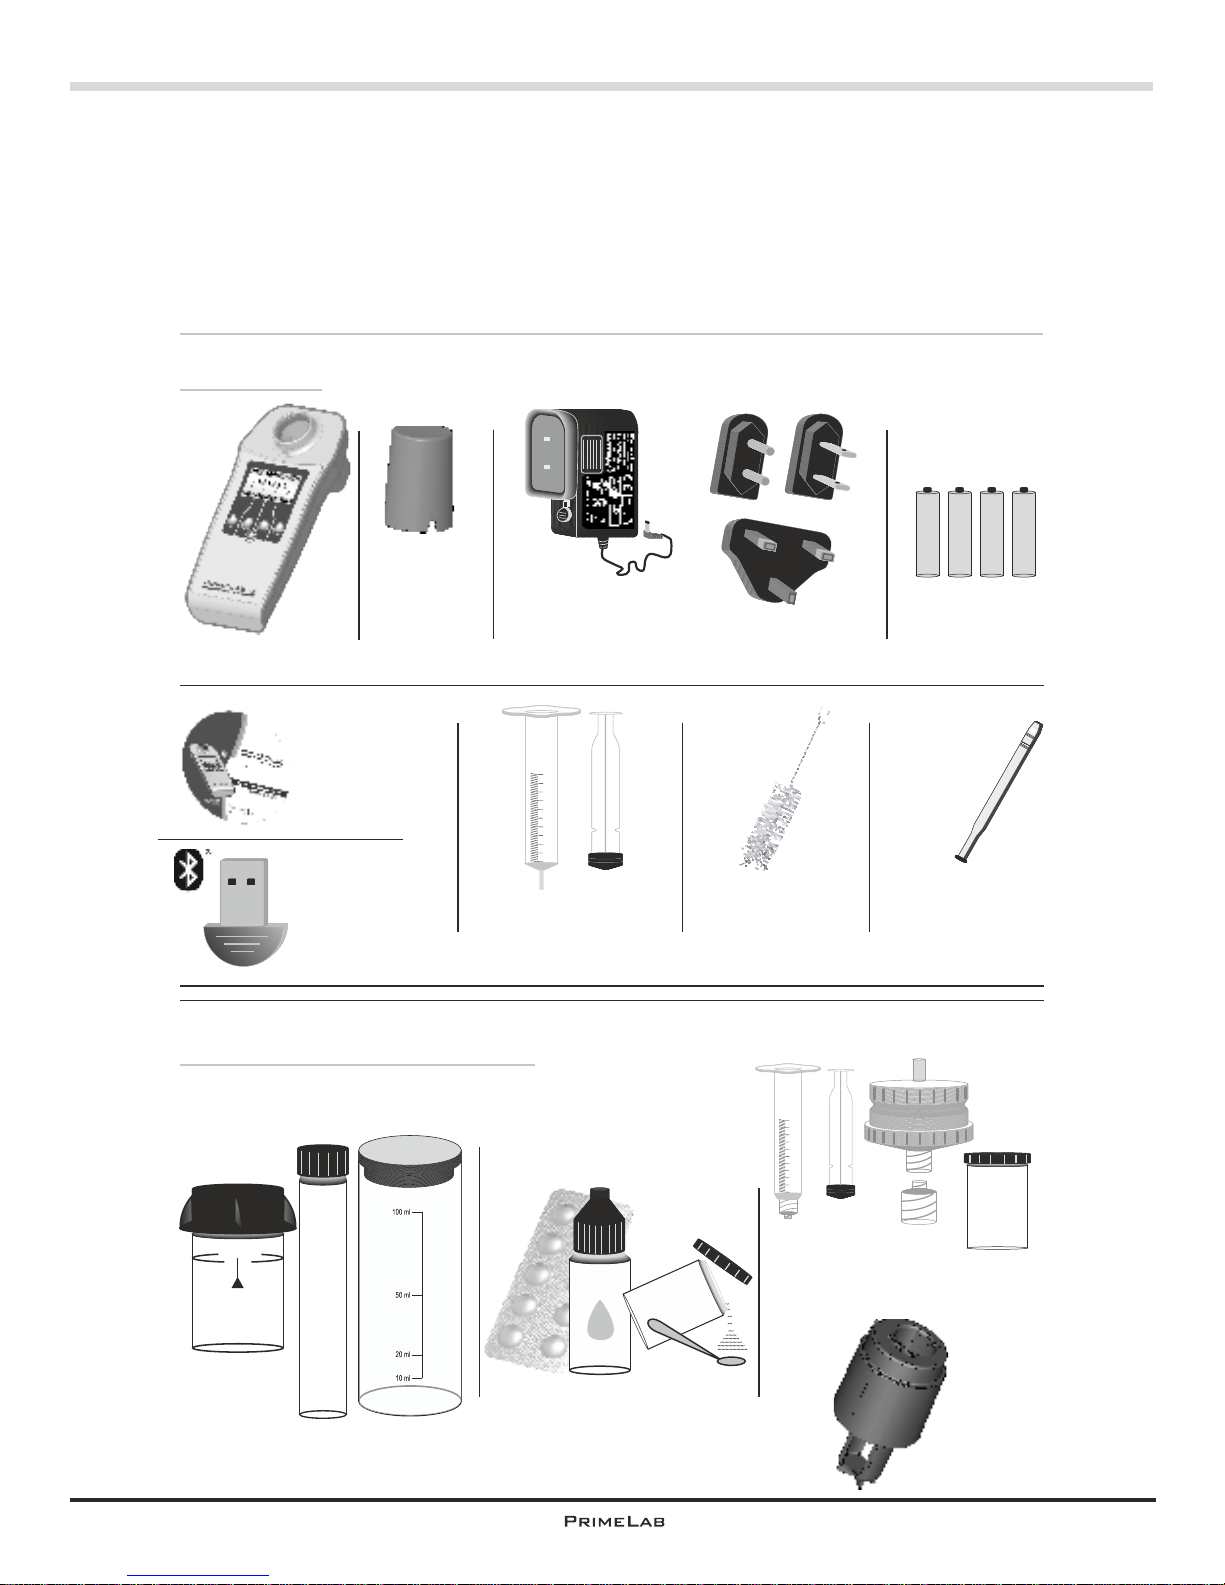
The following parts come as part of your kit or are available as optional accessories.
The quantities of some parts depend on the version (e.g. which reagents) you have
purchased.
If anything is missing from your kit as pictured below as “In every kit” please
immediately notify the vendor from whom you have purchased your PrimeLab!
10 ml
24 mm
glass
In every kit
Depending on device variant
Cuvettes
Reagents
16 mm
glass
Tablets
Liquids
Powder
Misc.
®
Bluetooth USB-Dongle
Filterholder
PrimeLab
+
-
AAA
+
-
AAA
+
-
AAA
+
-
AAA
4 x AAAbatteries
10
9
8
7
6
5
4
3
2
1
ml
10 ml syringe
Light shield
for 16mm
cuvette
Cleaning brush
Stirring rod
(variable
quantities)
Power supply with
exchangeable international
mains adaptors
100ml
plastic
CD-ROM
PrimeLab
DesktopAssistant
Filter
Filterpapers
MERCK
vial
adapter
6
10
9
8
7
6
5
4
3
2
1
ml
Luer-lock
syringe
(20ml)
Powder
Page 6
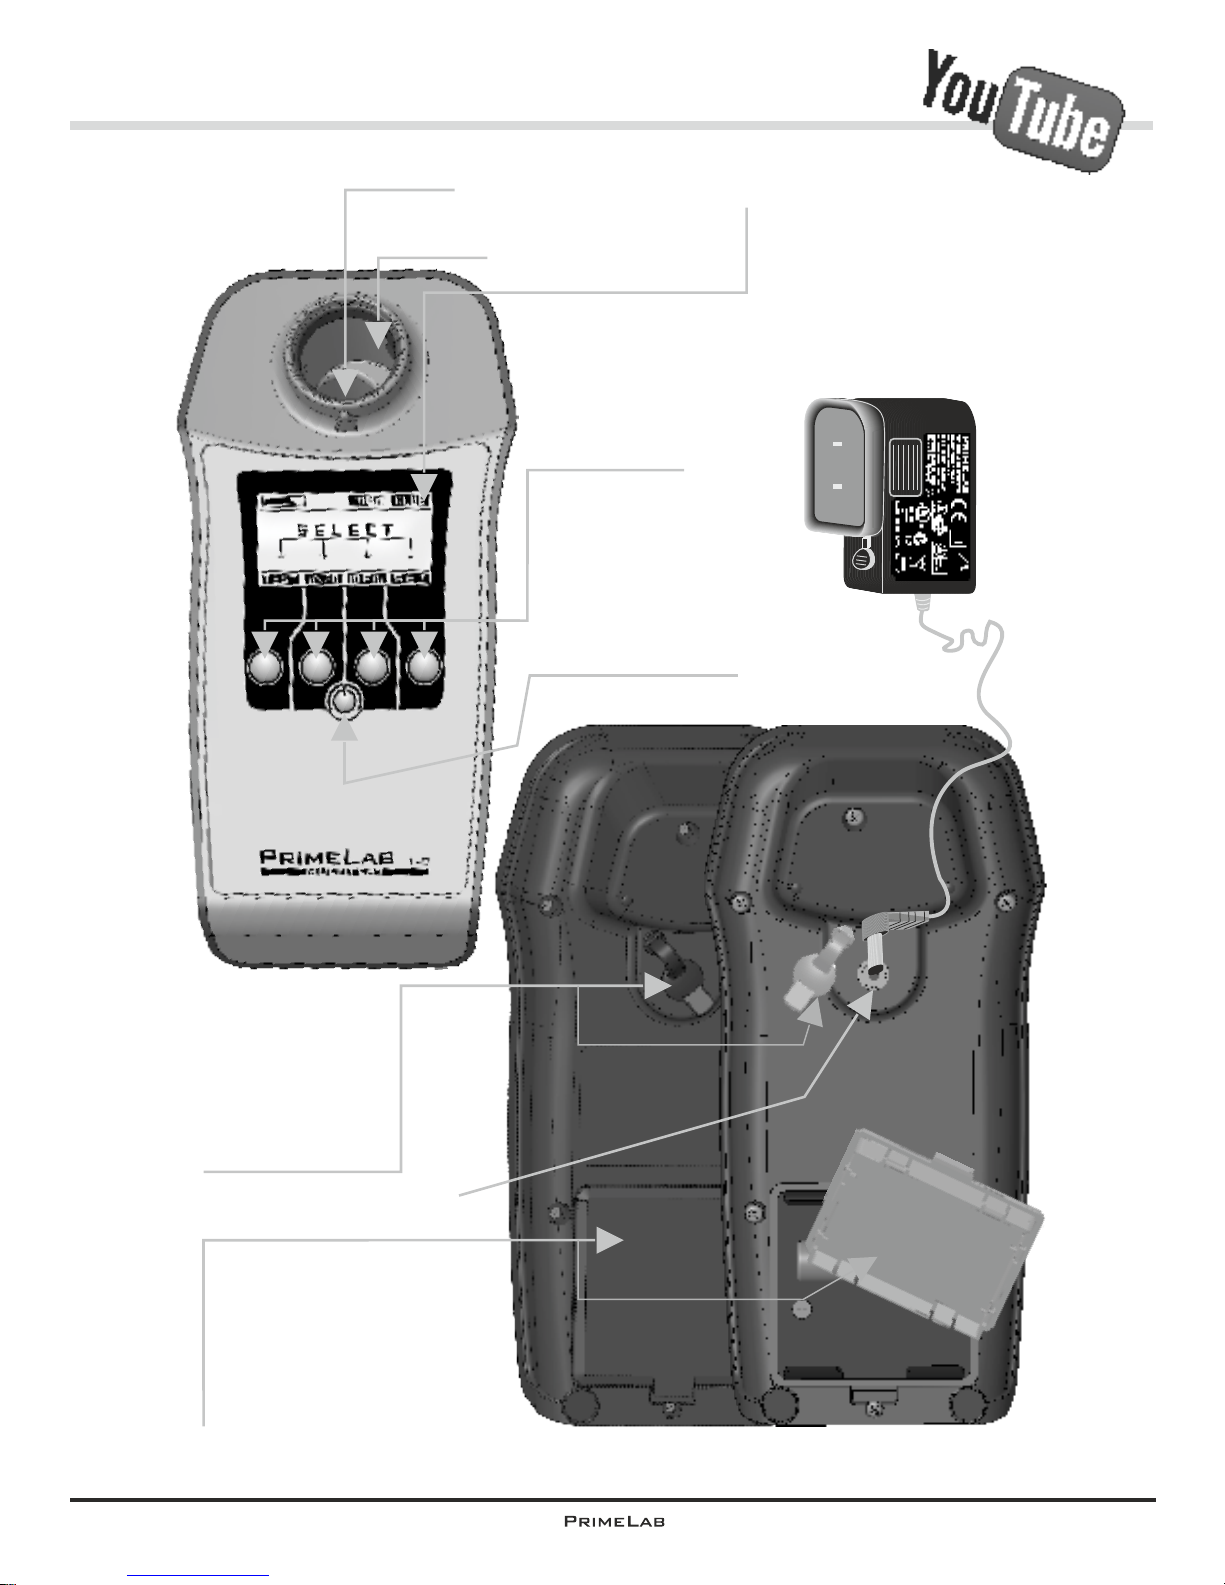
The PrimeLab / front and back
The PrimeLab / replacing batteries
7
Chamber for the16mm
and for the MERCK cuvettes
Chamber for the
24mm cuvette
On / Off button.
Hold for at least 1 second
to switch on/off
Back to main screen
Buttons 1 to 4.
Function according
to display
Rubber protection
plug for power
supply connection
socket, lift at tab
and turn to open
Power supply socket
Battery compartment lid
Use a coin or similar to
fit beneath the tab and
lever up.
Reclose by pushing down
with pressure.
!!! Do not use rechargeable batteries.
Batteries are NOT charged during mains operation!!!
PrimeLab display
(see next page)
7
Page 7
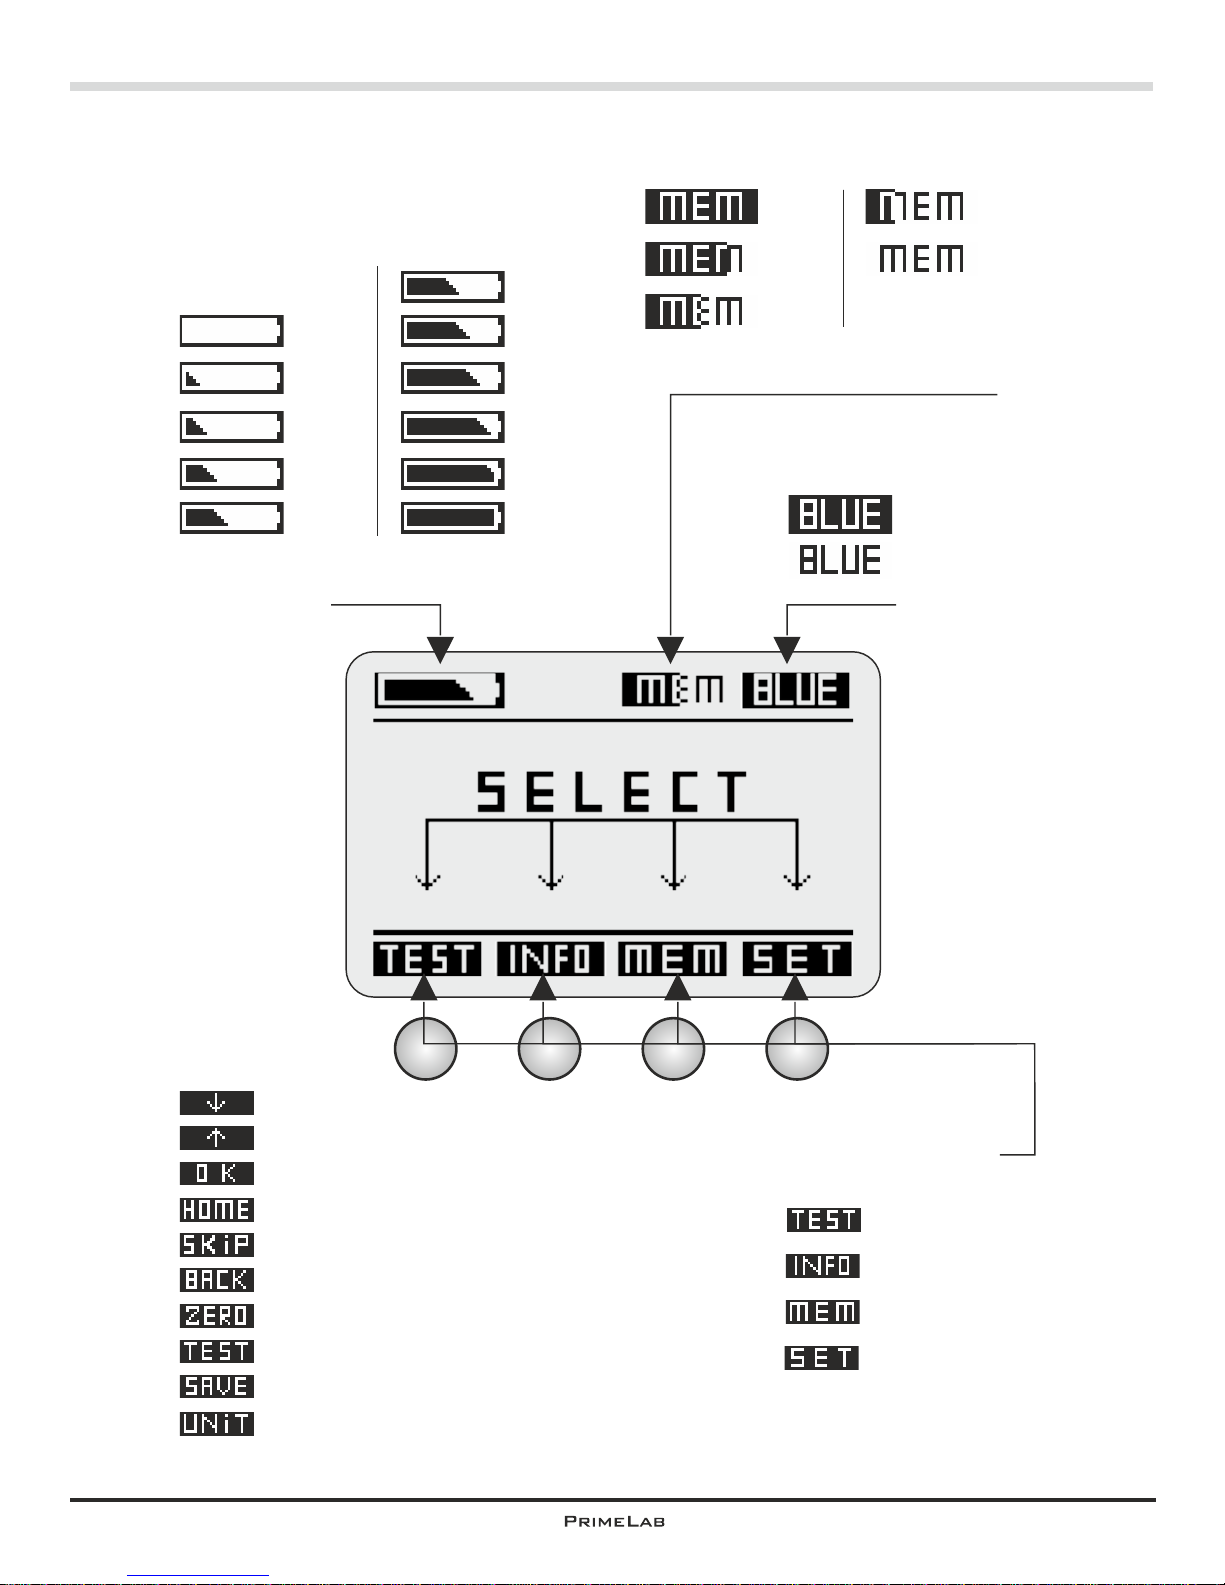
The PrimeLab / Display symbols
8
activated
deactivated
PrimeLab memory usage
100%
75%
50%
25%
0%
Battery state display
100%
90%
80%
70%
60%
50%
40%
30%
20%
10%
0%
Assign of
buttons 1 - 4
upon start:
Menu TEST
Menu INFO
Menu MEMORY
Menu SETUP
Other button
assignments:
8
®
Bluetooth -transmitter
Scroll down or decrease value
Scroll up or increase value
Confirm input / output
Step back or return to start screen
Skip messages / skip countdown
Step back
Initiate ZERO measurement (baseline)
Initiate test
Save result
Convert result to different units
Page 8
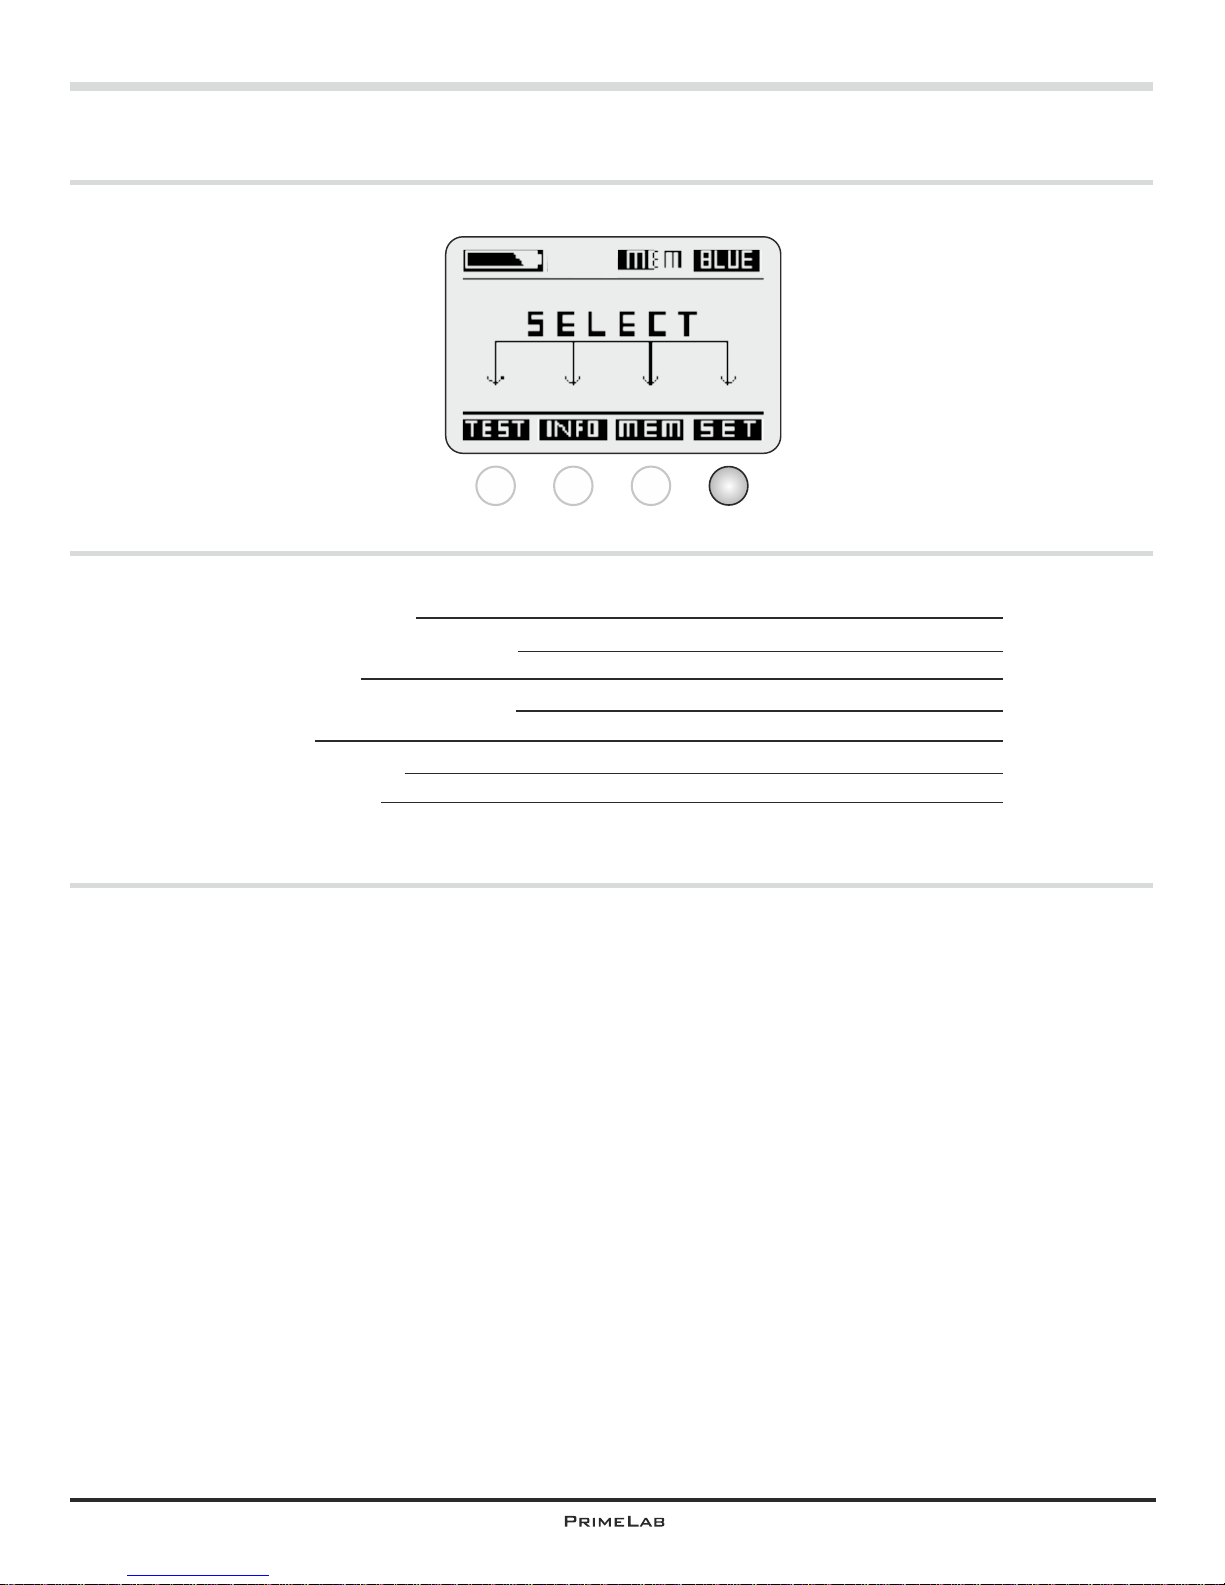
Set device language
®
Activate / deactivate Bluetooth
Set date / time
Set ideal ranges (parameters)
Calibration
Set display contrast
Set Auto-Off time
SET 1
SET 1
SET 2
SET 3
SET 4 - 6
SET 7
SET 7
Menu: SET (Setup)
SET
Menu: SET (Setup)
1 2 3 4
SET
Page 9
Menu: SET (Setup)
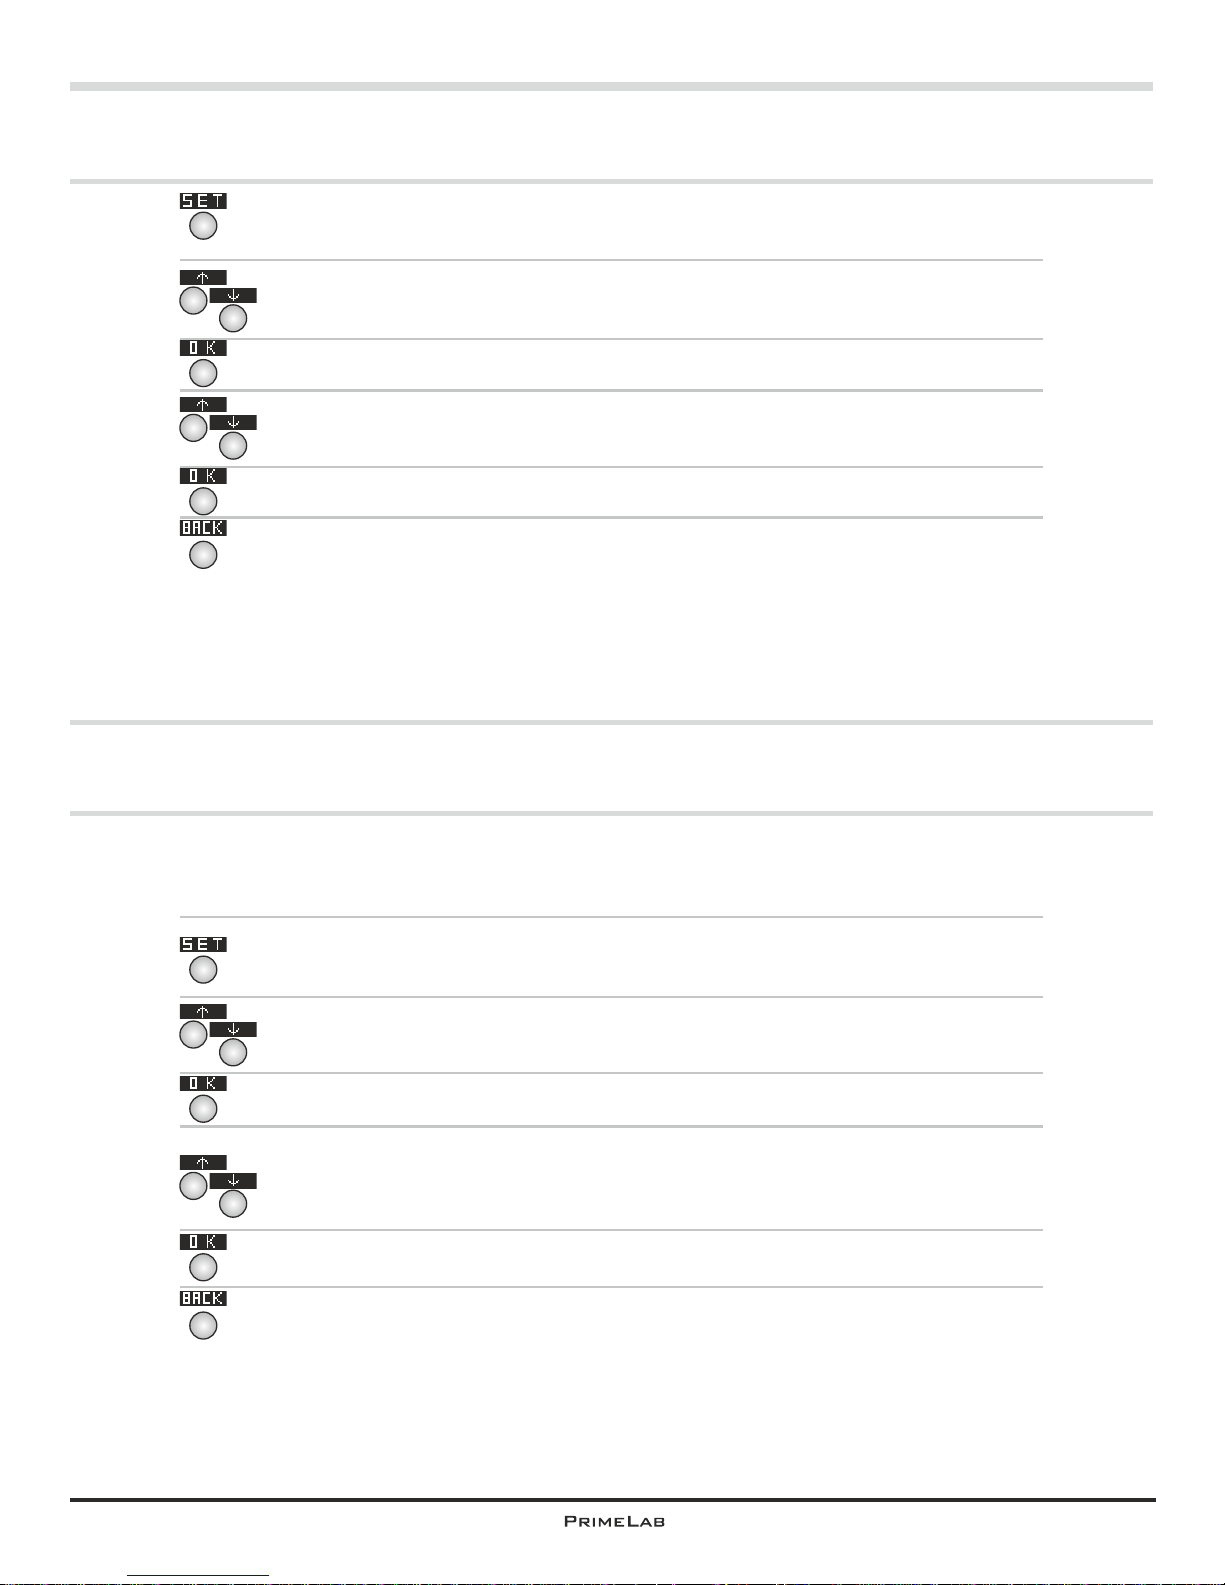
SET 1
Set device language
In the start menu press button 4 to access the SETUP menu.
In the setup list scroll up with button 2 and down with button 3 until the
entry “Language” appears in white on black.
Then press button 4.
Scroll up and down in the list with button 2 or 3 respectively until the
language you want to use appears in white on black.
Confirm the selection by pressing button 4.
Use button 1 to return to the main menu
4
4
4
1
®
Activate / deactive Bluetooth transmitter
A connection with the PC and the PrimeLab Desktop Assistant is only
®
possible if the Bluetooth transmitter in your PrimeLab is activated
In the start menu press button 4 to access the SETUP menu.
In the setup list scroll up with button 2 and down with button 3 until the
®
entry “Bluetooth ” appears in white on black.
Then press button 4.
Scroll up and down in the list with button 2 or 3 respectively until either
“Activate” or Deactivate” appear in white on black as required.
Confirm the selection by pressing button 4.
Use button 1 to return to the main menu
4
4
4
1
2
3
2
3
2
3
2
3
SET 1
Page 10
Menu: SET (Setup)
SET 2
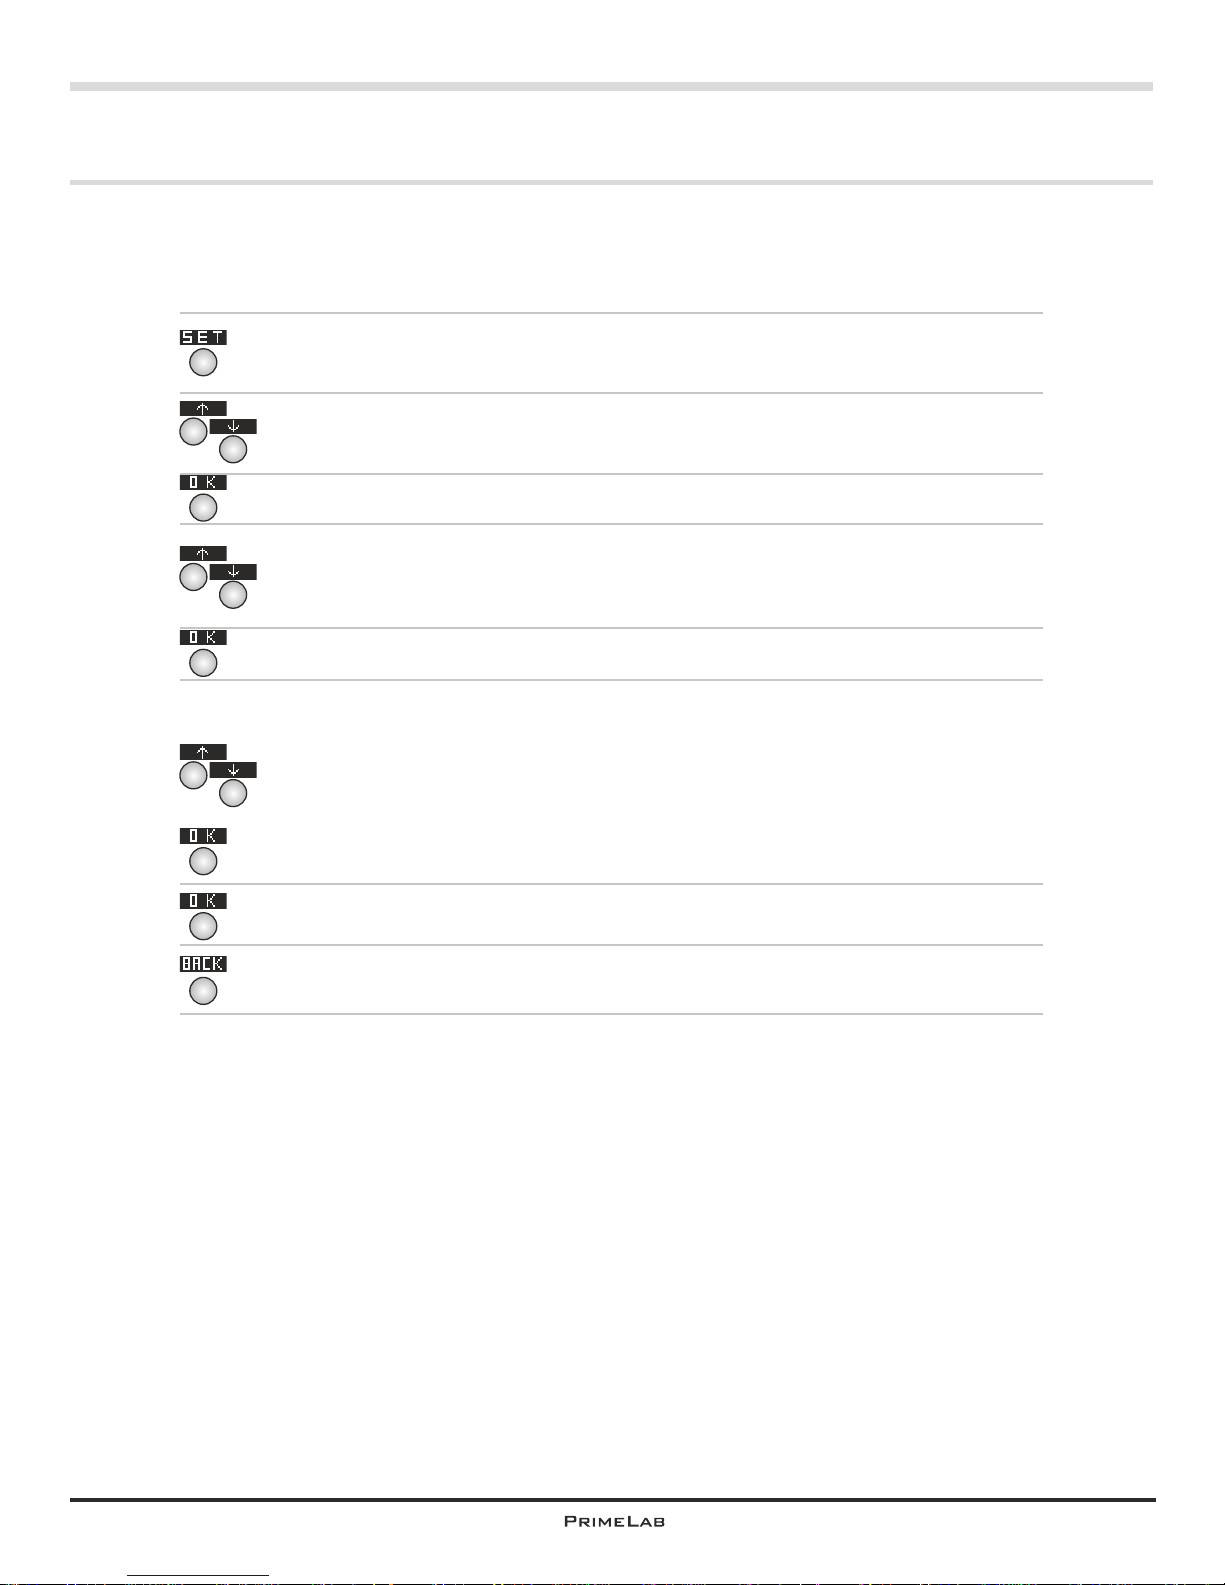
Set date / time
Setting the correct date and time is important because each measurement
value is saved with a date and time stamp.
The time can also be very easily set via the “PrimeLab Desktop Assistant”.
In the start menu press button 4 to access the SETUP menu.
In the setup list scroll up with button 2 and down with button 3 until the
entry “Date/Time” appears in white on black.
Then press button 4.
In the list scroll up or down with button 2 or 3 respectively until the
required entry (Date or Time) appears in white on black.
Confirm your selection by pressing button 4.
Below the number to be changed you will see a cursor (^).
The time must be entered in the 24:00 hour mode, the date in the format
DD.MM.YY.
Use buttons 2 or 3 to increase or decrease the respective number.
If and when the number is correct, press button 4 to confirm and move to
the next position.
When the last entry for the time or date has been made return to the submenu “Date/Time” by pressing button 4.
When you are finished with setting the date and time, leave the sub-menu
by pressing button 1 to return to the SETUP menu.
4
4
4
1
4
4
2
3
2
3
2
3
SET 2
Page 11
Menu: SET (Setup)
SET 3
Set ideal ranges (parameters)
There is the option of selecting an ideal range for every test and
measurement parameter by indicating in this menu which range (minimum
and maximum) you would classify as “good” or “acceptable” for this
particular parameter. According to your classification the results gained
from subsequent measurements and tests will be rated as “OK”, “Low” or
“High”.
The “PrimeLab Desktop Assistant” will also calculate the dosage
recommendation on the basis of the minimum and maximum range limits
set by you for the ideal range!
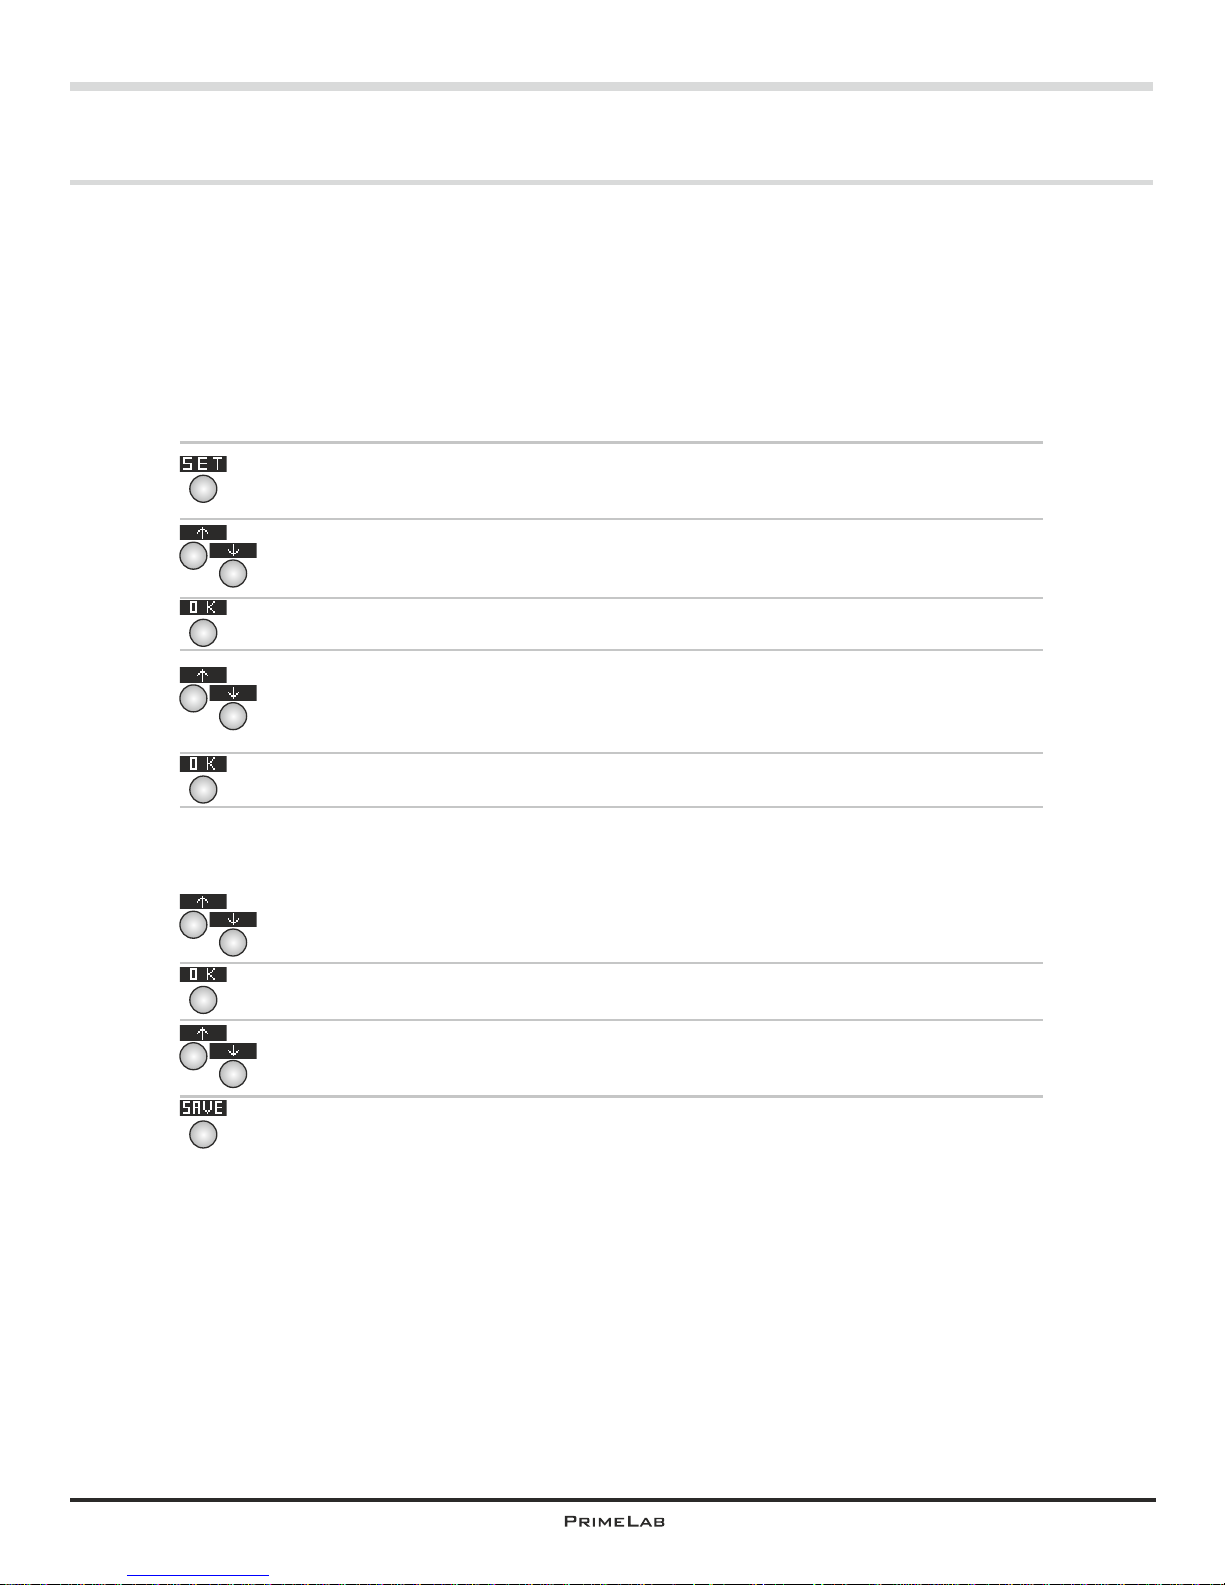
In the start menu press button 4 to access the SETUP menu.
In the setup list scroll up with button 2 and down with button 3 until the
entry “Ideal range” appears in white on black.
Then press button 4.
Scroll up and down the list by pressing button 2 and 3 respectively until
the required entry (parameter name) appears white on black.
Confirm your selection by pressing button 4.
First the minimum value must be entered. This, as well as the maximum
value, must be within the specific measurement range for the particular
parameter.
Adjust the minimum value by pressing button 2 and 3 (up and down).
Confirm the setting by pressing button 4.
Adjust the maximum value by pressing button 2 and 3 (up and down).
Save the settings by pressing button 4.
4
4
4
4
4
2
3
2
3
2
3
2
3
SET 3
Page 12
Menu: SET (Setup)
SET 4
4
4
4
4
2
3
2
3
SET 4
4
Calibration
Because of the innovative PrimeLab technology, especially in conjunction
with the JENCOLOR MultiColour sensor, it is no longer necessary to return
the photometer for calibration. The precision of the sensor is so good that
the strength of the light source (LED) is measured and the system is
calibrated on basis of the calculated value. Calibration should be carried
out on a regular basis (e.g. at least 2 weekly) to ensure accurate test
results at all times.
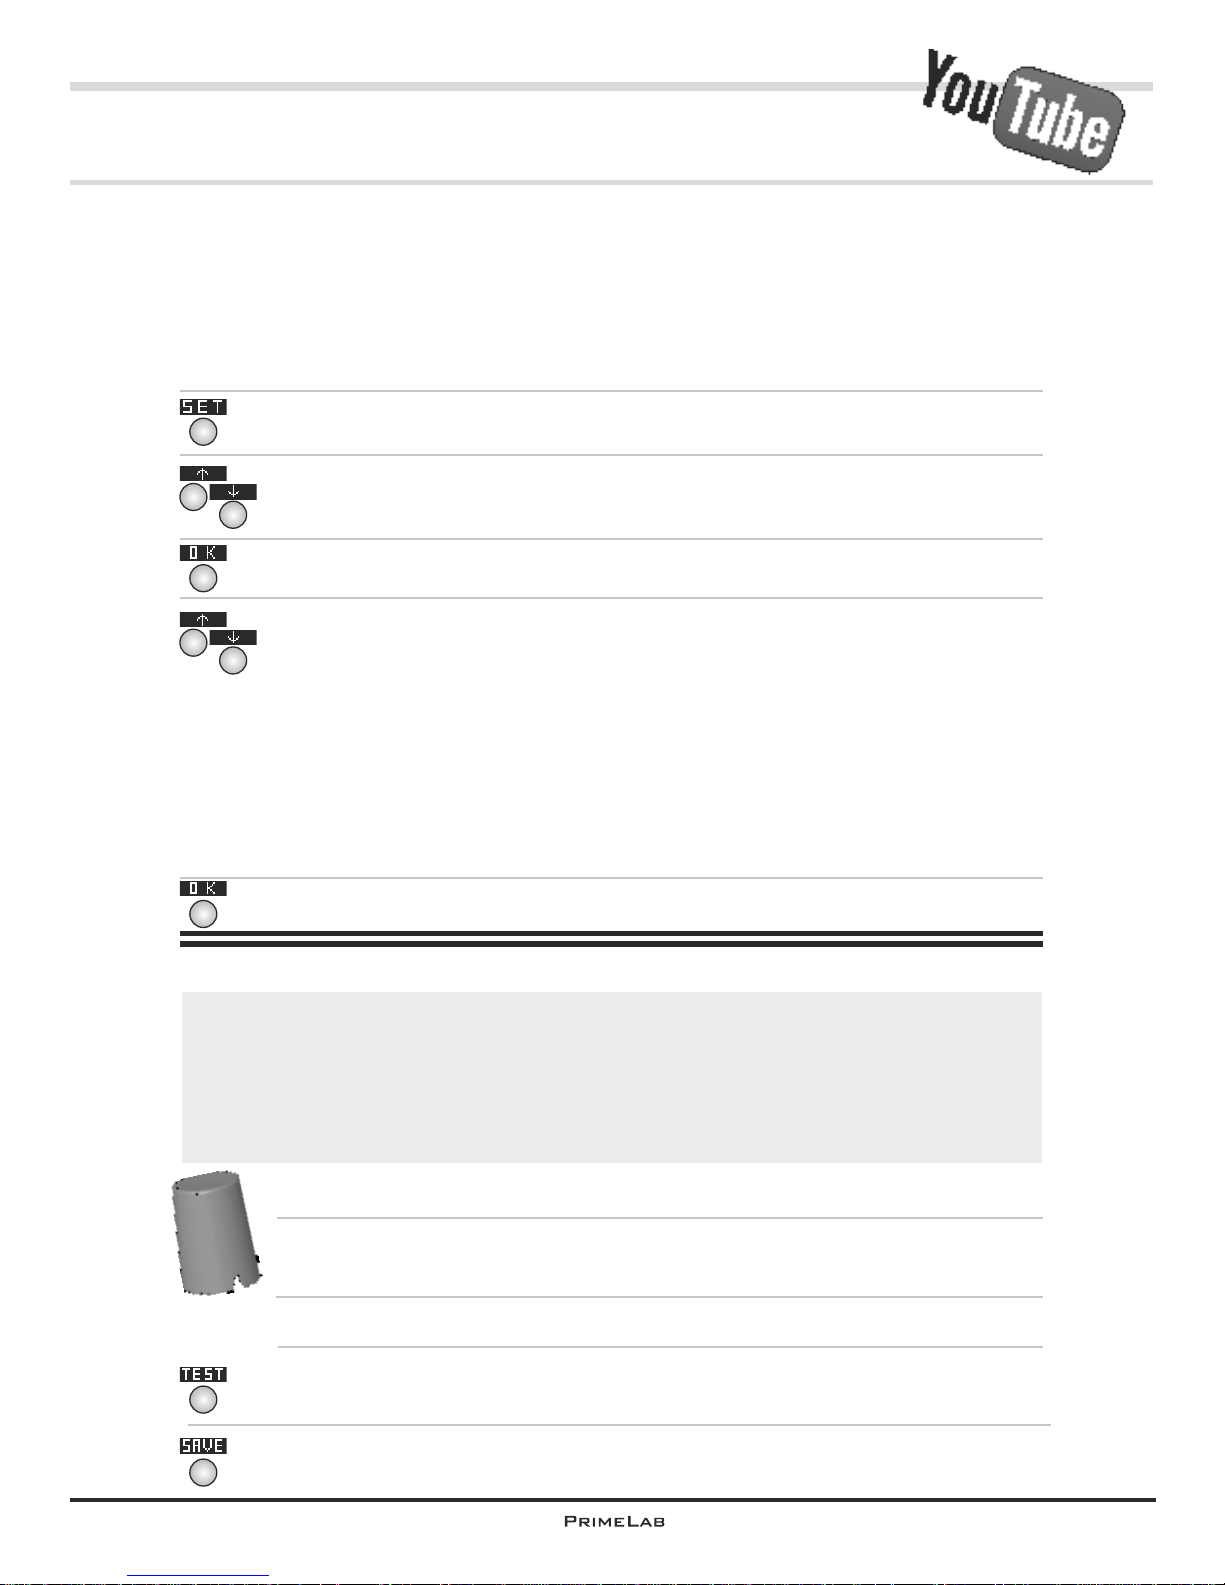
In start menu press button 4 to access the SETUP menu.
In setup list scroll up with button 2 and down with button 3 until
“Calibration” appears in white on black.
Press button 4.
Select calibration procedures to be carried out by scrolling with keys 2 and
3 by the following list:
PrimeLab
Turbidity adapter
PTSA adapter
Fluorescein adapter
The calibration procedures ending on "adapter" are only needed for
parameter-IDs 111 (PTSA) / 112 (Turbidity -NTU-) and 113 (Fluorescein).
For all other parameter-IDs, first calcibration option "PrimeLab" is
applicable.
Press button 4 to confirm your selection.
If you select “PrimeLab“:
The procedure described below is also shown on the display (3 steps)
and can be read in its entirety by scrolling up and down with button 2
and button 3.
Calibration is initiated by pressing button 4 and should only be
started after the steps described on the display / in the following
description have been taken!
If there is a cuvette inside the device, please remove it.
Place the “Light protection sleeve for 16 mm cuvette” in the (empty / with
no cuvette inserted) sample chamber (align with ^ symbol!).
Press button 4 to start the calibration procedure.
The calibration procedure takes no longer than 10 seconds and is
confirmed with the message “Calibration successful”.
Press button 4 again to save the calibration value in the system and return
to the sub-menu “SETUP”.
Continued...
Light shield
for 16mm
Cuvette
Page 13
Menu: SET (Setup)
SET 5SET 5
Continued...
Calibration
The following refers to calibration of ID 111/112/113 (PTSA/Turbidity/Fluorescein):
As this Parameter uses an indirect light from above, it is essential to always ensure the
correct amount of water in the vial, which is why exactly 10 ml of liquid should be taken
when doing a test. To achieve this, use the pipette which is part of the Adapter-kit. Please
change or clean the tip of the pipette after each measurement/calibration using destilled
water.
Please perform a new calibration for the parameters of the ID111 / 112 / 113 if the
measurement results obtained appear to be inaccurate or no longer correspond to
the value of the standard solutions supplied.
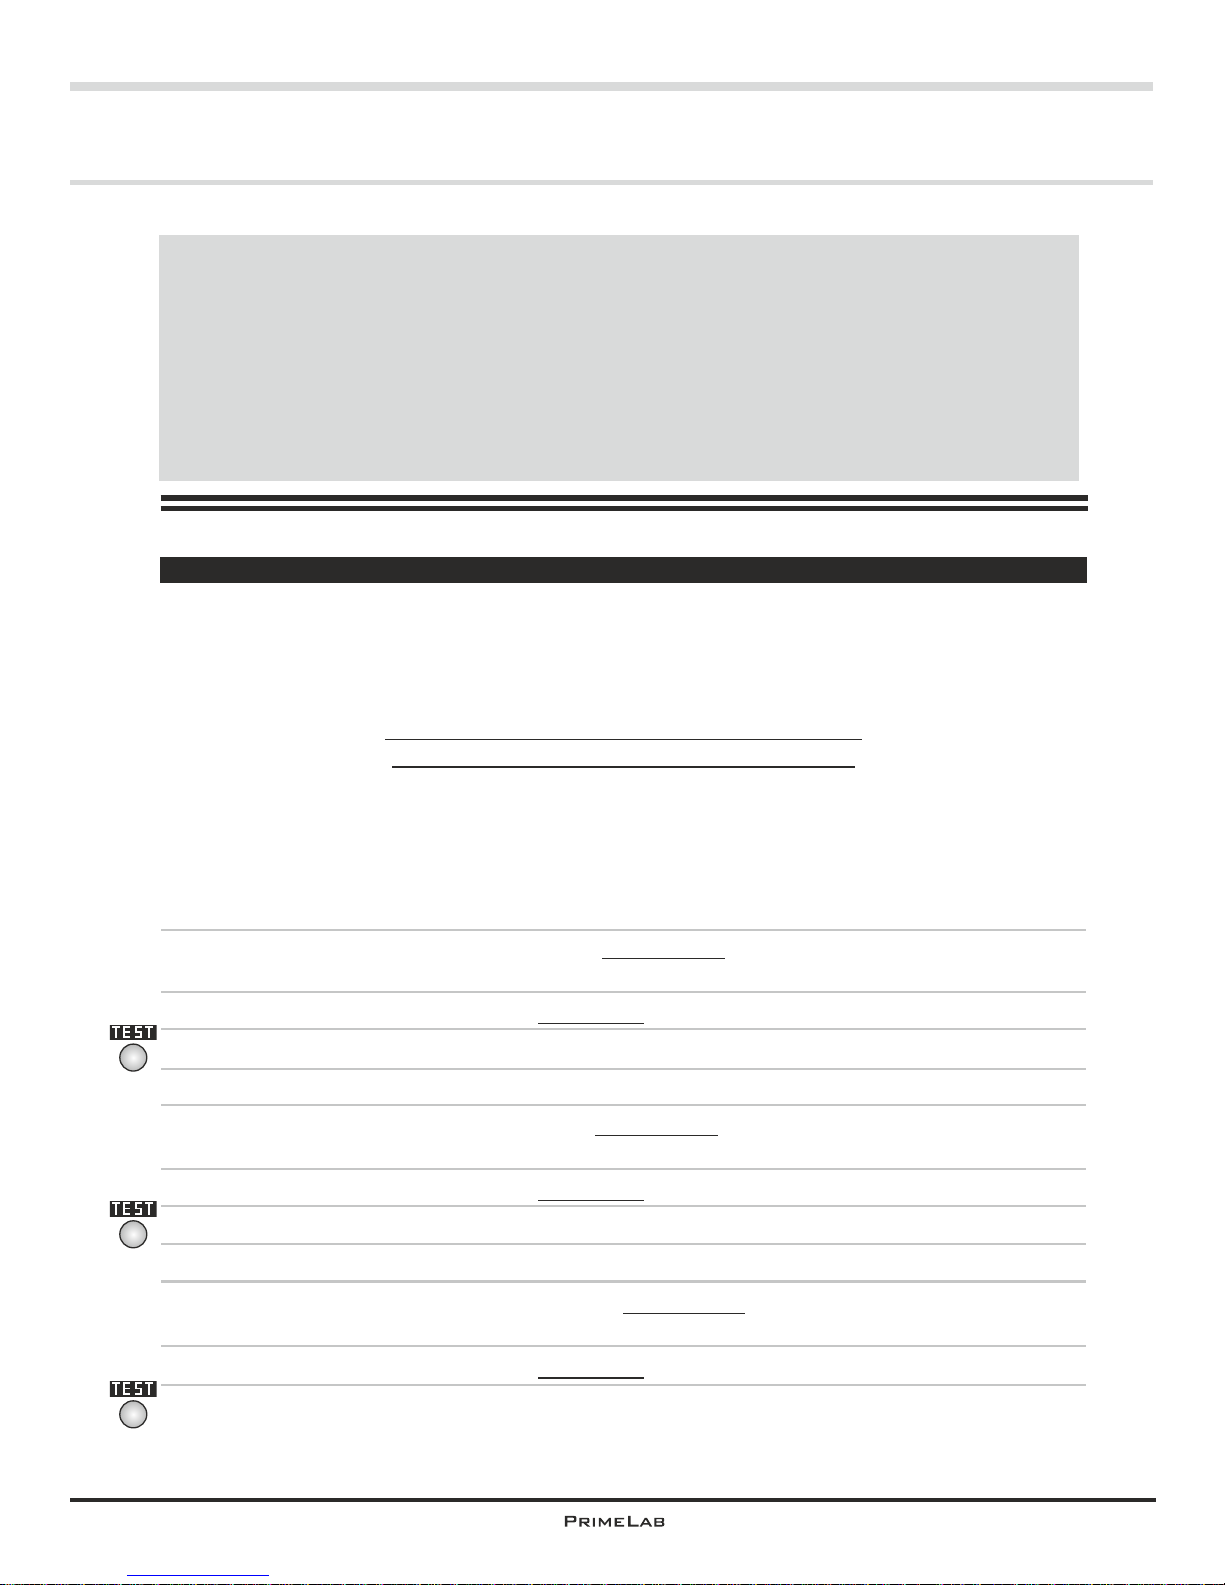
If you select „Turbidity-adapter“:
You first have to perform a „PrimeLab calibration“ !!! See page „SET 4"
Calibration steps, as shown below, will be displayd on the PrimeLab as well. Please
make sure the standard vials (0.5/10/1000 NTU) are free from fingerprints and dirt.
Clean vials properly by using the cloth provided in your kit, prior inserting into the
PrimeLab.
Use caution to shaking-/rest-instructions
on the standard vials (0.5/10/1000 NTU):
0.5 NTU standard vial: Let vial rest for at least 3 hours before use for the calibration
purposes. Turn vial TWO TIMES before you open it. Do not shake!
10 NTU standard vial: Turn vial THREE TIMES before you open it. Do not shake!
1000 NTU standard vial: Shake vial heavily before you open it!
Open „0.5 NTU“ standard vial and insert without lid and with forward arrow into the
PrimeLab.
Set Turbidity adapter on top of the open cell.
Press TEST.
Remove vial from PrimeLab and close it properly for future use.
Open „10 NTU“ standard vial and insert without lid and with forward arrow into the
PrimeLab.
Set Turbidity adapter on top of the open cell.
Press TEST.
Remove vial from PrimeLab and close it properly for future use.
Open „1000 NTU“ standard vial and insert without lid and with forward arrow into
the PrimeLab.
Set Turbidity adapter on top of the open cell.
Press TEST.
ID 112 is now calibrated successfully.
4
4
4
Continued...
Page 14
Menu: SET (Setup)
SET 6SET 6
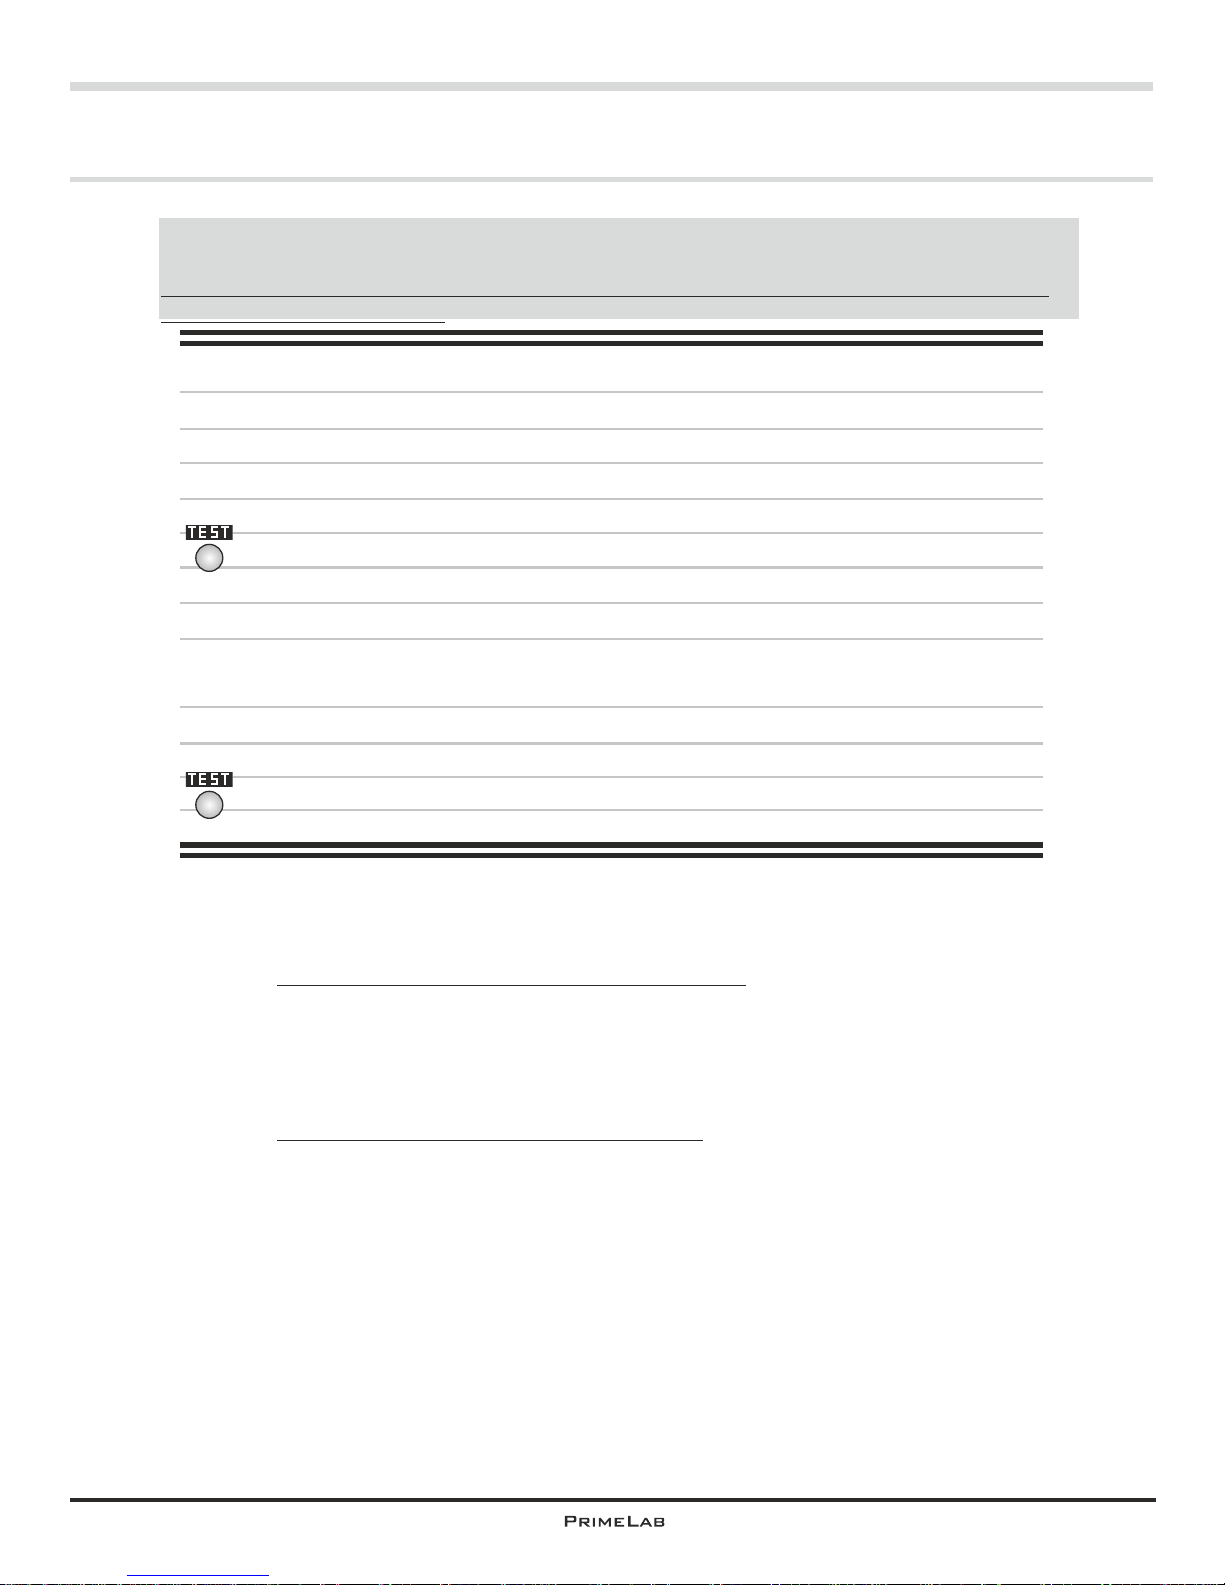
If you select „PTSA-/ Fluorescein-adapter“:
Select a 24mm glass vial for future PTSA and Fluorescein tests.
Fill vial with 10ml of distilled water. USE PIPETTE TO ENSURE 10ml!
Place vial into the PrimeLab. Do not close it!
Place PTSA-/Fluorescein-adapter on top of the open cuvette.
Press TEST.
Remove vial from PrimeLab.
Empty vial.
Fill vial with 10ml of reference-solution „500 ppb PTSA“ / „100 ppb
Fluorescein“. USE PIPETTE!
Place vial into the PrimeLab. Do not close it!
Place PTSA-/Turbidity-adapter on top of the open cuvette.
Press TEST. Calibation was sucessful!
Please use ONLY THIS VIAL for future PTSA/Flurescein tests!
Error Messages
During calibration and / or during the measurement, the following error
messages might be displayed on the PrimeLab:
Adapter not recognized - Possible causes:
Ÿ Battery depleted
Ÿ Adapter incorrectly (eg diagonally) placed
Ÿ Wrong adapter used (eg PTSA instead Turbidity)
Ÿ Adapter-lense (bottom) or optical path in the sample chamber
Ÿ (PrimeLab) dirty or wet
Measurement failed - Possible causes:
Ÿ Battery depleted
Ÿ Adapter incorrectly (eg diagonally) placed
Ÿ The identified water sample does not match the turbidity curve
Ÿ Wrong adapter used (eg PTSA instead of Turbidity)
Ÿ Adapter-lense (bottom) or optical path in the sample chamber
Ÿ (PrimeLab) dirty or wet
If the message reads “Calibration: ERROR!” or
“LED problem. Please check!” please abort the procedure and check that
there is no cuvette in the sampling chamber and that the sampling
chamber and especially the two “windows” on the sensor / LED level are
clean (see also “Cleaning the device” on page A 3).
Restart the calibration procedure.
If the device fails to calibrate after a second attempt it must be returned to
the manufacturer for inspection.
Continued...
Calibration
The following refers to calibration of ID 111/113 (PTSA/Fluorescein):
For ID 111 and ID 113 it is essential to always use the same vial for calibration as well as
for testing as adapter shines from above and each vial has different bottom
Due to the above it is essential to always use the same vial for testing which has
been used for calibration!
4
4
Page 15
Menu: SET (Setup)
SET 7
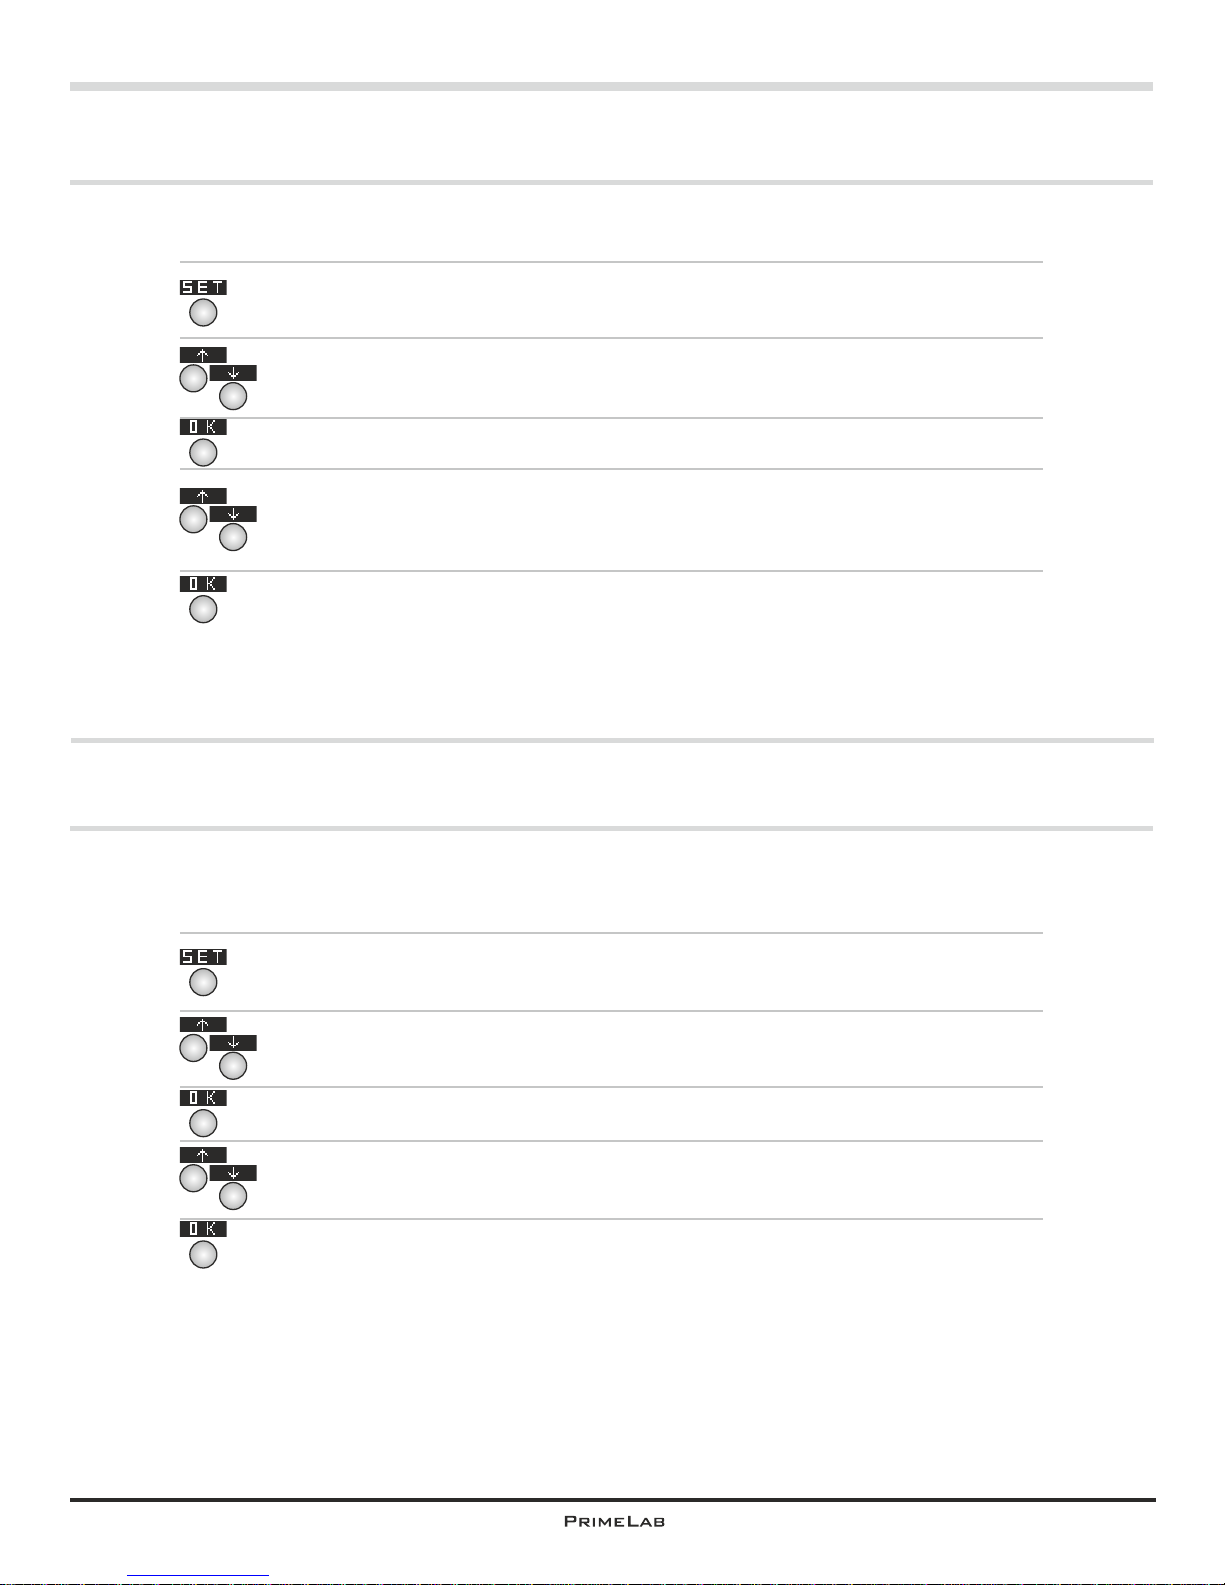
Set display contrast
Please ensure that you have removed the protective foil from the display
so the display quality is best.
In the start menu press button 4 to access the SETUP menu.
In the setup list scroll up with button 2 and down with button 3 until the
entry “Display” appears in white on black.
Then press button 4.
Change the contrast setting by pressing button 2 and button 3 (up and
down) until the contrast on the display is satisfactory.
Confirm the selected setting by pressing button 4.
4
4
4
Set Auto-Off time
You can determine after which time without any button being pressed or a
measurement being taken the device will automatically switch off to save
energy or preserve battery charge.
In the start menu press button 4 to access the SETUP menu.
In the setup list scroll up with button 2 and down with button 3 until the
entry “Auto-Off” appears in white on black.
Then press button 4.
Change the time setting for the auto-off by pressing button 2 and button 3
(up and down). The preset default is 10 minutes.
Confirm the selected setting by pressing button 4.
4
4
4
2
3
2
3
2
3
2
3
SET 7
Page 16
Menu: MEM (Memory)
MEM
View test results
Delete test results
MEM 1 - 2
MEM 3 - 4
Menu: MEM (Memory)
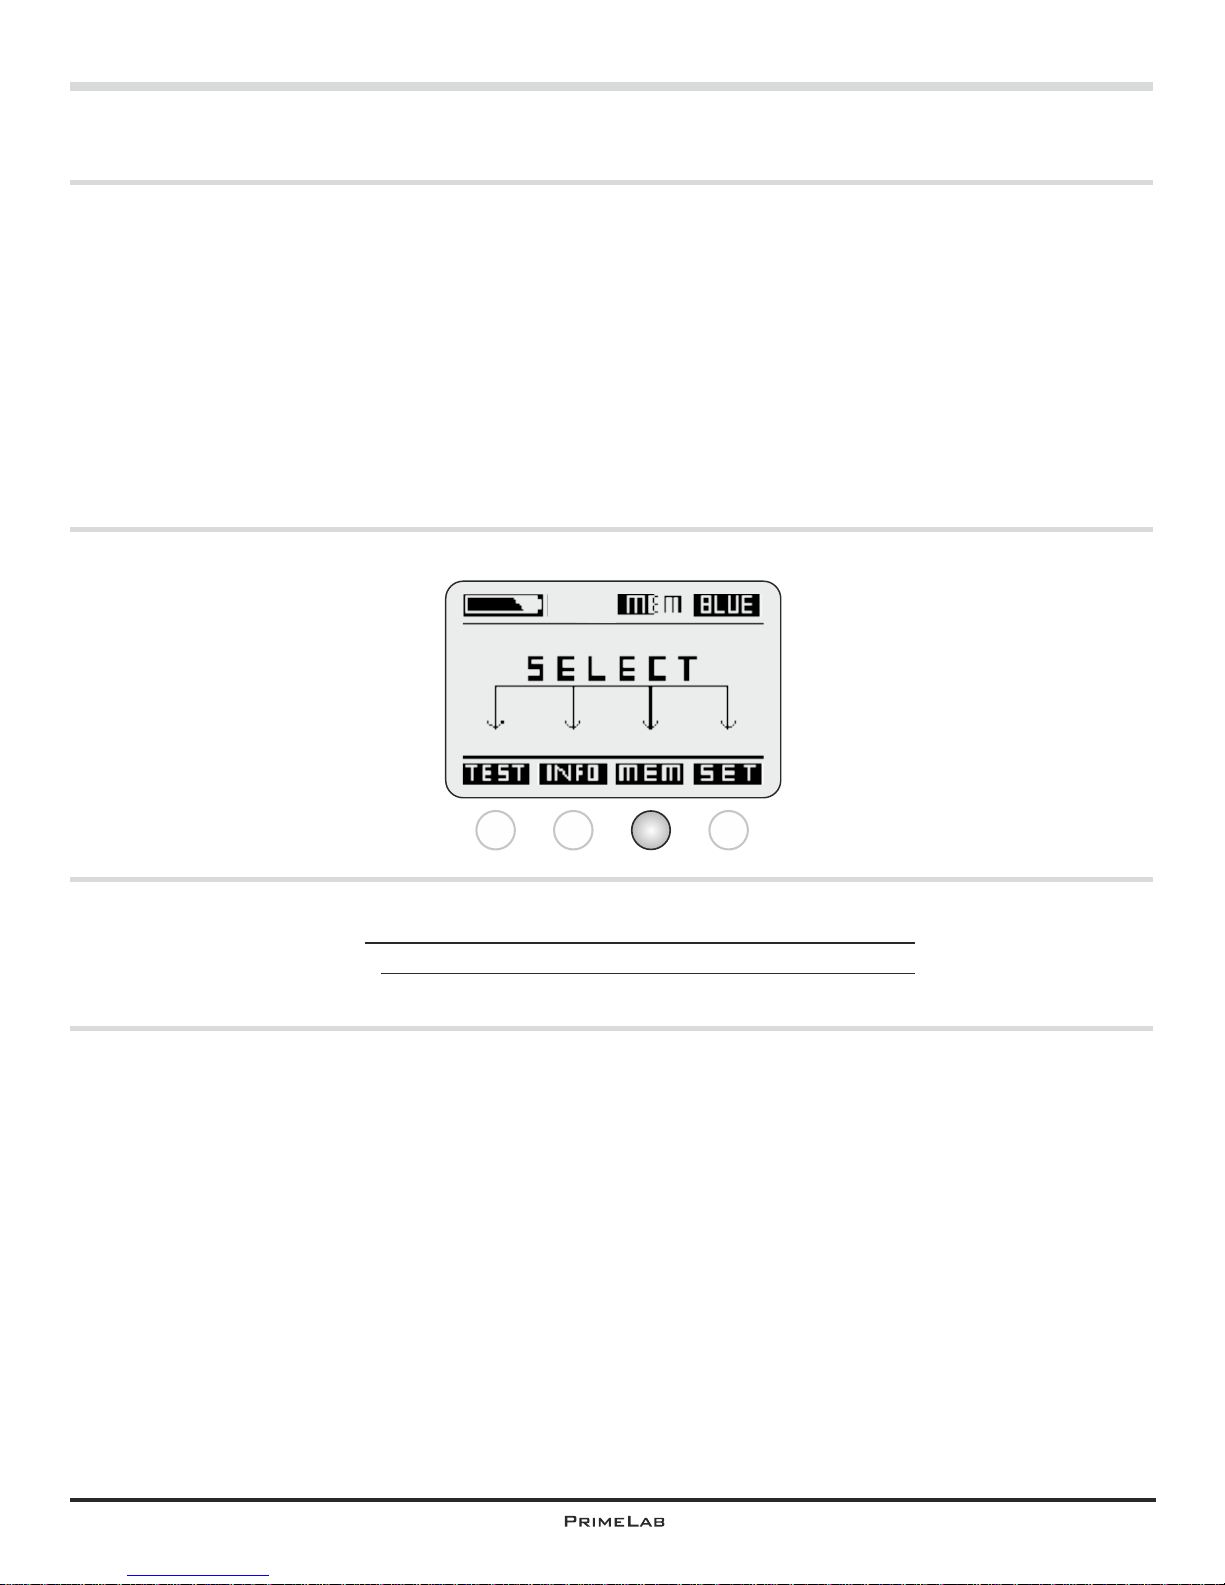
PrimeLab provides memory space for 100 test results.
If you attempt to save more than 100 results the respective oldest data set is
overwritten.
We recommend the regular synchronizing of the test data with the “PrimeLab
Desktop Assistant” to be able to view, edit and evaluate the data more easily and
better.
Test results are assigned to a specific account as a matter of principle
Before each test run it is queried to which account the results are to be assigned.
If you choose not to use the account option just select the “Default” option as a
standard account.
1 2 3 4
MEM
Page 17
Menu: MEM (Memory)
MEM 1
Browse test results
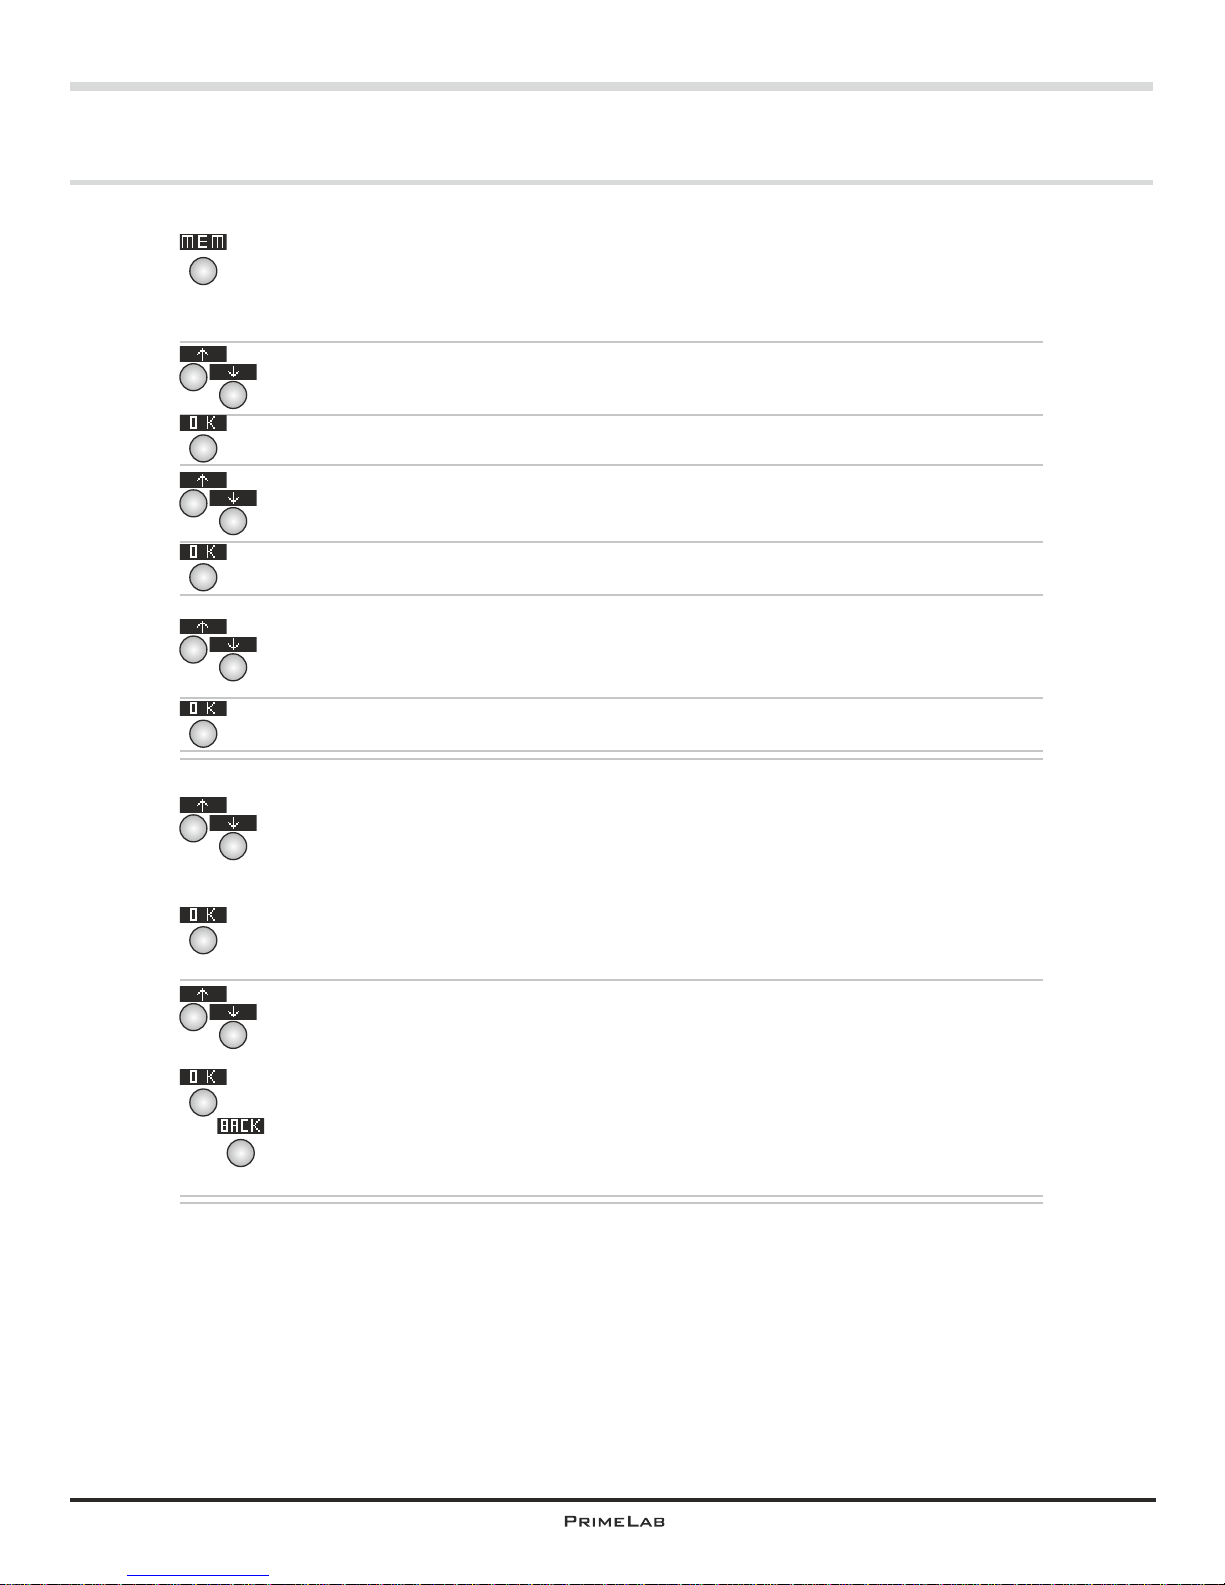
Press button 3 in the start menu to access the MEMORY menu.
First you will see how many data sets are saved in memory. “Used:
28/100” signifies, for example, that 28 saved data sets are stored in a
maximum of 100 memory spaces available.
Scroll up and down the list using button 2 or 3 respectively until the entry
“Browse results” appears white on black”.
Then press button 4.
Select the address data set to which you would like to have the saved test
results displayed.
Confirm your selection by pressing button 4.
Scroll up and down the list using button 2 or 3 respectively and select
either “View by test” (selection a) or “View all data” (selection b).
Confirm your selection by pressing button 4.
Selection a) You selected “View by test” to display a list sorted by
parameters. Scroll up or down the list using the buttons 2 or 3 respectively
until the required parameter list appears white on black.
Confirm the selected parameter group by pressing button 4 and then
select the test method with the buttons 2 and 3 for which you would like to
view the test results.
Confirm your selection by pressing button 4.
Now use the buttons 2 and 3 to scroll through the measurement results.
These will be displayed in chronological order. If you have defined ideal
ranges (Menu: Setup) the test results will display as “Low” / “OK” / “High”.
Press button 4 to change from a unit for which the result has been
displayed (e.g. “mg/l CaCO ” to “°dH”), as far as available, or you can
3
delete the result directly.
Press button 1 to return one step back or up in the menu.
3
4
4
4
4
4
2
3
2
3
2
3
2
3
2
3
1
MEM 1
Page 18
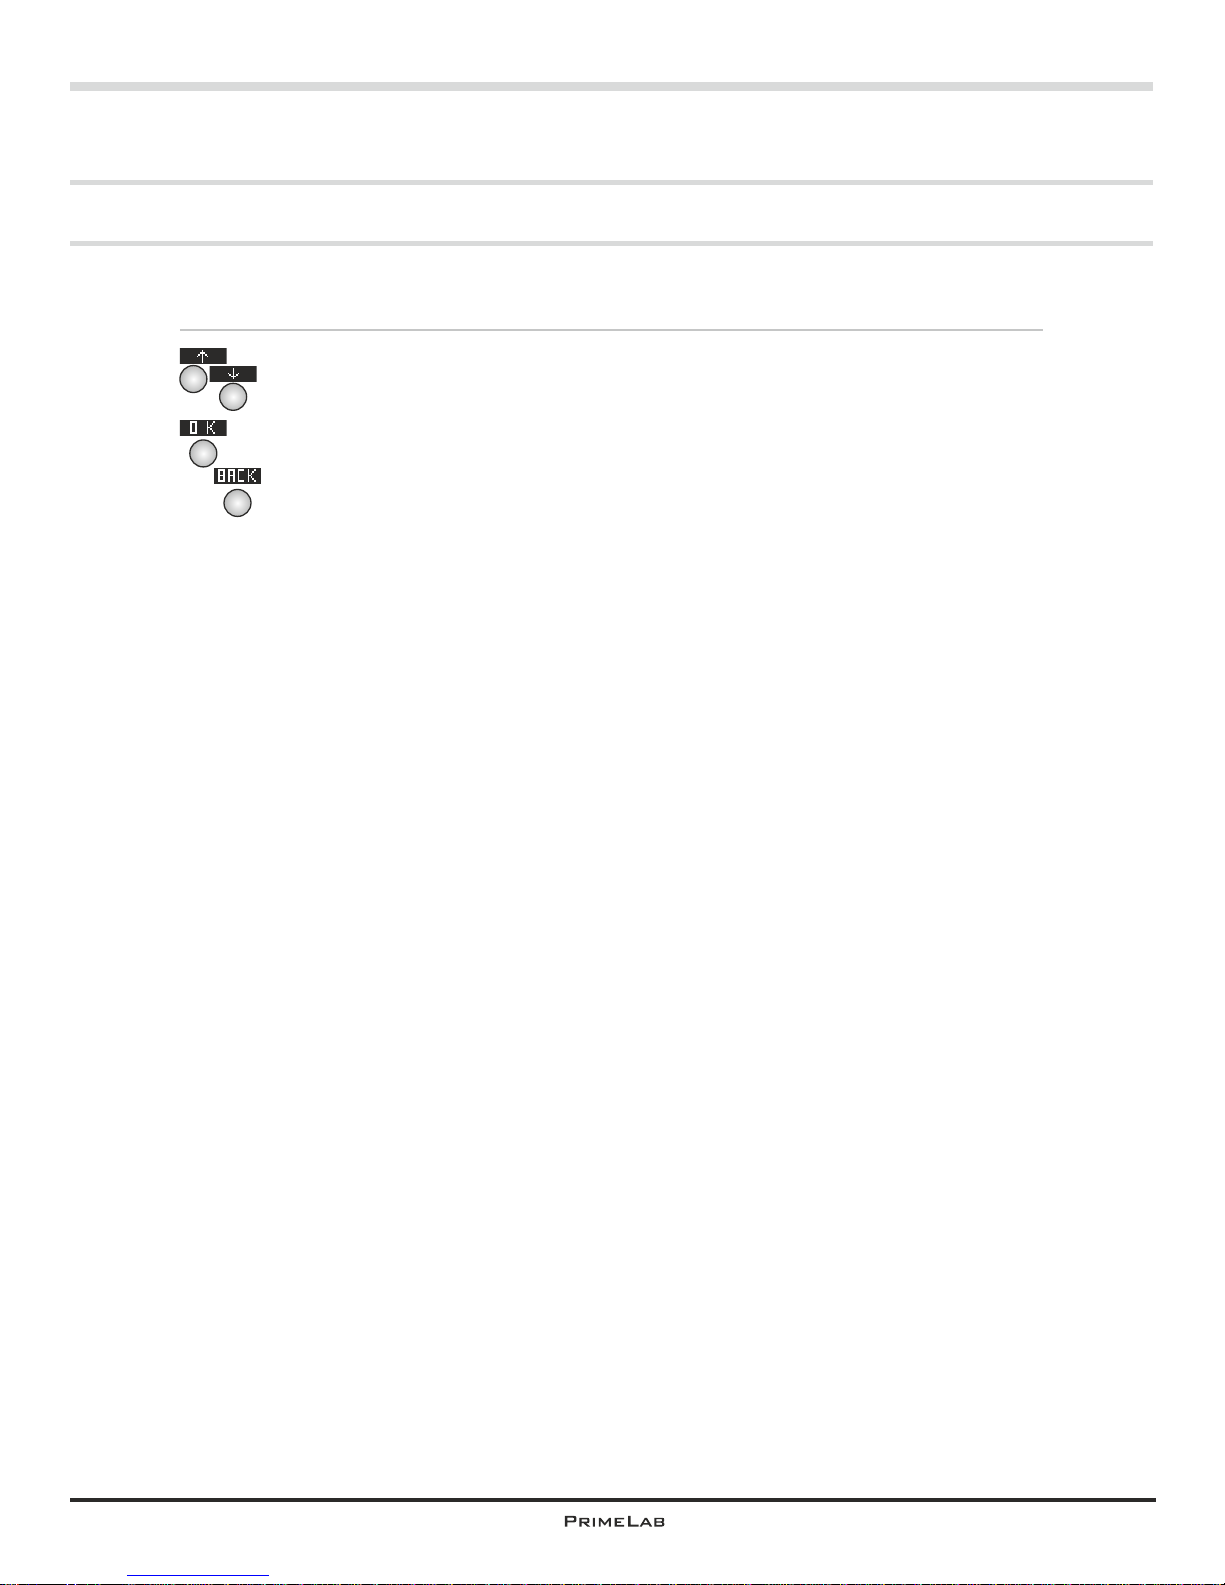
Menu: MEM (Memory)
MEM 2
View test results
Selection b) You selected “View all data” to see the stored test results for
the respective address data set with all parameters.
Use buttons 2 and 3 to scroll through the saved test results. These will be
shown chronologically. If you have defined ideal ranges (Menu Setup) the
values will be rated with “Low / OK / High”. Press button 4 to change the
unit in which this value is displayed (e.g. “mg/l CaCO ” to “°dH”), as far as
3
available, or immediately delete the entry.
Pressing button 1 will take you back up or back in the menu one step.
Continued...
4
1
2
3
MEM 2
Page 19
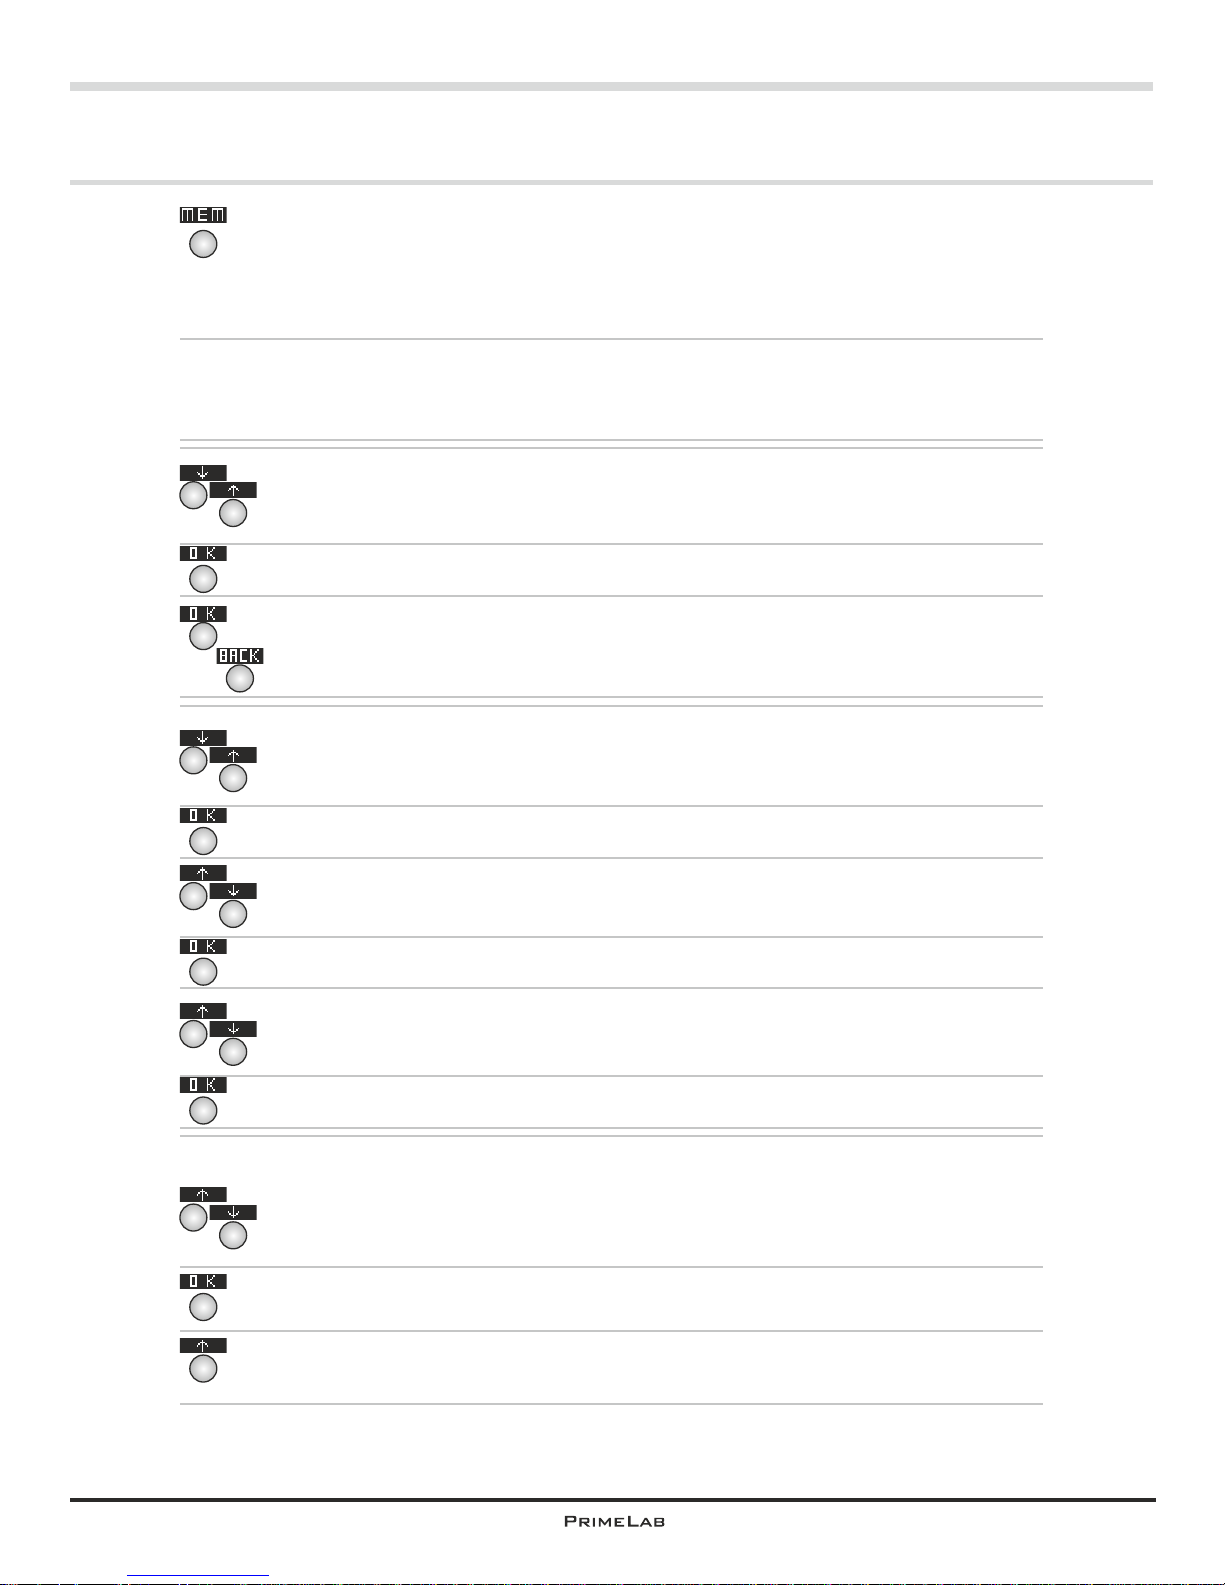
Clear test results
Press button 3 on the start menu to access the MEMORY menu,
First you will see how many data sets are saved in memory. “Used:
28/100” signifies, for example, that 28 saved data sets are stored in a
maximum of 100 memory spaces available.
You now have two options to delete saved results:
Option 1) Delete all saved test results
Option 2) Selectively delete individual test results
Option 1)
Scroll up and down in the list using buttons 2 and 3 respectively, until the
entry “Clear result” appears white on black.
Then press button 4.
You will then be asked if you really want to delete all saved data sets.
Confirm this by pressing button 4 or abort the procedure by pressing
button 1.
Option 2)
Scroll up and down the list using the button 2 (up) and 3 (down) until the
entry “Browse results” appears in white on black.
Then press button 4.
Using the buttons 2 and 3 select an account you want to see the saved
results for.
Confirm your selection by pressing button 4.
Scroll up and down the list using the button 2 and 3 respectively, and then
select “View by test” (selection a) or “View all data (selection b).
Confirm your selection by pressing button 4.
Selection a) You have selected “View by test” to see the stored test
results for this account sorted by parameters. Use button 2 and 3 to scroll
up and down respectively until the parameter group in which you want to
delete test results appears in white on black.
Confirm your selection by pressing button 4.
Now press button 2 or 3 to scroll to the parameter ID of which you want to
delete test results.
Confirm your entry by pressing button 4” on page MEM 4
2
3
4
4
4
Menu: MEM (Memory)
MEM 3
3
Continued...
2
3
2
3
2
3
2
3
4
4
1
4
2
MEM 3
Page 20
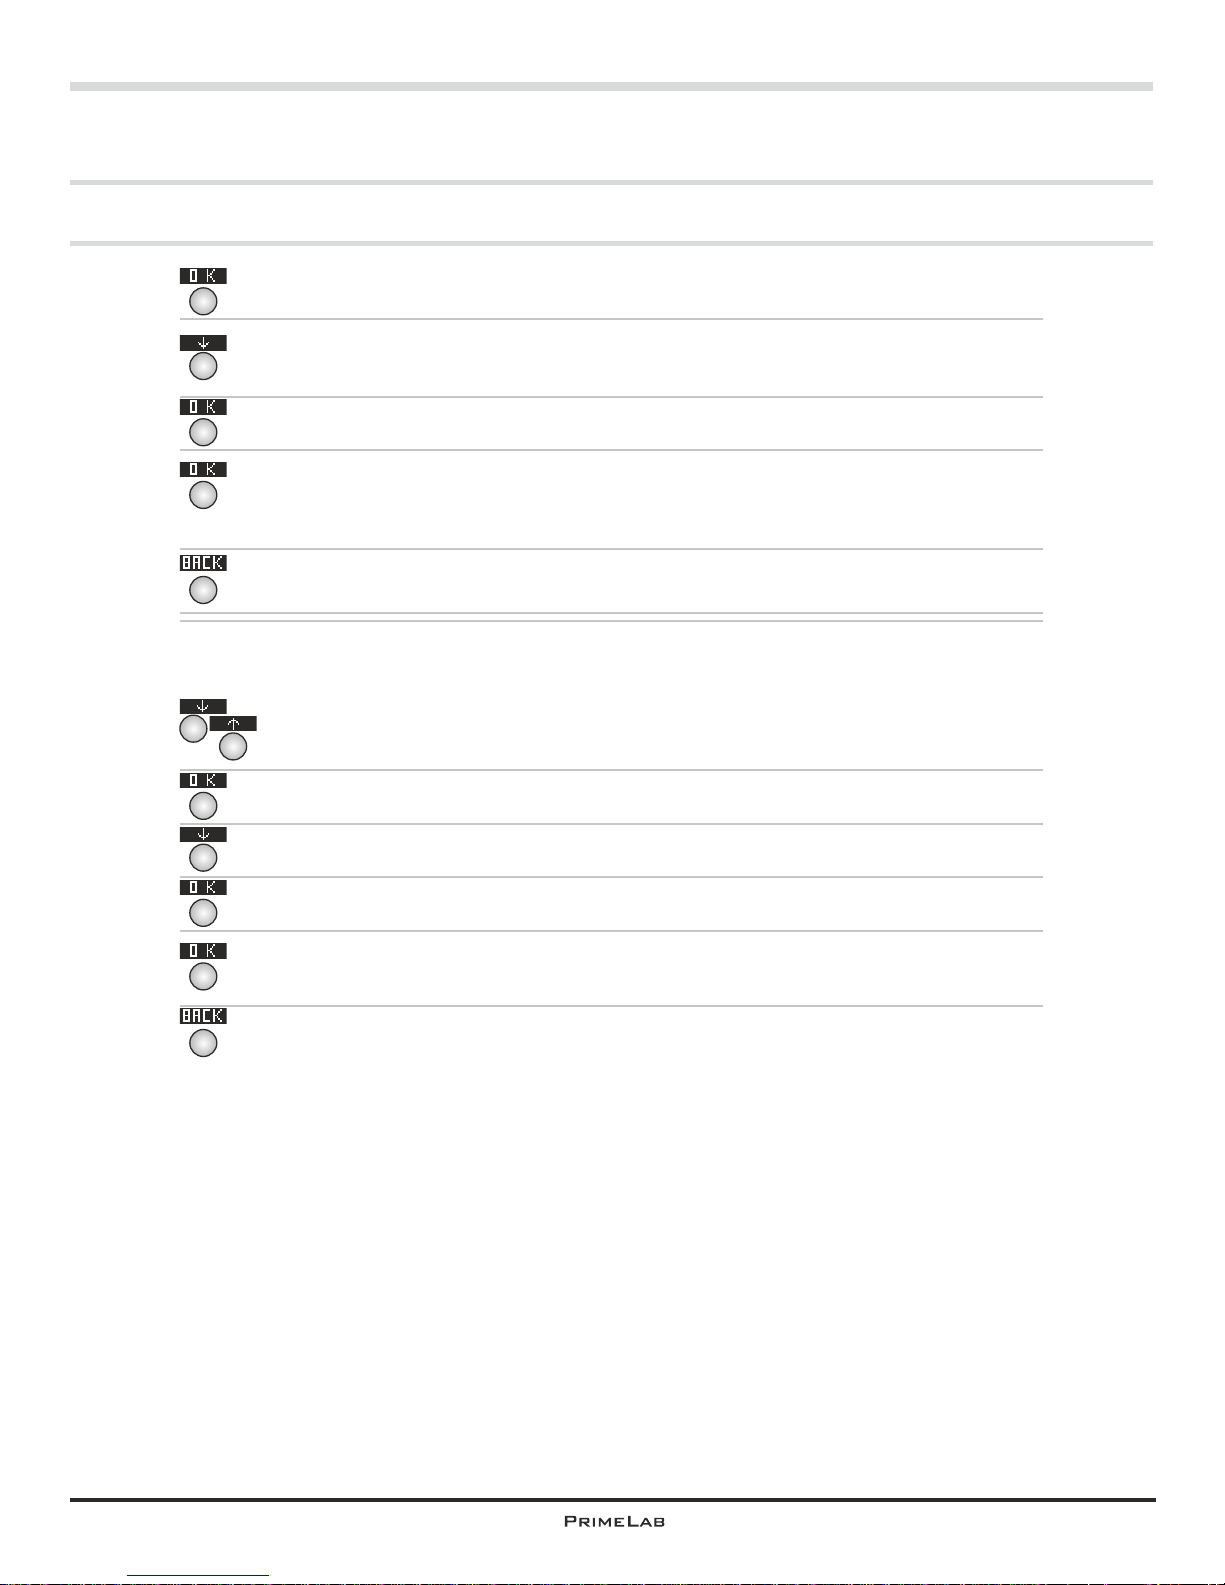
Delete test results
Confirm your entry by pressing button 4.
Press button 3 to select the option “Clear result”.
Confirm your selection by pressing button 4.
Just to make sure you are asked if you really want to delete this parameter
ID of which you want to delete test results If you are sure please confirm
by pressing button 4.
Press button 1 to go back one step.
Selection b) You have selected “View all data” to be shown the saved test
results for the particular account and for all parameters.
By pressing button 2 or 3 to scroll up or down respectively select the data
set you want to delete.
Confirm your selection by pressing button 4.
By pressing button 3 select “Clear result”.
Confirm your entry by pressing button 4.
Just to make sure you are asked if you really want to delete this set of
data. If you are sure please confirm by pressing button 4.
Press button 1 to go back one step.
Menu: MEM (Memory)
MEM 4
4
1
Continued...
3
4
4
4
1
3
4
4
2
3
MEM 4
Page 21

Menu: MEM (Memory)
left open for technical reasons
MEM 5MEM 5
Page 22
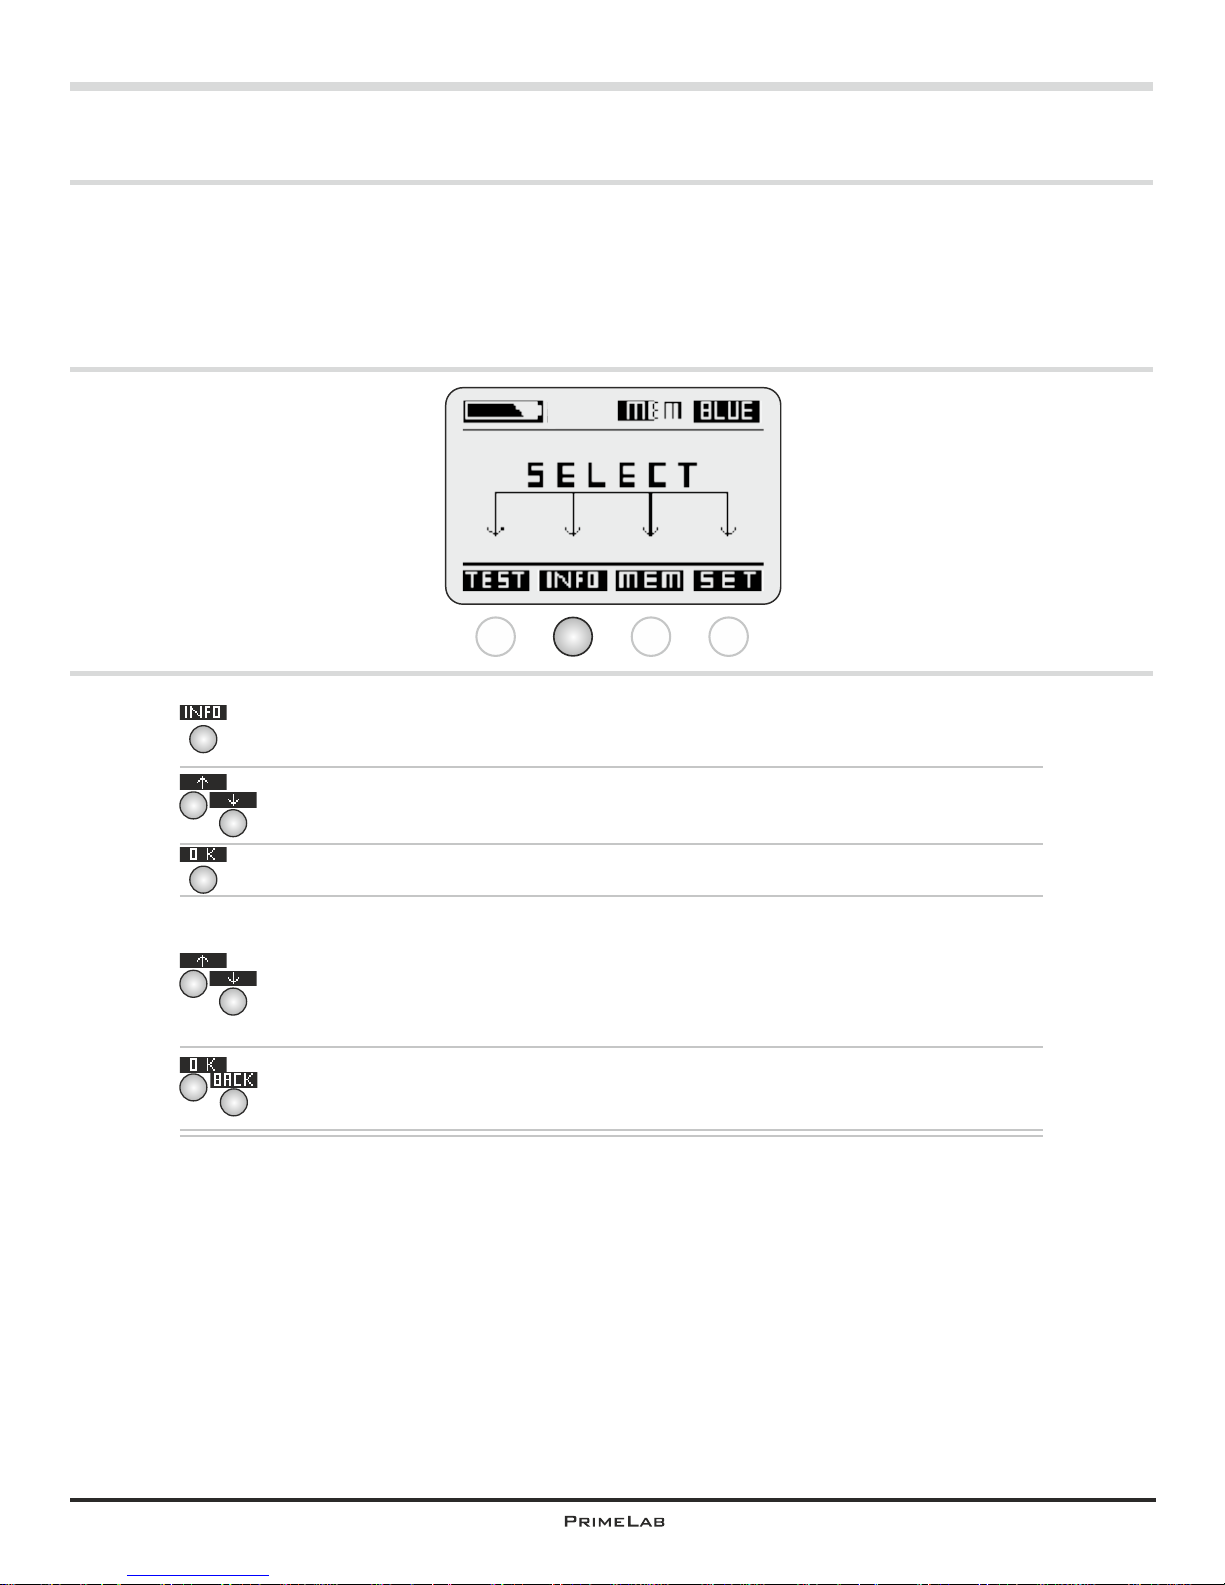
Menu: INFO
INFO 1
Menu: INFO
In the menu “Information” there is information on the firmware version of your
®
device as well as device name, Bluetooth address and the serial number.
In addition there is information regarding where you can obtain support for your
device; further information is available through the software “PrimeLab Desktop
Assistant”.
1 2 3 4
In the start menu, press button 2 to access the INFO menu.
Using button 2 and 3 to scroll up and down respectively through the
selection list until the entry “Device” appears white on black.
Confirm your selection by pressing button 4.
Using button 2 and 3 to scroll up and down respectively to view the
various information details for your device; these include: device, brand,
®
serial number, Bluetooth address, device name (determined by you
through the “PrimeLab Desktop Assistant”, firmware version, firmware
®
date and whether a Bluetooth module is installed or not.
Press button 4 or 1 to return to the INFO menu.
In a second step select the entry “Support” to view the link to the
PrimeLab website: www.primelab.org
4
2
3
2
2
3
4
1
INFO 1
Page 23

INFO 2INFO 2
Menu: INFO
left open for technical reasons
Page 24
!
Menu: TEST
Below the various test procedures, depending on the parameters to be measured
and the reagents to be used, are described.
Menu: TEST
TEST-1
!
The list shown below of parameters which can be tested using the
PrimeLab is not final!
Because PrimeLab can, through the use of the JENCOLOR sensor,
measure all parameters developing a colour in the visible spectral range
or clouding after addition of a reagent, the list of PrimeLab test procedures
is extended all the time.
Visit us on www.primelab.org or start your PrimeLab Desktop Assistant to
find out about new test procedures of interest to you.
These can then be easily downloaded and activated in your PrimeLab
after entering a code (fee required).
Parameters list / test procedures
Test process for all parameters / test procedure
Safety notes for an accurate measurement
Instructions for the individual test procedures
TEST 2 - 6
TEST 7
TEST 8 - 9
1 - 274
1 2 3 4
TEST-1
Page 25
Menu: TEST / Parameters list / test procedures
TEST-2TEST-2
group/method parameter ID range unit switch reagent page
Active Oxygen
01-Act-oxi-MPS-tab Active oxygen (MPS) 1 0 - 40 mg/l tablet 1
Alkalinity
05-Alkalinit-M-tab Alkalinity-M 5 5 - 200 mg/l °dH/°eH/ tablet 3
°fH/mmol/
mval/K
S4.3
121-Alka-M-HR-tab Alkalinity-M HR 121 5 - 200 mg/l HCO-3/°dH/ tablet 5
°eH/°fH/mmol/
K /mval
S4.3
06-Alkalinit-P-tab Alkalinity P 6 5 - 300 mg/l °dH/°eH/ tablet 6
°fH/mmol/
mval/K
S4.3
Aluminium
04-Aluminium-tab Aluminium 4 0 - 0.3 mg/l tablet 8
Ammonia
02-Ammonia-LR-tab Ammonia (LR) 2 0 - 1 mg/l NH /NH tablet 10
4 3
NO /NO
2 3
155-AmmoniaHR-pre Ammonia (HR) 155 1.0 - 50.0 mg/l NH /NH pre. vial 12
4 3
Acsamine
125-Acsam.28F-liq Acsamine 28F 125 0 - 100 mg/l liquid 13
145-Acsam.CC-liq Acsamine CC 145 0 - 100 mg/l liquid 14
146-Acsam.CCA-liq Acsamine CCA 146 0 - 100 mg/l liquid 15
126-AcsamineDW-liq Acsamine DW 126 0 - 100 mg/l liquid 16
141-Acsa.DWBR1-liq Acsamine DWBR1 141 0 - 100 mg/l liquid 17
142-Acsam.DWC-liq Acsamine DWC 142 0 - 100 mg/l liquid 18
143-Acsam.SW-liq Acsamine SW 143 0 - 100 mg/l liquid 19
144-Acsam.SWC-liq Acsamine SWC 144 0 - 100 mg/l liquid 20
Boron
07-Boron-tab Boron 7 0 - 2 mg/l tablet 21
Bromine
08-Bromine-tab Bromine 8 0 - 18 mg/l tablet 23
63-Bromine-liq Bromine 63 0 - 18 mg/l liquid/ 25
powder
128-Bromine-pp Bromine 128 0.0 - 4.5 mg/l powder 28
Carbohydrazide
71-Carbohydra-liq Carbohydrazide 71 0 - 1.3 mg/l liquid 30
Chloramines
95-Chloramines-tab Chloramines 95 0 - 8 mg/l tablet 31
Chloride
10-Chloride-tab Chloride 10 0.5 - 25 mg/l NaCl tablet 33
124-Chloride-liq Cloride 124 0 - 100 mg/l liquid 35
Chlorine
11-Chlorine-tab Chlorine 11 0 - 8.00 mg/l tablet 36
12-Chlorine-liq Chlorine 12 0 - 8.00 mg/l liquid 39
129-Chlorine-pp Chlorine 129 0.00 - 2.00 mg/l powder 41
14-Chlorine-HR-tab Chlorine HR (KI) 14 5 - 200 mg/l tablet 43
15-Chlorine-HR-liq Chlorine HR (KI) 15 0 - 200 mg/l liquid 45
122-ChlorineMR-tab Chlorine MR 0.00 - 10.00 mg/l tablet 46
Page 26
TEST-3TEST-3
Menu: TEST / Parameters list / test procedures
group/method parameter ID range unit switch reagent page
Chlorine Dioxide
16-Chlorin-Dio-tab Chlorine Dioxide 16 0 - 15.0 mg/l tablet 49
64-Chlorin-Dio-liq Chlorine Dioxide 64 0 - 15.0 mg/l liquid 52
130-Chl-Diox-pp Chlorine Dioxide 130 0.00 - 5.00 mg/l liquid+pow. 55
106-Chlorite-liq Chlorite 106 0 - 8.0 mg/l liquid 57
Chromium (hexavalent)
94-Chromium-tab Chromium 94 0 - 2.2 mg/l CrO tablet 59
4
103-Chromium-liq Chromium 103 0 - 1 mg/l CrO liquid 60
4
COD
79-COD-LR-pre COD (LR) 79 0 - 150 mg/l prep. vial 61
80-COD-MR-pre COD (MR) 80 0 - 1500 mg/l prep. vial 63
17-COD-HR-pre COD (HR) 17 0 - 15000 mg/l prep. vial 65
Colour
107-Colour Colour 107 15 - 500 mg/l --- 67
Copper
18-Copper-tab Copper 18 0 - 5 mg/l tablet 71
19-Copper-pow Copper 19 0 - 5 mg/l powder 74
Cyanide
158-Cyanide-pow Cyanide 158 0.01 - 0.50 mg/l pow. + liq. 76
Cyanuric Acid
20-Cyanur-Acid-tab Cyanuric Acid 20 2 - 160 mg/l tablet 78
DBNPA
65-DBNPA-liq DBNPA 65 0 - 13 mg/l liquid 79
82-DPNPA-tab DBNPA 82 0 - 13 mg/l tablet 81
DEHA
21-DEHA-liq DEHA 21 20 - 1000 µg/l mg/l liquid 82
DEWAN-50
109-DEWAN50-liq DEWAN-50 109 0 - 300 mg/l liquid 84
Dissolved Oxygen
163-DissOxyg-liq Dissolved Oxygen 163 0 - 10 mg/l liquid 86
Erythorbic Acid
70-Erythorbic-Acid Erythorbic Acid 70 0 - 3.5 mg/l liquid 88
Fluorescein
113-Fluorescein-Ad Fluorescein 113 0 - 500 µg/l C H O --- 89
20 12 5
Fluoride
72-Fluoride-liq Fluoride 72 0 - 2 mg/l liquid 91
Hardness
78-Hard-Cal-tab Hardn. - Calcium 78 0 - 500 mg/l °dH/°eH/°fH tablet 93
09-Hard-Cal-HR-tab Hardn. - Calcium (HR) 9 50 - 1000 mg/l °dH/°eH/°fH tablet 95
166-Hard-Cal-liq Hadn. - Calcium 166 0 - 500 mg/l °dH/°eH/°fH liquids 97
56-Hard-tot-LR-tab Hardn. - Total (LR) 56 2 - 50 mg/l °dH/°eH/°fH tablet 99
Ca
57-Hard-tot-HR-tab Hardn. - Total (HR) 57 20 - 500 mg/l °dH/°eH/°fH tablet 101
Ca
148-Hard-tot-liq Hardn. - Total (HR) 148 0 - 200 mg/l °dH, °eH, °fH liquid 103
Ca
Page 27
TEST-4TEST-4
Menu: TEST / Parameters list / test procedures
group/method parameter ID range unit switch reagent page
Hydrazine
23-Hydrazine-liq Hydrazine 23 5 - 600 µg/l liquid 105
Hydrocarbons
160-Hydrocarbons Hydrocarbons 160 0 - 1 NTU YES / NO - 107
Hydrogen Peroxide
24-Hydr-Per-LR-tab Hyd. Peroxide (LR) 24 0 - 3.8 mg/l tablet 108
66-Hydr-Per-LR-liq Hyd. Peroxide (LR) 66 0 - 3.8 mg/l liquid 110
162-HydrPer-HR-tab Hyd. Peroxide (HR) 162 0 - 200 mg/l tablet 112
25-Hydr-Per-HR-liq Hyd. Peroxide (HR) 25 0 - 200 mg/l liquid 114
Hydroquinone
26-Hydroquinon-liq Hydroquinone 26 0 - 2.5 mg/l liquid 115
Iodine
27-Iodine-tab Iodine 27 0 - 28 mg/l tablet 116
67-Iodine-liq Iodine 67 0 - 28 mg/l liquid 118
Iron
28-Iron-LR-tab Iron (LR) 28 0 - 1 mg/l tablet 120
29-Iron-MR-pow Iron (MR) 29 0 - 10 mg/l powder 122
127-Iron-MR-Fe-pow Iron (MR) Ferrous 127 0 - 10 mg/l powder 125
30-Iron-HR-liq Iron (HR) 30 0 - 30 mg/l liquid 126
132-Iron-tot-LR-pp Iron total (LR) 132 0.00 - 3.00 mg/l powder 129
149-Iron-Oil-liq Iron in Oil 149 50 - 500 mg/l liquid 131
Isothiazolinone
88-Isothiazol-liq Isothiazolonone 88 0 - 10 mg/l liquid 133
Legionella
147-Legionella-liq Legionella 147 60 - 1000000 cfu/test liquid 135
Magnesium
93-Magnesium-tab Magnesium 93 0 - 100 mg/l CaCO tablet 142
3
Manganese
31-Manganes-LR-tab Manganese (LR) 31 0.2 - 5 mg/l MnO /KMnO tablet 144
4 4
161-ManganVLR-tab Manganese (VLR) 161 0 - 0.030 mg/l tablet 146
Methylethylketoxime
69-Methylethyl-liq Methylethylketoxime 69 0 - 4.1 mg/l liquid 148
Molybdate
96-Molybdate-LR-tab Molybdate (LR) 96 0 - 15 mg/l Mo/Na MoO tablet 149
2 4
32-Molybdat-HR-tab Molybdate 32 1 - 100 mg/l Mo/Na MoO tablet 151
2 4
33-Molybdat-HR-liq Molybdate (HR) 33 5 - 200 mg/l Mo/Na MoO liquid 153
2 4
134-Molybd-HR-pp Molybdate (HR) 134 0 - 40 mg/l powder 155
Nickel
90-Nickel-HR-tab Nickel (HR) 90 0 - 7 mg/l tablet 157
100-Nickel-HR-liq Nickel (HR) 100 0 - 10 mg/l liquid 159
Nitrate
34-Nitrate-pow Nitrate 34 0.00 - 11.00 mg/l N liq./powder 161
Nitrite
35-Nitrite-LR-tab Nitrite (LR) 35 0 - 0.5 mg/l NO /NaNO tablet 163
2 2
36-Nitrite-HR-pow Nitrite (HR) 36 5 - 200 mg/l N/NO powder 165
2
Page 28
TEST-5TEST-5
Menu: TEST / Parameters list / test procedures
group/method parameter ID range unit switch reagent page
Nitrite
97-Nitrite-HR-tab Nitrite (HR) 97 0 - 1500 mg/l N/NO tablet 167
2
101-Nitrite-HR-liq Nitrite (HR) 101 0 - 3000 mg/l N/NO liquid 169
2
Nitrogen
151-NitroTotLR-pre Nitrogen-Total (LR) 151 0.5 - 25 mg/l NH , NH pre. vial 170
4 3
152-NitroTotHR-pre Nitrogen-Total (HR) 152 5 - 150 mg/l NH , NH pre. vial 173
4 3
Ozone
37-Ozone-tab Ozone 37 0 - 5.4 mg/l tablet 176
92-Ozone-liq Ozone 92 0 - 5.4 mg/l liquid 180
Peracetic Acid
164-PeracA-LR-tab Peracetic Acid 164 0 - 10 mg/l tablets 183
165-PeracA-HR-tab Peracetic Acid 165 0 - 300 mg/l tablets 185
Permanaganate
159-PTT-tab Permanganate Time T. 159 0 - 100 % tablet 187
Phenol
98-Phenol-tab Phenol 98 0 - 5 mg/l tablet 189
pH
40-pH-LR-tab pH-value (LR) 40 5.2 - 6.8 tablet 191
38-pH-MR-tab pH-value (MR) 38 6.4 - 8.4 tablet 193
39-pH-MR-liq pH-value (MR) 39 6.4 - 8.4 liquid 195
41-pH-univ-tab pH-Universal 41 5 - 11 tablet 197
42-pH-univ-liq pH-Universal 42 4 - 11 liquid 199
PHMB
43-PHMB-tab PHMB 43 2 - 60 mg/l tablet 201
Phosphate
44-Phosphat-LR-tab Phosphate (LR), ortho 44 0 - 4 mg/l P / P O tablet 203
2 5
45-Phosphat-LR-liq Phosphate (LR), ortho 45 0 - 4 mg/l P / P O liquid/ 205
2 5
powder
46-Phosphat-HR-tab Phosphate (HR), ortho 46 0 - 80 mg/l P / P O tablet 207
2 5
47-Phosphat-HR-liq Phosphate (HR), ortho 47 0 - 100 mg/l P / P O liquid 209
2 5
Phosphonate
87-Phosphonate-liq Phosphonate 87 0 - 20 mg/l PBTC / NTP / liquid 211
HEDPA /
EDTMPA / HMDTMPA /
DETPMPA / HPA
Phosphonate
110-Phosphon-tab Phosphonate 110 0 - 20 mg/l PBTC / NTP / tablet 214
HEDPA /
EDTMPA / HMDTMPA /
DETPMPA / HPA
153-PsphrTotLR-tab Phosphorus-Total (LR) 153 0 - 2.6 mg/l PO pre. vial 217
4
154-PsphrTotHR-tab Phosphorus-Total (HR) 154 0 - 52 mg/l PO pre. vial 219
4
Polyacrylate
85-Polyacryl-liq Polyacrylate 85 1 - 30 mg/l liquid 221
Potassium
48-Potassium-tab Potassium 48 0.7 - 12 mg/l tablet 223
Page 29
TEST-6TEST-6
Menu: TEST / Parameters list / test procedures
group/method parameter ID range unit switch reagent page
PTSA
111-PTSA-Ad PTSA 111 0 - 1000 µg/l --- 225
QAC
83-QAC-tab QAC 83 25 - 150 mg/l tablet 227
Silica
49-Silica-LR-liq Silica (LR) 49 0 - 5 mg/l Si liquid/ 228
powder
50-Silica-HR-pow Silica (HR) 50 0 - 100 mg/l Si powder 230
Sod.-Hypochlorite
51-Sodium-Hypo-tab Sodium Hypochlorite 51 0.2 - 40 % tablet 232
68-Sodium-Hypo-liq Sodium Hypochlorite 68 0.2 - 40 % liquid 234
Sulphate
54-Sulphate-tab Sulphate 54 5 - 100 mg/l tablet 236
55-Sulphate-pow Sulphate 55 5 - 100 mg/l powder 237
Sulphide
52-Sulphide-tab Sulphide 52 0.04 - 0.5 mg/l H S tablet 238
2
140-Sulphide-Ha Sulphide 140 0 - 0.7 mg/l liquid 240
Sulphite
53-Sulphite-LR-tab Sulphite (LR) 53 0 - 10 mg/l Na SO tablet 242
2 3
105-Sulphite-HR-tab Sulphite (HR) 105 5 - 50 mg/l Na2SO3 tablet 244
Suspended solids
81-Suspended-Sol Suspended solids 81 0 - 750 mg/l --- 246
Tannic acid
91-Tannic-acid-liq Tannic acid 91 0 - 150 mg/l liquid 248
Total Oxidant
108-Total-Oxid-liq Total Oxidant 108 0 - 8 mg/l liquid 249
Tracer
157-Tracer-Ad TRACER 157 0 - 1000 µg/l --- 251
Transmission
114-Transm-420nm Transmission-420nm 114 0 - 100 % --- 252
115-Transm-470nm Transmission-470nm 115 0 - 100 % --- 254
116-Transm-520nm Transmission-520nm 116 0 - 100 % --- 256
117-Transm-570nm Transmission-570nm 117 0 - 100 % --- 258
118-Transm-620nm Transmission-620nm 118 0 - 100 % --- 260
119-Transm-670nm Transmission-670nm 119 0 - 100 % --- 262
Turbidity
59-Turbidity Turbidity 59 20 - 1000 FAU FTU --- 264
112-Turbidity-NTU Turbidity-NTU 112 0 - 1000 NTU FTU/FNU --- 266
Urea
120-Urea-tab-liq Urea 120 0.1 - 2.5 mg/l tablet+liq. 268
150-UreaHR-tab-liq Urea (HR) 150 0.2 - 5.0 mg/l tablet+liq. 270
Watch
156-Watch-Ad Watch Products 156 0 - 1000 µg/l --- 272
Zinc
62-Zinc-tab Zinc 62 0 - 1 mg/l tablet 273
Page 30
!
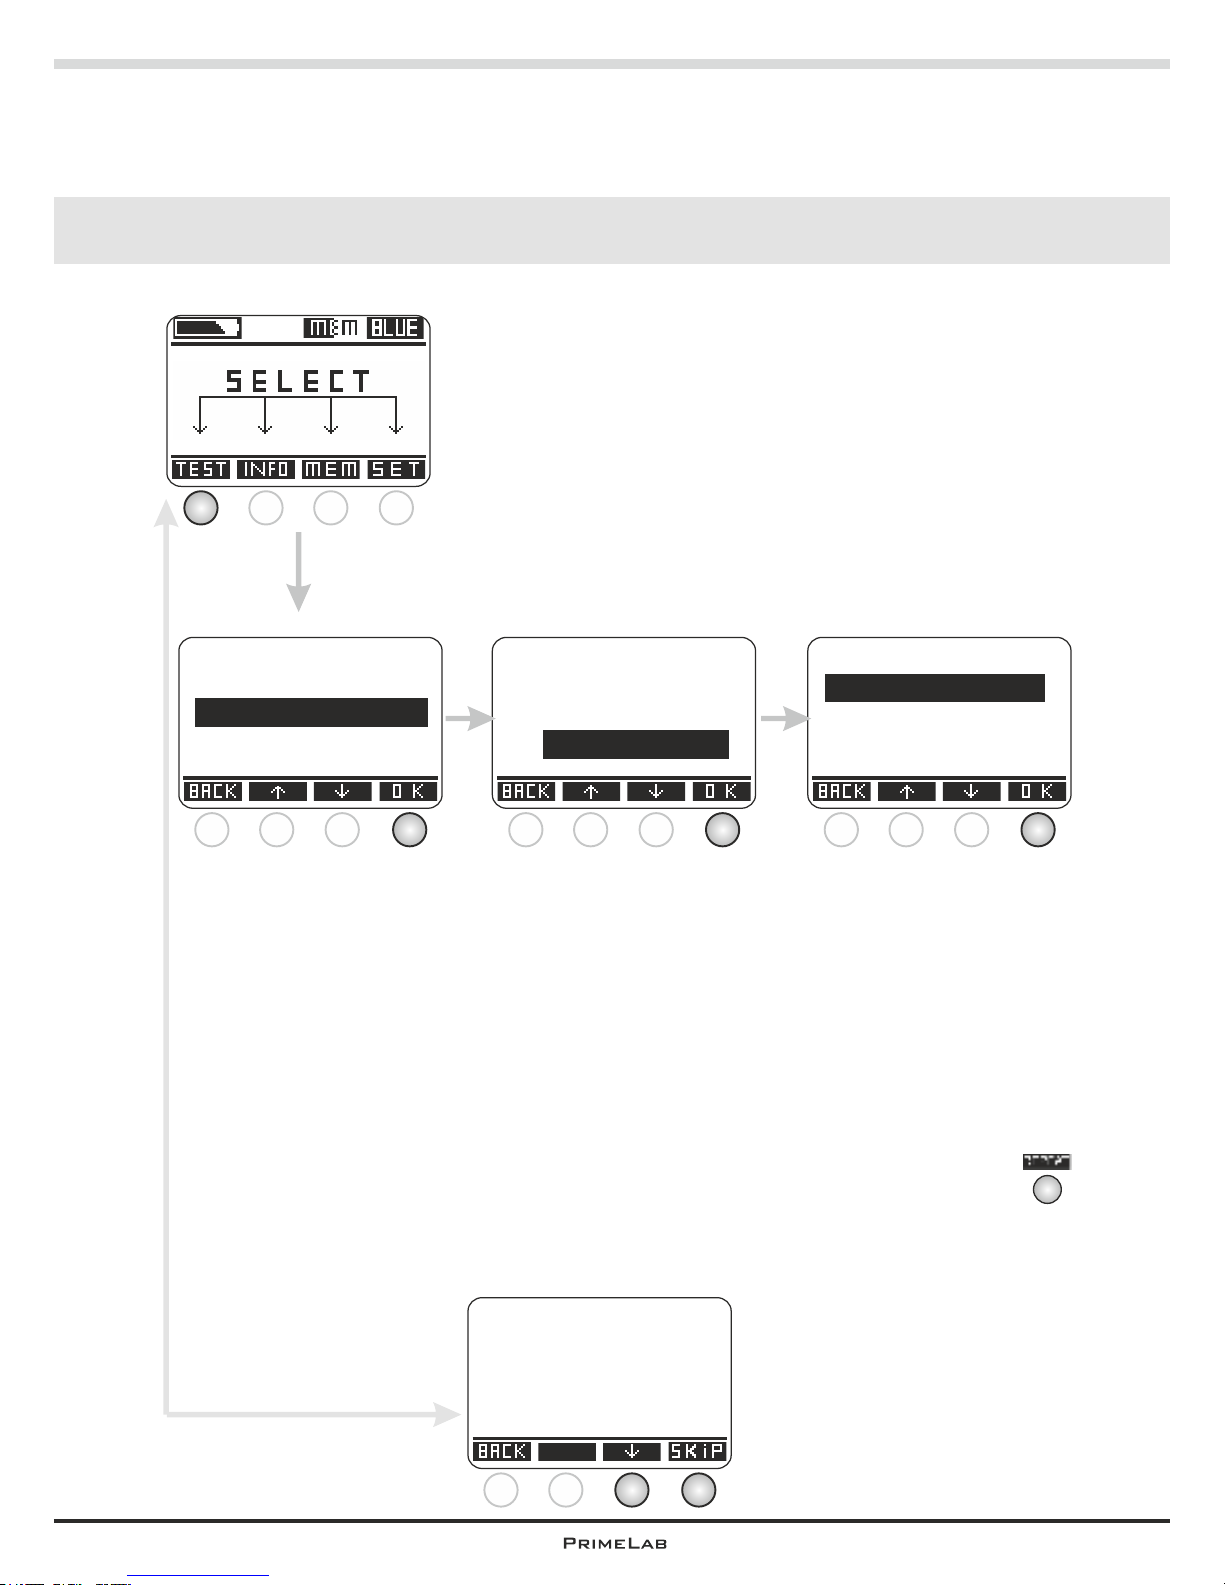
Test process for all parameters / test procedure
TEST-7
Accounts:
S m i t M i , S a m p 5 , K
M i l l P e , M u s t 1 , G
B a k e T h , T e s t 7 , B
Test groups:
Start screen:
Press button 1 to access
the menu “Test”.
The steps up to the selection of the parameter to be determined (and the
associated test procedure) are the same for all procedures. Below are the steps
required to select the test procedure “11 chlorine tab” which is used as an example.
Please always observe the important information and details for an
accurate measurement on pages “TEST-6” and “TEST-7”.
Alkalinity
Bromine
Chlorine
Press button 3 and/or 2 to
select the account for which
the test is to be performed.
Confirm your selection by
pressing button 4.
The test results will then be
saved in this account.
Use the PrimeLab software
(Desktop Assistant) to store
up to 20 accounts on the
PrimeLab.
To do this, please refer to
the section “PrimeLab
Desktop Assistant”.
Press button 3 and/or 2 to
select the parameter group
containing the
parameter/method you
want to use for your test.
1 2 3 4
1 2 3 4 1 2 3 4
The safety notices pertaining to
achieving accurate
measurements are only
displayed after each new startup prior to your first
mesurement. Scroll down
using button 3 or skip with
button 4.
1 ) Ce l l s , L i d s a n d
R o d s m u s t b e
c l e a n a n d f r e e
o f s c r a t c h e s
1 2 3 4
TEST-7
Tests:
11-Chlorine-Tab
12-Chlorine-Liq
14-Chlorine-HR-Tab
Press button 3 and/or 2 to
select the parameter / test
procedure to be used.
Confirm your selection by
pressing button 4.
All further steps are
described in the
instructions to the
individual test procedures.
Press button 2 in the test
result to repeat the
measurement without
going through the steps
again.
1 2 3 4
2
Page 31
!
!
!
!
!
!
!
!
Important notes for accurate testing
TEST-8
Please read the following instructions carefully because these must be
strictly observed to ensure accurate measurements:
Before inserting the cuvette into the sampling chamber please ensure that
the cuvette is absolutely dry and clean, that there is no soiling by
fingerprints etc., so that the light ray transmitted by the device for testing is
not refracted or blocked. It is best to wipe the outside of the cuvette with a
clean and dry cloth before inserting it.
The cuvette lid, the cuvette itself and the stirring rod (if used) must be
clean, to ensure that the samples to be tested are not contaminated by
dirt, residues or remaining reagents of a previous test.
Never clean cuvette, lid or stirring rod with a detergent as these will leave
residues and could influence any subsequent tests.
It is best to always use the same cuvette for any single parameter and to
mark the cuvette on the outside on the bottom with a waterproof marker
accordingly for this particular parameter.
The cuvette must also be free of any scratches as these would divert the
light ray transmitted during the test. Replace any scratched or damaged
cuvettes with new ones.
Make sure that you use only photometer grade reagents (PL range and
Photometer tablets). Using RAPID reagents will lead to incorrect results!
Check before each test run that the reagents used have not exceeded
their best before date.
Always keep the sampling chamber (where the cuvette is inserted) clean.
On the left and right inside of the chamber you will see an opening and
behind that a transparent plastic pane. The LED and the sensor are
located behind these. Both panes must be dry and clean.
Any soiling must be cleaned according to A-3 in these instructions.
The measurement must be performed in a radiation-free environment
which is not electromagnetically influenced. Keep mobile phones and
radio devices away during sampling.
Some reagents are classified as hazardous materials. These are identified
as such on the packaging. In addition you can download safety
specifications for the reagents offered by PrimeLab from the website
www.primelab.org.
Always adhere to the safety instructions on the packaging and in the
safety specifications to prevent damages to yourself, the PrimeLab device
and the environment.
NEVER touch reagents with your fingers, pour them directly from the
container into the water sample!
Always close liquid reagent containers immediately after use.
Always ensure uniform drop sizes are used.
Air bubbles on the inside of the cuvette wall will result in incorrect
measurements!
If there are any bubbles carefully shake the cuvette to release these.
!
!
!
!
!
Continued...
TEST-8
Page 32
!
!
!
!
TEST-9
Always conduct baseline (zero) measurements with the same cuvette
used for the subsequent test. Always make sure that the triangular
marking on the cuvette is aligned with the triangle on the front of the
sampling chamber on the device. There are always small differences
between cuvettes (tolerances due to production).
The device must be acclimatised to the ambient temperature. Great
differences between the device temperature and that of the environment
can lead to the formation of condensation obstructing the optical system,
which in turn will lead to incorrect measurements.
The sampling chamber must be free from water or humidity, otherwise
there will be the risk of damage to the electronics inside the device.
Please calibrate your PrimeLab on a regular basis (at least 2 weekly)
as described in SET-4 of these instructions to obtain the best
possible measurement results.
PrimeLab must remain on a flat surface while testing as otherwise
the LED light will not pass correctly through the sample water which
will lead to incorrect results.
Continued...
TEST-9
!
Important notes for accurate testing
Page 33

left open for technical reasons
Page 34
1
1
(01) Active Oxygen
Tablet
0.00 - 40.00 mg/l (O )
2
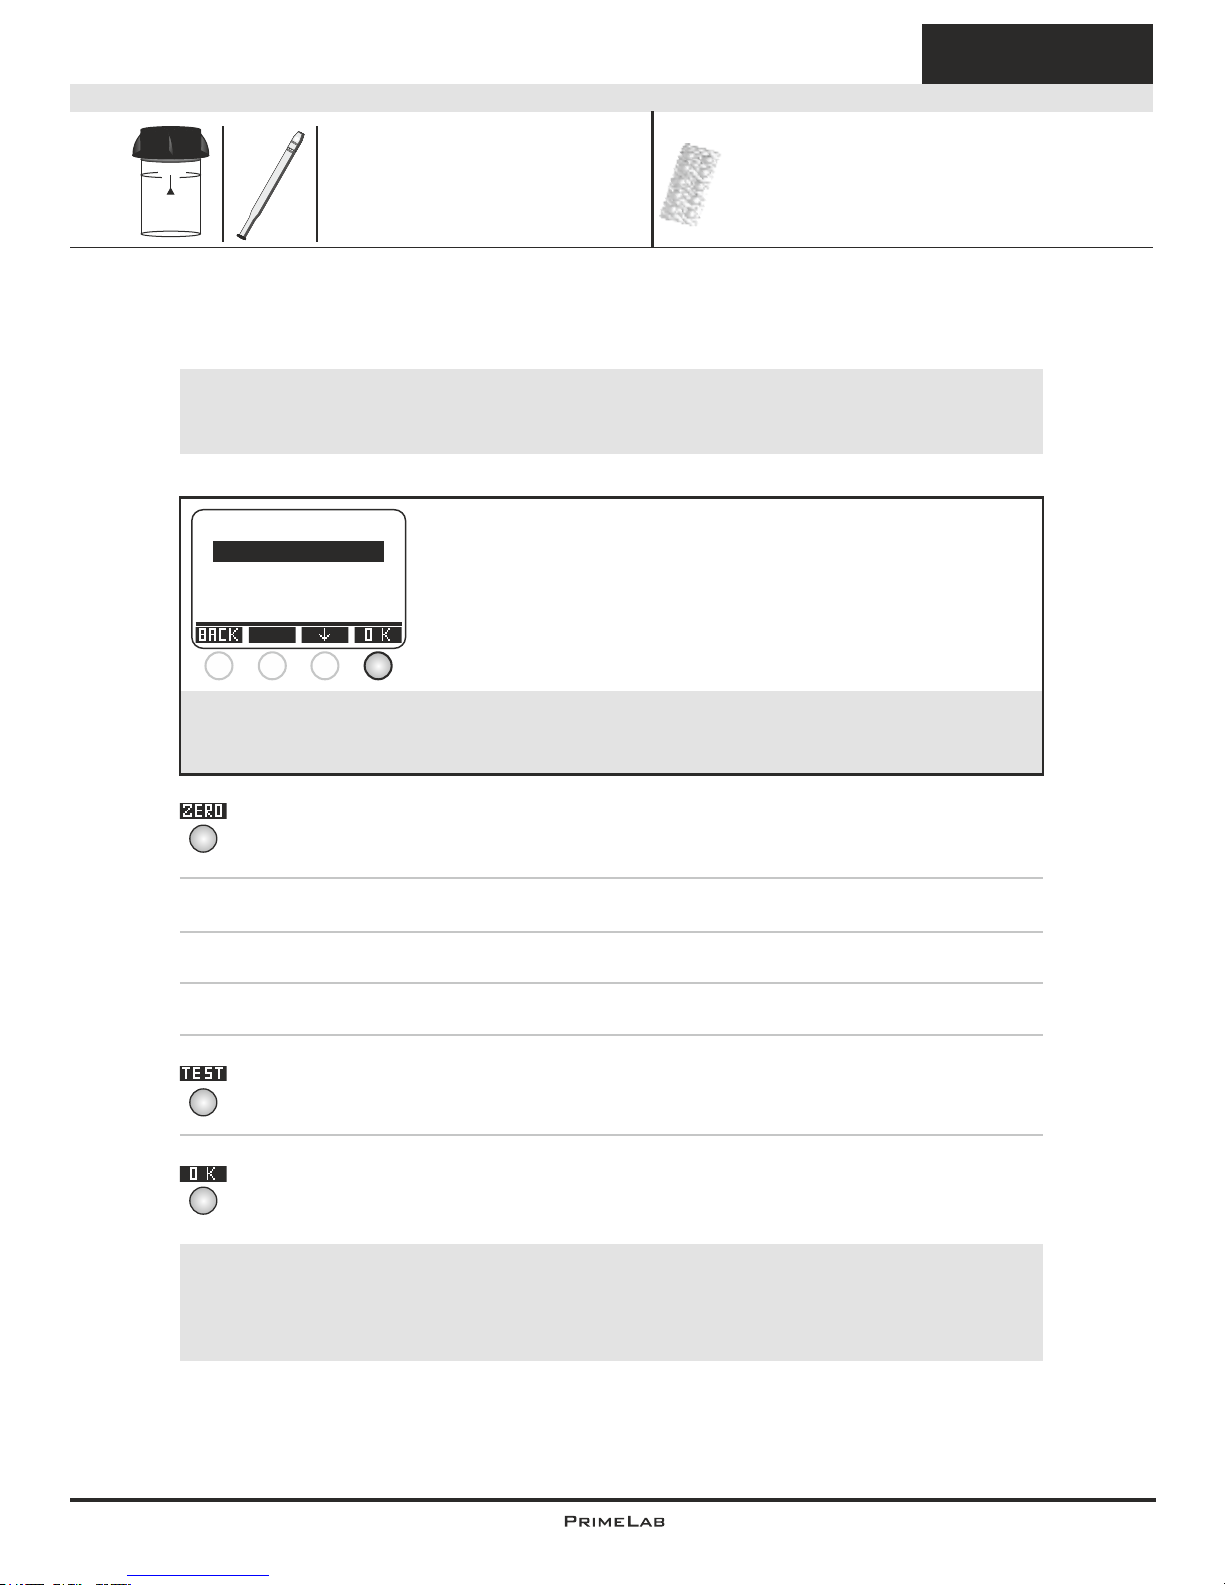
1) Fill 10ml of the sample water into a clean 24mm cuvette.
2) Replace the screw lid on the cuvette and insert it into the PrimeLab
sampling chamber. Align the arrow on the front of the cuvette. Press
ZERO.
3) Remove the cuvette from the chamber and unscrew the lid.
4) Add a "DPD N° 4 Photometer" tablet to the water sample in the cuvette.
5) Crush the tablet with a clean stirrer until it has completely dissolved.
6) Replace the lid on the cuvette, swirl it carefully and insert it into the
sampling chamber of the PrimeLab. Align the arrow on the front of the
cuvette. Press TEST.
7) After the lapse of a 2 minute countdown the determined result is
displayed. Press button 4 to save the result together with date and time in
the device.
Continued...
DPD N° 4 Photometer (TbsPD4...)
10 ml
Name on device: 01-Act-oxi-MPS-tab
24 mm
4
4
4
The individual steps of the measurement procedure are shown on the display.
Use button 3 (arrow down) to scroll through the steps.
Use button 4 to skip the notes.
!
Measurement procedure:
The steps up to the selection of the parameter value to be determined are the same for all
procedures and described on page "TEST-5". Please observe the important notes for
accurate measurements on pages "TEST-8" and "TEST-9".
One-Time-Zero:
Measure new ZERO
Use last ZERO
For the sake of precision select "Use last ZERO" only
if the stored ZERO value is used with the
same cuvette and the same water sample for the test!
!
If after switching on the device you have already performed the
ZERO (baseline) adjustment for the same type, the following
message is displayed:
-> Measure new ZERO = continue with step 2)
-> Use last ZERO = continue with step 4)
1 2 3 4
!
Possible messages in the line below the measurement value:
"low! / high! / good!":
Assessment of the measurement value relative to the ideal range defined by you.
"Overrange! / underrange!":
Measurement value for this parameter is outside the value range of this method.
Page 35

2
2
Continued...
Tablet
Note(s)
-> The chemical to be identified with this test procedure is potassium mono-
persulfate (MPS).
-> When preparing the measurement it is important to avoid any active oxygen
escaping. This is done by using a pipette and shaking of the sample water.
The measurement must be conducted immediately after taking the sample.
(01) Active Oxygen
Name on device: 01-Act-oxi-MPS-tab
0.00 - 40.00 mg/l (O )
2
Page 36
3
3
(05) Alkalinity-M
Tablet
5 - 200 mg/l (CaCO )
3
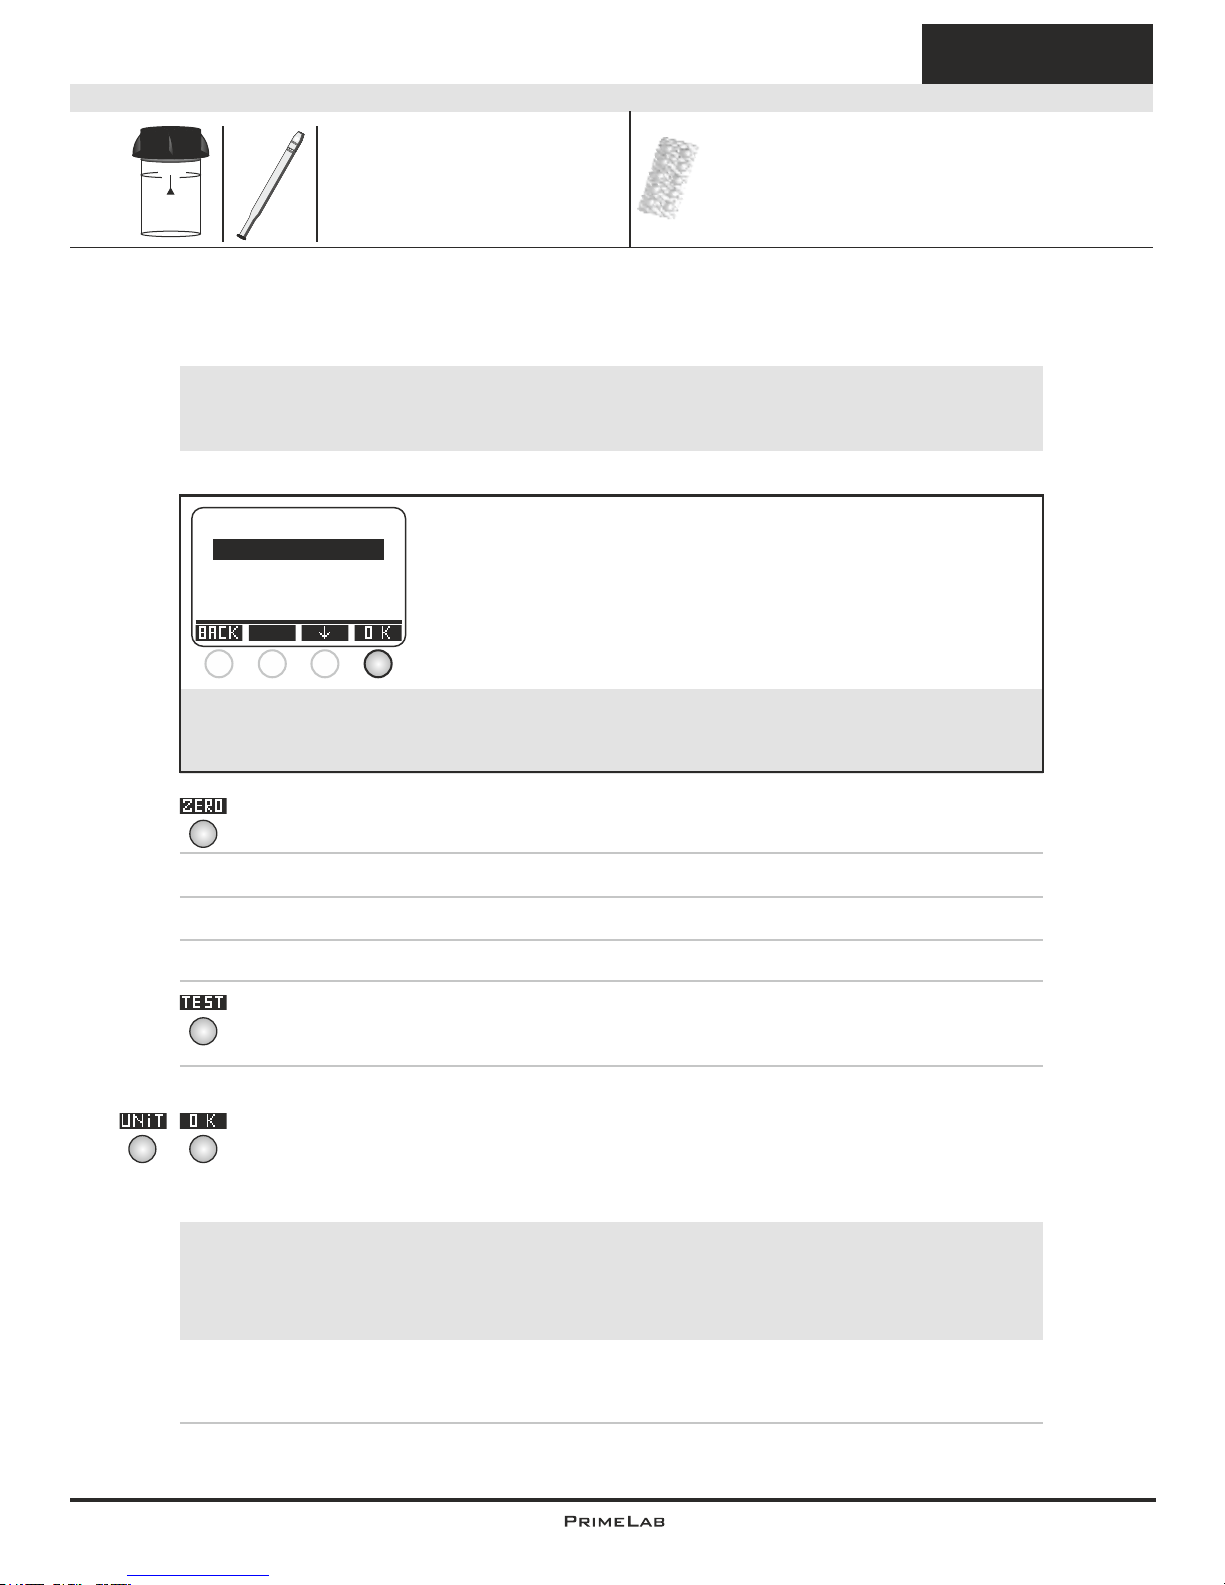
1) Fill 10ml of the sample water into a clean 24mm cuvette.
2) Replace the screw lid on the cuvette and insert it into the PrimeLab
sampling chamber. Align the arrow on the front of the cuvette. Press ZERO.
3) Remove the cuvette from the chamber and unscrew the lid.
4) Add a "Alkalinity-M Photometer" tablet to the water sample in the cuvette.
5) Crush the tablet with a clean stirrer until it has completely dissolved.
6) Replace the lid on the cuvette, swirl it carefully and insert it into the
sampling chamber of the PrimeLab. Align the arrow on the front of the cuvette.
Press TEST.
7) After the lapse of a 0:25 minute countdown the determined result is
displayed.
Press button 3 to convert the result to different units (*).
Press button 4 to save the test result together with date and time.
Alkalinity-M Photometer (TbsPTA...)
10 ml
Name on device: 05-Alkalinit-M-tab
24 mm
4
4
4
3
The individual steps of the measurement procedure are shown on the display.
Use button 3 (arrow down) to scroll through the steps.
Use button 4 to skip the notes.
!
Measurement procedure:
The steps up to the selection of the parameter value to be determined are the same for all
procedures and described on page "TEST-5". Please observe the important notes for
accurate measurements on pages "TEST-8" and "TEST-9".
One-Time-Zero:
Measure new ZERO
Use last ZERO
For the sake of precision select "Use last ZERO" only
if the stored ZERO value is used with the
same cuvette and the same water sample for the test!
!
If after switching on the device you have already performed the
ZERO (baseline) adjustment for the same type, the following
message is displayed:
-> Measure new ZERO = continue with step 2)
-> Use last ZERO = continue with step 4)
1 2 3 4
!
Possible messages in the line below the measurement value:
"low! / high! / good!":
Assessment of the measurement value relative to the ideal range defined by you.
"Overrange! / underrange!":
Measurement value for this parameter is outside the value range of this method.
Note(s)
-> (*) Conversion to HCO-3, °dH, °eH, °fH, mmol (KS4.3), mval
-> In order to obtain as precise a result as possible it is essential that the water
sample has a volume of exactly 10ml.
Page 37
4
4
(121) Alkalinity-M HR
Tablet
0 - 500 mg/l (CaCO )
3
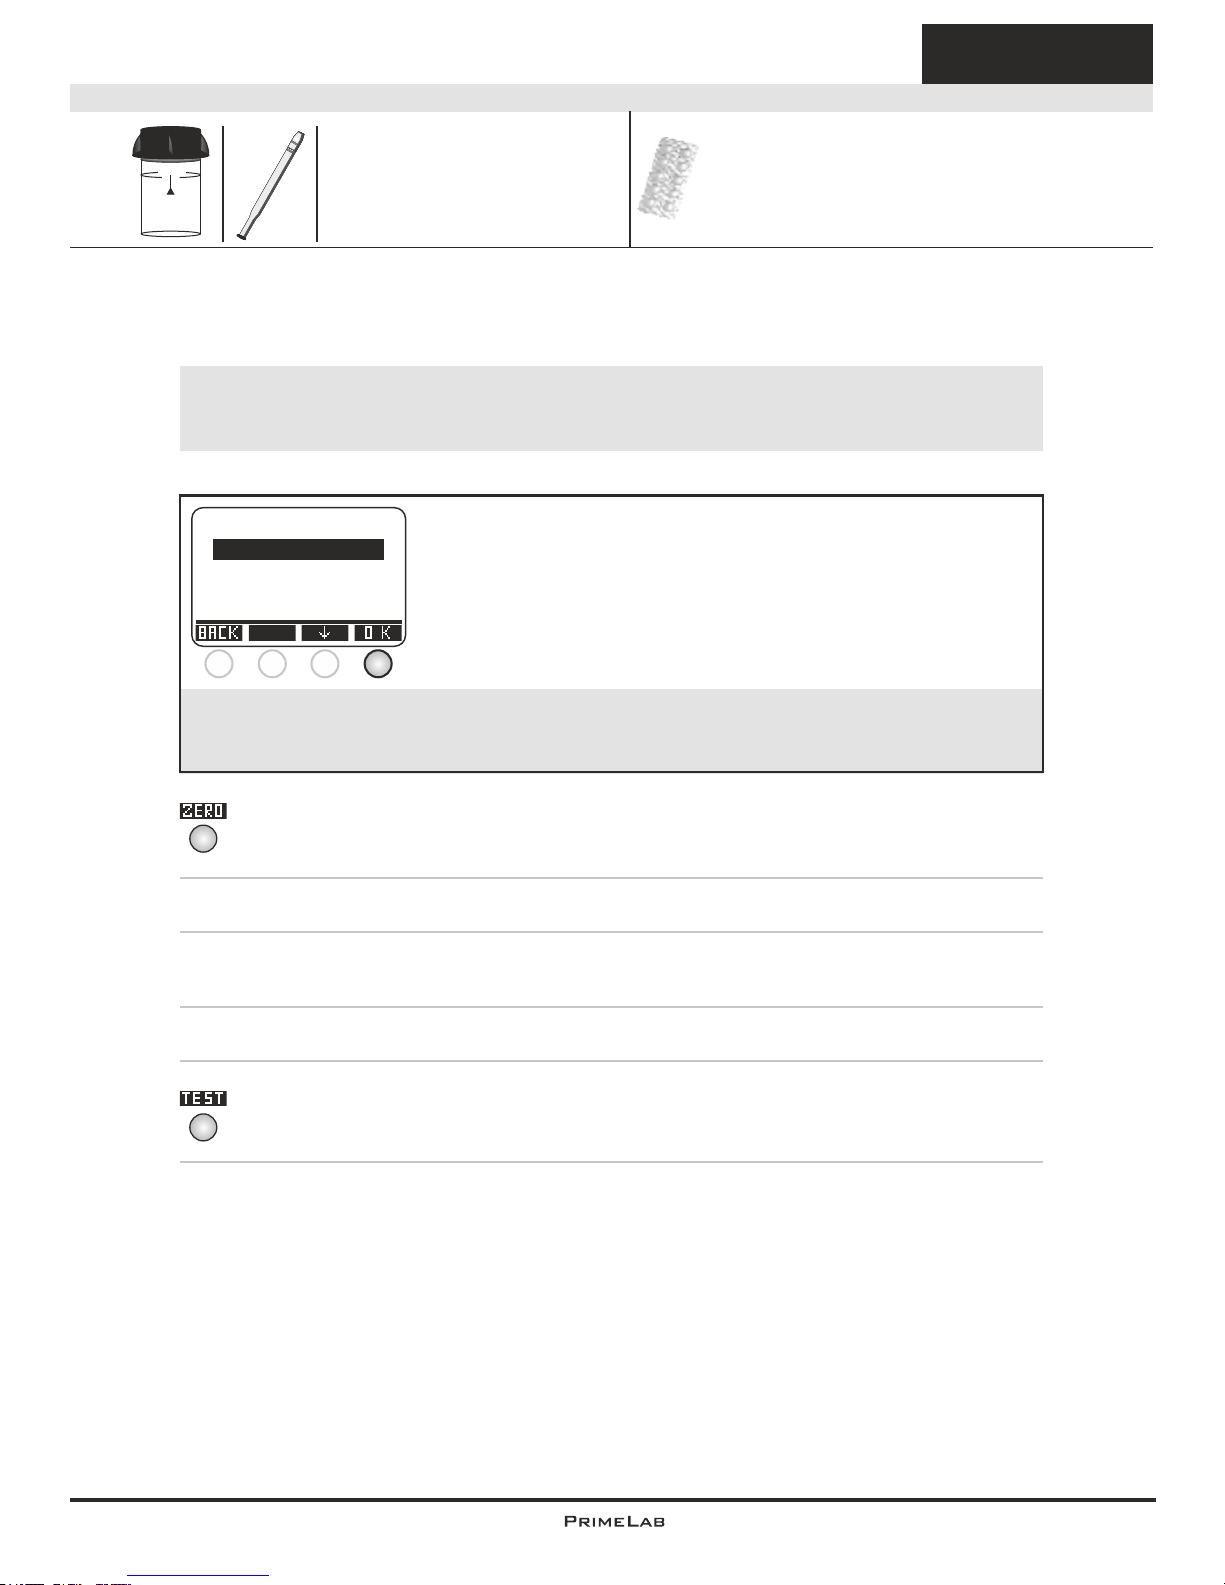
1) Fill 10ml of the sample water into a clean 24mm cuvette.
2) Replace the screw lid on the cuvette and insert it into the PrimeLab
sampling chamber. Align the arrow on the front of the cuvette. Press
ZERO.
3) Remove the cuvette from the chamber and unscrew the lid.
4) Add a "Alkalinity-M HR Photometer" tablet to the water sample in the
cuvette.
5) Crush the tablet with a clean stirrer until it has completely dissolved.
6) Replace the lid on the cuvette, swirl it carefully and insert it into the
sampling chamber of the PrimeLab. Align the arrow on the front of the
cuvette. Press TEST.
7) After the lapse of a 1 minute countdown the determined result is
displayed. Press button 3 to convert this into various measurement units(*)
8) Press button 4 to save the result together with date and time in the
device.
Alkalinity-M HR Photometer (TbsPTAHR…)
10 ml
Name on device: 121-Alka-M-HR-tab
24 mm
4
4
The individual steps of the measurement procedure are shown on the display.
Use button 3 (arrow down) to scroll through the steps.
Use button 4 to skip the notes.
!
Measurement procedure:
The steps up to the selection of the parameter value to be determined are the same for all
procedures and described on page "TEST-5". Please observe the important notes for
accurate measurements on pages "TEST-8" and "TEST-9".
One-Time-Zero:
Measure new ZERO
Use last ZERO
For the sake of precision select "Use last ZERO" only
if the stored ZERO value is used with the
same cuvette and the same water sample for the test!
!
If after switching on the device you have already performed the
ZERO (baseline) adjustment for the same type, the following
message is displayed:
-> Measure new ZERO = continue with step 2)
-> Use last ZERO = continue with step 4)
1 2 3 4
Page 38
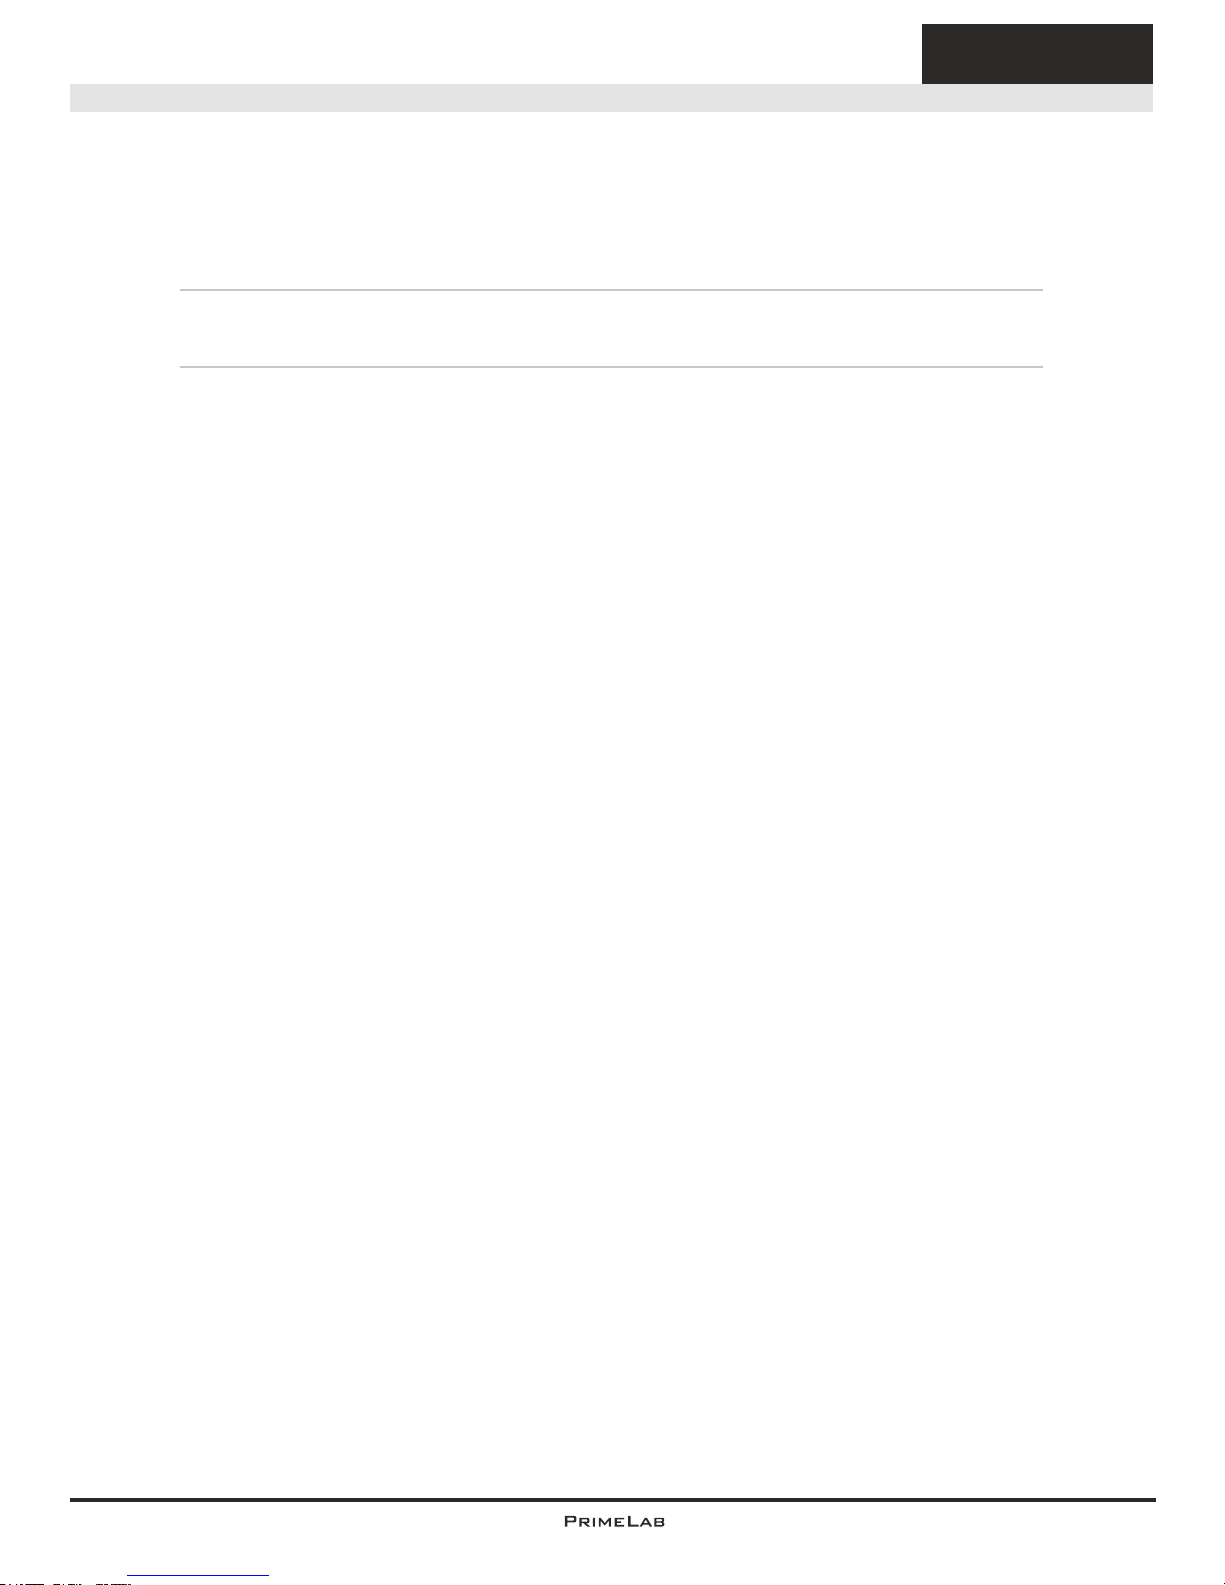
5
5
(121) Alkalinity-M HR
Tablet
0 - 500 mg/l (CaCO )
3
Name on device: 121-Alka-M-HR-tab
Continued...
Note(s)
-> (*) Conversion to HCO-3, °dH, °eH, °fH, mmol (KS4.3), mval
-> In order to obtain as precise a result as possible it is essential that the water
sample has a volume of exactly 10ml.
-> Extend the listed measurement range to 400 - 1000 mg/l by diluting your
water sample as follows: 1:1 = 5 ml of sample water plus 5 ml of distilled
water and continue with the test procedure. The test result displayed on the
screen needs to be multiplied by 2.
Page 39
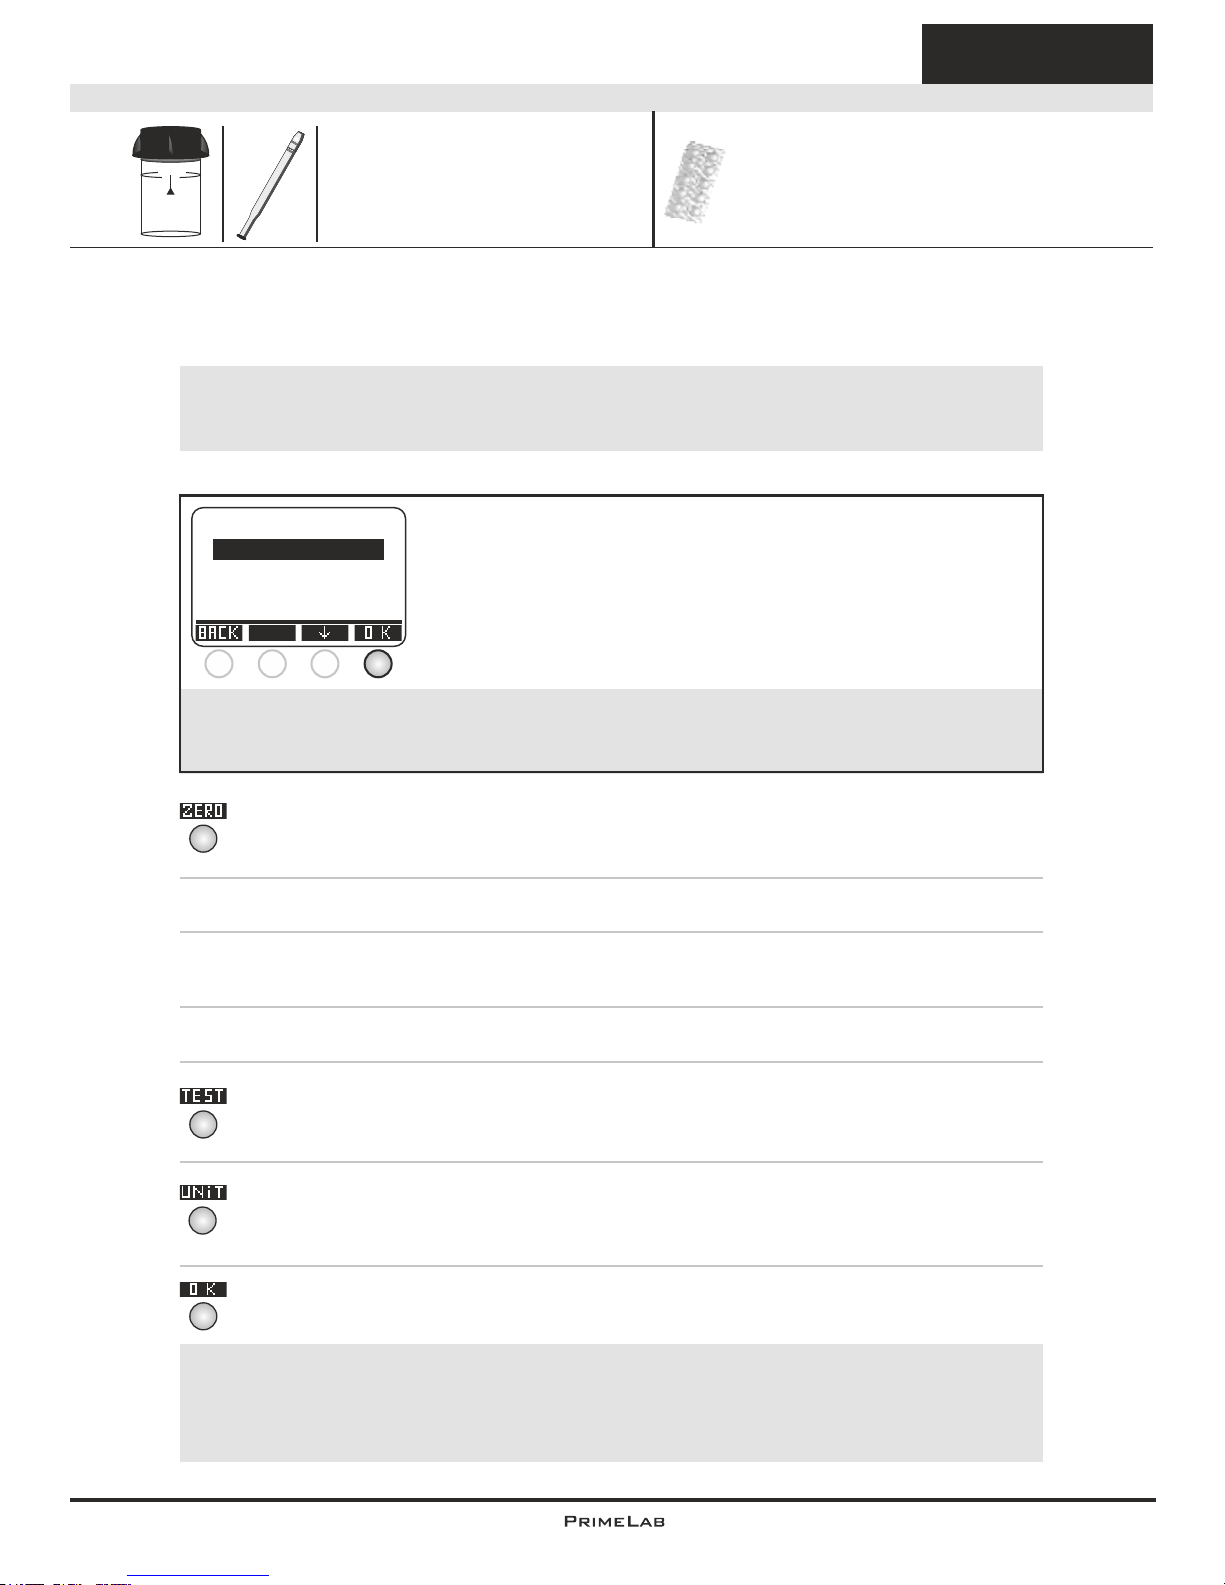
6
6
(06) Alkalinity-P
Tablet
5 - 300 mg/l (CaCO )
3
1) Fill 10ml of the sample water into a clean 24mm cuvette.
2) Replace the screw lid on the cuvette and insert it into the PrimeLab
sampling chamber. Align the arrow on the front of the cuvette. Press
ZERO.
3) Remove the cuvette from the chamber and unscrew the lid.
4) Add a "Alkalinity-P Photometer" tablet to the water sample in the
cuvette.
5) Crush the tablet with a clean stirrer until it has completely dissolved.
6) Replace the lid on the cuvette, swirl it carefully and insert it into the
sampling chamber of the PrimeLab. Align the arrow on the front of the
cuvette. Press TEST.
7) After the lapse of a 5 minute countdown the determined result is
displayed. Press button 3 to convert this into various measurement units
(*).
8) Press button 4 to save the result together with date and time in the
device.
Alkalinity-P Photometer (TbsPAP...)
10 ml
Name on device: 06-Alkalinit-P-tab
24 mm
4
4
3
Continued...
4
One-Time-Zero:
Measure new ZERO
Use last ZERO
For the sake of precision select "Use last ZERO" only
if the stored ZERO value is used with the
same cuvette and the same water sample for the test!
!
If after switching on the device you have already performed the
ZERO (baseline) adjustment for the same type, the following
message is displayed:
-> Measure new ZERO = continue with step 2)
-> Use last ZERO = continue with step 4)
1 2 3 4
The individual steps of the measurement procedure are shown on the display.
Use button 3 (arrow down) to scroll through the steps.
Use button 4 to skip the notes.
!
Measurement procedure:
The steps up to the selection of the parameter value to be determined are the same for all
procedures and described on page "TEST-5". Please observe the important notes for
accurate measurements on pages "TEST-8" and "TEST-9".
!
Possible messages in the line below the measurement value:
"low! / high! / good!":
Assessment of the measurement value relative to the ideal range defined by you.
"Overrange! / underrange!":
Measurement value for this parameter is outside the value range of this method.
Page 40

7
7
Tablet
5 - 300 mg/l (CaCO )
3
Continued...
Note(s)
-> (*) Conversion to °dH, °eH, °fH, mmol (KS4.3), mval
-> In order to obtain as precise a result as possible it is essential that the water
sample has a volume of exactly 10ml.
(06) Alkalinity-P
Name on device: 06-Alkalinit-P-tab
Page 41
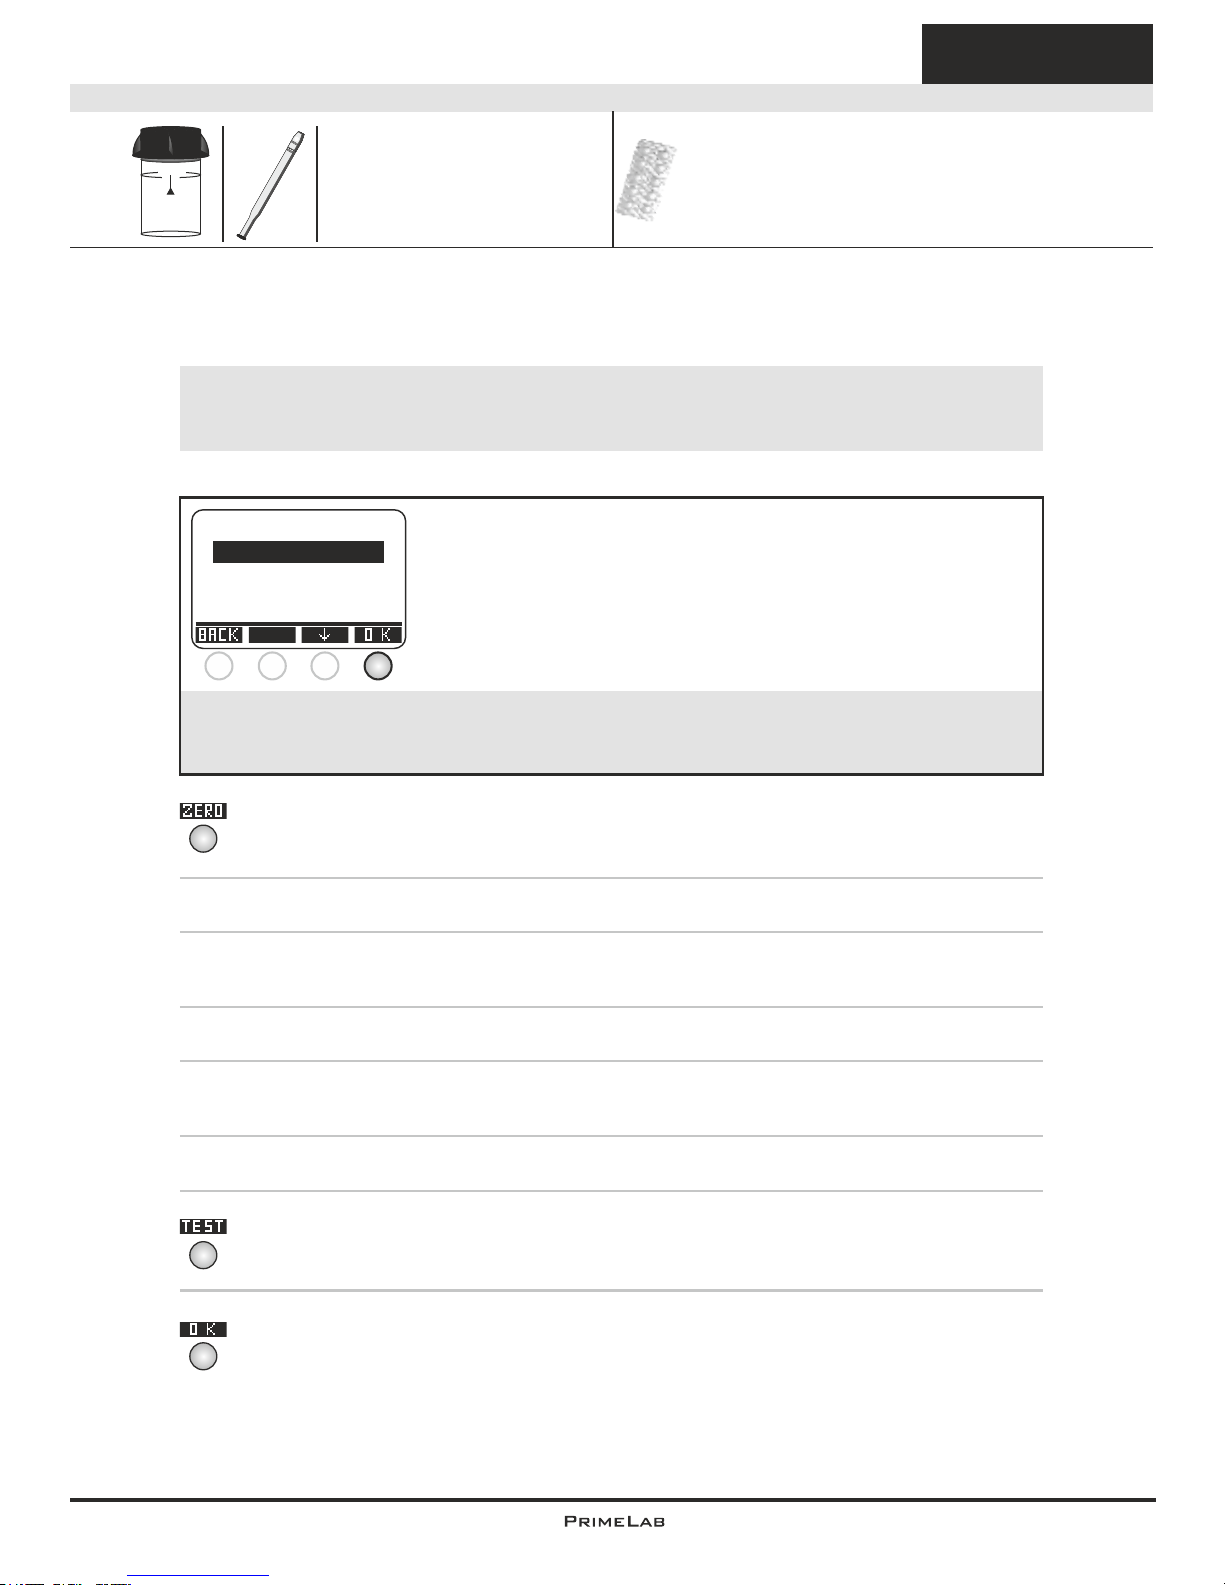
8
8
(04) Aluminium
Tablet
0 - 0.3 mg/l (Al)
Aluminium N°1 Photometer (TbsHALM1...)
Aluminium N°2 Photometer (TbsPALM2...)
10 ml
Name on device: 04-Aluminium-tab
24 mm
1) Fill 10ml of the sample water into a clean 24mm cuvette.
2) Replace the screw lid on the cuvette and insert it into the PrimeLab
sampling chamber. Align the arrow on the front of the cuvette. Press
ZERO.
3) Remove the cuvette from the chamber and unscrew the lid.
4) Add an "Aluminium N° 1 Photometer" tablet to the water sample in the
cuvette.
5) Crush the tablet with a clean stirrer until it has completely dissolved.
6) Add an "Aluminium N° 2 Photometer" tablet to the water sample in the
same cuvette.
7) Crush the tablet with a clean stirrer until it has completely dissolved.
8) Replace the lid on the cuvette, swirl it carefully and insert it into the
sampling chamber of the PrimeLab. Align the arrow on the front of the
cuvette. Press TEST.
9) After the lapse of a 5 minute countdown the determined result is
displayed. Press button 4 to save this together with date and time in the
device.
Continued...
4
4
4
The individual steps of the measurement procedure are shown on the display.
Use button 3 (arrow down) to scroll through the steps.
Use button 4 to skip the notes.
!
Measurement procedure:
The steps up to the selection of the parameter value to be determined are the same for all
procedures and described on page "TEST-5". Please observe the important notes for
accurate measurements on pages "TEST-8" and "TEST-9".
One-Time-Zero:
Measure new ZERO
Use last ZERO
For the sake of precision select "Use last ZERO" only
if the stored ZERO value is used with the
same cuvette and the same water sample for the test!
!
If after switching on the device you have already performed the
ZERO (baseline) adjustment for the same type, the following
message is displayed:
-> Measure new ZERO = continue with step 2)
-> Use last ZERO = continue with step 4)
1 2 3 4
Page 42

9
9
Tablet
0 - 0.3 mg/l (Al)
Continued...
Note(s)
-> The temperature of your water sample should be between 20°C and 25°C.
-> Fluorides and polyphosphates in the sample water will reduce the
measurement results. So long as no fluoride has been actively added this
effect is negligible. Otherwise, the result will be, depending on the fluoride
concentration in the water, 0.01 to 0.23 mg/l too low. To take this effect into
account the fluoride content in the water must be determined in a separate
procedure. Multiply the separately determined fluoride value with 0.4 and
then add 1 to this result, which will render the factor by which the
measurement result (aluminium) must be multiplied to get the correct value.
Example:
Determined fluoride value = 0.6 mg/l; multiplied with 0.4 = 0.24; plus 1 = 1.24
(= factor). Determined aluminium value = 0.15; multiply with the above factor
(1.24) = 0.186 mg/l aluminium concentration.
-> Iron and manganese are eliminated by the reagent tablet and have no
influence on the measurement result.
(04) Aluminium
Name on device: 04-Aluminium-tab
!
Possible messages in the line below the measurement value:
"low! / high! / good!":
Assessment of the measurement value relative to the ideal range defined by you.
"Overrange! / underrange!":
Measurement value for this parameter is outside the value range of this method.
Page 43
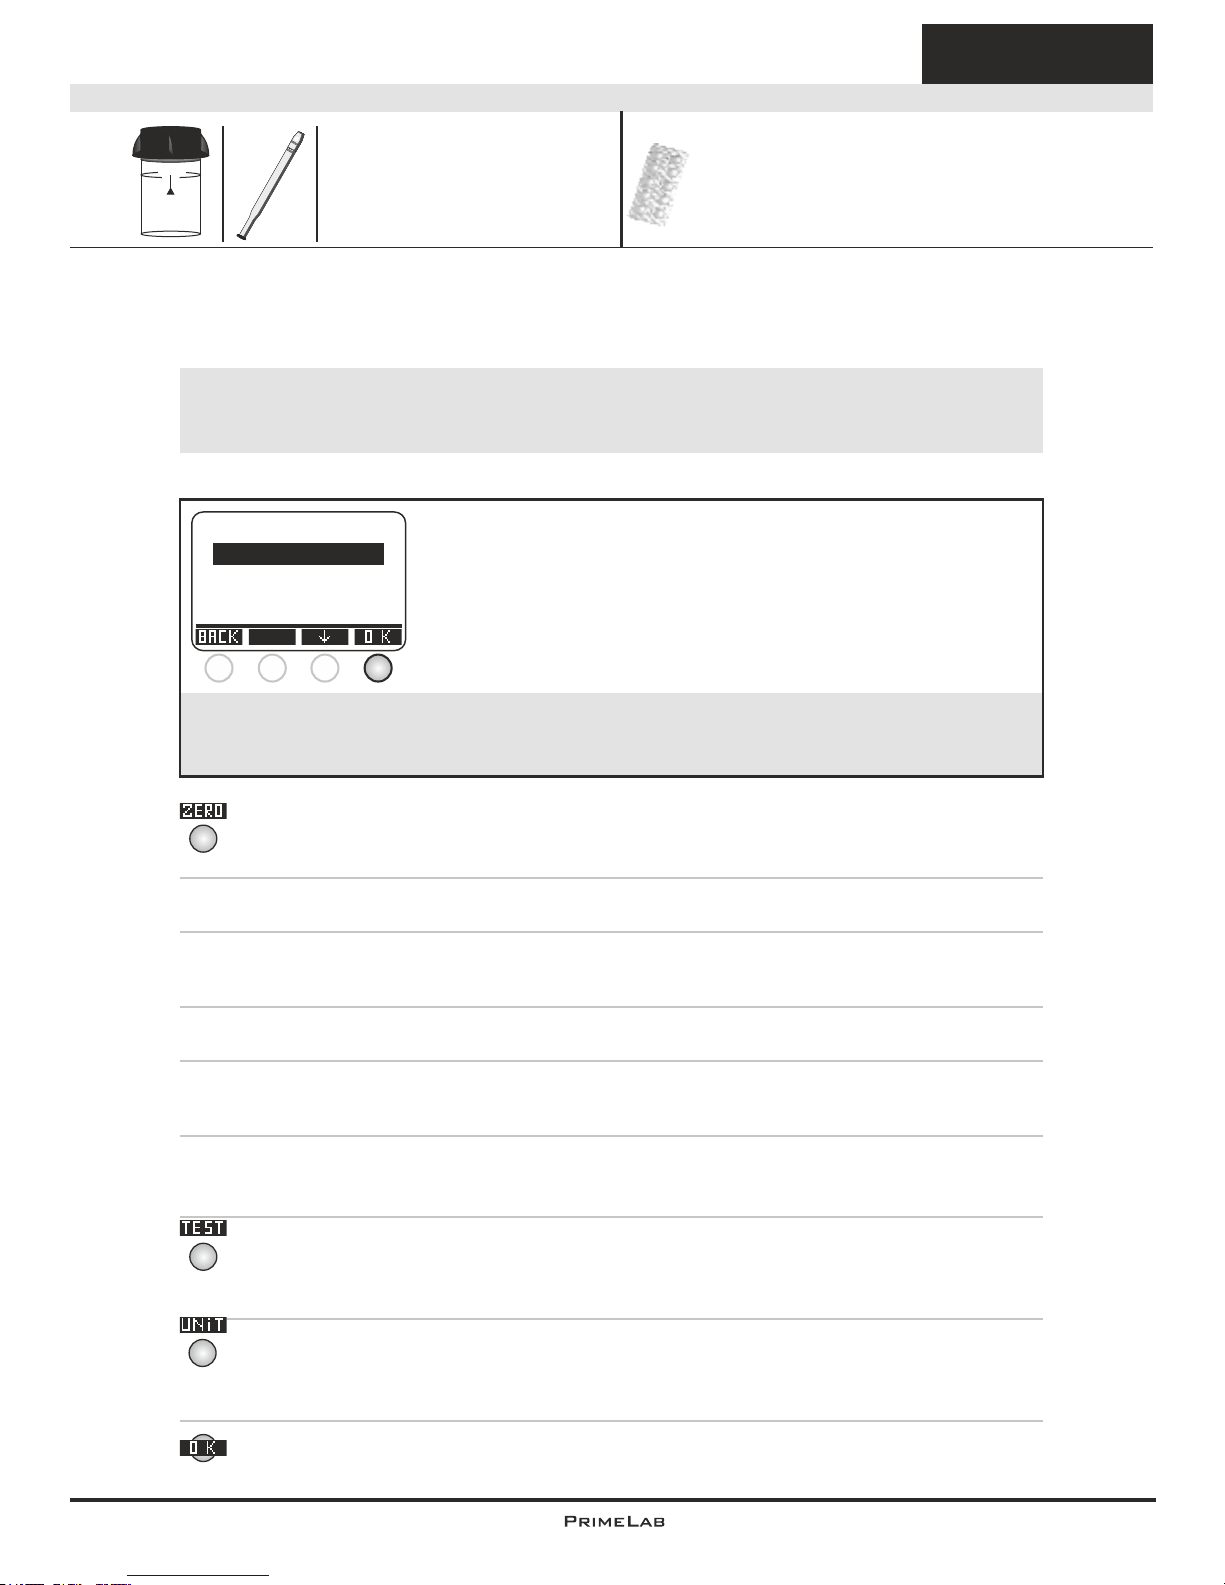
10
10
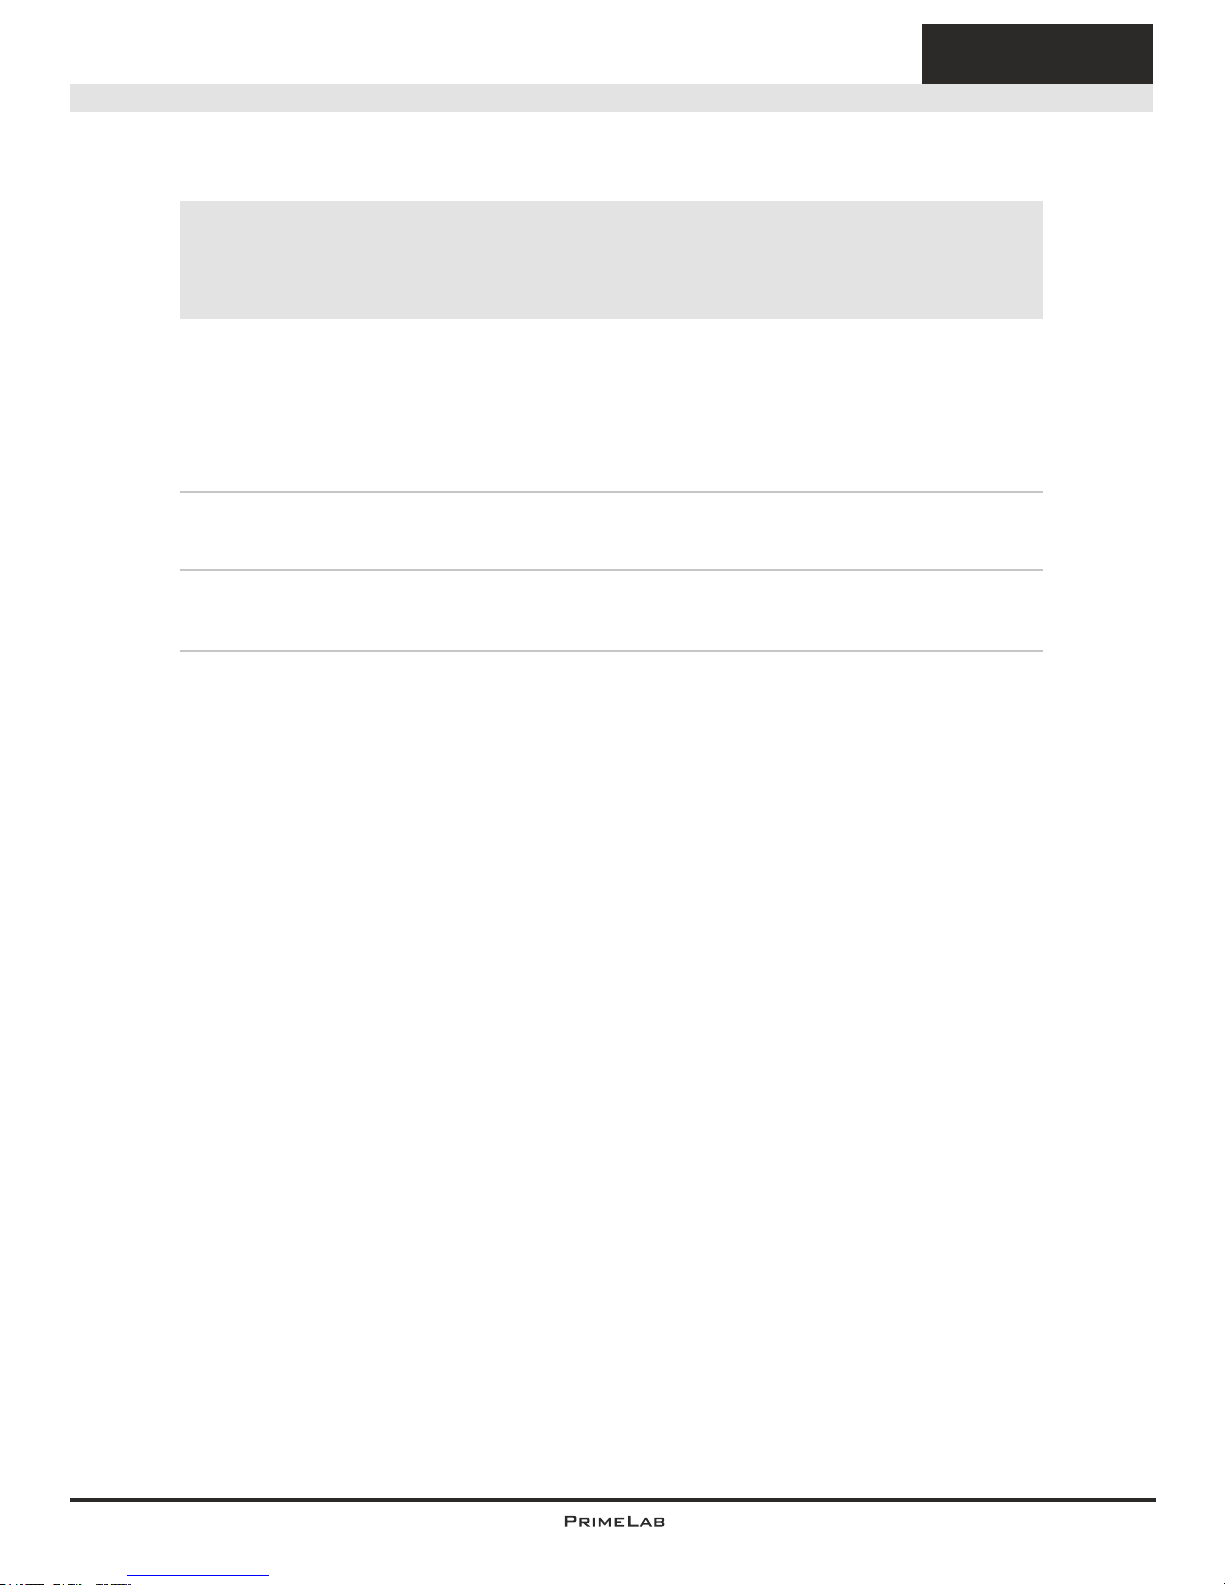
(02) Ammonia LR
Tablet
0 - 1.00 mg/l (N)
1) Fill 10ml of the sample water (*) into a clean 24mm cuvette.
2) Replace the screw lid on the cuvette and insert it into the PrimeLab
sampling chamber. Align the arrow on the front of the cuvette. Press
ZERO.
3) Remove the cuvette from the chamber and unscrew the lid.
4) Add an "Ammonia N° 1 Photometer" tablet (**) to the water sample in
the cuvette.
5) Crush the tablet with a clean stirrer until it has completely dissolved.
6) Add an "Ammonia N° 2 Photometer" tablet to the water sample in the
same cuvette.
7) Crush the tablets with a clean stirrer until both have completely
dissolved.
8) Replace the lid on the cuvette, swirl it carefully and insert it into the
sampling chamber of the PrimeLab. Align the arrow on the front of the
cuvette. Press TEST.
9) After the lapse of a 10 minute countdown the determined result is
displayed. Press button 3 to convert this into various measurement units
(***).
10) Press button 4 to save the result together with date and time in the
device.
Continued...
Ammonia N° 1 Photometer (TbsHAM1...)
Ammonia N° 2 Photometer (TbsPAM2...)
10 ml
Name on device: 02-Ammonia-LR-Tab
24 mm
4
4
3
The individual steps of the measurement procedure are shown on the display.
Use button 3 (arrow down) to scroll through the steps.
Use button 4 to skip the notes.
!
Measurement procedure:
The steps up to the selection of the parameter value to be determined are the same for all
procedures and described on page "TEST-5". Please observe the important notes for
accurate measurements on pages "TEST-8" and "TEST-9".
One-Time-Zero:
Measure new ZERO
Use last ZERO
For the sake of precision select "Use last ZERO" only
if the stored ZERO value is used with the
same cuvette and the same water sample for the test!
!
If after switching on the device you have already performed the
ZERO (baseline) adjustment for the same type, the following
message is displayed:
-> Measure new ZERO = continue with step 2)
-> Use last ZERO = continue with step 4)
1 2 3 4
4
Page 44
11
11
Tablet
0 - 1.00 mg/l (N)
Continued...
Note(s)
-> (*) The temperature of your water sample must not be below 20°C.
-> (**) The Ammonia N° 1 tablet will only dissolve completely after the
Ammonia N° 2 tablet has been added.
-> (***) The measurement result can be converted to the following units:
NH , NH
4 3
-> extremely salty water must be treated to avoid incorrect test results.
(02) Ammonia LR
Name on device: 02-Ammonia-LR-Tab
!
Possible messages in the line below the measurement value:
"low! / high! / good!":
Assessment of the measurement value relative to the ideal range defined by you.
"Overrange! / underrange!":
Measurement value for this parameter is outside the value range of this method.
Page 45
12
12
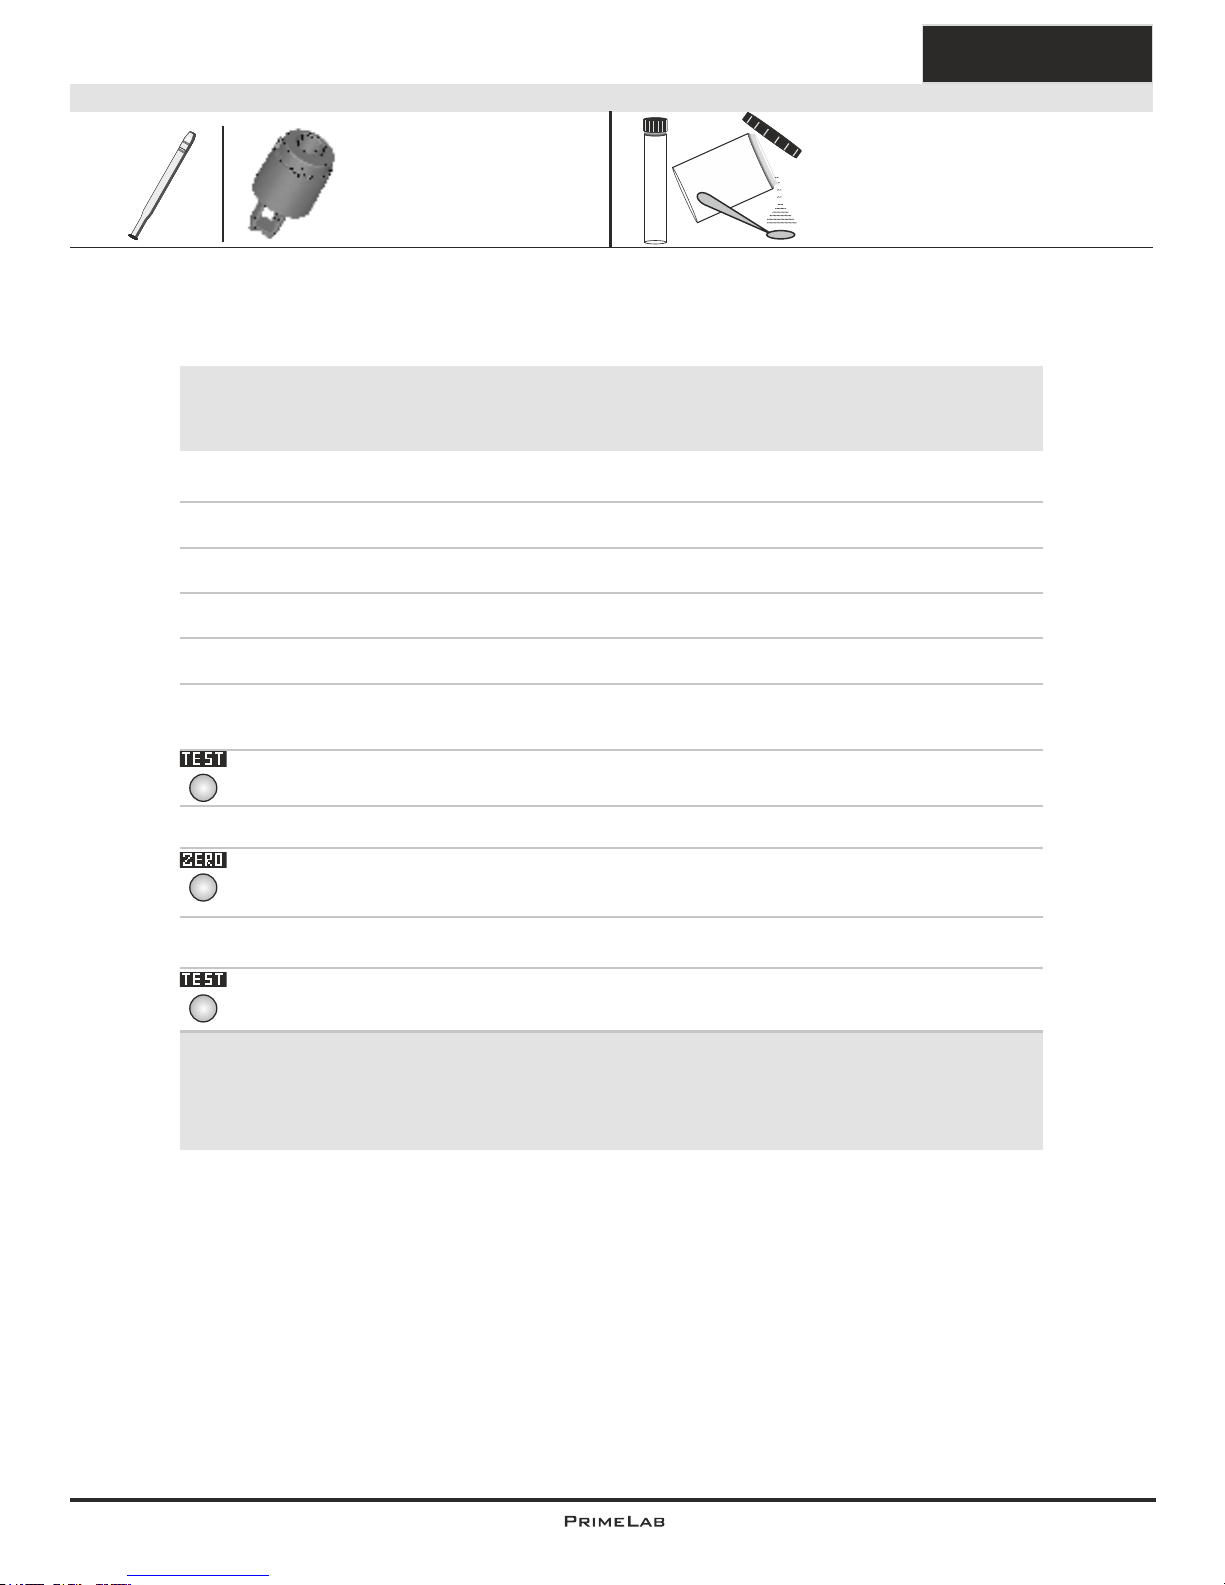
1) Prepare 2 cells (16mm) Ammonia HR. Label one as zero cell.
2) Open the first cell (zero) and fill with 0.1ml deionised water.
3) Open the second cell (sample) and fill with 0.1ml of your sample.
4) Add 1 powder pillow Am. Silic. F5 to each vial.
5) Add 1 powder pillow Am. Cyan. F5 to each vial.
6) Swirl with clean stiring rod for app. 20 seconds until powder completely
dissloved.
7) Reagents need to react press TEST to start 20:00 minutes countdown.
8) Place the COD adaptor into the device.
9) Place the ZERO cell and the light protection cover and than press
ZERO.
10) Remove the cell from the device.
11) Place the sample cell and the light protection cover into the device.
Than press TEST.
(155) Ammonia (HR)
0.00 - 50.00 mg/l (N)
Name on device: 155-AmmoniaHR-pre
The individual steps of the measurement procedure are shown on the display.
Use button 3 (arrow down) to scroll through the steps.
Use button 4 to skip the notes.
!
Measurement procedure:
The steps up to the selection of the parameter value to be determined are the same for all
procedures and described on page "TEST-5". Please observe the important notes for
accurate measurements on pages "TEST-8" and "TEST-9".
16mm vial
Ammonia HR vial
Ammonia Salicylate F5 Powder Pack
Ammonia Cynurate F5 Powder Pack
4
4
Powder
Note(s)
-> (*) Conversion to NH , NH .
3 4
-> Expect tolerances of up to 25% at very low levels (0 - 5 mg/l). If you intend to
measure low levels of Amminial, please use "Ammonia LR" parameter (ID02)
-> Adjust strong alkaline or acidic water samples to pH 7 by using 1 mol/l
Hypochloric acid / 1 mol/l Soldium hydroxide, before performing the test
-> In presence of chlorine, add 0.1 mol/l Sodium thiolufate per 0.3 mg/l Cl2
-> In presence of Iron, measure the iron content of your water and add an iron
standard solution with the same concentration to your ZERO vial (1st test
step)
!
Possible messages in the line below the measurement value:
"low! / high! / good!":
Assessment of the measurement value relative to the ideal range defined by you.
"Overrange! / underrange!":
Measurement value for this parameter is outside the value range of this method.
4
Page 46
13
13
0 - 100 mg/l (AC28)
Name on device: 125-Acsam.28F-liq
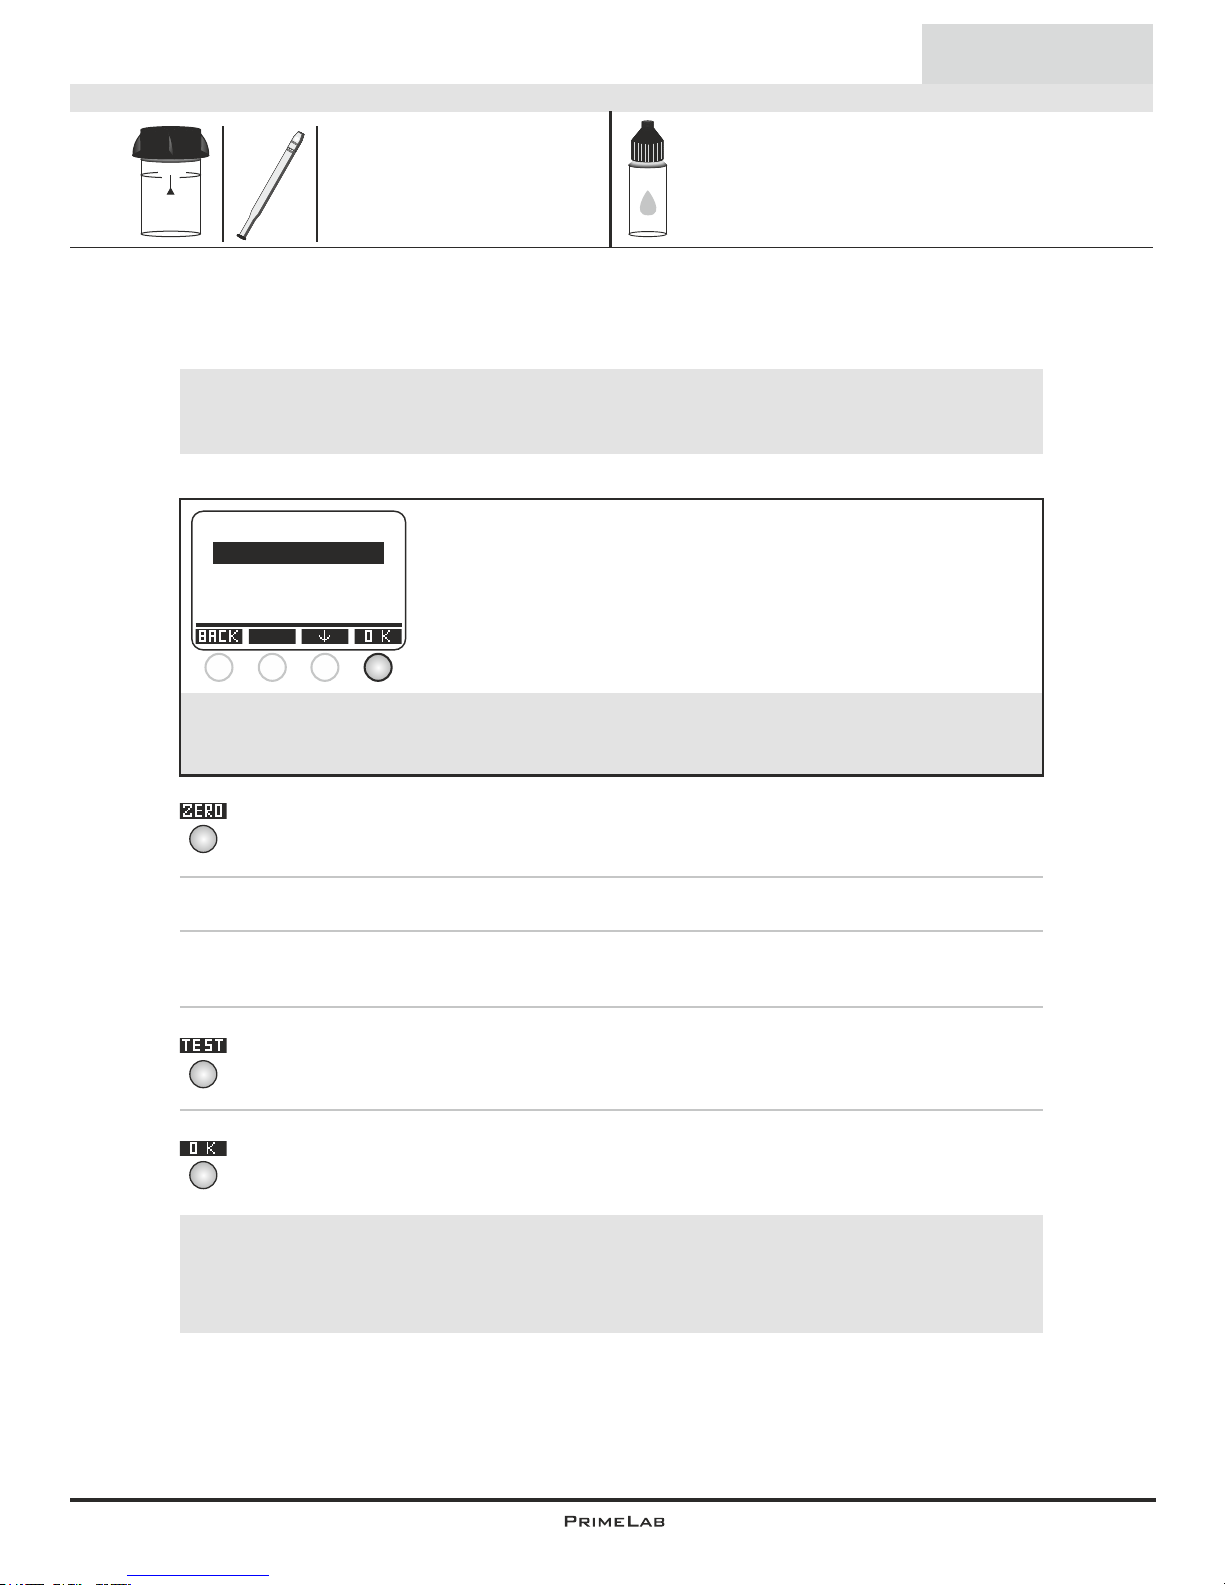
1) Fill 10ml of the sample water into a clean 24mm cuvette.
2) Replace the screw lid on the cuvette and insert it into the PrimeLab
sampling chamber. Align the arrow on the front of the cuvette. Press
ZERO.
3) Remove the cuvette from the chamber and unscrew the lid.
4) Add 6 drops "PL Acsamine 1" and 25 drops (1 ml) "PL Acsamine 2"
liquid reagent to the water sample in the cuvette.
5) Replace the lid on the cuvette, swirl it carefully and insert it into the
sampling chamber of the PrimeLab. Align the arrow on the front of the
cuvette. Press TEST.
6) After the lapse of a 2 minute countdown the determined result is
displayed. Press button 4 to save this together with date and time in the
device.
(125) Acsamine 28F
4
4
4
Liquid
10 ml
24 mm
PL Acsamine 1 (PL65Acsa1)
PL Acsamine 2 (PL65Acsa2)
The individual steps of the measurement procedure are shown on the display.
Use button 3 (arrow down) to scroll through the steps.
Use button 4 to skip the notes.
!
Measurement procedure:
The steps up to the selection of the parameter value to be determined are the same for all
procedures and described on page "TEST-5". Please observe the important notes for
accurate measurements on pages "TEST-8" and "TEST-9".
One-Time-Zero:
Measure new ZERO
Use last ZERO
For the sake of precision select "Use last ZERO" only
if the stored ZERO value is used with the
same cuvette and the same water sample for the test!
!
If after switching on the device you have already performed the
ZERO (baseline) adjustment for the same type, the following
message is displayed:
-> Measure new ZERO = continue with step 2)
-> Use last ZERO = continue with step 4)
1 2 3 4
!
Possible messages in the line below the measurement value:
"low! / high! / good!":
Assessment of the measurement value relative to the ideal range defined by you.
"Overrange! / underrange!":
Measurement value for this parameter is outside the value range of this method.
Page 47
14
14
0 - 100 mg/l (AC CC)
Name on device: 145-Acsam.CC-liq
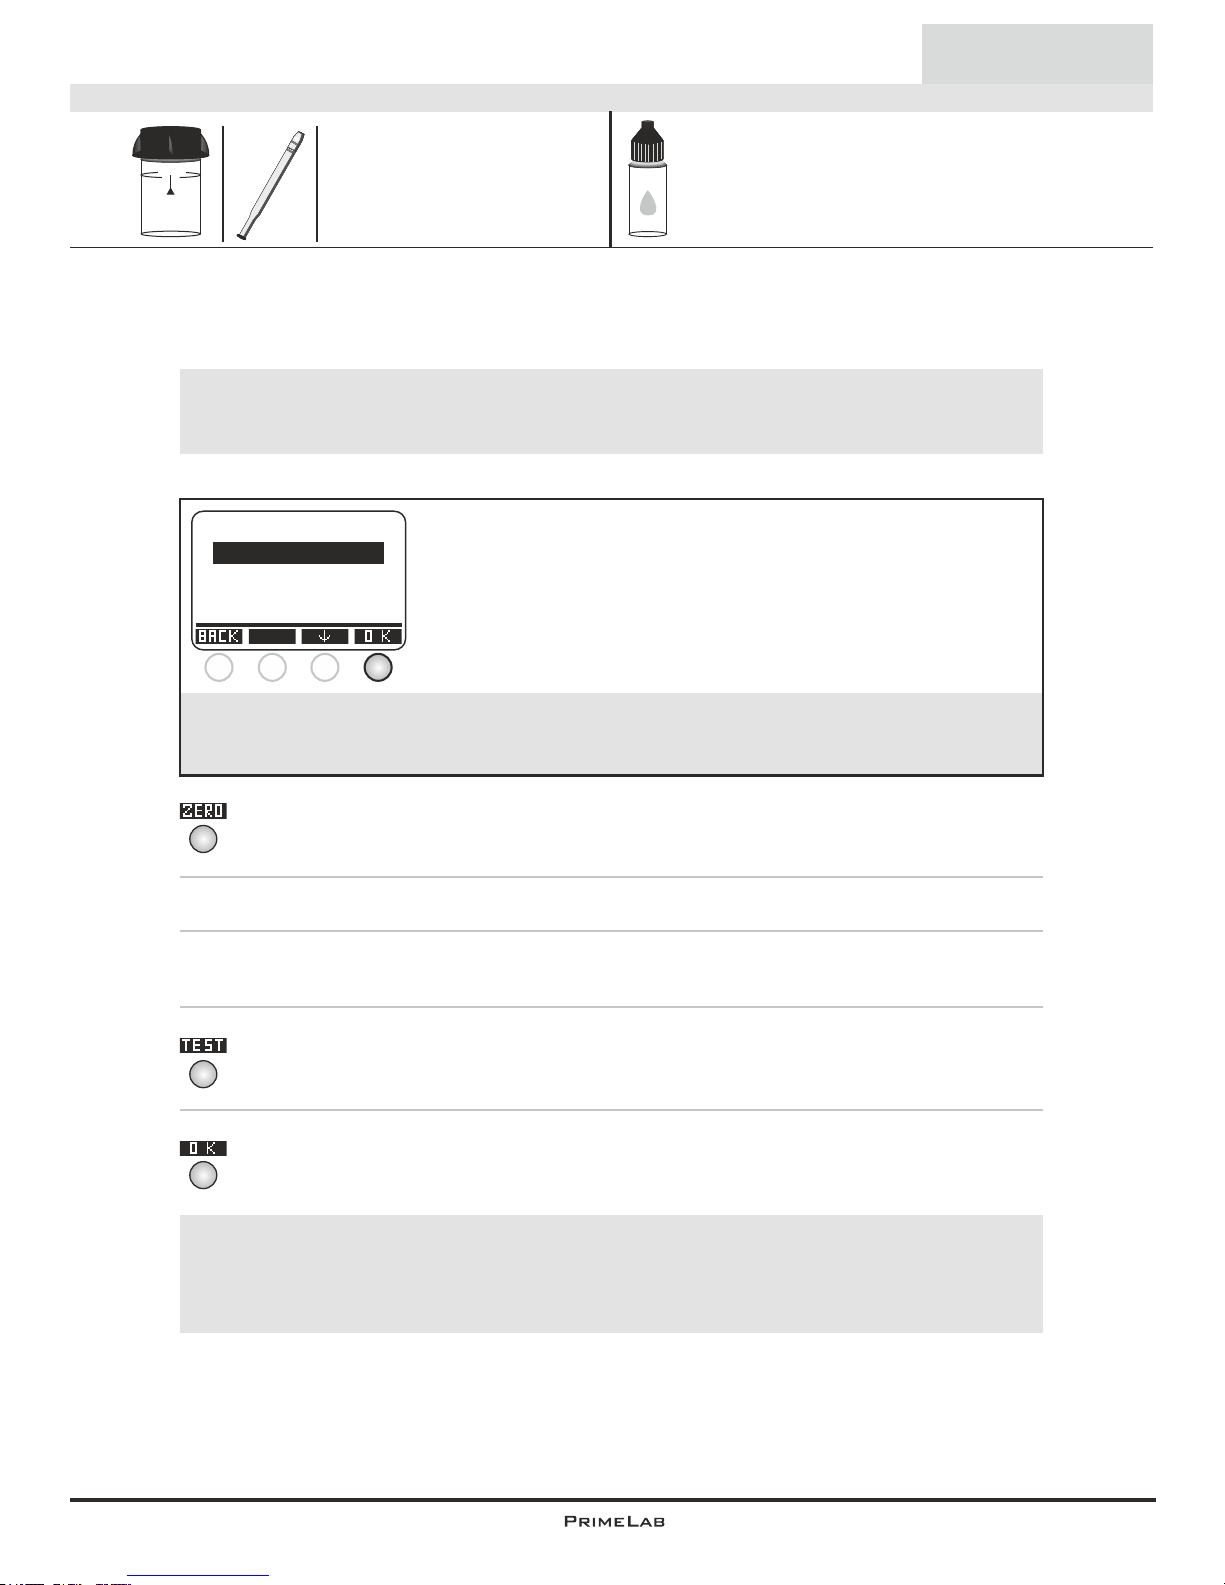
1) Fill 10ml of the sample water into a clean 24mm cuvette.
2) Replace the screw lid on the cuvette and insert it into the PrimeLab
sampling chamber. Align the arrow on the front of the cuvette. Press
ZERO.
3) Remove the cuvette from the chamber and unscrew the lid.
4) Add 6 drops "PL Acsamine 1" and 25 drops (1 ml) "PL Acsamine 2"
liquid reagent to the water sample in the cuvette.
5) Replace the lid on the cuvette, swirl it carefully and insert it into the
sampling chamber of the PrimeLab. Align the arrow on the front of the
cuvette. Press TEST.
6) After the lapse of a 2 minute countdown the determined result is
displayed. Press button 4 to save this together with date and time in the
device.
(145) Acsamine CC
4
4
4
Liquid
10 ml
24 mm
PL Acsamine 1 (PL65Acsa1)
PL Acsamine 2 (PL65Acsa2)
The individual steps of the measurement procedure are shown on the display.
Use button 3 (arrow down) to scroll through the steps.
Use button 4 to skip the notes.
!
Measurement procedure:
The steps up to the selection of the parameter value to be determined are the same for all
procedures and described on page "TEST-5". Please observe the important notes for
accurate measurements on pages "TEST-8" and "TEST-9".
One-Time-Zero:
Measure new ZERO
Use last ZERO
For the sake of precision select "Use last ZERO" only
if the stored ZERO value is used with the
same cuvette and the same water sample for the test!
!
If after switching on the device you have already performed the
ZERO (baseline) adjustment for the same type, the following
message is displayed:
-> Measure new ZERO = continue with step 2)
-> Use last ZERO = continue with step 4)
1 2 3 4
!
Possible messages in the line below the measurement value:
"low! / high! / good!":
Assessment of the measurement value relative to the ideal range defined by you.
"Overrange! / underrange!":
Measurement value for this parameter is outside the value range of this method.
Page 48
15
15
0 - 100 mg/l (AC CCA)
Name on device: 146-Acsam.CCA-liq
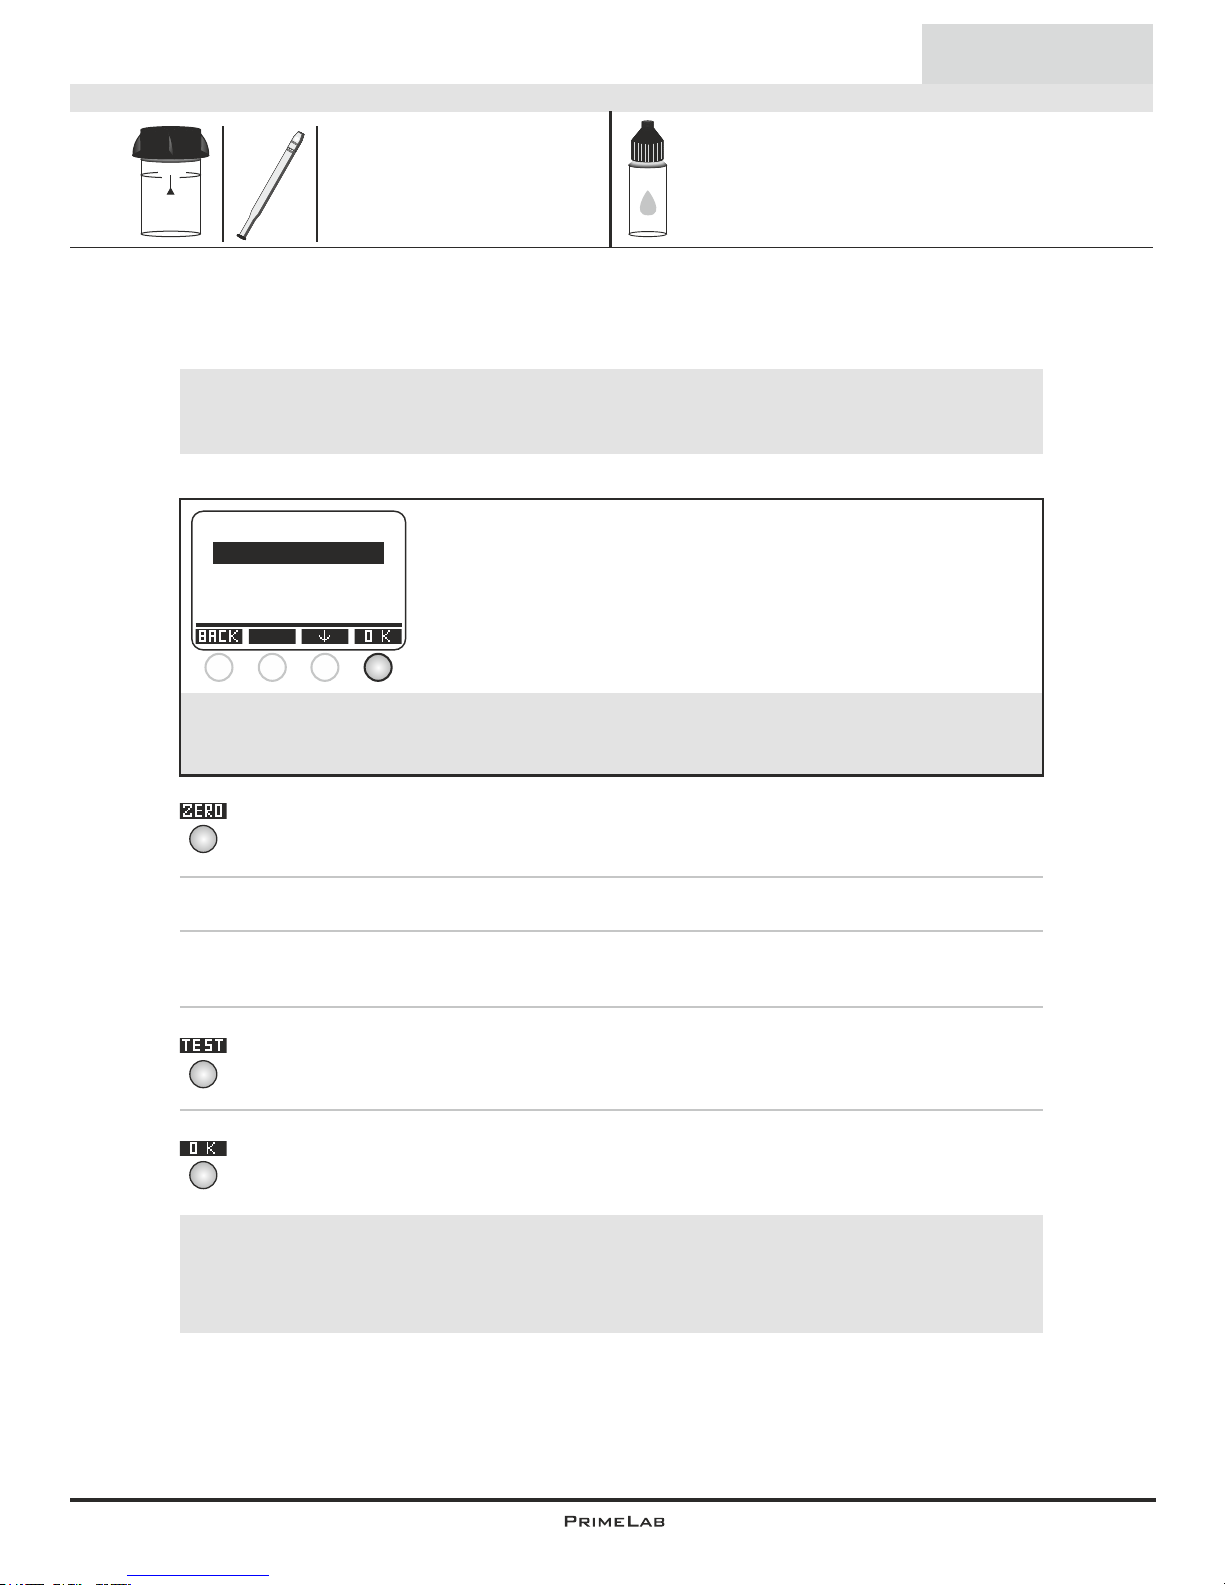
1) Fill 10ml of the sample water into a clean 24mm cuvette.
2) Replace the screw lid on the cuvette and insert it into the PrimeLab
sampling chamber. Align the arrow on the front of the cuvette. Press
ZERO.
3) Remove the cuvette from the chamber and unscrew the lid.
4) Add 6 drops "PL Acsamine 1" and 25 drops (1 ml) "PL Acsamine 2"
liquid reagent to the water sample in the cuvette.
5) Replace the lid on the cuvette, swirl it carefully and insert it into the
sampling chamber of the PrimeLab. Align the arrow on the front of the
cuvette. Press TEST.
6) After the lapse of a 2 minute countdown the determined result is
displayed. Press button 4 to save this together with date and time in the
device.
(146) Acsamine CCA
4
4
4
Liquid
10 ml
24 mm
PL Acsamine 1 (PL65Acsa1)
PL Acsamine 2 (PL65Acsa2)
The individual steps of the measurement procedure are shown on the display.
Use button 3 (arrow down) to scroll through the steps.
Use button 4 to skip the notes.
!
Measurement procedure:
The steps up to the selection of the parameter value to be determined are the same for all
procedures and described on page "TEST-5". Please observe the important notes for
accurate measurements on pages "TEST-8" and "TEST-9".
One-Time-Zero:
Measure new ZERO
Use last ZERO
For the sake of precision select "Use last ZERO" only
if the stored ZERO value is used with the
same cuvette and the same water sample for the test!
!
If after switching on the device you have already performed the
ZERO (baseline) adjustment for the same type, the following
message is displayed:
-> Measure new ZERO = continue with step 2)
-> Use last ZERO = continue with step 4)
1 2 3 4
!
Possible messages in the line below the measurement value:
"low! / high! / good!":
Assessment of the measurement value relative to the ideal range defined by you.
"Overrange! / underrange!":
Measurement value for this parameter is outside the value range of this method.
Page 49
16
16
0 - 100 mg/l (ACDW)
Name on device: 126-AcsamineDW-liq
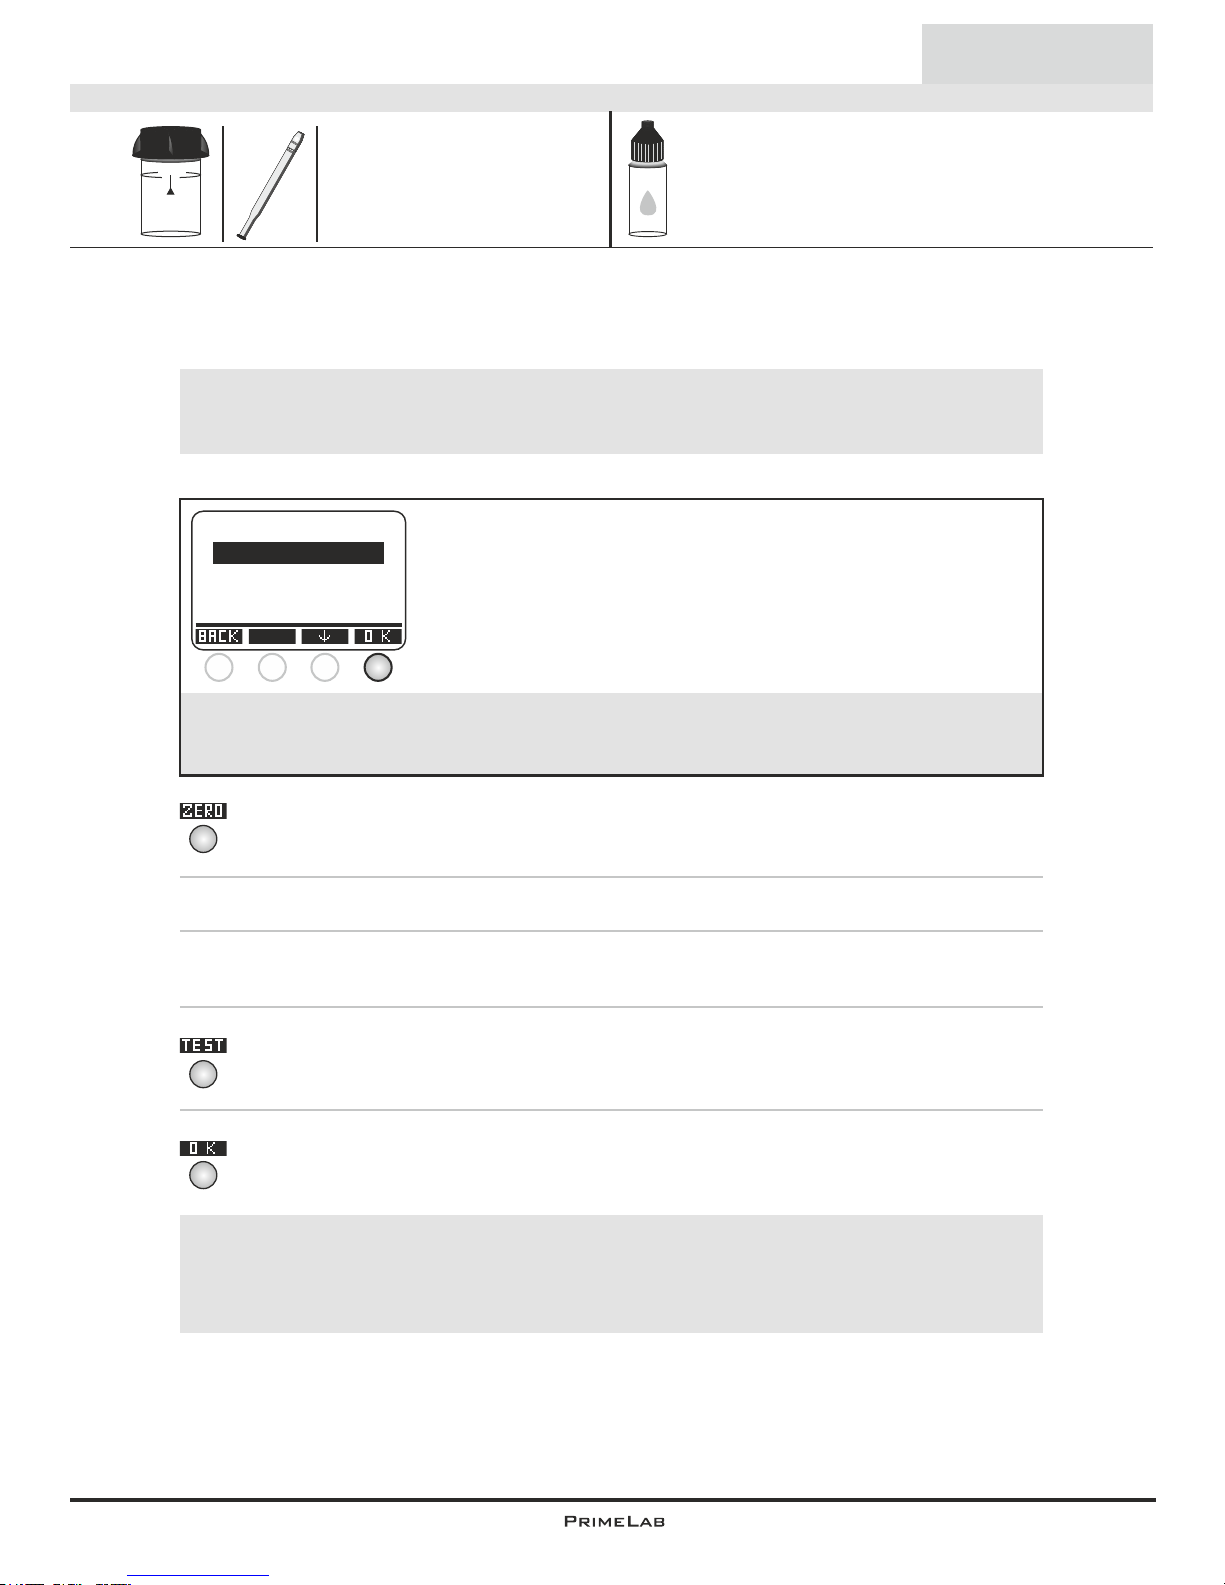
1) Fill 10ml of the sample water into a clean 24mm cuvette.
2) Replace the screw lid on the cuvette and insert it into the PrimeLab
sampling chamber. Align the arrow on the front of the cuvette. Press
ZERO.
3) Remove the cuvette from the chamber and unscrew the lid.
4) Add 6 drops "PL Acsamine 1" and 25 drops (1 ml) "PL Acsamine 2"
liquid reagent to the water sample in the cuvette.
5) Replace the lid on the cuvette, swirl it carefully and insert it into the
sampling chamber of the PrimeLab. Align the arrow on the front of the
cuvette. Press TEST.
6) After the lapse of a 2 minute countdown the determined result is
displayed. Press button 4 to save this together with date and time in the
device.
(126) Acsamine DW
4
4
4
Liquid
10 ml
24 mm
PL Acsamine 1 (PL65Acsa1)
PL Acsamine 2 (PL65Acsa2)
The individual steps of the measurement procedure are shown on the display.
Use button 3 (arrow down) to scroll through the steps.
Use button 4 to skip the notes.
!
Measurement procedure:
The steps up to the selection of the parameter value to be determined are the same for all
procedures and described on page "TEST-5". Please observe the important notes for
accurate measurements on pages "TEST-8" and "TEST-9".
One-Time-Zero:
Measure new ZERO
Use last ZERO
For the sake of precision select "Use last ZERO" only
if the stored ZERO value is used with the
same cuvette and the same water sample for the test!
!
If after switching on the device you have already performed the
ZERO (baseline) adjustment for the same type, the following
message is displayed:
-> Measure new ZERO = continue with step 2)
-> Use last ZERO = continue with step 4)
1 2 3 4
!
Possible messages in the line below the measurement value:
"low! / high! / good!":
Assessment of the measurement value relative to the ideal range defined by you.
"Overrange! / underrange!":
Measurement value for this parameter is outside the value range of this method.
Page 50
17
17
0 - 100 mg/l (AC DWBR1)
Name on device: 141-Acsa.DWBR1-liq
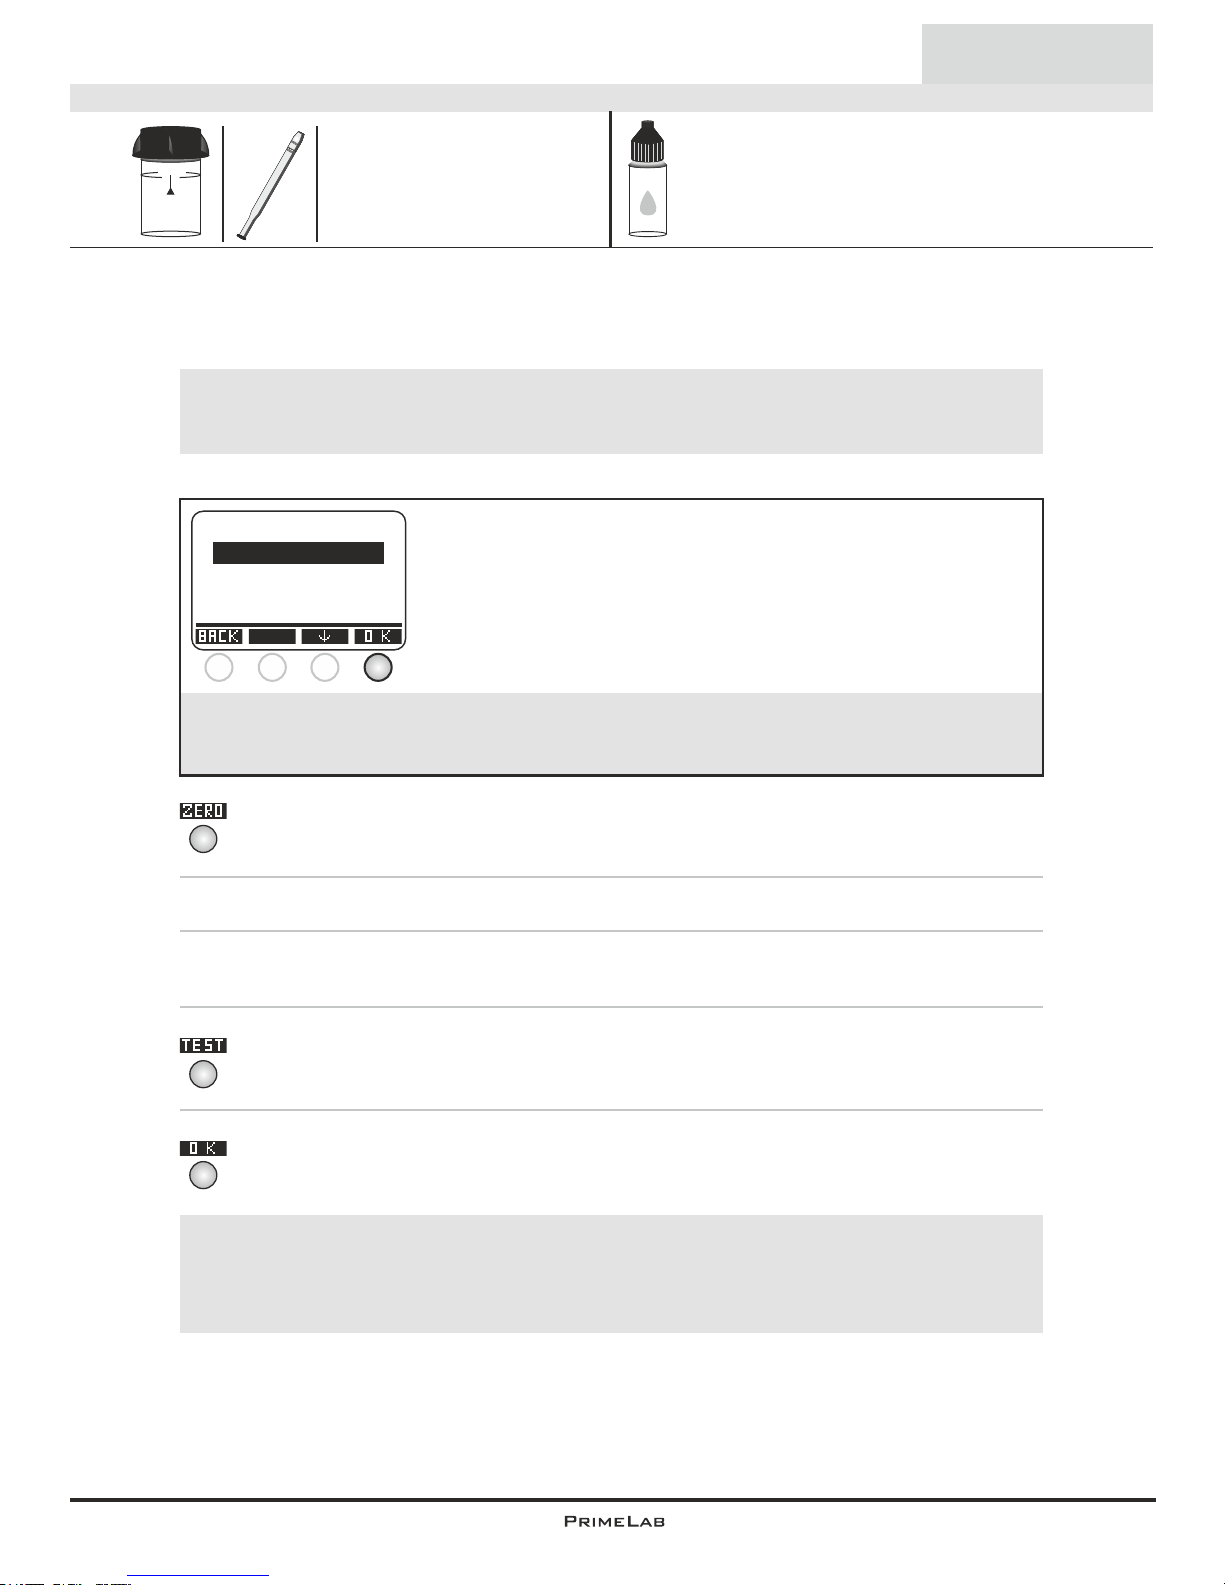
1) Fill 10ml of the sample water into a clean 24mm cuvette.
2) Replace the screw lid on the cuvette and insert it into the PrimeLab
sampling chamber. Align the arrow on the front of the cuvette. Press
ZERO.
3) Remove the cuvette from the chamber and unscrew the lid.
4) Add 6 drops "PL Acsamine 1" and 25 drops (1 ml) "PL Acsamine 2"
liquid reagent to the water sample in the cuvette.
5) Replace the lid on the cuvette, swirl it carefully and insert it into the
sampling chamber of the PrimeLab. Align the arrow on the front of the
cuvette. Press TEST.
6) After the lapse of a 2 minute countdown the determined result is
displayed. Press button 4 to save this together with date and time in the
device.
(141) Acsamine DWBR1
4
4
4
Liquid
10 ml
24 mm
PL Acsamine 1 (PL65Acsa1)
PL Acsamine 2 (PL65Acsa2)
The individual steps of the measurement procedure are shown on the display.
Use button 3 (arrow down) to scroll through the steps.
Use button 4 to skip the notes.
!
Measurement procedure:
The steps up to the selection of the parameter value to be determined are the same for all
procedures and described on page "TEST-5". Please observe the important notes for
accurate measurements on pages "TEST-8" and "TEST-9".
One-Time-Zero:
Measure new ZERO
Use last ZERO
For the sake of precision select "Use last ZERO" only
if the stored ZERO value is used with the
same cuvette and the same water sample for the test!
!
If after switching on the device you have already performed the
ZERO (baseline) adjustment for the same type, the following
message is displayed:
-> Measure new ZERO = continue with step 2)
-> Use last ZERO = continue with step 4)
1 2 3 4
!
Possible messages in the line below the measurement value:
"low! / high! / good!":
Assessment of the measurement value relative to the ideal range defined by you.
"Overrange! / underrange!":
Measurement value for this parameter is outside the value range of this method.
Page 51
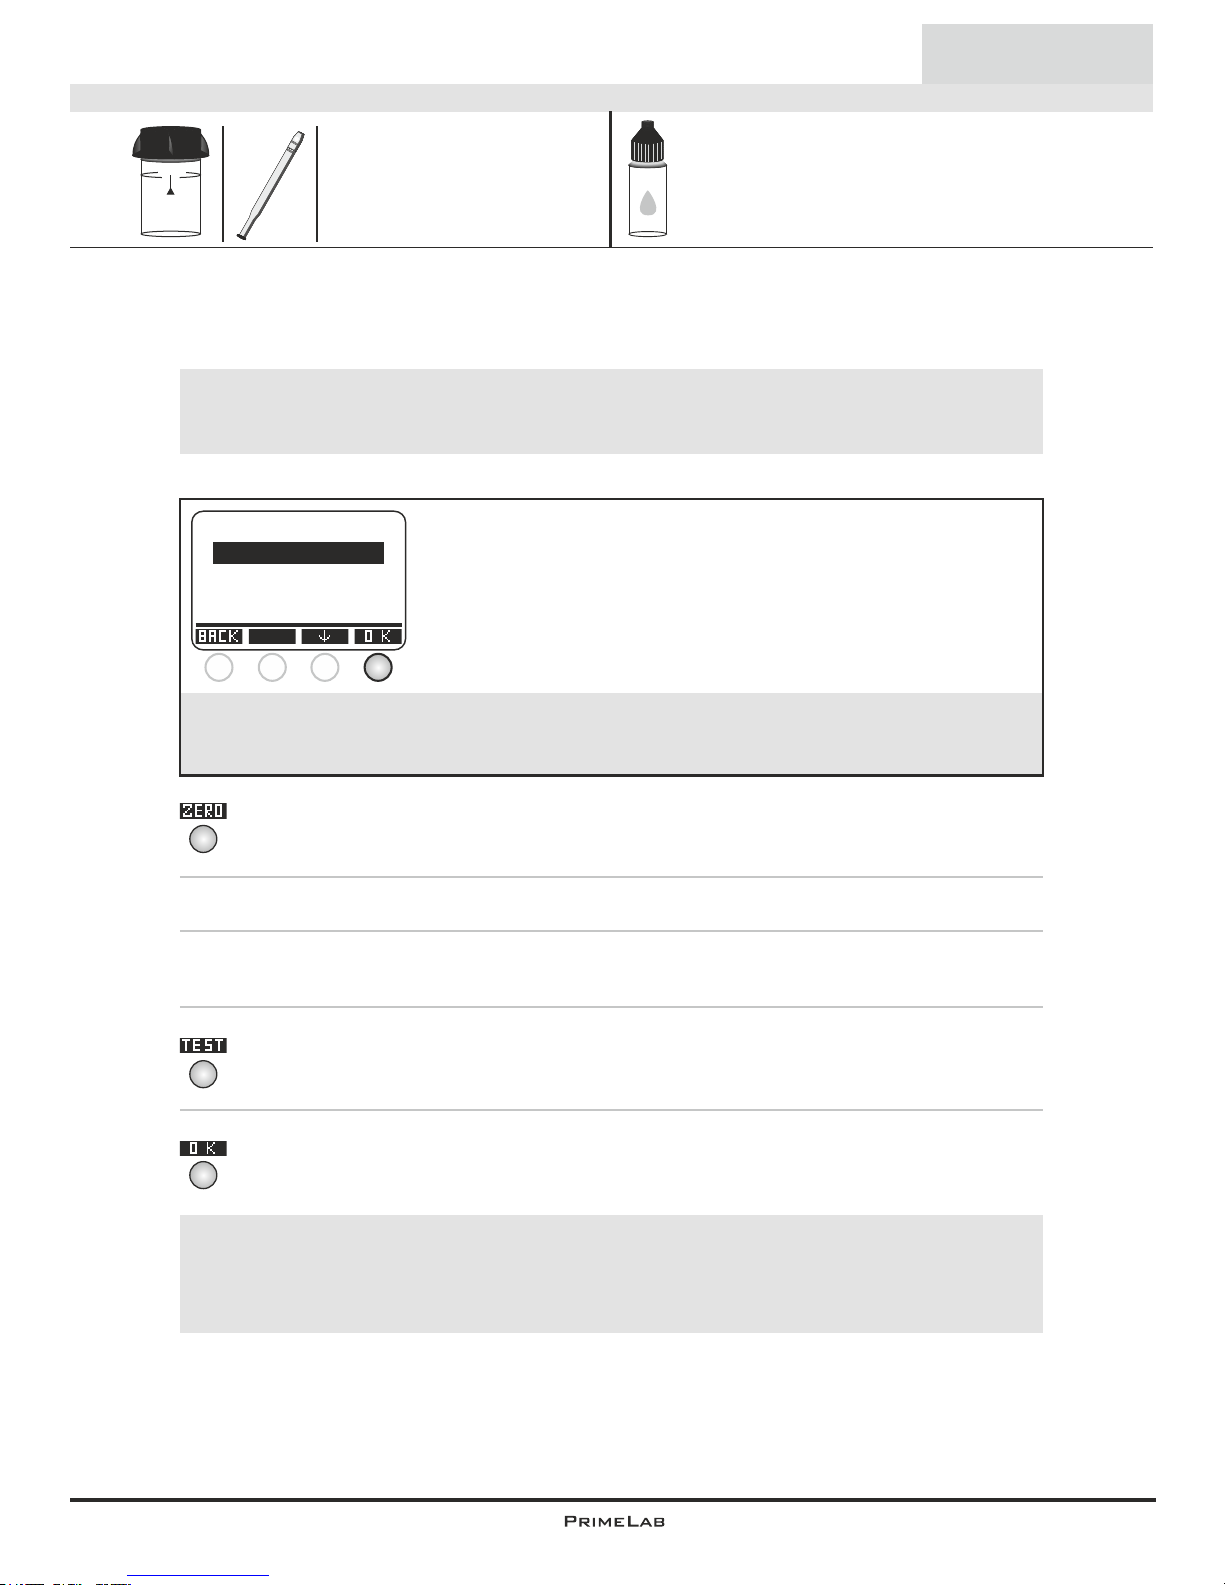
18
18
0 - 100 mg/l (AC DWC)
Name on device: 142-Acsam.DWC-liq
1) Fill 10ml of the sample water into a clean 24mm cuvette.
2) Replace the screw lid on the cuvette and insert it into the PrimeLab
sampling chamber. Align the arrow on the front of the cuvette. Press
ZERO.
3) Remove the cuvette from the chamber and unscrew the lid.
4) Add 6 drops "PL Acsamine 1" and 25 drops (1 ml) "PL Acsamine 2"
liquid reagent to the water sample in the cuvette.
5) Replace the lid on the cuvette, swirl it carefully and insert it into the
sampling chamber of the PrimeLab. Align the arrow on the front of the
cuvette. Press TEST.
6) After the lapse of a 2 minute countdown the determined result is
displayed. Press button 4 to save this together with date and time in the
device.
(142) Acsamine DWC
4
4
4
Liquid
10 ml
24 mm
PL Acsamine 1 (PL65Acsa1)
PL Acsamine 2 (PL65Acsa2)
The individual steps of the measurement procedure are shown on the display.
Use button 3 (arrow down) to scroll through the steps.
Use button 4 to skip the notes.
!
Measurement procedure:
The steps up to the selection of the parameter value to be determined are the same for all
procedures and described on page "TEST-5". Please observe the important notes for
accurate measurements on pages "TEST-8" and "TEST-9".
One-Time-Zero:
Measure new ZERO
Use last ZERO
For the sake of precision select "Use last ZERO" only
if the stored ZERO value is used with the
same cuvette and the same water sample for the test!
!
If after switching on the device you have already performed the
ZERO (baseline) adjustment for the same type, the following
message is displayed:
-> Measure new ZERO = continue with step 2)
-> Use last ZERO = continue with step 4)
1 2 3 4
!
Possible messages in the line below the measurement value:
"low! / high! / good!":
Assessment of the measurement value relative to the ideal range defined by you.
"Overrange! / underrange!":
Measurement value for this parameter is outside the value range of this method.
Page 52
19
19
0 - 100 mg/l (AC SW)
Name on device: 143-Acsam.SW-liq
1) Fill 10ml of the sample water into a clean 24mm cuvette.
2) Replace the screw lid on the cuvette and insert it into the PrimeLab
sampling chamber. Align the arrow on the front of the cuvette. Press
ZERO.
3) Remove the cuvette from the chamber and unscrew the lid.
4) Add 6 drops "PL Acsamine 1" and 25 drops (1 ml) "PL Acsamine 2"
liquid reagent to the water sample in the cuvette.
5) Replace the lid on the cuvette, swirl it carefully and insert it into the
sampling chamber of the PrimeLab. Align the arrow on the front of the
cuvette. Press TEST.
6) After the lapse of a 2 minute countdown the determined result is
displayed. Press button 4 to save this together with date and time in the
device.
(143) Acsamine SW
4
4
4
Liquid
10 ml
24 mm
PL Acsamine 1 (PL65Acsa1)
PL Acsamine 2 (PL65Acsa2)
The individual steps of the measurement procedure are shown on the display.
Use button 3 (arrow down) to scroll through the steps.
Use button 4 to skip the notes.
!
Measurement procedure:
The steps up to the selection of the parameter value to be determined are the same for all
procedures and described on page "TEST-5". Please observe the important notes for
accurate measurements on pages "TEST-8" and "TEST-9".
One-Time-Zero:
Measure new ZERO
Use last ZERO
For the sake of precision select "Use last ZERO" only
if the stored ZERO value is used with the
same cuvette and the same water sample for the test!
!
If after switching on the device you have already performed the
ZERO (baseline) adjustment for the same type, the following
message is displayed:
-> Measure new ZERO = continue with step 2)
-> Use last ZERO = continue with step 4)
1 2 3 4
!
Possible messages in the line below the measurement value:
"low! / high! / good!":
Assessment of the measurement value relative to the ideal range defined by you.
"Overrange! / underrange!":
Measurement value for this parameter is outside the value range of this method.
Page 53
20
20
0 - 100 mg/l (AC SWC)
Name on device: 144-Acsam.SWC-liq
1) Fill 10ml of the sample water into a clean 24mm cuvette.
2) Replace the screw lid on the cuvette and insert it into the PrimeLab
sampling chamber. Align the arrow on the front of the cuvette. Press
ZERO.
3) Remove the cuvette from the chamber and unscrew the lid.
4) Add 6 drops "PL Acsamine 1" and 25 drops (1 ml) "PL Acsamine 2"
liquid reagent to the water sample in the cuvette.
5) Replace the lid on the cuvette, swirl it carefully and insert it into the
sampling chamber of the PrimeLab. Align the arrow on the front of the
cuvette. Press TEST.
6) After the lapse of a 2 minute countdown the determined result is
displayed. Press button 4 to save this together with date and time in the
device.
(144) Acsamine SWC
4
4
4
Liquid
10 ml
24 mm
PL Acsamine 1 (PL65Acsa1)
PL Acsamine 2 (PL65Acsa2)
The individual steps of the measurement procedure are shown on the display.
Use button 3 (arrow down) to scroll through the steps.
Use button 4 to skip the notes.
!
Measurement procedure:
The steps up to the selection of the parameter value to be determined are the same for all
procedures and described on page "TEST-5". Please observe the important notes for
accurate measurements on pages "TEST-8" and "TEST-9".
One-Time-Zero:
Measure new ZERO
Use last ZERO
For the sake of precision select "Use last ZERO" only
if the stored ZERO value is used with the
same cuvette and the same water sample for the test!
!
If after switching on the device you have already performed the
ZERO (baseline) adjustment for the same type, the following
message is displayed:
-> Measure new ZERO = continue with step 2)
-> Use last ZERO = continue with step 4)
1 2 3 4
!
Possible messages in the line below the measurement value:
"low! / high! / good!":
Assessment of the measurement value relative to the ideal range defined by you.
"Overrange! / underrange!":
Measurement value for this parameter is outside the value range of this method.
Page 54
21
21
(07) Boron
Tablet
0 - 2 mg/l (B)
1) Fill 10ml of the sample water into a clean 24mm cuvette.
2) Replace the screw lid on the cuvette and insert it into the PrimeLab
sampling chamber. Align the arrow on the front of the cuvette. Press
ZERO.
3) Remove the cuvette from the chamber and unscrew the lid.
4) Add two "Boron N° 1 Photometer" tablet to the water sample in the
cuvette.
5) Crush the tablet with a clean stirrer until it has completely dissolved.
6) Add a "Boron N° 2 Photometer" tablet to the water sample in the same
cuvette.
7) Crush the tablet with a clean stirrer until it has completely dissolved.
8) Replace the lid on the cuvette, swirl it carefully and insert it into the
sampling chamber of the PrimeLab. Align the arrow on the front of the
cuvette. Press TEST.
9) After the lapse of a 20 minute countdown the determined result is
displayed. Press button 3 to convert this into various measurement units(*)
10) Press button 4 to save the result together with date and time in the
device.
Continued...
Boron N° 1 Photometer (TbsHBO1...)
Boron N° 2 Photometer (TbsPBO2...)
10 ml
Name on device: 07-Boron-tab
24 mm
4
4
The individual steps of the measurement procedure are shown on the display.
Use button 3 (arrow down) to scroll through the steps.
Use button 4 to skip the notes.
!
Measurement procedure:
The steps up to the selection of the parameter value to be determined are the same for all
procedures and described on page "TEST-5". Please observe the important notes for
accurate measurements on pages "TEST-8" and "TEST-9".
One-Time-Zero:
Measure new ZERO
Use last ZERO
For the sake of precision select "Use last ZERO" only
if the stored ZERO value is used with the
same cuvette and the same water sample for the test!
!
If after switching on the device you have already performed the
ZERO (baseline) adjustment for the same type, the following
message is displayed:
-> Measure new ZERO = continue with step 2)
-> Use last ZERO = continue with step 4)
1 2 3 4
3
4
Page 55

22
22
Tablet
0 - 2 mg/l (B)
Continued...
Note(s)
-> (*) The test result can be converted to the following unit: H BO
3 3
-> The pH value of the water sample should be between 6 and 7 pH.
-> The temperature of the water sample has an influence on the measurement
precision and should be at 20°C (+/- 1°C).
(07) Boron
Name on device: 07-Boron-tab
!
Possible messages in the line below the measurement value:
"low! / high! / good!":
Assessment of the measurement value relative to the ideal range defined by you.
"Overrange! / underrange!":
Measurement value for this parameter is outside the value range of this method.
Page 56
23
23
(08) Bromine
Tablet
0 - 18 mg/l (Br )
2
DPD N°1 Photometer (TbsPD1...)
Glycine (TbsHGC...)
10 ml
Name on device: 08-Bromine-tab
24 mm
4
4
4
1) Fill 10ml of the sample water into a clean 24mm cuvette.
2) Replace the screw lid on the cuvette and insert it into the PrimeLab
sampling chamber. Align the arrow on the front of the cuvette. Press
ZERO.
3) Remove the cuvette from the chamber and unscrew the lid.
4) Empty the cuvette except for a few drops. Add a "DPD N° 1
Photometer" tablet to the sample in the cuvette.
5) Crush the tablet with a clean stirrer until it has completely dissolved.
Fill the cuvette with the sample water up to the 10ml level.
6) Replace the lid on the cuvette, swirl it carefully and insert it into the
sampling chamber of the PrimeLab. Align the arrow on the front of the
cuvette. Press TEST.
7) The determined results for "tBr" (total/active bromine) is immediately
displayed. Press button 4 to save this together with date and time in the
device.
Continued...
The individual steps of the measurement procedure are shown on the display.
Use button 3 (arrow down) to scroll through the steps.
Use button 4 to skip the notes.
!
Measurement procedure:
The steps up to the selection of the parameter value to be determined are the same for all
procedures and described on page "TEST-5". Please observe the important notes for
accurate measurements on pages "TEST-8" and "TEST-9".
One-Time-Zero:
Measure new ZERO
Use last ZERO
For the sake of precision select "Use last ZERO" only
if the stored ZERO value is used with the
same cuvette and the same water sample for the test!
!
If after switching on the device you have already performed the
ZERO (baseline) adjustment for the same type, the following
message is displayed:
-> Measure new ZERO = continue with step 2)
-> Use last ZERO = continue with step 4)
1 2 3 4
!
Possible messages in the line below the measurement value:
"low! / high! / good!":
Assessment of the measurement value relative to the ideal range defined by you.
"Overrange! / underrange!":
Measurement value for this parameter is outside the value range of this method.
Page 57
24
24
Tablet
0 - 18 mg/l (Br )
2
Continued...
Note(s)
-> If the water sample contains chlorine and bromine both will be detected by
the DPD reagent and shown in the test result. If this is not required, the
measurement procedure must be amended as follows: After step 3 add a
"DPD Glycine" tablet to the sample liquid. Empty the cuvette except for a few
drops into a second clean vial.
Add a DPD N° 1 Photometer tablet to the first cuvette, which contains just a
few drops and crush it with a clean stirrer. Now fill the sample water with the
dissolved glycine tablet from the second cuvette into the first cuvette
containing the crushed DPD N° 1 Photometer tablet. Mix the tablet with the
liquid until it has dissolved completely. Wait for 2 minutes and then continue
with step 6.
-> When preparing the measurement it is important to avoid any bromine
escaping, which can happen during pipetting and shaking the sample.
The measurement must be performed directly after sampling.
-> It is important that the measurement devices to be used have not been
cleaned with household detergent, as this could greatly reduce the
measurement. To prevent any contamination the cuvette, the cuvette lid and
the stirrer should be stored in a 0.1 g/l sodium hypochlorite solution for one
hour and then rinse thoroughly with distilled water.
-> The DPD reagent used in this procedure buffers the pH value of the sample
water in a range of 6.2 to 6.5 pH. If your sample water is very alkaline or
acidic it must be adjusted to a pH range between 6 and 7 by adding 0.5 mol/l
sulphuric acid or respectively 1 mol/l caustic soda.
-> Water samples with parameter levels ´higher´ than the defined range may
lead to errors with the DPD chemistry; resulting in an incorrect reading
(possibly showing none detected). For measurement of higher bromine
values please dilute the water sample prior to testing.
-> If the water sample contains other reducing chemicals (e.g. active oxygen,
chlorine etc.) this will also be detected and be included in the result.
-> Water samples with a high calcium content resp. a high conductivity will
render the sample cloudy, which is detrimental to the measurement
precision. In this case use the "DPD N° 1 High Calcium (HC)".
(08) Bromine
Name on device: 08-Bromine-tab
Page 58
25
25
Name on device: 63-Bromine-liq
1) Fill 10ml of the sample water into a clean 24mm cuvette.
2) Replace the screw lid on the cuvette and insert it into the PrimeLab
sampling chamber. Align the arrow on the front of the cuvette. Press
ZERO.
3) Remove the cuvette from the chamber and unscrew the lid.
(If chlorine is present in your sample and needs to be removed prior to
testing - See Notes section for additional/modified procedure steps.)
4) Empty the cuvette except for a few drops.
5) Add 3 drops "PL DPD 1 A" and 3 drops "PL DPD 1 B“ liquid reagent into
the same cuvette.
6) Fill sample water into the same cuvette up to the 10ml level.
7) Replace the lid on the cuvette, swirl it carefully and insert it into the
sampling chamber of the PrimeLab. Align the arrow on the front of the
cuvette. Press TEST.
8) The determined results for "tBr" (total/active bromine) is immediately
displayed. Press button 4 to save this together with date and time in the
device.
(63) Bromine
4
4
4
Liquid
+Powder
PL DPD 1 A (PL30DPD1A)
PL DPD 1 B (PL30DPD1B)
PL DPD Nitrite Powder (PLpow20DPDNitr)
0 - 18 mg/l (Br )
2
10 ml
24 mm
The individual steps of the measurement procedure are shown on the display.
Use button 3 (arrow down) to scroll through the steps.
Use button 4 to skip the notes.
!
Measurement procedure:
The steps up to the selection of the parameter value to be determined are the same for all
procedures and described on page "TEST-5". Please observe the important notes for
accurate measurements on pages "TEST-8" and "TEST-9".
One-Time-Zero:
Measure new ZERO
Use last ZERO
For the sake of precision select "Use last ZERO" only
if the stored ZERO value is used with the
same cuvette and the same water sample for the test!
!
If after switching on the device you have already performed the
ZERO (baseline) adjustment for the same type, the following
message is displayed:
-> Measure new ZERO = continue with step 2)
-> Use last ZERO = continue with step 4)
1 2 3 4
!
Possible messages in the line below the measurement value:
"low! / high! / good!":
Assessment of the measurement value relative to the ideal range defined by you.
"Overrange! / underrange!":
Measurement value for this parameter is outside the value range of this method.
Powder
Continued...
Page 59
26
26
Continued...
Liquid
+powder
0 - 18 mg/l (Br )
2
Note: If you require determination of ´combined´ and/or ´free´ bromine,
please proceed with the following Steps 9 - 16.
9) Remove the lid, empty the cuvette completely and clean it thoroughly.
10) Fill 10ml sample water into a second clean 24mm cuvette.
11) Add 1 x 0.05mL (scoop) "PL DPD Nitrite" powder to the sample water
in the cuvette.
12) Replace the lid on the cuvette and swirl this back and forth 5 times.
13) Add 3 drops "PL DPD 1 A" and 3 drops "PL DPD 1 B“ liquid reagent
into the empty (first) cuvette.
14) Now fill this (first) cuvette with the sample water from the second
cuvette.
15) Replace the lid on the cuvette, swirl it carefully and insert it into the
sampling chamber of the PrimeLab. Align the arrow on the front of the
cuvette. Press TEST.
16) The total result is displayed immediately, divided in
"aBr" = "active bromine“
"cBr" = "combined bromine“
"tBr" = "total bromine“
To scroll through the values please used the arrow up and down buttons.
The result is saved when button 4 is pressed.
4
2
3
4
Name on device: 63-Bromine-liq
(63) Bromine
!
Possible messages in the line below the measurement value:
"low! / high! / good!":
Assessment of the measurement value relative to the ideal range defined by you.
"Overrange! / underrange!":
Measurement value for this parameter is outside the value range of this method.
Continued...
Page 60
27
27
Liquid
+powder
0 - 18 mg/l (Br )
2
Continued...
Note(s)
-> DPD 1 A and DPD 1 B reagent MUST be added to the vial
BEFORE water sample is added to avoid mis-readings!
-> If the water sample contains chlorine as well as bromine, this will be
detected by the DPD reagent and displayed in the result. If you do not want
chlorine to be detected together with brome the measurement procedure
´ must be amended as follows: (Replace steps 3, 4 & 5 in Bromine procedure
on Page 17 with these steps below):
3) Remove the cuvette from the chamber and unscrew the lid. Add 3 drops
“PL DPD Glycine“ into the 10 ml sample water and swirl to mix.
4) Add 3 drops “PL DPD 1A“ and 3 drops “PL DPD 1 B“ into a second
empty cuvette.
5) Pour the 10 ml of Glycine treated sample water from step 3 into the
second cuvette in step 4 and continue with Bromine procedure from step 6
onwards.
-> When preparing the measurement procedure it is important to avoid any
chlorine escaping, which can happen during pipetting and shaking the
sample. The measurement should be performed directly after sampling.
-> It is important that the measurement devices to be used have not been
cleaned with household detergent, as this could greatly reduce the
measurement. To prevent any contamination the cuvette, the cuvette lid and
the stirrer should be stored in a 0.1 g/l sodium hypochlorite solution for one
hour and then rinse thoroughly with distilled water.
-> The DPD reagent used in this procedure buffers the pH value of the sample
water in a range of 6.2 to 6.5 pH. If your sample water is very alkaline or
acidic it must be adjusted to a pH range between 6 and 7 by adding 0.5 mol/l
sulphuric acid or respectively 1 mol/l caustic soda.
-> Water samples with parameter levels ´higher´ than the defined range may
lead to errors with the DPD chemistry; resulting in an incorrect reading
(possibly showing none detected). For measurement of higher bromine
values please dilute the water sample prior to testing.
-> If the water sample contains other reducing chemicals (e.g. active oxygen,
chlorine etc.) this will also be detected and be included in the result.
-> Water samples with a high calcium content resp. a high conductivity will
render the sample cloudy, which is detrimental to the measurement
precision. In this case use the "DPD N° 1 High Calcium (HC)".
Name on device: 63-Bromine-liq
(63) Bromine
Page 61
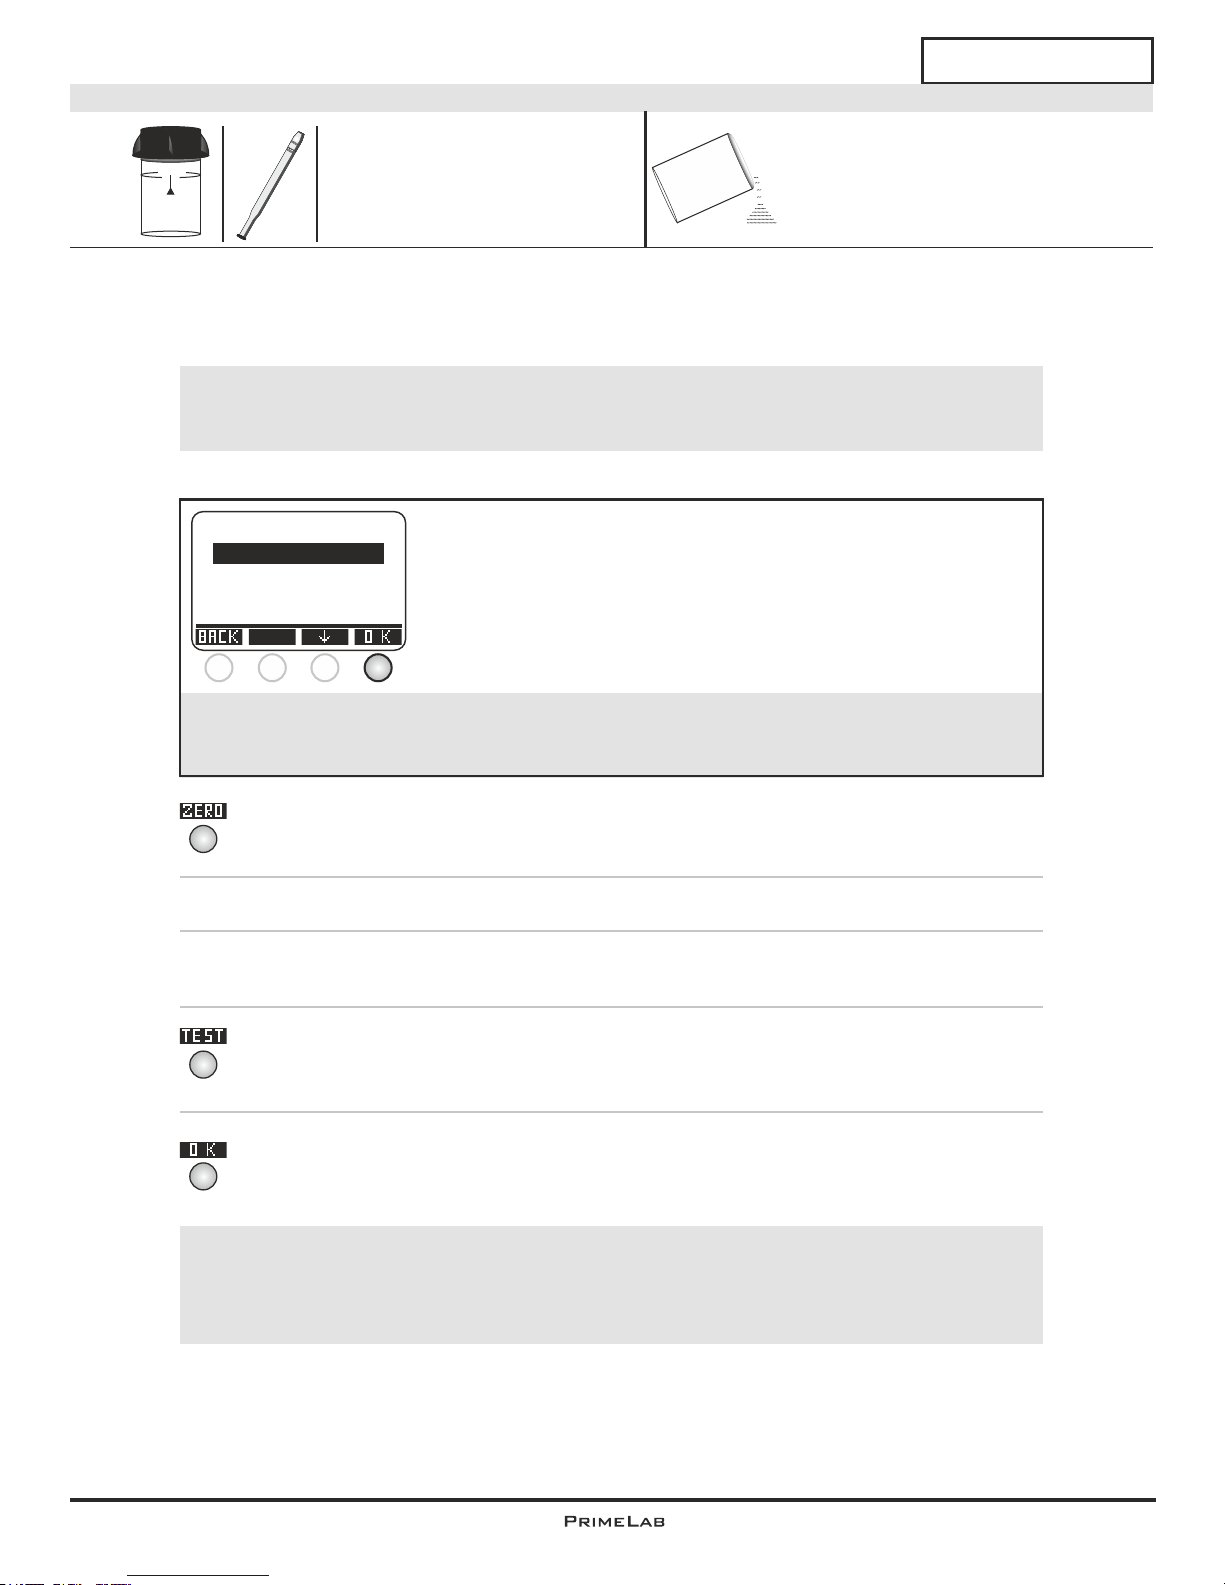
28
28
0.0 - 4.5 mg/l (Br )
2
Name on device: 128-Bromine-pp
1) Fill 10ml of the sample water into a clean 24mm cuvette.
2) Replace the screw lid on the cuvette and insert it into the PrimeLab
sampling chamber. Align the arrow on the front of the cuvette. Press
ZERO.
3) Remove the cuvette from the chamber and unscrew the lid.
4) Add the content of a "DPD Total Chlorine" powder pillow to the sample
and swirl it for approximately 20 seconds, until the powder has dissolved.
5) Replace the lid on the cuvette, swirl it carefully and insert it into the
sampling chamber of the PrimeLab. Align the arrow on the front of the
cuvette. Press TEST.
6) After the lapse of a 3 minute countdown the determined result is
displayed. Press button 4 to save this together with date and time in the
device.
(128) Bromine
4
4
4
10 ml
24 mm
Powder
DPD Total Chlorine PP (ppDPDtotalCl)
The individual steps of the measurement procedure are shown on the display.
Use button 3 (arrow down) to scroll through the steps.
Use button 4 to skip the notes.
!
Measurement procedure:
The steps up to the selection of the parameter value to be determined are the same for all
procedures and described on page "TEST-5". Please observe the important notes for
accurate measurements on pages "TEST-8" and "TEST-9".
One-Time-Zero:
Measure new ZERO
Use last ZERO
For the sake of precision select "Use last ZERO" only
if the stored ZERO value is used with the
same cuvette and the same water sample for the test!
!
If after switching on the device you have already performed the
ZERO (baseline) adjustment for the same type, the following
message is displayed:
-> Measure new ZERO = continue with step 2)
-> Use last ZERO = continue with step 4)
1 2 3 4
!
Possible messages in the line below the measurement value:
"low! / high! / good!":
Assessment of the measurement value relative to the ideal range defined by you.
"Overrange! / underrange!":
Measurement value for this parameter is outside the value range of this method.
Powder
Pilow
Continued...
Page 62
29
29
0.0 - 4.5 mg/l (Br )
2
Name on device: 128-Bromine-pp
(128) Bromine
Powder
Continued...
Note(s)
-> Alkalinity of more than 250 mg/l CaCO affect the measurement and the
3
color development. Neutralize to pH 6-7 with 1 N Hydrochloric Acid before
performing the test.
-> Acidity of more than 150 mg/l CaCO affect the measurement and the color
3
development. Neutralize to pH 6-7 with 1 N Sodium Hydroxide before
performing the test.
-> Other oxidants, such as chlorine, chlorine dioxide, ozone, peroxides as well
as iodine will interfere with the reagent reaction and will be part of the
displayed value.
-> If oxidized manganese or oxidized chromium is present in the sample,
sample needs to be pre-treated.
-> Hardness levels above 1000 mg/l CaCO affect the measurement
3
-> Extreme pH-values of the sample need to be corrected to pH 6-7 before
measuring the sample.
Page 63
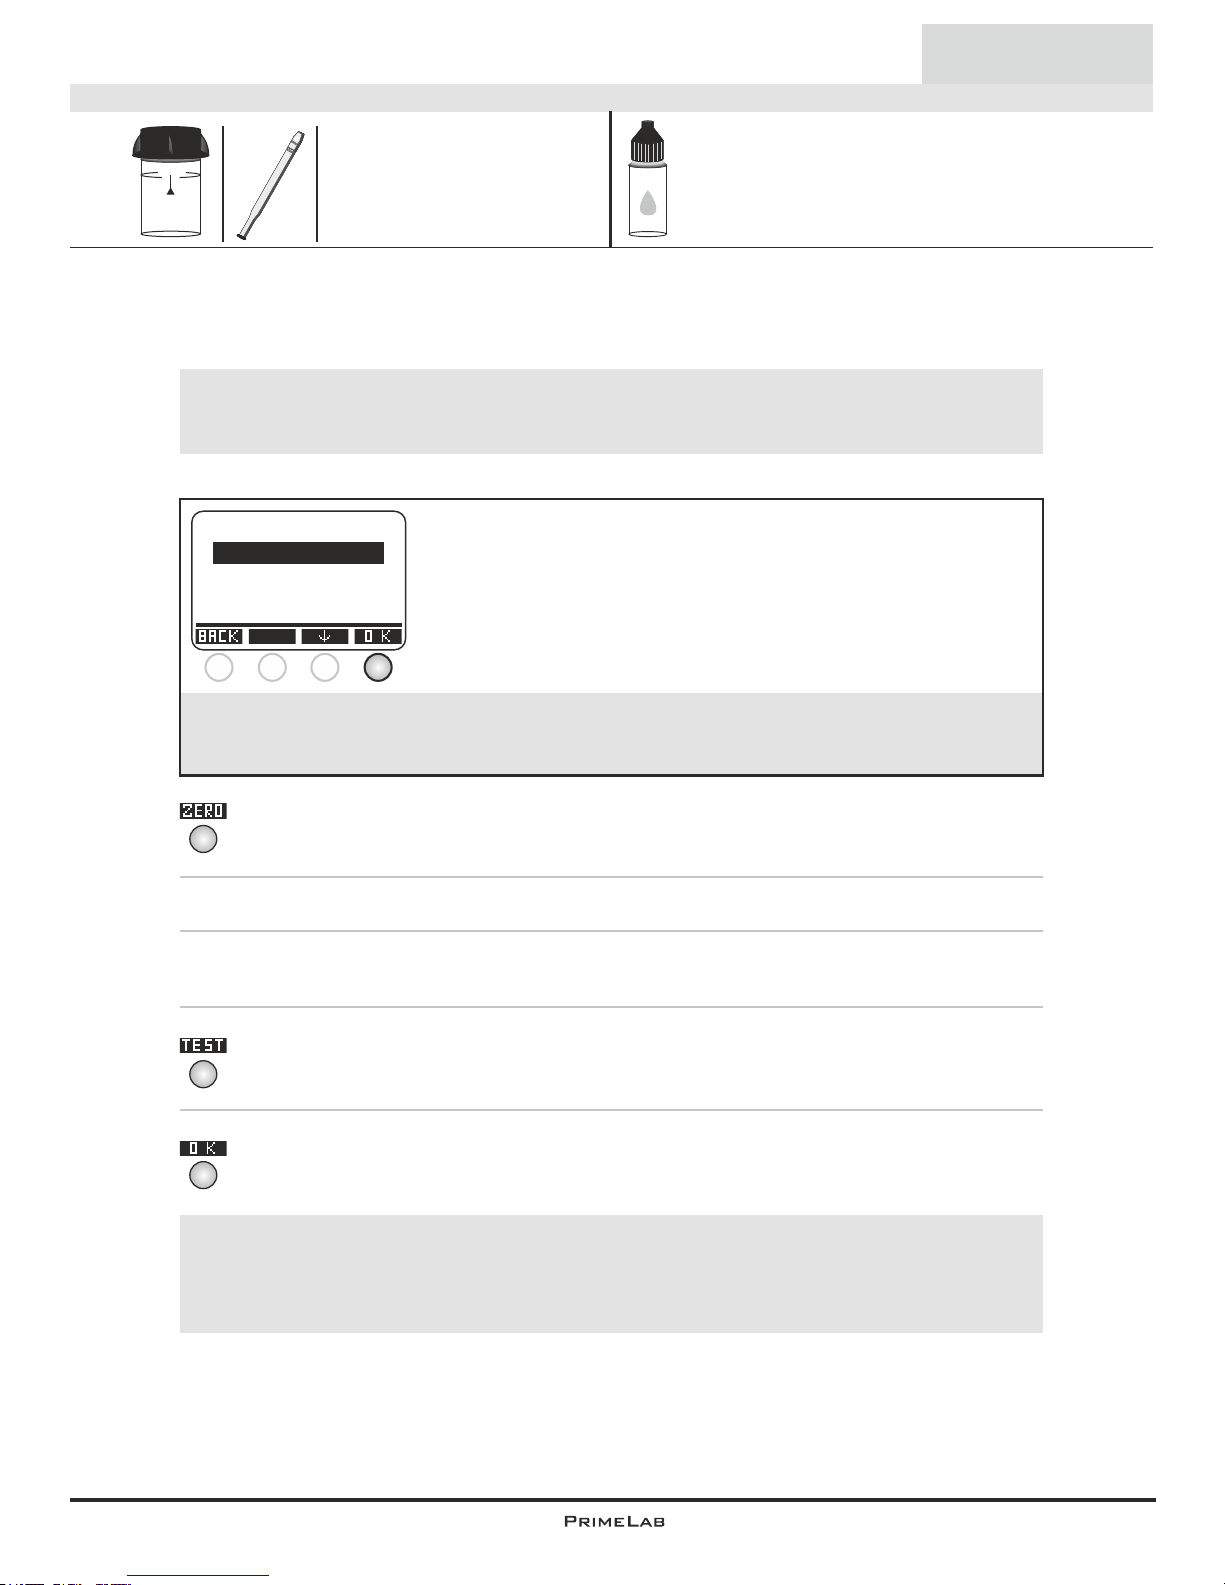
30
30
0 - 1.3 mg/l
Name on device: 71-Carbohydra-liq
1) Fill 10ml of the sample water into a clean 24mm cuvette.
2) Replace the screw lid on the cuvette and insert it into the PrimeLab
sampling chamber. Align the arrow on the front of the cuvette. Press
ZERO.
3) Remove the cuvette from the chamber and unscrew the lid.
4) Add 6 drops "PL Oxygen Scavenger 1" and 25 drops (1mL) "PL Oxygen Scavenger 2" liquid reagent to the water sample in the cuvette.
5) Replace the lid on the cuvette, swirl it carefully and insert it into the
sampling chamber of the PrimeLab. Align the arrow on the front of the
cuvette. Press TEST.
6) After the lapse of a 10 minute countdown the determined result is
displayed. Press button 4 to save this together with date and time in the
device.
(71) Carbohydrazide
4
4
4
Liquid
10 ml
24 mm
PL Oxygen Scavenger 1 (PL65OxyScav1)
PL Oxygen Scavenger 2 (PL65OxyScav2)
The individual steps of the measurement procedure are shown on the display.
Use button 3 (arrow down) to scroll through the steps.
Use button 4 to skip the notes.
!
Measurement procedure:
The steps up to the selection of the parameter value to be determined are the same for all
procedures and described on page "TEST-5". Please observe the important notes for
accurate measurements on pages "TEST-8" and "TEST-9".
One-Time-Zero:
Measure new ZERO
Use last ZERO
For the sake of precision select "Use last ZERO" only
if the stored ZERO value is used with the
same cuvette and the same water sample for the test!
!
If after switching on the device you have already performed the
ZERO (baseline) adjustment for the same type, the following
message is displayed:
-> Measure new ZERO = continue with step 2)
-> Use last ZERO = continue with step 4)
1 2 3 4
!
Possible messages in the line below the measurement value:
"low! / high! / good!":
Assessment of the measurement value relative to the ideal range defined by you.
"Overrange! / underrange!":
Measurement value for this parameter is outside the value range of this method.
Page 64
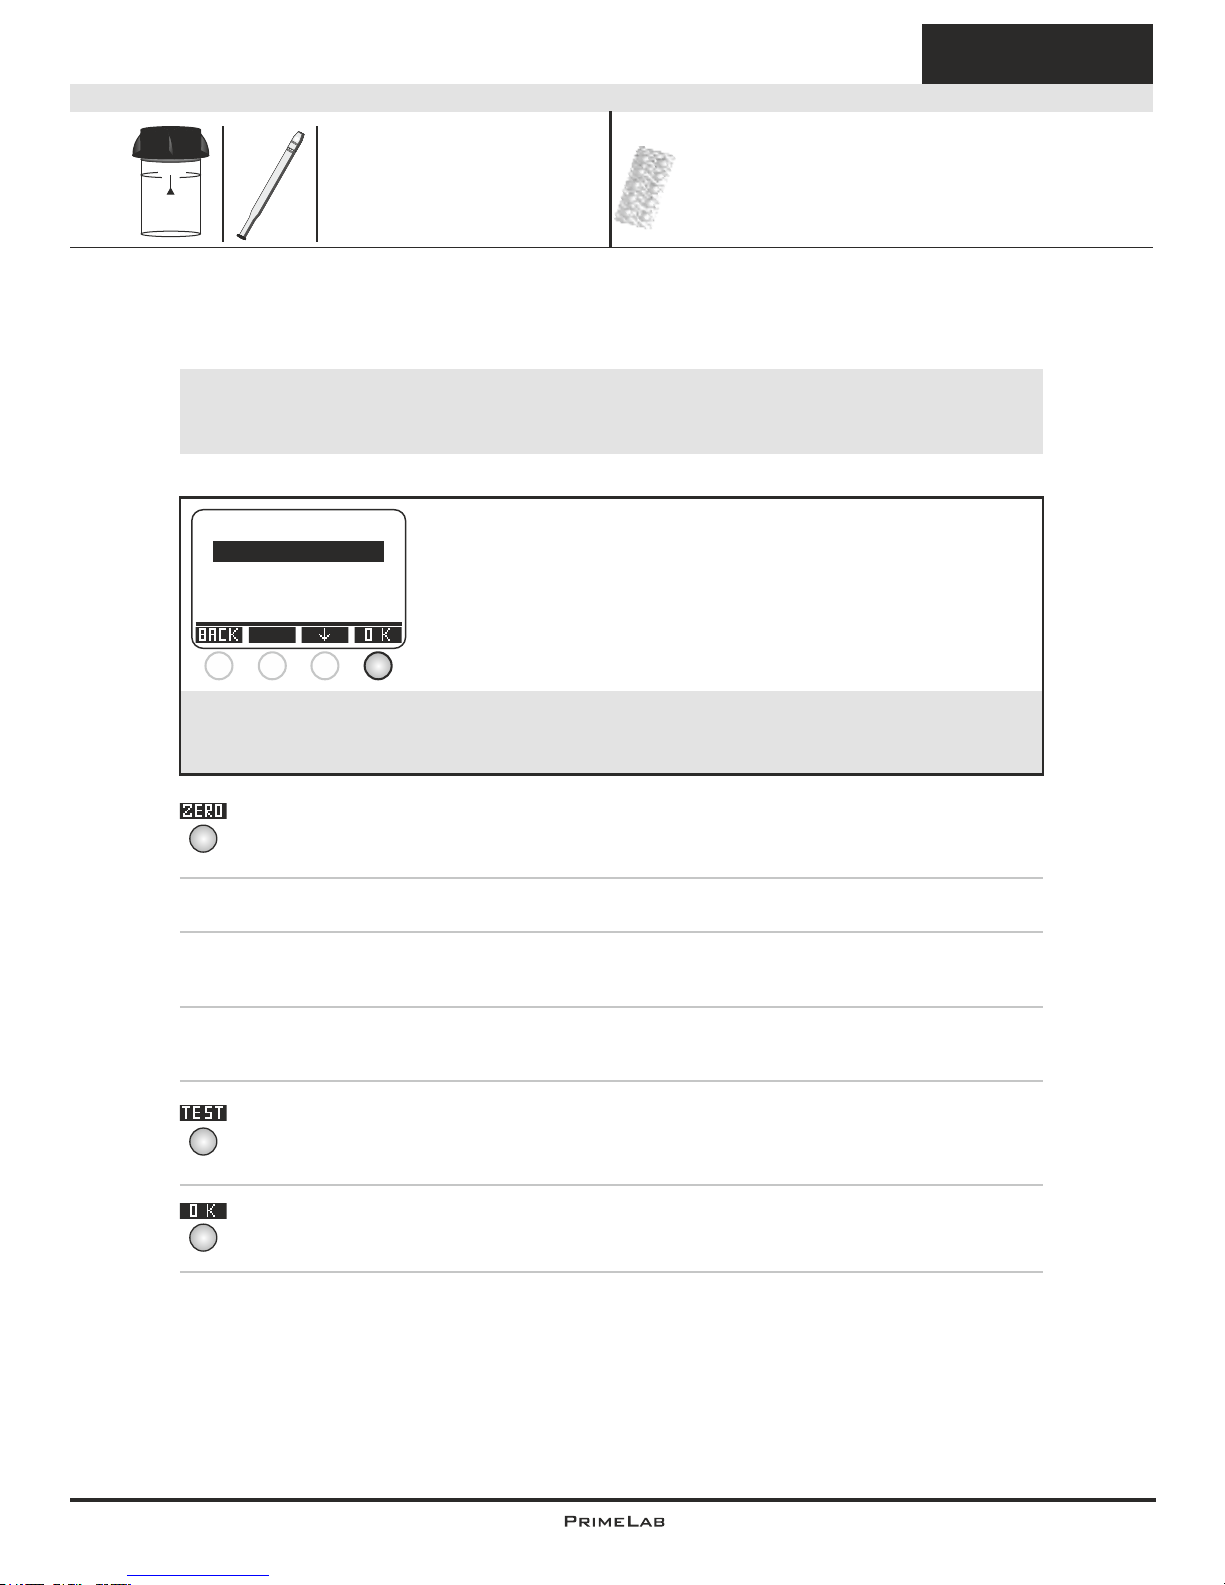
31
31
(95) Chloramines (Mono-/Di-)
0 - 8 mg/l (fCl/NH Cl/NHCl )
2 2
1) Fill 10ml of the sample water into a clean 24mm cuvette.
2) Replace the screw lid on the cuvette and insert it into the PrimeLab
sampling chamber. Align the arrow on the front of the cuvette. Press
ZERO.
3) Remove the cuvette from the chamber and unscrew the lid.
4) Empty the cuvette except for a few drops. Add a "DPD N° 1
Photometer" tablet to the sample in the cuvette.
5) Crush the tablet with a clean stirrer until it is completely dissolved. Fill
the cuvette with the sample water up to the 10ml level.
6) Replace the lid on the cuvette, swivel it carefully and insert it in the
sampling chamber of the PrimeLab. Align the arrow on the front of the
cuvette. Press TEST.
7) After the lapse of a 10 second countdown the total result is displayed as
"fCl" = "free chlorine". Press button 4 to save the result.
DPD N° 1 Photometer (TbsPD1...)
DPD N° 2 Photometer (TbsPD2...)
DPD N° 3 Photometer (TbsPD3...)
10 ml
Name on device: 95-Chloramines-tab
24 mm
4
4
4
Tablet
!
The individual steps of the measurement procedure are shown on the display.
Use button 3 (arrow down) to scroll through the steps.
Use button 4 to skip the notes.
Measurement procedure:
The steps up to the selection of the parameter value to be determined are the same for all
procedures and described on page "TEST-5". Please observe the important notes for
accurate measurements on pages "TEST-8" and "TEST-9".
One-Time-Zero:
Measure new ZERO
Use last ZERO
For the sake of precision select "Use last ZERO" only
if the stored ZERO value is used with the
same cuvette and the same water sample for the test!
!
If after switching on the device you have already performed the
ZERO (baseline) adjustment for the same type, the following
message is displayed:
-> Measure new ZERO = continue with step 2)
-> Use last ZERO = continue with step 4)
1 2 3 4
Continued...
Page 65
32
32
(95) Chloramines (Mono-/Di-)
8) Remove the lid again and add a "DPD N° 2 Photometer" tablet into the
same sample you have just used for determining "fCl".
9) Crush the tablet with a clean stirrer until it is completely dissolved.
10) Replace the lid on the cuvette, swivel it carefully and insert it in the
sampling chamber of the PrimeLab. Align the arrow on the front of the
cuvette. Press TEST.
11) After the lapse of a 10 second countdown the total result is displayed
as „NH Cl“ = „Mono-Chloramine“. To scroll through the values please
2
used the arrow up and down buttons. Press button 4 to save the result.
12) Remove the lid again and add a "DPD N° 3 Photometer" tablet into
the same sample you have just used for determining „NH Cl“.
2
13) Crush the tablet with a clean stirrer until it is completely dissolved.
14) Replace the lid on the cuvette, swivel it carefully and insert it in the
sampling chamber of the PrimeLab. Align the arrow on the front of the
cuvette. Press TEST.
15) After the lapse of a 2 minute countdown the total result is displayed,
divided in:
„fCl“ = „free chlorine“
„NH Cl“ = „Mono-Chloramine“
2
„NHCl “ = „Di-Chloramine“
2
Scroll through the results using the buttons "arrow up" and "arrow down".
Press button 4 to save the result.
Name on device: 95-Chloramines-tab
4
4
4
4
Continued...
!
Possible messages in the line below the measurement value:
"low! / high! / good!":
Assessment of the measurement value relative to the ideal range defined by you.
"Overrange! / underrange!":
Measurement value for this parameter is outside the value range of this method.
Tablet
0 - 8 mg/l (fCl/NH Cl/NHCl )
2 2
Page 66
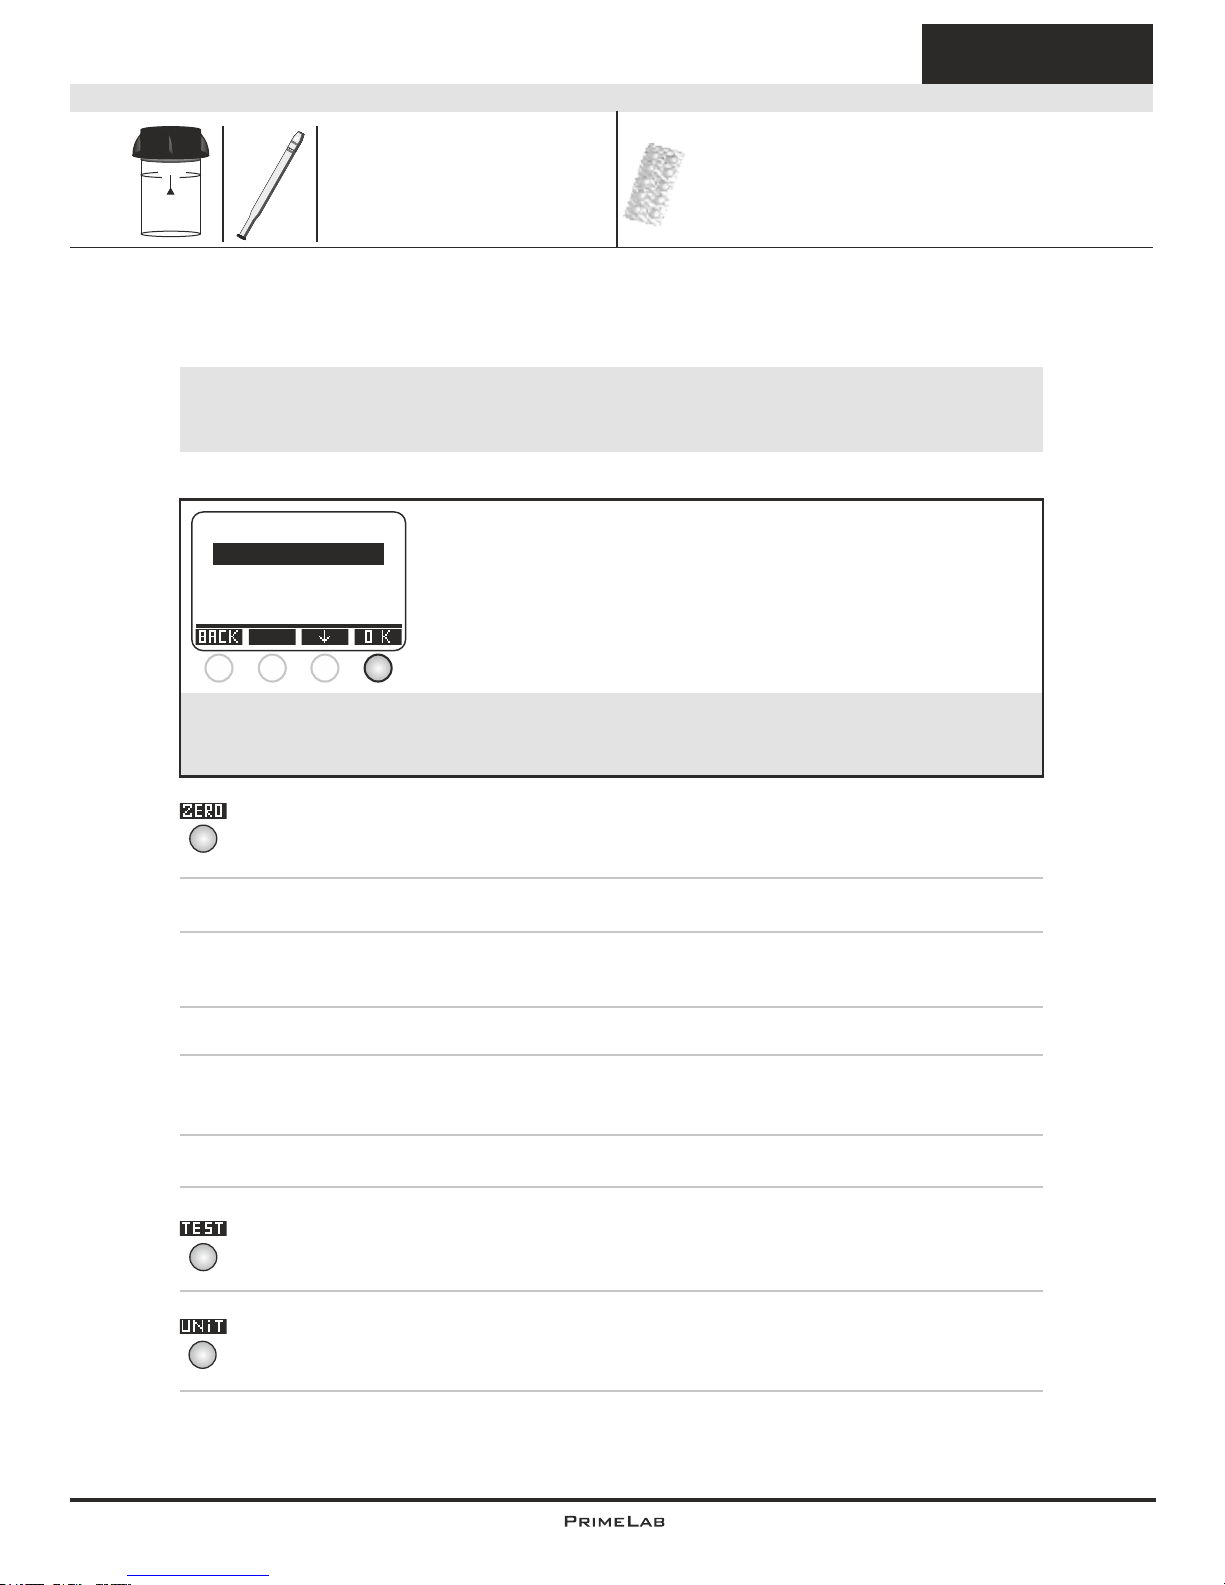
33
33
(10) Chloride
Tablet
1) Fill 10ml of the sample water into a clean 24mm cuvette.
2) Replace the screw lid on the cuvette and insert it into the PrimeLab
sampling chamber. Align the arrow on the front of the cuvette. Press
ZERO.
3) Remove the cuvette from the chamber and unscrew the lid.
4) Add a "Chloride N° 1 Photometer" tablet to the water sample in the
cuvette.
5) Crush the tablet with a clean stirrer until this is completely dissolved.
6) Add a "Chloride N° 2 Photometer" tablet to the water sample in the
same cuvette.
7) Crush the tablet with a clean stirrer until this is completely dissolved.
8) Replace the lid on the cuvette, swirl it carefully and insert it into the
sampling chamber of the PrimeLab. Align the arrow on the front of the
cuvette. Press TEST.
9) After the lapse of a 5 minute countdown the determined result is
displayed. Press button 3 to convert this into various measurement units
(*).
Continued...
Chloride N° 1 Photometer (TbsHCRD1...)
Chloride N° 2 Photometer (TbsPCRD2...)
10 ml
Name on device: 10-Chloride-tab
24 mm
4
4
3
0.5 - 25 mg/l -(Cl )
The individual steps of the measurement procedure are shown on the display.
Use button 3 (arrow down) to scroll through the steps.
Use button 4 to skip the notes.
!
Measurement procedure:
The steps up to the selection of the parameter value to be determined are the same for all
procedures and described on page "TEST-5". Please observe the important notes for
accurate measurements on pages "TEST-8" and "TEST-9".
One-Time-Zero:
Measure new ZERO
Use last ZERO
For the sake of precision select "Use last ZERO" only
if the stored ZERO value is used with the
same cuvette and the same water sample for the test!
!
If after switching on the device you have already performed the
ZERO (baseline) adjustment for the same type, the following
message is displayed:
-> Measure new ZERO = continue with step 2)
-> Use last ZERO = continue with step 4)
1 2 3 4
Page 67
34
34
Continued...
10) Press button 4 to save the result together with date and time in the
device.
4
Tablet
0.5 - 25 mg/l -(Cl )
Note(s)
-> (*) The test result can be converted to the following units:
NaCl
-> Avoid severe shaking of the water sample after adding the reagent, as this
can lead to incorrect measurements.
-> The reagent used will cause fine clouding.
-> Other substances in the water that may react with silver nitrate in
an acidic medium will lead to a falsification of the measurement result.
Such species are bromide and iodine.
-> Very alkaline water should be neutralized before the measurement by adding
nitric acid.
!
Possible messages in the line below the measurement value:
"low! / high! / good!":
Assessment of the measurement value relative to the ideal range defined by you.
"Overrange! / underrange!":
Measurement value for this parameter is outside the value range of this method.
(10) Chloride
Name on device: 10-Chloride-tab
Page 68
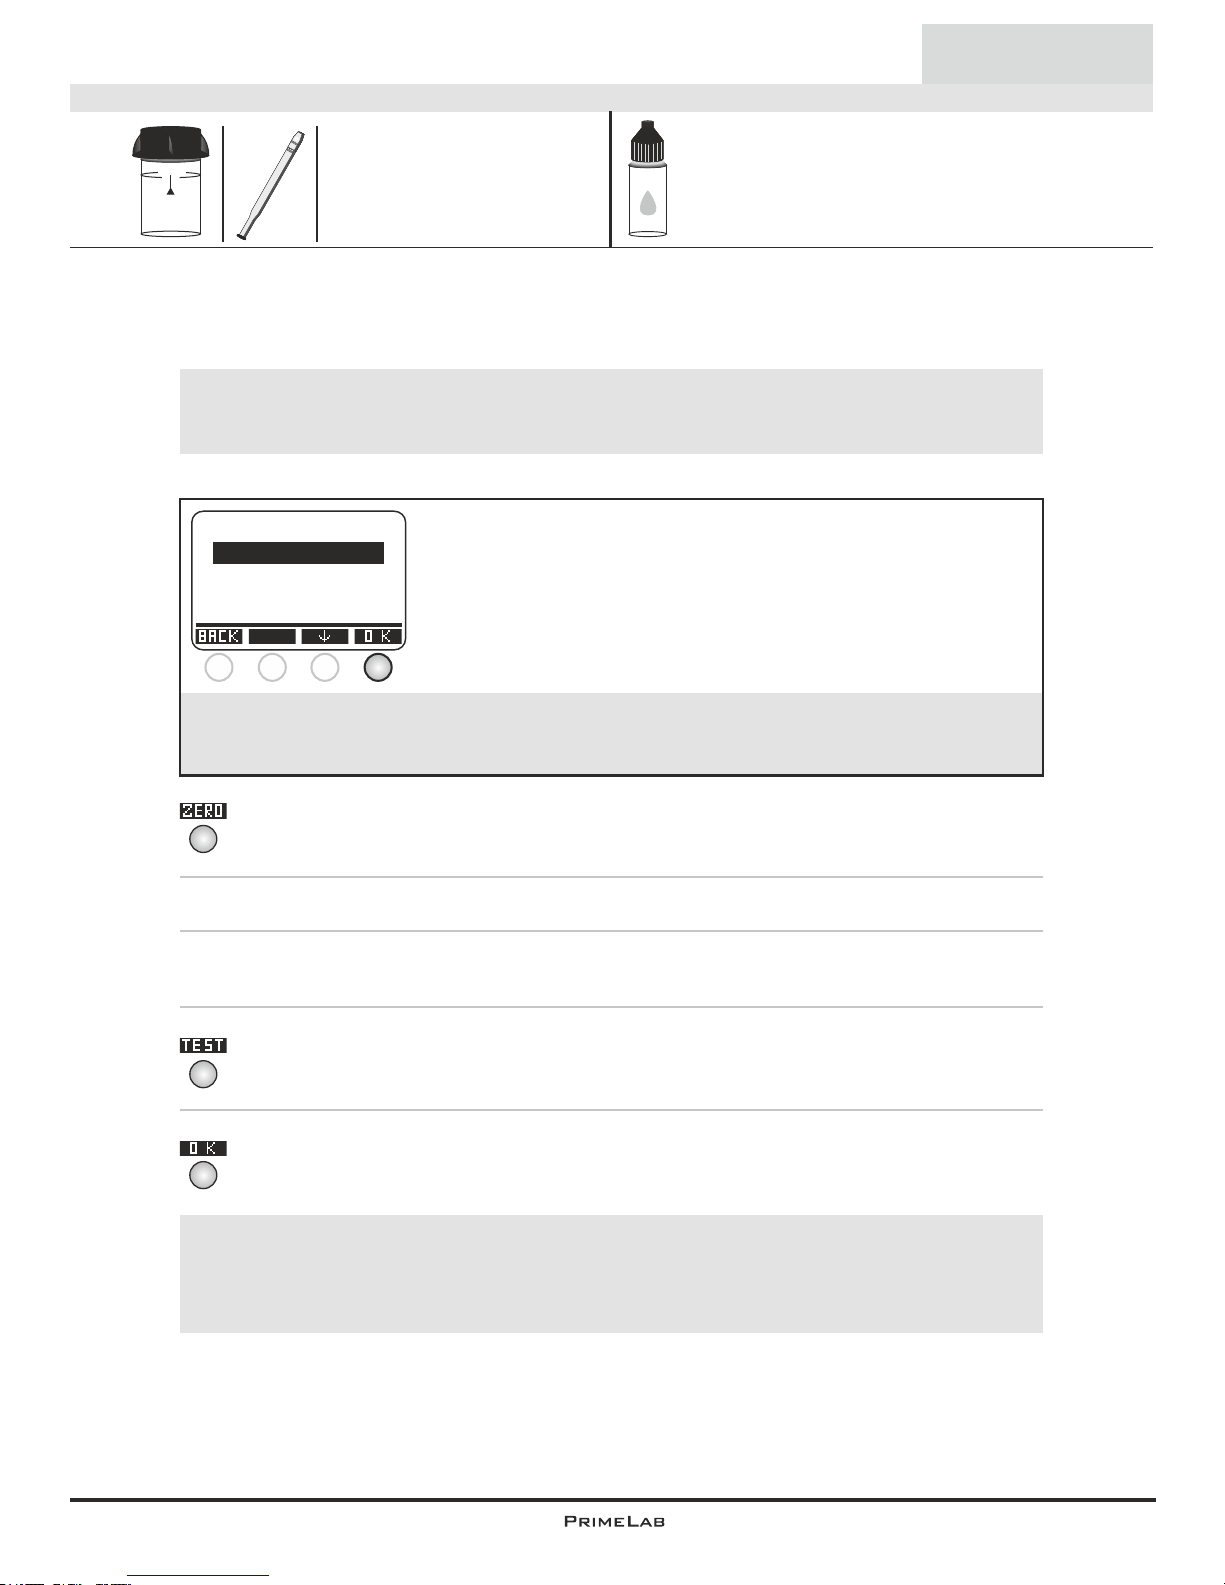
35
35
0 - 100 mg/l (Cl)
Name on device: 124-Chloride-liq
1) Fill 10ml of the sample water into a clean 24mm cuvette.
2) Replace the screw lid on the cuvette and insert it into the PrimeLab
sampling chamber. Align the arrow on the front of the cuvette. Press
ZERO.
3) Remove the cuvette from the chamber and unscrew the lid.
4) Add 15 drops "PL Chloride 1" and 15 drops "PL Chloride 2" liquid
reagent to the water sample in the cuvette.
5) Replace the lid on the cuvette, swirl it carefully and insert it into the
sampling chamber of the PrimeLab. Align the arrow on the front of the
cuvette. Press TEST.
6) After the lapse of a 5 minute countdown the determined result is
displayed. Press button 4 to save this together with date and time in the
device.
(124) Chloride
4
4
4
Liquid
10 ml
24 mm
PL Chloride 1 (PL65Chloride1)
PL Chloride 2 (PL65Chloride2)
The individual steps of the measurement procedure are shown on the display.
Use button 3 (arrow down) to scroll through the steps.
Use button 4 to skip the notes.
!
Measurement procedure:
The steps up to the selection of the parameter value to be determined are the same for all
procedures and described on page "TEST-5". Please observe the important notes for
accurate measurements on pages "TEST-8" and "TEST-9".
One-Time-Zero:
Measure new ZERO
Use last ZERO
For the sake of precision select "Use last ZERO" only
if the stored ZERO value is used with the
same cuvette and the same water sample for the test!
!
If after switching on the device you have already performed the
ZERO (baseline) adjustment for the same type, the following
message is displayed:
-> Measure new ZERO = continue with step 2)
-> Use last ZERO = continue with step 4)
1 2 3 4
!
Possible messages in the line below the measurement value:
"low! / high! / good!":
Assessment of the measurement value relative to the ideal range defined by you.
"Overrange! / underrange!":
Measurement value for this parameter is outside the value range of this method.
Page 69
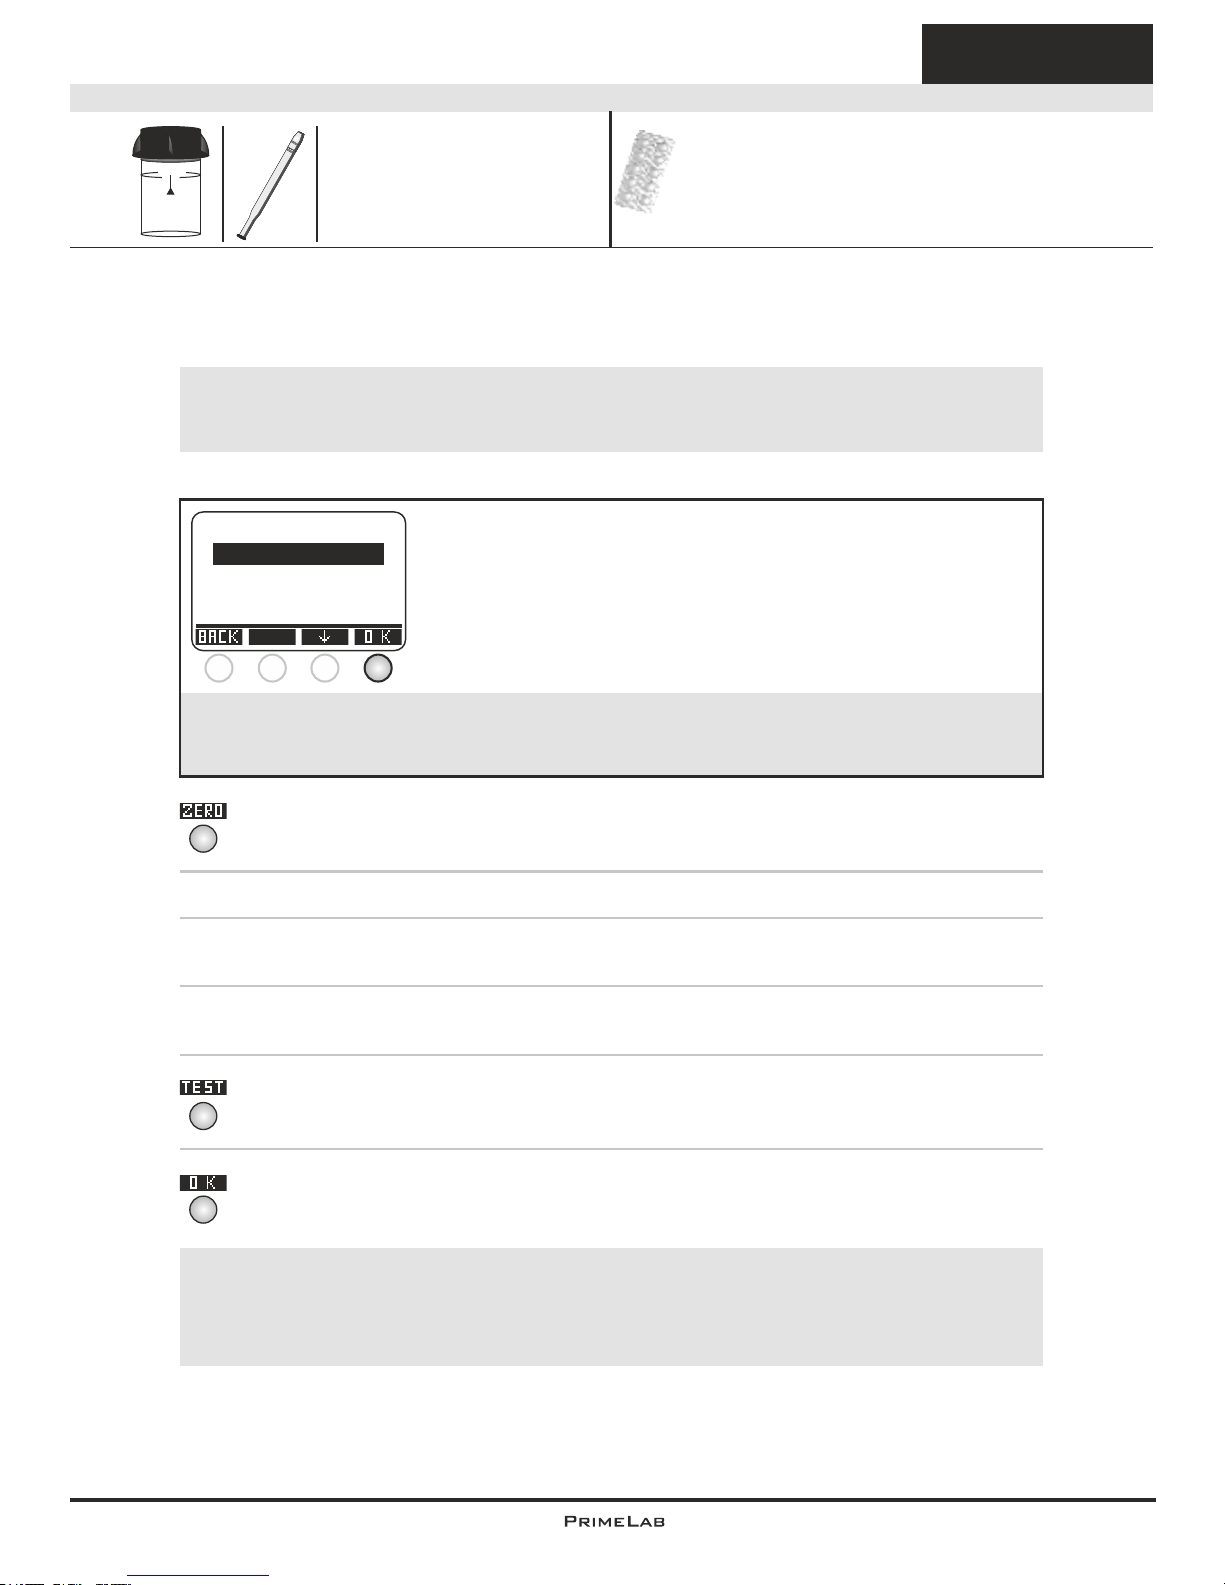
36
36
(11) Chlorine (free/combined/total)
Tablet
0.00 - 8.00 mg/l (Cl )
2
1) Fill 10ml of the sample water into a clean 24mm cuvette.
2) Replace the screw lid on the cuvette and insert it into the PrimeLab
sampling chamber. Align the arrow on the front of the cuvette. Press
ZERO.
3) Remove the cuvette from the chamber and unscrew the lid.
4) Empty the cuvette except for a few drops. Add a "DPD N° 1
Photometer" tablet to the sample in the cuvette.
5) Crush the tablet with a clean stirrer until it is completely dissolved. Fill
the cuvette with the sample water up to the 10ml level.
6) Replace the lid on the cuvette, swirl it carefully and insert it into the
sampling chamber of the PrimeLab. Align the arrow on the front of the
cuvette. Press TEST.
7) After the lapse of a 10 second countdown the determined result for "fCl"
(free chlorine) is displayed. Press button 4 to save the test result together
with date and time on the device.
Continued...
DPD N° 1 Photometer (TbsPD1...)
*DPD N° 1 HC Photometer (TbsPD1HC...)
DPD N° 3 Photometer (TbsPD3...)
*DPD N° 3 HC Photometer (TbsPD3HC...)
10 ml
* for very limey water or water samples with a high conductivity
24 mm
4
4
4
Name on device: 11-Chlorine-tab
The individual steps of the measurement procedure are shown on the display.
Use button 3 (arrow down) to scroll through the steps.
Use button 4 to skip the notes.
!
Measurement procedure:
The steps up to the selection of the parameter value to be determined are the same for all
procedures and described on page "TEST-5". Please observe the important notes for
accurate measurements on pages "TEST-8" and "TEST-9".
One-Time-Zero:
Measure new ZERO
Use last ZERO
For the sake of precision select "Use last ZERO" only
if the stored ZERO value is used with the
same cuvette and the same water sample for the test!
!
If after switching on the device you have already performed the
ZERO (baseline) adjustment for the same type, the following
message is displayed:
-> Measure new ZERO = continue with step 2)
-> Use last ZERO = continue with step 4)
1 2 3 4
!
Possible messages in the line below the measurement value:
"low! / high! / good!":
Assessment of the measurement value relative to the ideal range defined by you.
"Overrange! / underrange!":
Measurement value for this parameter is outside the value range of this method.
Page 70
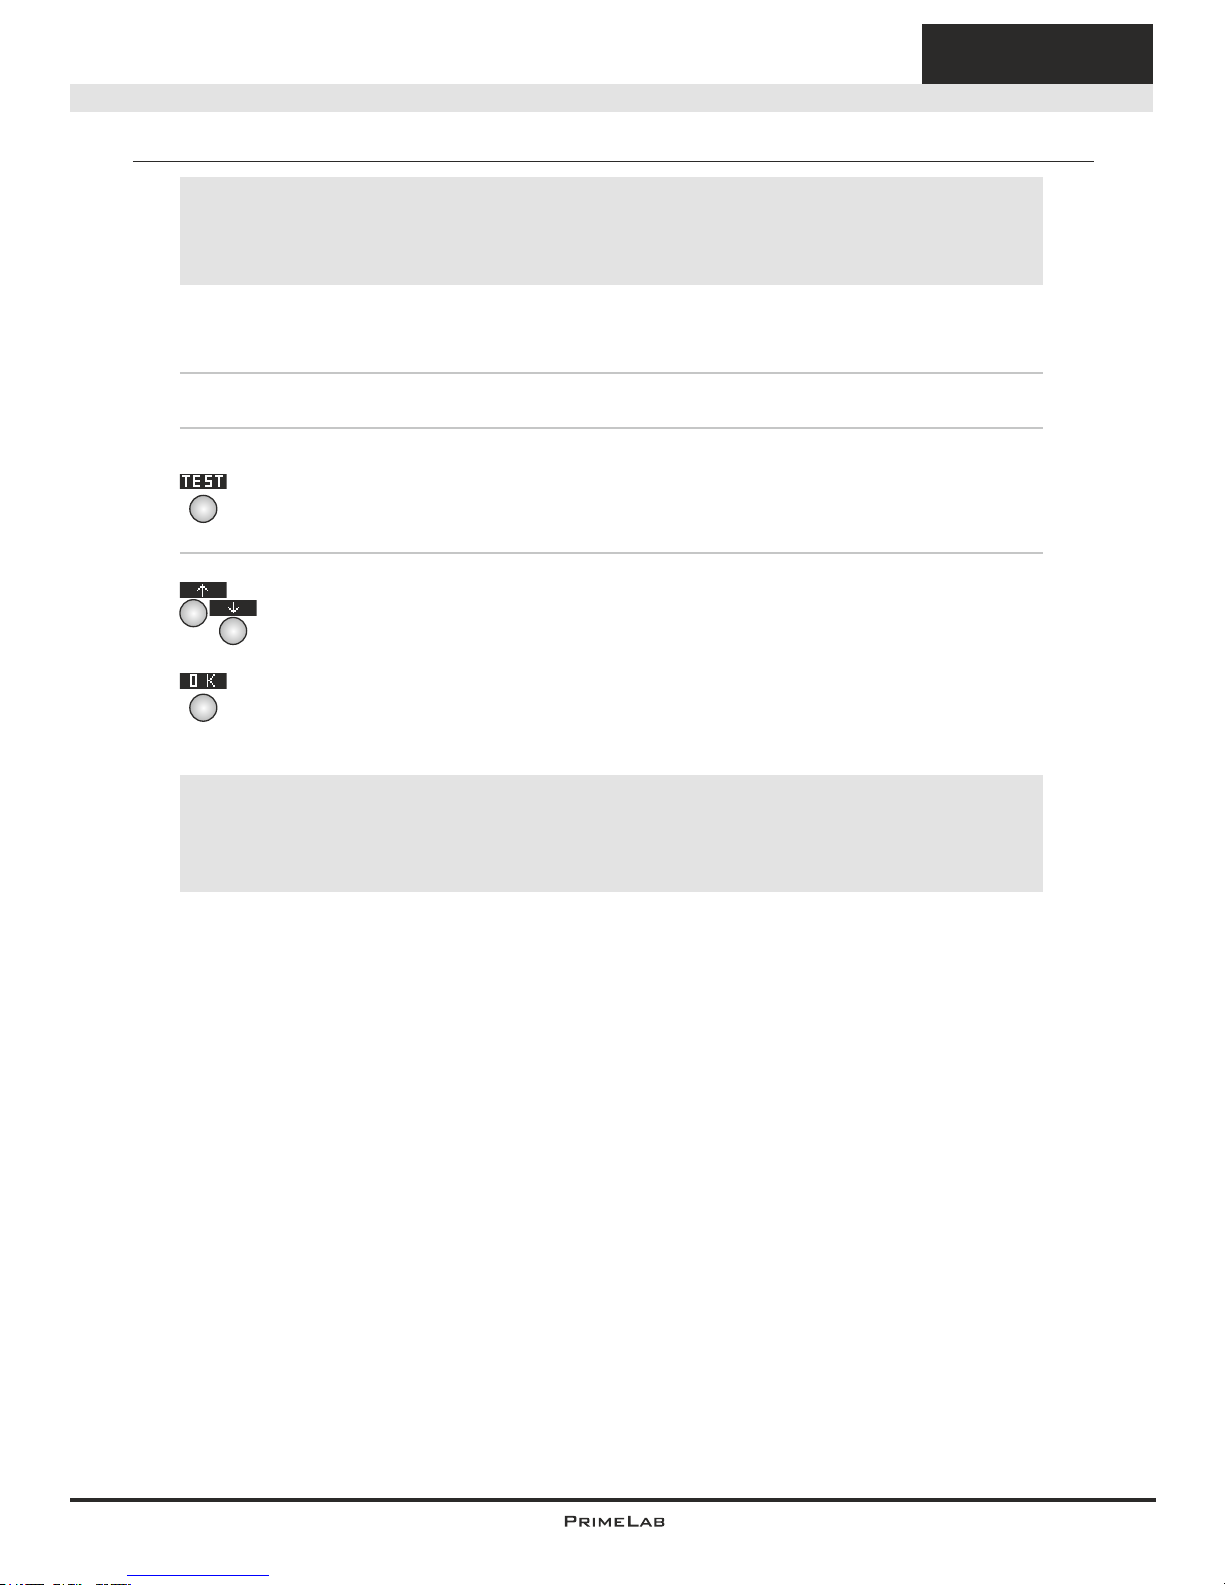
37
37
Continued...
Tablet
8) Remove the lid again and add a "DPD N° 3 Photometer" tablet into the
same sample you have just used for determining "free chlorine".
9) Crush the tablet with a clean stirrer until it has completely dissolved.
10) Replace the lid on the cuvette, swirl it carefully and insert it into the
sampling chamber of the PrimeLab. Align the arrow on the front of the
cuvette.
Press TEST.
11) After the lapse of a 2 minute countdown the total result is displayed,
divided in
"fCl" = "free chlorine“
"cCl" = "combined chlorine“
"tCl" = "total chlorine".
Scroll through the results using the buttons "arrow up" and "arrow down".
Press button 4 to save the result.
After pressing the button 4 (OK) the measurement is continued to determine the
total chlorine (tCl) and later also bonded chlorine (cCl). If this is not required the
measurement can be termianted by pressing "HOME". IN this case only the value
for free chlorine (fCl) is stored.
!
Continued...
2
3
4
4
0.00 - 8.00 mg/l (Cl )
2
(11) Chlorine (free/combined/total)
Name on device: 11-Chlorine-tab
!
Possible messages in the line below the measurement value:
"low! / high! / good!":
Assessment of the measurement value relative to the ideal range defined by you.
"Overrange! / underrange!":
Measurement value for this parameter is outside the value range of this method.
Page 71
38
38
Continued...
Tablet
Note(s)
-> Sample water with a high calcium content or high conductivity will cloud the
sample and deteriorate the measurement precision. In this case use the
DPD N° 1 High Calcium (HC) and DPD N° 3 High Calcium (HC) tablets.
-> If the measuring water contains further reducing chemicals (e.g. active
oxygen, bromine etc.) this will also be detected and is part of the result.
-> When preparing the measurement procedure it is important to avoid any
chlorine escaping, which can happen during pipetting and shaking the
sample. The measurement should be performed directly after sampling.
-> It is important that the measurement devices to be used have not been
cleaned with household detergent, as this could greatly reduce the
measurement. To prevent any contamination the cuvette, the cuvette lid and
the stirrer should be stored in a 0.1 g/l sodium hypochlorite solution for one
hour and then thoroughly rinse with distilled water.
-> The DPD reagent used in this procedure buffers the pH value of the sample
water in the range between 6.2 and 6.5 pH. If your sample water is very
alkaline or acidic this must be adjusted to a pH range between 6 and 7 by
the addition of 0.5 mol/l sulphuric acid or resp. 1 mol/l caustic soda before
the DPD reagent is added.
-> Water samples with parameter levels ´higher´ than the defined range may
lead to errors with the DPD chemistry; resulting in an incorrect reading
(possibly showing none detected). For measurement of higher chlorine
values please select the respective matching procedure.
0.00 - 8.00 mg/l (Cl )
2
(11) Chlorine (free/combined/total)
Name on device: 11-Chlorine-tab
Page 72
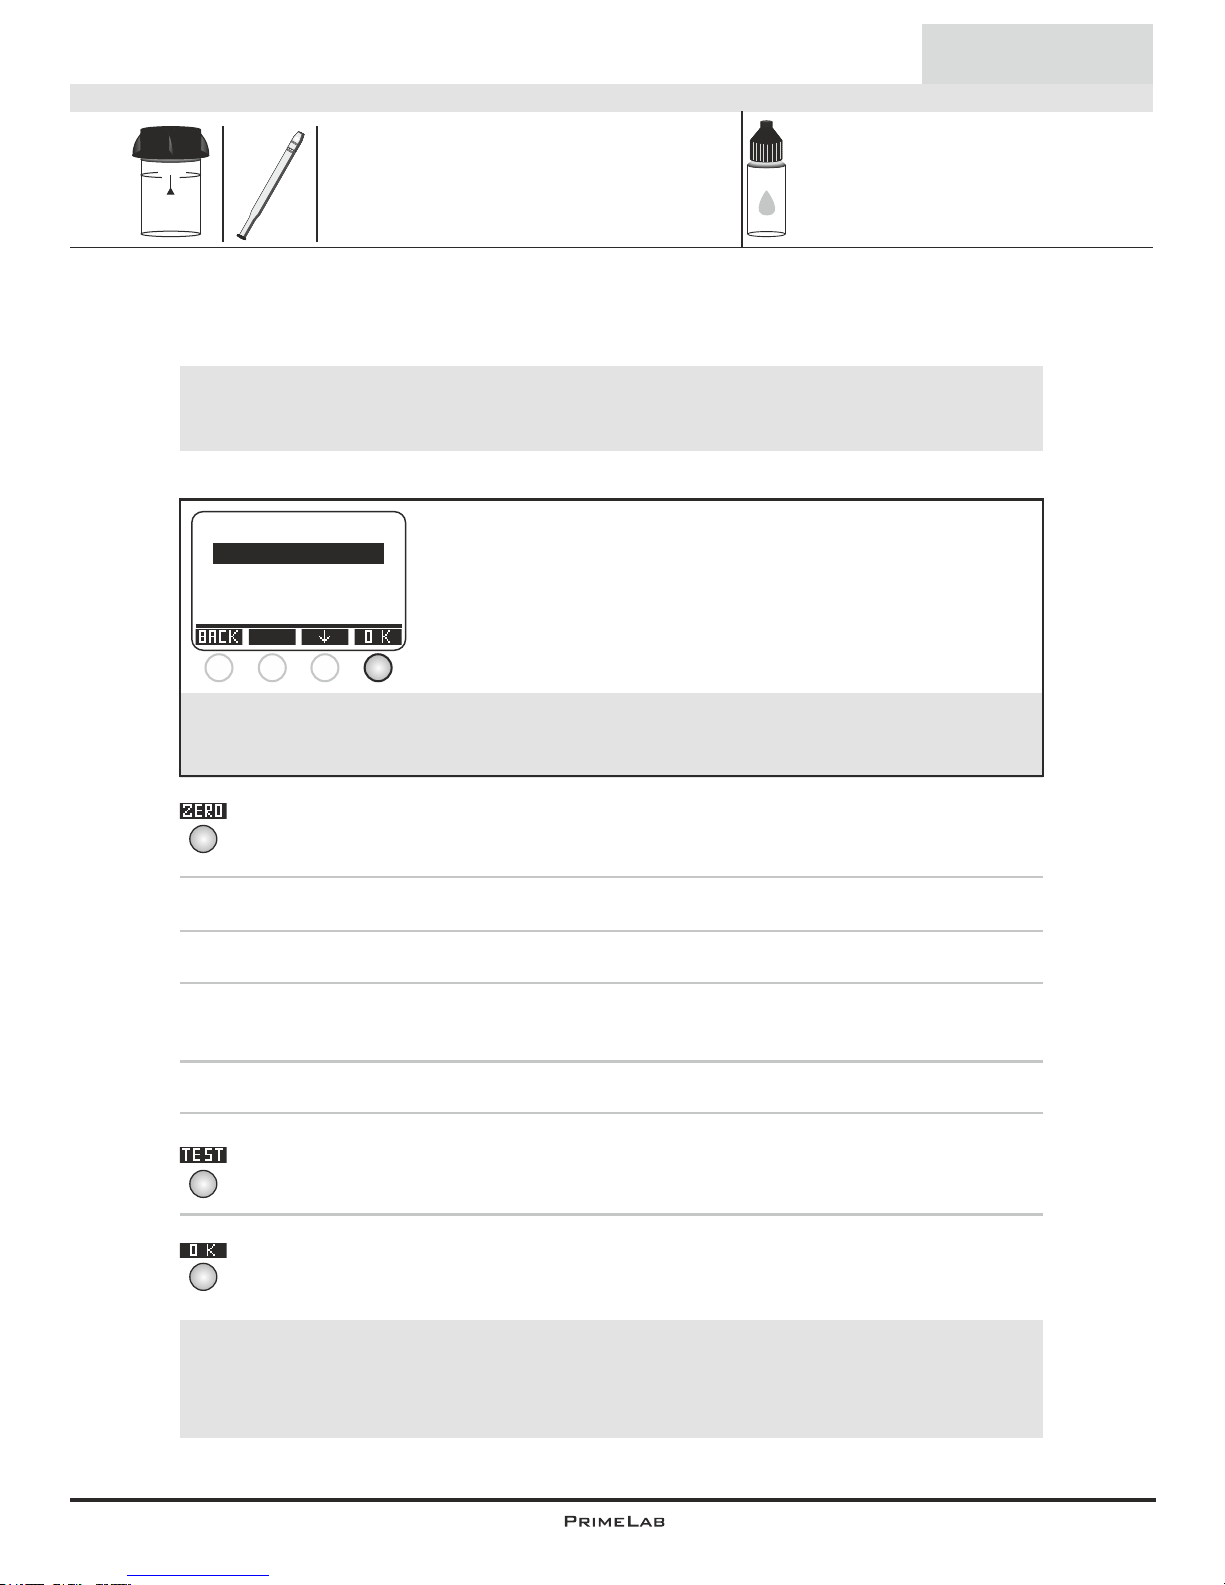
39
39
1) Fill 10ml of the sample water into a clean 24mm cuvette.
2) Replace the screw lid on the cuvette and insert it into the PrimeLab
sampling chamber. Align the arrow on the front of the cuvette. Press
ZERO.
3) Remove the cuvette from the chamber and unscrew the lid.
4) Empty the cuvette.
5) Add 3 drops "PL DPD 1 A" and 3 drops "PL DPD 1 B“ liquid reagent into
the empty cuvette.
6) Fill sample water into the same cuvette up to the 10ml level.
7) Replace the lid on the cuvette, swirl it carefully and insert it into the
sampling chamber of the PrimeLab. Align the arrow on the front of the
cuvette. Press TEST.
8) The determined results for "fCl" (free chlorine) is immediately
displayed. Press button 4 to save this together with date and time in the
device.
Continued...
4
4
4
Liquid
PL DPD 1 A (PL30DPD1A)
PL DPD 1 B (PL30DPD1B)
PL DPD 3 C (PL30DPD3C)
0 - 8 mg/l (Cl )
2
10 ml
24 mm
(12) Chlorine (free/combined/total)
Name on device: 12-Chlorine-liq
The individual steps of the measurement procedure are shown on the display.
Use button 3 (arrow down) to scroll through the steps.
Use button 4 to skip the notes.
!
Measurement procedure:
The steps up to the selection of the parameter value to be determined are the same for all
procedures and described on page "TEST-5". Please observe the important notes for
accurate measurements on pages "TEST-8" and "TEST-9".
One-Time-Zero:
Measure new ZERO
Use last ZERO
For the sake of precision select "Use last ZERO" only
if the stored ZERO value is used with the
same cuvette and the same water sample for the test!
!
If after switching on the device you have already performed the
ZERO (baseline) adjustment for the same type, the following
message is displayed:
-> Measure new ZERO = continue with step 2)
-> Use last ZERO = continue with step 4)
1 2 3 4
!
Possible messages in the line below the measurement value:
"low! / high! / good!":
Assessment of the measurement value relative to the ideal range defined by you.
"Overrange! / underrange!":
Measurement value for this parameter is outside the value range of this method.
Page 73
40
40
Continued...
Liquid
9) Remove the cuvette from the chamber and unscrew the lid.
10) Add 3 drops "PL DPD 3 C" liquid reagent to the water sample in the
cuvette.
11) Replace the lid on the cuvette, swirl it carefully and insert it into the
sampling chamber of the PrimeLab. Align the arrow on the front of the
cuvette. Press TEST.
12) After the lapse of a 2 minute countdown the total result is displayed,
divided in
"fCl" = "free chlorine“
"cCl" = "combined chlorine“
"tCl" = "total chlorine".
Scroll through the results using the buttons "arrow up" and "arrow down".
Press button 4 to save the result.
4
2
3
4
Note(s)
-> DPD 1 A and DPD 1 B reagent MUST be added to the vial
BEFORE water sample is added to avoid mis-readings!
-> The notes under ID 11 apply here as well.
-> Liquid reagents should be stored below 10°C and above 5°C in securely
closed bottles.
(12) Chlorine (free/combined/total)
Name on device: 12-Chlorine-liq
0 - 8 mg/l (Cl )
2
After pressing the button 4 (OK) the measurement is continued to determine the
total chlorine (tCl) and later also bonded chlorine (cCl). If this is not required the
measurement can be termianted by pressing "HOME". IN this case only the value
for free chlorine (fCl) is stored.
!
!
Possible messages in the line below the measurement value:
"low! / high! / good!":
Assessment of the measurement value relative to the ideal range defined by you.
"Overrange! / underrange!":
Measurement value for this parameter is outside the value range of this method.
Page 74
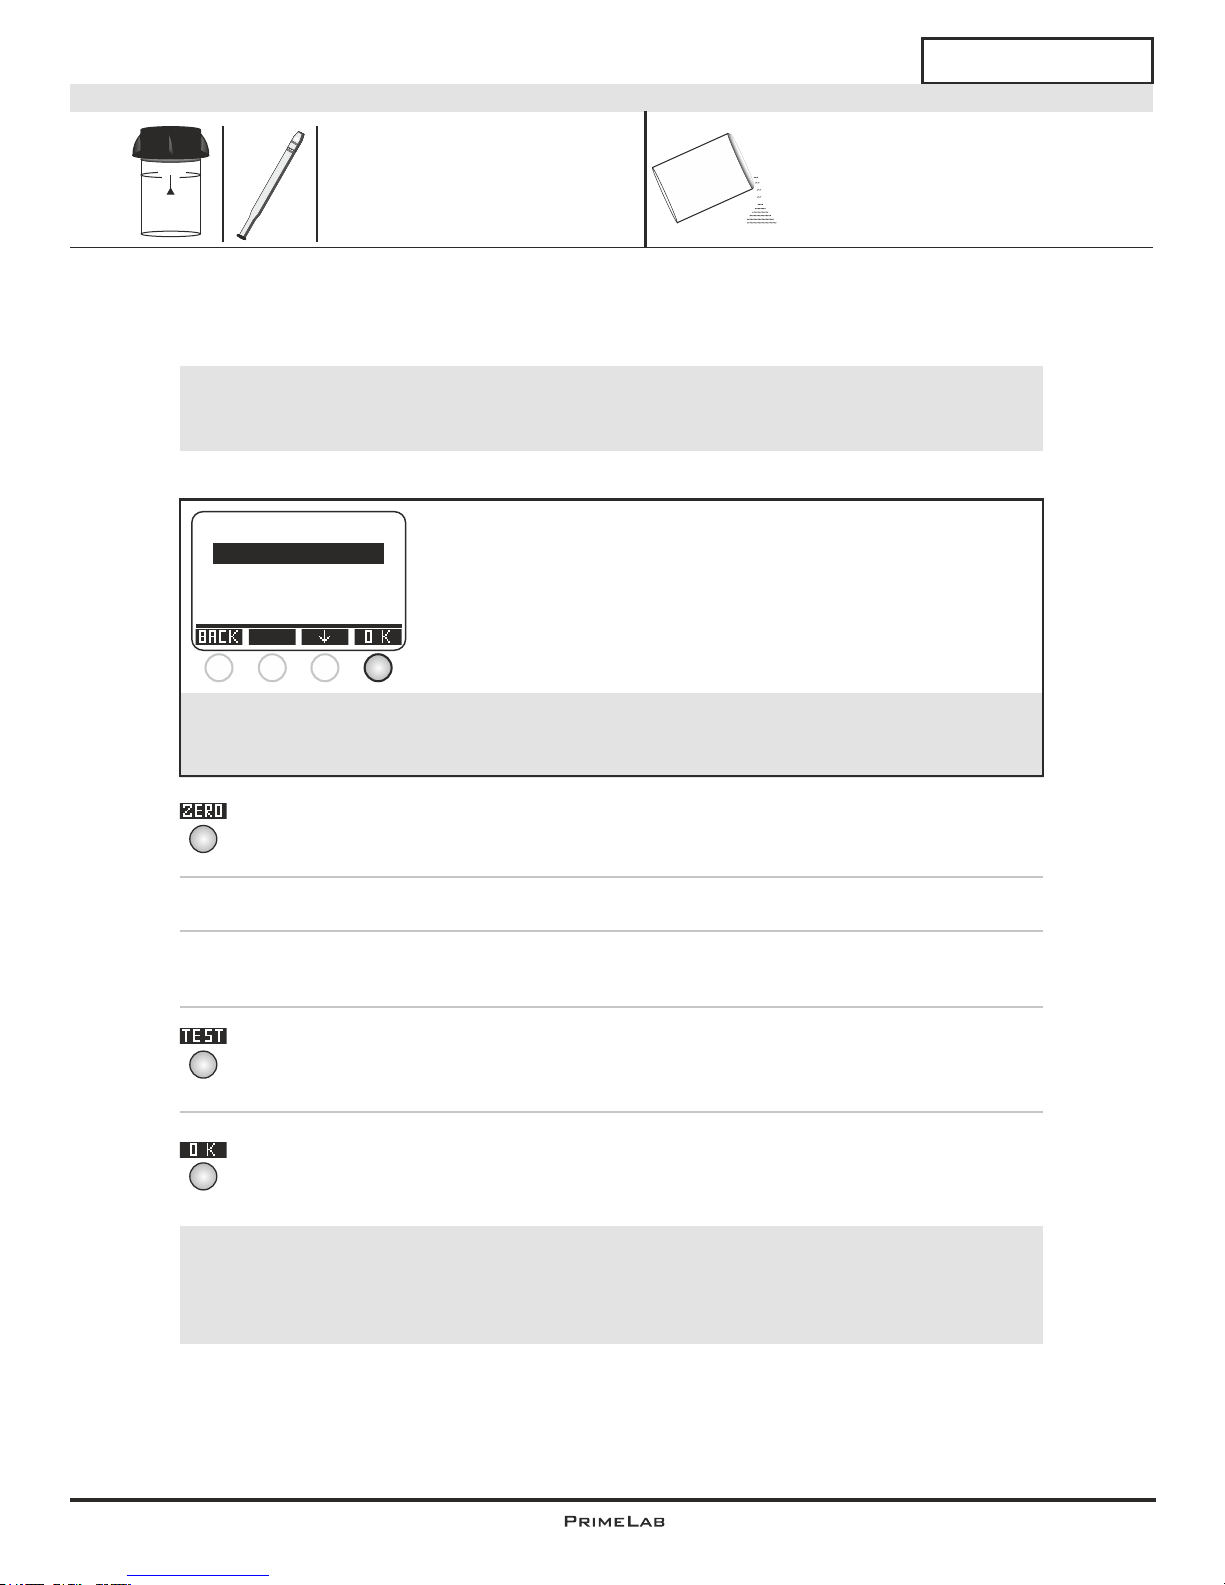
41
41
0.00 - 2.00 mg/l (fCl )
2
Name on device: 129-Chlorine-pp
1) Fill 10ml of the sample water into a clean 24mm cuvette.
2) Replace the screw lid on the cuvette and insert it into the PrimeLab
sampling chamber. Align the arrow on the front of the cuvette. Press
ZERO.
3) Remove the cuvette from the chamber and unscrew the lid.
4) Add the content of a "DPD Free Chlorine" powder pillow to the sample
and swirl it for approximately 20 seconds, until the powder has dissolved.
5) Replace the lid on the cuvette, swirl it carefully and insert it into the
sampling chamber of the PrimeLab. Align the arrow on the front of the
cuvette. Press TEST.
6) After the lapse of a 3 minute countdown the determined result is
displayed. Press button 4 to save this together with date and time in the
device.
(129) Chlorine free
4
4
4
10 ml
24 mm
Powder
DPD Free Chlorine PP (ppDPDfreeCl)
The individual steps of the measurement procedure are shown on the display.
Use button 3 (arrow down) to scroll through the steps.
Use button 4 to skip the notes.
!
Measurement procedure:
The steps up to the selection of the parameter value to be determined are the same for all
procedures and described on page "TEST-5". Please observe the important notes for
accurate measurements on pages "TEST-8" and "TEST-9".
One-Time-Zero:
Measure new ZERO
Use last ZERO
For the sake of precision select "Use last ZERO" only
if the stored ZERO value is used with the
same cuvette and the same water sample for the test!
!
If after switching on the device you have already performed the
ZERO (baseline) adjustment for the same type, the following
message is displayed:
-> Measure new ZERO = continue with step 2)
-> Use last ZERO = continue with step 4)
1 2 3 4
!
Possible messages in the line below the measurement value:
"low! / high! / good!":
Assessment of the measurement value relative to the ideal range defined by you.
"Overrange! / underrange!":
Measurement value for this parameter is outside the value range of this method.
Powder
Pilow
Continued...
Page 75
42
42
0.00 - 2.00 mg/l (fCl )
2
Name on device: 129-Chlorine-pp
Powder
Continued...
Note(s)
-> Alkalinity of more than 250 mg/l CaCO affect the measurement and the
3
color development. Neutralize to pH 6-7 with 1 N Sodium Hydroxide before
performing the test.
-> Acidity of more than 150 mg/l CaCO affect the measurement and the color
3
development. Neutralize to pH 6-7 with 1 N Sodium Hydroxide before
performing the test.
-> Other oxidants, such as bromine, chlorine dioxide, ozone, peroxides as well
as iodine will interfere with the reagent reaction and will be part of the
displayed value.
-> Organic chloramines may interfere. Monochloramines lead to higher
readings (~0.1 mg/l at 3 mg/l monochloramines after 1 minute).
-> If oxidized manganese or oxidized chromium is present in the sample,
sample needs to be pre-treated.
-> Hardness levels above 1000 mg/l CaCO affect the measurement
3
-> Extreme pH-values of the sample need to be corrected to pH 6-7 before
measuring the sample.
(129) Chlorine free
Page 76
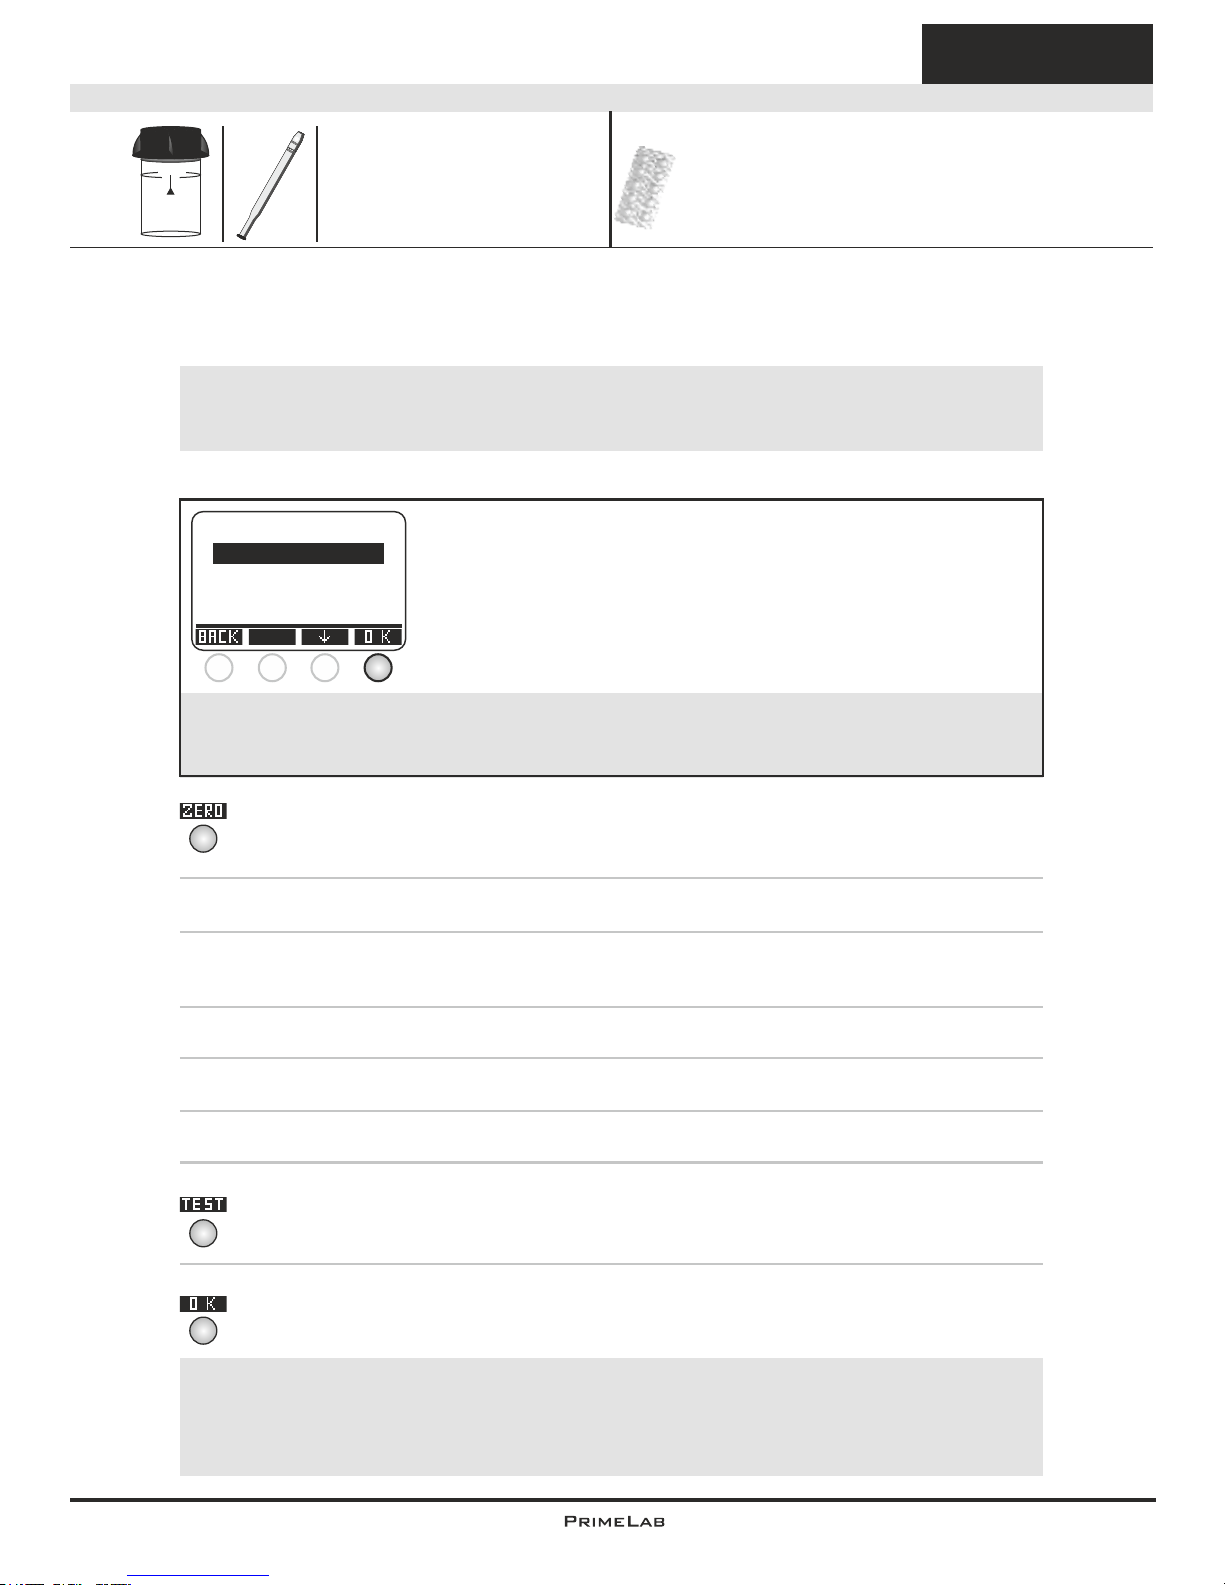
43
43
(14) Chlorine (KI) HR
Tablet
5 - 200 mg/l (Cl )
2
1) Fill 10ml of the sample water into a clean 24mm cuvette.
2) Replace the screw lid on the cuvette and insert it into the PrimeLab
sampling chamber. Align the arrow on the front of the cuvette. Press
ZERO.
3) Remove the cuvette from the chamber and unscrew the lid.
4) Add a "Chlorine HR (KI) Photometer" tablet to the water sample in the
cuvette.
5) Crush the tablet with a clean stirrer until this is completely dissolved.
6) Add a "Acidifying GP" tablet to the water sample in the same cuvette.
7) Crush the tablet with a clean stirrer until this is completely dissolved.
8) Replace the lid on the cuvette, swirl it carefully and insert it into the
sampling chamber of the PrimeLab. Align the arrow on the front of the
cuvette. Press TEST.
9) After the lapse of a 10 second countdown the determined result is
displayed. Press button 4 to save the test result together with date and
time on the device.
Chlorine HR (KI) Photometer (TbsPCLHR...)
Acidifying GP (TbsHAFG...)
10 ml
Name on device: 14-Chlorine-HR-tab
24 mm
4
4
4
The individual steps of the measurement procedure are shown on the display.
Use button 3 (arrow down) to scroll through the steps.
Use button 4 to skip the notes.
!
Measurement procedure:
The steps up to the selection of the parameter value to be determined are the same for all
procedures and described on page "TEST-5". Please observe the important notes for
accurate measurements on pages "TEST-8" and "TEST-9".
One-Time-Zero:
Measure new ZERO
Use last ZERO
For the sake of precision select "Use last ZERO" only
if the stored ZERO value is used with the
same cuvette and the same water sample for the test!
!
If after switching on the device you have already performed the
ZERO (baseline) adjustment for the same type, the following
message is displayed:
-> Measure new ZERO = continue with step 2)
-> Use last ZERO = continue with step 4)
1 2 3 4
!
Possible messages in the line below the measurement value:
"low! / high! / good!":
Assessment of the measurement value relative to the ideal range defined by you.
"Overrange! / underrange!":
Measurement value for this parameter is outside the value range of this method.
Continued...
Page 77

44
44
Tablet
Continued...
Note(s)
-> In this procedure all oxidizing substances contained in the test liquid will be
detected.
(14) Chlorine (KI) HR
5 - 200 mg/l (Cl )
2
Name on device: 14-Chlorine-HR-tab
Page 78
45
45
1) Fill 10ml of the sample water into a clean 24mm cuvette.
2) Replace the screw lid on the cuvette and insert it into the PrimeLab
sampling chamber. Align the arrow on the front of the cuvette. Press
ZERO.
3) Remove the cuvette from the chamber and unscrew the lid.
4) Add 3 drops "PL Chlorine HR 1" and 3 drops "PL Chlorine HR 2" liquid
reagent to the water sample in the cuvette.
5) Replace the lid on the cuvette, swirl it carefully and insert it into the
sampling chamber of the PrimeLab. Align the arrow on the front of the
cuvette. Press TEST.
6) The determined result is immediately displayed. Press the "OK" button
to save the result together with date and time.
4
4
4
Liquid
PL Chlorine HR 1 (PL65ClHR1)
PL Chlorine HR 2 (PL65ClHR2)
(15) Chlorine (KI) HR
0 - 200 mg/l (Cl )
2
Name on device: 15-Chlorine-HR-liq
10 ml
24 mm
The individual steps of the measurement procedure are shown on the display.
Use button 3 (arrow down) to scroll through the steps.
Use button 4 to skip the notes.
!
Measurement procedure:
The steps up to the selection of the parameter value to be determined are the same for all
procedures and described on page "TEST-5". Please observe the important notes for
accurate measurements on pages "TEST-8" and "TEST-9".
One-Time-Zero:
Measure new ZERO
Use last ZERO
For the sake of precision select "Use last ZERO" only
if the stored ZERO value is used with the
same cuvette and the same water sample for the test!
!
If after switching on the device you have already performed the
ZERO (baseline) adjustment for the same type, the following
message is displayed:
-> Measure new ZERO = continue with step 2)
-> Use last ZERO = continue with step 4)
1 2 3 4
!
Possible messages in the line below the measurement value:
"low! / high! / good!":
Assessment of the measurement value relative to the ideal range defined by you.
"Overrange! / underrange!":
Measurement value for this parameter is outside the value range of this method.
Note(s)
-> In this procedure all oxidizing substances contained in the test liquid will be
detected.
-> Liquid reagents should be stored below 10°C and above 5°C and in securely
closed bottles.
Page 79
46
46
(122) Chlorine MR (free/combined/total)
Tablet
0.00 - 10.00 mg/l (Cl )
2
1) Fill 10ml of the sample water into a clean 24mm cuvette.
2) Replace the screw lid on the cuvette and insert it into the PrimeLab
sampling chamber. Align the arrow on the front of the cuvette. Press
ZERO.
3) Remove the cuvette from the chamber and unscrew the lid.
4) Empty the cuvette except for a few drops. Add a "DPD N° 1 MR
Photometer" tablet to the sample in the cuvette.
5) Crush the tablet with a clean stirrer until it is completely dissolved. Fill
the cuvette with the sample water up to the 10ml level.
6) Replace the lid on the cuvette, swirl it carefully and insert it into the
sampling chamber of the PrimeLab. Align the arrow on the front of the
cuvette. Press TEST.
7) After the lapse of a 10 second countdown the determined result for "fCl"
(free chlorine) is displayed. Press button 4 to save the test result together
with date and time on the device.
Continued...
DPD N° 1 MR Photometer (TbsPD1MR...)
DPD N° 3 MR Photometer (TbsPD3MR...)
10 ml
24 mm
4
4
4
Name on device: 122-ChlorineMR-tab
The individual steps of the measurement procedure are shown on the display.
Use button 3 (arrow down) to scroll through the steps.
Use button 4 to skip the notes.
!
Measurement procedure:
The steps up to the selection of the parameter value to be determined are the same for all
procedures and described on page "TEST-5". Please observe the important notes for
accurate measurements on pages "TEST-8" and "TEST-9".
One-Time-Zero:
Measure new ZERO
Use last ZERO
For the sake of precision select "Use last ZERO" only
if the stored ZERO value is used with the
same cuvette and the same water sample for the test!
!
If after switching on the device you have already performed the
ZERO (baseline) adjustment for the same type, the following
message is displayed:
-> Measure new ZERO = continue with step 2)
-> Use last ZERO = continue with step 4)
1 2 3 4
!
Possible messages in the line below the measurement value:
"low! / high! / good!":
Assessment of the measurement value relative to the ideal range defined by you.
"Overrange! / underrange!":
Measurement value for this parameter is outside the value range of this method.
Page 80
47
47
Continued...
8) Remove the lid again and add a "DPD N° 3 MR Photometer" tablet into
the same sample you have just used for determining "free chlorine".
9) Crush the tablet with a clean stirrer until it has completely dissolved.
10) Replace the lid on the cuvette, swirl it carefully and insert it into the
sampling chamber of the PrimeLab. Align the arrow on the front of the
cuvette.
Press TEST.
11) After the lapse of a 2 minute countdown the total result is displayed,
divided in
"fCl" = "free chlorine“
"cCl" = "combined chlorine“
"tCl" = "total chlorine".
Scroll through the results using the buttons "arrow up" and "arrow down".
Press button 4 to save the result.
After pressing the button 4 (OK) the measurement is continued to determine the
total chlorine (tCl) and later also bonded chlorine (cCl). If this is not required the
measurement can be termianted by pressing "HOME". IN this case only the value
for free chlorine (fCl) is stored.
!
2
3
4
4
!
Possible messages in the line below the measurement value:
"low! / high! / good!":
Assessment of the measurement value relative to the ideal range defined by you.
"Overrange! / underrange!":
Measurement value for this parameter is outside the value range of this method.
Continued...
(122) Chlorine MR (free/combined/total)
Tablet
0.00 - 10.00 mg/l (Cl )
2
Name on device: 122-ChlorineMR-tab
Page 81
48
48
Note(s)
-> Water samples with Chlorine level > 20 mg/l lead to incorrect results
because the counter bleaches.
-> If the measuring water contains further reducing chemicals (e.g. active
oxygen, bromine etc.) this will also be detected and is part of the result.
-> When preparing the measurement procedure it is important to avoid any
chlorine escaping, which can happen during pipetting and shaking the
sample. The measurement should be performed directly after sampling.
-> It is important that the measurement devices to be used have not been
cleaned with household detergent, as this could greatly reduce the
measurement. To prevent any contamination the cuvette, the cuvette lid and
the stirrer should be stored in a 0.1 g/l sodium hypochlorite solution for one
hour and then thoroughly rinse with distilled water.
-> The DPD reagent used in this procedure buffers the pH value of the sample
water in the range between 6.2 and 6.5 pH. If your sample water is very
alkaline or acidic this must be adjusted to a pH range between 6 and 7 by
the addition of 0.5 mol/l sulphuric acid or resp. 1 mol/l caustic soda before
the DPD reagent is added.
-> Water samples with parameter levels ´higher´ than the defined range may
lead to errors with the DPD chemistry; resulting in an incorrect reading
(possibly showing none detected). For measurement of higher chlorine
values please select the respective matching procedure.
Continued...
(122) Chlorine MR (free/combined/total)
Tablet
0.00 - 10.00 mg/l (Cl )
2
Name on device: 122-ChlorineMR-tab
Page 82
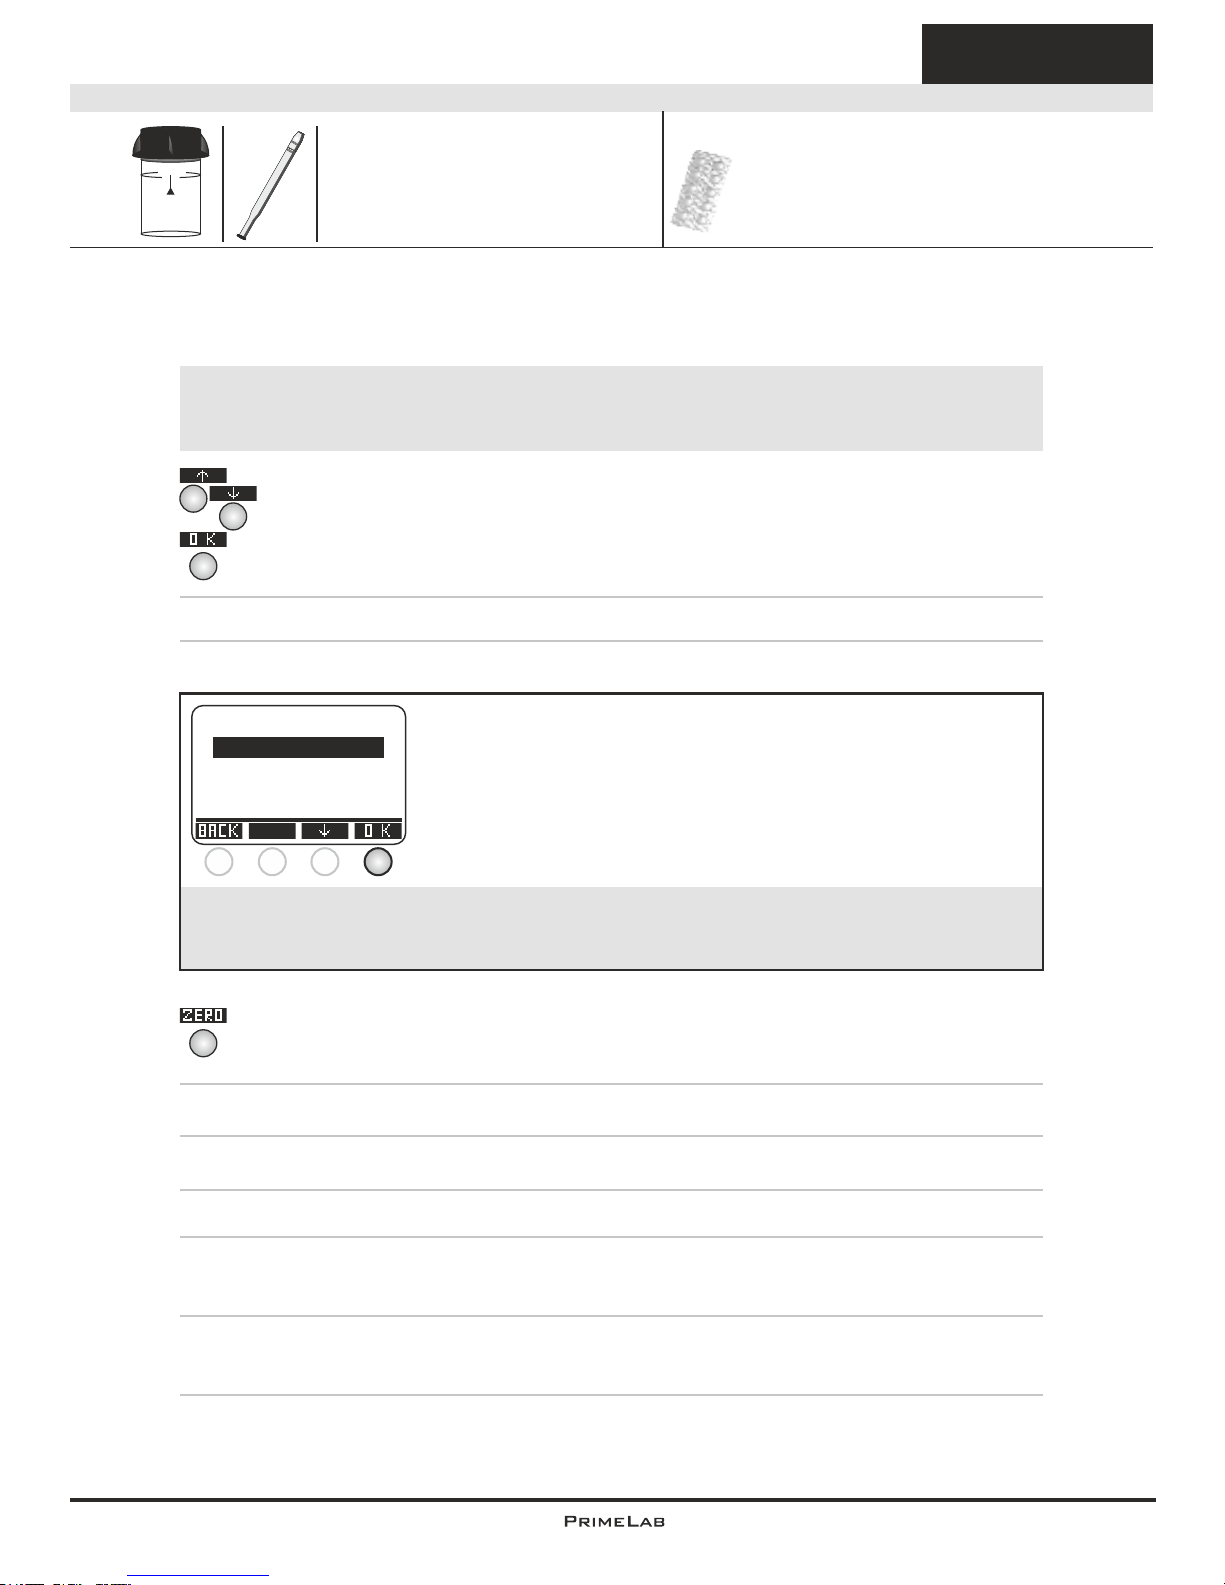
49
49
0 - 15 mg/l (ClO )
2
Name on device: 16-Chlorin-Dio-tab
DPD N° 1 Photometer (TbsPD1...)
Glycine (TbsHGC...)
(16) Chlorine Dioxide
Please select either:
A) "Chlorine dioxide with chlorine" or
B) "Chlorine dioxide without chlorine"
A) Measurement procedure for “Chlorine dioxide with chlorine”
1) Fill 10ml of the sample water into a clean 24mm cuvette.
2) Replace the screw lid on the cuvette and insert it into the PrimeLab
sampling chamber. Align the arrow on the front of the cuvette. Press
ZERO.
3) Remove the cuvette from the chamber and unscrew the lid.
4) Add a "Glycine" tablet to the water sample in the cuvette.
5) Crush the tablet with a clean stirrer until this is completely dissolved.
6) Replace the lid on the cuvette and swirl it carefully to mix the liquids
well.
7) Add a "DPD N° 1 Photometer“ tablet in the second empty and clean
cuvette.
Continued...
4
Tablet
10 ml
2
3
4
The individual steps of the measurement procedure are shown on the display.
Use button 3 (arrow down) to scroll through the steps.
Use button 4 to skip the notes.
!
Measurement procedure:
The steps up to the selection of the parameter value to be determined are the same for all
procedures and described on page "TEST-5". Please observe the important notes for
accurate measurements on pages "TEST-8" and "TEST-9".
One-Time-Zero:
Measure new ZERO
Use last ZERO
For the sake of precision select "Use last ZERO" only
if the stored ZERO value is used with the
same cuvette and the same water sample for the test!
!
If after switching on the device you have already performed the
ZERO (baseline) adjustment for the same type, the following
message is displayed:
-> Measure new ZERO = continue with step 2)
-> Use last ZERO = continue with step 4)
1 2 3 4
Page 83
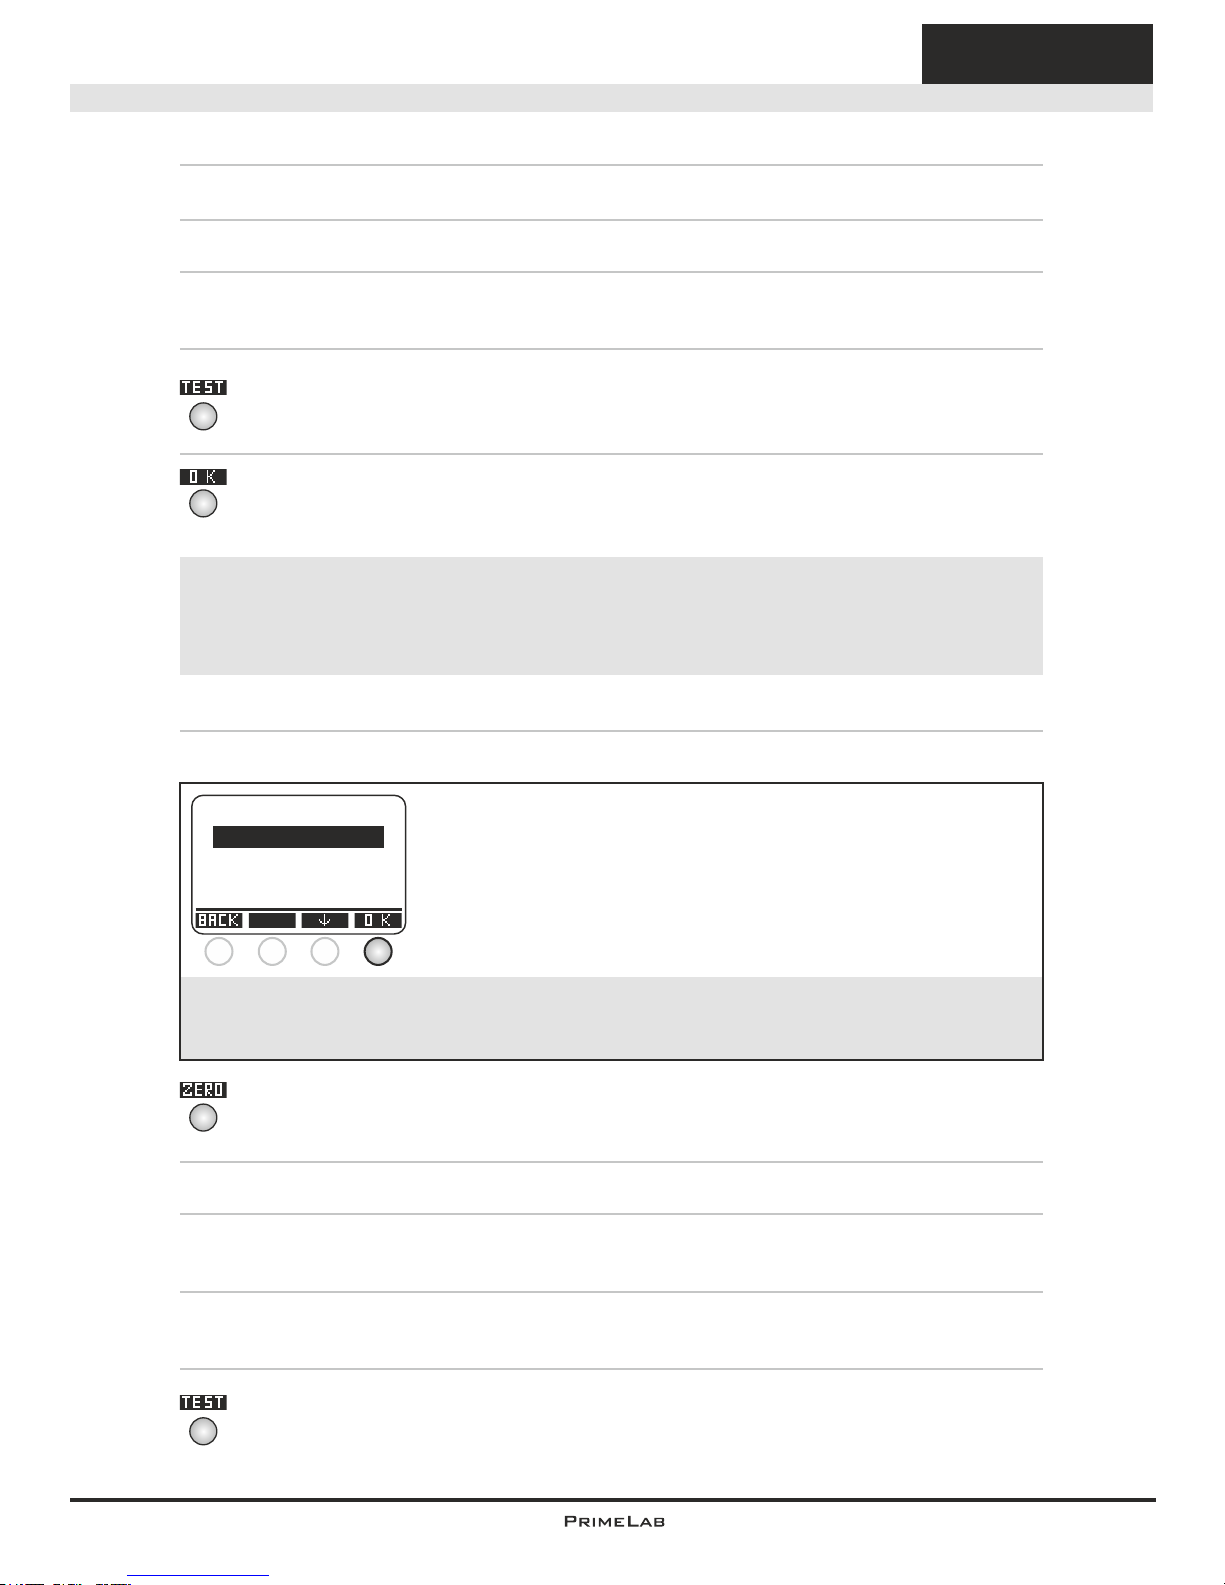
50
50
8) Crush the tablet with a clean stirrer to a fine powdery mass.
9) Fill in the prepared water from the first cuvette.
10) Replace the lid on the cuvette and swirl it carefully to mix the solution
well.
11) Replace the cuvette in the sampling chamber in the PrimeLab. Make
sure the arrow on the front of the cuvette is aligned. Press the TEST
button.
12) After the lapse of a 10 second countdown the determined result is
displayed. Press button 4 to save the test result together with date and
time on the device.
B) Measurement procedure for “Chlorine dioxide without chlorine”
1) Fill 10ml of the sample water into a clean 24mm cuvette.
2) Replace the screw lid on the cuvette and insert it into the PrimeLab
sampling chamber. Align the arrow on the front of the cuvette. Press
ZERO.
3) Remove the cuvette from the chamber and unscrew the lid.
4) Empty the cuvette except for a few drops. Add a "DPD N° 1
Photometer" tablet to the sample in the cuvette.
5) Crush the tablet with a clean stirrer until this is completely dissolved.
Fill the cuvette with the sample water up to the 10ml level.
6) Replace the lid on the cuvette, swirl it carefully and insert it into the
sampling chamber of the PrimeLab. Align the arrow on the front of the
cuvette. Press TEST.
Continued...
Tablet
4
4
4
Continued...
Name on device: 16-Chlorin-Dio-tab
!
Possible messages in the line below the measurement value:
"low! / high! / good!":
Assessment of the measurement value relative to the ideal range defined by you.
"Overrange! / underrange!":
Measurement value for this parameter is outside the value range of this method.
One-Time-Zero:
Measure new ZERO
Use last ZERO
For the sake of precision select "Use last ZERO" only
if the stored ZERO value is used with the
same cuvette and the same water sample for the test!
!
If after switching on the device you have already performed the
ZERO (baseline) adjustment for the same type, the following
message is displayed:
-> Measure new ZERO = continue with step 2)
-> Use last ZERO = continue with step 4)
1 2 3 4
(16) Chlorine Dioxide
4
0 - 15 mg/l (ClO )
2
Page 84
51
51
7) After the lapse of a 10 second countdown the determined result is
displayed. Press button 4 to save the test result together with date and
time on the device.
Continued...
Tablet
4
Note(s)
-> By selecting the procedure "Chlorine dioxide with chlorine" and adding the
Glycine tablet the chlorine content of the water is eliminated.
-> Otherwise observe the notes as under ID11 (chlorine tablet).
Name on device: 16-Chlorin-Dio-tab
!
Possible messages in the line below the measurement value:
"low! / high! / good!":
Assessment of the measurement value relative to the ideal range defined by you.
"Overrange! / underrange!":
Measurement value for this parameter is outside the value range of this method.
(16) Chlorine Dioxide
0 - 15 mg/l (ClO )
2
Page 85
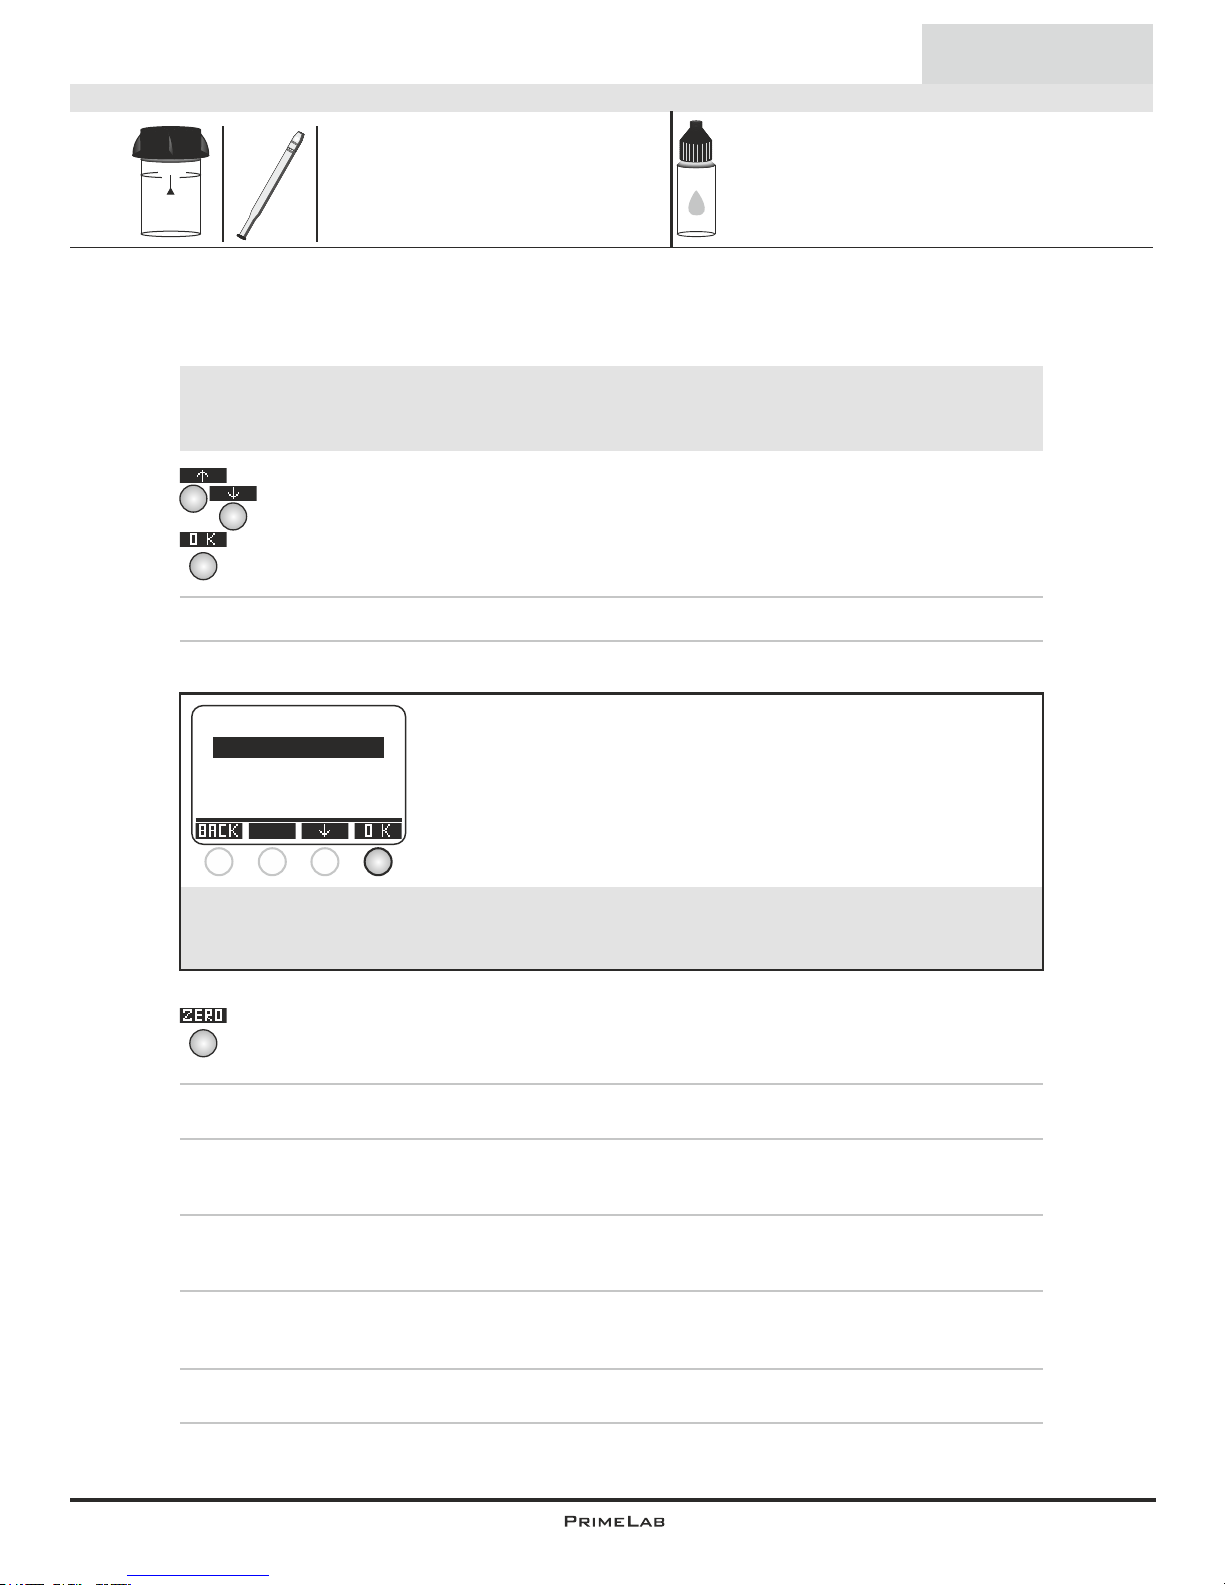
52
52
Name on device: 64-Chlorin-Dio-liq
(64) Chlorine Dioxide
Please select either:
A) "Chlorine dioxide with chlorine" or
B) "Chlorine dioxide without chlorine"
A) Measurement procedure for “Chlorine dioxide with chlorine”
1) Fill 10ml of the sample water into a clean 24mm cuvette.
2) Replace the screw lid on the cuvette and insert it into the PrimeLab
sampling chamber. Align the arrow on the front of the cuvette. Press
ZERO.
3) Remove the cuvette from the chamber and unscrew the lid.
4) Add 3 drops "PL DPD Glycine" liquid reagent to the water sample in the
cuvette.
5) Replace the lid on the cuvette and swirl it carefully to mix the liquids
well.
6) Add three drops of "PL DPD 1 A" and three drops of "PL DPD 1 B" into
a second empty and clean cuvette.
7) Fill in the prepared water from the first cuvette.
Continued...
4
10 ml
2
3
4
Liquid
PL DPD 1 A (PL30DPD1A)
PL DPD 1 B (PL30DPD1B)
PL DPD Glycine (PL30DPDGlycine)
The individual steps of the measurement procedure are shown on the display.
Use button 3 (arrow down) to scroll through the steps.
Use button 4 to skip the notes.
!
Measurement procedure:
The steps up to the selection of the parameter value to be determined are the same for all
procedures and described on page "TEST-5". Please observe the important notes for
accurate measurements on pages "TEST-8" and "TEST-9".
One-Time-Zero:
Measure new ZERO
Use last ZERO
For the sake of precision select "Use last ZERO" only
if the stored ZERO value is used with the
same cuvette and the same water sample for the test!
!
If after switching on the device you have already performed the
ZERO (baseline) adjustment for the same type, the following
message is displayed:
-> Measure new ZERO = continue with step 2)
-> Use last ZERO = continue with step 4)
1 2 3 4
0 - 15 mg/l (ClO )
2
Page 86
53
53
Liquid
Continued...
8) Replace the lid on the cuvette, swirl it carefully and insert it into the
sampling chamber of the PrimeLab. Align the arrow on the front of the
cuvette. Press TEST.
9) The determined result is immediately displayed. Press the "OK" button
to save the result together with date and time.
B) Measurement procedure for “Chlorine dioxide without chlorine”
1) Fill 10ml of the sample water into a clean 24mm cuvette.
2) Replace the screw lid on the cuvette and insert it into the PrimeLab
sampling chamber. Align the arrow on the front of the cuvette. Press
ZERO.
3) Remove the cuvette from the chamber and unscrew the lid.
4) Empty the cuvette except for a few drops. Then add 3 drops of "PL
DPD 1 A" and 3 drops of "PL DPD 1 B" to the remaining test liquid in the
cuvette.
5) Fill sample water into the same cuvette up to the 10ml level.
6) Replace the lid on the cuvette, swirl it carefully and insert it into the
sampling chamber of the PrimeLab. Align the arrow on the front of the
cuvette. Press TEST.
7) The determined result is immediately displayed. Press the "OK" button
to save the result together with date and time.
4
4
4
4
4
Name on device: 64-Chlorin-Dio-liq
!
Possible messages in the line below the measurement value:
"low! / high! / good!":
Assessment of the measurement value relative to the ideal range defined by you.
"Overrange! / underrange!":
Measurement value for this parameter is outside the value range of this method.
One-Time-Zero:
Measure new ZERO
Use last ZERO
For the sake of precision select "Use last ZERO" only
if the stored ZERO value is used with the
same cuvette and the same water sample for the test!
!
If after switching on the device you have already performed the
ZERO (baseline) adjustment for the same type, the following
message is displayed:
-> Measure new ZERO = continue with step 2)
-> Use last ZERO = continue with step 4)
1 2 3 4
!
Possible messages in the line below the measurement value:
"low! / high! / good!":
Assessment of the measurement value relative to the ideal range defined by you.
"Overrange! / underrange!":
Measurement value for this parameter is outside the value range of this method.
(64) Chlorine Dioxide
0 - 15 mg/l (ClO )
2
Continued...
Page 87

54
54
Liquid
Continued...
Note(s)
-> DPD 1 A and DPD 1 B reagent MUST be added to the vial BEFORE water
sample is added to avoid mis-readings!
-> Observe the notes as under ID11 (chlorine tablet).
-> Liquid reagents should be stored below 10°C and above 5°C and in securely
closed bottles.
Name on device: 64-Chlorin-Dio-liq
(64) Chlorine Dioxide
0 - 15 mg/l (ClO )
2
Page 88
55
55
0.00 - 5.00 mg/l (ClO )
2
Name on device: 130-Chl-Diox-pp
1) Fill 10ml of the sample water into a clean 24mm cuvette.
2) Replace the screw lid on the cuvette and insert it into the PrimeLab
sampling chamber. Align the arrow on the front of the cuvette. Press
ZERO.
3) Remove the cuvette from the chamber and unscrew the lid.
4) Add 4 drops "PL DPD Glycine" liquid reagent to the test liquid in the
cuvette.
5) Replace the lid on the cuvette and swivel it carefully to mix the solution
well.
6) Add the content of a "DPD Free Chlorine" powder pillow to the sample
and swirl it for approximately 20 seconds, until the powder has dissolved.
7) Replace the lid on the cuvette, swivel it carefully and insert it in the
sampling chamber of the PrimeLab. Align the arrow on the front of the
cuvette. Press TEST.
8) After the lapse of a 2 minute countdown the determined result is
displayed. Press button 4 to save the test result together with date and
time on the device.
(130) Chlorine Dioxide
4
4
4
10 ml
24 mm
PL DPD Glycine (PL30DPDGlycine)
DPD Free Chlorine (PP) (ppDPDfreeCl)
The individual steps of the measurement procedure are shown on the display.
Use button 3 (arrow down) to scroll through the steps.
Use button 4 to skip the notes.
!
Measurement procedure:
The steps up to the selection of the parameter value to be determined are the same for all
procedures and described on page "TEST-5". Please observe the important notes for
accurate measurements on pages "TEST-8" and "TEST-9".
One-Time-Zero:
Measure new ZERO
Use last ZERO
For the sake of precision select "Use last ZERO" only
if the stored ZERO value is used with the
same cuvette and the same water sample for the test!
!
If after switching on the device you have already performed the
ZERO (baseline) adjustment for the same type, the following
message is displayed:
-> Measure new ZERO = continue with step 2)
-> Use last ZERO = continue with step 4)
1 2 3 4
!
Possible messages in the line below the measurement value:
"low! / high! / good!":
Assessment of the measurement value relative to the ideal range defined by you.
"Overrange! / underrange!":
Measurement value for this parameter is outside the value range of this method.
Continued...
Liquid
+Powder
Powder
Pilow
Page 89
56
56
Continued...
Note(s)
-> Alkalinity of more than 250 mg/l CaCO affect the measurement and the
3
color development. Neutralize to pH 6-7 with 1 N Hydrochloric Acid before
performing the test.
-> Acidity of more than 150 mg/l CaCO affect the measurement and the color
3
development. Neutralize to pH 6-7 with 1 N Sodium Hydroxide before
performing the test.
-> Bromine at all levels, Ozone (if >1.5 mg/l) and chlorine (if >6 mg/l) as well as
iodine will interfere with the reagent reaction and will be part of the displayed
value. Peroxides may interfere as well.
-> Organic chloramines may interfere. Monochloramines lead to higher
readings (~0.1 mg/l at 3 mg/l monochloramines after 1 minute).
-> If oxidized manganese or oxidized chromium is present in the sample,
sample needs to be pre-treated.
-> Hardness levels above 1000 mg/l CaCO affect the measurement
3
-> Extreme pH-values of the sample need to be corrected to pH 6-7 before
measuring the sample.
0.00 - 5.00 mg/l (ClO )
2
Name on device: 130-Chl-Diox-pp
(130) Chlorine Dioxide
Liquid
+Powder
Page 90
57
57
0 - 8 mg/l (Cl )
2
Name on device: 106-Chlorite-liq
(106) Chlorite
1) Fill 10ml of the sample water into a clean 24mm cuvette.
2) Replace the screw lid on the cuvette and insert it into the PrimeLab
sampling chamber. Align the arrow on the front of the cuvette. Press
ZERO.
3) Remove the cuvette from the chamber and unscrew the lid.
4) Add 3 drops "PL DPD Glycine" liquid reagent to the test liquid in the
cuvette.
5) Replace the lid on the cuvette and swivel this back and forth 5 times.
6) Add 3 drops of "PL DPD 1 A" and 3 drops of "PL DPD 1 B" into a
second empty and clean cuvette.
7) Fill in the prepared water from the first cuvette.
8) Replace the lid on the cuvette, swivel it carefully and insert it in the
sampling chamber of the PrimeLab. Align the arrow on the front of the
cuvette. Press TEST.
9) Remove the vial from the PrimeLab and set it aside. It is not required
for this test.
10) Add 3 drops of "PL DPD 1 A" and 3 drops of "PL DPD 1 B" into a
second empty and clean cuvette.
Continued...
4
10 ml
Liquid
The individual steps of the measurement procedure are shown on the display.
Use button 3 (arrow down) to scroll through the steps.
Use button 4 to skip the notes.
!
Measurement procedure:
The steps up to the selection of the parameter value to be determined are the same for all
procedures and described on page "TEST-5". Please observe the important notes for
accurate measurements on pages "TEST-8" and "TEST-9".
One-Time-Zero:
Measure new ZERO
Use last ZERO
For the sake of precision select "Use last ZERO" only
if the stored ZERO value is used with the
same cuvette and the same water sample for the test!
!
If after switching on the device you have already performed the
ZERO (baseline) adjustment for the same type, the following
message is displayed:
-> Measure new ZERO = continue with step 2)
-> Use last ZERO = continue with step 4)
1 2 3 4
4
PL DPD Glycine (PL30DPDGlycine)
PL DPD 1 A (PL30DPD1A)
PL DPD 1 B (PL30DPD1B)
PL DPD 3 C (PL30DPD1A)
PL DPD Acidifying (PL30DPDAcidif)
PL DPD Neutralising (PL30DPDNeutr)
Page 91
58
58
Continued...
11) Fill sample water into the same cuvette up to the 10ml level.
12) Add 3 drops "PL DPD 3 C" liquid reagent to the test liquid in the
cuvette.
13) Replace the lid on the cuvette, swivel it carefully and insert it in the
sampling chamber of the PrimeLab. Align the arrow on the front of the
cuvette. Press TEST.
14) Wait for the lapse of a 2 minute countdown.
15) Remove the cuvette from the chamber and unscrew the lid.
16) Add 3 drops "PL DPD Acidifying" liquid reagent to the test liquid in the
cuvette.
17) Replace the lid on the cuvette, swivel it carefully and insert it in the
sampling chamber of the PrimeLab. Align the arrow on the front of the
cuvette. Press TEST.
18) Wait for the lapse of a 2 minute countdown.
19) Remove the cuvette from the chamber and unscrew the lid.
20) Add 3 drops "PL DPD Neutralising" liquid reagent to the test liquid in
the cuvette.
21) Replace the lid on the cuvette, swivel it carefully and insert it in the
sampling chamber of the PrimeLab. Align the arrow on the front of the
cuvette. Press TEST.
22) The determined result is immediately displayed. Press the "OK" button
to save the result together with date and time.
4
!
Possible messages in the line below the measurement value:
"low! / high! / good!":
Assessment of the measurement value relative to the ideal range defined by you.
"Overrange! / Underrange!":
Measurement value for this parameter is outside the value range of this method.
Note(s)
-> DPD 1 A and DPD 1 B reagent MUST be added to the vial BEFORE
water sample is added to avoid mis-readings!
-> The range of the side measurements performed during the Chlorite tests
may be up to 8 mg/l whilst it is rather unlikely that the range of Chlorite can
be tested up to 8 mg/l.
4
4
0 - 8 mg/l (Cl )
2
Name on device: 106-Chlorite-liq
(106) Chlorite
Liquid
Page 92
59
59
(94) Chromuim (hexavalent)
0 - 2.2 mg/l
6+
(Cr )
Chromium N° 1 (TbsHChro1...)
Chromium N° 2 (TbsHChro2...)
10 ml
24 mm
4
4
4
1) Fill 10ml of the sample water into a clean 24mm cuvette.
2) Replace the screw lid on the cuvette and insert it into the PrimeLab
sampling chamber. Align the arrow on the front of the cuvette. Press
ZERO.
3) Remove the cuvette from the chamber and unscrew the lid.
4) Add one „Chromium N° 1" tablet to the water sample in the cuvette.
5) Crush the tablet with a clean stirrer until it is completely dissolved.
6) Add one "Chromium N° 2" tablet to the same cuvette.
7) Crush the tablet with a clean stirrer until it is completely dissolved.
8) Replace the lid on the cuvette, swivel it carefully and insert it in the
sampling chamber of the PrimeLab. Align the arrow on the front of the
cuvette. Press TEST.
9) After the lapse of a 10 minute countdown the determined result is
displayed. Press button 4 to save the test result together with date and
time on the device.
Tablet
Name on device: 94-chromium-tab
The individual steps of the measurement procedure are shown on the display.
Use button 3 (arrow down) to scroll through the steps.
Use button 4 to skip the notes.
!
Measurement procedure:
The steps up to the selection of the parameter value to be determined are the same for all
procedures and described on page "TEST-5". Please observe the important notes for
accurate measurements on pages "TEST-8" and "TEST-9".
One-Time-Zero:
Measure new ZERO
Use last ZERO
For the sake of precision select "Use last ZERO" only
if the stored ZERO value is used with the
same cuvette and the same water sample for the test!
!
If after switching on the device you have already performed the
ZERO (baseline) adjustment for the same type, the following
message is displayed:
-> Measure new ZERO = continue with step 2)
-> Use last ZERO = continue with step 4)
1 2 3 4
!
Possible messages in the line below the measurement value:
"low! / high! / good!":
Assessment of the measurement value relative to the ideal range defined by you.
"Overrange! / underrange!":
Measurement value for this parameter is outside the value range of this method.
Note
-> (*) Conversion to CrO
4
Page 93
60
60
1) Fill 10ml of the sample water into a clean 24mm cuvette.
2) Replace the screw lid on the cuvette and insert it into the PrimeLab
sampling chamber. Align the arrow on the front of the cuvette. Press
ZERO.
3) Remove the cuvette from the chamber and unscrew the lid.
4) Empty the cuvette except for a few drops.
5) Add 1 x 0.05ml (scoop) "PL Chromate 1" powder and 15 drops of
„PL Chromate 2" into the same cell.
6) Stir the mixture of powder and liquid reagent until all the powder has
dissolved.
7) Add precisely 10 ml sample water to the same cuvette.
8) Replace the lid on the cuvette, swivel it carefully and insert it in the
sampling chamber of the PrimeLab. Align the arrow on the front of the
cuvette. Press TEST.
9) After the lapse of a 5 minute countdown the determined result is
displayed. Press button 4 to save the test result together with date and
time on the device.
(103) Chromium (hexavalent)
4
4
10 ml
24 mm
PL Chromate 1 (PLpow40Chromate1)
PL Chromate 2 (PL65Chromate2)
0 - 1 mg/l
6+
(Cr )
Powder
4
Name on device: 103-Chromium-liq
Liquid
+Powder
The individual steps of the measurement procedure are shown on the display.
Use button 3 (arrow down) to scroll through the steps.
Use button 4 to skip the notes.
!
Measurement procedure:
The steps up to the selection of the parameter value to be determined are the same for all
procedures and described on page "TEST-5". Please observe the important notes for
accurate measurements on pages "TEST-8" and "TEST-9".
One-Time-Zero:
Measure new ZERO
Use last ZERO
For the sake of precision select "Use last ZERO" only
if the stored ZERO value is used with the
same cuvette and the same water sample for the test!
!
If after switching on the device you have already performed the
ZERO (baseline) adjustment for the same type, the following
message is displayed:
-> Measure new ZERO = continue with step 2)
-> Use last ZERO = continue with step 4)
1 2 3 4
!
Possible messages in the line below the measurement value:
"low! / high! / good!":
Assessment of the measurement value relative to the ideal range defined by you.
"Overrange! / underrange!":
Measurement value for this parameter is outside the value range of this method.
Note
-> (*) Conversion to CrO
4
Page 94
61
61
0 - 150 mg/l (O )
2
Name on device: 79-COD-LR-pre
(79) COD LR
16 mm cuvette
COD-79-LR
1) Prepare two cells (16mm) "COD-79-LR". Label one as zero cell.
2) Open the first cell (zero) and fill with 2 ml deionised water.
3) Open the second cell (sample) and fill with 2 ml of your sample water.
4) Cap both cells and shake to mix. CAUTION: Cells turn hot!
5) Put the cells in a preheated thermoreactor for 120 minutes at 150°C.
6) CAUTION: cells are hot! Remove the cells from the thermoreactor and
allow to cool to 60°C or less.
7) While warm invert cells several times to mix the contents well. Allow to
cool to room temperature.
8) Place the prepared vial adaptor into the device.
9) Place the zero cell and the light protection cover into the device and
then press ZERO.
10) Remove the cell from the device.
11) Place the sample cell and the light protection cover into the device.
Then press TEST.
4
Continued...
The individual steps of the measurement procedure are shown on the display.
Use button 3 (arrow down) to scroll through the steps.
Use button 4 to skip the notes.
!
Measurement procedure:
The steps up to the selection of the parameter value to be determined are the same for all
procedures and described on page "TEST-5". Please observe the important notes for
accurate measurements on pages "TEST-8" and "TEST-9".
One-Time-Zero:
Measure new ZERO
Use last ZERO
For the sake of precision select "Use last ZERO" only
if the stored ZERO value is used with the
same cuvette and the same water sample for the test!
!
If after switching on the device you have already performed the
ZERO (baseline) adjustment for the same type, the following
message is displayed:
-> Measure new ZERO = continue with step 9)
-> Use last ZERO = continue with step 11)
1 2 3 4
4
Page 95
62
62
0 - 150 mg/l (O )
2
(79) COD LR
12) The determined result is immediately displayed. Press the "OK"
button to save the result together with date and time.
Continued...
Note(s)
-> Suspended particles in the zero cell and / or the sample cell lead to wrong
test results. Make sure that any existing suspended solids have settled to the
bottom of the cell and are not disturbed by the insertion into the PrimeLab.
-> Both cells used for the measurement (zero / sample) must be from the same
production batch. The cell used for ZERO can be kept for other tests (of the
same batch) but must be stored in the dark.
-> For COD content above 150 mg/l, the use of another method (COD MR /
COD HR) is recommended to achieve accurate results.
-> Never insert hot cells into the PrimeLab measuring chamber!
-> This method is not suitable for water samples with Chloride values higher
than 1,000 mg/l.
4
!
Possible messages in the line below the measurement value:
"low! / high! / good!":
Assessment of the measurement value relative to the ideal range defined by you.
"Overrange! / underrange!":
Measurement value for this parameter is outside the value range of this method.
Name on device: 79-COD-LR-pre
16 mm cuvette
Page 96
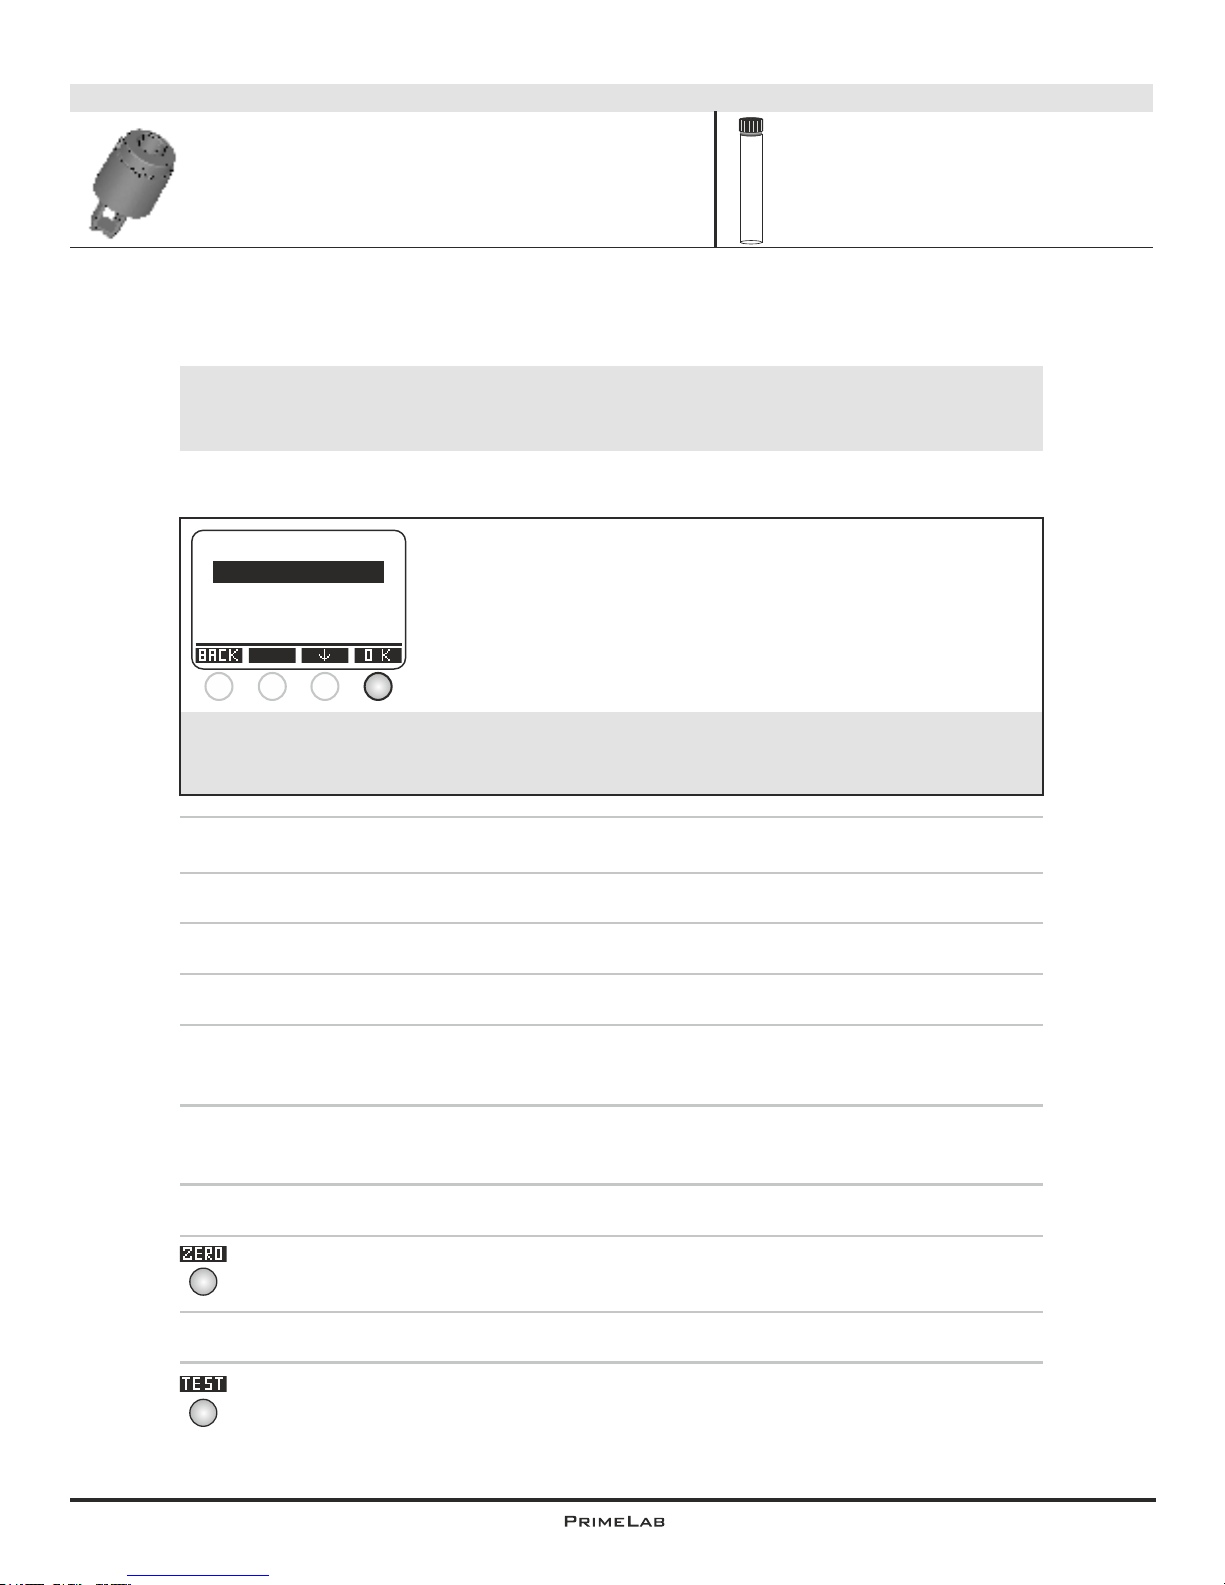
63
63
0 - 1500 mg/l (O )
2
Name on device: 80-COD-MR-pre
(80) COD MR
COD-80-MR
1) Prepare two cells (16mm) "COD-80-MR". Label one as zero cell.
2) Open the first cell (zero) and fill with 2 ml deionised water.
3) Open the second cell (sample) and fill with 2 ml of your sample water.
4) Cap both cells and shake to mix. CAUTION: Cells turn hot!
5) Put the cells in a preheated thermoreactor for 120 minutes at 150°C.
6) CAUTION: cells are hot! Remove the cells from the thermoreactor and
allow to cool to 60°C or less.
7) While warm invert cells several times to mix the contents well. Allow to
cool to room temperature.
8) Place the prepared vial adaptor into the device.
9) Place the zero cell and the light protection cover into the device and
then press ZERO.
10) Remove the cell from the device.
11) Place the sample cell and the light protection cover into the device.
Then press TEST.
4
Continued...
The individual steps of the measurement procedure are shown on the display.
Use button 3 (arrow down) to scroll through the steps.
Use button 4 to skip the notes.
!
Measurement procedure:
The steps up to the selection of the parameter value to be determined are the same for all
procedures and described on page "TEST-5". Please observe the important notes for
accurate measurements on pages "TEST-8" and "TEST-9".
One-Time-Zero:
Measure new ZERO
Use last ZERO
For the sake of precision select "Use last ZERO" only
if the stored ZERO value is used with the
same cuvette and the same water sample for the test!
!
If after switching on the device you have already performed the
ZERO (baseline) adjustment for the same type, the following
message is displayed:
-> Measure new ZERO = continue with step 9)
-> Use last ZERO = continue with step 11)
1 2 3 4
4
16 mm cuvette
Page 97
64
64
0 - 1500 mg/l (O )
2
(80) COD MR
12) The determined result is immediately displayed. Press the "OK"
button to save the result together with date and time.
Continued...
Note(s)
-> Suspended particles in the zero cell and / or the sample cell lead to wrong
test results. Make sure that any existing suspended solids have settled to the
bottom of the cell and are not disturbed by the insertion into the PrimeLab.
-> Both cells used for the measurement (zero / sample) must be from the same
production batch. The cell used for ZERO can be kept for other tests (of the
same batch) but must be stored in the dark.
-> For COD content above 1500 mg/l, the use of another method (COD HR) is
recommended to achieve accurate results.
-> Never insert hot cells into the PrimeLab measuring chamber!
-> This method is not suitable for water samples with Chloride values higher
than 1,000 mg/l.
4
!
Possible messages in the line below the measurement value:
"low! / high! / good!":
Assessment of the measurement value relative to the ideal range defined by you.
"Overrange! / underrange!":
Measurement value for this parameter is outside the value range of this method.
Name on device: 80-COD-MR-pre
16 mm cuvette
Page 98
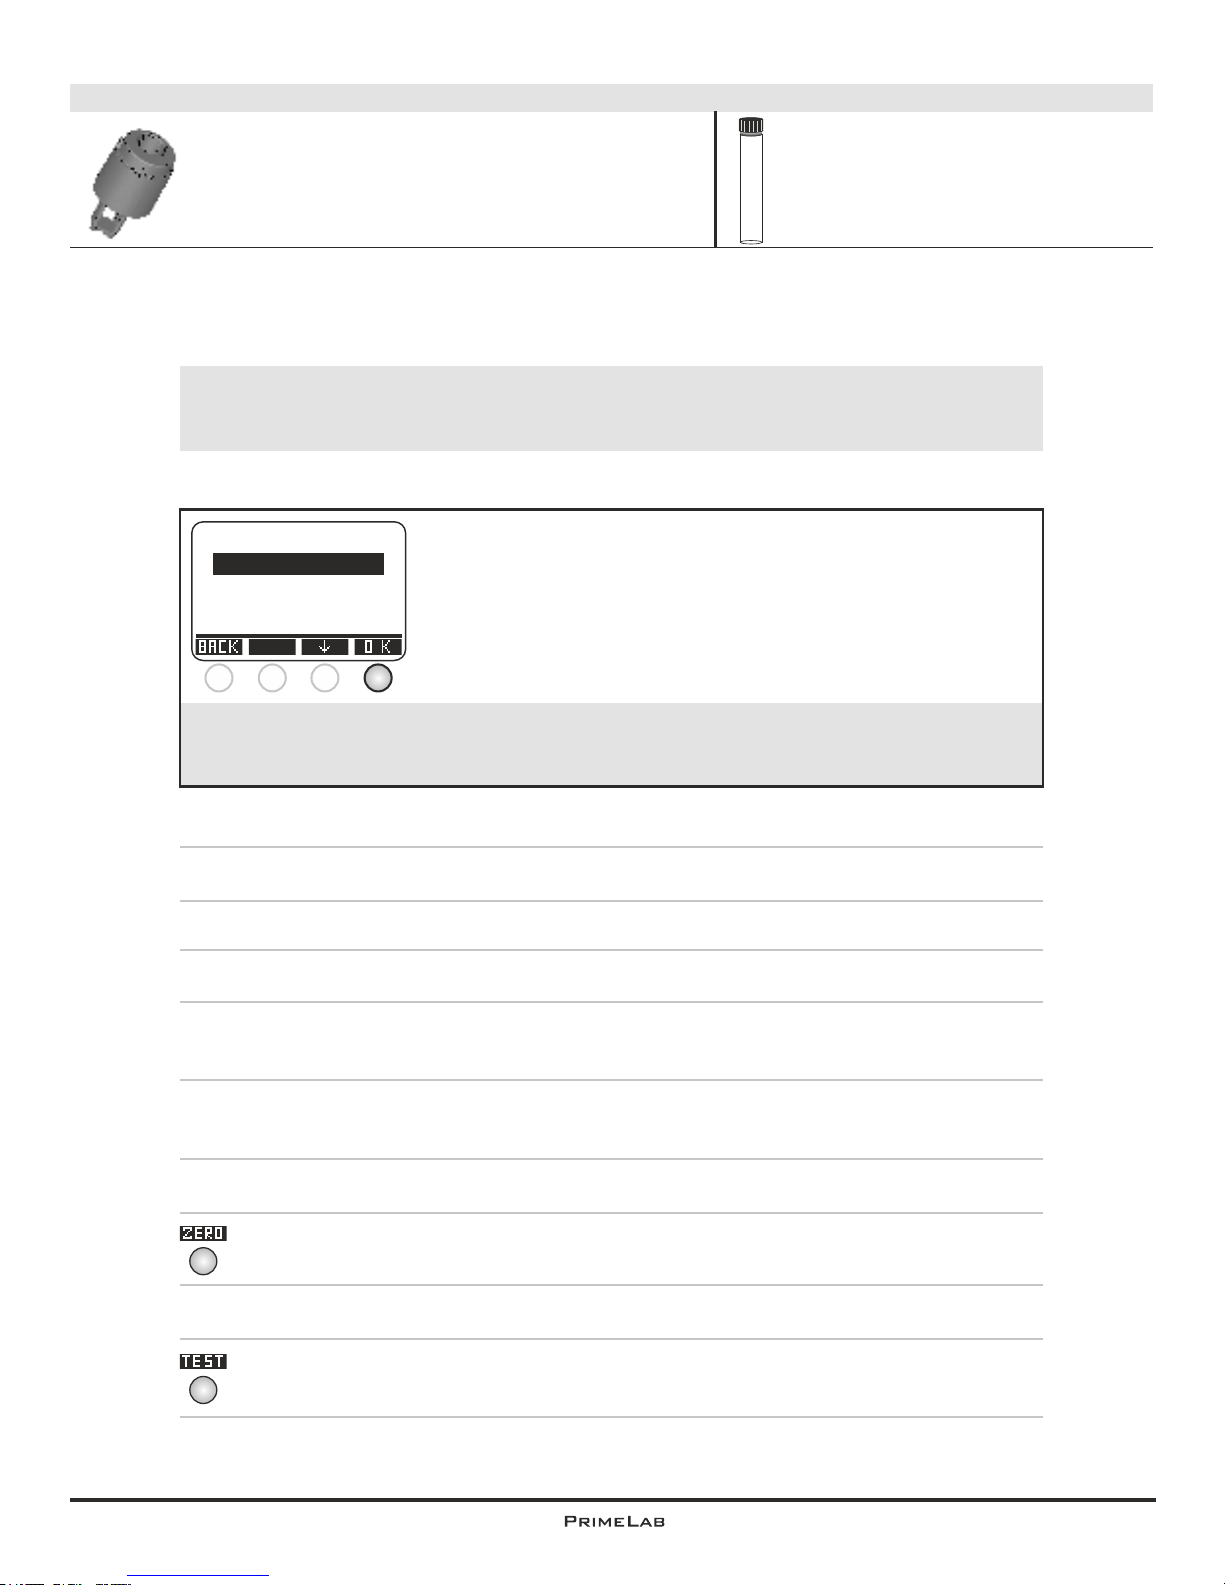
65
65
0 - 15000 mg/l (O )
2
Name on device: 17-COD-HR-pre
(17) COD HR
COD-17-HR
1) Prepare two cells (16mm) "COD-17-HR". Label one as zero cell.
2) Open the first cell (zero) and fill with 0.2 ml deionised water.
3) Open the second cell (sample) and fill with 0.2 ml of your sample water.
4) Cap both cells and shake to mix. CAUTION: Cells turn hot!
5) Put the cells in a preheated thermoreactor for 120 minutes at 150°C.
6) CAUTION: cells are hot! Remove the cells from the thermoreactor and
allow to cool to 60°C or less.
7) While warm invert cells several times to mix the contents well. Allow to
cool to room temperature.
8) Place the prepared vial adaptor into the device.
9) Place the zero cell and the light protection cover into the device and
then press ZERO.
10) Remove the cell from the device.
11) Place the sample cell and the light protection cover into the device.
Then press TEST.
4
Continued...
The individual steps of the measurement procedure are shown on the display.
Use button 3 (arrow down) to scroll through the steps.
Use button 4 to skip the notes.
!
Measurement procedure:
The steps up to the selection of the parameter value to be determined are the same for all
procedures and described on page "TEST-5". Please observe the important notes for
accurate measurements on pages "TEST-8" and "TEST-9".
One-Time-Zero:
Measure new ZERO
Use last ZERO
For the sake of precision select "Use last ZERO" only
if the stored ZERO value is used with the
same cuvette and the same water sample for the test!
!
If after switching on the device you have already performed the
ZERO (baseline) adjustment for the same type, the following
message is displayed:
-> Measure new ZERO = continue with step 9)
-> Use last ZERO = continue with step 11)
1 2 3 4
4
16 mm cuvette
Page 99
66
66
0 - 15000 mg/l (O )
2
(17) COD HR
12) The determined result is immediately displayed. Press the "OK"
button to save the result together with date and time.
Continued...
Note(s)
-> Suspended particles in the zero cell and / or the sample cell lead to wrong
test results. Make sure that any existing suspended solids have settled to the
bottom of the cell and are not disturbed by the insertion into the PrimeLab.
-> Both cells used for the measurement (zero / sample) must be from the same
production batch. The cell used for ZERO can be kept for other tests (of the
same batch) but must be stored in the dark.
-> For COD content 10,000 mg/l, the use of another method (COD LR / COD
MR) is recommended to achieve accurate results
-> Never insert hot cells into the PrimeLab measuring chamber!
-> This method is not suitable for water samples with Chloride values higher
than 10,000 mg/l.
4
Name on device: 17-COD-HR-pre
!
Possible messages in the line below the measurement value:
"low! / high! / good!":
Assessment of the measurement value relative to the ideal range defined by you.
"Overrange! / underrange!":
Measurement value for this parameter is outside the value range of this method.
16 mm cuvette
Page 100
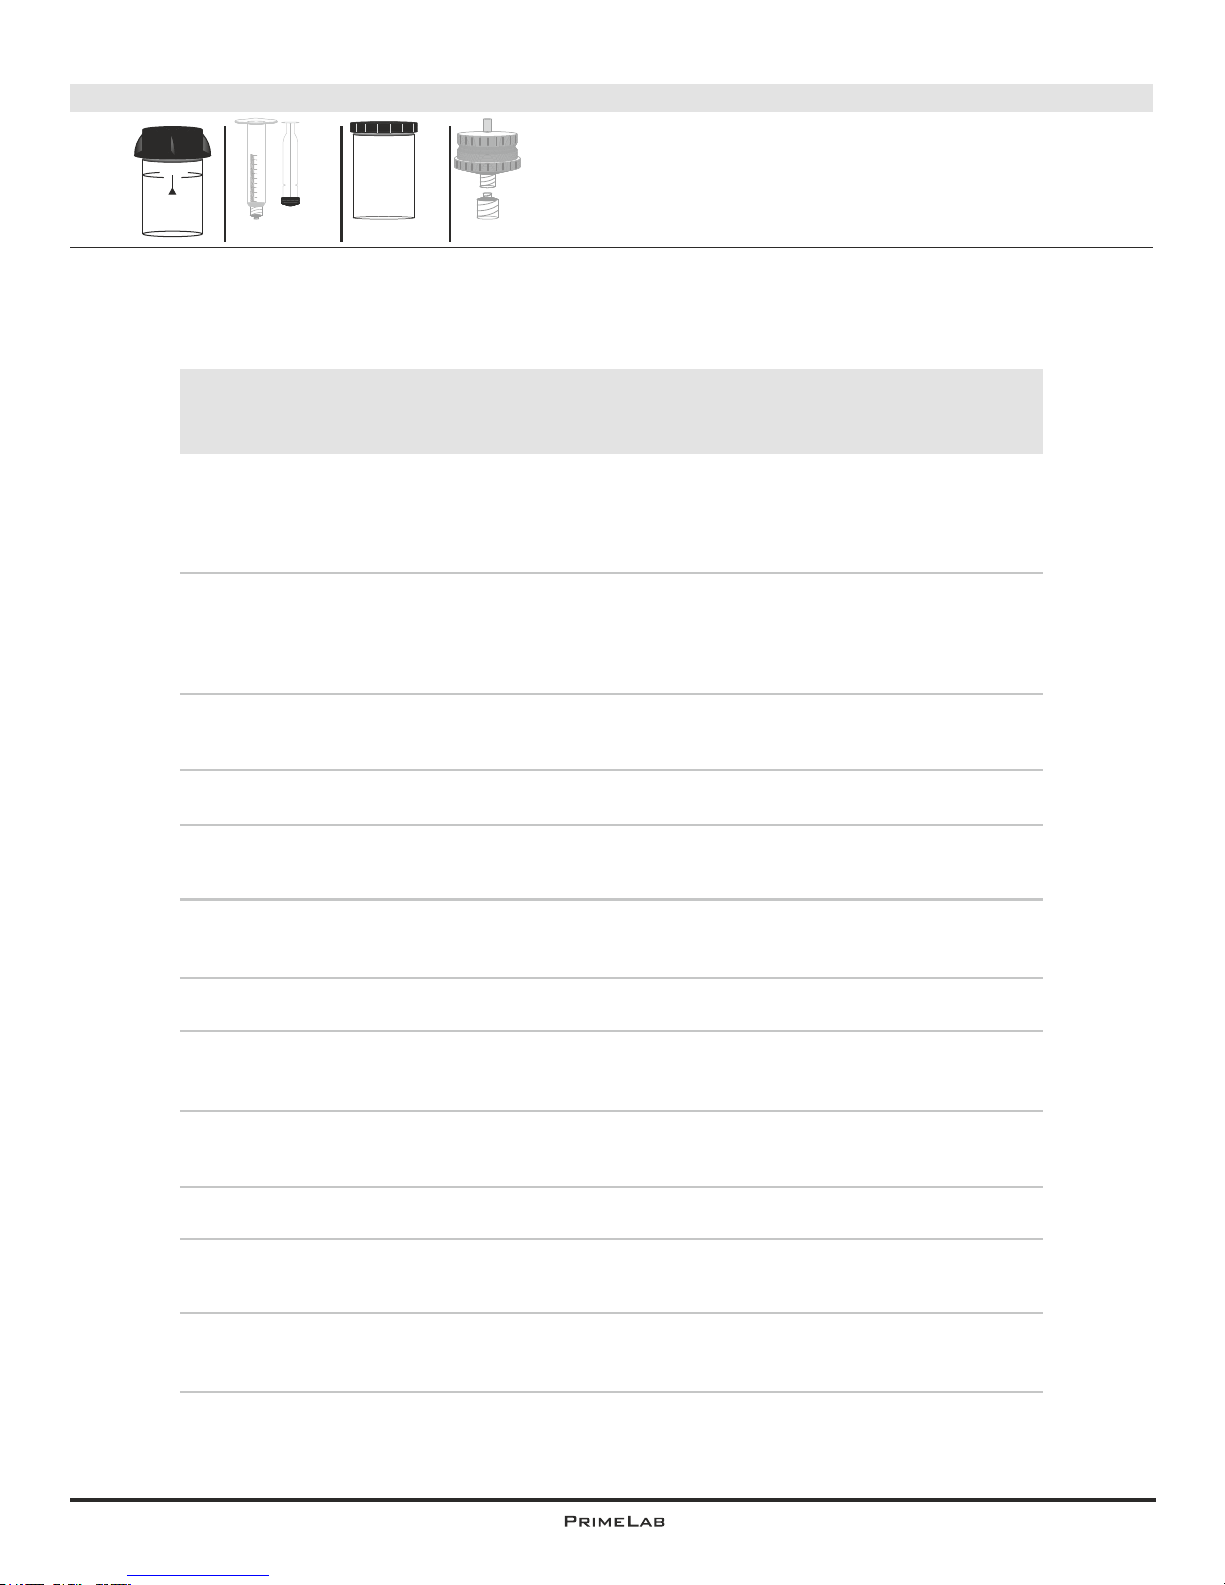
67
67
0 - 500 mg/l (Pt-Co)
Name on device: 107-Colour
10 ml
24 mm
(107) Colour
Select either:
A) „True colour“
B) „Apparent colour“
A) Measurement procedure for „True colour“
1.) Unscrew the two halves of the filter holder and place one filter circle
(0.45µ) onto the base section.
2.) Screw the two parts together again, ensuring the O ring is correctly
located.
3.) Fill a clean luer-lock syringe (20 ml) with deionised water.
4.) Connect the syringe to the filter holder and discharge the syringe to
waste.
5.) Disconnect the syringe from the filter holder and refill syringe with
destilled water.
6.) Fill a clean luer-lock syringe (20 ml) with deionised water.
7.) Connect the syringe to the filter holder and discharge the syringe to
waste.
8.) Disconnect the syringe from the filter holder and refill syringe with
destilled water.
9.) Fill a clean luer-lock syringe (20 ml) with deionised water.
10.) Connect the syringe to the filter holder and discharge the syringe to
waste.
11.) Disconnect the syringe from the filter holder and refill syringe with
destilled water.
(*)
Syringe
10
9
8
7
6
5
4
3
2
1
ml
Filter
0.45µm
(*)
Filter paper
(*)
Filter adapter
Continued...
The individual steps of the measurement procedure are shown on the display.
Use button 3 (arrow down) to scroll through the steps.
Use button 4 to skip the notes.
!
Measurement procedure:
The steps up to the selection of the parameter value to be determined are the same for all
procedures and described on page "TEST-5". Please observe the important notes for
accurate measurements on pages "TEST-8" and "TEST-9".
 Loading...