

18GA PNEUMATIC FLOORING STAPLER
Q180
OPERATING INSTRUCTIONS
WARNING
Read these instructions thoroughly before using
this tool and keep it handy for reference.
Rev. 05/19 Printed in Taiwan

PRIMATECH PNEUMATIC 18GA STAPLER Q180
The pneumatic flooring stapler Q180 is a professional precision tool specially developed for the
installation of most of 3/8" to 5/8" solid and engineered hardwood flooring. Weighting only 3 lbs
(1.4 kg), this specially designed tool makes the installation of thin or laminate flooring very easy.
The Q180 stapler takes standard ¼" crown, 18ga staples in
lengths of 1/2" (13 mm) to 1-9/16" (40mm)
For best result, only PRIMATECH fasteners should be used. Read carefully these instructions before
operating this tool. It is important to understand warnings/cautions and the safety measures to
ensure safe use of this tool.
Additional information is available directly from the manufacturer:
1135 Jérémie-Fortin, Québec, QC
Canada, G1J 1R8
Phone: 1 (800) 363-1962 or 1 (418) 522-7744
Fax: 1 (418) 522-7466
email: support@primatech.ca
web: http://ts.primatech.ca/180
SAFETY MEASURES
These important guidelines should always be followed to work safely with the PRIMATECH
pneumatic stapler model Q180:
1. Read these instructions thoroughly before using this tool and keep it handy for reference if
necessary.
2. Always keep hands, feet or other body parts away from the fastener ejection area.
3. Never aim the tool in any direction other than the working area.
4. Always carry or manipulate the tool by its handle while the air supply hose is connected.
5. Never leave the tool laying down on its side while the air supply hose is connected; the tool
should always be left on the floor, standing on its plastic base.
6. Do not alter or remove safety.
7. Always disconnect the air supply hose when the tool is not in use or when move to another
work area.
8. Never service or repair the tool, clear obstructions or make adjustments while the air supply
hose is connected.
9. Only compressed air should be used to power this tool; do not exceed 120 psi (8 bar).
10. Never use oxygen or any other compressed gas as a power source for this tool. Explosion
may occur.
11. Always wear OSHA-required Z-87 safety glasses with side shields.
12. Always wear proper ear and feet protection while the air supply hose is connected.
13. Always remove fasteners from the magazine before servicing tool.
DO NOT REMOVE OR ALTER SAFETY. DO NOT USE A TOOL WITH A DEFECTIVE SAFETY.
NEVER DEPRESS THE SAFETY CONTACT WITH YOUR HANDS WHEN TOOL IS CONNECTED
TO AIR SUPPLY. EXTREME CAUTION IS ADVISED WHEN USING THIS TOOL.
CONNECTION & AIR SUPPLY SYSTEM
To ensure maximum performance and efficiency, and also a minimum of care, this PRIMATECH
pneumatic stapler requires clean, dry air. It is necessary to use a filter and a pressure regulator.
This tool needs a detachable male coupler with 1/4" NPT male treads. The use of a 1/4" (1 cm)
diameter air supply hose is recommended. A smaller hose or a hose longer than 50' (15 m) could
cause a pressure drop when the tool is activated repeatedly.
ALWAYS USE A FREE-FLOW CONNECTION FOR THE COMPRESSED AIR SUPPLY TO PRE-
VENT THAT THE TOOL STAYS CHARGED AFTER DISCONNECTING THE AIR SUPPLY HOSE.
UNLOAD TOOL BEFORE CONNECTING AIR TO PREVENT ACCIDENTAL DISCHARGE.
AFTER MOVING TOOL TO A DIFFERENT WORK AREA, OR AFTER ANY MAINTENANCE TO
THE TOOL, ALWAYS ENSURE PROPER OPERATION BY ACTUATING TOOL SEVERAL TIMES
WITHOUT FASTENERS OVER THE SUBFLOORING .
Dirt, dust, and other particles in the air supply can cause sluggish operation or premature wear of
many components of the tool. Drain water from the compressor tank regularly. The compressor
start-stop limits should be set to deliver an air pressure of at least 100 psi (7 bar) at all time.
Consult the compressor manual or dealer for instructions on how to make this adjustment.
This tool is designed to be operated with a compressed air pressure of 70 to 120 psi (5-8 bar).
Always use the tools at minimum operating pressure in order to avoid unnecessary high noise
level. A higher pressure could be necessary, for example to use the tool with different species of
harder wood. In these more difficult cases, the compressed air pressure can be increased up to
120 psi (8.0 bar). It is very important not to exceed this maximum pressure to prevent leaks,
premature wear or damages to the tool.
Check the compressed air supply hose before connecting to ensure that they are free from dirt or
particles that can alter the performance of the tool. Pay special attention to any air leaks. Do not
use a compressed air pressure higher than 120 psi (8 bar). Higher pressure can cause premature
wear or damage to certain components. After assembly, check all the connections to prevent the
leaks and to have maximum efficiency.
TO PREVENT ACCIDENTAL DAMAGE TO THE FINISHED SURFACE OF THE INSTALLED
FLOOR, REST THE TOOL ONTO THE SUBFLOORING WHEN CONNECTING AIR, LOADING
TOOL OR PERFORMING ANY MAINTENANCE TO THE TOOL.
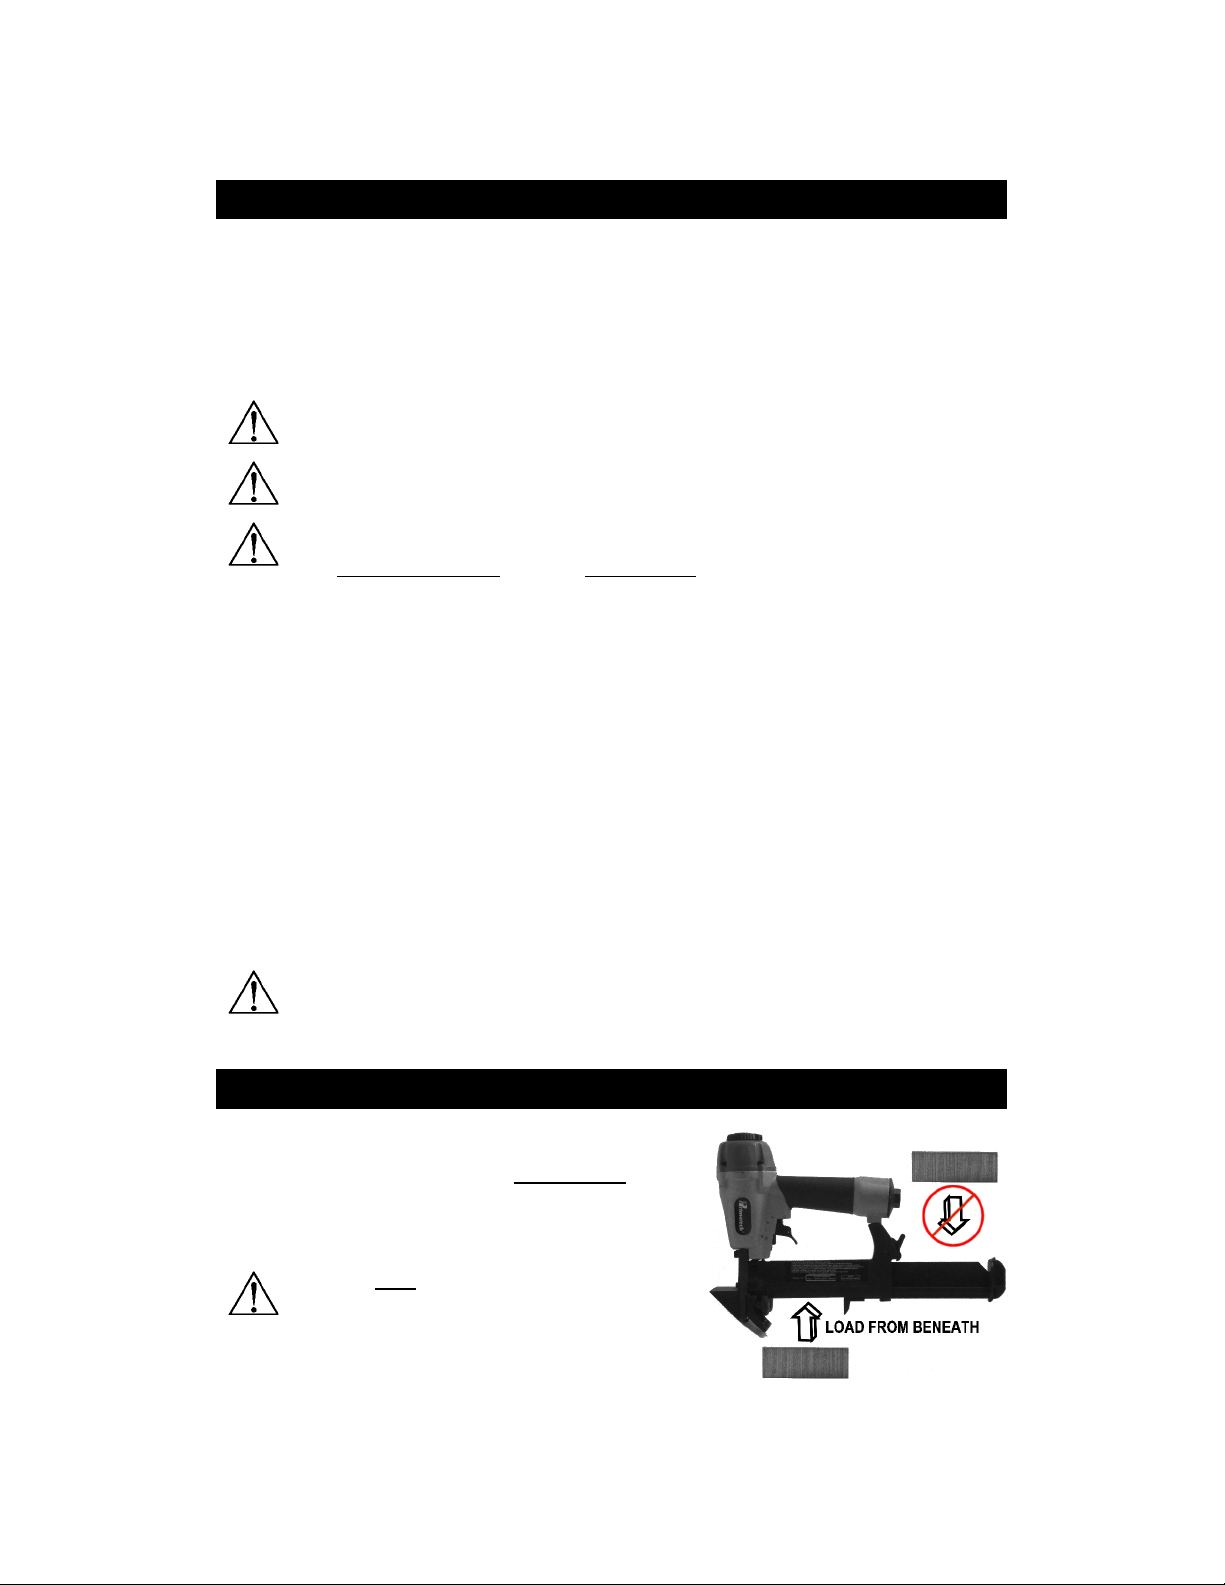
LOADING THE TOOL
Press the latch mechanism and pull back to fully open the
magazine unit. Load the fasteners from beneath into the
magazine. Close the magazine by pushing forward until
latch is engage.
USE ONLY THE TYPE OF FASTENERS
IDENTIFIED ON THE MASAZINE. THE USE OF
ANY OTHER TYPE OF FASTENERS WILL DAMAGE
THE TOOL.

OPERATION
Unload tool and rest it onto the subflooring, Connect the hose and cycle tool once or twice without
fastener. After loading the tool, the tool is ready for use.
With the flooring firmly in place, position the tool onto the flooring. Apply downward pressure to
ensure that the safety contact is fully depressed and proper seating of the fastener. Pull the trigger
to fasten.
THE TOOL WILL NOT CYCLE WHEN THE SAFETY CONTACT IS NOT FULLY DEPRESSED.
Eye protection is recommended and should be worn by the operator and
other in working area. Accidental ejection of fasteners or wood debris
could cause severe eye injury.
In some environments, ear protection might be required, as working
condition may include exposure to high noise levels which lead to
hearing damage.
Wearing safety boots and safety hat is also highly recommended.
NOTE: All the personal protection equipments must meet national
standards.
Be it raw, factory finished or engineered, hardwood is a natural material subject to various factors,
such as humidity, subflooring, installation procedure, type of tools, fasteners, etc. Installer should
always ensure optimal surface preparation, comply with all manufacturer's recommendations and
conduct a pre-installation test prior beginning any installation.
BEFORE STARTING AN INSTALLATION,FASTEN DOWN FEW BOARDS TO ASCERTAIN THAT
YOU ARE USING THE RIGHT TOOL AND FASTENER.

ADJUSTING FOR HARDWOOD THICKNESS
The fastener position can be adjusted to accommodate the thickness of the flooring. The shoe
adjustment feature provides close control of the fastener positioning to reduce occurrence of split
tongues or dimples in the flooring surface.
1. Loosen both knobs (425) until top shoe (404) and bottom shoe move freely.
2. Position the top shoe (404) and engage plate (403) with the tongue of flooring.
3. Adjust the bottom shoe (402) to the subfloor to balance the tool and retighten knobs (425).
After completing the adjustment procedure, proceed with the installation of few boards. Carefully
check for the proper positioning of the fastener onto the board. Check again after few more rows
to insure that all parts are secured in place. Tool may lose adjustment over time if this procedure
is not strictly followed.
BEFORE STARTING AN INSTALLATION, FASTEN DOWN FEW BOARDS TO ASCERTAIN THAT
YOU ARE USING THE RIGHT FASTENER AND THAT THE TOOL IS PROPERLY ADJUSTED.
PREVENTIVE MAINTENANCE
This tool requires frequent lubrication. Use only detergent-free oil such as Primatech
P-090. Few drops of oil daily in the air inlet is sufficient. Other types of lubricant may
degrade the seals.
MAINTENANCE & REPAIR
Disassembly of the tool must be done in a clean environment. Some parts can be easily damaged
if disassembled with improper tools or by inadequate methods. Maintenance should only be
performed by trained personnel. Use only genuine PRIMATECH replacement parts.
TO PREVENT INJURY, ALWAYS DISCONNECT THE AIR SUPPLY HOSE WHEN SERVICING
OR DISASSEMBLING THE TOOL.
When servicing the tool, do not twist or force any parts. Damage may result from such abuse. If
parts do not come loose easily, contact your PRIMATECH distributor for more information.
When opening the tool for maintenance, always clean all components of dirt, grit, or particles.
Inspect the tool carefully for broken parts or excessive wear, and replace if necessary. When
ordering parts, be sure to specify the right part number, and also the tool serial number.
AFTER ANY MAINTENANCE TO THE TOOL, REMOVE ALL FASTENERS BEFORE
CONNECTING AIR AND ACTUATE THE TOOL REPEATEDLY OVER A PIECE OF WOOD OR
SUBFLOORING TO INSURE PROPER OPERATION.

TROUBLESHOOTING
This section will help to diagnose common problems and will give suggestions to solve them.
Consult our on-line Technical Support site at www.primatech.ca/support for updated documents
and more tips.
TO PREVENT INJURY, ALWAYS DISCONNECT THE AIR SUPPLY HOSE WHEN
ADJUSTING, SERVICING OR DISASSEMBLING THE TOOL.
FIRST: CHECK THE COMPRESSED AIR SUPPLY
Many of problems come from a faulty or inadequate compressed air supply system. Before
attempting to repair the tool, the following points should be checked:
a) check the pressure at the output of the compressor; adjust to 70-120 psi (5-8 bar) as
required.
b) check the tank pressure of the compressor & adjust the start/stop limits.
c) check the air delivery system; a 1/4" hose is recommended.
d) use fewer tools simultaneously; do not exceed the capacity of the compressor or of the
delivery system.
e) drain water from the compressor.
SECOND: CHECK FOR AIR LEAKS
At rest, this tool should not have any air leak. Before attempting to replace other part, replace
defective seal.
TOOL DOES NOT DRIVE FASTENERS
a) Check that there are fasteners in the magazine.
b) Check that fasteners are loaded from beneath; not from top of magazine.
c) Make sure the magazine latch is engaged.
d) Check the front end of the magazine for burrs or damages.
e) Check the safety mechanism.
f) Check if the driver is stuck in down position. (see driving blade does not return)
g) Check for obstruction in the fastener ejection area.
FASTENERS ARE NOT SET COMPLETELY
a) First, verify air supply. (see 1 above)
b) Check the adjustment of the base and ensure the tool is well seated on the floor while
ejecting.
c) Increase air pressure when working with harder woods; do not exceed 120 psi (8 bar)
d) Check the driving blade for broken end.
e) Clean tool and lubricate tool; particularly the head assembly.
f) Wood is too hard for 18GA staples.
TOOL DOES NOT ACTIVATE
a) Check the air supply.
b) Check if the safety mechanism is fully depress.
c) Inspect the trigger assembly for damage.
d) Inspect the head assembly and check all seals; reassemble carefully.

DRIVING BLADE DOES NOT RETURN
a) Check for jammed fastener or obstruction.
b) Check gate/foot and end of magazine for damages or burrs.
c) Check the driving blade.
d) Inspect the head assembly and check all seals; clean & lubricate.
e) Check the rubber band around the cylinder.
f) Check that the bumper is in place.
BROKEN OR WORN DRIVING BLADE
Replace the driving blade.
POOR FEED OR TOOL JAMMING
a) Make sure the magazine latch is engaged.
b) Check the gate/foot assembly for damages or wear.
c) Check the front end of the magazine for burrs or damages.
OTHER PROBLEMS
Contact Primatech: 1 (800) 363-1962
1 (418) 522-7744
by email support@primatech.ca
Technical support, information & schematics at
http://ts.primatech.ca/180
 Loading...