

Page 1

Primare I21 Integrated Amplier
Page 2

Page 3

I21 AMPLIFIER USER GUIDE
Copyright and acknowledgements
Copyright © 2004 Primare Systems AB.
All rights reserved.
Primare Systems AB
Renvägen 1
SE-352 45 Växjö
Sweden
Issue: I21
The information in this guide is believed to be correct as
of the date of publication. However, our policy is one of
continuous development and so the information is subject
to change without notice, and does not represent a com-
mit ment on the part of Primare Systems AB.
Primare is a trademark of Primare Systems AB. All rights
reserved. All other product names are trademarks or regis-
tered trade marks of their respective owners.
FCC Warning:
This equipment generates and can radi-
ate radio frequency energy and if not installed and used
correctly in accordance with our instructions may cause
interference to radio communications or radio and televi-
sion reception. It has been type-tested and complies with
the limits set out in Subpart J, Part 15 of FCC rules for
a Class B computing device. These limits are intended to
provide reasonable protection against such interference in
home installations.
EEC:
This product has been de signed and type-tested
to comply with the limits set out in EN55013 and
EN55020.
This guide was produced by Condesign Ljungby AB.
www.condesign.se
200429
Page 4

I21 AMPLIFIER USER GUIDE
Page 5

I21 AMPLIFIER USER GUIDE
Welcome to the I21 Integrated Ampli er
High-performance power ampli er
Flexible inputs
Fixed and variable outputs
Superb technical design
Intuitive user interface
Using the I21 with other Primare products
2
Technical speci cation
2
Power connection
3
Safety instruction
3
Switching on and off
3
To switch on
3
To switch on from standby or to standby
3
Back panel connections
4
Outputs
4
Loudspeaker outputs
4
Preampli er outputs
4
Inputs
4
Source inputs
4
Front panel controls
OPERATING THE I21 INTEGRATED AMPLIFIER
Selecting a source
7
To select a source
7
Changing the volume
7
To change the volume
7
To dim the front panel display
To restore the normal display
Page 6

I21 AMPLIFIER USER GUIDE
Page 7

1
I21 AMPLIFIER USER GUIDE
Welcome to the Primare I21 Integrated Ampli er! This chapter
introduces you to its key features, and explains how you can
take advantage of its superb sound as the key component in
your hi- system.
Welcome to the I21 Integrated Ampli er
The I21 is an integrated preampli er and power ampli er
with extraordinary performance for its price.
The I21 incorporates a power ampli er providing 75 Watts
per channel of superb quality sound.
The I21 preampli er stage provides four inputs, labelled
CD, TUNER, LINE 1, and LINE 2, to cater for a exible
range of sources.
The currently selected source is provided on two pairs of
line-level outputs, for connecting the I21 to other equip-
ment. The TAPE OUT sockets are independent of the posi-
tion of the volume control, and allow you to connect the
I21 to a tape recorder. The PRE OUT sockets are controlled
by the volume control, and can be used to connect the I20
to another output stage.
Superb technical design
The I21 incorporates a classic circuit design based on J-FET
input devices and bipolar output devices, typical of far more
expensive equipment, giving high performance and excellent
reliability.
In keeping with the philosophy of the Primare range of sys-
tems, the I21 can be controlled through a very simple and
intuitive set of front panel controls.
Alternatively all the functions of the I21 can be controlled
by the C22 Remote Control supplied with the I21, along
with the other Primare components in your system.
Page 8

2
I21 AMPLIFIER USER GUIDE
Although the I21 is exible enough to work with virtu-
ally any other equipment
you have in your system, it is
ideal for use with the other products in the Primare range.
A particular bene t of using the I21 with other Primare
sources is that you can control your entire system with a
single remote control, to give you a fully integrated system
with the simplest possible user interface.
Technical speci cation
Output power per channel
2 x 75W into 8
Ω
,
2 x 125W into 4
Speaker terminals
4 –16
Output impedance
330mV
Tape outputs
300mV
0.05% (1kHz, 10V into 8
)
Signal-to-noise, line
-100dB (A-weighted)
25A
430 x 385 x 100mm
Weight
13,5kg
Page 9
3
I21 AMPLIFIER USER GUIDE
This chapter provides a quick overview of how to connect
the I21 integrated ampli er to other components in your
system.
Warning
that the required supply voltage, indicated
on the back panel, cor re sponds to your local
AC supply. If a different voltage is stated on
the type plate do not connect the I21 to the mains power,
and seek advice from your dealer.
Connect the mains power using the enclosed mains cable.
NOTE
the system from the mains power before connecting or dis-
connecting any of the cables. Never short circuit speaker
terminals. This might seriously damage the unit.
Safety instructions
To prevent re or shock hazard, do not expose this
appliance to dripping or splashing. No objects lled with
liquids, such as vases, should be placed on the I21.
If you want to build in the I21 you need to be sure to
allow space of at least 20 cm behind, 10 cm on both sides
and 30 cm above the top panel of the unit. This is to pre-
vent re or damage caused by overheating. Also make sure
that the main switch is accessable.
Switching on and off
To switch on
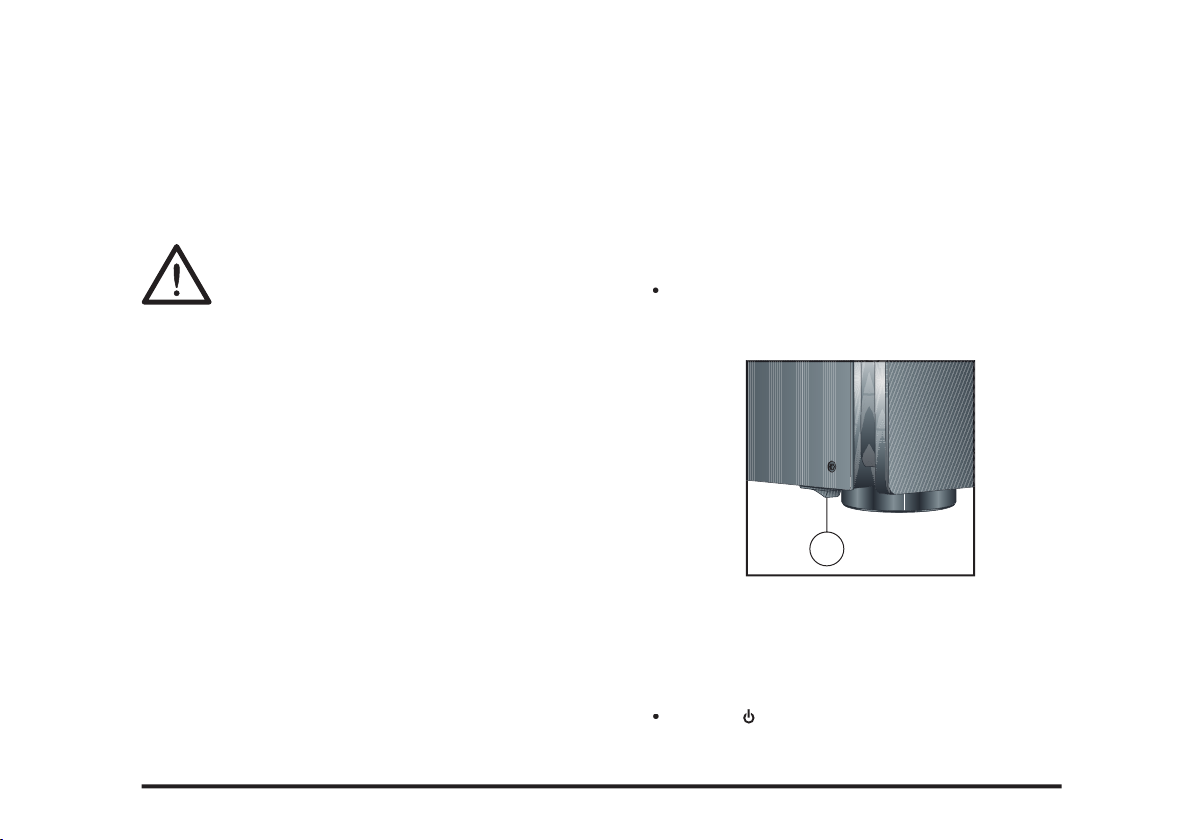
Use the main switch under the left-hand edge of the
housing (1).
1
During normal operation you can leave the I21 switched
on and in standby mode.
To switch on from standby or to standby
Pressing
on the front panel or on the remote control,
will change the standby mode.
Page 10
4
I21 AMPLIFIER USER GUIDE
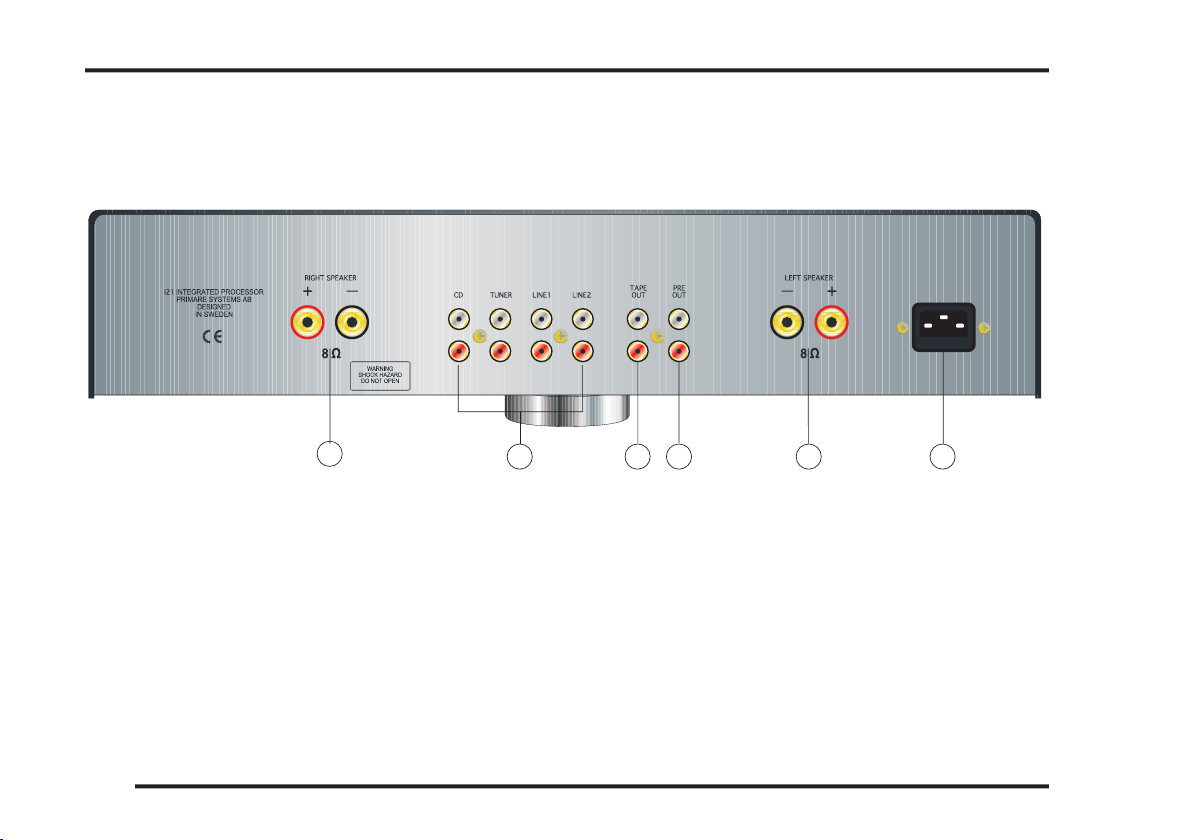
A.
Right loudspeaker outputs
B.
Audio inputs
C.
Tape outputs
D.
Preampli er outputs
E.
Right loudspeaker outputs
F.
Mains power input
C
F
A
Page 11

5
I21 AMPLIFIER USER GUIDE
Outputs
Connect the left and right loudspeakers to the correspon-
ding terminals. The terminals can accept speaker cables
terminated with 4mm banana plugs, spade terminals, or
bare wires. To connect bare wires unscrew the terminal,
pass the bare wire through the hole in the terminal bolt,
and clamp the wire in place by screwing the terminal back
down.
The PRE OUT sockets provide a line-level output from
the I21 preampli er stage which can be connected to
another preampli er. The level of this output is controlled
by the VOLUME control on the I21.
The TAPE OUT sockets provide a xed level copy of the
currently selected source, suitable for connecting to a tape
recorder.
Source inputs
Connect each source to the appropriate source input,
connecting the right channel to the red socket and the left
channel to the white socket.
To connect an analogue turntable with a moving mag-
net or moving coil cartridge you will need an additional
phono preampli er such as the Primare R20. The output
of the turntable is connected to the R20, and the output
of the R20 should be connected to a spare input on the
I21, such as LINE1.
Page 12
6
I21 AMPLIFIER USER GUIDE
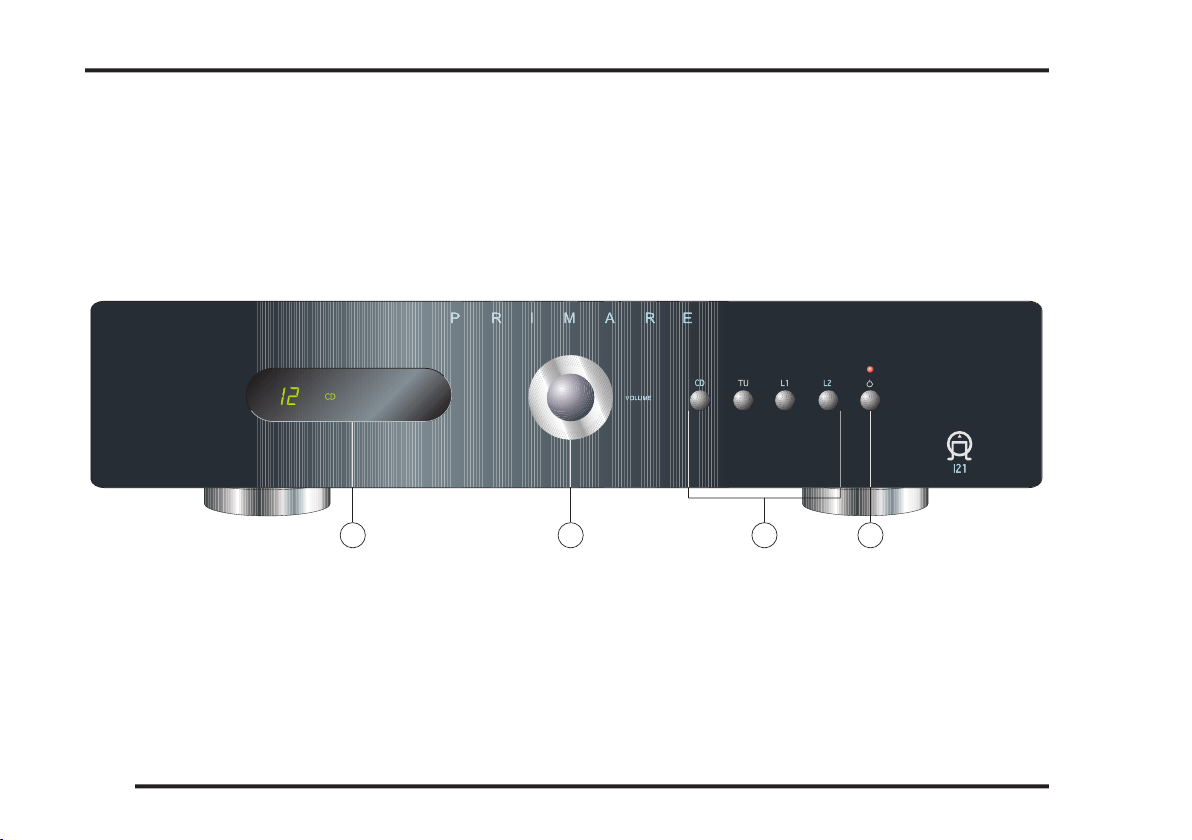
All the functions of the I21 Integrated Ampli er can be
accessed using the ve front panel push buttons and the
volume control. Information about all operations is dis-
played on the front panel display
C
A.
The display keeps you informed about the volume
setting and currently selected inputs.
B.
The VOLUME control changes the volume
C.
The INPUT SELECTOR buttons select one of the
four source inputs.
D.
The STANDBY button switches the I21 to standby, or
switches it on from standby.
Page 13
I21 AMPLIFIER USER GUIDE
This chapter explains how to operate the I21 Integrated
Ampli er, using either the front panel controls or the remote
control.
Selecting a source
The I21 Integrated Ampli er provides a choice of four line
inputs, labelled: CD, TUNER, LINE 1, and LINE 2.
To select a source
Press the button on the front panel or the remote
control corresponding to the source you want to select.
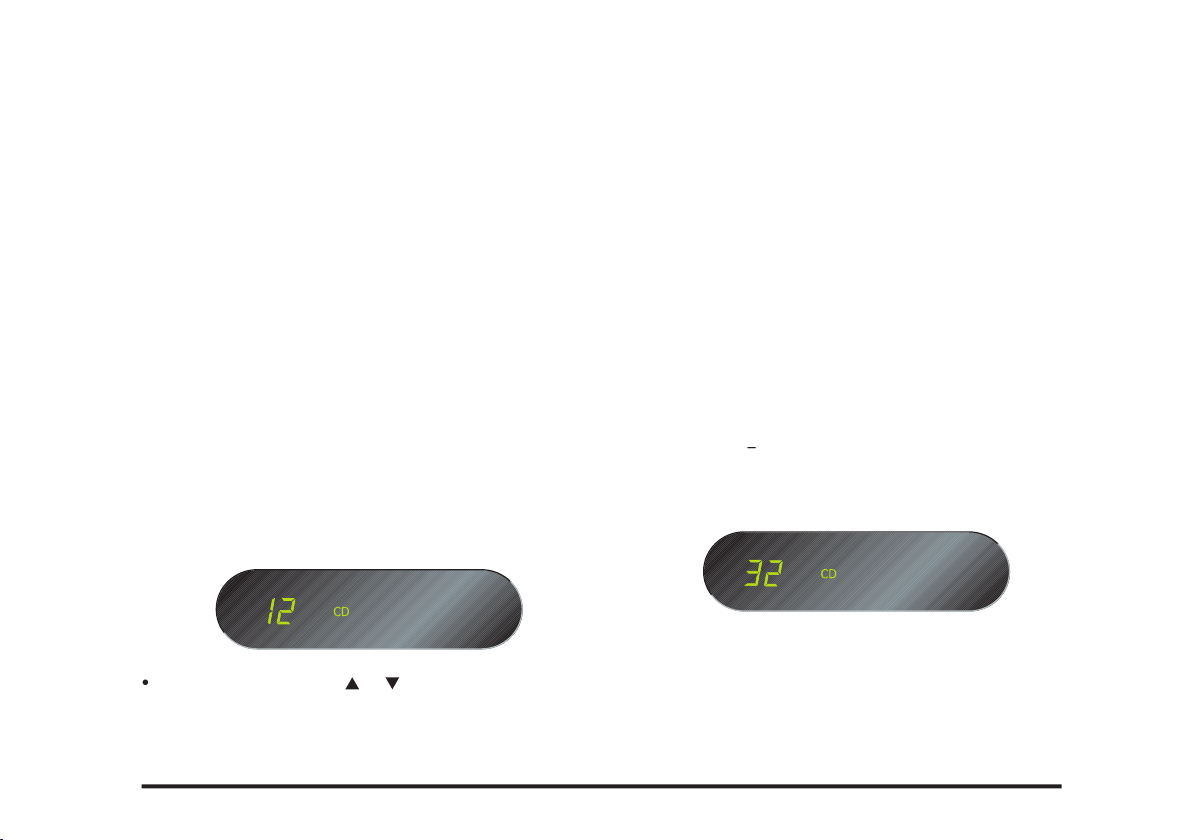
The currently selected source is indicated on the front
panel display:
Alternatively, press the
or
buttons on the remote
control to step between sources.
Changing the volume
The I21 allows you to vary the volume from 0 (silence) to
79 (maximum volume).
To change the volume
Rotate the VOLUME control on the front panel, or
press the
or
buttons on the remote control.
The current volume setting is shown on the front panel.
Page 14
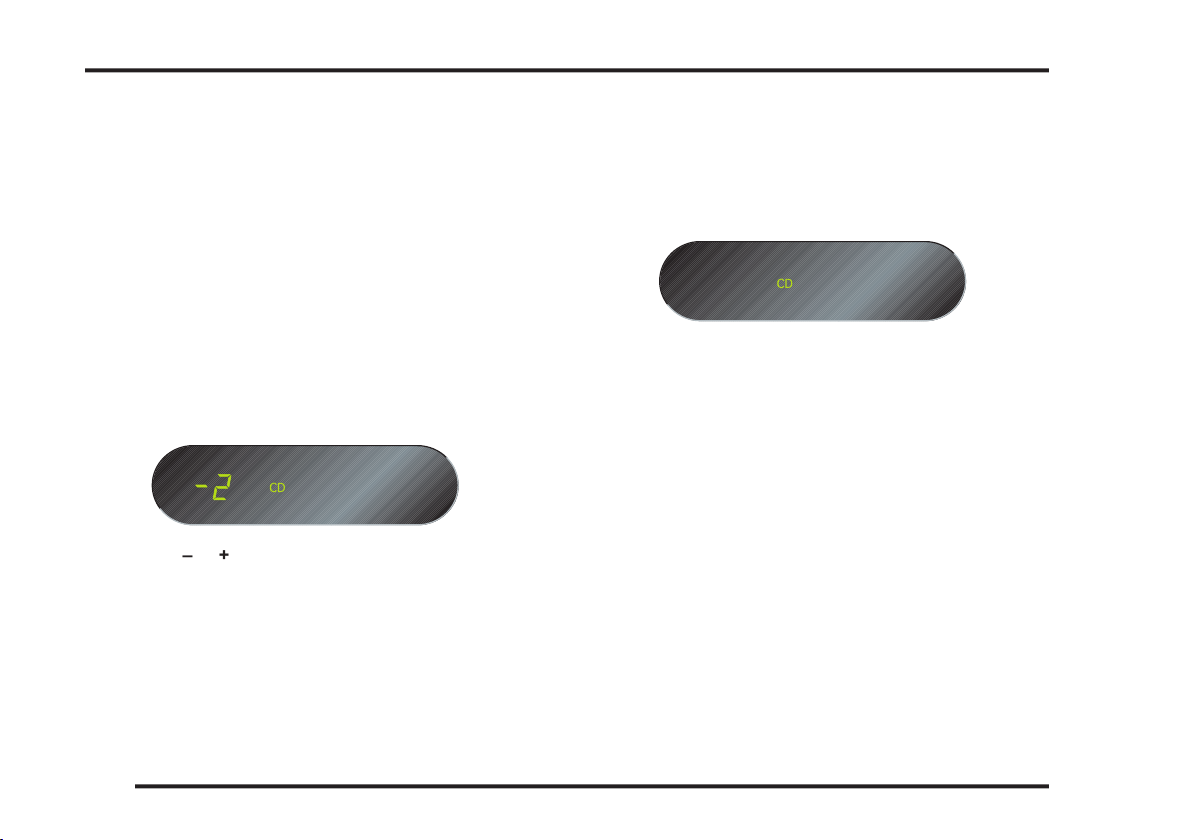
8
I21 AMPLIFIER USER GUIDE
Changing the balance
You can change the balance of the sound between the
left and right channels to shift the position of the stereo
image.
To change the balance
Press the
button on the remote control.
The front panel display shows the current balance set-
ting, where -6 corresponds to the leftmost position, 0
corresponds to centre, and 6 corresponds to the rightmost
position.
Press the
or
buttons on the remote control to
adjust the balance.
Press the
button again to revert to the
normal volume display.
Alternatively the normal display will revert automatically
after four seconds.
To dim the front panel display
Press the
DIM
button on the remote control.
The display will dim to show just the currently
selected source.
To restore the normal display
Press the
DIM
button again.
OPERATING THE I21 INTEGRATED AMPLIFIER
Page 15

Page 16

 Loading...