

PrimaLuceLab SESTO SENSO User Manual
robotic focusing motor
VERSION 2.1
Update 01-06-2018
This instrument is produced by PrimaLuceLab iSrl. For any questions regarding use, service, and warranty, please refer to
the addresses provided in the relevant documents.!
PrimaLuceLab iSrl • Italia • www.primalucelab.com
Note: 2.0 version of SESTO SENSO software described in this user manual needs the use of 2.0 version of SESTO
SENSO firmware. If your SESTO SENSO has a previous firmware version, before using the software please read how to
update it on page 16 of this user manual.

PrimaLuceLab iSrl SESTO SENSO user manual
English
SESTO SENSO is the robotic focusing motor by of PrimaLuceLab for precision focus control and it allows to robotize most
micrometric focusers for telescopes. It is the first robotic focusing motor that does not need an external handpad, but is
controlled directly through an USB port, enabling you to make astrophotography even easier and more precision especial-
ly when combined with the EAGLE system.
The use of SESTO SENSO, unlike other motors, does not preclude manual use of the telescope focuser on which it is in-
stalled. For manual use it is sufficient not to power SESTO SENSO and use the normal focusing knob of the telescope. Be
careful by manually shifting the telescope focus knob, you will lose the SESTO SENSO reference position, so you will need
to repeat the positioning procedure. For best performance, it is recommended to use pinion and rack focusers.
Index
Technical specifications 2
Scope of delivery and parts identification 2
Installing SESTO SENSO on telescope 3
Software installation 6
Computer connection 8
Focuser control with SESTO SENSO software 8
SESTO SENSO advanced parameter settings 13
Using SESTO SENSO with third party softwares 15
Firmware update 16
"
page !1

PrimaLuceLab iSrl SESTO SENSO user manual
Technical specifications
Power 10-15V, suggested 12V 0.8A max"
Maximum weight load (vertical position): 7Kg"
Control: USB port"
Resolution: 0.7um/step +/-5% 3200step/turn"
Working temperature -15°C/+50°C"
Max excursion with 1/10 transmission: 29m"
PC control: SESTO SENSO software and ASCOM driver"
Temperature sensor Optional
Scope of delivery and parts identification
1) SESTO SENSO robotic focusing motor"
2) Power cable for cigarette plug"
3) Micro USB cable"
4) 3mm allen screw to install SESTO SENSO on focuser"
5) 1.5mm allen screw to install bushings"
6) Red bushing Ø2.5mm for AIRY refractors (ED72, APO80, ED90, ED100, APO104T, APO120, APO150T), OrionOp
ticsUK VX and CT, Baader Steeltrack® focusers, TS-Optics V-Power, Omegon V-Power, SkyWatcher"
7) Black bushing Ø2.8mm for Feather Touch focusers"
8) Green bushing Ø3.5mm for Takahashi telescopes"
9) Silver bushing Ø3.1mm for Moonlite focusers
10) Yellow bushing for AIRY refractors (APO 65F, BLACK 80T) and SharpStar telescopes with 2” focusers"
11) 2x grubscrews M3 for bushings"
12) USB pen with driver, control software and user manuals"
13) Red led for status activity"
14) Temperature sensor port"
15) Micro USB port for PC connection"
16) 12V 0.7A port with Ø5.5 ø2.5mm jack"
17) Holes for bushings fixing"
18) Grubscrews to fix the focuser!
"
page !2
PrimaLuceLab iSrl SESTO SENSO user manual
Installing SESTO SENSO on telescope
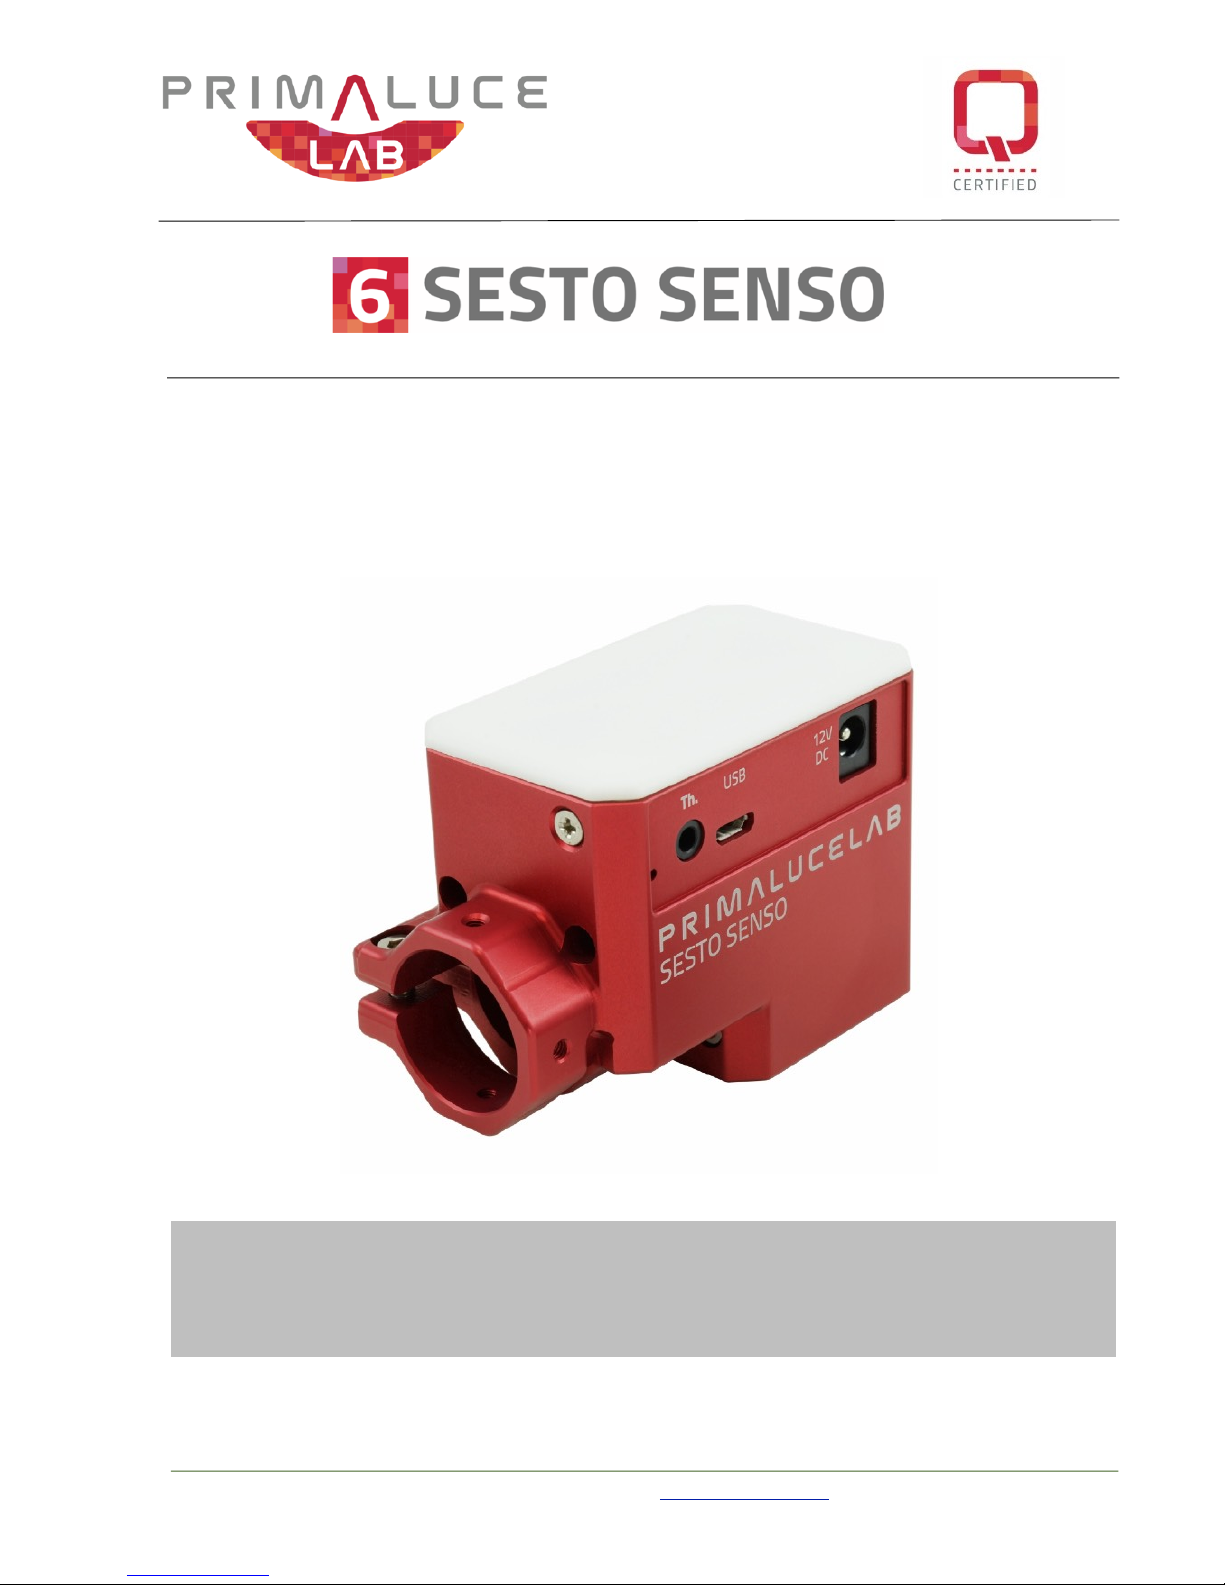
First, you need to locate the bushing (details 6-7-8-9-10) for use with
the focuser you have, (figure 2) slightly screw the grubscrews (details
11A and 11B) into the bushing and insert the bushing within the SE-
STO SENSO body (detail 1). Check that the crankshaft groove is facing
upwards. The large hole of the bushing should point towards the mo-
tor pin, the bushing should be inserted until it engages with the motor
pin. At this point you can use the small allen screw (detail 5) to screw
the two grubscrews (detail 11A) by passing through the special hole on
the aluminum body of SESTO SENSO.
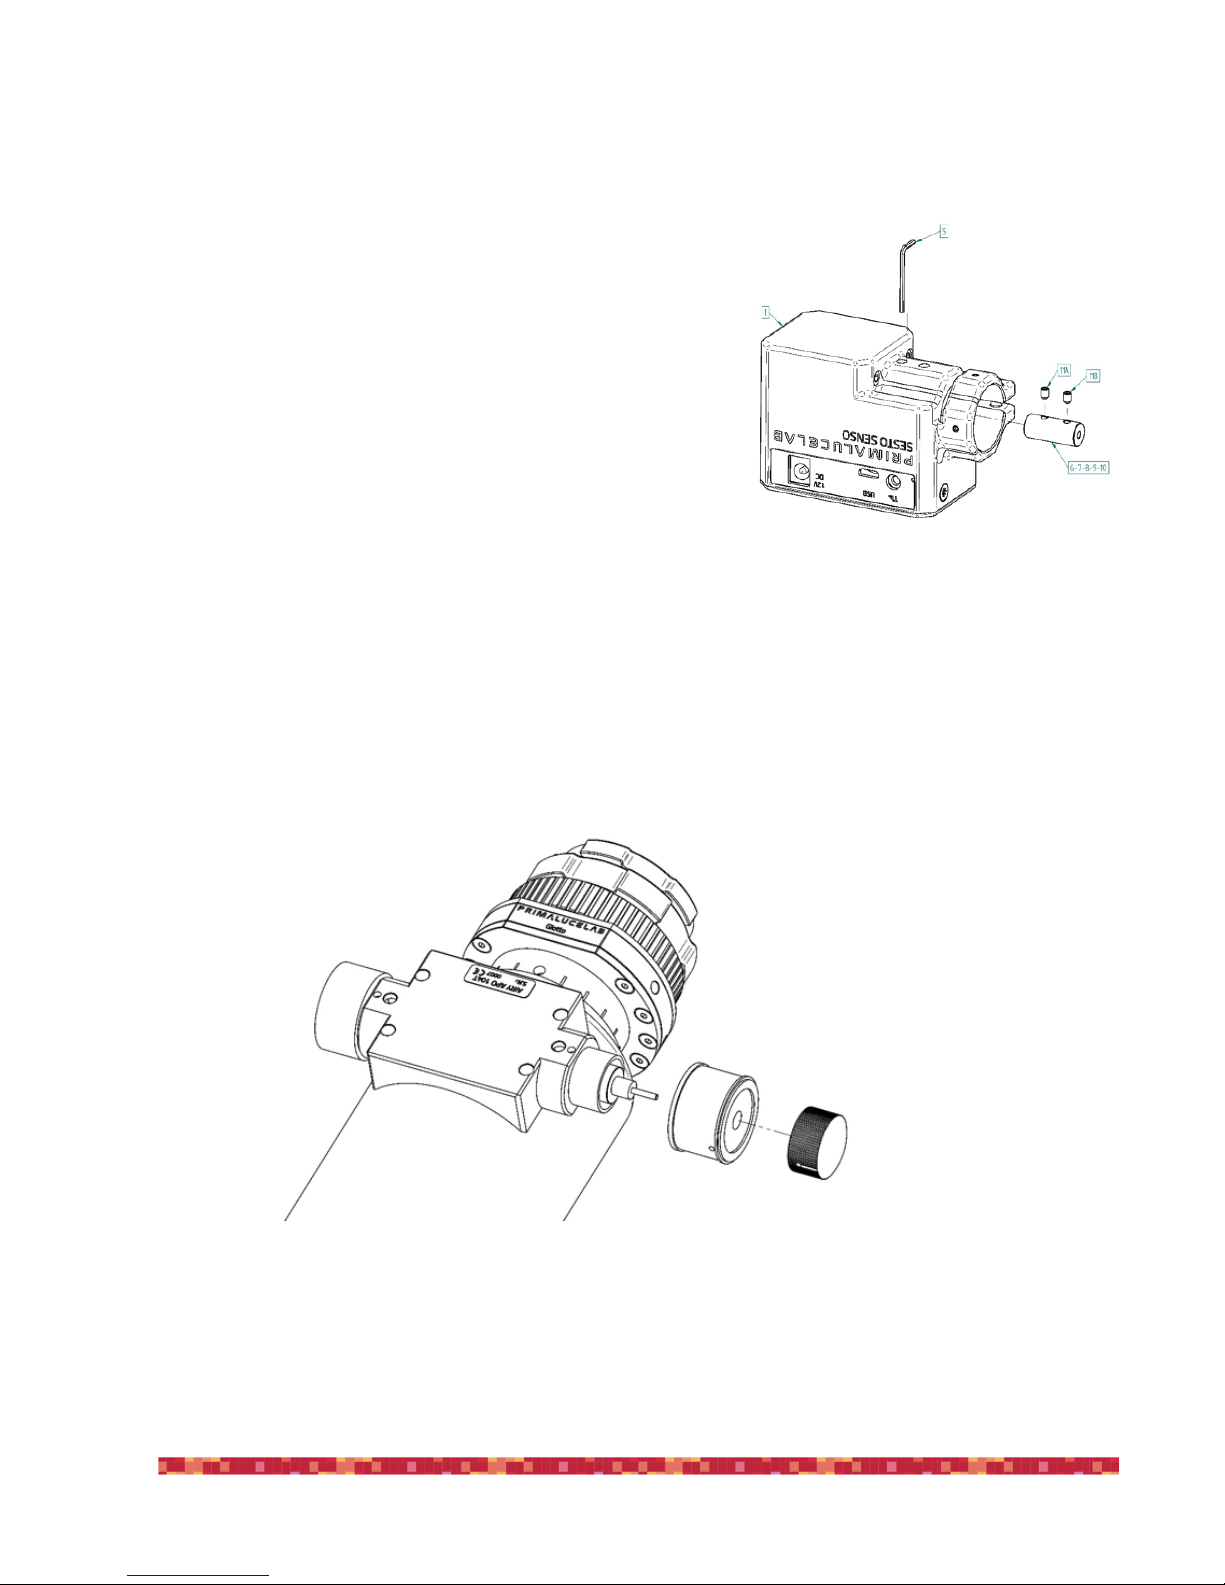
In order to connect SESTO SENSO to the focuser (figure 3) of your telescope, you m us t r e-
move the manual focus micrometric knob by unscrewing the screw normally present on the knurled knob. After pulling it
out, you also need to disconnect the larger knob on the focuser, always by means of an allen screw on the knob. On some
plastic-covered focusers, you need to remove the plastic to access the disassembly screw.
"
page !3
figure 2
figure 3
PrimaLuceLab iSrl SESTO SENSO user manual
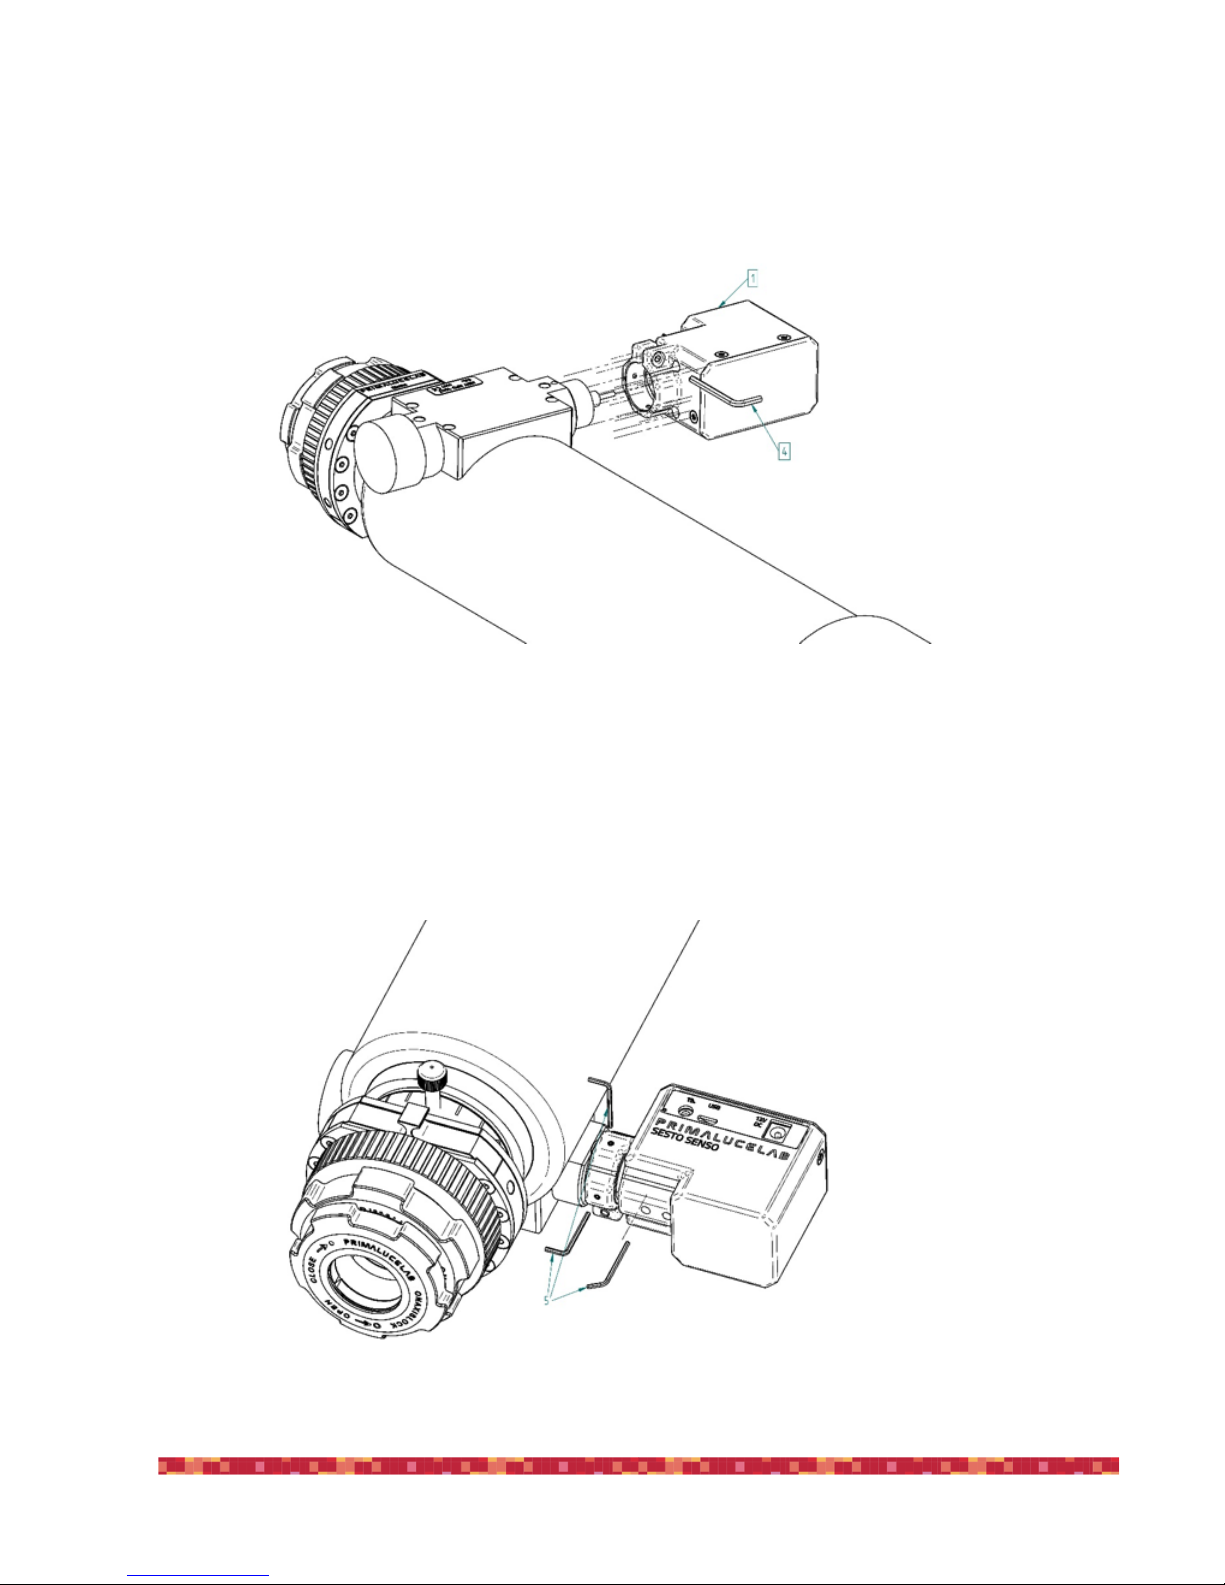
Now you can insert SESTO SENSO (detail 1) on the focuser of your telescope by paying attention to centering the micro-
metric pin with the pre-assembled bushing on SESTO SENSO, until it stops, and then close the outer ring of SESTO SENSO
using the allen screw (Figure 4).
Now use the supplied 1.5mm allen screw (Figure 5) to close the two 90° screws and the two bolt screws by passing th-
rough the special hole on SESTO SENSO body.
"
page !4
figure 5
figure 4
PrimaLuceLab iSrl SESTO SENSO user manual
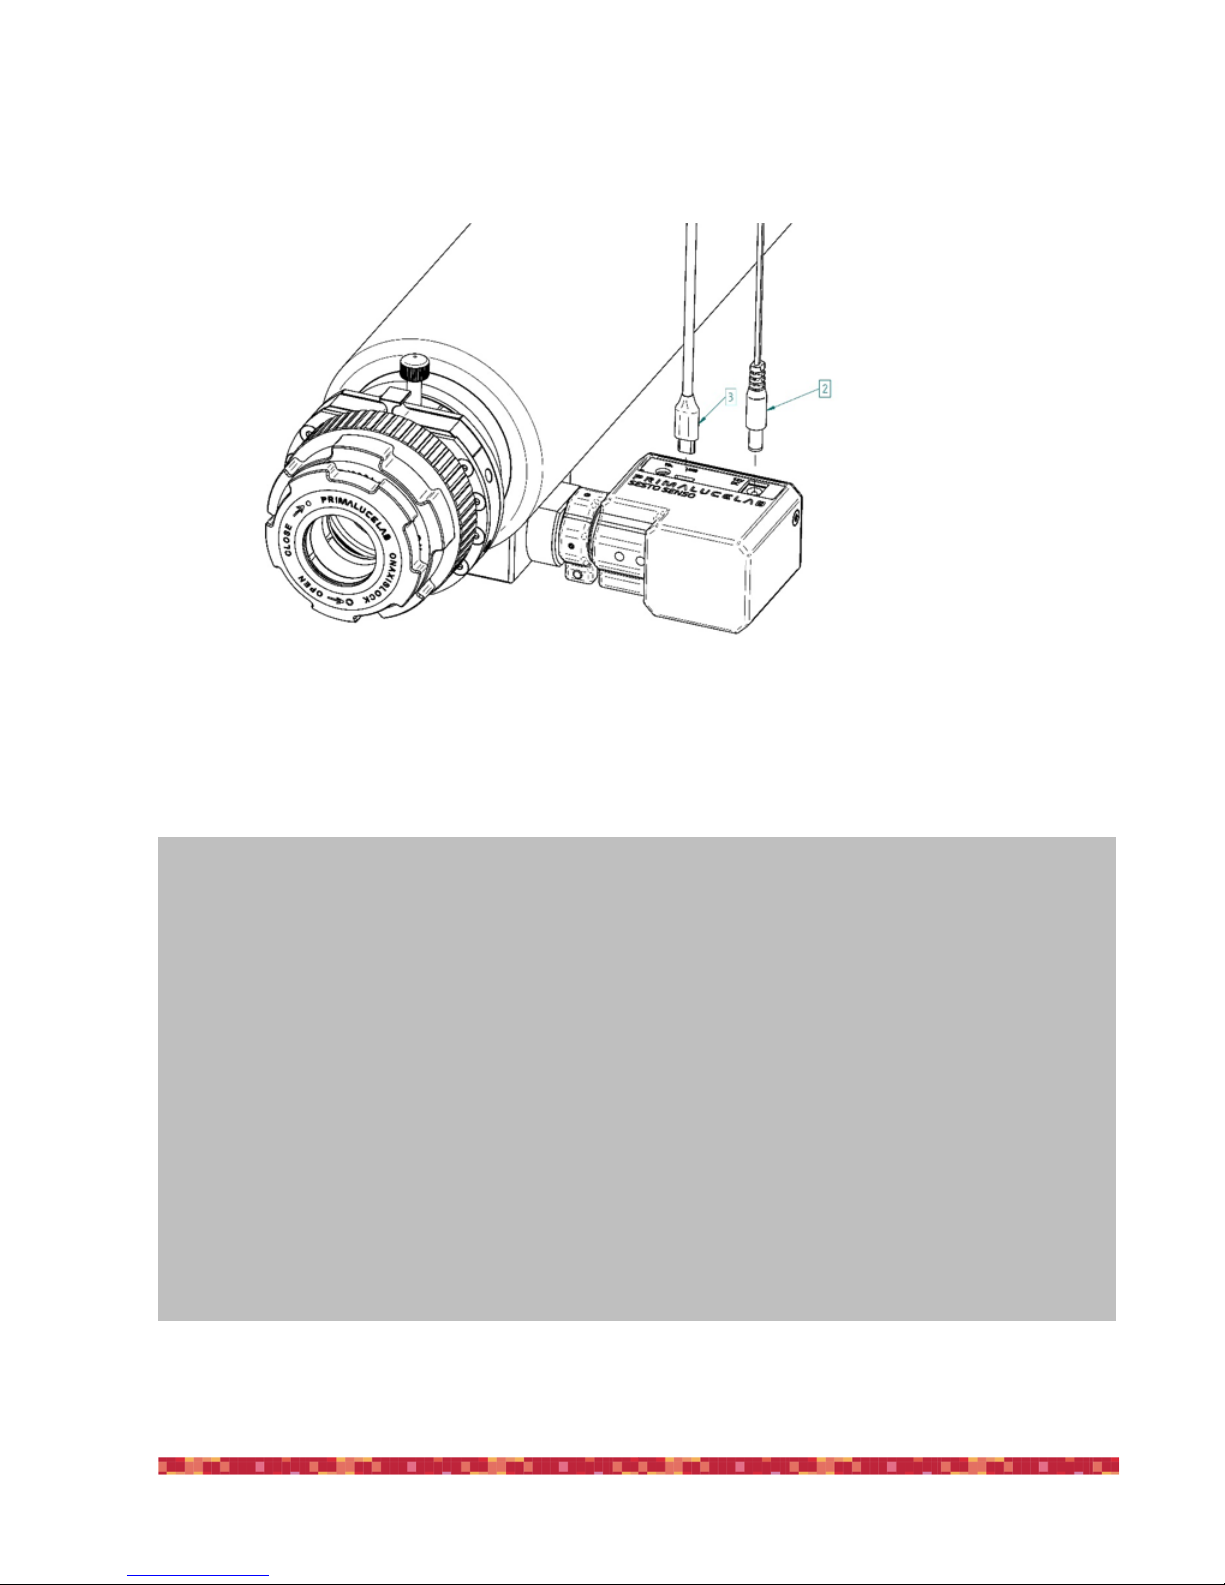
We can proceed with the connections (figure 6), first the power cable (detail 2), then after powering SESTO SENSO, the
micro USB cable (detail 3) to connect to the PC
"
page !5
figure 6
NOTE: After installing SESTO SENSO on your focuser, check the smoothness of the movement keeping SESTO SENSO
powered off and then manually moving the focus knob of your focuser. The presence of SESTO SENSO will make the
movement harder (since the motor is connected) but the motion must still be uniform. If you notice an uneven move-
ment, repeat the installation procedure.
NOTE: SESTO SENSO connects to several focusers that may have different machining and tolerances precisions. Focu-
sing accuracy, especially when using automatic focusing procedures, depends on the focuser mechanics and not only
strictly on SESTO SENSO. If your focuser has an important backlash, you can adjust the backlash parameter in the
ASCOM driver.
 Loading...