

Page 1
~~~~~~Warranty~~~~~~
This product is guaranteed for 12 months from the date of purchase when the appliance is
used solely for domestic purposes. For commercial use the product is guaranteed for 90 days
from the date of purchase.
The guarantee is valid against mechanical or electrical defects if the product is used in
accordance with the instructions and provided that it is not connected to an unsuitable
electricity supply or dismantled, interfered with or damaged in any way.
IMPORTANT, P LEASE RETAIN THI S WARRANTY
Under this guarantee any parts found to be defective will be repaired or replaced free
of charge.
Please ask your retailer to either stamp this warranty or simply attach your store
receipt. Keep this warranty somewhere safe. DO NOT SEND TO PRIMA.
This guarantee in no way affects your rights under statutory law.
NAME____________________________________________________________
ADDRESS_________________________________________________________
___________________________________________________________________
PURCHASED FROM_________________________________________________
DATE OF PURCHASE ___________________MODEL_____________________
The Prima International PLC. Prima House, Premier Park,
Oulton, Leeds LS26 8ZA. United Kingdom Tel: 0113 251 1500
If you have internet access you can register this product
on line at: www.prima-international.com
Popcorn Maker
Model: PCM002
Visit our web site!
www.prima-international.com
Page 2
IMPORTANT SAFEGUARDS
• This appliance is not a toy. Close supervision is necessary when used by or near
children.
• Read all instructions before using the Popcorn Maker
• Keep children away from the popcorn chute when in operation as there may be
hot corn kernels that bounce out of the collection bowl when corn first starts to
pop.
• Never leave the unit unattended when in use
• To protect against risk of electrical shock do not put unit in water or other liquid.
• Never overfill the popping chamber
• Never put oil, water, flavourings etc. in the popping chamber. Use only popping corn.
• Unplug from outlet when not in use, before putting on or taking off parts and before
cleaning.
• Do not operate Popcorn Maker with a damaged cord or plug after the appliance
malfunctions, or is dropped or damaged in any manner
• The use of attachments not recommended or sold by manufacturer may cause, fire
electric shock or injury.
• Do not use outdoors.
• Do not let cord hang over edge of table or counter or touch hot surfaces.
• Do not use for other than intended use.
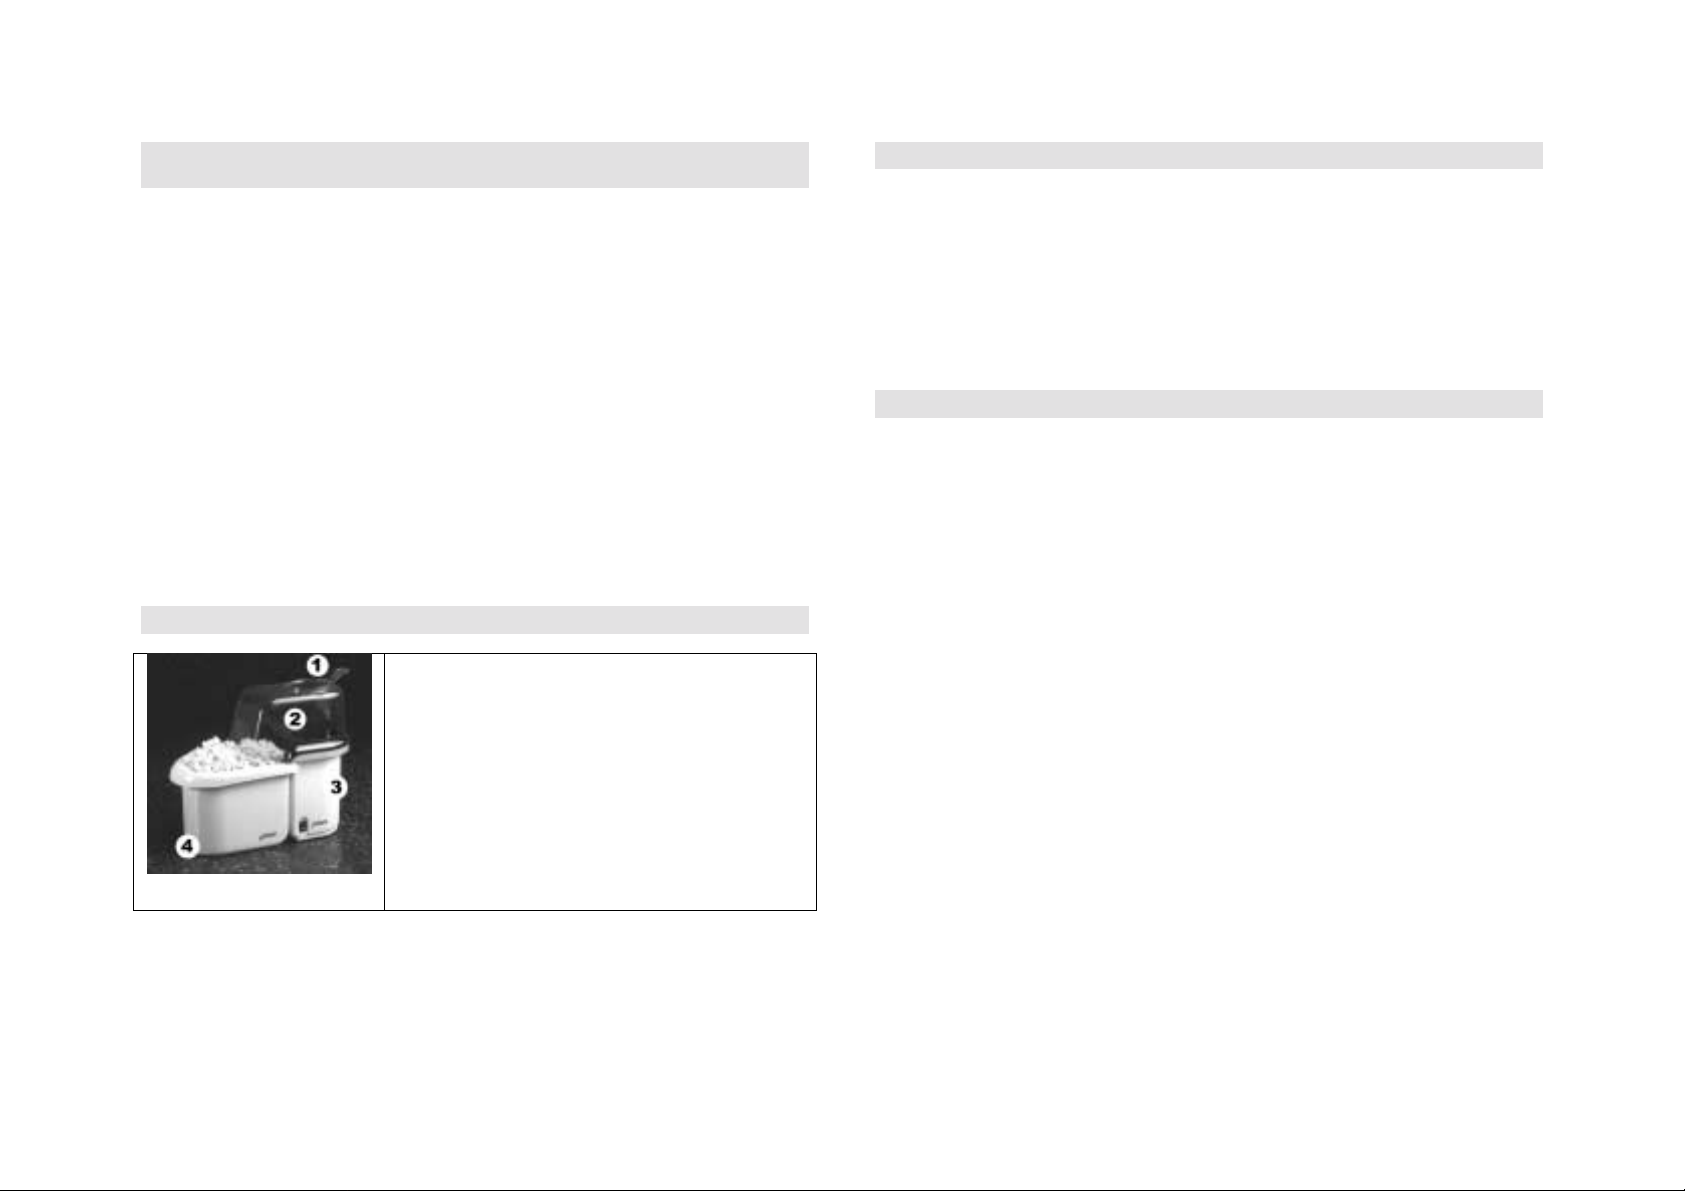
PARTS IDENTIFICATION
1. Measuring cup/butter dish
2. Top cover/hood
3. Popping chamber (inside)
4. Collection bowl
HOW TO USE
1. Remove the measuring cup (1) and the top cover (2). Fill the measuring cup with
popping corn then pour the corn into the popping chamber (3).
2. Replace the top cover and the measuring cup.
3. Position the collection bowl (4) as shown above.
4. Plug the unit into a 220-230V mains outlet & switch on. The popcorn should be ready
within 3-4 minutes.
5. When the corn has finished popping switch the unit off and unplug the electrical cord.
IMPORTANT
YOU MUST ALLOW THE UNIT TO C OOL FOR AT LE AST 1 0 MINUTES AFTE R 2
CONSECUTIVE USES.
CARE & CLEANING
• Always switch the unit off and remove mains plug from wall socket before cleaning the
appliance.
• Only the removable components like the Measuring cup & Top cover can be immersed
in water.
• The rest of the Duck Popper can be cleaned using a soft cloth moistened with a mild
detergent solution.
Page 3

FLAVOURINGS
Try some of these:
Popcorn dessert.
25g smooth peanut butter.
2 tbsp golden syrup
2-3 tbsp double cream
Ice cream
Chocolate sugar strands
Put the peanut butter and syrup in a large pan and heat, stirring continuously until the peanut
butter has melted. Bring to the boil and simmer for 1 minute then stir in the cream. Cook for
another 30 seconds or so then remove from heat. Allow to cool for a few minutes then add
the popcorn and stir gently, coating the popcorn evenly. Place scoops of ice cream into
serving bowls and top with the popcorn. Sprinkle with chocolate sugar strands.
Chocolate flavouring
100g plain chocolate
2 tbsp butter
3 tbsp golden syrup
Break the chocolate into small pieces and place into a large pan along with the butter and
syrup. Heat gently & allow the mixture to melt, stirring occasionally. When all the chocolate
has melted, bring the mixture to the boil for 1 minute. Remove from heat & add the popcorn.
Stir gently until the popcorn is evenly coated with the mixture. Allow to cool & serve. Eat the
same day.
Cheese flavouring
75g of crumbled cheese (type is up to you)
3 tbsp créme fraîche
2 celery sticks (finely chopped)
1 small onion (peeled & grated)
50g walnuts (finely chopped)
Place the cheese and créme fraîche in a large pan. Heat gently until the cheese melts. Stir in
the onion & celery and continue cooking for a further 1-2 minutes. Stir in the walnuts and
remove from heat. Add the popcorn and stir gently until it is evenly coated. Serve.
We do not have any further recipes for publication, however we often put recipes or
flavouring tips suggested by our customers on the web site.
CONNECTION TO THE MAINS SUPPLY
The wires in the mains lead are coloured in accordance with the following code:
BROWN - LIVE (L)
BLUE - NEUTRAL (N)
GREEN/YELLOW - EARTH (E)
As the colours of the wires in the mains lead of this appliance may not correspond
with the coloured markings identifying the terminals in your plug, proceed as follows:
• The BLUE wire is the NEUTRAL and must be connected to the
terminal which is marked with the letter N or coloured BLACK
• The BROWN wire is the LIVE and must be connected to the terminal
which is marked with the letter L or coloured RED.
• The wire which is coloured GREEN/YELLOW must be connected to
the terminal which is marked E or coloured GREEN or
GREEN/YELLOW.
Always ensure that the cord grip is positioned and securely fastened.
WARNING: THIS APPLIANCE MUST BE EARTHED.
WIRING FOR A 13AMP PLUG
 Loading...