

Page 1
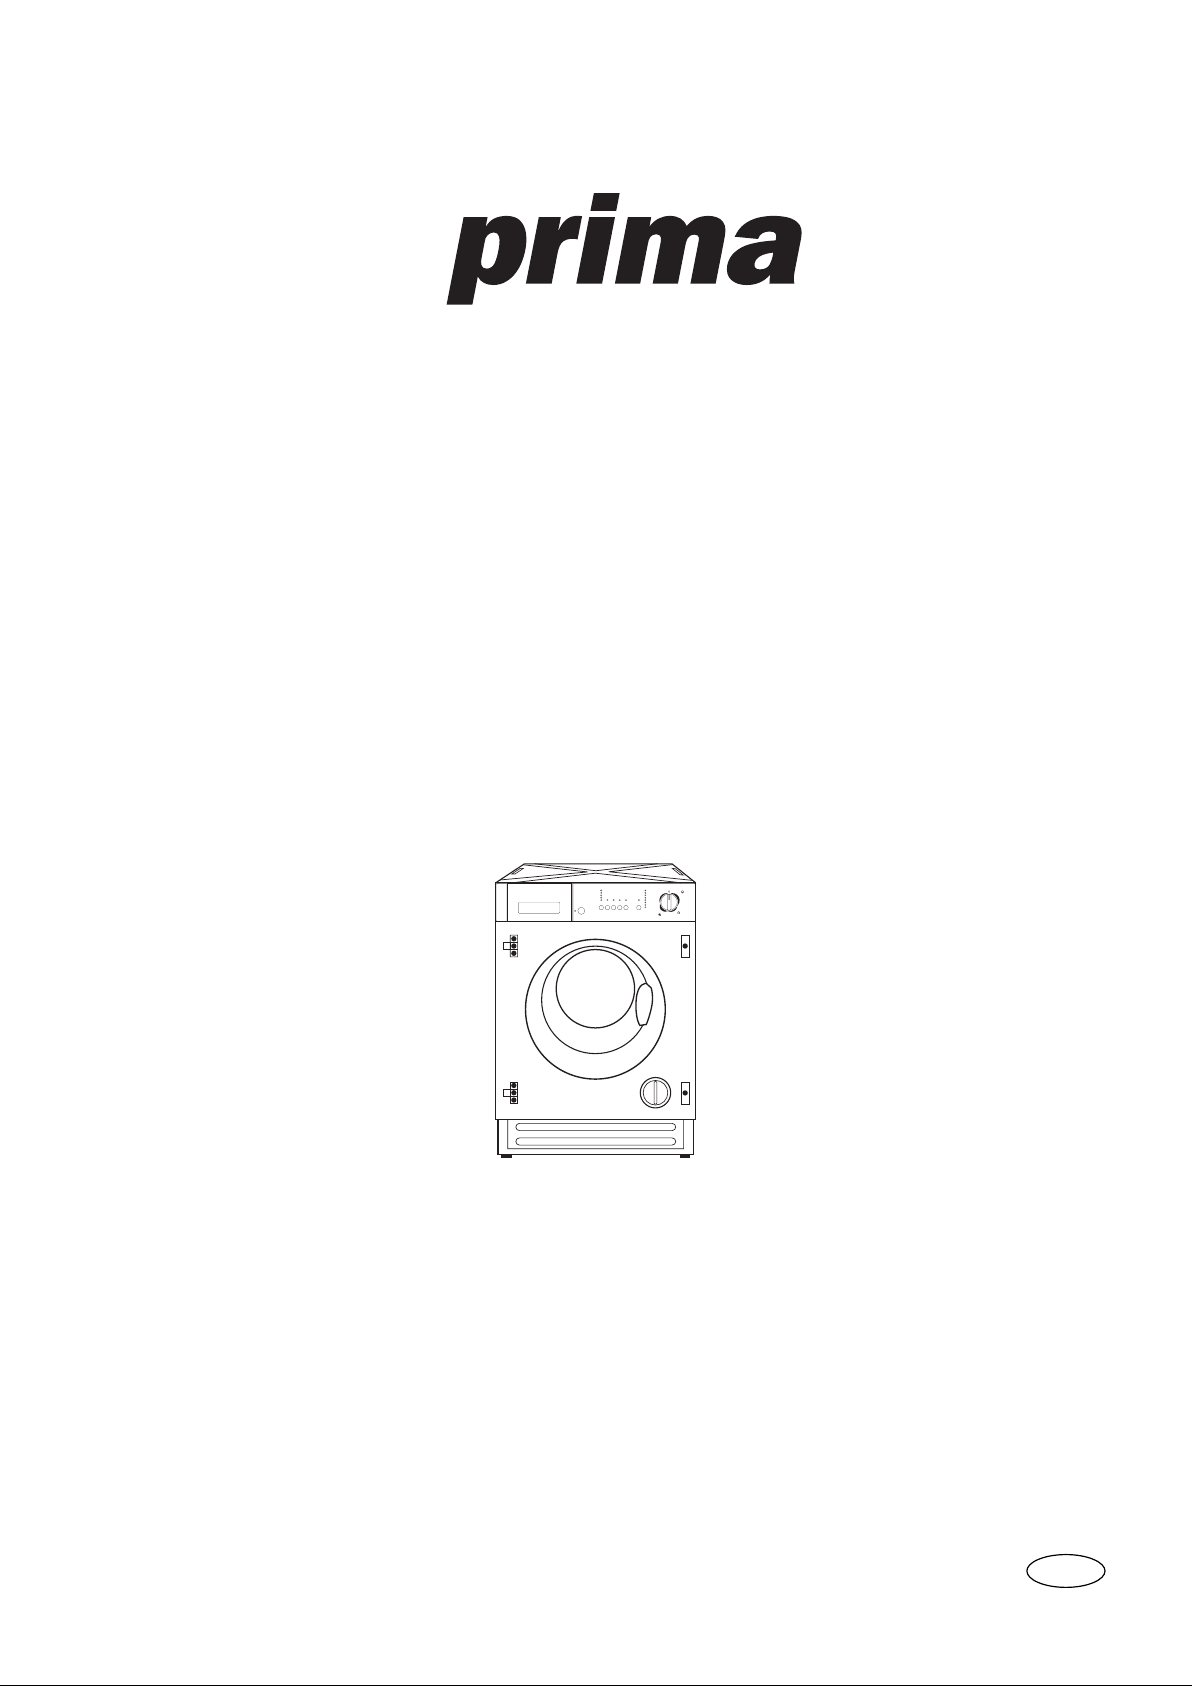
WASHING MACHINE
90°
90°Eco
60°Eco
40°Eco
40°
30°
Cold
60°
60°Eco
40°
40°
30°
40°
30°
Cold
Soak 30°
Rinse
Softener
Drain
Spin
Mini
Cottons
Synthetics
Delicates
Handwash
30°
Cold
LPR 712
LPR 712
132967680
INSTRUCTION BOOKLET
GB
Page 2

Important Safety Information
It is most important that this instruction book should be retained with the appliance for future
reference. Should the appliance be sold or transferred to another owner, or should you move
house and leave the appliance, always ensure that the book is supplied with the appliance in
order that the new owner can get to know the functioning of the appliance and the relevant
warnings.
These warnings have been provided in the interest of safety. You MUST read them carefully
before installing or using the appliance.
●
Installation
●
This appliance is heavy. Care should be taken when
moving it.
●
It is dangerous to alter the specifications or attempt
to modify this product in any way.
●
All packing and transit bolts must be removed before
use. Serious damage can occur to the product and to
property if this is not adhered to. See relevant section
in instructions.
●
Any plumbing work required to install this appliance
should be carried out by a qualified plumber or
competent person.
●
Any electrical work required to install this appliance
should be carried out by a qualified electrician or
competent person.
●
Care must be taken to ensure that the appliance does
not stand on the electrical supply cable.
●
If the machine is situated on a carpeted floor, please
adjust the feet in order to allow air to circulate freely.
Child Safety
●
This appliance is designed to be operated by adults.
Children should not be allowed to tamper with the
controls or play with the product.
●
Pets and children have been known to climb into
washing machines. Please check your drum before
use.
●
The glass door becomes very hot during the washing
cycle. Keep children away from the vicinity of the
appliance whilst it is in operation.
Keep all packaging well away from children.
●
Keep all detergents in a safe place out of children’s
●
reach.
Use
●
Always unplug the appliance and turn off the water
supply after use.
Do not overload the appliance. See relevant section
in the instruction book.
●
Only wash fabrics which are designed to be machine
washed. If in doubt, consult the care label on the
clothes.
●
Before washing, ensure that all pockets are empty
and buttons and zips are fastened. Avoid washing
frayed or torn articles and treat stains such as paint,
ink, rust, and grass before washing. Under wired
bras must NOT be machine washed.
●
Any objects such as coins, safety pins, nails, screws,
stones or any other hard, sharp material can cause
extensive damage and must not be placed into the
machine.
●
Garments which have been in contact with volatile
petroleum products should not be machine washed.
If volatile cleaning fluids are used, care should be
taken to ensure that the fluid is removed from the
garment before placing in the machine.
●
Wash small items such as socks, laces, washable
belts etc in a washing bag or pillow case as it is
possible for such items to slip down between the tub
and the inner drum.
●
Only use the advised quantities of fabric softener.
Damage to the fabric can ensue if you over-fill.
Refer to the manufacturer’s recommendations of
quantities.
●
As some duvets and eiderdowns should be washed
in large commercial machines because of their bulk,
please check with the manufacturer of the item
before washing in a domestic machine.
●
Leave the porthole door slightly ajar between washes
to preserve the door seal.
●
Under no circumstances should you attempt to repair
the machine yourself. Repairs carried out by
inexperienced persons may cause injury or serious
malfunctioning. Contact your local Service Force
Centre. Always insist on genuine spare parts .
2
Page 3

Contents
For the User
Important Safety Information
Your New Washing Machine
Description of the Appliance
Detergent dispenser drawer 5
Child safety feature 5
The Control Panel
Programme information
Operating sequence
Load the laundry 9
Measure out the detergent and the fabric softener 9
Switch the machine on 9
Select the required programme 9-10
Select the spin speed or the “rinse hold” option 10
Select the required options 10
Start the programme 10
At the end of the programme 10
Washing Hints
Which detergent?.... 11
And in which form? 11
Wash Care Symbols
Washing Programmes
6-9
9-10
11-12
13
14-15
Maintenance and Cleaning
Descaling 16
2
After each wash 16
Maintenance Wash 16
4
External cleaning 16
5
Cleaning the dispenser drawer 16
Cleaning the drawer recess 16
Cleaning the filter 16-17
The dangers of freezing 17
8
Emergency emptying out 17
Something Not Working
Service and Spare Parts
Guarantee conditions
For the Installer
Installation Instructions
Technical Specifications
Unpacking 22
Positioning 22
Water inlet 22-23
Water drainage 23-24
Levelling 24
Special conditions 24
In the interest of the environment 24
Electrical connection 25
Building-in 26-27
16-17
18-19
19-20
20
21
21
Guide to use the Instruction Book
The following symbols will be found in the text to guide you throughout the instructions:
Safety instructions
Hints and tips
Environmental information
3
Page 4
Your New Washing Machine
Your new washing machine meets all modern requirements for effective treatment of laundry
with low water, energy and detergent consumption.
Even small loads are washed “economically” because the amount of water used is regulated
automatically according to the load and type of fabric.
●
Automatic cooling of the wash water to 60°C
before draining, with the 95°C programme. This
reduces thermal shock to fabrics, helping to prevent
creasing.
●
The special wool programme with its new delicate
wash system treats your woollens with extreme care.
●
The balance control device ensures that the
washing machine remains stable when spinning.
●
The ECO valve allows total use of detergent and
reduces water consumption so saving energy.
Ecological hints
To save water and energy and help protect the
environment, we recommend that you follow these
hints:
●
Adjust the quantity of detergent according to the
hardness of your water supply, the amount of
laundry and the degree of soiling.
●
Select an “economy” programme for lightly soiled
laundry.
●
A programme without prewash is sufficient for
normally soiled laundry.
●
The machine works more economically if it is fully
loaded.
●
With adequate pre-treatment, stains and limited
soiling can be removed; the laundry can then be
washed at a lower temperature.
In the interest of the
environment
●
Materials marked with the symbol are
recyclable.
●
Check with your local Council or Environmental
Health Office to see if there are facilities in your area
for re-cycling this appliance.
●
When the appliance is to be scrapped, cut off the
power supply cable and make the door lock device
unusable to prevent young children from being
trapped inside.
●
Help to keep your country tidy - use authorised
disposal sites for your old appliance.
The symbol on the product or on its packaging
indicates that this product may not be treated as
household waste. Instead it shall be handed over to
the applicable collection point for the recycling of
electrical and electronic equipment. By ensuring this
product is disposed of correctly, you will help
prevent potential negative consequences for the
environment and human health, which could
otherwise be caused by inappropriate waste handling
of this product. For more detailed information about
recycling of this product, please contact your local
city office, your household waste disposal service or
the shop where you purchased the product.
How do we help to protect the environment?
We use recycled paper!
Important
Your machine is fitted with a balance control device, which ensures the machine is stable during the spin.
If the wash load appears not to have been spun sufficiently at the end of the wash cycle, because it is not evenly
distributed in the drum, the balance control device may have operated. It will therefore be necessary to redistribute the
wash load manually and select a spin programme. For more detailed information see the section headed "Something
Not Working".
4
Page 5
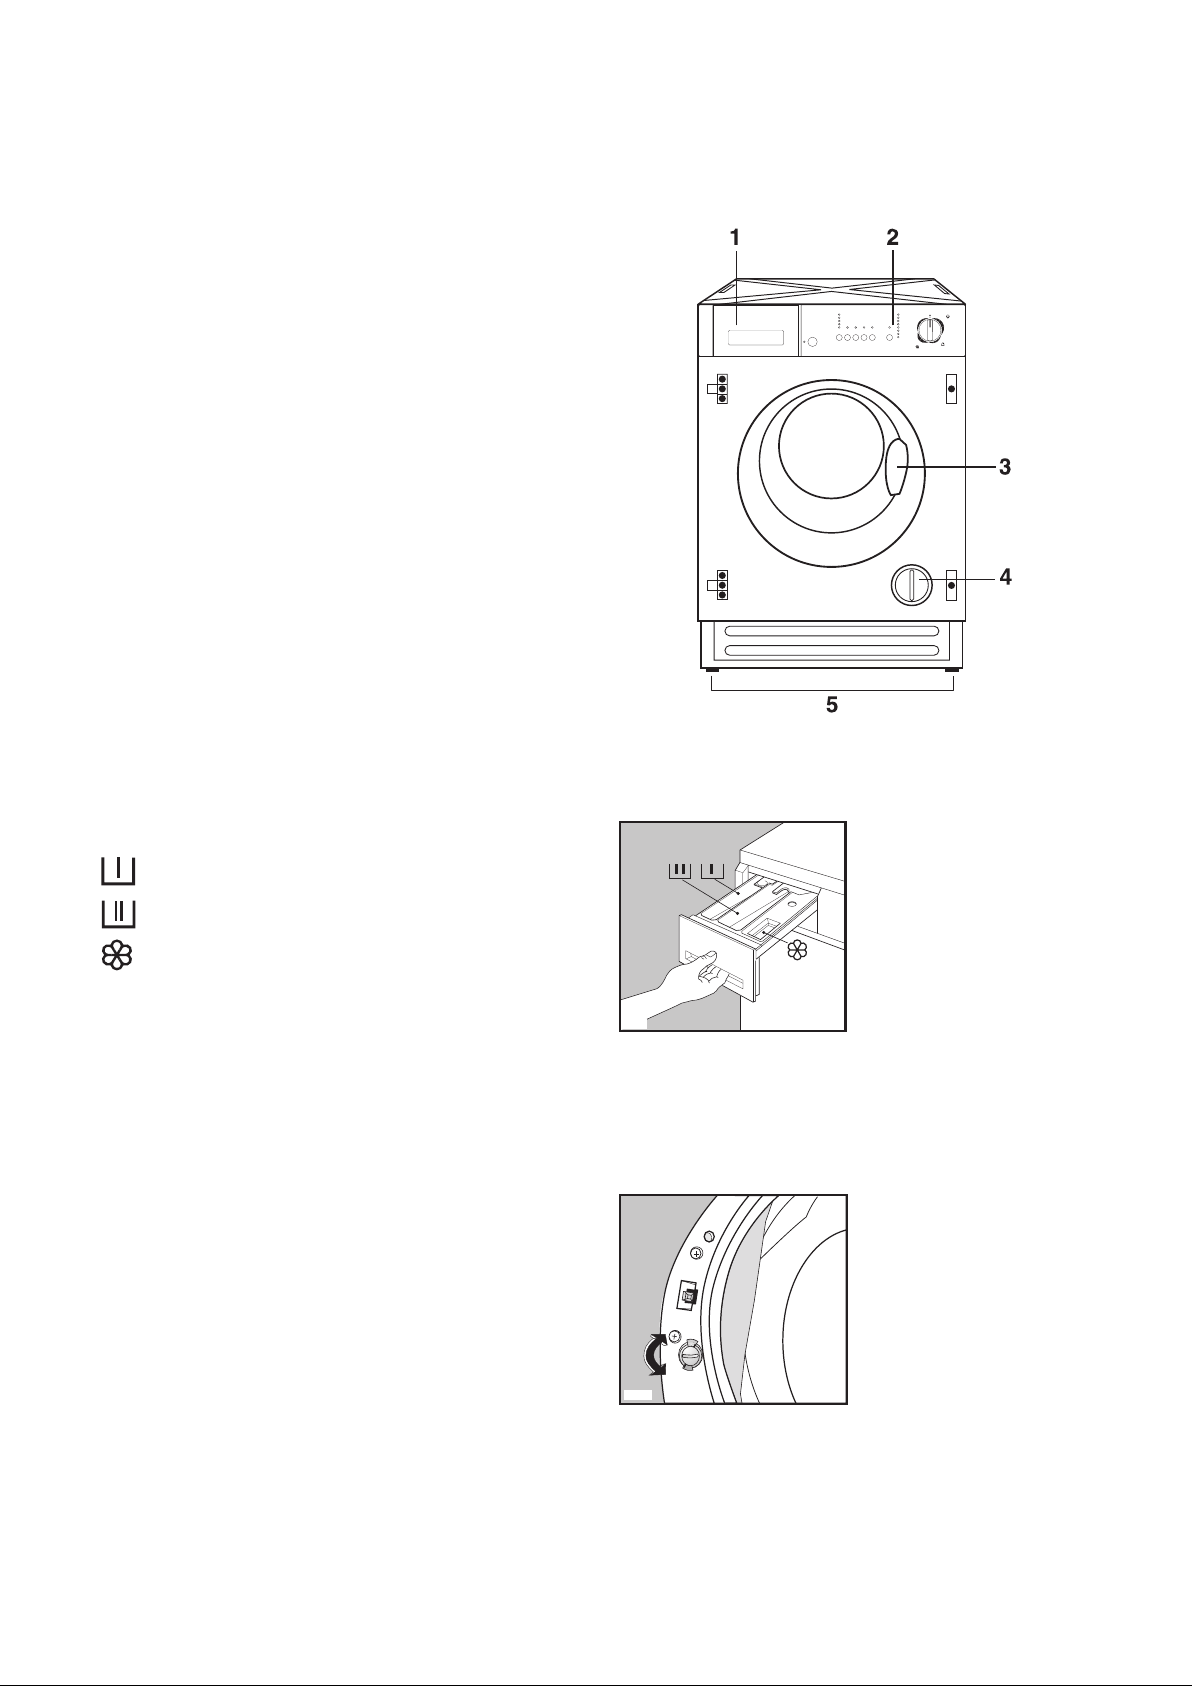
Description of the Appliance
1 Detergent dispenser drawer
2 Control panel
3 Door opening handle
4 Filter
5 Adjustable feet
Cottons
90°
90°Eco
Mini
Spin
60°Eco
Drain
40°Eco
Softener
40°
Rinse
Soak 30°
30°
Cold
Cold
60°
Hand-
30°
wash
60°Eco
40°
40°
30°
40°
Synthetics
Cold
30°
Delicates
LPR 712
Detergent dispenser drawer
Prewash
Main wash
Fabric softener
Child safety feature
This machine incorporates a special child safety feature
to prevent small children from being trapped inside the
machine.
To activate this device, rotate the button (without
pressing it) inside the door clockwise until the groove is
horizontal. If necessary use a coin.
To disable this device and restore the possibility of
closing the door, rotate the button anti-clockwise until
the groove is vertical.
P0301
P1131
5
Page 6
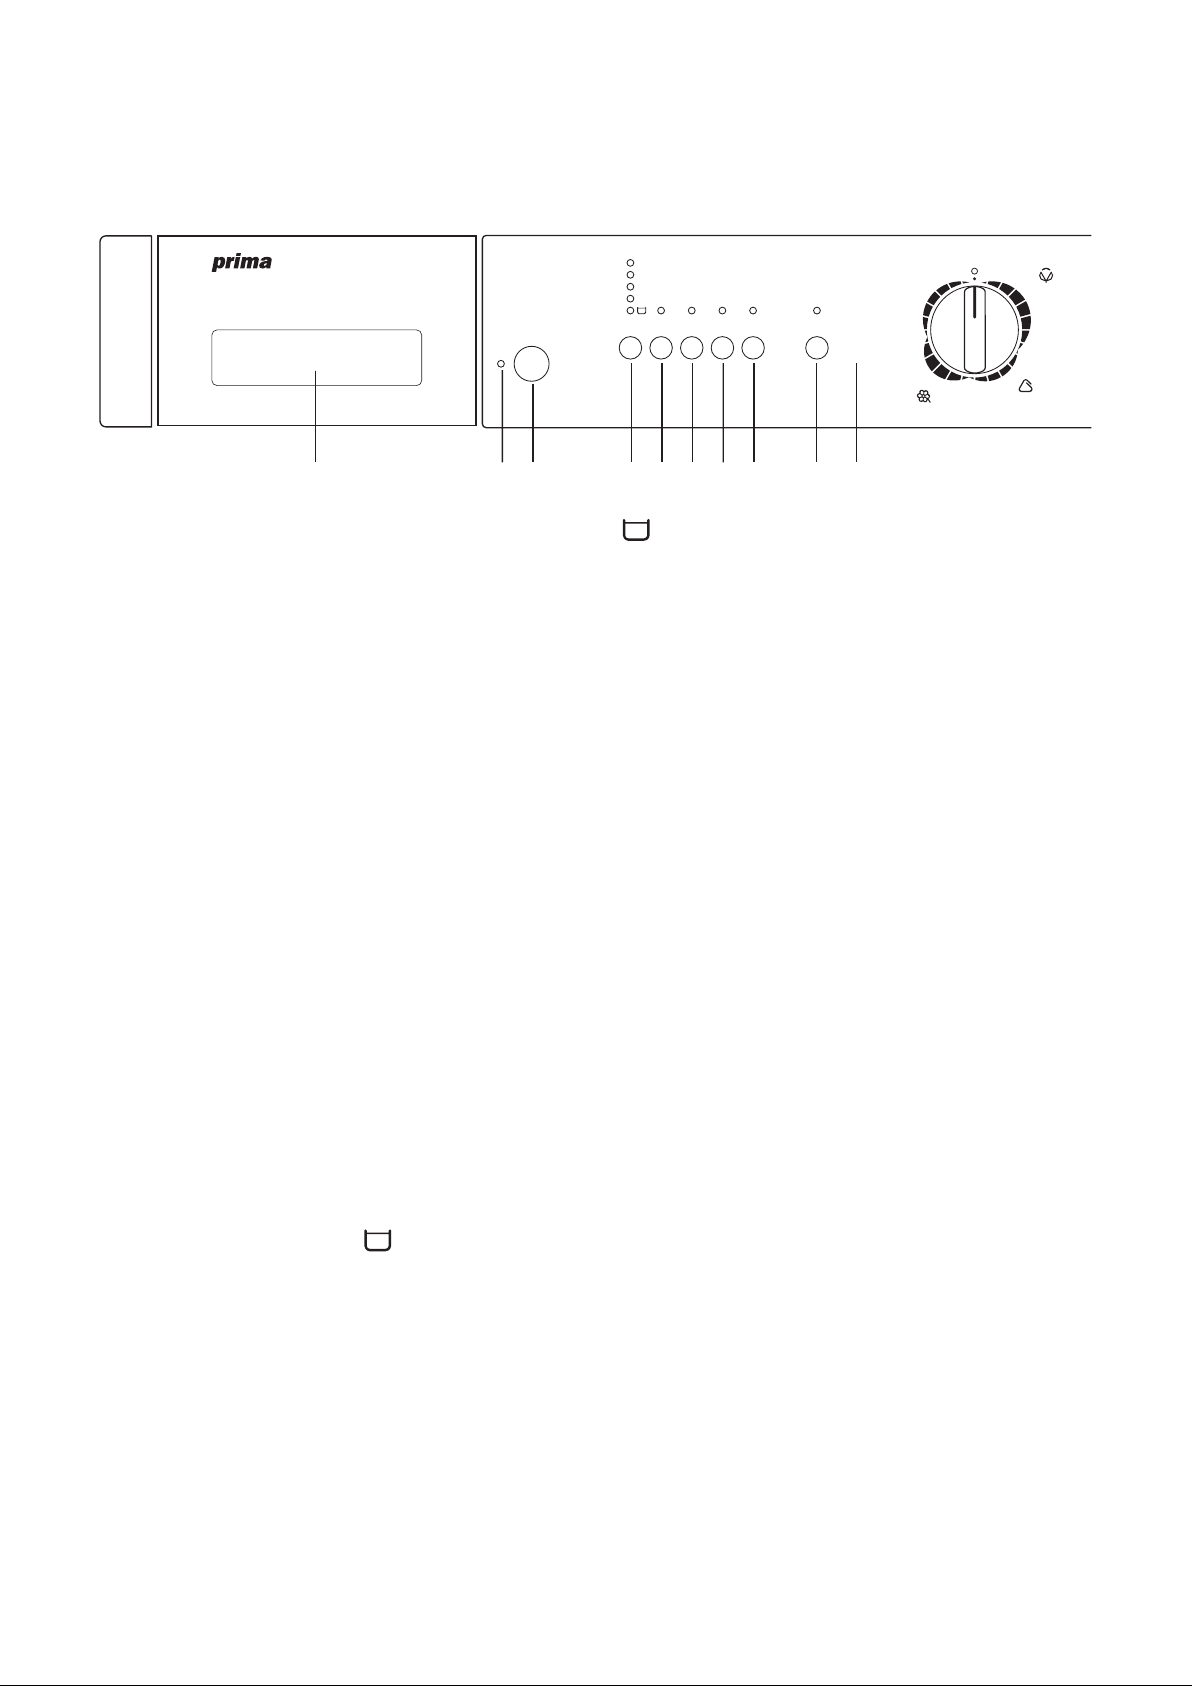
The Control Panel
1 23
45 9678 10 11
Quick
Prewash
Extra
Rinse
Easy
Iron
Start/
Pause
On/Off
Spin
1200
900
700
500
90°
90°Eco
60°Eco
40°Eco
40°
30°
Cold
60°
60°Eco
40°
40°
30°
40°
30°
Cold
Soak 30°
Rinse
Softener
Drain
Spin
Mini
Cottons
Synthetics
Delicates
Hand-
wash
30°
Cold
LPR 712
1Detergent dispenser drawer
2 Mains-on light
This light comes on when the “On/Off” button is
pressed, and goes out when it is pressed again.
3 “On/Off” button
Press this button to switch the machine on. Press it
again to switch the machine off.
Programme Option buttons
Depending on the programme, different functions can
be combined. These must be selected after choosing the
desired programme and before pressing the
“Start/Pause” button.
When these buttons are pressed, the corresponding pilot
lights come on. When they are pressed again, the pilot
lights go out.
If an incorrect option is selected, the corresponding
pilot light flashes for a few seconds.
4 Spin” button
Press this button to reduce the maximum speed of the
final speed proposed by the machine for the selected
programme or to select position “Rinse Hold” .
The light corresponding to the selected option
illuminates.
The following speeds are available for the different
fabrics:
• Cottons, linen: 500/700/900 max 1200 r.p.m.
• Synthetics and Handwash (wool):
500/700 max 900 r.p.m.
• Delicates and Mini:
500 max 700 r.p.m.
Rinse Hol
When Rinse Hold option is selected, the last rinse
water is not emptied out, to prevent the fabrics from
creasing. When the programme has finished, the door is
locked, the light of the “Start/Pause” button goes off,
the pilot lights “End” and “Rinse Hold” in the
programme progress display are alight to indicate that
the water must be emptied out.
There are two methods of draining the water from the
machine.
Method 1: Drain the water only, no spin:
• Turn selector dial to "o" position.
• Select the programme
The water will be emptied out without spinning.
Method 2: Drain and then spin the laundry:
Drain”.
“
• Turn selector dial to “o” position.
• Select programme
Spin”.
“
• Select the required spin speed (see 4 spin speed
button)
• Press Start/Pause button
The water will empty out and then the laundry will be
spun at the selected spin speed.
Attention! Before selecting programmes “Drain” or
“Spin”, the selector dial has to be positioned on “
(cancelling).
5 “Quick” button
This option can be used for lightly soiled Cotton,
Synthetic or delicate items that have been used or
worn for a short time.
This option is not available with the Handwash
(Wool) programme, the Energy saving programmes
(90° Eco, 60° Eco and 40° Eco) and Mini.
6
o”
Page 7
6 “Prewash “button
10 Programme progress display
The machine performs a prewash cycle at 30°C max.
The prewash cycle ends with a short spin at 650 r.p.m.
in programmes for Cottons and Synthetics, and with
emptying of the water for Delicates.
This option is not available with the Handwash (wool)
programme, Soak 30° and Mini.
For use when washing heavily soiled laundry.
7 “Extra Rinse” button
This option can be selected with all programmes, except
the Handwash (wool) programme, Soak 30° and Mini.
The machine will add 2 rinses for cotton and 1 rinse for
synthetics and delicates.
This option is recommended for people who are allergic
to detergents and in areas where the water is very soft.
8 “Easy Iron” button
Selecting this button the laundry is gently washed and
spun to avoid any creasing. In this way ironing is easier.
Furthermore the machine will perform 6 rinses instead
of 3 for cotton and 4 rinses instead of 3 for synthetics.
This function can be used only for cotton and synthetic
fabrics.
If this option is selected for cotton programmes, the spin
speed automaticaly will reduce to 900 rpm.
If this option is selected for synthetic programmes with
a temperature of 60°C, the machine will perform a
washing cycle at max 40°C.
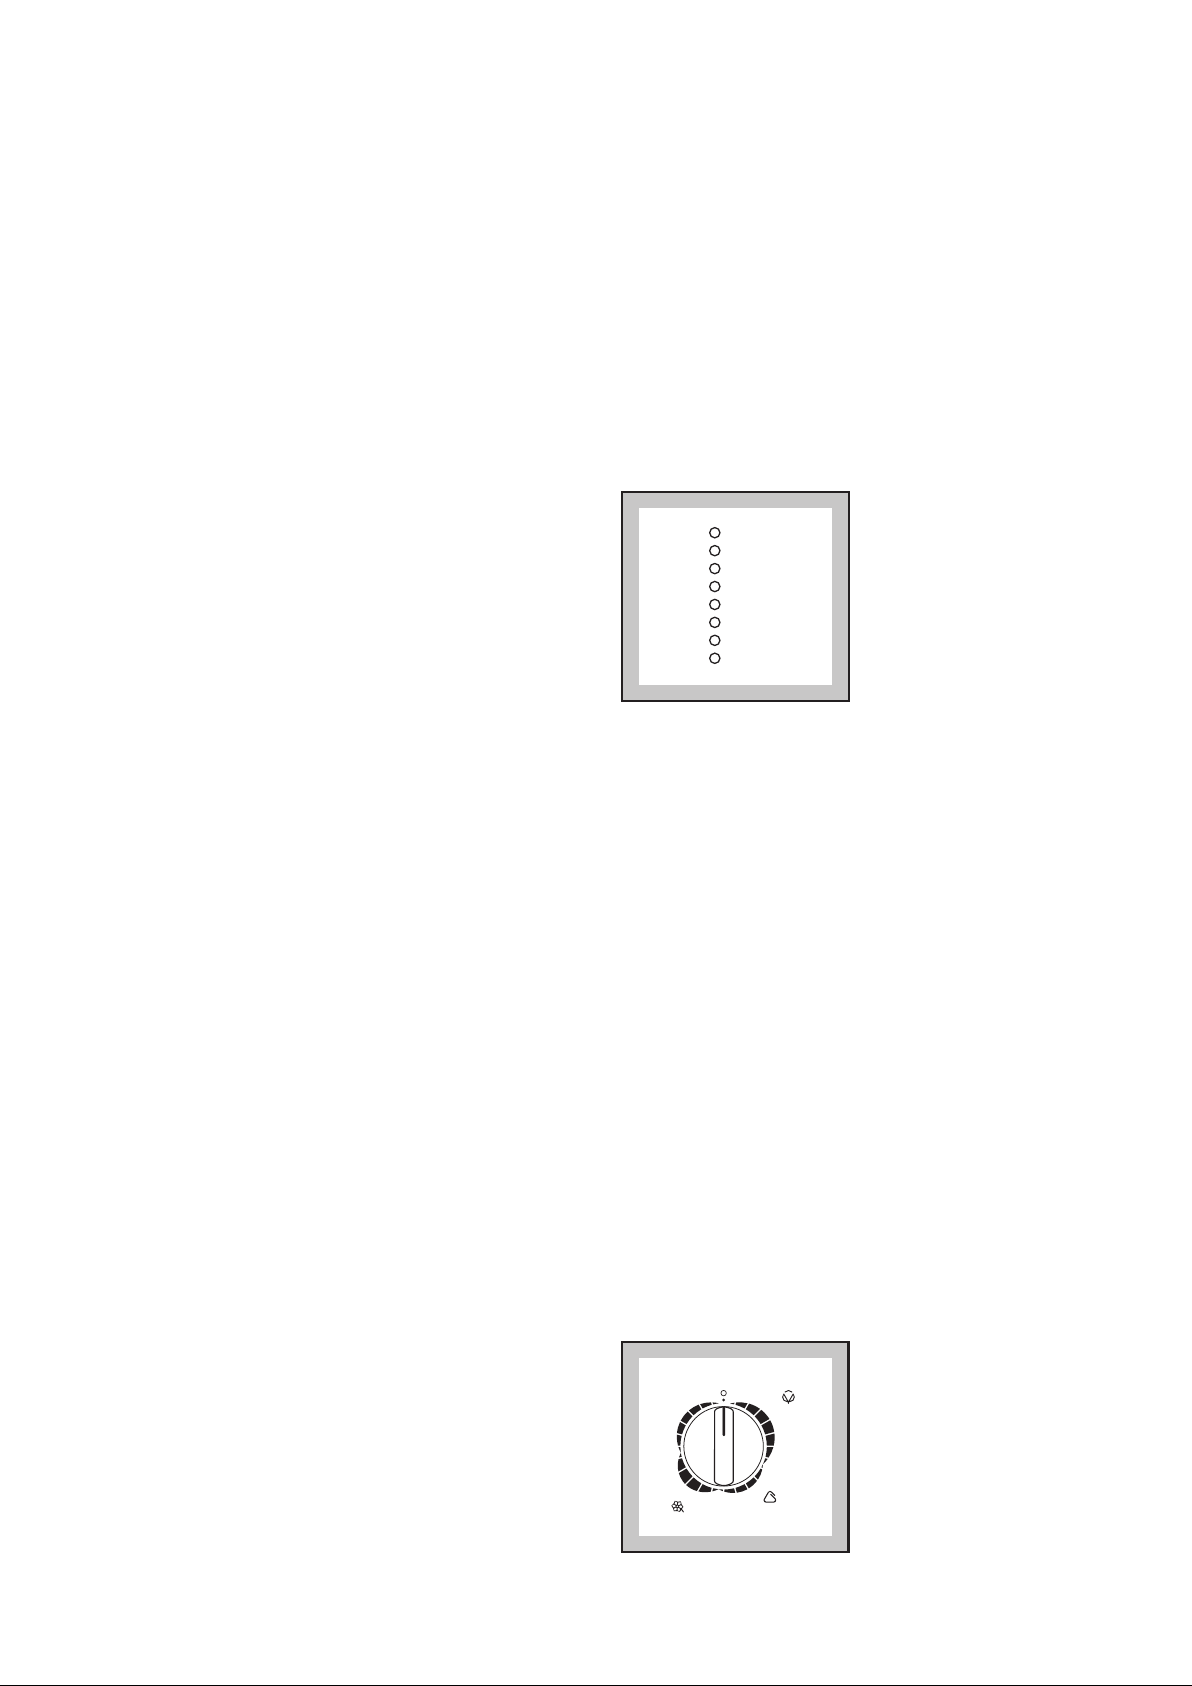
By selecting the wash programme, the pilot lights
corresponding to the various phases making up the
programme come on.
After the machine has started, only the running phase
light illuminate and stay on. (If you have selected the
“Soak 30°” programme the pilot light “Prewash”
illuminates”). When the programme has finished, the
“End” pilot light comes on and the door can be opened.
Prewash
Wash
Rinse
rinse hold
Drain
Spin
Filter
End
The “End” pilot light flashes in the event of operating
problems.
1 flash = the machine does not fill
2 flashes = the machine does not empty
4 flashes = the door has not been closed
To eliminate the problem, see paragraph “Something not
working”.
If the “Filter” pilot light flashes at the end of the
programme this means that the drain filter must be
cleaned.
11 Programme selector dial
9 “Start/Pause” button
This button has two functions: start - pause
Start
After having selected the required programme, press this
button to start the machine; the corresponding pilot light
stops flashing.
Pause
To interrupt a programme which is running, press the
“Start/Pause” button: the corresponding pilot light
starts to flash.
To restart the programme from the point at which it was
interrupted, press the Start/Pause button again.
The selector is divided into 5 sections:
• Cottons
• Synthetics
• Delicates
• Handwashing (Wool)
• Special programmes
• Reset programme “
90°
Mini
Spin
Drain
Softener
Rinse
Soak 30°
Cold
Hand-
30°
wash
40°
30°
40°
Cold
Delicates
30°
90°Eco
40°
60°Eco
60°Eco
60°
40°Eco
40°
30°
Cold
Synthetics
o”
Cottons
LPR 712
7
Page 8

The selector dial can be turned either clockwise or
anticlockwise.
Position Eco in cottons and synthetics sectors
corresponds to the ENERGY SAVING programmes and
position «Cold» to “cold wash”.
At the end of the programme the selector dial must
be turned to position “
button must be pressed to switch the machine off.
o” (reset) and the “On/Off”
Functions
Altering an option or a running programme
It is possible to change any option before the
programme carries it out.
Before you make any change, you must pause the
washing machine by pressing the “Start/Pause” button.
Changing a running programme is possible only by
resetting it. Turn the programme selector dial to "
then to the new programme position. The washing water
in the tub will not emptied out .
Start the new programme by pressing the “Start/Pause”
button.
o" and
End of “Soak 30” programme
At the end of the soak time, the machine stops
automatically with water left in the tub. The light of
the “Start/Pause” button goes off and the pilot light
“End” in the programme progress display is alight but
the door is locked to indicate that the water must be
emptied out.
Before starting a new washing phase, it is necessaty to
empty out the water by:
● draining only. Select programme “Drain” and press
Start/Pause button, the water is emptied out without
spinning, or
● draining and spin. Select programme “Spin”.
Reduce the spin speed by means of the relevant
button and then press Start/Pause button. The water
is empty out and the laundry is spun at the selected
spin speed.
At the end of the cycle, the light “End” illuminates, the
door can be opened.
Important!
At the end of the «Soak 30°» programme you can select
the washing programme. First, turn the programme
selector dial to “
o” (Reset), then select the programme.
Interrupting a programme
Depress the “Start/Pause” button to interrupt a
programme which is running: the corresponding light
starts to flash.
Depress the same button to restart the programme.
Opening the door after the programme has
started
You can open the door, after having set the washing
machine to PAUSE, provided the following conditions
exist:
• the washing machine has not heated beyond 55°C;
• the level of the water is not high;
If these requirements are met, when you pause the
washing machine, the door can be opened.
Should it not be possible to open the door, and should it
be absolutely necessary to do so, switch the machine off
by pressing the “On/Off” button.
After approximately 3 minutes, you can open the door.
Pay attention to the level and temperatures of the
water in the washing machine!
When you close the door and press the “On/Off” button
again, the washing machine will resume the programme
from the point where it had been interrupted.
Programme information
“Handwash” (wool)
Washing programme for machine washable wool as
well as for hand washable woolens and delicate fabrics
with the “hand washing” care symbol.
“Soak 30°”
This is a special programme for heavily soiled laundry.
The machine performs a soak of about 30 minutes at
30°C. At the end of the soak time the machine will stop
automatically with water left in the tub. Pour the
detergent for the soak programme into the compartment
marked .
This programme cannot be used for very delicate
fabrics or Wool.
Before starting a new washing phase, it is necessary to
empty the water by selecting the “Drain” programme.
“Rinses”
With this programme it is possible to rinse and spin
cotton garments which have been washed by hand.
The machine performs 3 rinses, followed by a final spin
at 1200 r.p.m. The spin speed can be reduced by pressing
“Spin” button.
8
Page 9
“Softener”
Hand washed cotton garments can be softened with this
programme. The machine performs 1 rinse, followed by
a final spin at the max. speed, which can be reduced by
pressing “Spin” button.
“Drain”
For emptying out the water of the last rinse in
programmes with the “Rinse Hold” option or at the end
of the Soak 30° programme.
Turn first the programme selector dial to “
select “Drain” programme and press the “Start/Pause”
button.
o”, then
“Spin”
Separate long spin at the maximum speed for hand
washed cotton garments.
“Mini”
This is a complete programme that can be combined
with the following options: “Spin” reduction and
“Rinse Hold”. To be used for laundry which is lightly
soiled or which needs freshening up. Max load: 2 kg.
Washing temperature: 30°C, programme duration: 30
minutes, final spin speed: 700 r.p.m.
o”
“
To reset a programme turn the selector dial to “
Now can a new programme be selected.
Operating Sequence
o”.
Before the first wash, we recommend that you pour 2
litres of water into the main wash compartment of
the detergent drawer in order to activate the ECO valve.
Then run a cotton cycle at 90°C, without any laundry in
the machine, to remove any manufacturing residue from
the drum and tub.
Pour 1/2 a measure of detergent and start the machine.
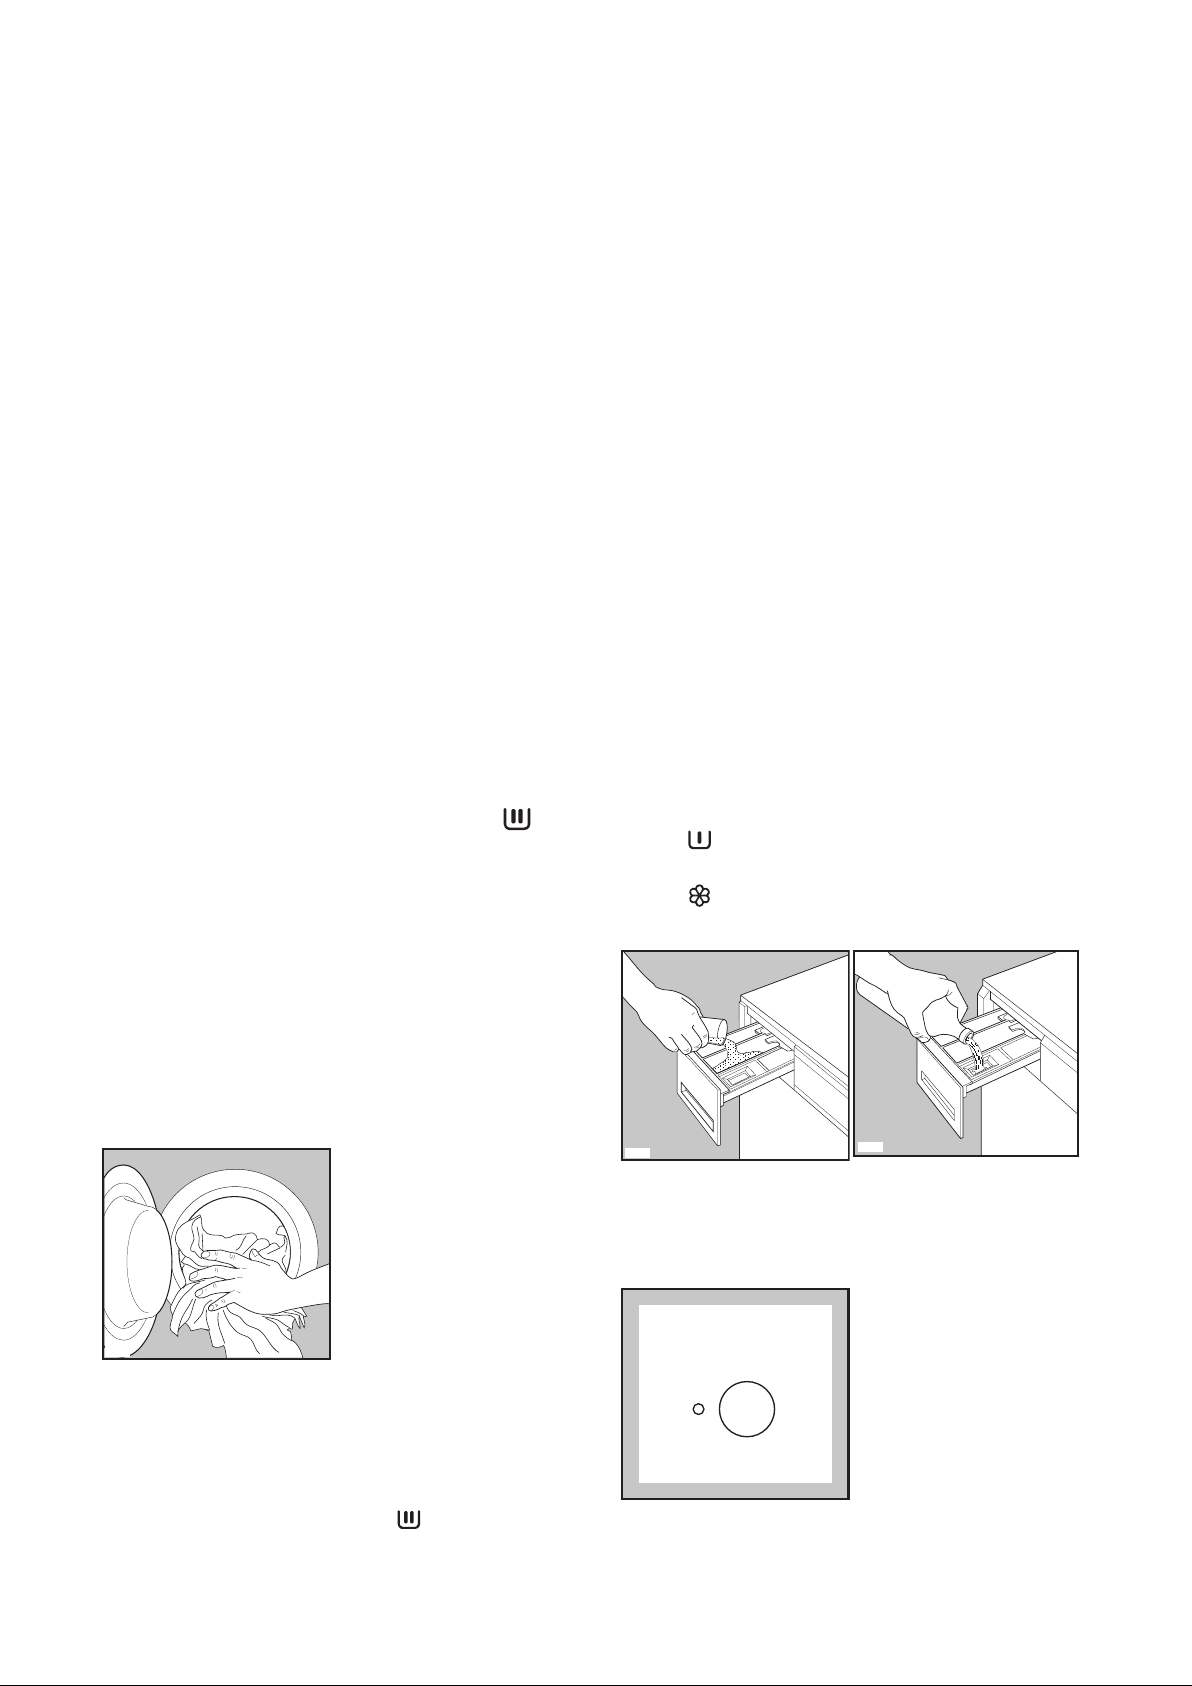
1. Load the laundry
Open the door by pulling the door handle outwards.
Place the laundry in the drum, one item at a time,
shaking them out as much as possible.
Close the door.
P0004
If you have selected the prewash option or the soak 30°
programme, pour detergent into the wash compartment
marked .
If required, pour fabric softener into the compartment
marked (the amount used must not exceed the
“MAX” mark in the drawer). Close the drawer gently.
P0006
P0005
3. Switch the machine on
To switch the machine on, press the “on/off” button: the
mains-on light comes on.
On/Off
2. Measure out the detergent
and the fabric softener
Pull out the dispenser drawer until it stops.
Measure out the amount of detergent required and pour
it into the main wash compartment .
9
Page 10
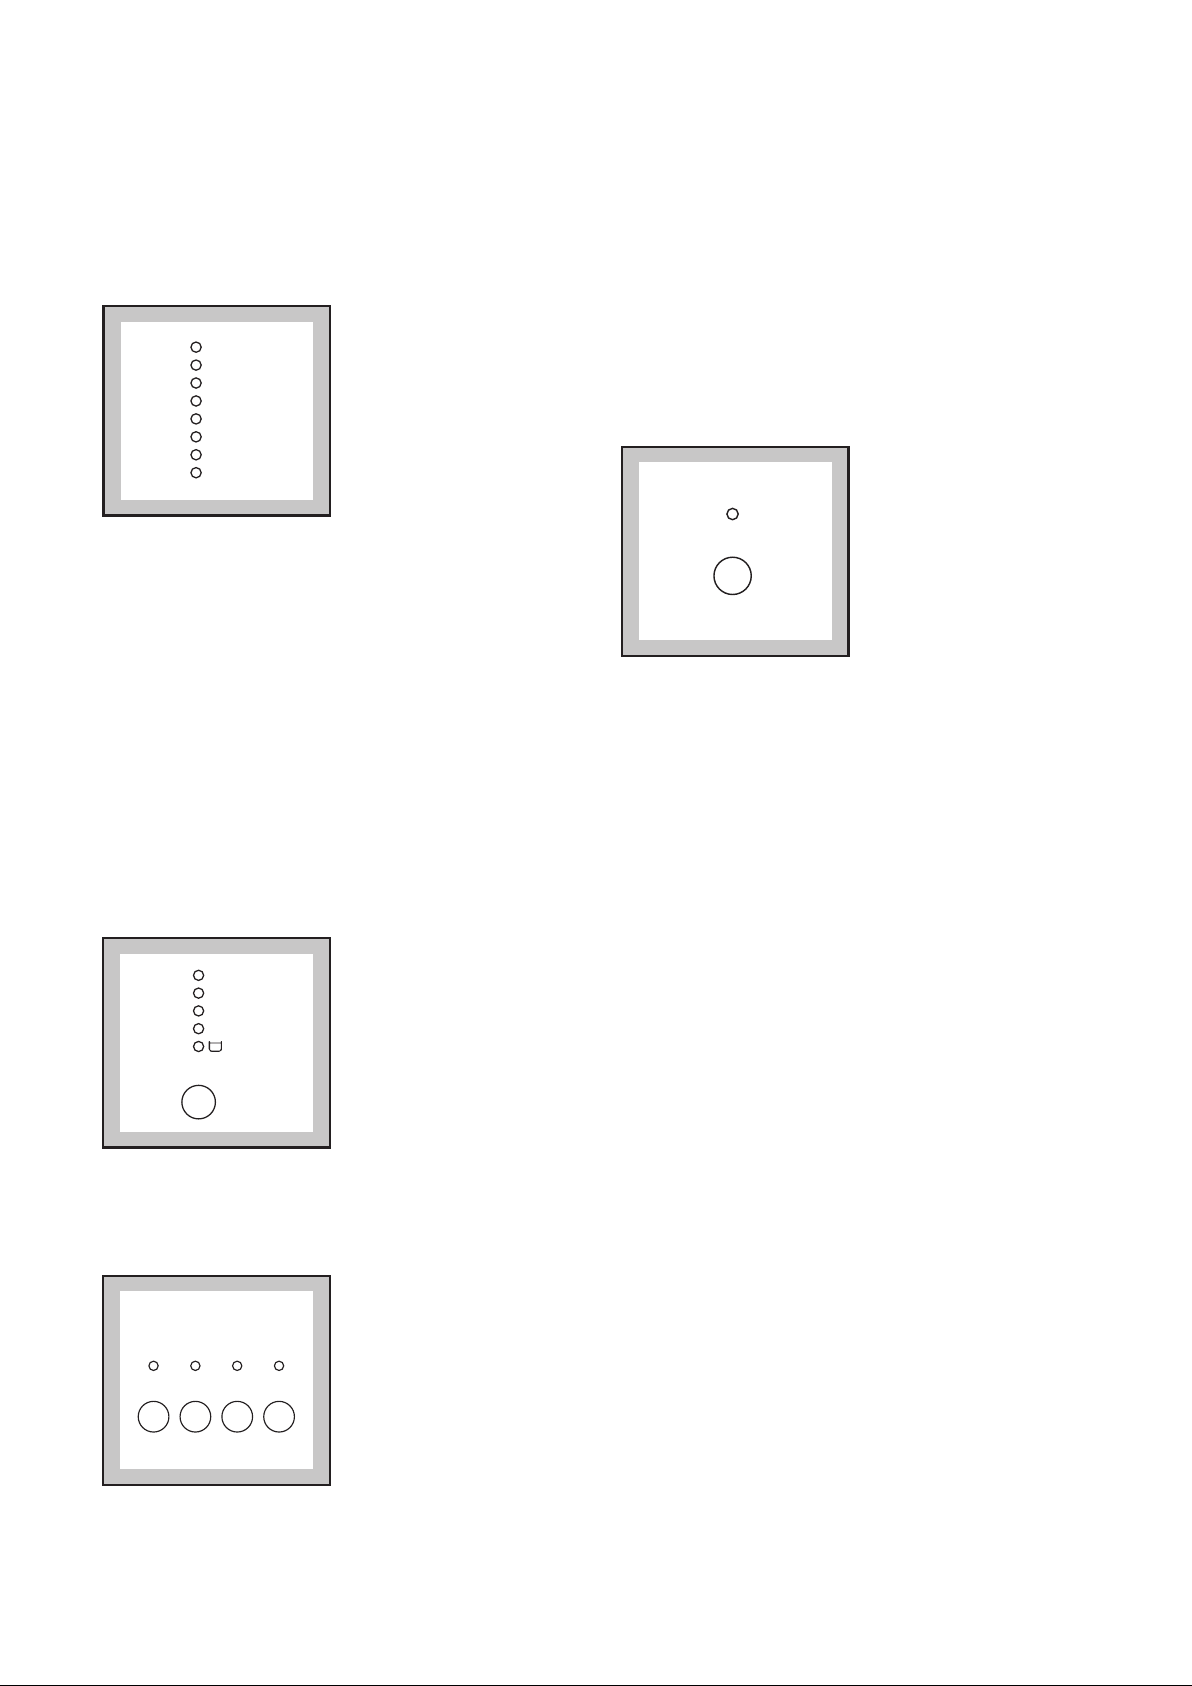
4. Select the required programme
7. Start the programme
Turn the programme selector dial to the desired position.
Prewash
Wash
Rinse
rinse hold
Drain
Spin
Filter
End
The pilot lights corresponding to the different phases
making up the selected programme light on.
If your laundry needs a soak time, turn the programme
selector dial to “Soak 30°” and then, before starting a
washing cycle, drain the water as described in the “End
of Soak 30 programme ” paragraph.
5. Select the “spin” speed or
“rinse hold”
Depress the spin speed button to choose the required
speed or “Rinse Hold” option : the corresponding light
comes on.
1200
900
700
500
Spin
option
6. Select the required options
The light corresponding to the pressed button
illuminates.
Extra
Quick
Easy
ERinsePrewash
Iron
To start the selected programme, press the
“Start/Pause” button; the corresponding light stops
flashing.
The pilot light corresponding to the wash phase which is
running is on.
The machine starts operating.
Start/
Pause
8. At the end of the programme
The machine stops automatically. The light of the
“Start/Pause” button goes out, the “End” pilot light
illuminates and the door can be opened.
If the “Rinse Hold” option has been selected, the door
will be locked, the light of the “Start/Pause” button
goes off, the only “Rinse Hold” pilot light remains lit to
indicate that the water must be drained before opening
the door.
To empty out the water you can, after turning the
programme selector dial to “
● select programme “Drain”, the water is emptied out
without spinning
● select programme
“
means of the relevant button and then press the
“Start/Pause” button. The water is emptied out and
the laundry is spun at the selected spin speed.
At the End of the cycle, and the“End” light illuminates.
The door can be opened.
Turn the programme selector dial to Reset “
Switch the machine off by pressing the “On/Off”
button.
Remove the laundry from the drum and carefully check
that the drum is empty so as to avoid any forgotten
items being damaged in a subsequent wash (e.g.
shrinking) or their colour running into a load of whites.
If you do not intEnd to carry out another wash, close the
water tap.
Leave the door open to prevent the formation of mildew
and unpleasant smells.
o” position:
Spin”. Select the spin speed by
o”.
10
Page 11

Washing Hints
Do NOT overload the machine. Weigh the laundry the
first few times you use the appliance.
The average weights of the most common items are
listed below as a guide:
1000g = 1 kg
Sheet 700-1000 g
Pillow case 100-200 g
Tablecloth 400-500 g
Serviette 50-100 g
Tea towel 70-120 g
Linen hand towel 100-150 g
Towelling hand towel 150-250 g
Towelling bath towel 700-1000 g
Bath robe 1000-1500 g
Man’s shirt 200-300 g
Apron 150-200 g
●
Load the laundry loosely alternating large items with
small ones.
●
Sort the laundry according to the type of fabric,
colour-fastness and how dirty it is.
●
Avoid washing unhemmed or torn items as they may
unravel.
●
Before washing, empty all pockets of small objects
which may have been left inside (coins, keys, screws
etc). as these could damage the drain pump.
●
When washing curtains, remove the hooks.
●
Close poppers and zips and fasten loose buttons.
●
It is essential to wash new coloured items separately
when washing for the first time.
●
When washing fabrics requiring different wash
temperatures together, always select the lowest
temperature.
●
White items should not be washed with coloured
items.
●
Very small items (handkerchiefs, ribbons, socks etc)
should be washed in a washing bag or a pillow case.
●
Use a good quality detergent suitable for automatic
washing machines.
●
Use the correct quantities of detergent.
●
For wool, use gentle detergent only in small
quantities.
●
Bleach is very corrosive; it should be used with care
and kept out of reach of children.
●
Some stains such as fruit, wine, grass, rust etc. are
difficult to remove and should be treated before
washing with specific products, which can be found
in most household shops. In some cases it may help
to soak the stain before washing with a special presoak product or biological detergent.
●
Only wool marked “Pure New Wool - washable,
preshrunk” can be washed in the machine using the
wool programme; other types of wool should be
washed by hand or dry cleaned.
The wool wash cycle of this machine has been
approved by Woolmark for the washing of machine
washable Woolmark products provided that the
garments are washed according to the instructions on
the garment label and those issued by the
manufacturer of this washing machine. M9605.
●
If you have used the machine to wash, rinse or spin
only non-colour fast garments, there may be dye left
in the sump. To ensure any subsequent wash is not
contaminated with the dye, select and carry out a
rinse and spin programme, without any garments, to
ensure that any dye is removed from the sump.
●
Once you have finished using the machine, you are
advised to unplug it and turn off the water taps.
11
Page 12
Which detergent?....
And in which form?
To ensure you obtain the best wash results from your
appliance, it is important to use the right detergent in
your everyday wash, and only detergents recommended
for use in automatic machines.
To maintain the appearance of your clothes and
household textiles and to make them last longer you
should use different types of detergent for different
washes, whether for whites, colours or delicates.
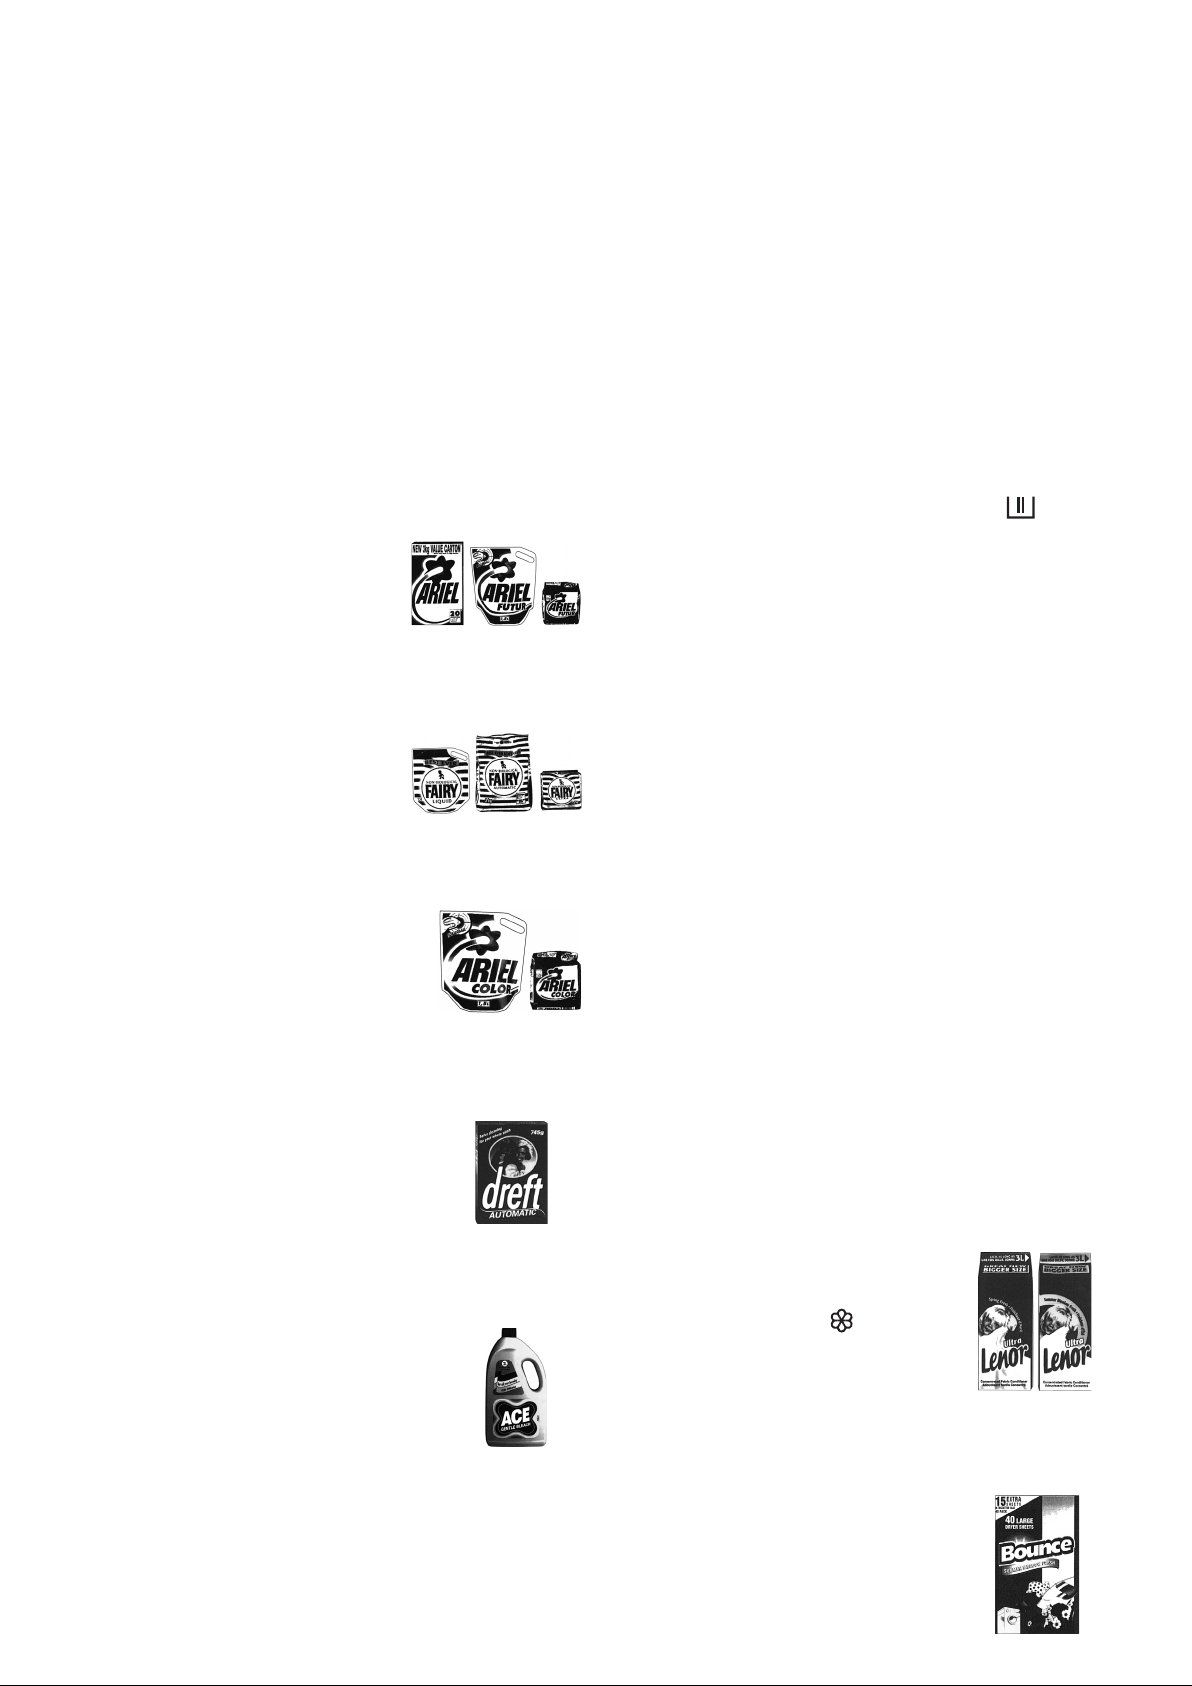
WHITES
We recommend the Ariel product
range which is biological and
designed to provide excellent
cleaning and stain removal even
at low temperatures.
NON BIOLOGICAL
If you prefer to use a non
biological detergent, which does
not contain enzymes we
recommend Fairy. Fairy provides
good cleaning and stain removal.
COLOURS
For coloured items you should use a detergent which is
designed to clean while maintaining the original colour.
Ariel Color does not contain bleach
and therefore helps to preserve
colours.
DELICATE ITEMS
When washing delicates such as
woollens, you should use a product which is specially
designed to care for fine fabrics.
Dreft Automatic is suitable for
woollens and other delicates.
Not only are there different types of detergent, but they
are also available in different forms. Whether you chose
a powder or liquid in traditional or compact form is
your own personal choice.
TRADITIONAL POWDERS
Pour the powder directly into the dispenser drawer. Do
not sprinkle powder onto clothes in the machine drum.
TRADITIONAL LIQUIDS
Liquid can be placed in the main wash compartment of
the detergent drawer marked with the symbol , start
the machine immediately upon placing the
detergent in the dispenser drawer.
Alternatively the detergent is measured into the
specially designed dosing device* which should be
placed on top of the laundry, and at the back of the
machine drum.
COMPACT POWDERS AND LIQUIDS
Compact detergents (or concentrates as they are also
known) are available in liquid or powder form, and
generally require a smaller dosage. Follow the
manufacturer’s instructions to ensure the most
economical usage. Pour the detergent directly into the
dispenser drawer, or alternatively measure the detergent
into the specially designed dosing device* which
should be placed on top of the laundry, and at the back
of the machine drum.
* If you use a dosing device in a washer dryer,
please ensure the dosing device/ball is removed
before carrying out a drying programme.
FABRIC CONDITIONERS
These are ideal for improving ‘softness’, and also
reduce static cling on synthetics and make ironing
easier. They are available in two types:
LAUNDRY BLEACH
For additional stain removal you may wish to use a
product such as Ace Gentle Bleach which is used in
addition to your chosen detergent. Ace is suitable for all
washable fabrics including silks,
woollens and colours.
For example Lenor liquid fabric
softener, for use in the washing
machine/washer dryer. The
liquid fabric softener should be
poured into the compartment
marked with the symbol .
Follow the
manufacturer’s dosage
instructions and never exceed the
MAX level.
Bounce conditioning sheets for use
in a tumble dryer. We recommend
the conditioning sheets are pinned
(using a safety pin) to an article
of laundry and placed in the
tumble dryer.
12
Page 13
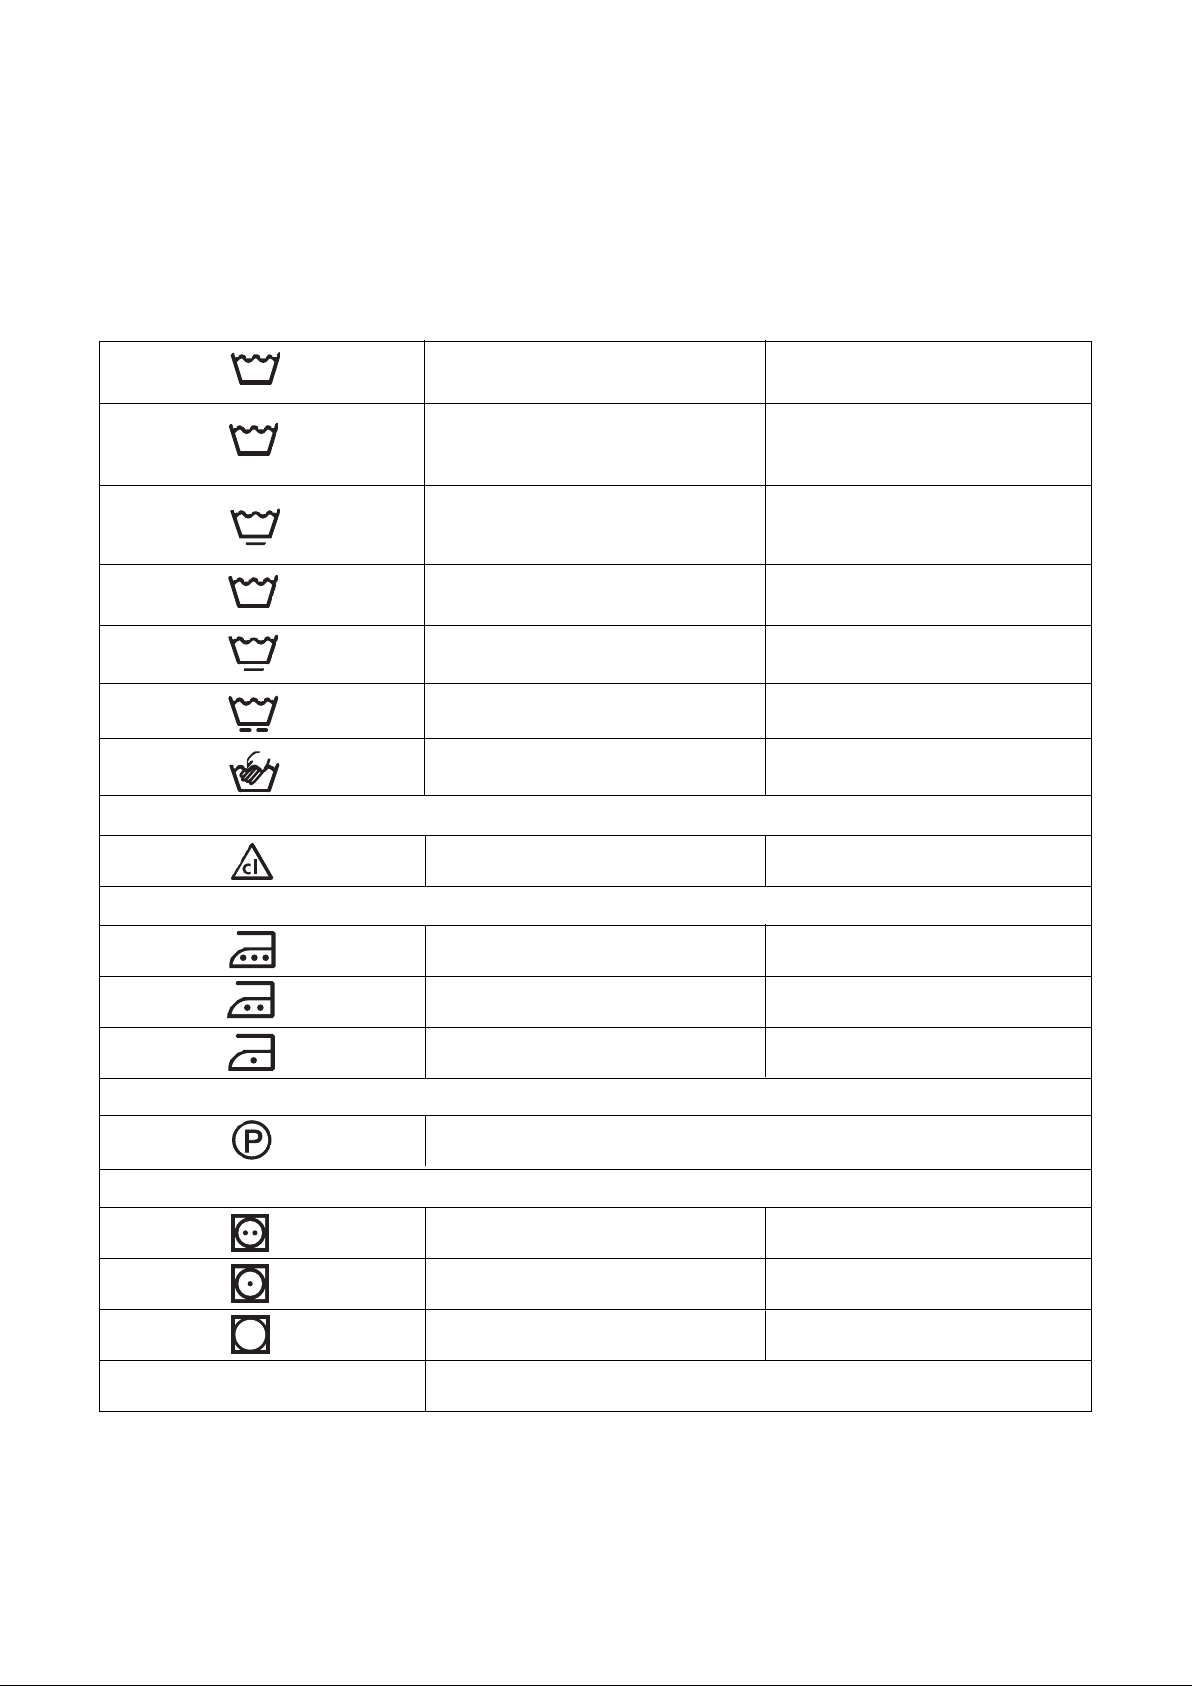
Wash Care Symbols
95
60
50
40
40
40
Wash care labels inside garments recommend how to launder your clothes with the best results. The care labelling
code is in line with care labelling used in the rest of Europe. The symbols used make it easy to select the correct
programme on your washing machine.
WASHING SYMBOL
BLEACHING
WASH ACTION FABRIC
Normal (Maximum)
Normal (Maximum)
Reduced (Medium)
Normal (Maximum)
Reduced (Medium)
Much Reduced (Minimum)
Hand wash only
Chlorine bleach may be used
White Cotton or Linen
without Special Finishes
Cotton, Linen or Viscose
without Special Finishes
Colourfast at 60°C.
Nylon, Polyester/Cotton, Viscose
with Special Finishes, Cotton/
Acrylic Mix.
Cotton, Linen or Viscose
Colourfast at 40°C but not 60°C.
Acrylics, Acetate, Triacetate, Wool
mixes, Polyester/wool blends.
Wool, wool mixtures, Silks
Do not machine wash
IRONING
Hot iron
Warm iron
Cool iron
DRY CLEANING
May be dry cleaned. Other letters and/or a bar beneath the circle will
indicate the required process to the dry cleaner.
TUMBLE DRYING
with high heat setting
with low heat setting
May be tumble dried
X
A cross through any symbol means «DO NOT»
Important Notes
For best results, always use the dispenser drawer for
dispensing detergents and liquid additives.
Once the dispenser has been filled, close it by pushing it
in gently. This is particularly important if you are using
Cotten, Linen, Viscose
Polyester mixtures, Wool
Acrylic, Nylon, Polyester
fabric conditioner to avoid the conditioner entering the
machine prematurely.
When using liquid detergent and a prewash programme,
place the detergent into the correct compartment in the
dispenser drawer, after the prewash has finished.
13
Page 14
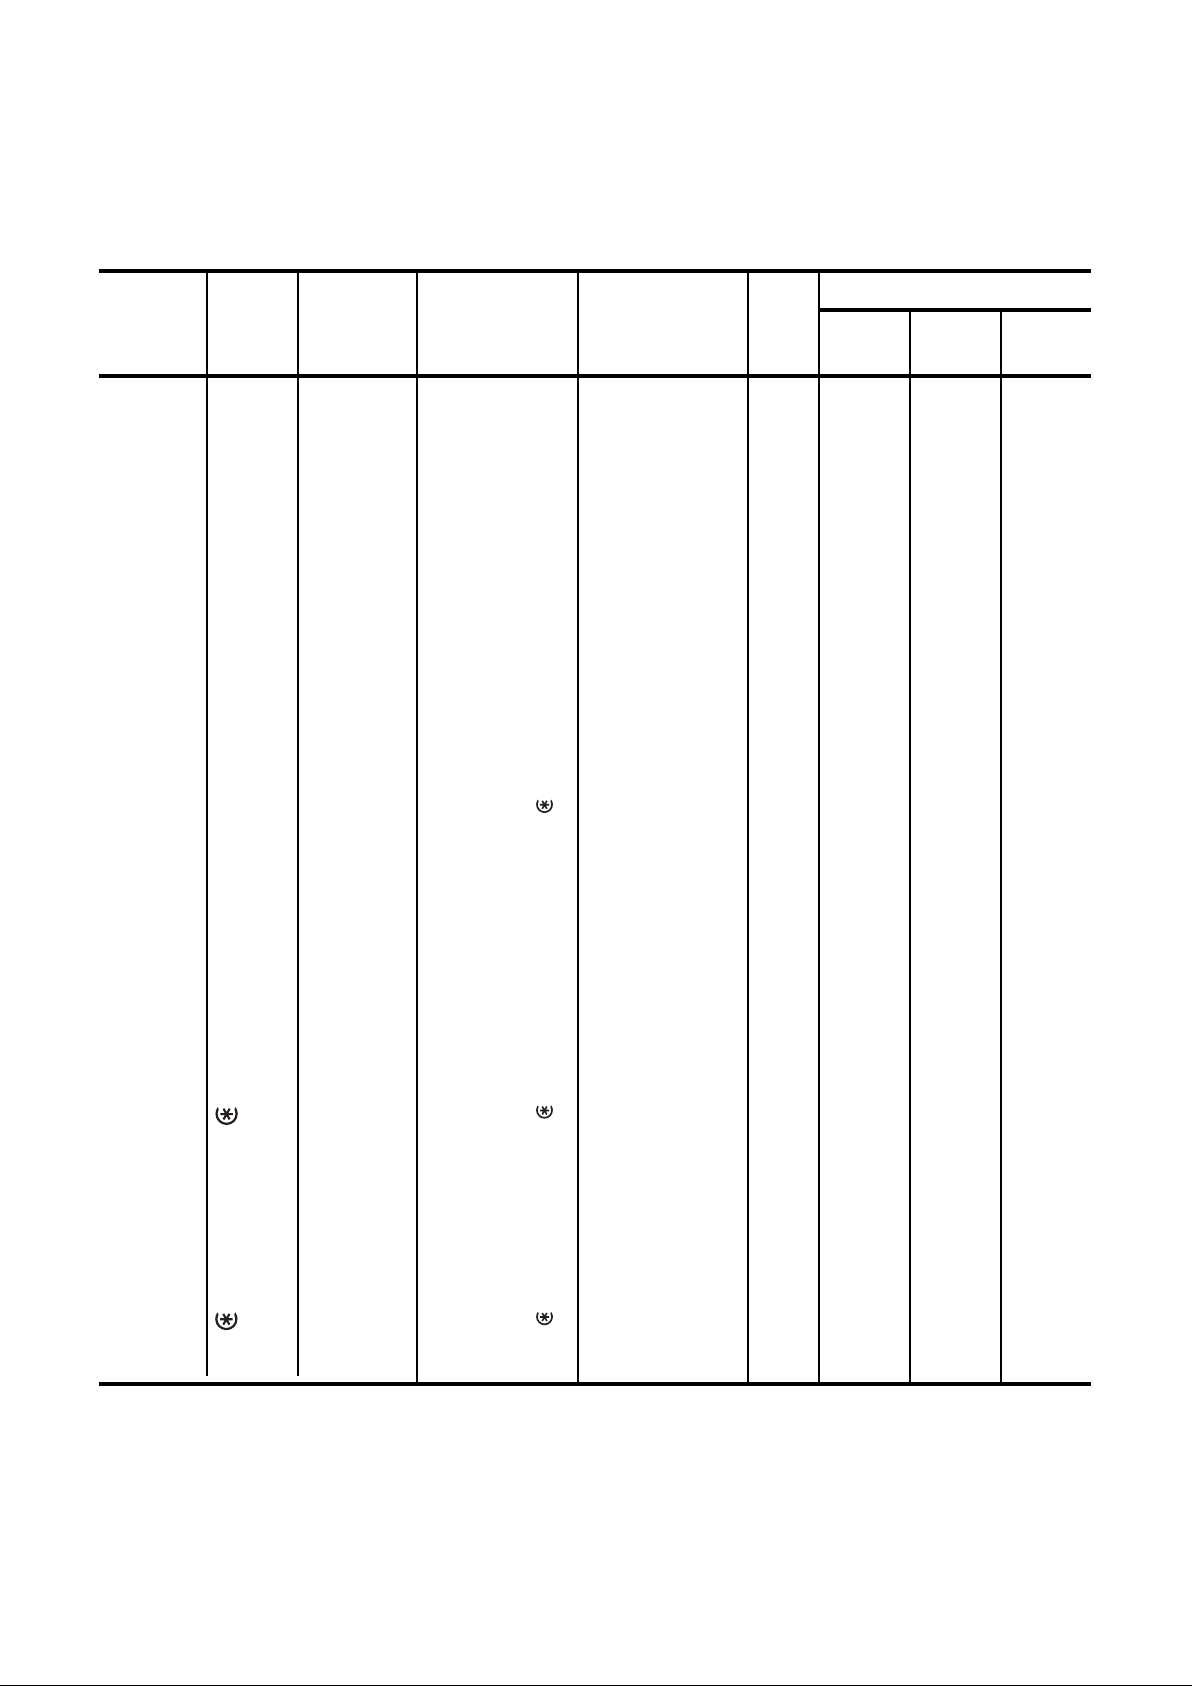
Washing Programmes
Section
Cottons
Cottons
*Cottons
Cottons
Cottons
Temp.
90°
90 Eco°
60°Eco
40° Eco
30°-40°
(Cold
Type of
fabric
Whites
Whites
Economy
Whites and
Fast colours
Colours
Economy
Non-fast
colours
)
Programme
description
Wash at 95°C
3 rinses
Normal spin
Wash at 67°C
3 rinses
Normal spin
Wash at 60°C
3 rinses
Normal spin
Wash at 40°C
3 rinses
Normal spin
Wash at 30°-40°
or cold wash
3 rinses
Normal spin
Additional
Max.
functions
SPIN SPEED/ R. HOLD
PREWASH, QUICK,
EXTRA RINSE
EASY IRON
SPIN SPEED/ R. HOLD
PREWASH,
EXTRA RINSE,
EASY IRON
SPIN SPEED/ R. HOLD
PREWASH,
EXTRA RINSE
EASY IRON
SPIN SPEED/ R. HOLD
PREWASH,
EXTRA RINSE,
EASY IRON
SPIN SPEED/ R. HOLD
PREWASH, QUICK,
EXTRA RINSE
EASY IRON
load
5 kg
5 kg
5 kg
5 kg
5 kg
Consumption**
Energy
kWh
2.0
1.4
0.85
0.9
0.55
WaterltTime
min
53
49
49
49
49
145
135
135
150
115
Synthetics
Synthetics
Synthetics
Delicates
Handwash
Wool
60°
60° Eco
30°-40°
(Cold)
30°- 40°
30°- 40°
(Cold)
Synthetics
Synthetics
Economy
Synthetics
Delicates
Wool
(Handwash)
Wash at 60°C
3 rinses
Delicate spin
Wash at 40°C
3 rinses
Delicate spin
Wash at 30°-40°C
or cold wash
3 rinses
Delicate spin
Wash at 30°-40°C
3 rinses
Delicate spin
Wash at 30°-40°C
or cold wash
SPIN SPEED/ R. HOLD
PREWASH, QUICK,
EXTRA RINSE
EASY IRON
SPIN SPEED/ R. HOLD
PREWASH, EXTRA R.
EASY IRON
SPIN SPEED/ R. HOLD
PREWASH, QUICK,
EXTRA RINSE
EASY IRON
SPIN SPEED/ R. HOLD
PREWASH, QUICK,
EXTRA RINSE
SPIN SPEED/ R. HOLD
1 k g
2 kg
2 kg
2 kg
2 kg
0.85
0.35
0.4
0.5
0.35
52
52
49
52
53
90
90
75
60
55
3 rinses
Delicate spin
* The “Cotton Whites and fast colours Economy” programme at 60° Eco C is the reference programme for the
data entered in the energy label, in compliance with EC 92/75 standards.
** This data is given purely as an indication: the consumption values may vary in relation to the quantity and type of
laundry, the temperature of the water supply and the ambient temperature. The data refers to the highest
temperature for each programme.
14
Page 15
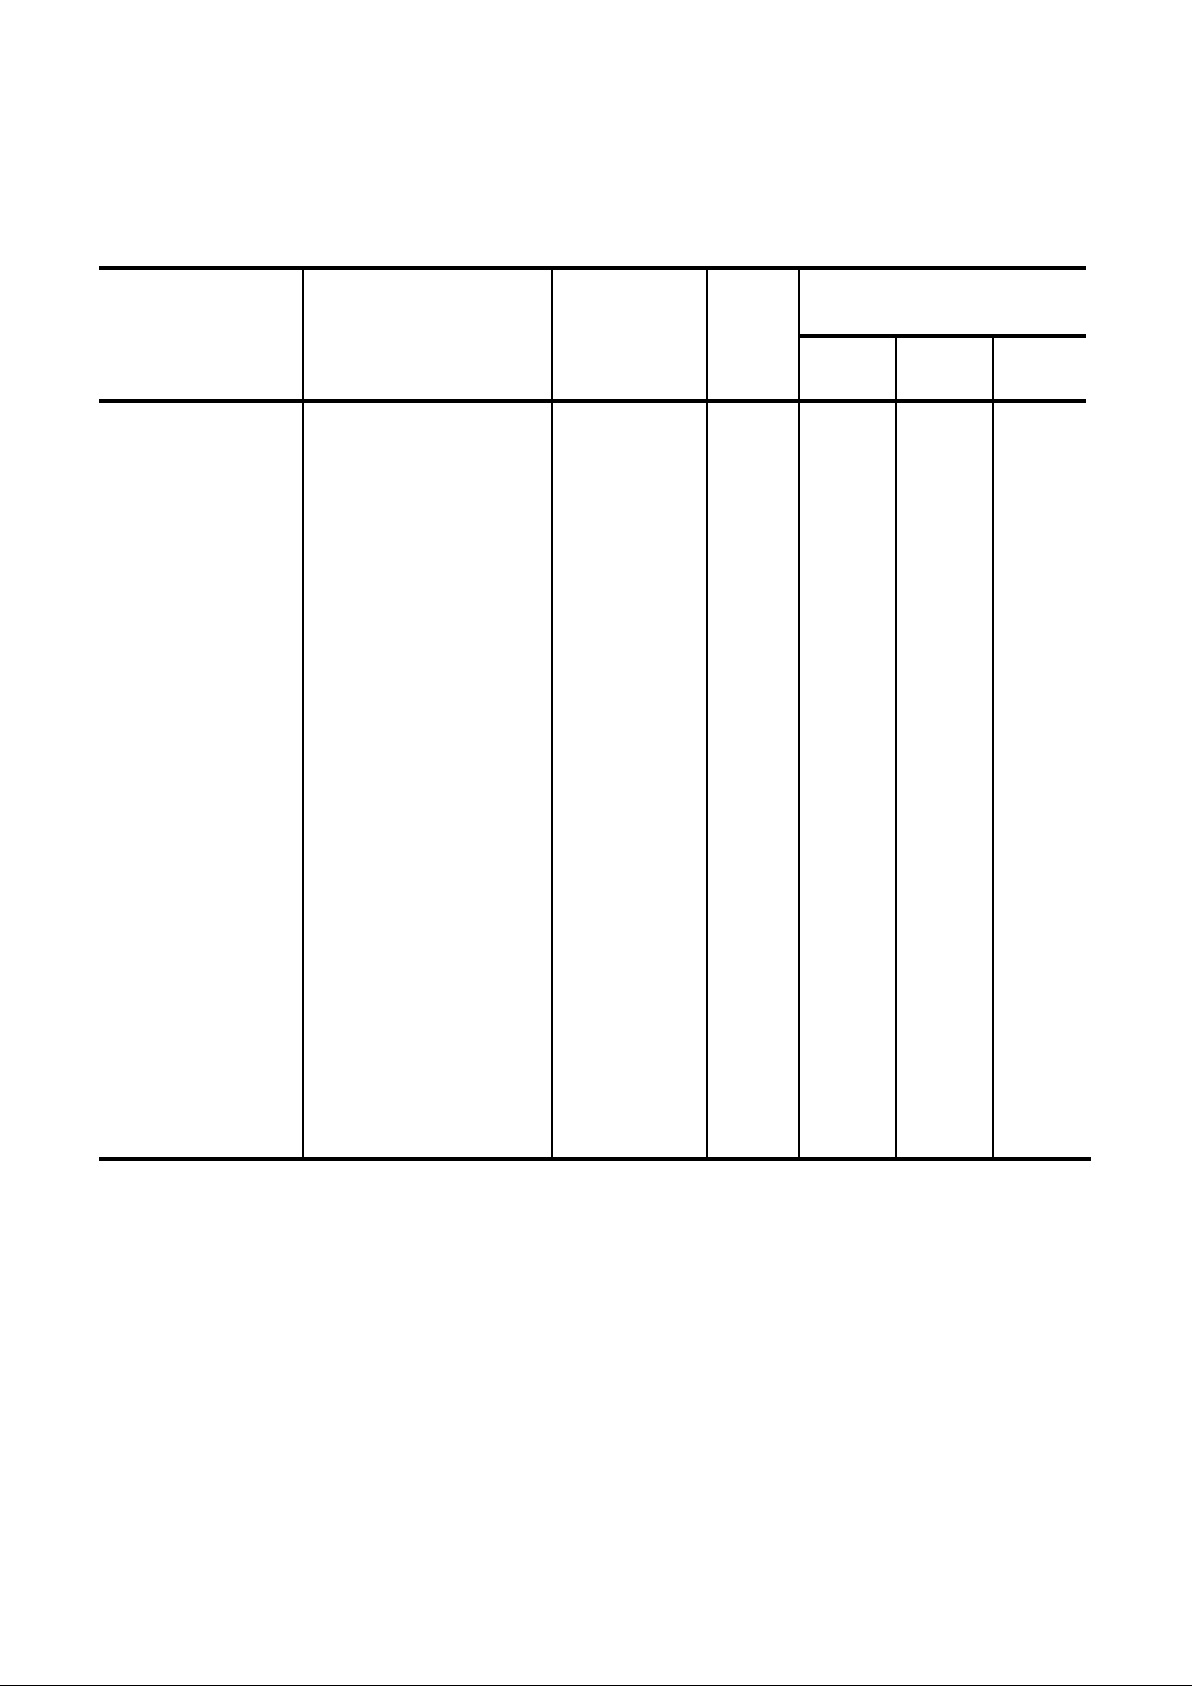
Special Programmes
Programme
Programme description
Additional
functions
Max.
load
Energy
kWh
Consumption*
Water
lt
Time
min
Soak 30°
Rinses
Softener
Drain
Spin
Mini
Soak at 30°C for about 30
minutes. Stop with water in
the tub.
3 rinses with liquid additive
if required
Long spin
1 rinse with softener
Short spin
For emptying out after the
programme Soak 30° or at
the end of a programme
with “Rinse Hold” option
Separate long spin at 1100
rpm max
Wash at 30°C
2 rinses
Short spin at 700 r.p.m.
SPIN SPEED/
RINSE HOLD
EXTRA RINSE
EASY IRON
SPIN SPEED/
RINSE HOLD
SPIN SPEED
SPIN SPEED/
RINSE HOLD
5 kg
5 kg
5 kg
-
5 kg
2 kg
0.30
0.08
-
-
-
0.28
17
45
17
38
30
45
21
-
-
2
10
30
O
This data is given purely as an indication: the consumption values may vary in relation to the quantity and type of
laundry, the temperature of the water supply and the ambient temperature.
For cancelling the wash
programme which is
running
15
-
-
-
Page 16
P1086
P0009
P0010
Maintenance and Cleaning
Before any maintenance or cleaning is carried out you
must DISCONNECT the appliance from the electricity
supply.
Descaling
The water we use normally contains lime. It is a good
idea to periodically use a water softening powder in the
machine. Do this separately from any laundry washing,
and according to the softening powder manufacturer's
instructions. This will help to prevent the formation of
lime deposits.
After each wash
Leave the door open for a while. This helps to prevent
mould and stagnant smells forming inside the appliance.
Keeping the door open after a wash will also help to
preserve the door seal.
Maintenance Wash
With the use of low temperature washes it is possible to
get a build up of residues inside the drum.
We recommend that a maintenance wash be performed
on a regular basis.
To run a maintenance wash:
●
The drum should be empty of laundry.
●
Select the hottest cotton wash programme.
●
Use a normal measure of detergent, must be a
powder (such as Ariel Futur).
External cleaning
Clean the exterior cabinet of the appliance with soap
and water only, and then dry thoroughly.
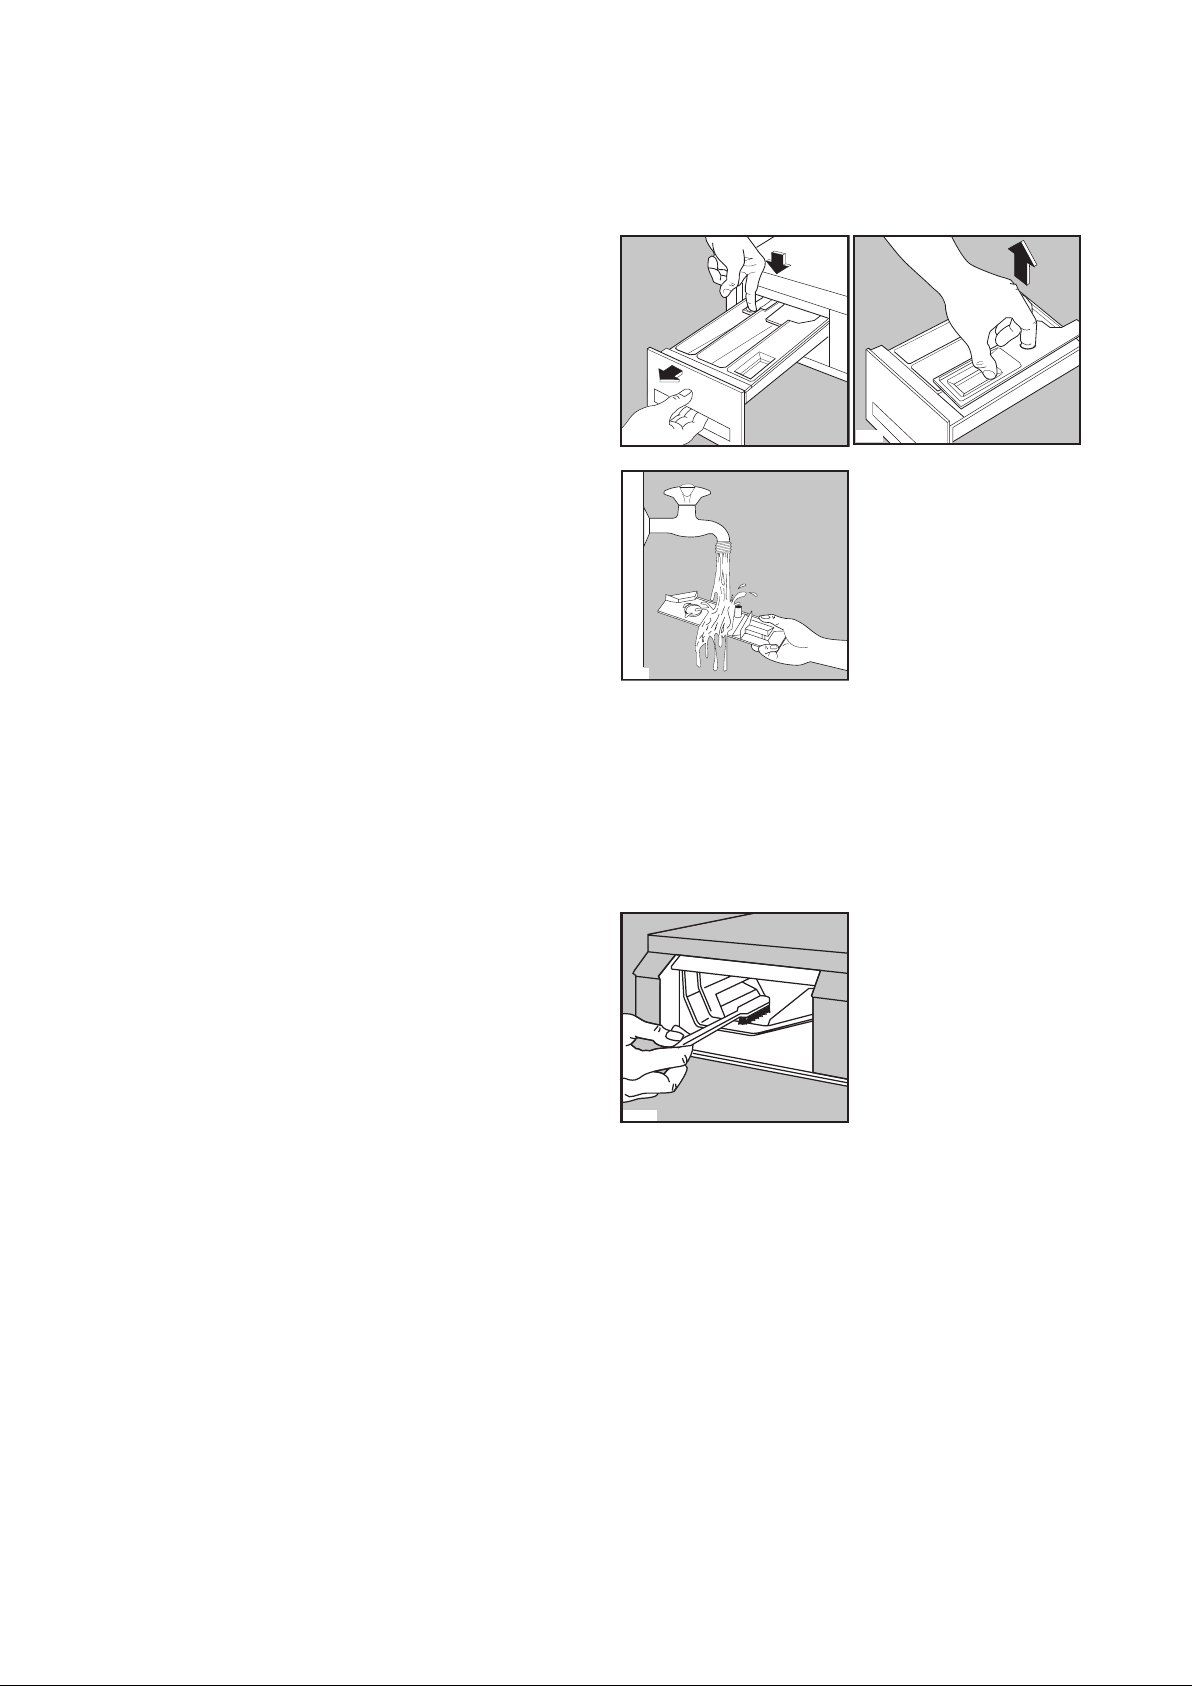
Cleaning the dispenser drawer
The washing powder and additive dispenser drawer
should be cleaned regularly.
Remove the drawer by pressing the catch downwards
and by pulling it out. Flush it out under a tap, to remove
any traces of accumulated powder.
To aid cleaning, the top part of the additive
compartment should be removed.
Cleaning the drawer recess
Having removed the drawer, use a small brush to clean
the recess, ensuring that all washing powder residue is
removed from the upper and lower part of the recess.
Replace the drawer and run the rinse programme
without any clothes in the drum.
P0038
Cleaning the filter
The water drain filter
A clean filter is important for the correct functioning of
the machine, and should therefore be cleaned after every
washing programme.
Place a container under the filter to catch any spillage. If
the filter is blocked and the machine is unable to drain
you will need to drain the water manually from the
machine at this stage. To do this, unhook the drain hose
from the standpipe or sink and hold the end of the hose
over a bowl on the floor. The water should drain by
gravity into the bowl. When the bowl is full, hook the
hose back up and empty the bowl. Repeat the procedure
until water stops flowing out.
16
Page 17
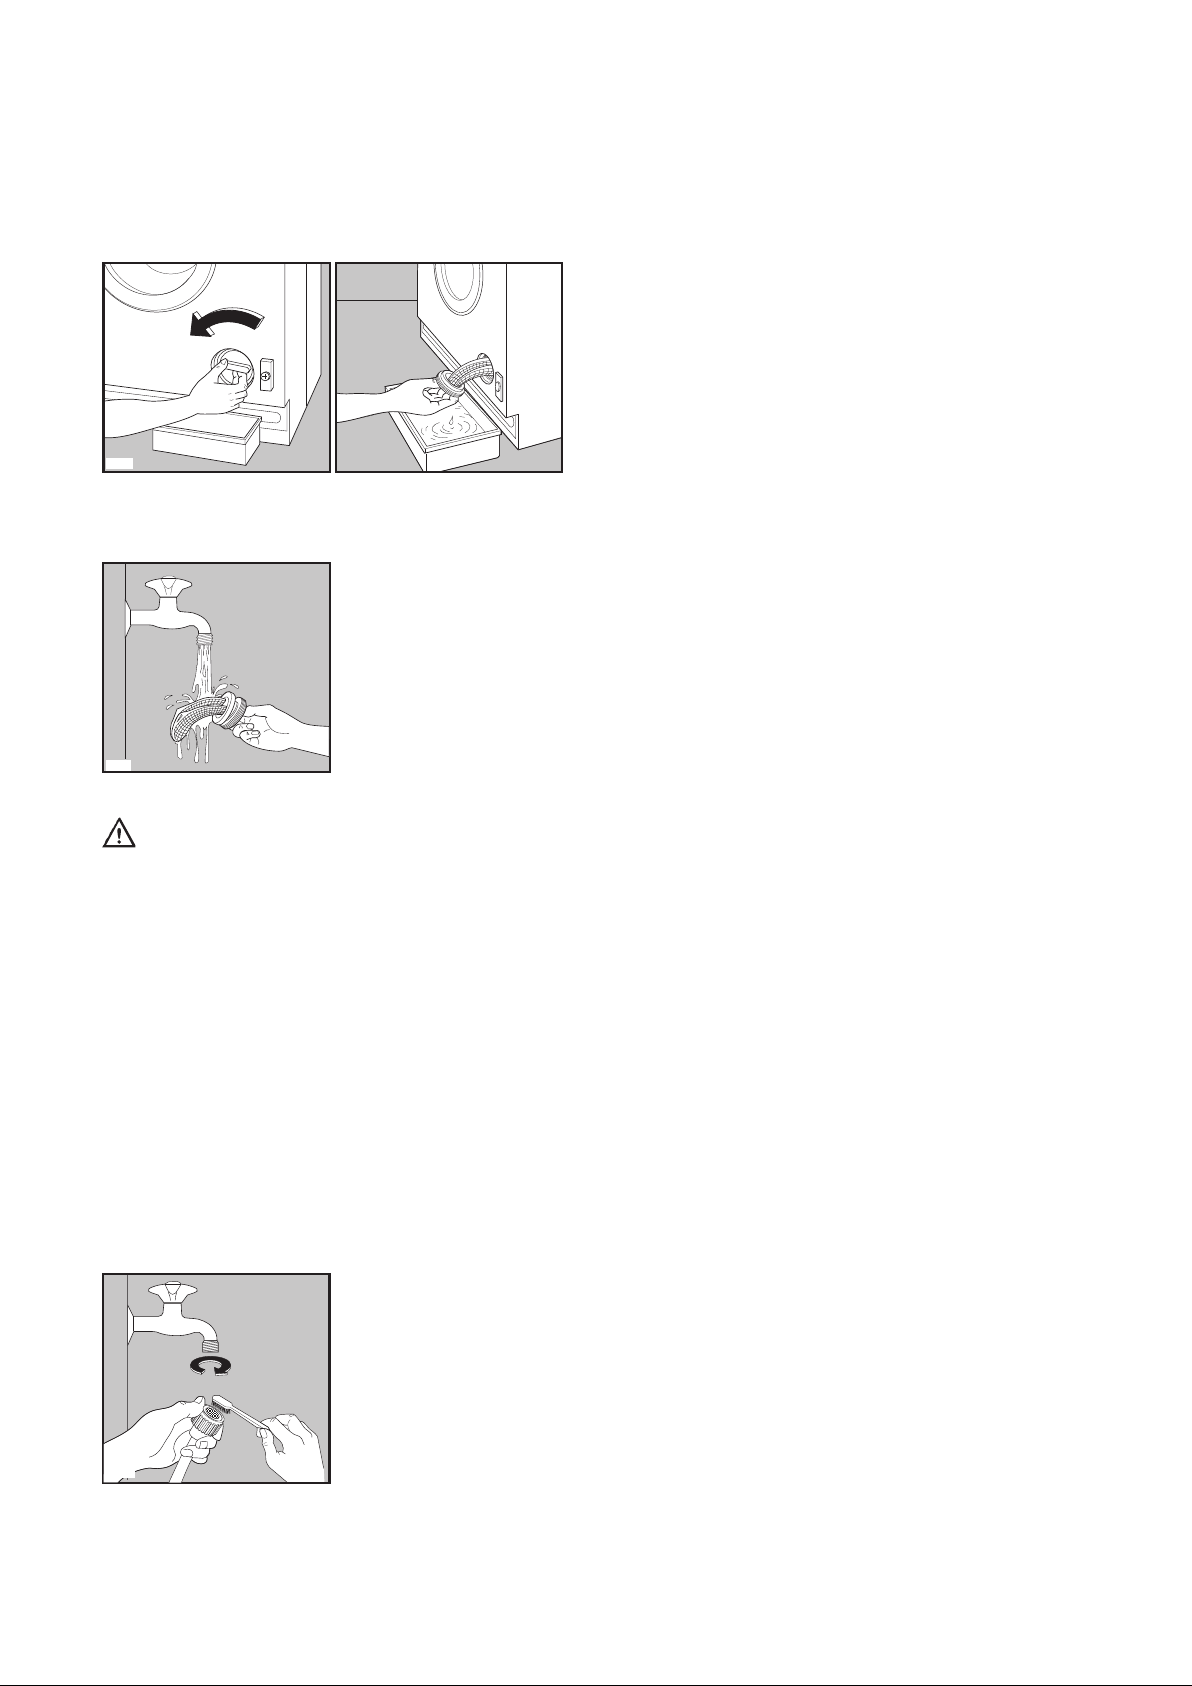
Unscrew and remove the filter.
P0037
P0039
Clean carefully under a fast running tap.
P0040
The dangers of freezing
If the machine is exposed to temperatures below 0°C,
certain precautions should be taken.
●
Turn off the water tap.
●
Unscrew the inlet hose.
●
Unhook the drain hose from the rear support and
position the end of this hose and that of the inlet
hose in a bowl. Run the draining programme.
●
Disconnect the appliance.
●
Screw the inlet hose and reposition the drain hose.
●
When you intend to start the machine up again,
make sure that the room temperature is above 0°C.
Important!
Every time you drain the water through the emergency
emptying hose you must pour 2 litres of water into the
main wash compartment of the detergent drawer and
then run “Drain” programme. This will activate the
ECO valve and avoid the detergent remains being
wasted.
Warning
When the appliance is in use and depending on the
programme selected there can be hot water in the filter.
Never remove the filter during a wash cycle, always
wait until the appliance has finished the cycle, and is
empty. When replacing the filter, ensure it is securely
retightened so as to stop leaks and young children being
able to remove it.
The water inlet filter
If your water is very hard or contains traces of lime
deposit, the water inlet filter may become clogged.
It is therefore a good idea to clean it from time to time.
Turn off the water tap. Unscrew the water inlet hose.
Clean the filter using a hard bristle brush.
Tighten up the inlet hose.
Emergency emptying out
If the water is not discharged, proceed as follows to
empty out the machine:
●
pull out the plug from the power socket;
●
close the water tap;
●
if necessary, wait until the water has cooled down;
●
Unscrew and remove the filter;
●
place a bowl on the floor. The water should drain by
gravity into the bowl. When the bowl is full, empty
the bowl. Repeat the procedure until water stops
flowing out;
●
clean the filter if necessary as previously described;
●
screw the filter again.
P1090
17
Page 18

Something Not Working
Certain problems are due to lack of simple maintenance or oversights, which can be solved easily without calling out an
engineer. Before contacting your local Service Force Centre, please carry out the checks listed below.
IMPORTANT: if you call out an engineer to a fault listed below, or to repair a fault caused by incorrect use or
installation, a charge will be made even if the appliance is under guarantee.
During machine operation it is possible that the “End” light starts to flash:
1 flash = the machine does not fill
2 flashes = the machine does not empty
4 flashes = the door has not been closed
Once the problem has been eliminated, press the “Start/Pause” button to restart the programme. If after all checks, the
problem persists, contact your local Service Force Centre.
Symptom
The machine does not start
The machine does not fill
The machine fills then empties
immediately
The machine does not empty and/or
does not spin
Possible causes
●
The door has not been closed.
●
The plug is not properly inserted in the power socket.
●
There is no current at the socket
●
The main fuse or the fuse in the plug has blown.
●
The selector dial is not correctly positioned.
●
The Start/Pause button has not been pressed.
●
Ensure the water tap is open.
●
The filter in the inlet hose is blocked..
●
The inlet hose may be squashed or kinked.
●
The door has not been closed.
●
The end of the drain hose is too low.
●
The end of the drain hose is submerged in water.
●
There is no vent in the end of the drain hose.
●
The drain hose may be squashed or kinked.
●
The Rinse Hold option or the Soak 30 programme has been selected.
●
The drain filter may be blocked.
●
The drain hose extension is not correct. Follow the instructions for
connecting to the waste.
●
The drainage system pipes are blocked.
●
The wash load is unbalanced: redistribute the clothes inside the drum to
allow the machine to spin.
There is water on the floor
Unsatisfactory washing results
●
Too much detergent or unsuitable detergent has been used (creates too
much foam).
●
Check whether there are any leaks from one of the inlet hose fittings. It
is not always easy to see this as the water runs down the hose; check to
see if it is damp.
●
The drain hose may be damaged or not securely positioned.
●
The detergent dispenser drawer or recess is clogged.
●
The drainage system pipes are blocked.
●
Too little detergent or unsuitable detergent has been used. An
insufficient amount of detergent leaves the laundry looking grey and
causes lime scale to form.
●
Stubborn stains have not been treated prior to washing
●
The correct wash programme has not been selected.
●
Too much laundry has been placed in the drum.
18
Page 19
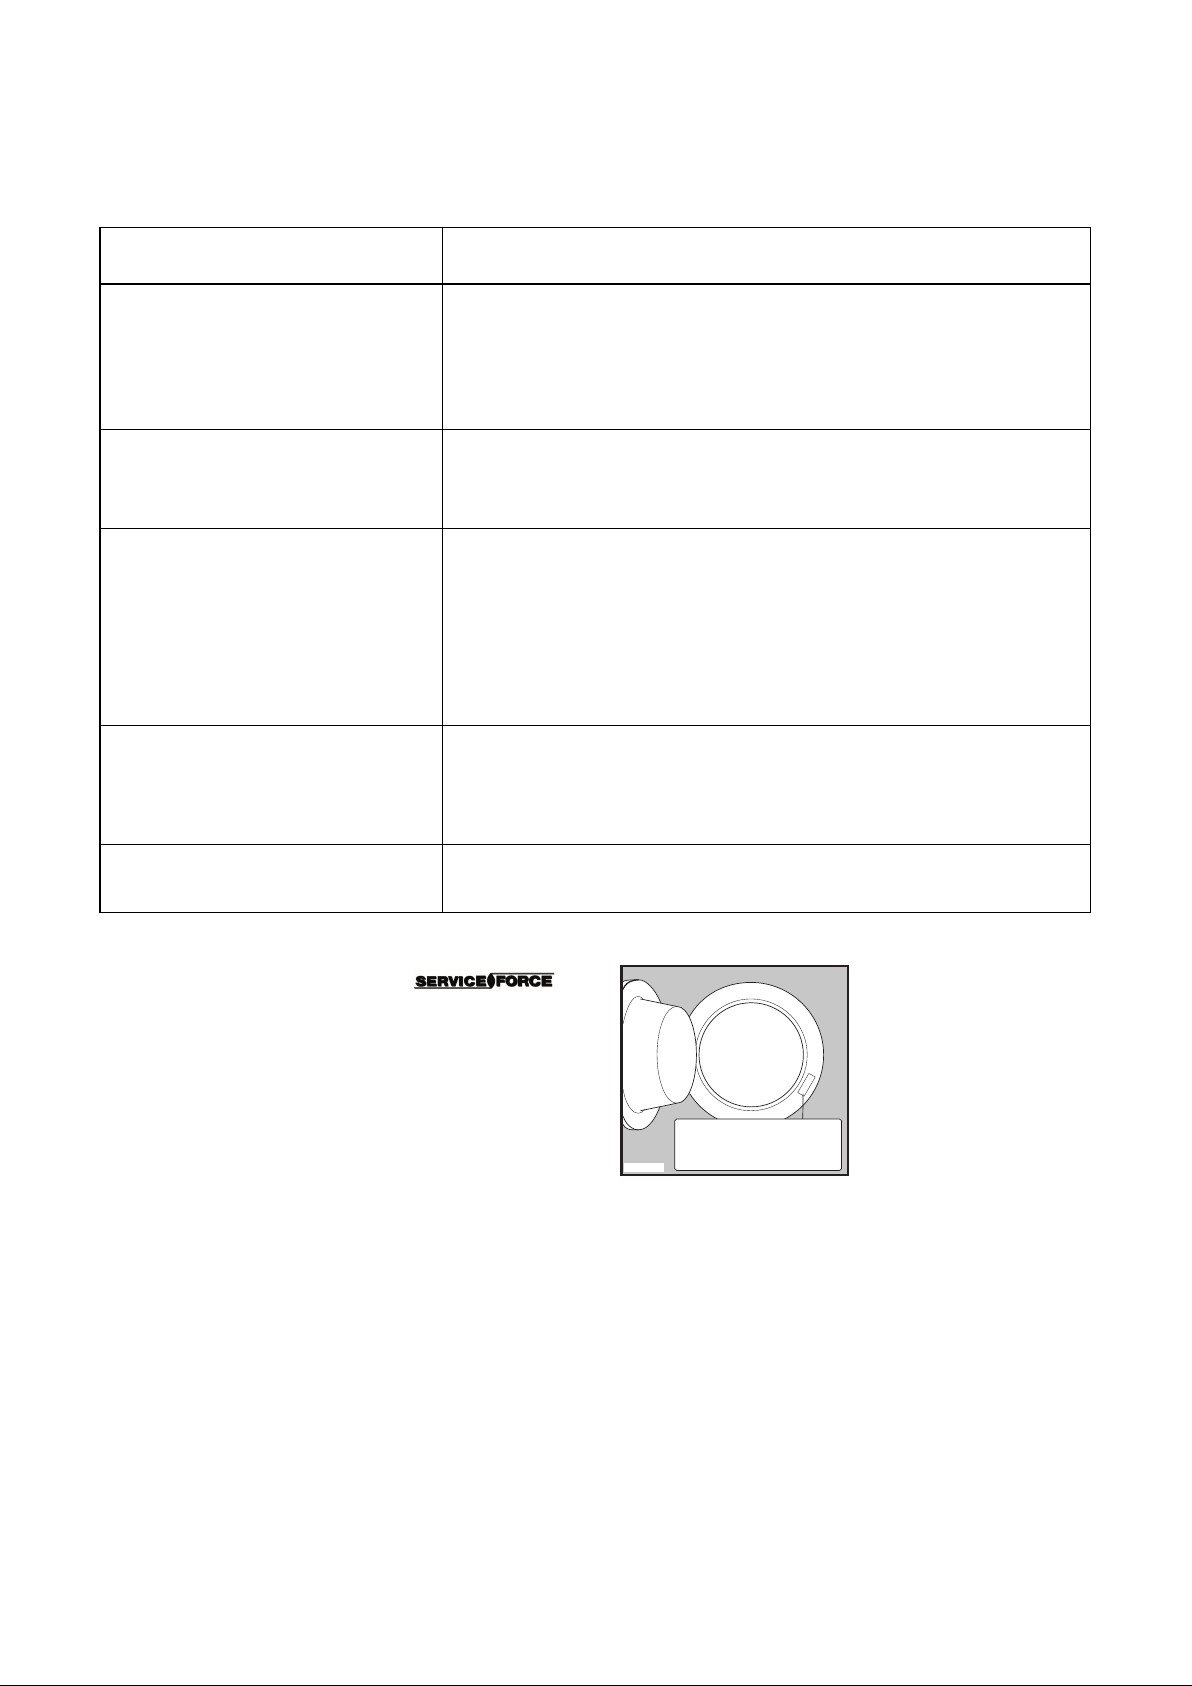
Symptom
Mod. ..........
Prod. No. ...........
Ser. No. .........
Mod. ..........
Prod. No. ...........
Ser. No. .........
P0042 BD
Possible causes
The machine vibrates when spinning
The door will not open
Spinning starts late or the machine
does not spin
The machine makes an unusual
noise
No water is visible in the drum
●
The internal packing has not been removed.
●
The machine is in contact with the wall or furniture.
●
The machine is not level.
●
The washing load is badly distributed in the drum.
●
Maybe there is very little laundry in the drum.
●
The water level is above the bottom edge of the door.
●
The machine is heating the water.
●
The drum is turning.
●
The electronic unbalance detection device has cut in because the
laundry is not evenly distributed in the drum. The laundry is
redistributed by reverse rotation of the drum. This may happen several
times before the unbalance disappears and normal spinning can resume.
If, after 10 minutes, the laundry is still not evenly distributed in the
drum, the machine will not spin. In this case, redistribute the load
manually and select the spin programme.
●
The machine is fitted with a type of motor which makes an unusual
noise compared with other traditional motors. This new motor ensures
a softer start and more even distribution of the laundry in the drum
when spinning, as well as increased stability of the machine.
●
Machines based on modern technology operate very economically
using very little water without affecting performance.
Service & Spare Parts
In the event of your appliance requiring service, or if
you wish to purchase spare parts, please contact your
local Service Force Centre by telephoning:
0870 5 929929
For the address of your local Service Force Centre and
further information about Service Force, please visit the
website at www.serviceforce.co.uk.
Before calling out an engineer, please ensure you have
read the details under the heading “Something Not
Working”.
When you contact the Service Force Centre you will
need to give the following details:
1. Your name, address and post code
2. Your telephone number
3. Clear and concise details of fault
4. The model and serial number of the appliance (found
on the rating plate - see picture)
5. The purchase date.
Customer Care Department
For general enquiries concerning your appliance or for
further information, please contact our Customer Care
Department by letter or telephone at the address below
Customer Care Department - EHP
Major Appliances
Addington Way, Luton - -Bedfordshire
LU4 9QQ
Tel 08705 950 950*
* calls to this number may be recorded for training
purposes.
19
Page 20

Please note that a valid purchase receipt or
guarantee documentation is required for inguarantee service calls.
Guarantee Conditions
●
Standard guarantee conditions
We undertake that if, within 12 months of the date of the
purchase, this Prima appliance or any part thereof is
proved to be defective by reason only of faulty
workmanship or materials, we will, at our option, repair
or replace the same FREE OF ANY CHARGE for
labour, materials or carriage on condition that:
●
The appliance has been correctly installed and used
only on the electricity supply stated on the rating
plate.
●
The appliance has been used for normal domestic
purposes only, and in accordance with the
manufacturer’s instructions.
●
The appliance has not been serviced, maintained,
repaired, taken apart or tampered with, by any
person not authorised by us.
All service work under this guarantee must be
undertaken by a Service Force Centre.
Any appliance or defective part replaced shall become
the Company’s property.
This guarantee is in addition to your statutory and other
legal rights.
Home visits are made between 8.30am and 5.30pm
Monday to Friday. Visits may be available outside these
hours in which case a premium will be charged.
Exclusions
This guarantee does not cover:
●
Damage or calls resulting from transportation,
improper use or neglect, the replacement of any light
bulbs or removable parts of glass or plastic.
●
Costs incurred for calls to put right an appliance
which is improperly installed or calls to appliances
outside the United Kingdom.
Appliances found to be in use within a commercial
environment, plus those which are subject to rental
agreements.
European guarantee
If you should move to another country within Europe
then your guarantee moves with you to your new home
subject to the following qualifications:
●
The guarantee starts from the date you first
purchased your product.
●
The guarantee is for the same period and to the same
extent for labour and parts as exists in the new
country of use for this brand or range of products.
●
The guarantee relates to you and cannot be
transferred to another user.
●
Your new home is within the European Community
(EC) or European Free Trade Area.
●
The product is installed and used in accordance with
our instructions and is only used domestically, i.e. a
normal household.
●
The product is installed taking into account
regulations in your new country.
Before you move please contact your nearest Customer
Care Centre, listed below, to give them details of your
new home. They will then ensure that the local Service
Organisation is aware of your move and able to look
after you and your appliances.
France Senlis +33 (0)344 62 20 13
Germany Nurnberg +49 (0)800 234 7378
Italy Pordenone +39 (0)800 11 75 11
Sweden Stockholm +46 (0)20 78 77 50
UK Luton +44 (0)8705 950 950
Ireland Dublin +353 (0)1 40907528
20
Page 21
Installation Instructions
It is dangerous to alter the specifications or
attempt to modify this product in any way.
Care must be taken to ensure that the appliance
does not stand on the electrical supply cable.
Any electrical work required to install this
appliance should be carried out by a qualified
electrician or competent person.
Any plumbing work required to install this
appliance should be carried out by a qualified
plumber or competent person.
Technical Specifications
DIMENSIONS Height 82 cm
Width 60 cm
Depth 54 cm
POWER SUPPLY VOLTAGE 230-240 V/50 Hz
TOTAL POWER ABSORBED 2050 W (10A)
WATER PRESSURE Minimum 0.05 MPa
Maximum 0.80 MPa
MAXIMUM RECOMMENDED LOAD Cotton, linen 5 kg
Synthetics 2 kg
Delicate fabrics 2 kg
Handwash (Wool) 1 kg
SPIN SPEED Maximum 1200 rpm
CONSUMPTION DATA FOR WASHING Energy 0.85 kWh
5 KG of NORMALLY SOILED COTTON Water 49 litres
ITEMS WITH THE ECONOMY Time 130 mins
PROGRAMME 60° Eco
This appliance complies with the following E.E.C. Directives:
- 73/23 EEC of 19.2.73 (Low Voltage Directive) and subsequent modifications;
- 89/336 EEC of 3.5.89 (Electromagnetic Compatibility Directive) and subsequent modifications.
21
Page 22
Unpacking
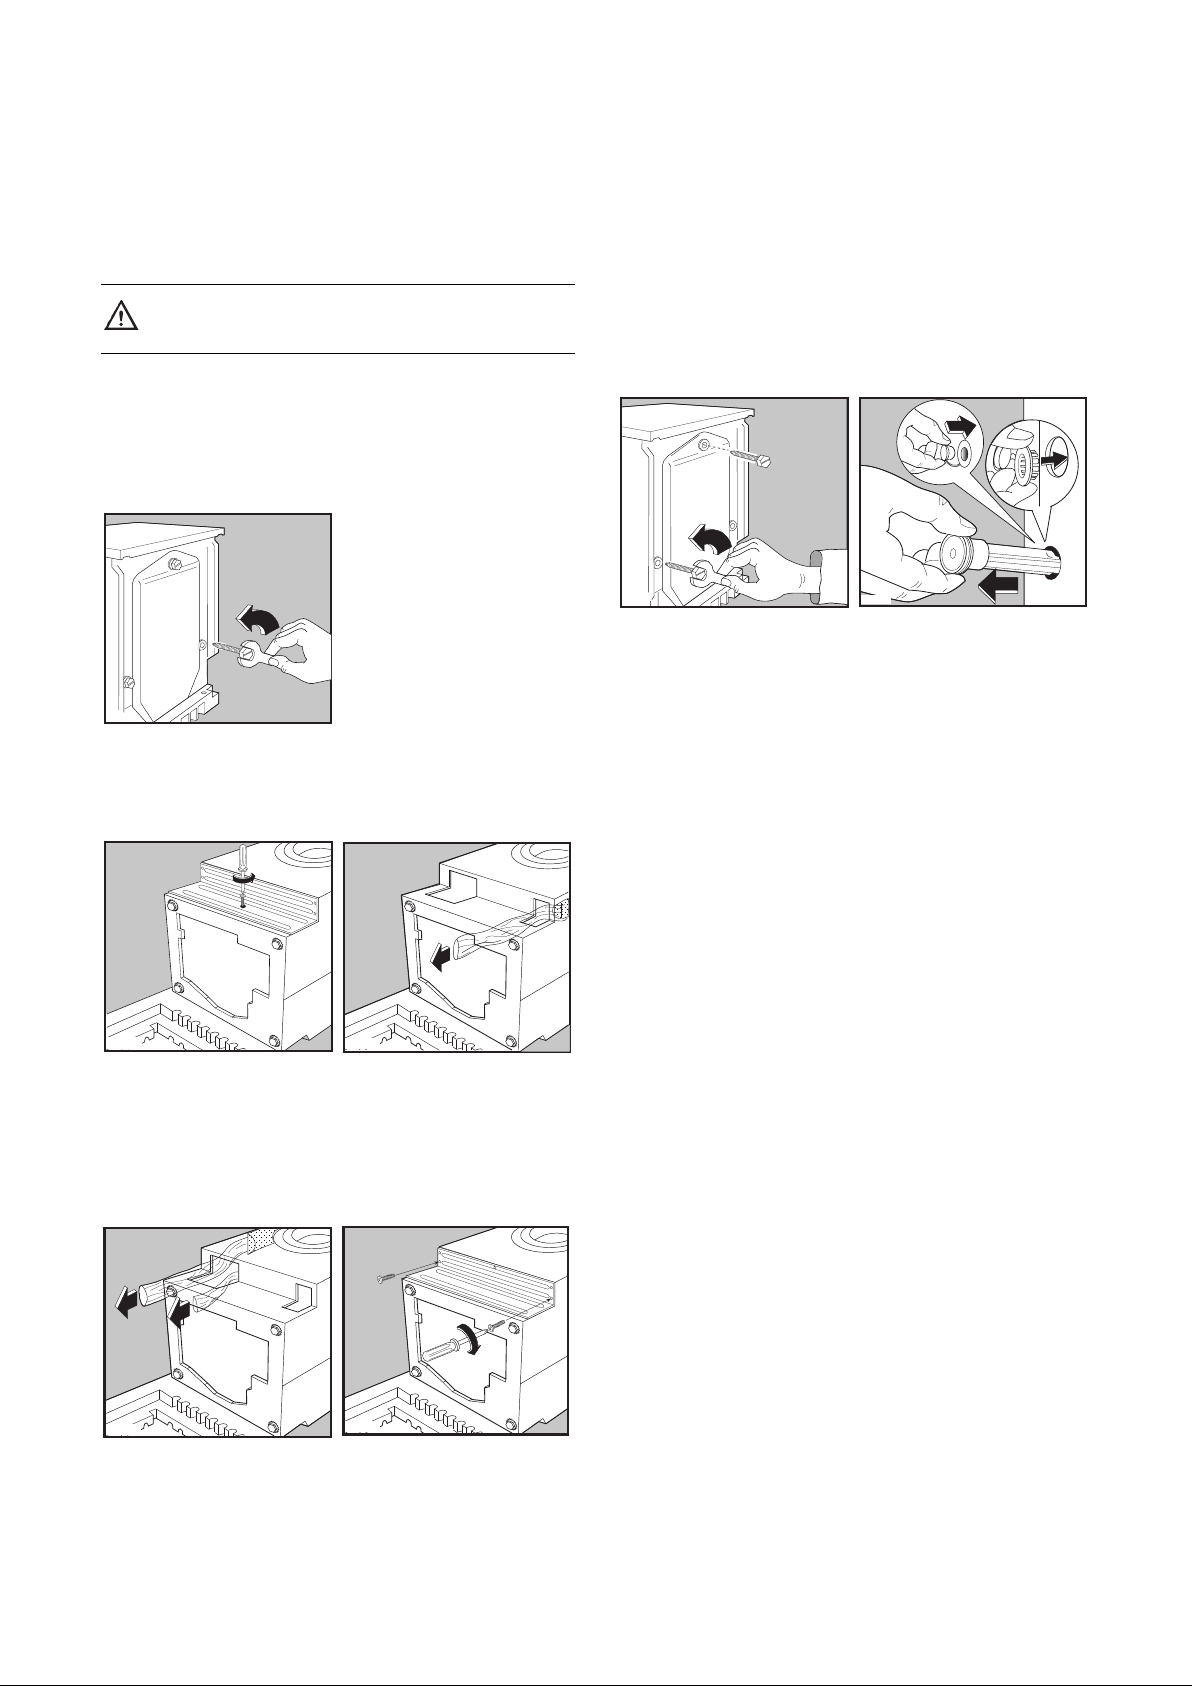
All transit bolts and packing must be removed
before using the appliance.
You are advised to keep all the packaging for re-use in
case the machine is to be transported again.
Using a spanner unscrew and remove the rear right bolt.
Lay the machine gently on its back, making sure that the
hoses are not squashed.
Set the machine upright and remove the two remaining
bolts from the back.
Pull out the three plastic spacers from the holes into
which the bolts were fitted.
Plug the open holes with the plugs supplied with the
instruction booklet.
P0255
Remove the polystyrene base and take off the bottom
panel by unscrewing the central screw. Carefully slide
out the right polythene bag.
P0457
P0015
Repeat the operation for the left and central polythene
bags.
Re-fit the bottom panel using the 4 screws supplied with
the door hinges (in the plastic bag) and the previously
removed screw.
P0256
P0020
Positioning
Install the machine on a flat hard floor.
Make sure that air circulation around the machine is not
impeded by carpets, rugs etc. Check that the machine
does not touch the wall or other kitchen units.
Never place cardboard, wood or similar materials under
the machine to compensate for any unevenness in the
floor.
Your new washing machine has been designed to be
permanently plumbed in to your home’s water supply
and drainage system. However, if this is not possible, it
may be connected to a suitable existing tap with the
drain hose discharging into a sink.
The appliance has an inlet hose, with female 3/4” BSP
thread connector. If this connection is not compatible
with the plumbing of the existing installation, a variety
of connectors are available from good hardware stores
and plumbers merchants to suit most domestic
plumbing. Any alteration to your existing plumbing
must be carried out by a competent person, or qualified
plumber.
P0016
P0453
Water inlet
Connect the hose to a tap with a 3/4’’ thread.
Do not use previously employed hoses.
Installation should comply with local water authority
and building regulations’ requirements.
The appliance must be connected to a cold water
supply.
A minimum water pressure of 0.05 MPa (0.5 bar) is
required for safe operation of the appliance.
22
Page 23
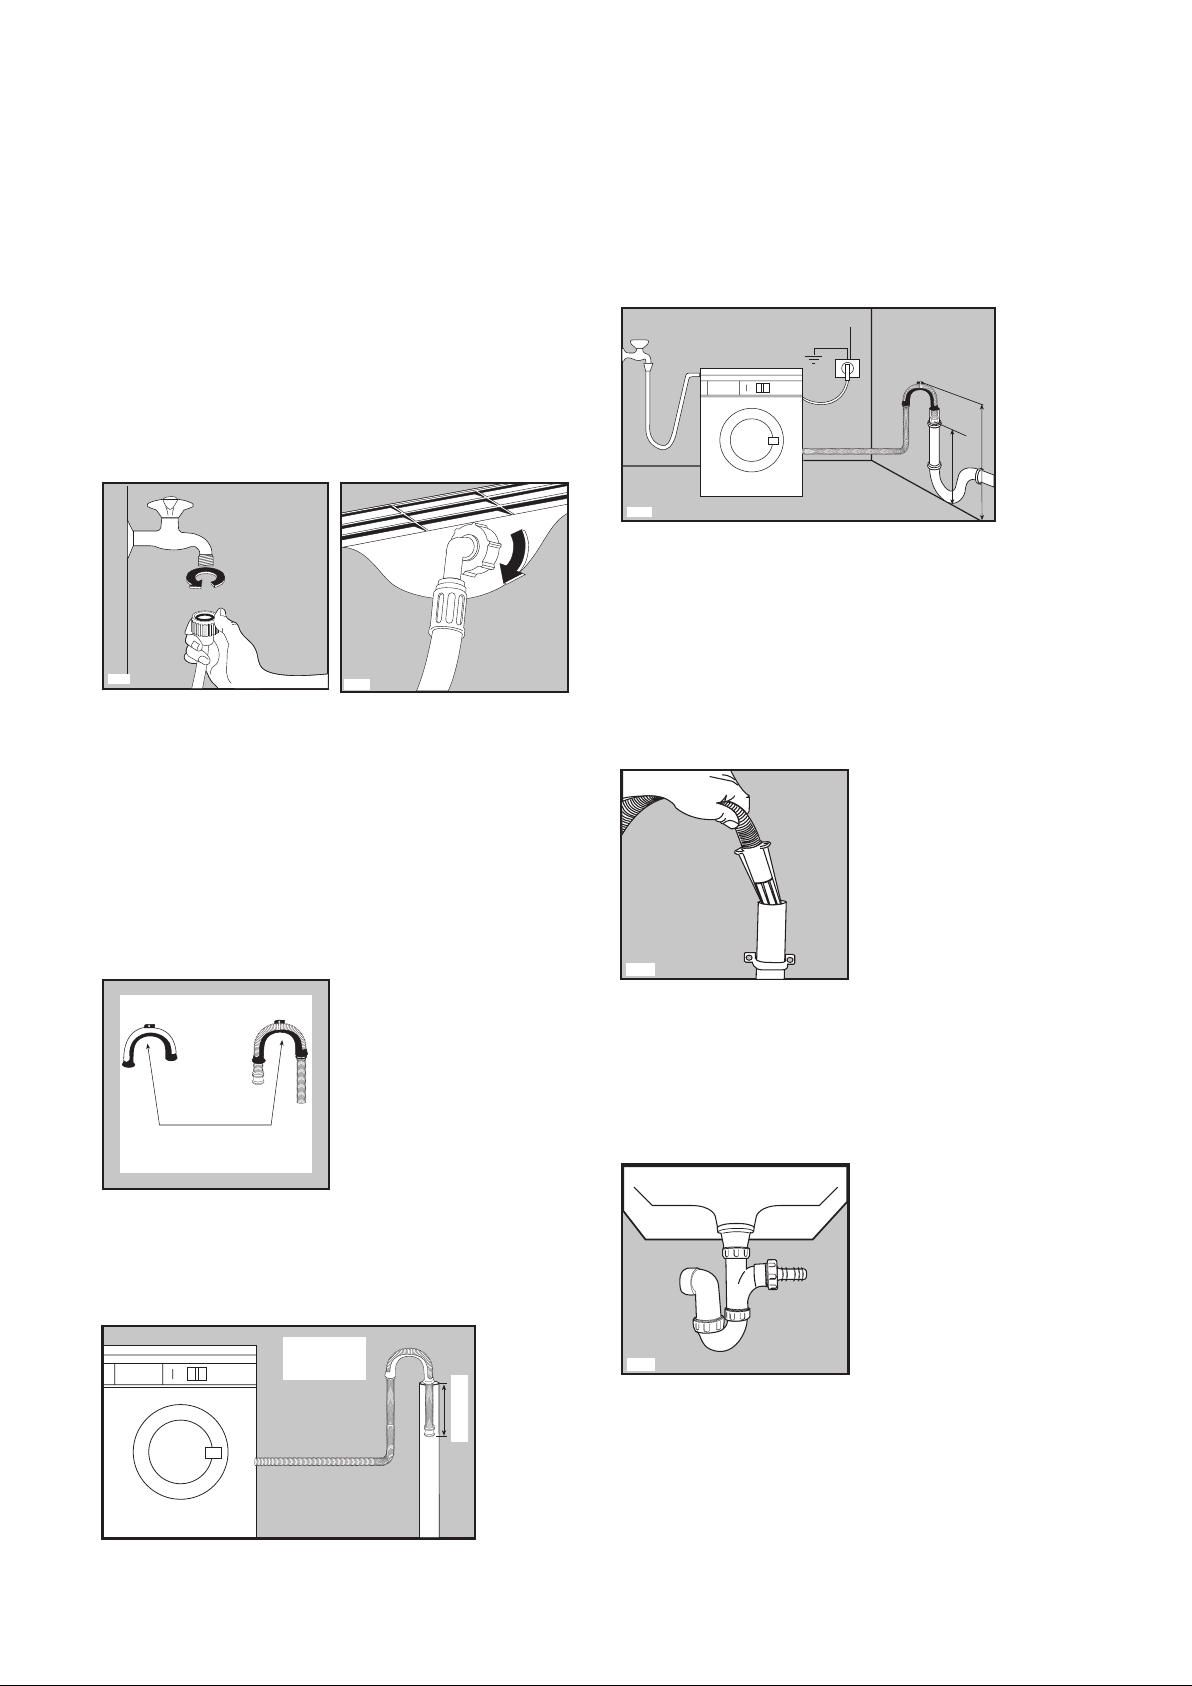
If you cannot make the cold water connection direct
from the rising mains, you may be able to operate the
appliance from your cold water storage system.
There should be a minimum distance of 5.02m
(16.5 ft) between the appliance’s inlet and the bottom of
the water storage tank.
Set the hoses correctly by loosening the ring nuts. After
positioning the inlet hoses, be sure to tighten the ring
nuts again to prevent leaks.
P1088
P0021
Water drainage
This appliance is designed to be permanently plumbed
into your home's drainage system using one of the
following methods.
When discharging into a standpipe ensure that the top of
the standpipe is no more than 90cm (35.4'') and no less
than 60cm (23.6'') above floor level.
3 pin
Max. 90 cm (35.4)
Min. 60 cm (23.6)
P1201
The drain hose may be extended to a maximum of 4
metres. An additional drain hose and joining piece is
available from your local Service Force Centre.
The joining piece must have an internal diameter of
18mm.
If your drain hose looks like this (see below) you do not
require the “U” piece”. Just push the hose firmly into
the standpipe.
1. Into a drainage standpipe.
Firstly form a hook in the end of the drain hose using
the “U” piece” supplied.
U piece
supplied
P1199
Place the drain hose into your standpipe, which should
have an internal diameter of approximately 38mm thus
ensuring there is an air break between the drain hose
and standpipe.
38 mm (11.2)
standpipe
diameter
30 cm (12")
P1212
2. Onto a sink outlet spigot.
If the outlet spigot has not been used before, remove
any blanking plug that may be in place.
P1197
Push the drain hose onto the spigot and secure with a
clip if required, ensure a loop is formed in the drain
hose (see diagram) to prevent waste from the sink
entering the washing machine.
P1200
23
Page 24
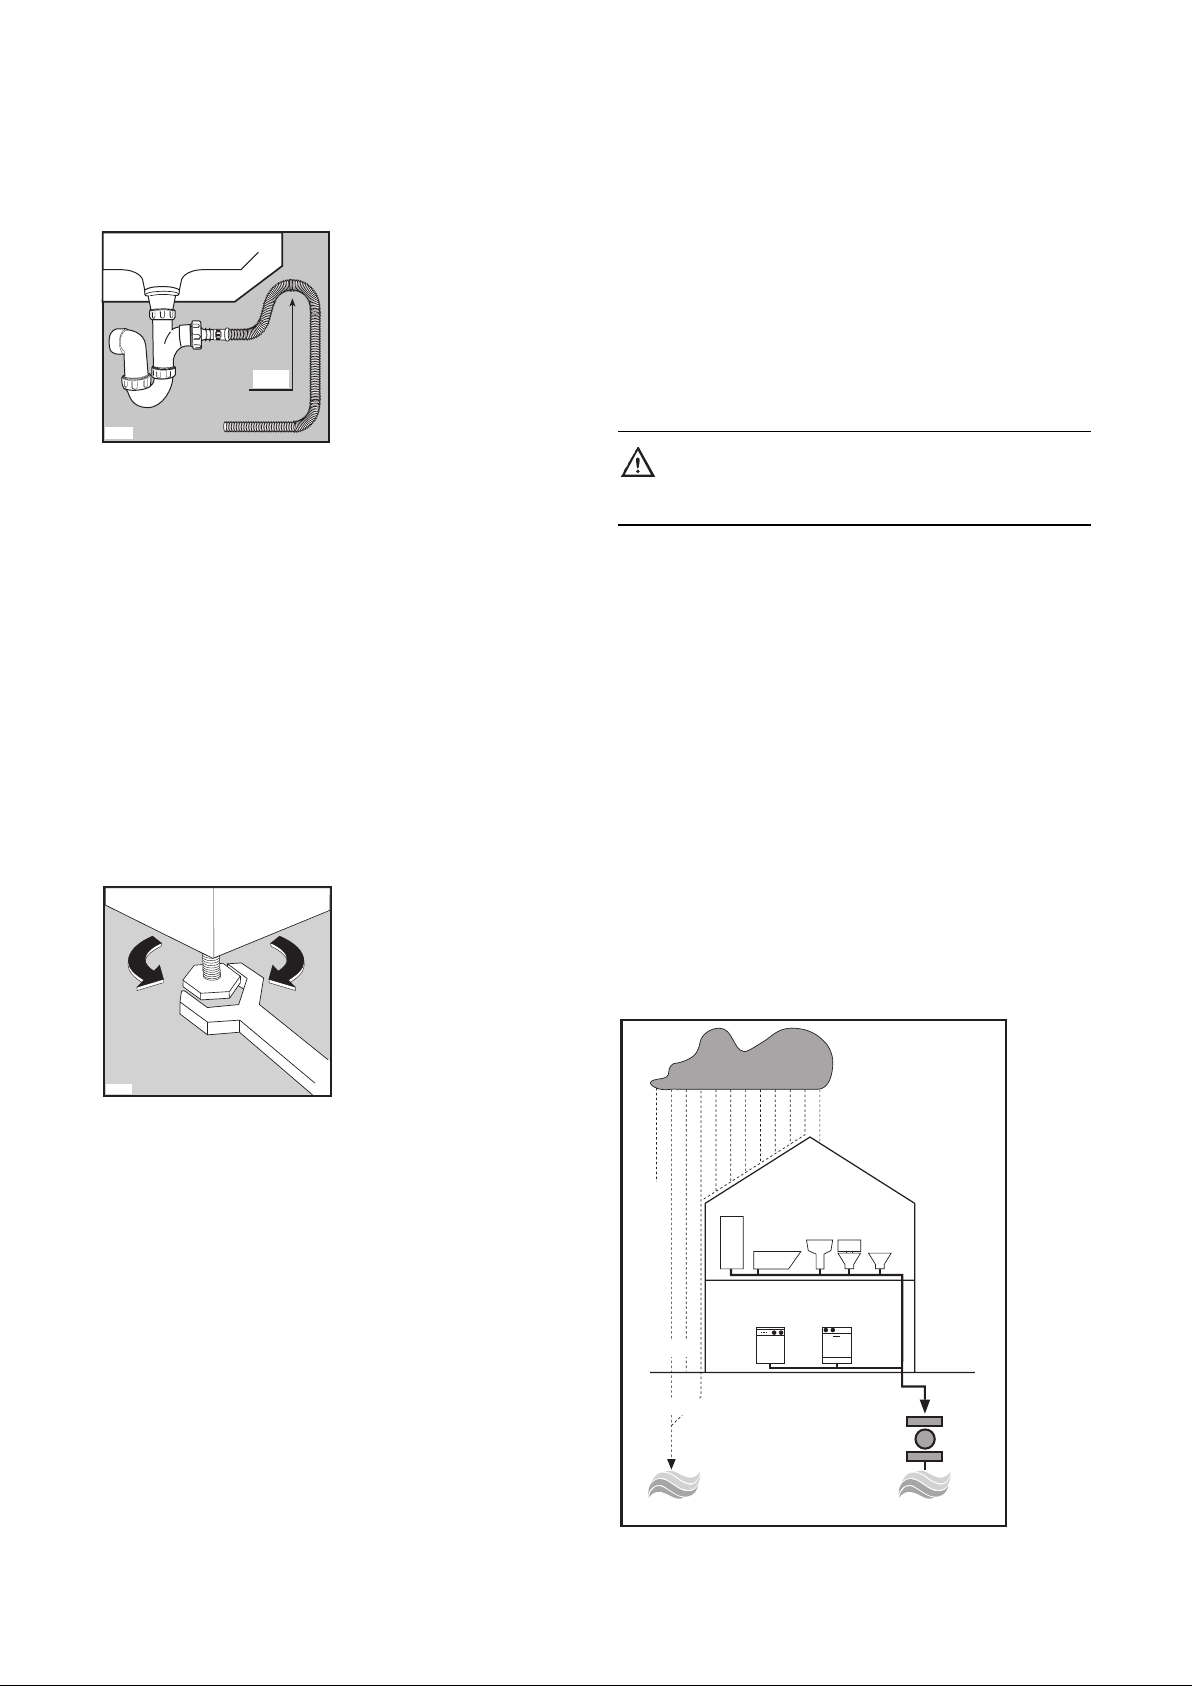
Loop
Special conditions
If the floor is carpeted or covered with crumbly or soft
material, insert a rigid support base under the feet to
prevent noise, vibration or displacement. The base
should protrude a few centimetres beyond the edges of
the machine.
P1198
Important
●
Before connecting the machine to new pipework or
to pipework that has not been used for some time,
run off a reasonable amount of water to flush out any
debris that may have collected in the pipes.
For a correct functioning of the machine the drain
●
hose must be hooked on the proper support piece
situated on the top of the back side of the appliance.
Levelling
Level the washing machine by raising or lowering the
feet. The feet may be tight to adjust as they incorporate
a self locking nut, but the machine MUST be level and
stable (check diagonally).
Warning
The machine should NOT be placed on deep pile
carpeting.
Note
Please ensure that when the appliance is installed it is
easily accessible for the engineer in the event of a
breakdown.
In the interest of the environment
Washing machines and dishwashers should be
connected to the FOUL drainage system, the water will
then be taken to a sewage works for treatment before
being discharged safely into a river.
It is essential that these appliances are not connected to
the surface water drainage system as this water is
discharged directly into a river or stream and may cause
pollution.
If you require any further advice please contact your
local water authority.
P1051
Any necessary adjustment can be made with a spanner.
Accurate levelling prevents vibration, noise and
displacement of the machine during operation.
Some vibration is inevitable, especially if mounted on a
wooden floor.
Sprung wooden floors are particularly susceptible to
vibration. For advice, consult a builder. If possible,
always place the machine on a solid floor.
24
P0987
RAINWATER
'RUN-OFF'
SURFACE WATER
DRAINS & SEWERS
UNTREATED
DISCHARGE
RIVER
SHOWER
BATH
WASHING
MACHINE
SINK TOILET
DISHWASHER
BIDET
FOUL DRAIN
FOUL SEWERS
SEWAGE
TREATMENT
WORKS
TREATED
DISCHARGE
RIVER
Page 25
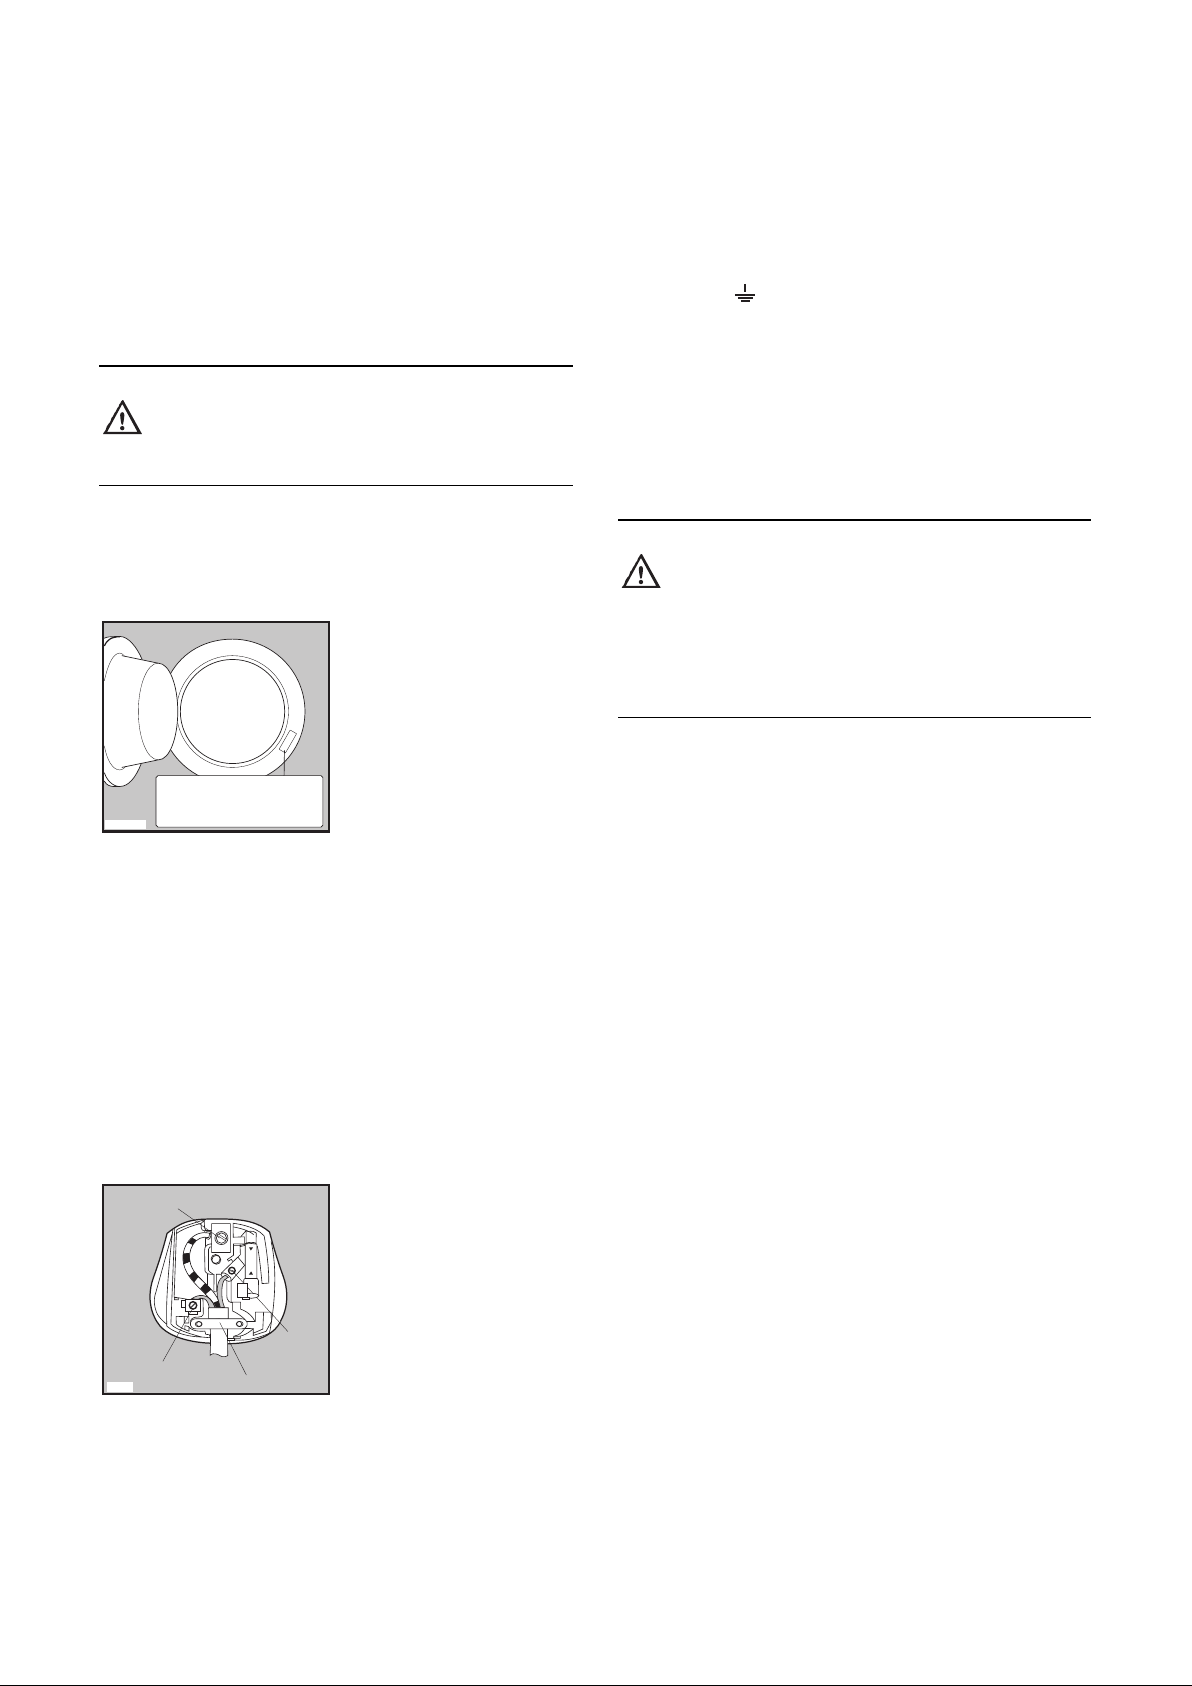
Electrical connection
Any electrical work required to install this appliance
should be carried out by a qualified electrician or
competent person.
WARNING: THIS APPLIANCE MUST BE
EARTHED.
The manufacturer declines any liability should
this safety measure not be observed.
Before switching on, make sure the electricity supply
voltage is the same as that indicated on the appliance’s
rating plate. The rating plate is located at the top of the
rim of the open door.
Prod. No. ...........
Mod. ..........
Ser. No. .........
Mod. ..........
Prod. No. ...........
P0042 BD
Ser. No. .........
The wire coloured green and yellow must be connected
to the terminal marked with the letter «E» or by the
earth symbol or coloured green and yellow.
The wire coloured blue must be connected to the
terminal «N» or coloured black.
The wire coloured brown must be connected to the
terminal marked «L» or coloured red.
Upon completion there must be no cut, or stray strands
of wire present and the cord clamp must be secure over
the outer sheath.
WARNING:
A cut off plug inserted into a 13 amp socket is
a serious safety (shock) hazard.
Ensure that the cut off plug is disposed of
safely. Should the appliance power supply
cable neeed to be replaced, this MUST be
carried out by our Service Force Centre.
Note
When the appliance is installed the power supply cable
must be accessible.
The appliance is supplied with a 13amp plug fitted.
In the event of having to change the fuse in the plug
supplied, a 13amp ASTA approved (BS1363/A) fuse
must be used.
Should the plug need to be replaced for any reason,
proceed as described below.
The wires in the mains lead are coloured in accordance
with the following code:
Green and Yellow - Earth
Blue - Neutral
Brown - Live
GREEN & YELLOW
E
13A
L
N
BROWN
BLUE
P1041
CORD CLAMP
Permanent connection
In the case of permanent connection it is necessary that
you install a double pole switch between the appliance
and the electricity supply (mains), with a minimum gap
of 3mm between the switch contacts and of a type
suitable for the required load in compliance with the
current electrical regulations.
The switch must not break the yellow and green earth
cable at any point.
25
Page 26
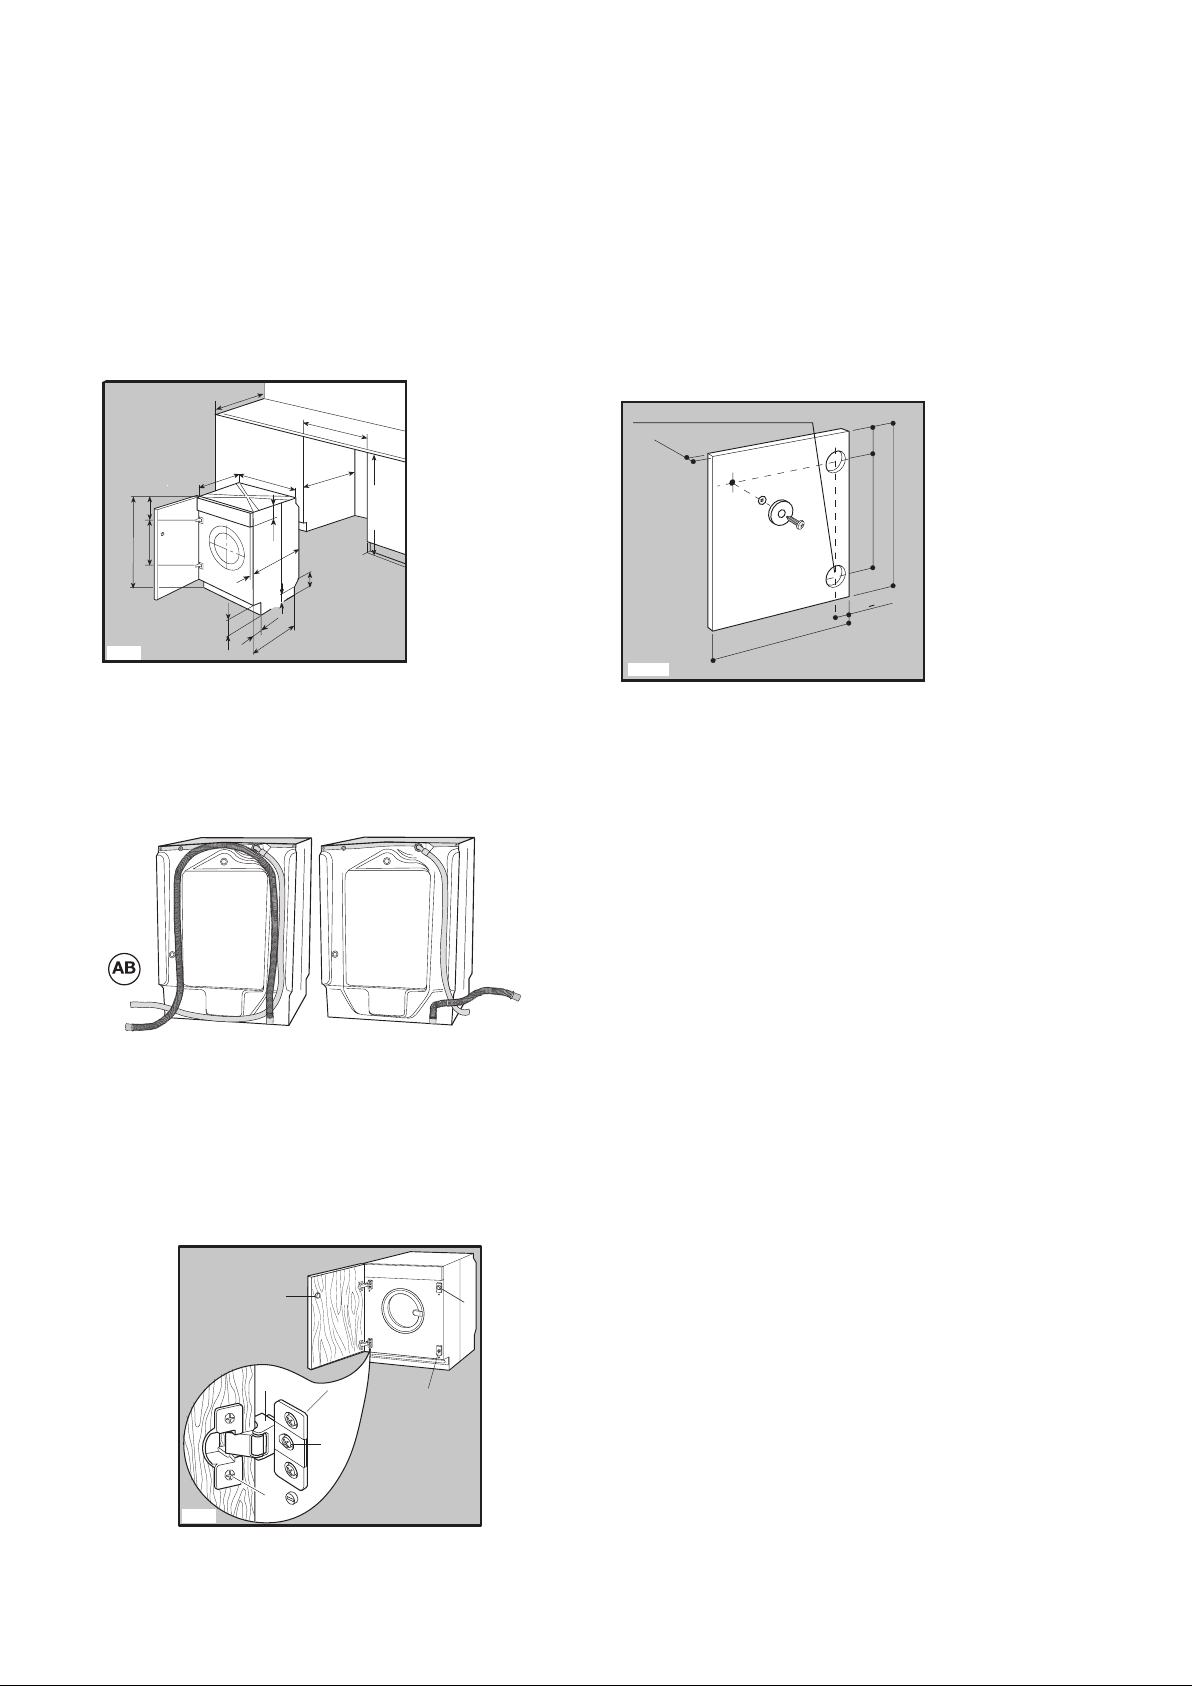
Building-in
P0965
820 min
570
min.
600
596
416
176,5
818
541
195
490
160
120
90
8
515
165
A
600
35 Ø 12.5-14 depth
16-22
B
C
22+1,5
595-598
416
P0422S
C
This appliance has been designed to be built into the
kitchen furniture.
The recess should have the dimensions shown in picture
A.
When installing the appliance into the kitchen furniture
ensure, if possible, the hoses are placed in either of the
two recesses on the back of the appliance. This will help
to prevent the hoses from becoming kinked or trapped.
Picture AB.
a) Door
The dimensions of the door should be:
- width 595-598 mm
- thickness 16-22 mm
The height (C-Fig. C) depends on the height of the
adjacent furniture's base.
b) Hinges
To mount the hinges it is necessary to drill two holes
(dia. 35 mm, depth 12.5-14 mm depending on the depth
of door furniture) on the inner side of the door. The
distance between the holes hobs fixing centres must be
416 mm.
The distance (B) from upper edge of the door to the
centre of the hole depends on the adjacent furniture's
dimensions.
The required dimensions are given in the picture C.
The hinges will be fixed to the door by means of screws
for wood (2-Fig. B) supplied with the appliance.
Preparation and assembly of the door
The machine is originally pre-arranged for the assembly
of a door opening from right to left.
In this case it is sufficient to screw in the hinges (1) and
the counter-magnet (6) provided with the appliance, at
the right level (Fig. B).
P0982
6
1
1
7
2
3
3
2
4
5
B
c) Mounting the door
Fix the hinges (1) to the machine by means of the
M5x15 screws (3-Fig. B). The hinges can be adjusted to
compensate for possible uneven thickness of the door.
To align the door perfectly it is necessary to loosen the
screw (3-Fig. B), adjust the door and tighten the screw
again.
d) Counter-magnet (6)
The appliance is pre-arranged for a magnetic closure of
the door. To enable a correct operation of this device, it
is necessary to screw the counter-magnet (6) (steel disk
+ rubber ring) into the inner side of the door.
Its position must correspond to the magnet (4) on the
appliance (see picture D).
26
Page 27
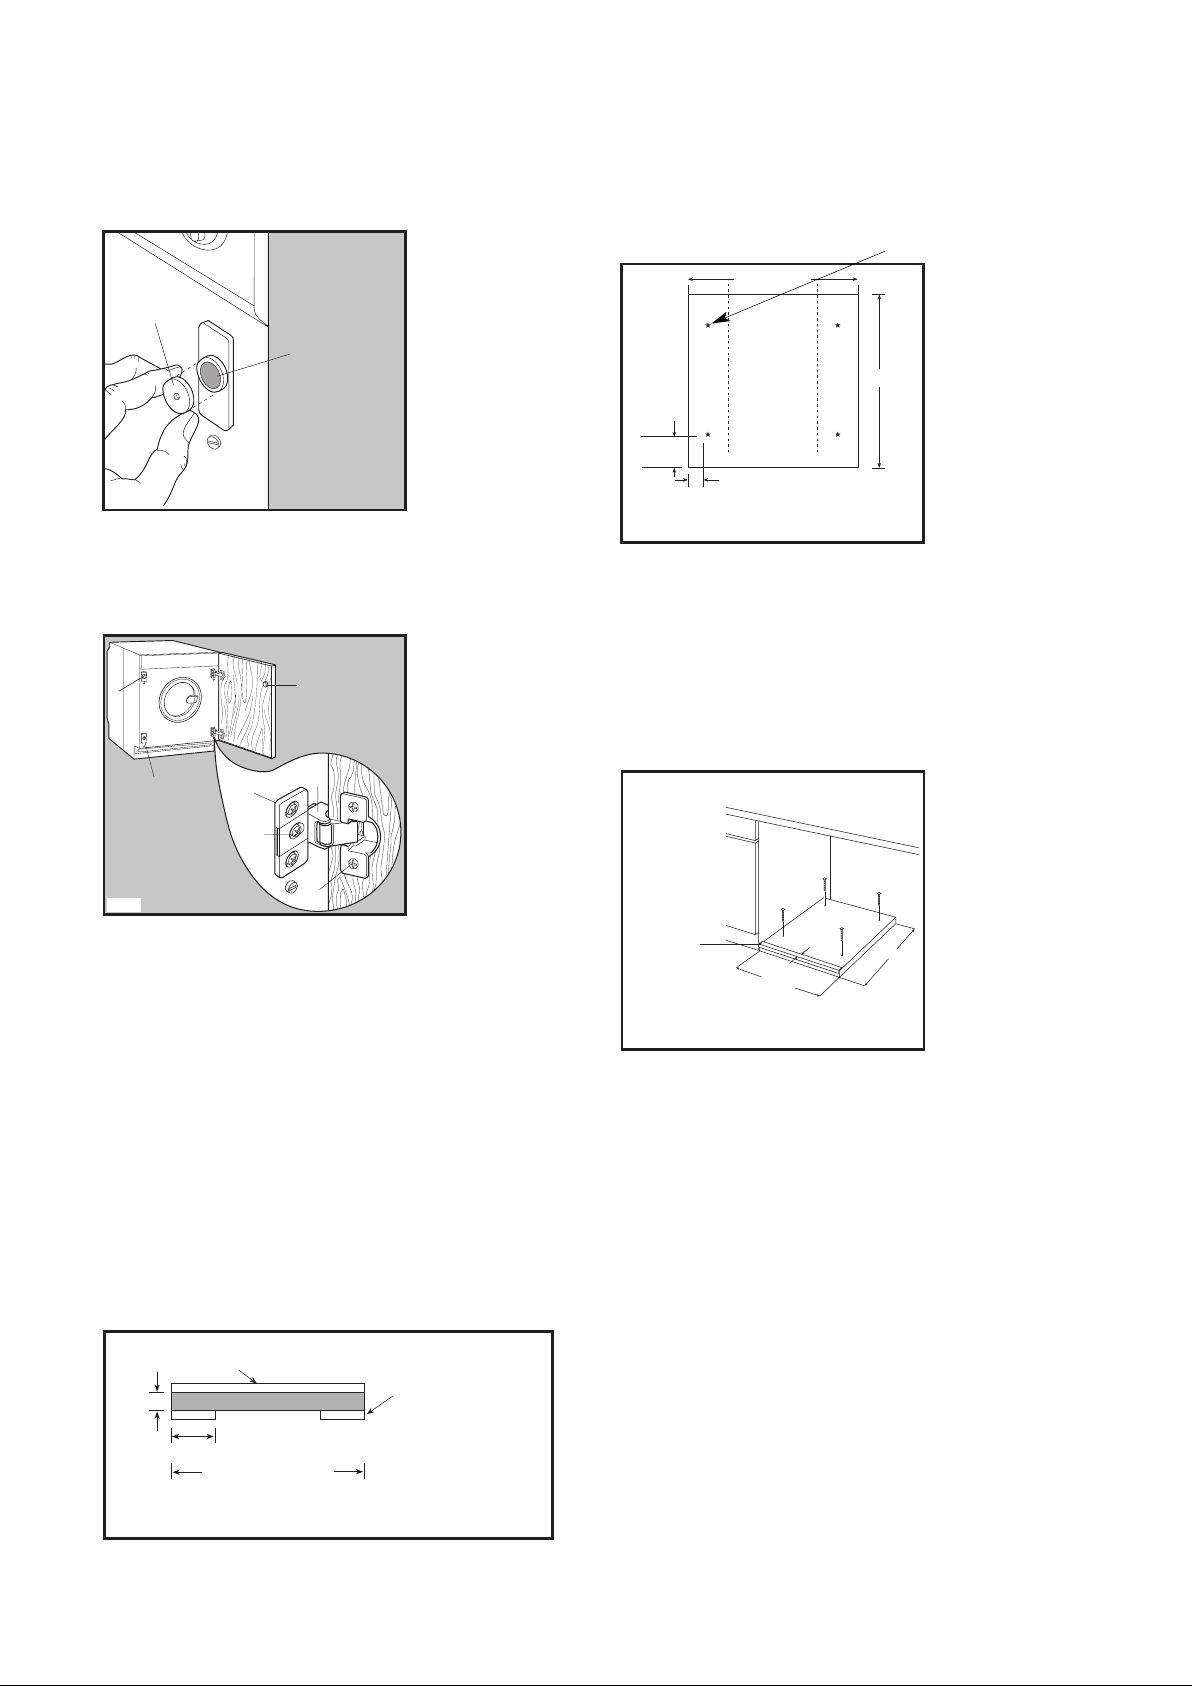
Drill four fixing holes see Fig. G
600-605 mm
6
4
490 mm
95 mm
P0984
If the door has to be opened from left to right, invert the
position of the plates (7), the magnet (4) and the plate
(5) (Fig. B and E). Mount the countermagnet (6) and the
hinges (1) as previously described.
4
6
D
E
G
Position the base into the recess with its front edge as
far forward as the adjoining plinth line will allow.
The reason for placing the base in this position is to
allow a small strip of beading to be fitted in front of
the appliance feet.
Fix the base firmly to the floor using four appropriate
countersunk screws (see Fig. H).
5
P0983
7
Recommendations regarding the
1
3
2
Hardwood strip
5 mm x 25 mm
construction and fitting of a base
when the installation requires an
H
integrated appliance to be raised
Where the appliance has been raised by mounting onto
a wooden base provided by the installer. The material
used to construct the base should have a non slip
surface, be water repellent and if possible be one solid
piece.
If it is not possible to use one solid piece, due to the
additional height required, ensure that any additional
strips of timber are glued and screwed to the underside
of the base (see Fig. F).
5 mm Hardwood strip
40 mm
100 mm
600-605 mm
Front view
Additional pieces of
timber should run
from front to back
F
With the appliance installed adjust all four feet ensuring
the machine is stable, and a clearance of approximately
5 mm is left between the top of the machine and the
underside of the worktop.
A final check for stability should be carried out with the
machine on spin with a load, this will identify the need
for any further fine adjustment to the feet.
A strip of beading approximately 605 mm W, x 5 mm
H, x 25 mm D must be screwed down into the base
directly in front of the machine’s feet, this will provide
additional security.
If required an additional door magnet, part number
1242394-00/3 and disc, part number 1242393-00/5 are
available from spare parts.
50 mm
Front edge
Top view
5 X 25 X 605
600-605
490
27
Page 28

plc 2007
 Loading...