

Page 1
2LB BREADMAKER
Instruction and Recipe Book
Model: ABM30
Visit our website
www.buyprima.com
Page 2

TABLE OF CONTENTS
IMPORTANT SAFEGUARDS ........................................................................................2
PARTS & CONTROL PANEL.........................................................................................4
CHOICE OF BREADS
USING THE BREAD MAKER.........................................................................................7
OPERATION TIPS.........................................................................................................8
OPERATING PROCEDURE FOR MAKING DOUGH & BAKING BREAD.....................9
USING THE TIMER .....................................................................................................13
INGREDIENTS.............................................................................................................14
TIPS FOR BEST RESULT...........................................................................................15
CLEANING INSTRUCTION .........................................................................................16
TROUBLE-SHOOTING................................................................................................17
RECIPES .....................................................................................................................22
............................................................................................................................... 6
1
Page 3

IMPORTANT SAFEGUARDS
When using the Automatic Bread Maker, basic safety precautions should always be followed
including the following:
Read all instructions before use.
1. Do not touch hot surface. Use handles or knobs. Always use oven mitts when handling hot
materials and allow metal parts to cool before cleaning.
2. ALWAYS use oven mitts when removing the bread pan after use. The metal handle on the
bread pan will be very hot
3. Unplug this product from wall outlet when not in use and before cleaning. Allow to cool thoroughly
before putting on or taking off parts.
4. Close supervision is necessary when any appliance is used by or near children.
5. Do not use on a wet floor or in places that the appliance can be splashed with water. Do not
immerse cord, plugs, or main body of the appliance in water.
6. Do not operate any appliance with a damaged electrical cord, or plug, or after the appliance
malfunctions or has been damaged in any manner. Return the appliance to the nearest
authorized service facility for examination, repair or adjustment.
7. This appliance is intended for household use only. Do not use outdoors or for commercial
purposes.
8. Do not use appliance for other than intended use.
9. The use of attachments not recommended by manufacturer may cause damage or injury.
10. Do not let cord hang over edge of table or counter, or touch hot surfaces. Do not place on an
unsteady or cloth-covered surface.
11. Do not place the appliance on or near a hot gas or an electric burner, a heated oven a microwave.
12. Place on a heat resistance surface.
13. Do not allow anything to rest on the power cord. Do not plug in cord where persons may walk or
trip on it.
14. Avoid contact with any moving parts.
15. Keep the unit at least 11cm away from walls or any objects when using it.
2
Page 4
16. To disconnect, grip the plug and pull from the wall outlet. Never pull on the cord.
17. There is a main On/Off switch on the bottom of the unit to switch the machine off fully.
FOR HOUSEHOLD USE ONLY
CAUTION:
TO REDUCE THE RISK OF ELECTRIC SHOCK, COOK ONLY IN REMOVABLE CONTAINER.
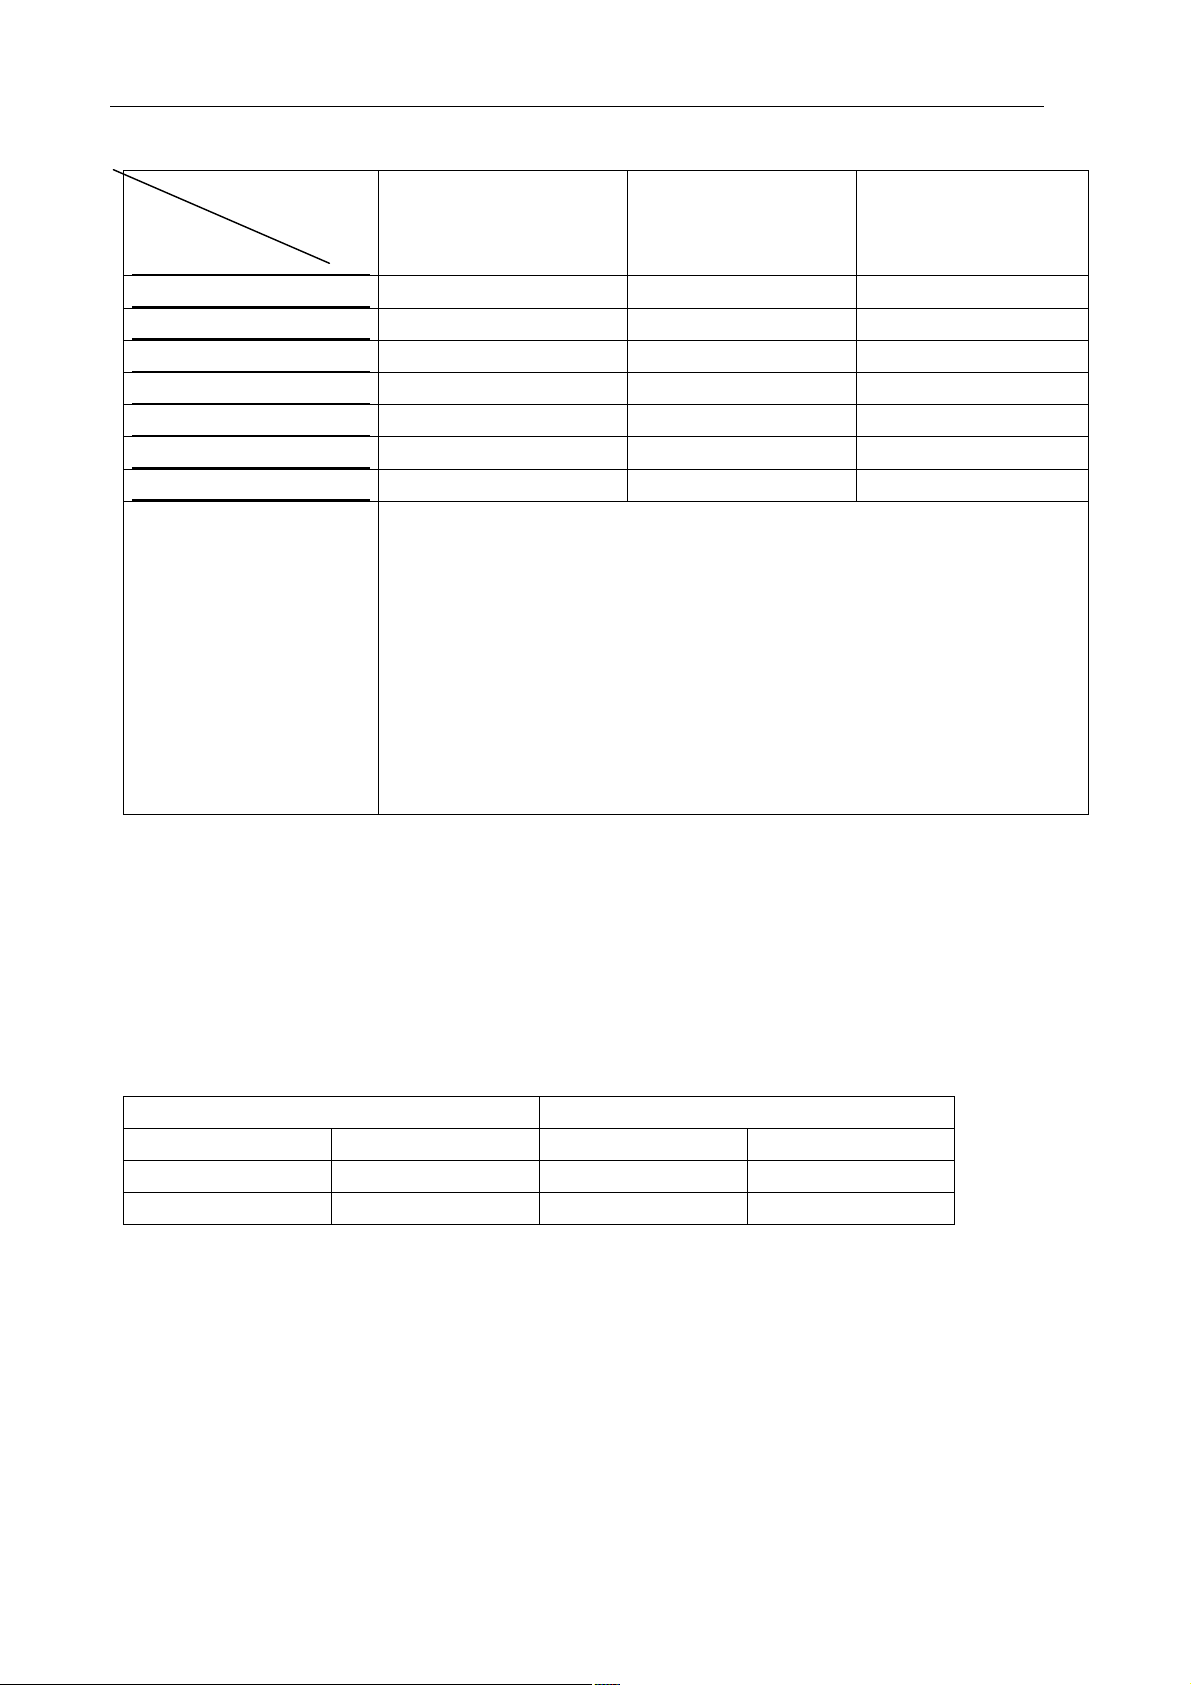
Product specification
Parameters
Model
ABM30 220~240Vac/50Hz 600~720W 550W 50W 16hours
Rating voltage
Rating
Power
Electro thermal
Tube power
Electromotor
Power
Delay Setting
Time
IMPORTANT
WARNING: You should not dispose of this device with your household waste.
A selective collection system for this type of product is implemented by your
local authorities. Please contact your local authorities to find out how and
where collection takes place.
These restrictions apply because electrical and electronic devices contain
dangerous substances that have harmful effects on the environment or on
human health and must be recycled.
This symbol indicates that electrical and electronic devices are
collected selectively. The symbol shows a waste container crossed out with
an X symbol.
If the power cable is damaged, it must be replaced by a person qualified in
3
Page 5
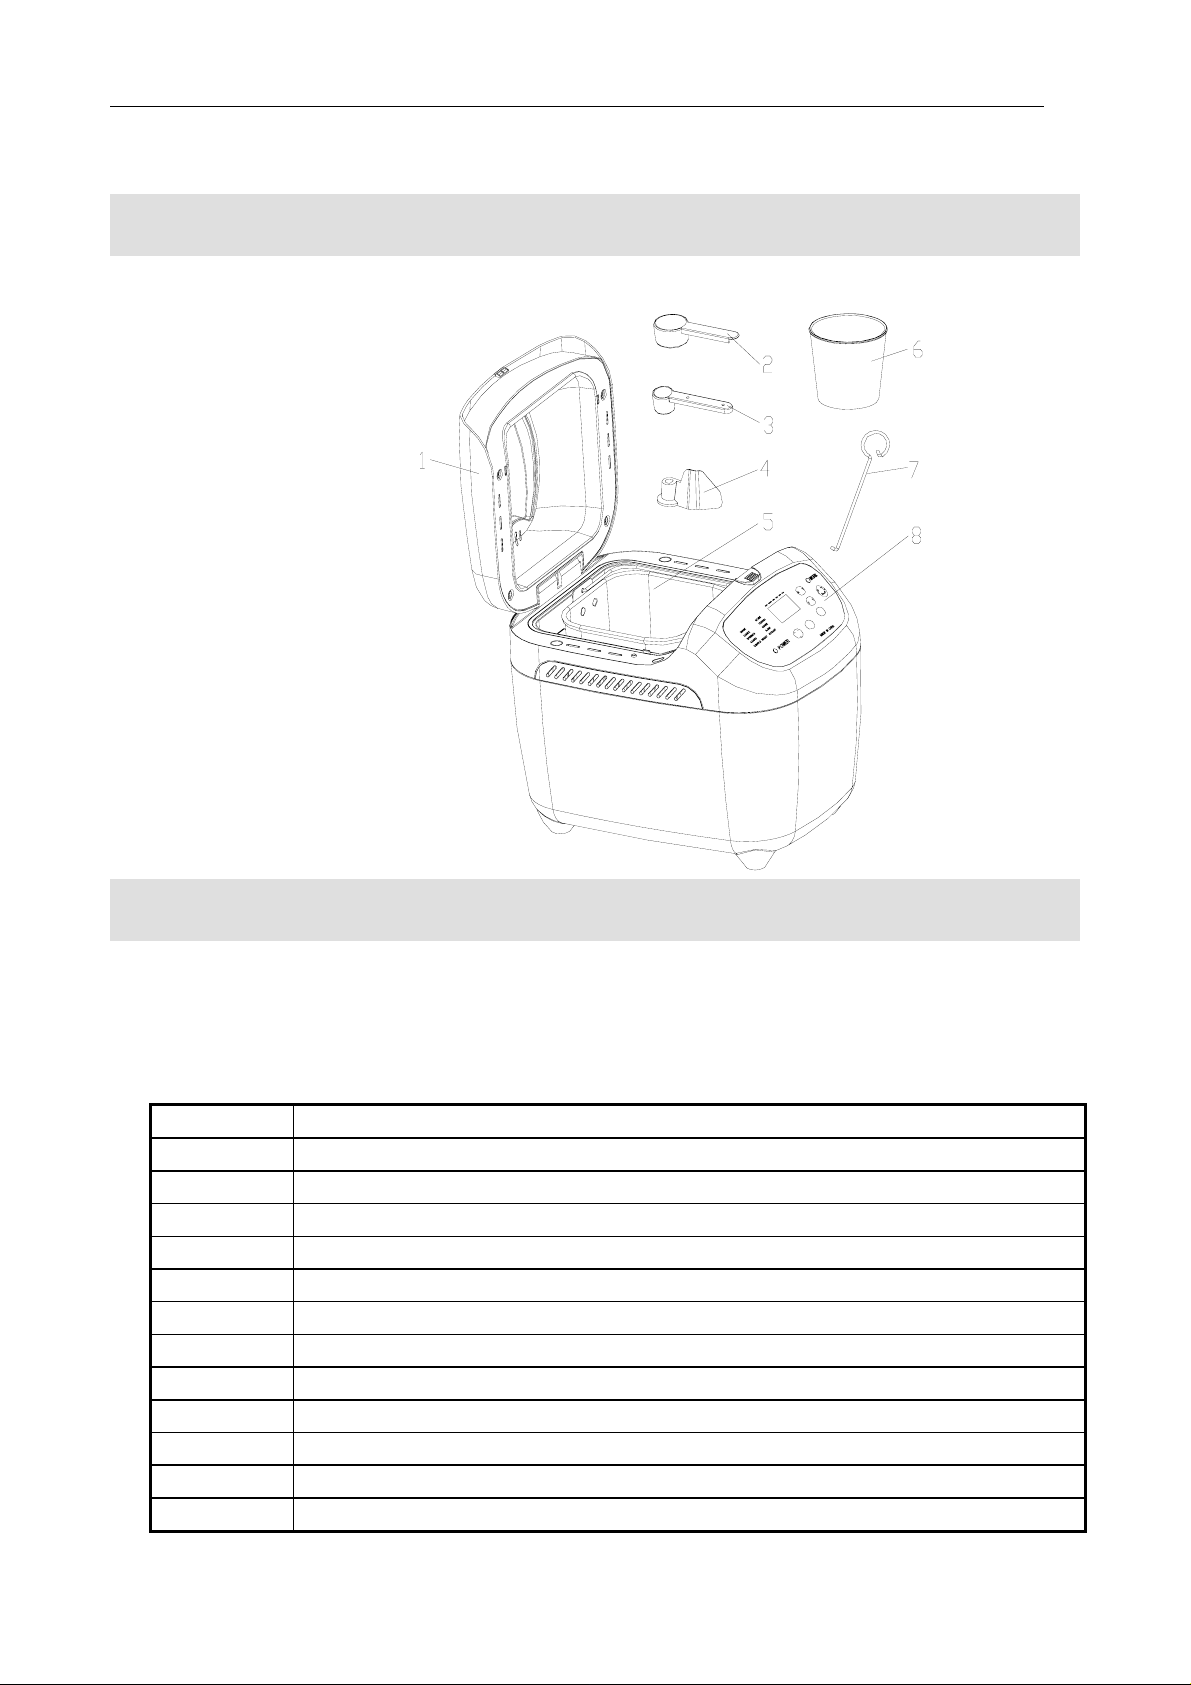
PARTS
1, Lid System
2, Big Measuring Spoon
3, Small Measuring Spoon
4, Bread Paddle
5, Bread Pan
6, Measuring Cup
7, Hook
8, Control Panel
Control Panel
A. DISPLAY WINDOW
Shows your selection and time setting.
B. LIST OF MENUS (Bread Type)
CODE NO. BAKING PROGRAMS
1
2
3
4
5
6
7
8
9
10
11
12
4
BASIC BREAD
FRENCH BREAD
SWEET BREAD
WHOLEMEAL BREAD
YOGURT BREAD
CAKE
WISK
JAM
DOUGH
SANDWICH
FAST BAKE
BAKE
(See page 6 for explanation of baking programs)
Page 6

C. SELECT
Press this button to select the baking cycle you want. Press this button until your choice is
indicated ie: 1, 2, 3 – see table above.
D. BREAD COLOUR
Press this button to select LIGHT, MEDIUM or DARK bread color. The indictor line ‘^’ will move
between Light, Medium and Dark to show selected function.
E. TIMER
The ^ and V buttons are used to set the start time. The Timer can be set up to 16 hours in
advance.
When you press the Timer button it will automatically display how long the selected bread
program will take to cook. Add on how many hours you want to add until the bread machine starts
the chosen cycle.
F. START
Press this button to start the baking cycle you choose.
G. STOP
Press this button for 3 seconds to stop operation or to switch off the keep warm function that
automatically switches on for 60 minutes when the bread cycle has finished.
H. SIZE
Press this button to select the LOAF SIZE you want. The Indictor ‘^’ line will move between the
loaf sizes to show selection.
I. AUTO MEMORY
The breadmaker will automatically remember the last function for up to 30 minutes if the power is
interrupted while in cycle. If power is restored within 30 minutes the machine will carry on from
where it was interrupted. If the power is off for longer than 30 minutes then the cycle will need to
be started again from the beginning.
5
Page 7

Choice of Breads
BASIC BREAD
This is the program shown when the machine is first switched on.
This is a good, general-purpose program for white or brown bread. Most of the recipes use this
program. Results in golden brown crust and tender interior.
The unit automatically kneads ingredients, kneads the dough, raises it and bakes it at a normal
speed. You can also set the delay timer.
FRENCH BREAD
This setting is slightly longer than the BASIC BREAD program due to the extra kneading and
rising time required giving the FRENCH BREAD loaf a “airy” texture characteristic of French
bread.
SWEET BREAD
A little more kneading and a little less rising in this programme, which means it works well with
loaves that have high sugar content. You can also set the delay timer.
WHOLE WHEAT BREAD
For breads using 51% to 100% whole-wheat flour with low gluten content. Flour is rich in fiber,
vitamin B groups and vitamin E.
It spreads the kneading and rising steps to give better results with the low gluten content. You
can also set the delay timer, but it is not advised to use the delay function as this can produce
poor results.
YOGURT BREAD
For bread made with yogurt.
The unit automatically kneads ingredients, kneads the dough, raises it and bakes it at a normal
speed. You can also set the delay timer.
CAKE PROGRAM
Makes a sponge cake
WISK PROGRAM
This is for making dough only. It uses shorter steps to knead the dough in a shorter time.
Use the dough to make Dumplings, noodles etc. This function does not raise the dough or bake
it. Note: Crust colour control and loaf size selection are not available.
JAM FUNCTION
Use this program to make jam. Crust colour control and loaf size selection are not available.
DOUGH PROGRAM
This program kneads the dough and raises it for you to then bake in the oven yourself. Crust
colour control and loaf size selection are not available
6
.
Page 8

SANDWICH BREAD
The machine Kneads, rises and bakes a light texture bread with a thinner crust. You can also set
the delay timer.
FAST BAKE BREAD
This mode is similar to the quick program in that the steps are shorter for a faster process time
Loaf size and bread color cannot be altered in this mode; quick mode is good for the gluten-free
recipes. This setting normally produces smaller; dense loafs due to the shorter process time.
Note: Crust colour control and loaf size selection are not available.
BAKE PROGRAM
This program is specially designed for re-heating baked bread.
The program setting time is one hour but you can adjust the time according to your needs. The
longest baking time is four hours.
You can increase baking time of a loaf by using this program straight after another program if you
wish. To action press the “TIME” button to add or reduce the time, then Press start/stop button for
confirmation. You can also set the delay timer.
Using the Bread Maker
With your new BREAD MAKER:
• You can bake a loaf of bread from scratch (flour, yeast, water, etc.). See the Cook Book for lots of
tasty recipes.
• Or you can make dough for rolls or shaped loaves you will bake in your oven. Use the BREAD
MAKER “DOUGH” cycle to do the mixing and kneading for you, then shape and bake the bread
yourself.
• You can make Yogurt and Cakes along with a Jam function… what more could you need!
Inserting and Removing the Bread Pan
• To insert the Bread Pan in the BREAD MAKER, sit the bread pan in place and clockwise rotate it
until it click in place.
IMPORTANT:
Remember to insert the Kneading Paddle, and then add all your ingredients.
• To remove the Bread Pan from the Baking Oven, wearing oven mitts hold the Handle and
counterclockwise rotate it and then lift it up gently.
When removing the Bread Pan after baking, BE SURE TO WEAR OVEN MITTS to prevent
7
Page 9

burning. After you remove the loaf by turning the Bread Pan upside down and shaking gently,
check to see that the Kneading Paddle is removed from the loaf. If it is stuck in your bread,
use a non-metal utensil to gently remove it, taking care not to scratch the Kneading Paddle.
Operation Tips
• Use oven mitts when working with bread or any part of the BREAD MAKER that is hot from
baking.
• Wipe off crumbs and clean the BREAD MAKER, as needed, after baking once the machine has
cooled.
• It is normal for the viewing window to collect moisture during the beginning of the baking cycle. As
your bread bakes, the moisture soon will evaporate so you can watch the baking progress.
• Do not open the lid during baking. This causes the bread to bake improperly.
Caution
• To protect young children, keep the BREAD MAKER out of their reach when you are not there to
supervise—especially during the kneading and baking cycles.
• Use the BREAD MAKER on a flat, hard, heat resistant surface. Do not place it near flame or heat,
or on a soft surface (such as a carpet). Avoid placing it where it may tip over during use. Dropping
the BREAD MAKER could cause it to malfunction. Keep out of drafts and cold when it use this
could effect how well the bread rises.
• After baking, wait for the BREAD MAKER to cool down before touching or cleaning the Bread Pan
or internals of the BREAD MAKER.
• Never use metal utensils with the bread maker. These can scratch the non-stick surface of the
Bread Pan.
• Avoid electric shocks by unplugging before using a damp cloth or sponge to wipe the interior of
the Oven.
• Never use the Bread Pan on a gas or electric cook top or an open flame.
Avoid covering the Steam Vents during kneading and baking cycles. This could cause the
BREAD MAKER to warp or discolor.
8
Page 10

Operating Procedure
Here's how to bake bread with your BREAD MAKER:
(Please note illustrations are for reference only and may show a bread mak er shape different to the one you have
purchased)
Step 1:
Open the Lid and remove the
Bread Pan.
Step 2:
Position the Kneading Paddle
on the Drive Shaft as shown.
Match the flat side of the Drive
Shaft to the flat part of the hole
in Kneading Paddle. Make sure
the paddle is secure.
9
Page 11
Step 3:
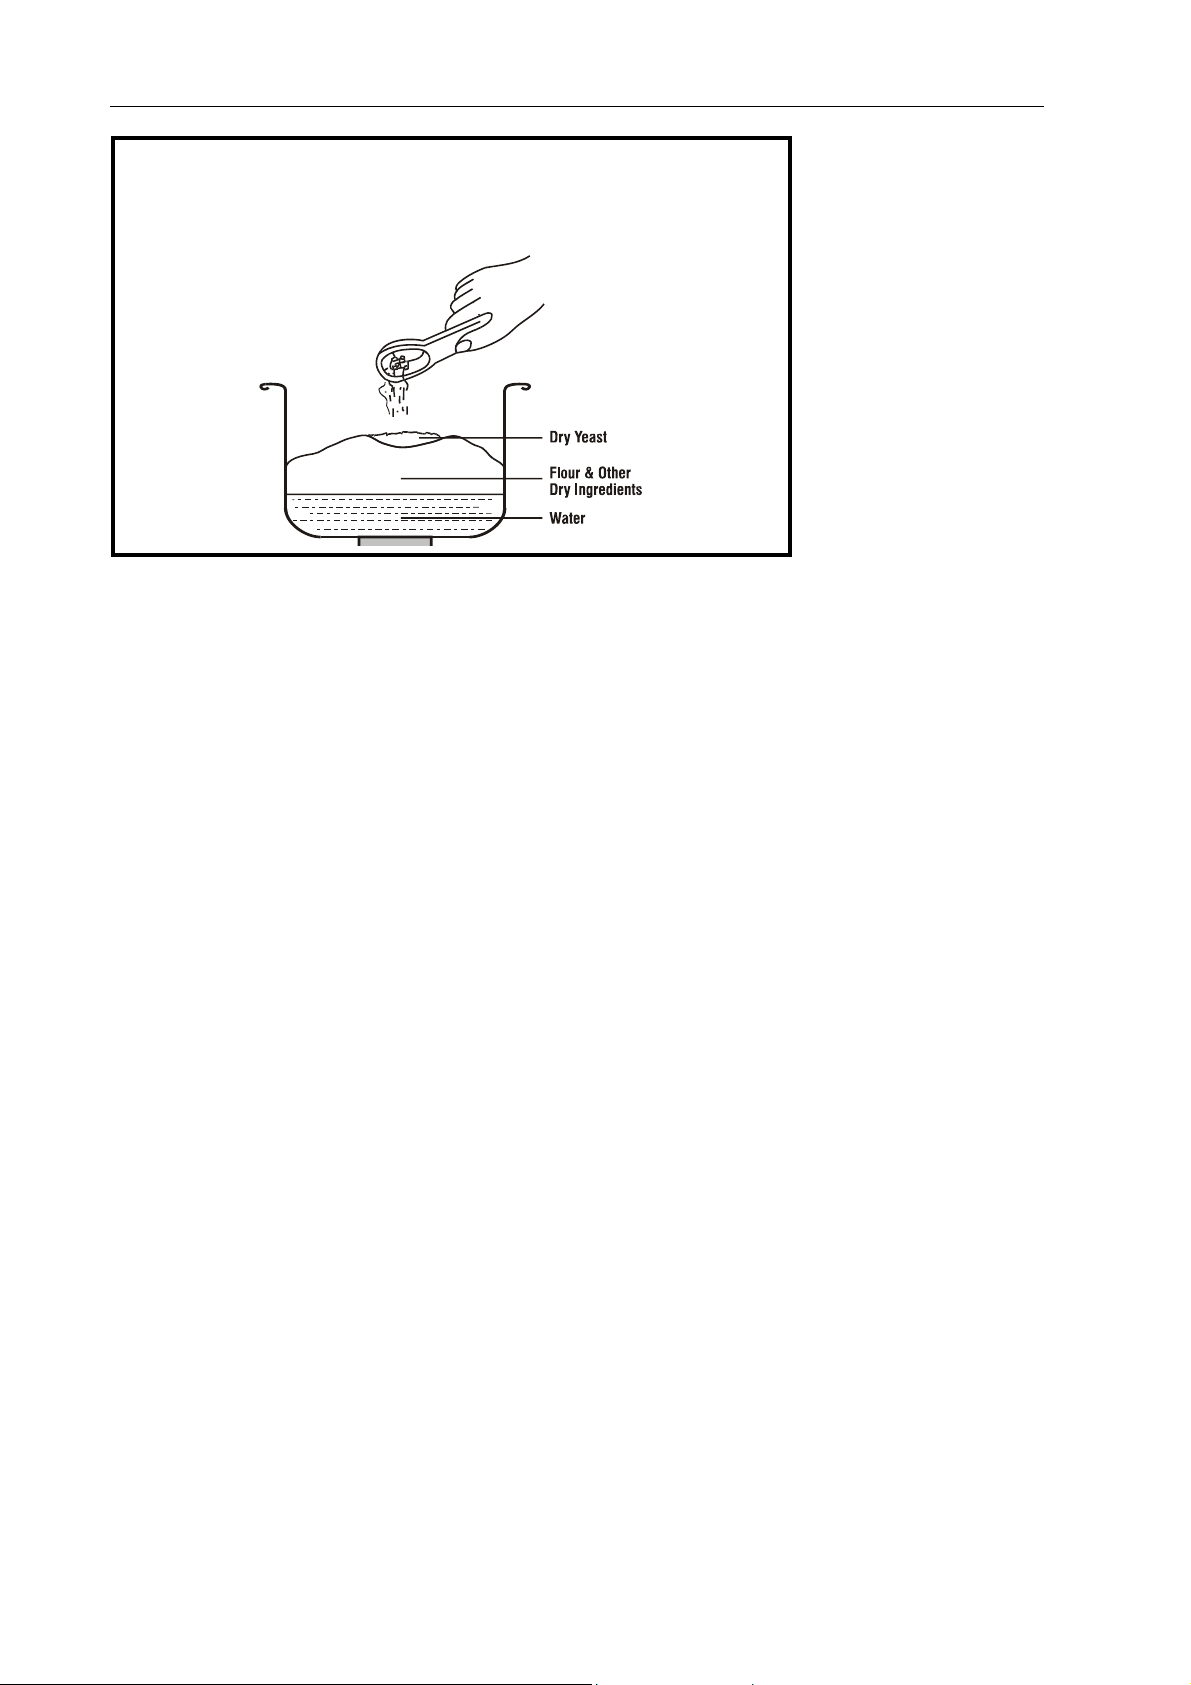
Add ingredients into the bread
pan. For best results, add all
liquid ingredients first. Then,
add all dry ingredients
EXCEPT yeast and (if
needed) oil
Step 4:
Make a small indentation on
top of the dry ingredients (not
so deep it reaches the wet
layer) and add the yeast in the
indentation.
If using Oil add a small
indentation on top of the dry
ingredients in each of the four
corners.
This order of adding
ingredients is important,
especially when using the
timer, because it keeps the
yeast away from the liquid
ingredients until it is time to
knead them together. (Liquid
ingredients will activate the
yeast).
10
Page 12

Step 5:
Insert the Bread Pan in the
BREAD MAKER, sit the bread
pan in place. Close the Lid.
Step 6:
Press the SELECT button to
choose the cycle you want.
Press BREAD COLOUR to
Select the colour of the bread
and if you want to delay the
programming press TIMER.
Please see page 13 for full
details.
Half way during the kneading
cycle the machine will beep to
let you know this is when to
add any fruits or nuts to the
dough.
11
Page 13

Step 7:
When the baking phase is
completed, the BREAD
MAKER will beep 12 times.
This indicates the bread is
done. Press the STOP button
(hold down for 3 seconds). Put
on your oven mitts and
remove the Bread Pan.
Remember that the Bread Pan
and your loaf are very hot! Be
careful not to place either on a
tablecloth, plastic surface or
other surface that might
scorch or melt.
If the bread is not removed
immediately after baking and
the STOP button is not
pressed, a controlled
cool-down and keep-warm
cycle will begin and the unit
will shut off automatically after
60 minutes. To prevent the
bread from becoming soggy
from condensation, it is best to
remove the bread immediately
after baking is complete.
Step 8:
Turn over the Bread Pan a few
inches from the countertop
and gently shake out the loaf.
Place the loaf on a wire rack or
other cooling surface to cool.
Bread should be cooled
slightly (15 to 30 minutes)
before it is sliced.
Sometimes, the Kneading
Paddle will stick in the bread.
Use the metal utensil to gently
remove it, taking care not to
scratch the Kneading Paddle.
12
Page 14

Using the Timer
To enjoy fresh, warm bread after waking up in the morning, set the Timer in the evening before going
to bed. The Timer can be preset up to 16 hours.
Note:
• Don’t use the timer if your recipe includes eggs, fresh milk or other ingredients that may spoil.
• The BREAD MAKER timer is used for Basic Bread, Normal Whole Wheat Bread
To set the Timer, follow these steps:
1. Add ingredients as usual, taking care not to let the yeast and liquid ingredients contact one
another.
2. Close the BREAD MAKER lid.
3. Press the SELECT button to select your desired setting, and then select your desired bread
COLOR.
4. Press the TIMER buttons (^ and v buttons ) to select the time delay you need. You can set the
time up to 16 hours.
5. Press START button to complete Timer setting and to start the timer operation. The colon ( : )
begins to flash and the TIMER LED indicator lights up letting you know the time is started.
6. When baking cycle starts, the OPERATION LED indicator lights up and the time display shows
the remaining time for the baking cycle.
7. When baking is completed, the COMPLETED LED indicator lights up and the unit beeps 12
times.
13
Page 15

Ingredients
Use only fresh ingredients. Check the expiration date on the packing. Expired yeast and flour are
harmful to health and will also produce poor bread.
BASIC INGREDIENTS:
FLOUR
It is best to use strong bread flour to make bread. We can also use whole wheat bread flour to make
whole wheat bread. However whole wheat flour dough does not rise as rapidly and as big as white
bread flour dough.
SUGAR
Sugar helps yeast fermentation, gives taste and colour to the bread and keeps the bread tender.
White sugar is used for making basic bread. Brown sugar is used for making whole wheat bread.
FATS
The fats we use in making bread are usually butter (unsalted butter) or oil. Fats help to keep the bread
soft and shiny after baking.
Margarine can be used instead of butter although the bread baked with margarine will have a
different flavor and texture.
SALT
Ordinary table salt is used in our recipe. Salt can keep the gluten in the dough and stops it from
over-rising.
MILK AND MILK PRODUCTS
Dried milk is useful for the shine and taste of the bread. Liquid milk and dried milk are not
interchangeable because of the difference in water content.
WATER
Adding accurate amount of water is the most important step in bread making. A small difference in
the amount of the water may affect the result of the bread. The temperature of tap water should be
between 21%C to 27%C (70%F to 80%F).
DRY YEAST
Active dry yeast is recommended for making bread. Stay with the standard active dry yeast for the
best result. Do not use compressed yeast or rapid rise yeast.
CHEMICAL LEAVENS
Chemical leavens such as baking powder and baking soda are used for making quick bread.
14
Page 16

Other Ingredients
EGGS
Eggs can improve the flavor and aroma of the bread. However, water content of the egg must be
accounted for in the formula, because an average size egg contains about 73% water.
FRUITS
Sugar and water contents in fruits must be considered in the recipes. Total weight of fruits used
should not exceed 13% of the flour weight.
VEGETABLES
Content of water and sugar in vegetables must also be considered. Like fruits the total amount should
weight about 13% of the flour weight.
NUTS
When using nuts, chop them to about 1/8 inch cubes. Use up to about 10% of the flour weight.
SPICES
Spices are used to add flavor to the bread. Only small amount (1/2--1 tsp.) is needed.
Tips
• It is the best to use lukewarm water between 21%C and 27%C (70%F and 80%F). All other
ingredients should be prepared at room temperature.
• Do not add more flour than suggested in the recipes. Excess flour will cause the bread to bake
incompletely and the dough to stick to the inside of the Lid. Use fresh ingredients.
1. Since moisture is an enemy to flour, be sure to store your flour in an airtight container.
2. To keep the yeast active, store it in an airtight container in your refrigerator.
• When using the timer, we recommend setting it for as short a time as possible. Because
ingredients are partially combined in the Bread Pan, the dough may tend to deteriorate if left too
many hours, especially on a warm or humid day.
• Keep the lid closed during the baking cycle.
• After your bread has cooled down completely, store it in bread bin or air tight container to prevent
it from drying out.
15
Page 17

Cleaning
• The Bread Pan and Kneading Paddle have non-stick surfaces that make cleaning easy.
1. After baking, unplug the BREAD MAKER and allow the main body to cool down before
cleaning.
2. Remove the Bread Pan from the BREAD MAKER Oven and the Kneading Paddle from the
Bread Pan. Wipe the Bread Pan and Kneading Paddle with warm soapy water. Avoid
scratching the non-stick surface.
If the Kneading Paddle sticks to the drive shaft, pour warm water into the pan to loosen it and
leave it to soak. DO NOT USE EXCESSIVE FORCE.
3. Wipe the inside of the Lid and Oven with a damp cloth or sponge. If any residue has scorched
on the heating plate or elsewhere, scrub with a non-abrasive scrubbing pad wipe clean. You
can remove the Lid for easier cleaning by opening it up to a 90° angle and pull it out from the
hinge.
• Do not use vinegar, bleach, or harsh chemicals to clean the BREAD MAKER.
• Do not soak the Bread Pan for a long period of time- this could interfere with the free working of
the Drive Shaft.
• Do not immerse the BREAD MAKER in water or splash with water.
• Be sure the BREAD MAKER is completely cooled and dried before storage.
Caution: Avoid electric shock - unplug the BREAD MAKER before cleaning!
16
Page 18

Trouble Shooting
Number Problem Reason Settlement
1
2 I can’t get the bread out of the
3
4 When starting the machine the
5 The kneading blades are moving
6 The dough has risen and is
17
The central section of the bread
is sinking; the bottom crust of
the bread is too thick.
It has been kept on the keep
warm function for too long and
it has lost too much of it’s
As soon as the cycle has finished
remove the pan from the machine
and the bread pan.
water content.
bread pan.
The kneading blade is stuck
inside the loaf.
Using oven mitts gently turn the
bread pan upside down and turn
the kneading blade holder on the
underside of the bread pan half a
turn to loosen the kneading arms.
This should now release the bread.
1,you have chosen a wrong
program.
Check the recipe you are using is
for the program you have set.
The ingredients are not blended
well, and the result is not good.
2, The bread cycle has been
interrupted for more than 30
minutes during a cycle.
If power has been switched off for
more than 30 minutes you need to
start again with fresh ingredients.
It is okay to pause the machine to
add more ingredients during a
cycle but for no more than 30
minutes.
3, The lid of the bread machine
has been opened which has
After the last rising period do not
open the lid.
resulted in the bread becoming
hard.
LCD displays ”H: HH”
The temperature of the
machine is too high and needs
to cool down before you start.
Switch the machine off at the
mains and take the bread pan out
the machine. Leave the lid open
on the machine and leave the
machine to cool for 20 minutes.
Check the bread pan is fixed into
position.
Check the kneading blades are
pushed in correctly and there is no
gap between the kneading blades
and the bread pan
Add 1 tablespoon of water to
soften the dough.
but not blending the dough.
Make sure the bread pan is not
fixed into place correctly.
The kneading blades are not
fitted correctly.
The dough is too dry and heavy
for the kneading blades to
move.
Too much yeast or flour. Try adding less yeast or flour
touching the lid of the machine
Page 19

8 The dough has not risen Too little yeast has been added.
Water temperature is too hot
Too much salt has been added
or has been mixed with the
yeast before it has been mixed.
Check the yeast is fresh and in
date and the amount you added.
Water temperature should be at
ambient room temperature.
Check salt quantity added. Keep
the salt away from the yeast if
using the timer so they are not
mixed together until kneading
starts. Salt activates the yeast.
9
1, the flour is not strong bread
Change to strong bread flour
flour.
The top of the bread has sunk
once baking has started.
10 The bread is too heavy and
dense.
bread.
2, The temperature is too high
or low.
3, The dough is too wet
4. Too much sugar has been
added
1, Too much flour has been
sued and the dough is to dry
1, too much water has been
used
The temperature of the room can
effect how well the bread rises. In
cool weather bread may sink more
than in warm weather.
Reduce the water content by 30ml
and try again.
Reduce the sugar content by ½ big
spoon
Add more water
Reduce the water by 30ml 11 There are too many holes in the
2, You forgot to add salt Add correct amount of salt per
recipe
The main problem we are contacted about at Prima are the top of the bread loaf sinking and the bread loaf not
rising enough.
These problems relate to the ingredients – not the bread maker . The Prima Ran ge of bread makers are excellent
machines but what they do is essentially very simple. The mix the dough, prove the dough and then bake the
dough. Nothing the machine will do will prevent good ingredients from maki ng a great loaf.
There are 3 critical things to consider: Flour, Yeast and Water
Use good strong bread flour, one that has not been stored adversely. If the flour is old or damp, it will not work
properly. It must be strong flour specifically for bread making. Select wholemeal flour carefully. Generally
speaking, you get what you pay for!
Always use yeast that comes in sachets – not resalable tins or tubs. Sachet yeast does not rely upon suga r to
ferment and performs in exactly the same way every time. That is why sachet yeast is perfect for machine bread.
Sometimes the yeast maybe past it’s best even before the best before date – especially if it is in a re-sealable
packet that hasn’t been sealed correctly.
Around winter time we get an increase in calls from customers saying that their loafs don’t rise as well. This is
due to water straight from the tap in winter months can be as mu ch as 5 degrees colder than the summer
18
Page 20

months.
Although all our recipes have been formulated to make good bread with water straight from the tap we
recommend that you allow the water to stand at room temperature for at least an hour during the cool ed times of
the year. Very cold water slows down the yeast, which results in a smaller loaf.
Finally, the relationship between the water and flour is critical whether you are making bread by hand or with a
machine. Too much water causes the dough to over rise and then sinks, whilst not enough water can result in a
poorly risen, dense loaf.
Different brands of flour absorb different amounts of water. The recipes we have given in this b ooklet have b een
designed to yield a satisfactory loaf with a wide range of flour brands. However don’t be afrai d to add more water
if you think that you need to. Add a t ablespoon at a time.
19
Page 21

U.K. PLUG WIRING INSTRUCTIONS
The wires in the mains lead are coloured in accordance with the following code:
BROWN - LIVE (L)
BLUE - NEUTRAL (N)
GREEN/YELLOW - EARTH (E)
As the colours of the wires in the mains lead of this appliance may not correspond with the
coloured markings identifying the terminals in your plug, proceed as follows:
• The BLUE wire is the NEUTRAL and must be connected to the terminal which is marked
with the letter N or coloured BLACK
• The BROWN wire is the LIVE and must be connected to the terminal that is marked with the
letter L or coloured RED.
• The wire which is coloured GREEN/YELLOW must be connected to the terminal which is
marked E or coloured GREEN or GREEN/YELLOW.
Always ensure that the cord grip is positioned and securely fastened.
WARNING: THIS APPLIANCE MUST BE EARTHED.
If a 13A (BS1363) fused plug is used it must be fitted with a 13A fuse. If in doubt consult a qualified
electrician.
WIRING FOR A 13AMP PLUG
EARTH
(GREEN & YELLOW)
LIVE
(BROWN)
NEUTRAL
(BLUE)
13 AMP
20
Page 22

~~~~~ Warranty ~~~~~
This product is guaranteed for 1 year from the date of purchase when the appliance is used solely for
domestic purposes. For commercial use the product is guaranteed for 90 days from the date of
purchase.
The guarantee is valid against mechanical or electrical defects if the prod uct is used in accordance with
the instructions and provided that it is not connected to an unsuitable electricity supply or dismantled,
interfered with or damaged in any way.
IMPORTANT, PLEASE RETAIN THIS WARRANTY
Please ask your retailer to either stamp this warranty or simply attach your store receipt. Keep
this warranty somewhere safe. DO NOT SEND TO PRIMA.
This guarantee in no way affects your rights under statutory law.
IF THE PRODUCT MALFUNCTIONS DURING ITS WARRANTY PERIOD IT MUST BE RETURNED
TO THE RETAILER FROM WHOM IT WAS PURCHASED FOR REPLACEMENT. IF YOU BOUGHT
THIS PRODUCT VIA MAIL ORDER, PLEASE KEEP ALL THE DOCUMENTATION THAT CAME
WHEN THE UNIT WAS DELIVERED.
NAME__________________________________________________________________
ADDRESS______________________________________________________________
_______________________________________________________________________
PURCHASED FROM__________________________________________________________
DATE OF PURCHASE _________________________MODEL________________________
Prima House, Unit 15 (2) D, Springfield Commercial Centre, Bagley Lane, Leeds LS28 5LY.
Tel: 0844 581 5000 www.buyprima.com
© Copyright 2006 Nu-World UK Ltd. All rights reserved.
21
Page 23

RECIPES
Please follow the advice below:
1) Please place all ingredients into the bread pan in the following order:
2) When you have added all ingredients, in the correct order, select your chosen program, crust
selection and the loaf size. Press the ‘Start’ button to start the bread machine straight away or
press the ‘TIMER’ button to use the delay timer. You can set the delay timer for up to 16 hours in
advance.
3) When the chosen bread cycle has finished, the machine will sound 12 times, and go into Keep
Warm for one hour; if you don’t want the machine to go in to ‘Keep Warm’ function hold
“start/stop” button for three seconds to cancel once the cycle has finished and remove the bread.
4) When the cycle has finished carefully open the lid and use the hook to pull up the bread
panhandle. Use oven mitts to then remove the bread pan from the machine, turning
anti-clockwise to remove the bread pan. The Bread Pan and handle will be very hot. DO NOT
TOUCH WITH BARE SKIN USE OVEN MITTS.
5) If the Kneading paddle is stuck inside the bread carefully remove it with a plastic utensil.
6) Leave the bread to cool on a wire rack for at least 30 minutes before slicing.
The measuring instruments that you receive free with your bread machine convert into the following
measurements:
Measuring Cup: 250ml = 1 cup of flour: 148g 1 cup of water: 250g
Small spoon: 5ml = 1 small spoon of salt: 6g 1 small spoon of yeast: 3.5g,
Big Spoon: 15ml = 1 big spoon of sugar,: 14g 1 big spoon milk powder: 6.48g,
1 big spoon of butter: 16g 1 egg: 50-60g,
When measuring use a level spoonful.
Please note that all recipes given below are just for reference. Many different factors can affect how
well the bread rises including the ambient temperature as well as the ingredients.
If bread doesn’t rise properly or sinks during cooking this is down to the ingredients used not the
machine. The machine only mixes dough, rises it and cooks it. It cannot make a bad loaf! If this
happens it is down to the ingredients used. Check the troubleshooting section and that all
ingredients used are fresh
22
Page 24

Prima do not have any other recipes other than these listed here but there are many good books for
breadmaker machines around.
After you have got used to your machine you will be able to adapt the recipes given here to your own
taste and experiment to create your perfect loaf!
1, basic:
Weight
450g(1.0LB) 680g1.5(LB) 900g(2.0LB)
Ingredients
Water
140ml (140g) 250ml (246g) 310ml (313.4g)
Salt 1/3small sp (2g) 1/2 small sp (3g) 1 small sp (6g)
Sugar 1/2 big sp (7.5g) 2/3 big sp (10g) 1 big sp (14g)
Butter 12/3 big sp (25g) 2 big sp (32g) 2 1/2big sp (40g)
Strong white flour 2 cu (296g) 2 1/2 cu (375g) 3 1/2 cu(519g)
Dried milk powder 1 2/3 big sp (12g) 2 big sp (13g) 2 1/2 big sp (16g)
Dry yeast 1small sp (3.5g) 1 1/2small sp (3.75g) 1 2/3 small sp (6g)
2, French:
Weight
450g(1.0LB) 680g(1.5LB) 900g(2.0LB)
Ingredients;
Water
Salt
Sugar
Butter
Strong white flour
Dried milk powder
Dry yeast
130ml (130g) 240ml (238g) 300ml (298g)
2
/3small sp (4g) 11/4small sp (7g) 1 1/2small sp (9g)
11/2big sp (21g) 2 big sp (28g) 2 1/2big sp (35g)
1
/2big sp (8g) 1big sp (16g) 11/4big sp (18g)
2 cu (296g) 2 1/2 cu (375g) 31/2cu (519g)
12/3 big sp (12g) 2 big sp (13g) 21/2big sp (16g)
1small sp (3.5g) 11/2small sp (5g) 11/2small sp (5g)
3,sweet bread
Weight
450g(1.0LB) 680g(1.5LB) 900g(2.0LB)
Ingredients;
Water
Sugar
Salt
Butter
Strong white flour
Dried milk powder
Dry yeast
140ml (140g) 260ml (264g) 310ml (313g)
31/2big sp (49g) 3big sp (42g) 4big sp (56g)
1
/4small sp (2g)
12/3big sp (30g) 2big sp (32g) 21/2big sp (40g)
2cu (296g) 21/2cu (375g) 31/2cu (519g)
12/3big sp (12g) 2big sp (10g) 21/2big sp (16g)
1small sp (3.5g) 11/2small sp (5g) 11/2small sp (5g)
23
1
/3small sp (2.5g)
1
/2small sp (3g)
Page 25

4, whole wheat:
Weight
Ingredients;
Water
Salt
Sugar
Butter
Whole wheat flour
Dried milk powder
Dry yeast
5, yogurt bread
Weight
Ingredients
Water
Salt
Sugar
Butter
Strong white flour
Yogurt
Dry yeast
450g(1.0LB) 680g(1.5LB) 900g(2.0LB)
140ml (140g) 240ml (237g) 300ml (294g)
1
/3small sp (2g)
1
/2small sp (3g) 1small sp (6g)
11/2big sp (21g) 2big sp (28g) 21/2big sp (35g)
11/2big sp (24g) 2big sp (32g) 21/2big sp (40g)
2cu (296g) 21/2cu (375g) 31/2cu (519g)
12/3big sp (12g) 13/4big sp (12g) 2big sp (13g)
1small sp (3.5g) 11/2small sp (5g) 11/2small sp (5g)
450g(1.0LB) 680g(1.5LB) 900 g(2.0LB)
50ml (50g) 100ml (100g) 110ml (110g)
100g 150g 200g
11/2big sp (21g) 2big sp (28g) 21/2big sp (42g)
1
/2small sp (3g)
1
/2small sp (3g)
2
/3small sp (5g)
11/2big sp (24g) 2big sp (32g) 21/2big sp (40g)
2cu (296g) 21/2cu (370g) 31/2cu (518g)
1small sp (3.5g) 11/2small sp (5g) 11/2small sp (5g)
24
Page 26
6, cake:
Weight
450g(1.0LB) 680g(1.5LB) 900g(2.0LB)
Ingredients;
Water
Carbonate soda powder
Sugar
Butter
Strong white flour
Egg
Dry yeast
30ml (29.5g) 30ml (29.5g) 60ml (58.7g)
1small sp(3g) 1small sp (3g) 1small sp (3g)
1
/8cup (48g)
1
/8cup (48g)
1
/4cup (90g)
1/8cup (50g) 1/3cup (124g) 1/2cup (150g)
11/3cup (197g) 13/4cup (269.5g) 21/2cup (385g)
2 pcs (100g) 3 pcs (150g) 4 pcs (200g)
1small sp (3.5g) 11/2small sp (5g) 11/2small sp (5g)
Place in the following order into the barrel:
eggs
water
sugar
salt
butter
strong flour
carbonate soda powder
Order
dry yeast - dig a concave into the flour to put the yeast, make sure you
don’t make the hole so deep that it touches the water.
7, whisk
You can use any bread recipe for this. Once the dough has been kneaded the cycle will finish. You
can use the dough at a later date by putting it back in the machine on the Bake Program.
8, Jam
Prescription 1 Prescription 2
Fruit 600g Orange 650g
Sugar 200g Sugar 180g
Lemon juice 2big sp Lemon juice 100g
9, Dough
Y ou can use any bread recipe for this. Once the dough has been kneaded and has risen the cycle will
finish. You can cook the risen dough yourself in the oven.
25
Page 27
10, Sandwich:
Weight
450g(1.0LB) 680g(1.5LB) 900g(2.0LB)
Ingredients;
Water
Salt
Sugar
Butter
Strong white flour
Dried milk powder
Dry yeast
Egg
90ml (90g) 200ml (198g) 280ml (77g)
1
/2small sp (3g)
1
/3small sp (2g)
2
/3 small sp (4g) 1small sp (6g)
1
/2small sp (3g)
1
/2small sp (3g)
1 1/2big sp (21g) 2 big sp (28g) 2 1/2big sp (35g)
1 1/2big sp (24g) 2big sp (32g) 21/2big sp (40g)
2cu (296g) 21/2cu (367g) 31/2cu (519g)
1
/2small sp (1g)
1
/2small sp (1g)
1small sp (2g)
499.5g 696g 944g
Place in the following order into the barrel:
eggs
water
sugar
salt
butter
strong flour
milk powder
Order
dry yeast - dig a concave into the flour to put the yeast, make sure you don’t
make the hole so deep that it touches the water.
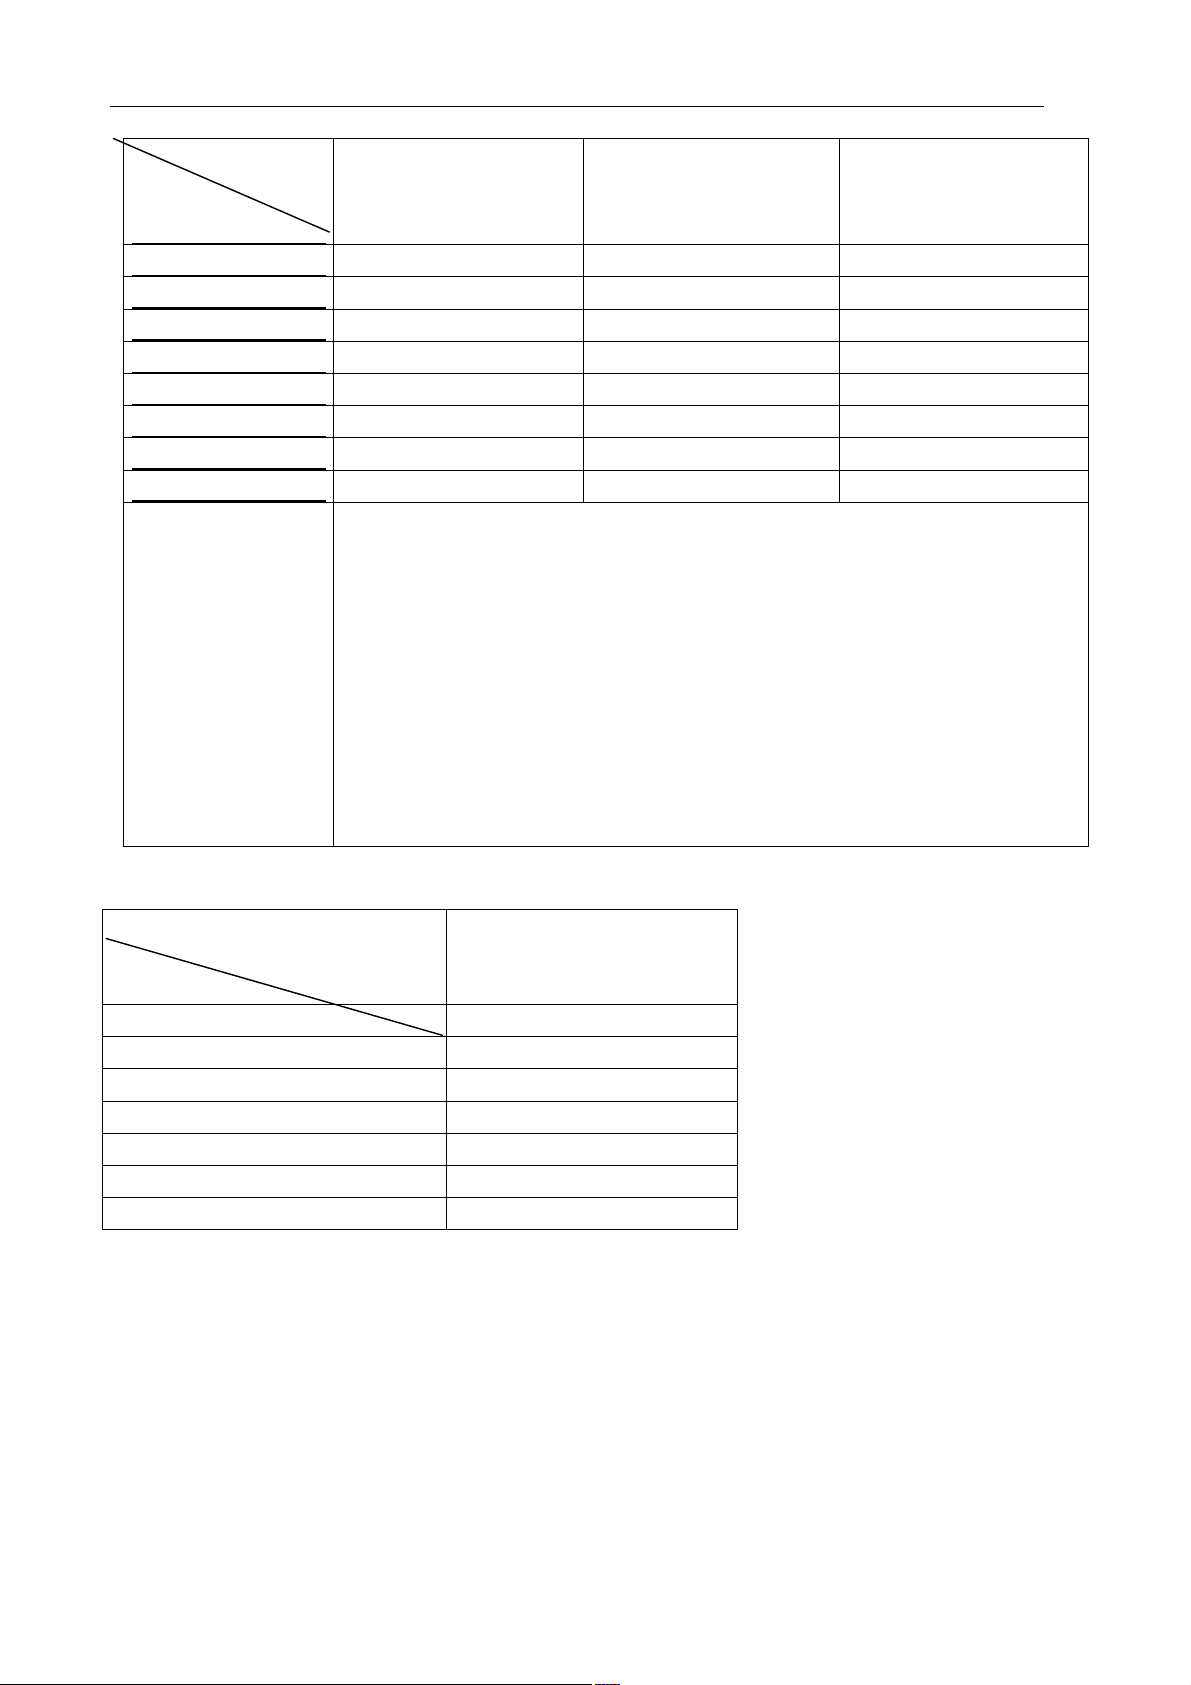
11 Fast bake:
Weight
600g
Ingredients
Water 180ml (183g)
Salt 1/4small sp (1.5g)
Sugar 2 big sp (28g)
Butter 2 big sp (32g)
Strong flour 1 2/3cu (356g)
Dry milk powder 2 big sp (13g)
Dry yeast 2 1/2 small sp (8.5g)
12 Bake
This program is specially designed for reheating finished bread; you can also use this program to
increase the baking time after another program has finished.
This program setting time is one hour. You can adjust time according to you needs but the longest
baking time is four hours.
Press the “TIME” button to add or reduce the time, then press start/stop button for confirmation.
26
 Loading...