

Page 1
P-RH Heavy Commercial
Roof Hydrants and Bracket
Installation, Operation & Maintenance Instructions
The Prier Heavy Commercial Roof Hydrants provide a wide
variety of installation options suitable for all types of roofs
and structures.
The Prier Universal Roof Hydrant Mounting Bracket (P-RMB)
attaches to a structural member of the building, not simply
the skin of the building to provide a stronger, safer installation. Additionally, the hydrant is installed through a
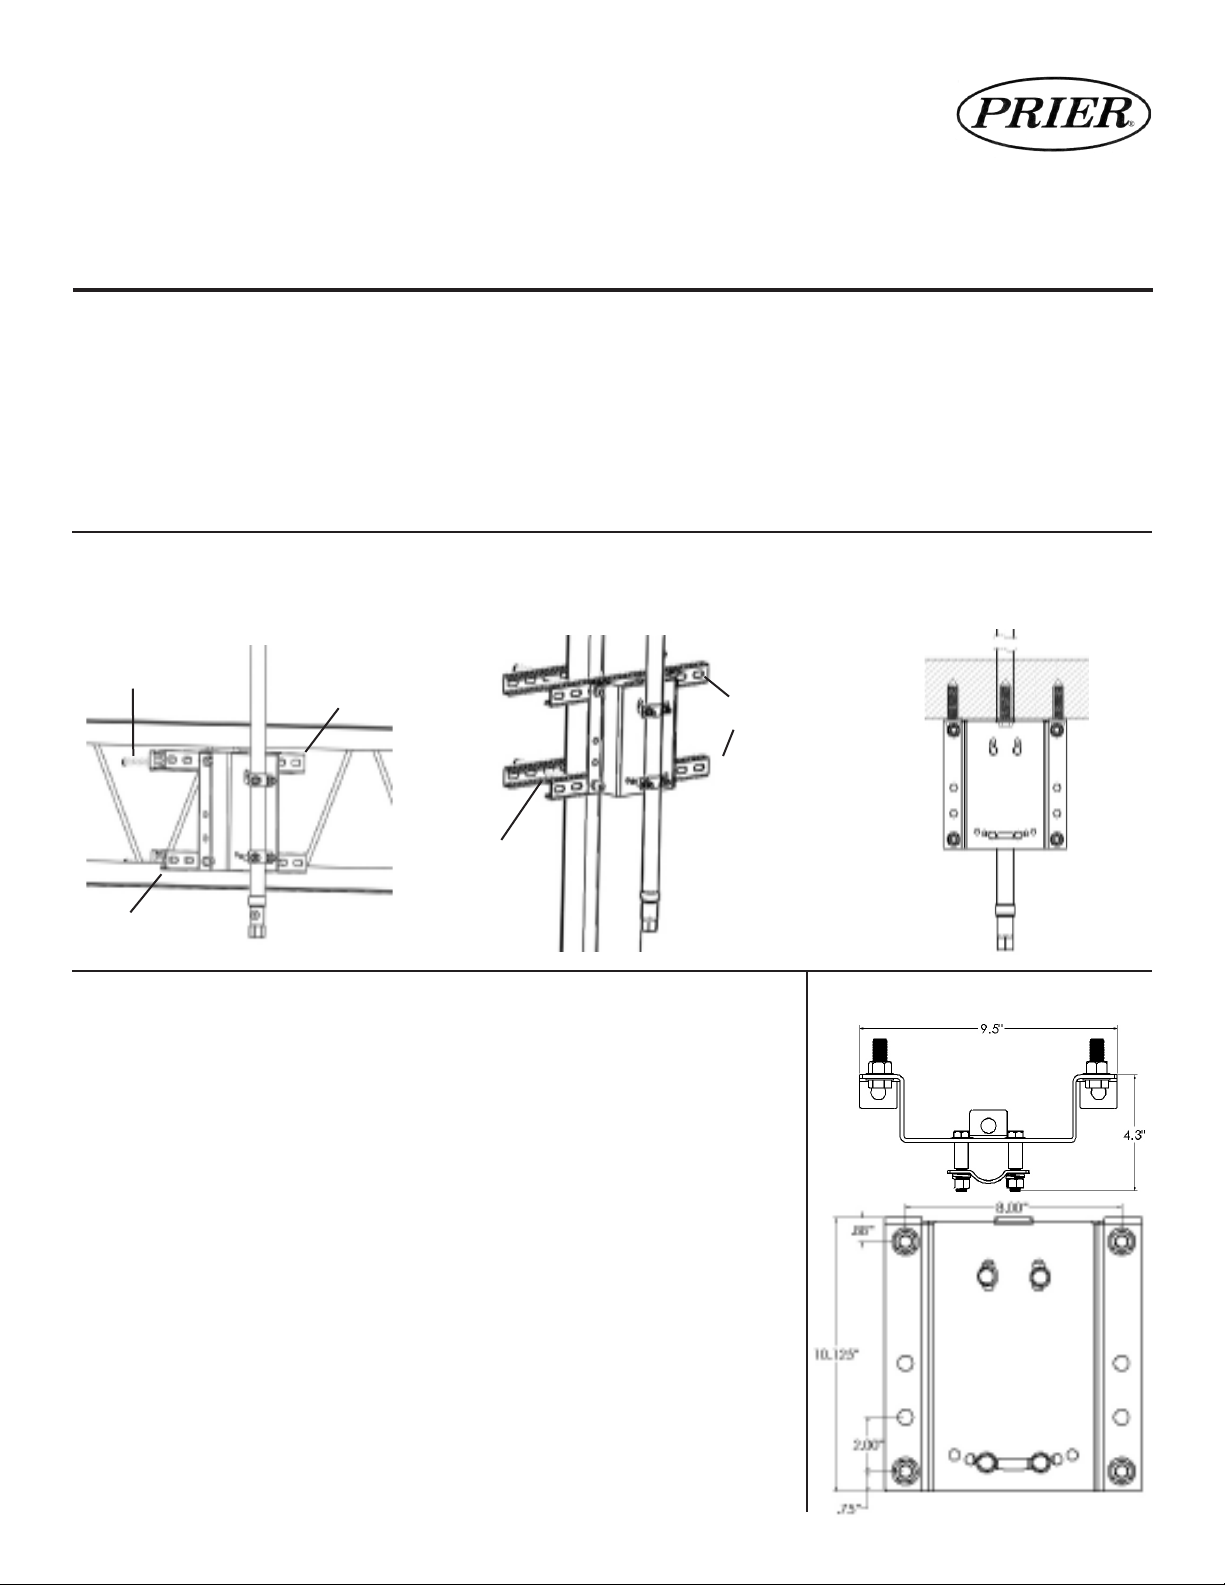
Typical Installations:
Truss (Purlin) Installation
Threaded rod
Unistrut
I-Beam (Column) Installation
small, single hole penetration in the roof, ensuring simple
installation by a single tradesman and years of leak-free
operation. The Prier design is adjustable for all types of
roofs up to 4/12 pitch.
Depending on your chosen installation, standard building
materials may be required, including Unistrut, threaded
rod and additional fasteners.
Unistrut
4515 East 139th Street
Grandview, MO 64030
(800) 362-9055
Fax: (800) 362-1463
Concrete Roof Installation
Threaded rod
Unistrut
Bracket Installation Instructions:
1. Select a location for the installation of your Prier Roof Hydrant. A good
location typically has close proximity to any rooftop equipment requiring
water and is near structural members under the roof and can be properly
drained to water supply and drain.
2. Determine the type of installation you will use to install the Universal Roof
Hydrant Mounting Bracket (P-RMB) to the structure of the building. Typical installations are shown above. The P-RMB can be installed to any of
the structural supports on the building. (Some of these installations may
require additional Unistrut, all-thread or fasteners.)
3. If mounting to a concrete roof, assure that the tabs are in the “UP” position.
4. Mount the P-RMB to the desired structure.
Truss (Purlin) Instructions:
1. For a truss installation, you will need to use Unistrut and fasteners that are
not provided with the Universal Roof Hydrant Mounting Bracket (P-RMB).
2. Cut two sections of Unistrut that are approximately 24” in length, making
Rough-In Dimensions:
Page 2
...continued - Truss (Purlin) Instructions:
sure the Unistrut is long enough to cover enough of the webbing to
ensure a secure connection. Using fasteners, sandwich the truss between the two pieces of Unistrut until secure.
3. Mount the P-RMB to the Unistrut with the fasteners provided.
I-Beam (Column) Instructions:
1. For a column I-beam installation, you will need to use Unistrut , threaded
rod, washers and nuts that are not provided with the Universal Roof
Hydrant Mounting Bracket (P-RMB).
2. Cut two sections of Unistrut that are approximately 18” in length. Using the threaded rod, sandwich the I-beam between the two pieces
of Unistrut until secure.
3. Mount the P-RMB to the Unistrut with the fasteners provided.
Concrete Roof Instructions:
1. For a concrete roof, you will need 1/2” concrete wedge anchors, not
provided with the Universal Roof Hydrant Mounting Bracket (P-RMB).
2. Using the top tabs on the P-RMB as a template, mark the concrete where
the holes for the concrete wedge anchors should be drilled. Drill and
install concrete wedge anchors per manufacturer instructions.
3. Mount the P-RMB to the wedge anchors installed in step two and torque
to manufacturer requirements.
Hydrant Installation Instructions:
Roof Pitch Options:
In some occasions, the Roof Hydrant
may need to be angled to match the
roof or equipment conguration. That
has been accounted for in the P-RMB.
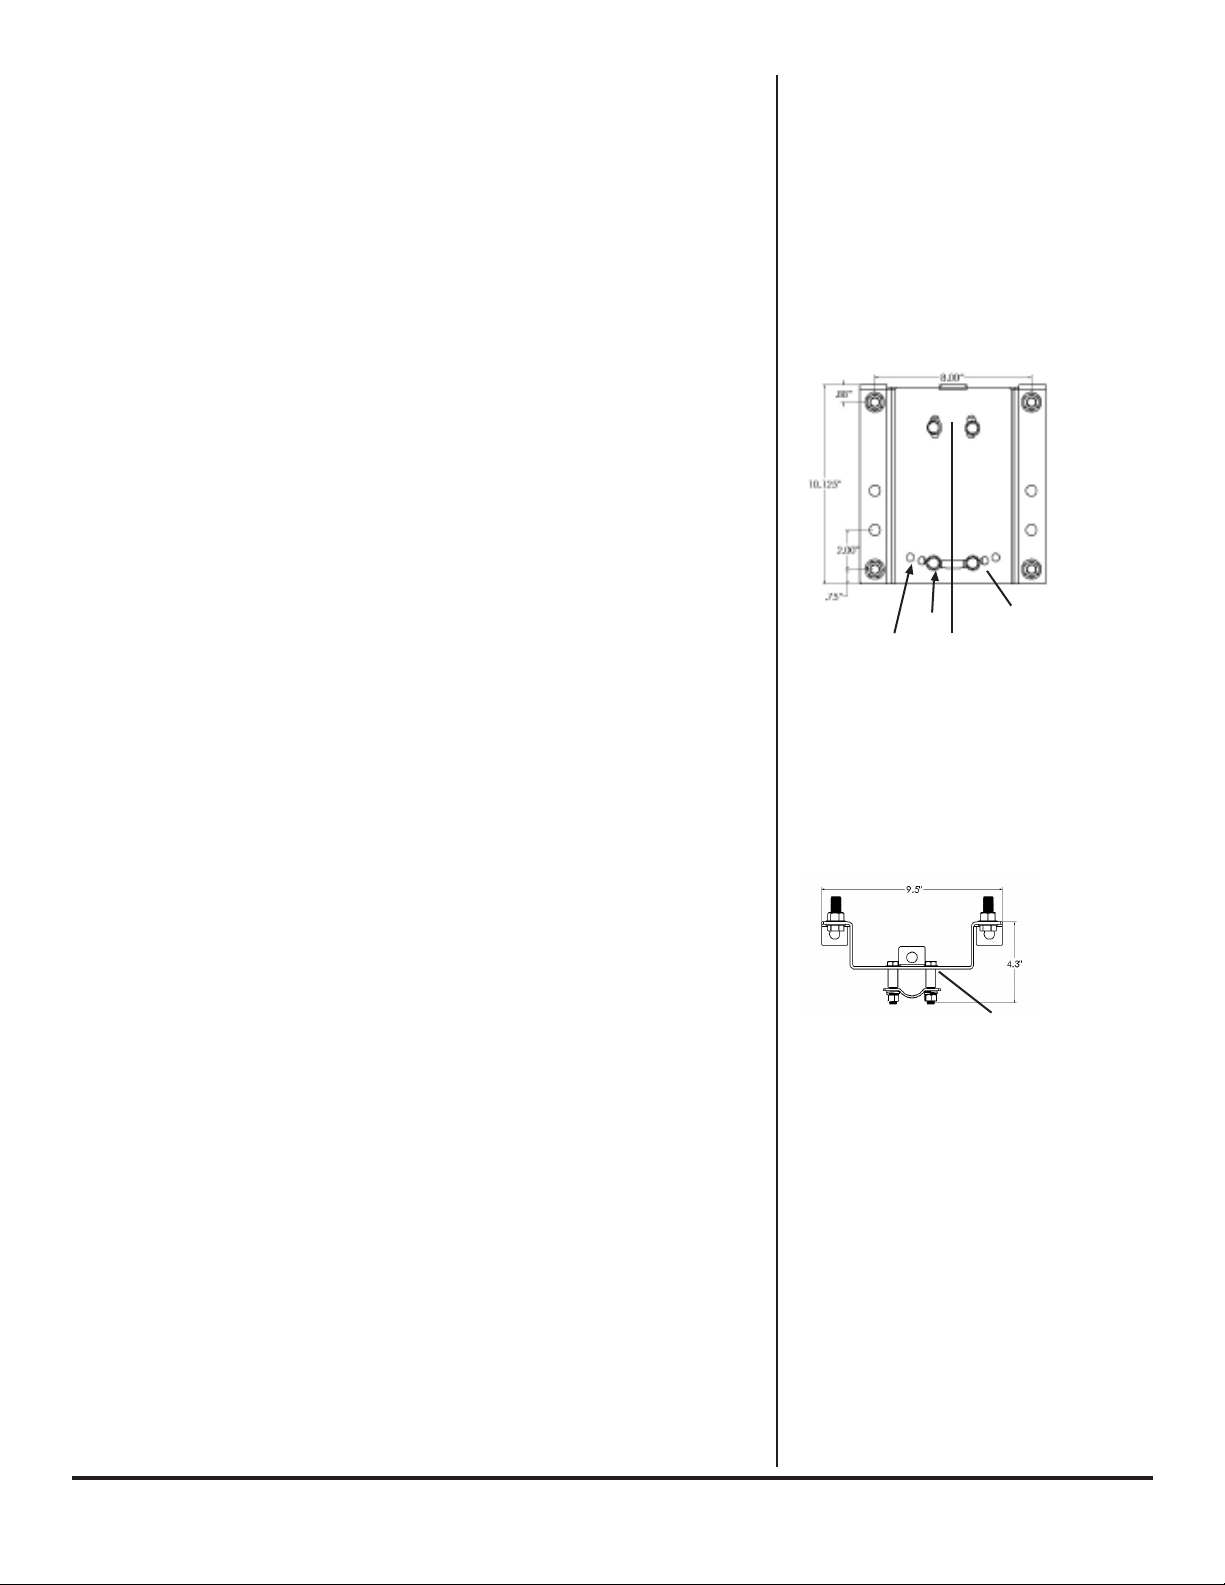
Figure 1
~6°
~12°
As shown above in Figure 1, you can
adjust the angle of the roof hydrant
by changing the position of the pipe
bracket. Upon completion, the hydrant should be perpendicular to the
oor for proper operation.
Angle Adjustments
1. Drill a 1 3/4” hole in the roof directly above the pipe brackets on the
Universal Roof Hydrant Mounting Bracket (P-RMB). If necessary, use
a laser pointer or scrap pipe through the pipe brackets to assure the
hole is drilled in the proper location.
2. Install the hydrant from the rooftop through the hole drilled in step
one and down through the pipe brackets in the P-RMB. Each hydrant
has a measuring tape sticker axed to the hydrant to assist in installation. The measuring tape begins at “roof level”. You will need to take
into account any insulation, pitch boxes or gravel when determining
the height of the hydrant.
3. Secure the hydrant into the P-RMB by tightening the bolts on the pipe
bracket.
4. If using a freezeless hydrant, there is a 1/8” drain port that will need to
be piped away to a drain.
Roof Seal:
The roof penetration should be sealed by the roong contractor with acceptable roong construction methods. Prier recommends either a poured in
place pitch box or a leaded roof ashing, sealed by the roong contractor,
as they would for any other rooftop pipe penetrations.
Figure 2
Angle Adjustments
As shown above in Figure 2, you can
adjust the angle of the roof hydrant in
the other direction by stacking washers under the pipe support. Upon
completion, the hydrant should be
perpendicular to the oor for proper
operation.
Maintenance:
The Prier Roof Hydrants require no
scheduled maintenance and will provide years of reliable service.
www.PRIER.com • 800.362.9055
890-0023
 Loading...