

Page 1
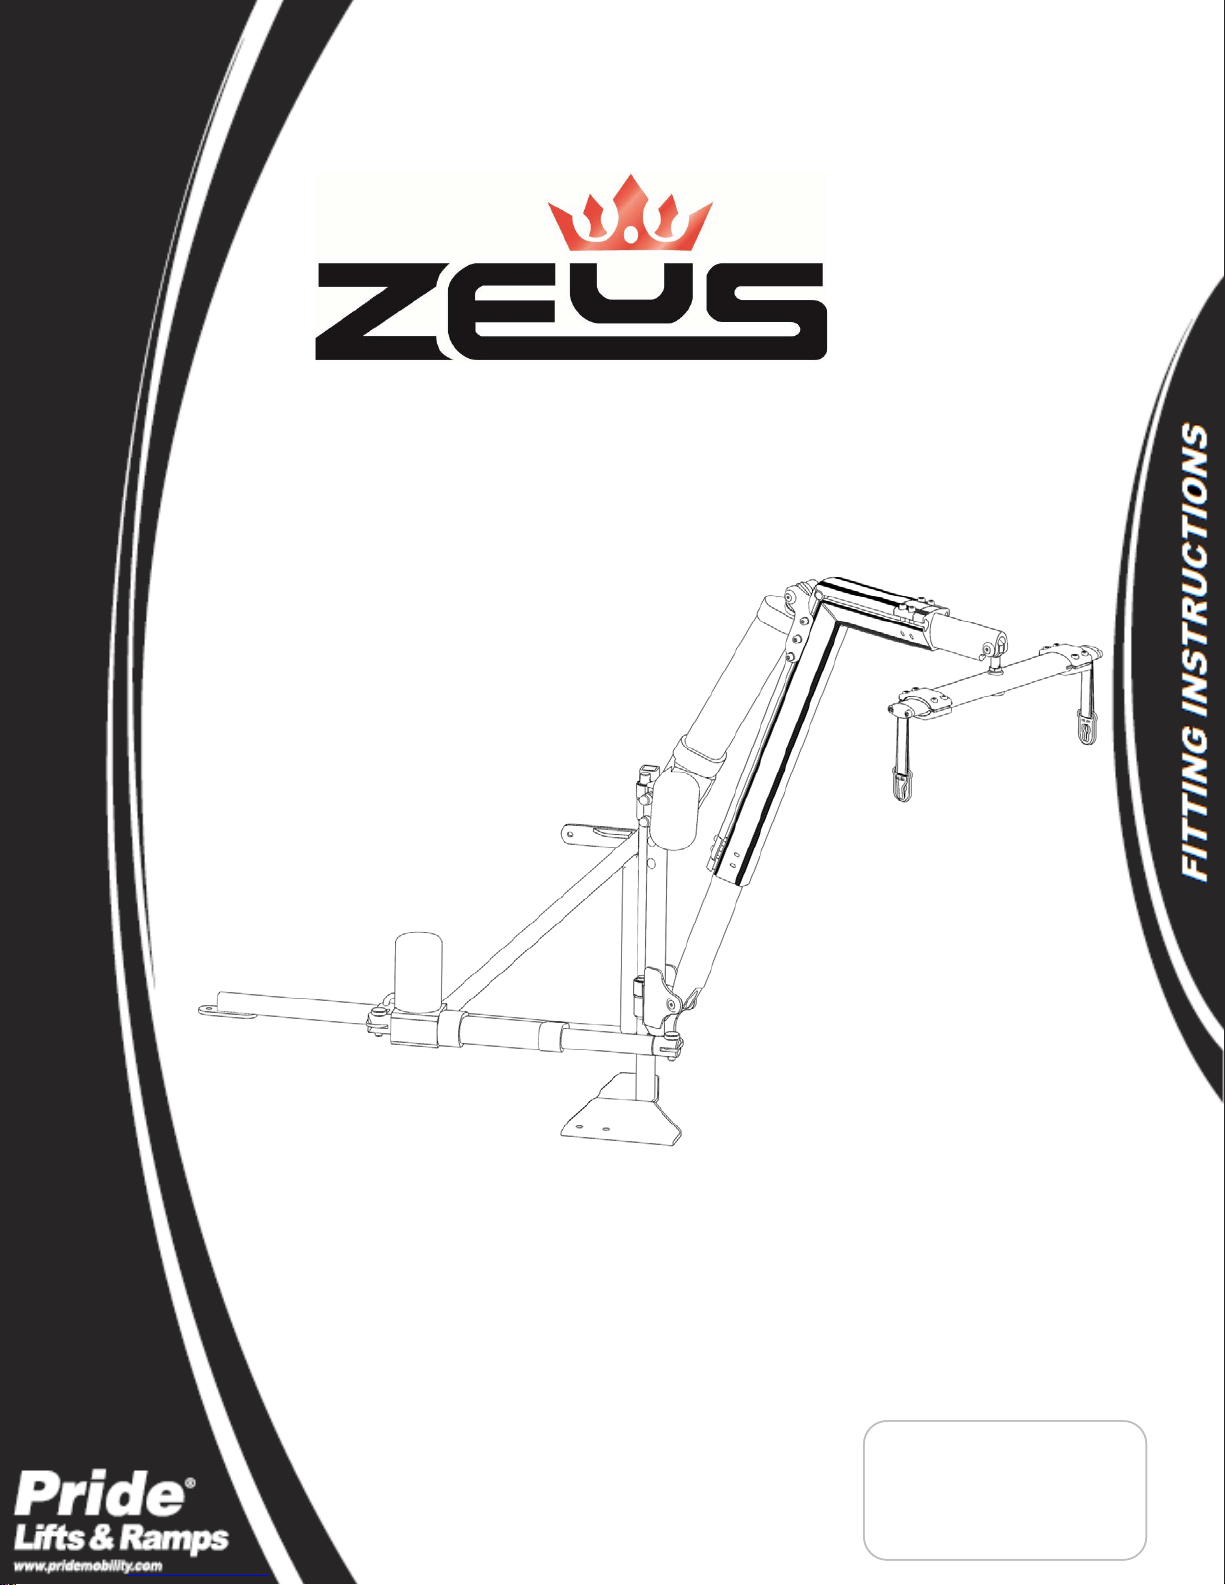
260/440lb
AFFIX BARCODE LABEL
HERE
Page 2
SAFETY GUIDLINES
WARNING! An authorized Pride Provider or qualified technician must perform the initial setup of this lift and
Manufactured By:
Distributed By:
Autochair Ltd
Pride Mobility Product, Corp.
Wood Street North
182 Susquehanna Avenue
Copyright © 2017
Meadowlane Ind. Est.
Exeter
Autochair Ltd.
Alfreton
PA 18643-2694
1225265/Rev E/Aug 2017
Derbyshire, DE55 7JR
USA
UK
must follow all of the instructions in this manual.
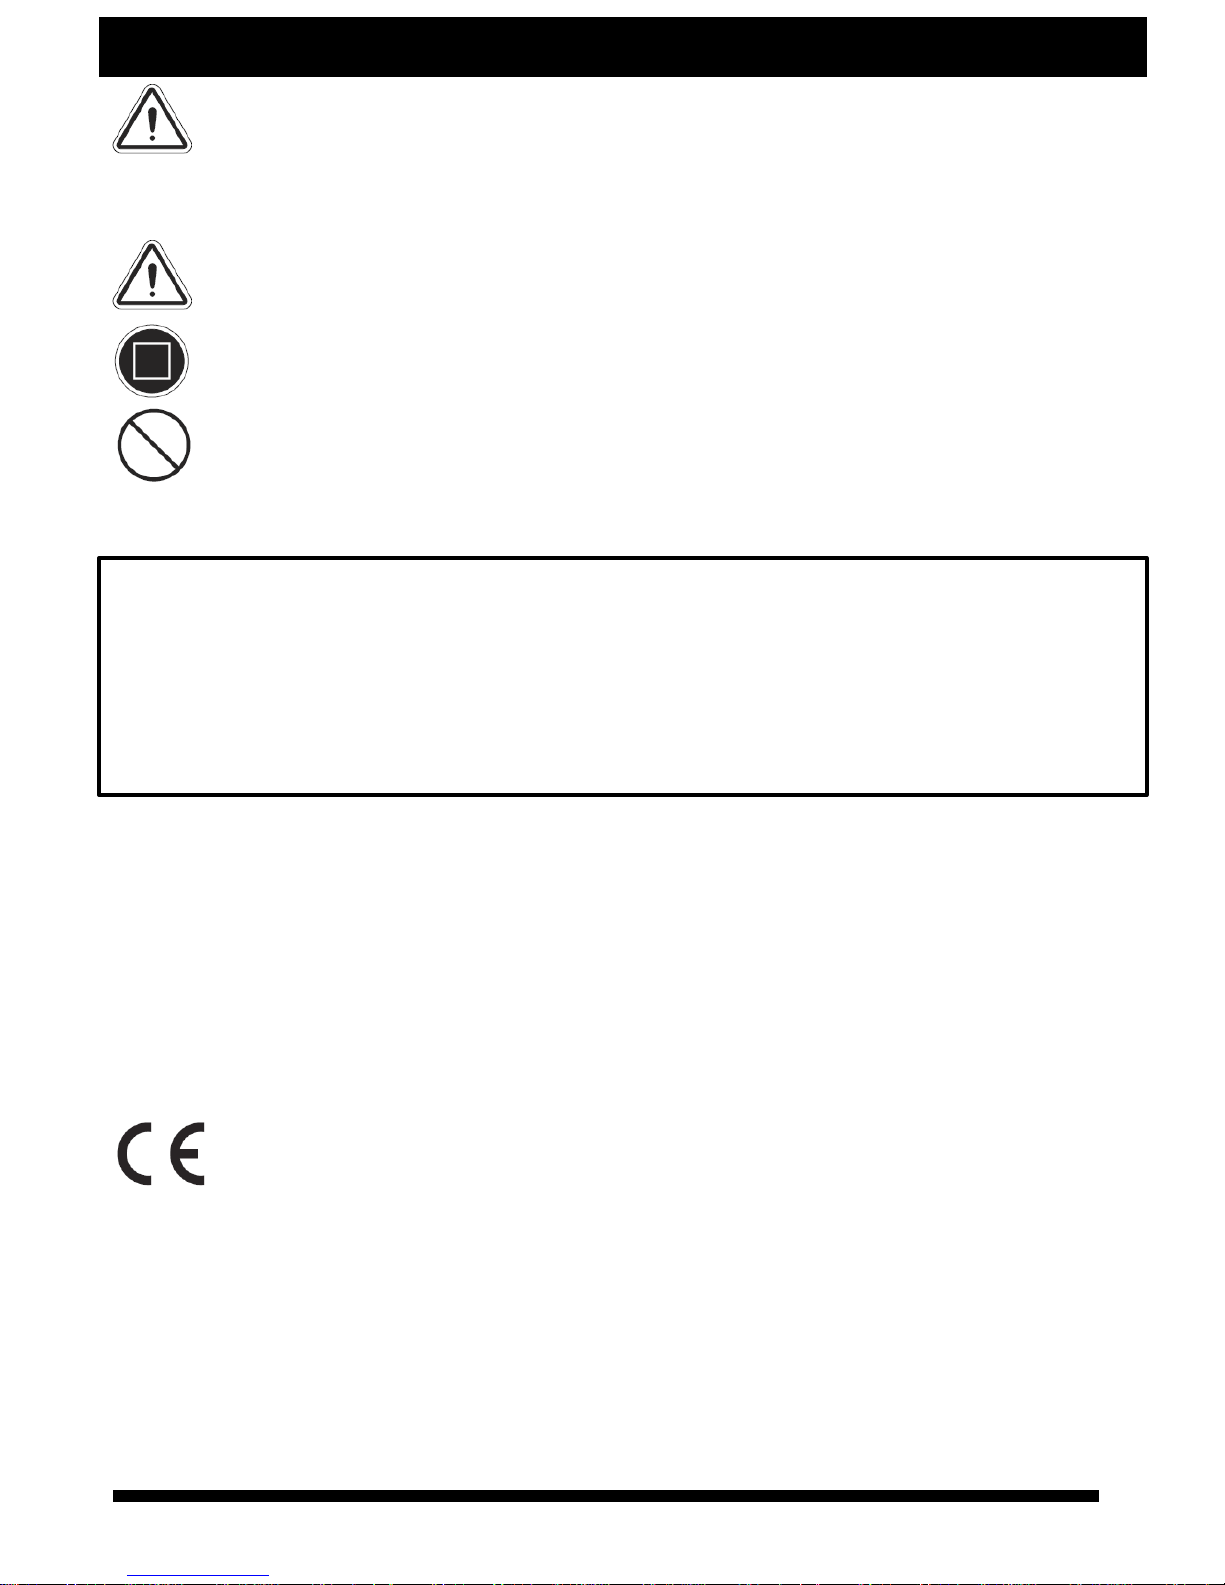
The symbols below are used throughout this owner's manual and on the product to identify warnings and
important information. It is very important for you to read them and understand them completely.
WARNING! Indicates a potentially hazardous condition/situation. Failure to follow designated procedures
can cause either personal injury, component damage, or malfunction. On the product, this icon is
represented as a black symbol on a yellow triangle with a black border.
MANDATORY! These actions should be performed as specified. Failure to perform mandatory actions can
cause personal injury and/or equipment damage. On the product, this icon is represented as a white symbol
on a blue dot with a white border.
PROHIBITED! These actions are prohibited. These actions should not be performed at any time or in any
circumstances. Performing a prohibited action can cause personal injury and/or equipment damage. On the
product, this icon is represented as a black symbol with a red circle and red slash.
Please fill out the following information for quick reference:
Pride Provider:_____________________________________________________________________
Address:___________________________________________________________________________
Phone Number:_______________________________
Purchase Date:_______________________ Serial Number:_______________________
NOTE: This owner’s manual is co mpiled from the late st specifications and product information available
at the time of publica ti on. We r eser ve th e r ight to make ch a ng es a s they become necessary. An y chan ges
to our products may cause slight variations between the illustrations and explanations in this manual and
the product you have purchased. The latest/current version of this manual is available on our website.
NOTE: This product is compliant with WEEE, RoHS, and REACH directives and requirements.
www.pridemobility.com 2
Page 3

CONTENTS
INTRODUCTION .................................................................................................................... 4
I.
II. SAFETY .................................................................................................................................... 5
III. TECHNICAL …......................................................................................................................... 8
IV. FITTING INSTRUCTIONS ................................................................................................ 9
V. WIRING .................................................................................................................................... 13
VI. INSTALLING & REMOVING …........................................................................................ 15
VII. TROUBLESHOOTING ......................................................................................................... 17
VIII. WARRANTY ......................................................................................................................... 18
www.pridemobility.com 3
Page 4

I.
INTRODUCTION
USA:
Canada:
Pride Mobility Products Corporation
Pride Mobility Products Company
182 Susquehanna Ave.
5096 South Service Road
Exeter, PA 18643-2694
Beamsville, Ontario L0R 1B3
Welcome to Pride Mobility Products. Congratulations on the purchase of your new lift system. The lift
system design combines the most advanced state-of-the-art components with modern, attractive styling.
At Pride, your safety is important to us. Please read and follow all instructions in this manual before
operating your lift system for the first time. These instructions were produced for your benefit. Your
understanding of these instructions is essential for the safe operation of your new lift system.
Pride is not liable for damage to property or personal injury arising out of the unsafe use of a lift system.
Pride is also not liable for any property damage or personal injury arising out of the failure of any person
and/or user to follow the instructions and recommendations set forth in this manual or any other instructions
or recommendations contained in other lift system related literature issued by Pride or contained on the lift
system itself.
INTERNET AND PRIVATE PURCHASES
If you purchased your product over the Internet or from a previous owner and you have any questions about
the safe use and/or maintenance of the product, please visit the Pride web pa ge a t www.pridemobility.com
or contact your authorized Pride Provider.
PURCHASER’S AGREEMENT
By accepting delivery of this product, you promise that you will not change, alter, or modify this product or
remove or render inoperable or unsafe any guards, shields, or other safety features of this product; fail, refuse,
or neglect to install any retrofit kits from time to time provided by Pride to enhance or preserve the safe use
of this product.
SHIPPING AND DELIVERY
Before using your lift, make sure your delivery is complete as some components may be individually
packaged. If you do not receive a complete delivery, please contact your Pride Provider immediately. Where
damage has occurred during transport, either to the packaging or content, please contact the delivery
company responsible.
INFORMATION EXCHANGE
We want to hear your questions, comments, and suggestions about this manual. We would also like to hear
about the safety and reliability of your new lift system, and about the service you received from your
authorized Pride Provider.
Please notify us of any change of address, so we can keep you apprised of important information about
safety, new products, and new options that could improve your ability to use and enjoy your lift system.
Please feel free to contact us at the address below:
NOTE: If you ever lose or misplace your copy of this manual, contact us and we will be glad to send you a
new one immediately.
www.pridemobility.com 4
Page 5

II. SAFETY
PRODUCT SAFETY SYMBOLS
The symbols below are used on the lift system to identify warnings and mandatory or prohibited actions.
It is very important for you to read and understand them completely.
Read and follow the information in the owner’s manual.
Maximum lifting capacity.
Do not sit on mobility product while operating the lift system or during
transport.
Pinch/Crush points created during assembly and/or operation. Keep hands/
fingers away from moving components during operation.
Battery posts, terminals and related accessories contain lead and lead
compounds. Wear goggle and gloves when handling batteries and wash
hands after handling.
Disposal and recycling. Contact your authorized Pride Provider for
information on proper disposal of your Pride product and its packaging.
www.pridemobility.com 5
Page 6

II. SAFETY
LIFTING CAPABILITIES
The lift system is designed to lift a maximum weight of 260 lbs. (120 kg) or 440 lbs. (200kg) depending on
the model purchased. Check this by referring to labels on the lift arm. Under no circumstances should the
lift system be made to exceed this weight limit. Subjecting the lift system to the strain of lifting more than it
is designed to may cause it to fail, resulting in damage to the mobility product and/or injury to the lift
operator. Refer to the mobility product specifications for information on the overall weight of the mobility
product before lifting with the lift system.
WARNING! Exceeding the maximum lifting capacity of 260lbs or 440lbs may cause the lift
system to fail, resulting in damage to the mobility product and/or injury to the lift operator.
MANDATORY! Adding accessories, oversized batteries, or a different seat will increase the
weight of your mobility device. Verify with your authorized Pride Provider that the total weight
of your mobility device, including additions, DOES NOT exceed 260 lbs or 440 lbs. (120/200 kg).
INSTALLATION
This hoist is intended f or installation in the rear luggage compartment of a vehicle. Read and fully understand
the installation instruction s provided with th e hoist an d the relate d fitting kit instr uctions bef ore installing the
lift system.
WARNING! This hoist is only intended to be installed by an authorized Pride installer or
qualified technician. Separate installation instructions are provided with the hoist and the
installation kit. Read and fully understand both manuals prior to installation.
LIFTING NON-PRIDE PRODUCTS
The lift system is an extremely versatile device, which users may employ to lift items other than Pride
products. Pride has no control over such use, nor can Pride anticipate every possible use to which a lift
system may be put. Operating the lift system outside of the safe limits as discussed in this manual or using the
lift system to lift any item deemed by Pride to be incompatible with the lift system is done at the operator’s
own risk, and Pride accepts no liability for damage or injury resulting from such use.
PRE-LIFT INSPECTION
There should be no sharp edges on the hoist, the fitting kit or the scooter bracket s. If you find any sharp
edges, please contact your supplier before use. Make sure that you are completely happy with the operation
of your hoist before operating it yourself. Misuse of the product could result in injury. Inspect th e lifting
straps before every use for twisting, fraying or signs o f wear. If si gns of wear beco me evident, have the
them replaced by your authorized Pride Provider.
WARNING! A frayed or worn strap can snap, resulting in damage to the mobility product
and/or injury to the lift operator.
OPERATOR POSITIONING
Keep hands clear of the lift arm while the lift system is lifting/lowering or loading in/out a mobility product.
The operator of the lift should stand a safe distance from the unit being lifted/lowered to ensure that his/her
feet are never positioned under a raised mobility product.
www.pridemobility.com 6
Page 7

II. SAFETY
TRANSPORT VEHICLE POSITIONING
Be sure your vehicle is parked on flat, level ground and the emergency brake is engaged before attempting to
lift a mobility product.
WARNING! Attempting to lift a mobility product when a vehicle is not on level ground will
cause the mobility product to swing toward or away from the vehicle, making it difficult to
get the mobility product into the vehicle.
KEY SAFETY POINTS
WARNING! All models of the Zeus are very powerful in both the UP (lifting) and DOWN
(lowering) as well as the IN (into vehicle) and OUT (out of vehicle) operation. Care should be
taken that the hoist boom and the mobility product that is being lifted are free to move. The
Zeus has the power to break trim and cause harm if not operated correctly.
WARNING! The hoist must never be operated by a child or any person not deemed appropriate
to operate the equipment by the technician who installed it.
WARNING! The safety Pin must be fitted into the top pin in the A-Frame prior to use.
WARNING! Note the position of all pinch point warning labels stating “Keep Clear”. Never
place your hands in these locations when the hoist is moving.
WARNING! The hoist must never be used to lift items other than the mo bility product it was
originally installed and set-up to lift.
WARNING! Never use a system that has signs of damage.
WARNING! Do not exceed maximum lifting capacity.
WARNING! Misuse of the hoist may result in serious injury.
Before lifting the mobility product for the first time, operate the hoist without a load until the
controls are familiar.
Any adjustment to the hoist settings must only be carried out by an authorized Pride Provider.
Your hoist should be inspected at least every year by a qualified person.
If in doubt about any aspect of your hoist, contact an authorized Pride Provider.
www.pridemobility.com 7
Page 8

III. TECHNICAL
Model / SWL
440 lbs (200kg)
260 lbs (120kg)
Maximum lifting capacity, SWL:
440lbs (200kg)
260lbs (120kg)
Power supply:
12V dc
Maximum current draw:
22 Amps
Material Finish:
Powder Coated Carbon
PRODUCT SPECIFICATION
Weight of the lifting arm: 30.8lbs (14kg)
Product Materials: Aluminum and Mild/Stainless Steels
24.2lbs (11kg)
COMPONENT DESCRIPTION
BOOM
1
‘A’ FRAME – DESIGN VARIES DEPENDING ON VEHICLE
2
IN / OUT ACTUATOR
3
IN / OUT ACTUATOR FIXING PLATE
4
ACTUATOR PIN
5
RETAINING PIN
6
SPREADER BAR
7
CONTROL BOX
8
HANDSET
9
PIVOT POST
10
UP/DOWN ACTUATOR
11
www.pridemobility.com 8
Page 9

IV. FITTING INSTRUCTIONS
The hoist is tested and set to a nominal position for the vehicle it i s int ended for . Adj ustment may then be
required to suit the vehicle. The screws ar e only tightene d to st op movement in trans port. All fixings are to be
fully tightened and checked at installation.
Description of components and Max./Min. settings;
www.pridemobility.com 9
Page 10

IV. FITTING INSTRUCTIONS
Setting the Boom (Vertical Extension)
1. The hois t will be provide d a ssemble d and set to a no minal boom si ze suit able f or the vehicle. If a
more optimal boom setting is required the following procedure can be used.
2. The actuator supplied will be labelled with the maximum weight setting. Refer to the charts, provided above,
for the allowable settings for the different stroke actuators. No boom length should be set greater than 35 ½ “
(900mm).
3. Do not set a 440lb (200kg) hoist below 27.95” (710mm) boom length.
4. Before starting, ensure the actuator is fully retracted.
5. If the chart shows that a different lower actuator bracket position is required on the pivot post, this should be
changed first.
6. Fit the Boom Assembly, with the actuator and pivot post, to the A-Frame fitted in the vehicle.
7. Loosen the vertical extension main clamp and the actuator bracket while supporting the horizontal boom.
8. Extend the boom to the desired length to suit the boot opening. Do not exceed the maximum extension.
9. While holding the horizontal boom horizontal (parallel to the vehicle floor), tighten the vertical extension
main clamp and actuator bracket, by hand initially, to hold the hoist in position while the settings are
checked. (Do not load the hoist at this stage).
10. Once satisfied that the hoist moves through its intended movements without fouling the boot opening,
tighten the main clamps and the actuator brackets to the specified torque settings.
Setting the Horizontal Extension
1. The horizontal extension provides two functions; it is principally adjusted to suit the width of the spreader
bar, ensuring the spreader bar can rotate without hitting the boom. It can also be increased to give more
drop when the boom is lowered.
2. With the spreader bar set to the desired width check the rotation of the bar.
3. If necessary, loosen the horizontal extension main clamp and adjust the length of the horizontal extension.
4. Do not set beyond the limits shown in the diagrams.
5. Once satisfied that the position is correct, tighten the main clamps to the specified torque settings.
Setting the Spreader Bar
1. Loosen the clamps on the spreader bar extensions and adjust to the width of the scooter seat or the
required width for the power chair.
2. Do not exceed the limits shown in the diagram and also make sure the arms are extended equal lengths
to maintain balance of the load across the pivot.
3. Loosen the strap clamps and extend the straps to the desired length.
4. Ensure that the straps are of equal length to keep the spreader bar level during lifting.
5. Once satisfied that the positions are correct, tighten the main clamps and the actuator brackets to the
specified torque settings.
www.pridemobility.com 10
Page 11

IV. FITTING INSTRUCTIONS
A B C D E
F
Model
260lb
440lb
Actuator Stroke
10"
12" 10" Inch
mm
250mm
300mm
250mm
35.43
900
35.04
890
34.65
880
34.25
870
33.86
860
33.46
850
33.07
840
32.68
830
32.28
820
31.89
810
31.50
800
31.10
790
30.71
780
30.31
770
C
29.92
760
29.53
750
29.13
740
28.74
730 B
28.35
720
C
27.95
710
27.56
700
D
27.17
690
26.77
680 E 26.38
670
25.98
660
25.59
650
25.20
640
The limits of the adjustments are shown on the previous diagrams.
The maximum settings must not be exceeded.
When correctly set, the top part of the hoist must be parallel with the vehicle floor, when the
actuator is fully retracted.
Pivot Post Bracket Positions
The following table shows the lower actuator bracket positions and the reference used in the actuator setting
chart;
he following table shows the lower actuator bracket positions recommended for various actuators and loads;
T
DO NOT
USE
A A
B
A
BOOM LENGTH
A
B
C
D
www.pridemobility.com 11
Page 12

IV. FITTING INSTRUCTIONS
This screw is factory set and
not adjustable.
TORQUE SETTINGS
NOTE: Only use the screws supplied as these have pre-applied thread locking compound.
When tightening the screws, the screws should be tightened slowly and evenly until the desired torque setting is
reached.
Do not tighten each screw, from loose, to the full torque setting before tightening the next, the brackets clamps
will be unevenly loaded and may not clamp fully.
After reaching the torque setting, repeat the tightening sequence checking that all screws are at the desired
torque setting.
www.pridemobility.com 12
Page 13

V. WIRING
12Vdc IN
IN/OUT ACTUATOR
UP/DOWN ACTUATOR
HANDSET
25A
POWER STATUS
POWER BUTTON
FIXING HOLES
HARD WIRING THE CONTROL BOX
• The wiring supplied for connecting the battery and power socket is twin core with red and black
insulation.
• Run the cable down the brace bar and through the bulkhead (use the grommet supplied if required) to
the vehicle battery. Secure the cable where required using the cable ties provided.
• Connect both wires to the battery. Use the inline fuse holder provided on the positive connection.
Wire as follows BLACK = negative / RED = positive. A spare 25 AMP fuse is provided and should
be handed to the customer or located in an obvious and appropriate position.
• DO NOT use a painted surface to achieve an earth. This could lead to intermittent operation of the
hoist.
Securely fix the control box in a position which is easily accessible when the vehicle is both loaded and
•
unloaded.
CONTROL BOX CABLES
RED CONNECTORS
www.pridemobility.com 13
BLACK CONNECTORS
INDICATOR LIGHT
= POWER ON
= POWER OFF
Page 14

V. WIRING
CONNECTING ACTUATORS
Test operation with handset. If the movement is opposite to expected then reverse the polarity of the
connector/s.
REVERSING POLARITY
www.pridemobility.com 14
Page 15

VI. INSTALLING AND REMOVING
1. Rest the upper mounting lug onto the longer upper pin before aligning the lower pin. The hoist
should slide smoothly down into place.
2. Half engage actuator pin
4. Fasten together with the actuator pin – Ensure the pin is fully engaged
5. Fully insert the Retaining Clip into the top pin
6. Clip the power connectors securely together
INSTALLING
3. Rotate the hoist and align with it actuator
www.pridemobility.com 15
Page 16

VI. INSTALLING AND REMOVING
1. Ensure the system power is OFF
3. Remove retaining clip
4. Partially remove the actuator pin
6. Remove actuator pin
7. Slide hoist upwards to remove
8. Store the hoist in a safe location
REMOVING
2. Unclip the power connectors
5. Rotate the actuator away from the hoist
www.pridemobility.com 16
Page 17

VII. TROUBLESHOOTING
• Make sure that the hoist is switched on.
• Check cable connection into control box
• Has the actuator become disconnected from the power supply?
• Is the scooter/wheelchair caught on the vehicle?
•
The stronger actuator required for 440lbs lifts uses a clutch for overload
• Is the scooter too heavy for the lift?
• We recommend yearly service to ensure safety, reliability and
• If you think that your
hoist
has been damaged for any reason, please call
TROUBLESHOOTING & FREQUENTLY ASKED QUESTIONS
PROBLEM SUGGESTIONS
• Turn the hoist off and back on again and retry.
Nothing works
• Check the fuse. This is next to the car’s battery, a spare fuse is always
supplied.
•
Does the car have a flat battery (try to start it)
Handset doesn’t work
Turns on but won’t lift
Turns on but won’t power in
Stops during lifting
The actuator makes a loud
clicking noise
Hoist is lifting very slowly
• Check cable connection into handset
• Has the actuator become disconnected from the power supply?
• Check the electrical plugs between ‘UP/DOWN actuator and power
supply, reconnect if they have come apart
Check the electrical plugs between ‘IN/OUT’ actuator and power
•
supply, reconnect if they have come apart
• Is the load of more than the hoist’s capacity? Please check this weight
with your supplier.
• Check the fuse. This is next to the car’s battery, a spare fuse is always
supplied.
protection. If the noise only occurs at the top or bottom of the lift, this
is perfectly normal. If it occurs part way through the lift the unit is
overloaded. Check the scooter/chair is not caught against anything.
• 440lbs (200kg) is the maximum safe working load. (See page 8)
• If the
•
hoist
is extended refer to the technica l section to check the
settings do not exceed the recommended limits.
Is the vehicle’s battery charged?
What about servicing?
What if we have an accident?
performance of your
your authorized Pride Provider for inspection and testing before use.
www.pridemobility.com 17
hoist
.
Page 18

VIII. WARRANTY
A B C D E
Model:
The warranty period for your hoist is 12 months from the date of delivery.
This warranty will cover any defects of workmanship or function.
The warranty does not cover any incorrectly installed hoist’s or one with damaged mechanical or electrical
components due to incorrect use or damage.
The warranty does not cover consequential loss, unless regional law requires it.
The warranty is invalidated if the seal on either the actuator or control box is broken. These contain no user
replaceable components. No alteration should be made to the hoist by anyone other than a qualified person,
as defined by an authorized Pride Provider.
In the event of damage or defects in the actuator, the hoist should be returned to your authorized Pride
Provider for evaluation.
No wires must be cut as they are fitted with connectors that must be correctly removed before repair.
In the event of any malfunction of the electrical circuit box or handset which require replacement, they
should be removed and returned as a set.
Please keep a note of the following:
Serial Number: ________________________
Set up details
Date Supplied: ________________________
Details of the Supplier (Stamp): __________
260lb:………………
Zip Code: ____________________________
440lb:………………
Tel: _________________________________
Scooter/Chair Weight: _____________________ Signed: ____________________
If this changes, please check with your authorized Pride Provider
www.pridemobility.com 18
Page 19

NOTES
www.pridemobility.com 19
Page 20

www.pridemobility.com 20
 Loading...