

Pride Mobility raptor series Owner's Manual
OPERATION
COMFORT
RAPTOR
MAINTENANCE
BATTERY
CHARGING
SERIES
OWNER’S MANUAL
4
WARNING! An authorized Pride Provider or qualified technician must perform the initial setup of
this scooter and must perform all of the procedures in this manual.
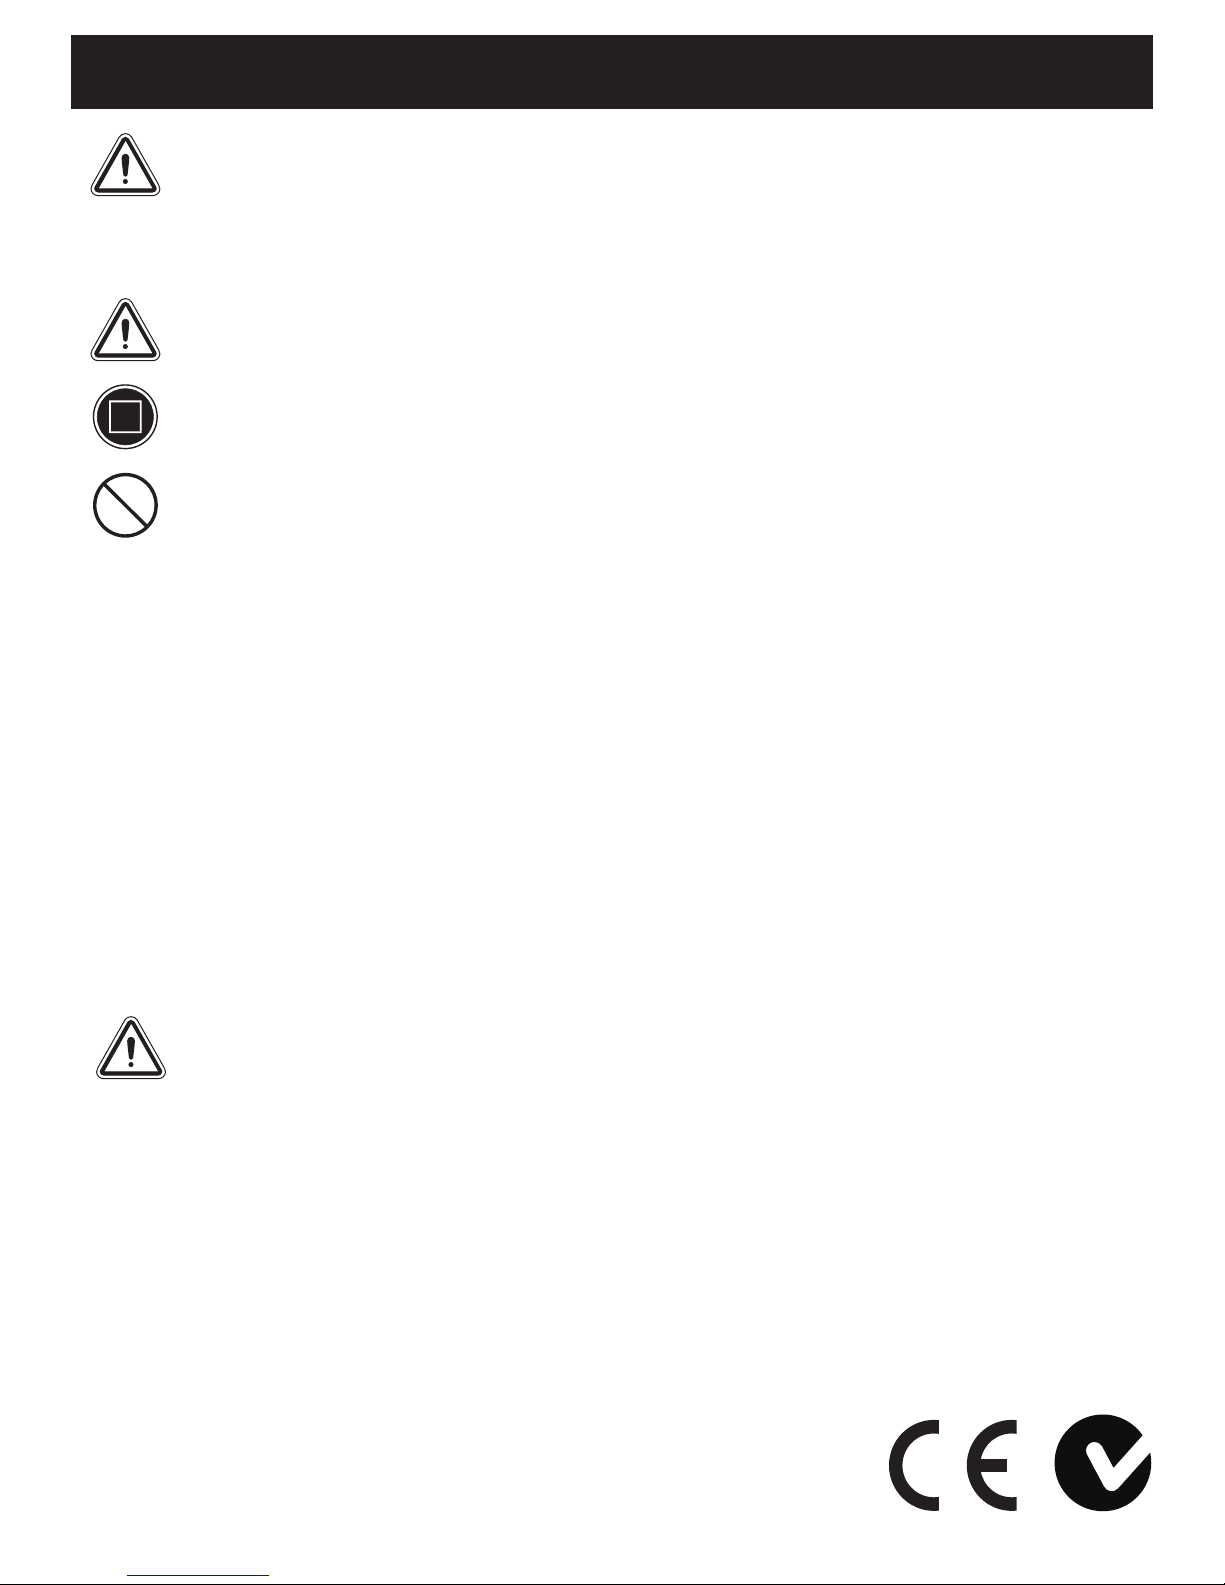
SAFETY GUIDELINES
The symbols below are used throughout this owner’s manual and on the scooter to identify warnings
and important information. It is very important for you to read them and understand them completely.
WARNING! Indicates a potentially hazardous condition/situation. Failure to follow designated
procedures can cause either personal injury, component damage, or malfunction. On the product,
this icon is represented as a black symbol on a yellow triangle with a black border.
MANDATORY! These actions should be performed as specified. Failure to perform mandatory
actions can cause personal injury and/or equipment damage. On the product, this icon is
represented as a white symbol on a blue dot with a white border.
PROHIBITED! These actions are prohibited. These actions should not be performed at any time or
in any circumstances. Performing a prohibited action can cause personal injury and/or equipment
damage. On the product, this icon is represented as a black symbol with a red circle and red slash.
Intended Use
The intended use of the Pride Mobility Products device is to provide mobility to persons limited to a
seated position that have the capacity of operating a scooter.
NOTE: This owner’s manual is compiled from the latest specifications and product information
available at the time of publication. We reserve the right to make changes as they become
necessary. Any changes to our products may cause slight variations between the illustrations
and explanations in this manual and the product you have purchased. The latest/current version
of this manual is available on our website.
NOTE: This product is compliant with WEEE, RoHS, and REACH directives and requirements.
NOTE: This product meets IPX4 classification (IEC 60529).
NOTE: The product and its components are not made with natural rubber latex. Consult with the
manufacturer regarding any after-market accessories.
WARNING! Avoid abrupt maneuvers at excessive speed. It is recommended that you operate the
scooter at the slowest speed until you become familiar with scooter controls and operation.
Copyright © 2017
INFMANU4884/Rev B/August 2017

CONTENTS
I. SAFETY ............................................................................................................. 4
II. YOUR SCOOTER ................................................................................................ 7
III. BATTERIES AND CHARGING .......................................................................... 14
IV. OPERATION ... ...................................................................................................20
V. COMFORT ADJUSTMENTS ...............................................................................22
VII. BASIC TROUBLESHOOTING ............................................................................24
VIII. CARE AND MAINTENANCE ............................................................................. 26
Raptor 3
I. SAFETY
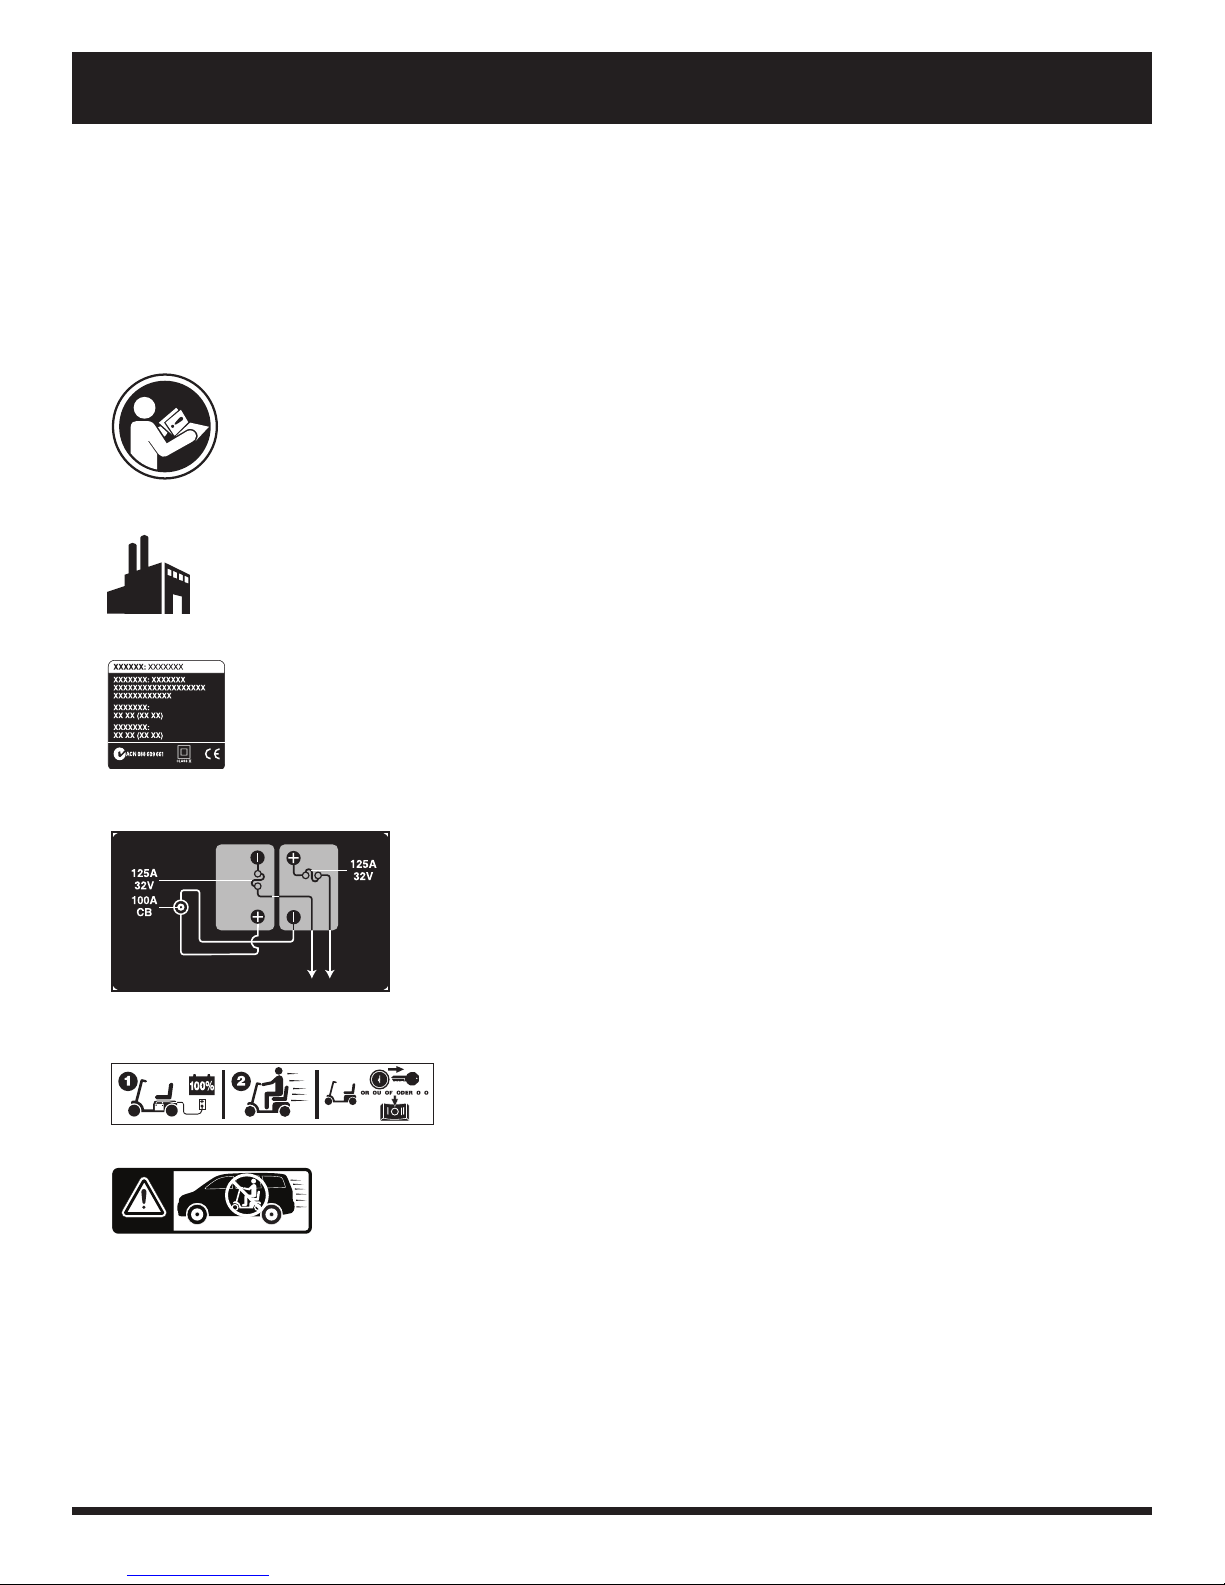
PRODUCT SAFETY SYMBOLS
The symbols below are used on the scooter to identify warnings, mandatory actions, and prohibited
actions. It is very important for you to read and understand them completely.
NOTE: There are more warnings identified and explained in the Consumer Safety Guide that is
included with your scooter. Please become familiar with all the warnings and safety information
found in the Consumer Safety Guide and refer to this resource often.
Read and follow the information in the owner’s manual.
Manufactured in.
Scooter information label.
Battery Set Configuration:
+ = Positive (Red) Terminal Post
- = Negative (Black) Terminal Post
Connect Red wires to Red Positive (+) Terminal Posts.
Connect Black wires to Black Negative (-) Terminal Posts.
Fully charge batteries before operating.
Remove key from an unattended scooter.
Does not meet ISO 7176-19 standards for occupied transport in a motor vehicle.
When traveling in a motor vehicle, do not sit in your scooter.
4 Raptor

I. SAFETY
GENERAL
MANDATORY! Do not operate your new scooter for the first time without completely reading and
understanding this owner’s manual and the Consumer Safety Guide.
Your scooter is a state-of-the-art life-enhancement device designed to increase mobility. We provide an
extensive variety of products to best fit the individual needs of the scooter user. Please be aware that
the final selection and purchasing decision regarding the type of scooter to be used is the responsibility
of the scooter user, who is capable of making such a decision.
The contents of this manual are based on the expectation that a mobility device expert has properly
fitted the scooter to the user.
There are certain situations, including some medical conditions, where the scooter user will need to
practice operating the scooter in the presence of a trained attendant. A trained attendant can be defined
as a family member or care professional specially trained in assisting a scooter user in various daily
living activities.
As you begin using your scooter during daily activities, you will probably encounter situations in which
you will need some practice. Simply take your time and you will soon be in full and confident control as
you maneuver through doorways, on and off elevators, up and down ramps, and over moderate terrain.
Additional general information can be found on the supplemental information sheets and booklets
included in your Owner’s Package. Please fully read and review the information, and keep it readily
available for future reference.
Below are some precautions, tips, and other safety considerations that will help you become accustomed
to operating the scooter safely.
PRE-RIDE SAFETY CHECK
Get to know the feel of your scooter and its capabilities. We recommend that you perform a safety check
before each use to make sure your scooter operates smoothly and safely.
Perform the following inspections prior to using your scooter:
Check the condition of the tires. Make sure they are not damaged or excessively worn.
Check to ensure all tires are inflated to the proper psi/bar/kPa air pressure rating.
Check all electrical connections. Make sure they are tight and not corroded.
Check all harness connections. Make sure they are secured properly.
Check the brakes to ensure they operate properly.
Check the battery condition meter to ensure the batteries are fully charged.
Ensure the manual freewheel lever is in drive mode before sitting on the scooter.
If you discover a problem, contact your authorized Pride Provider for assistance. Please refer to the
Contact Information insert in your Owner’s Package.
Raptor 5

I. SAFETY
BRAKING INFORMATION
Your scooter is equipped with these powerful brake systems:
Regenerative: Uses electricity to rapidly slow the vehicle when the throttle control lever returns to
the center/stop position.
Disc Park Brake: Activates mechanically after regenerative braking slows the vehicle to near stop or
when power is removed from the system for any reason.
Handbrake: This lever provides you with emergency stopping power. See II. “Your Scooter.”
6 Raptor
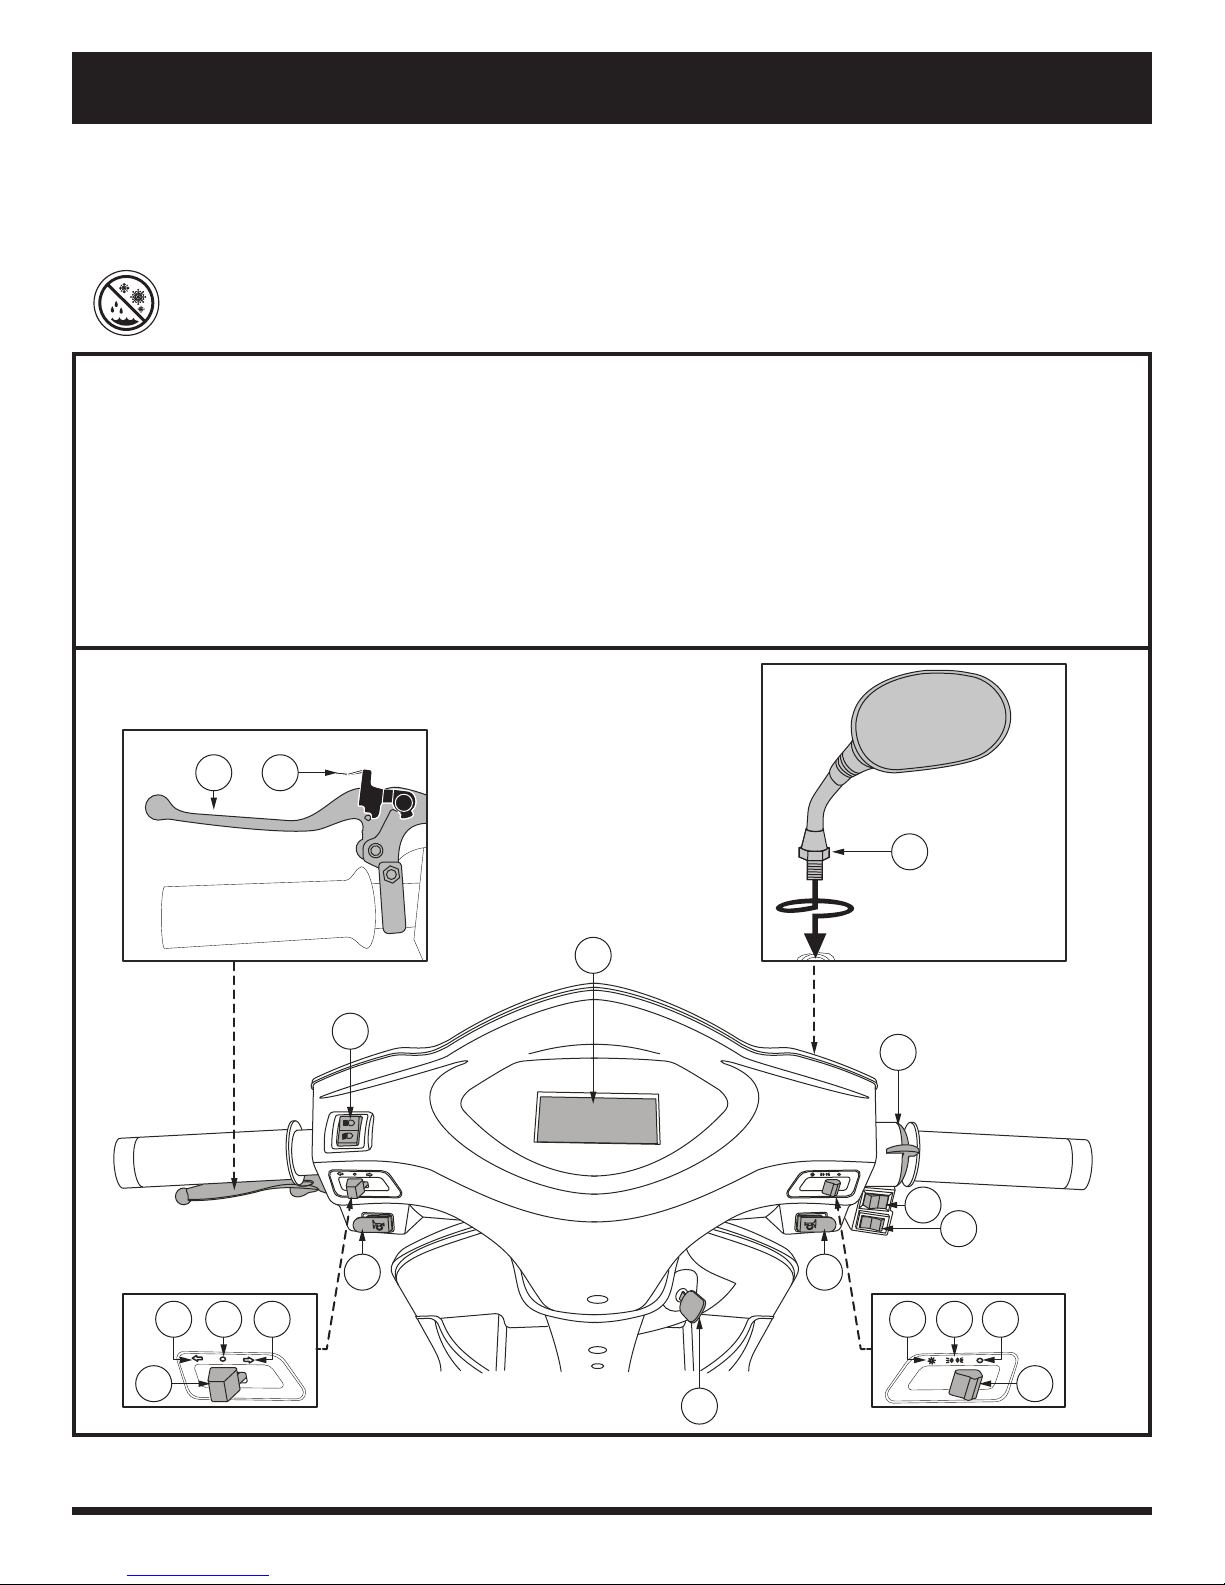
II. YOUR SCOOTER
TILLER CONSOLE
The tiller console houses all controls needed to drive your scooter, including the throttle control lever,
forward-reverse switch, hi-low switch, and the handbrake. See figure 1.
PROHIBITED! Do not expose the tiller console to moisture. In the event that the tiller console does
become exposed to moisture, do not attempt to operate your scooter until the tiller console has
dried thoroughly.
IDENTIFICATION KEY
1. LCD Screen
2. Handbrake
3. Parking Brake
4. High Beam/Low Beam Switch
5. Turn Signal Switch
6. Left Turn Signal Position
7. Turn Signal Off Position
8. Right Turn Signal Position
9. Horn Buttons
32
10. Key Switch
11. Mirror
12. Throttle Control
13. Hi-Low Switch
14. Forward-Reverse Switch
15. Lights Switch
16. Full Lights Position
17. Running Lights Position
18. Lights Off Position
11
1
4
9
7586
Figure 1. Tiller Console
Raptor 7
12
13
14
9
17 1816
15
10

II. YOUR SCOOTER
Hi-Low Switch
This switch toggles the scooter’s speed between HIGH and LOW.
Press the Hi-Low switch to the “H” position to set the speed adjustment to High.
Press the Hi-Low switch to the “L” position to set the speed adjustment to Low.
Forward-Reverse Switch
This switch controls the driving direction of your scooter.
Press the Forward-Reverse switch to the “F” position to drive forward.
Press the
Throttle Control Lever
This lever allows you to control the forward speed and the reverse speed of your scooter up to the
maximum speed you preset with the High-Low switch. The throttle control lever is located on the right
handgrip. See Figure 1.
Place your right hand on the right handgrip and your left hand on the left handgrip.
Use your thumb to press the throttle control downward in order to control the speed of movement.
Release the throttle completely to bring the scooter to a complete stop.
Release the throttle control lever and allow your scooter to come to a complete stop before switching
between forward and reverse. When the throttle control lever is completely released, it automatically
returns to the “stop” position and engages your scooter’s brakes.
Forward-Reverse
switch to the “R” position to drive in reverse.
Handbrake Lever
This lever provides you with emergency stopping power. When in motion, release the throttle control
lever and gently squeeze the handbrake lever to come to a stop. Be advised that using the handbrake
lever to stop may cause the scooter to stop abruptly.
NOTE: When the handbrake lever is engaged, your scooter’s rear brake lights will activate only
when the key is in the key switch and turned to the ON position.
WARNING! The handbrake is intended for use only as an emergency brake and/or parking brake.
Parking Brake
To engage the parking brake, squeeze the handbrake lever, then press the parking brake lever toward
the handbrake to latch it in place. Squeeze the handbrake lever to release the parking brake when ready
to resume movement.
NOTE: When the parking brake is engaged, your scooter will not operate.
Horn Buttons
These buttons activate a warning horn. Your scooter must be powered up for the horn to be operational.
Do not hesitate to use the warning horn when doing so may prevent accident or injury.
NOTE: When the horn button is pressed, the scooter’s blinker lights flash once as a hazard.
8 Raptor
II. YOUR SCOOTER
Turn Signal Buttons
Switch the turn signal button in the appropriate direction to activate it. The turn signal lights will flash
on your scooter.
After toggling the turn signal switch, it will return to the center neutral position.
Press down on the turn signal button in the neutral position to ensure that the turn signal deactivates
after 10 to 15 seconds.
NOTE: The turn signals are timed to shut off after 10 to 15 seconds only after the turn signal
button has been pressed in the center position. If this button is not pressed, the turn signal will
remain on.
Lights Switch
The lights switch offers both a running light and a full light option.
To activate the scooter’s running lights, switch the headlights activation switch to the center position.
The tail lights and the low front light will turn on.
To activate the full lights, switch the headlights activation switch to the far left position. In addition to
the low light and tail lights, the headlight will engage.
To turn the lighting system off, switch the activation switch back to the far right position.
High Beam/Low Beam Switch
When the Lights Switch is in the full light position, your scooter will engage the high beam or the low
beam headlight.
Switch the High Beam/Low Beam Switch up to engage the high beam, or down to engage the low beam.
WARNING! Scooter users are required to use their lights when visibility is restricted—day or night.
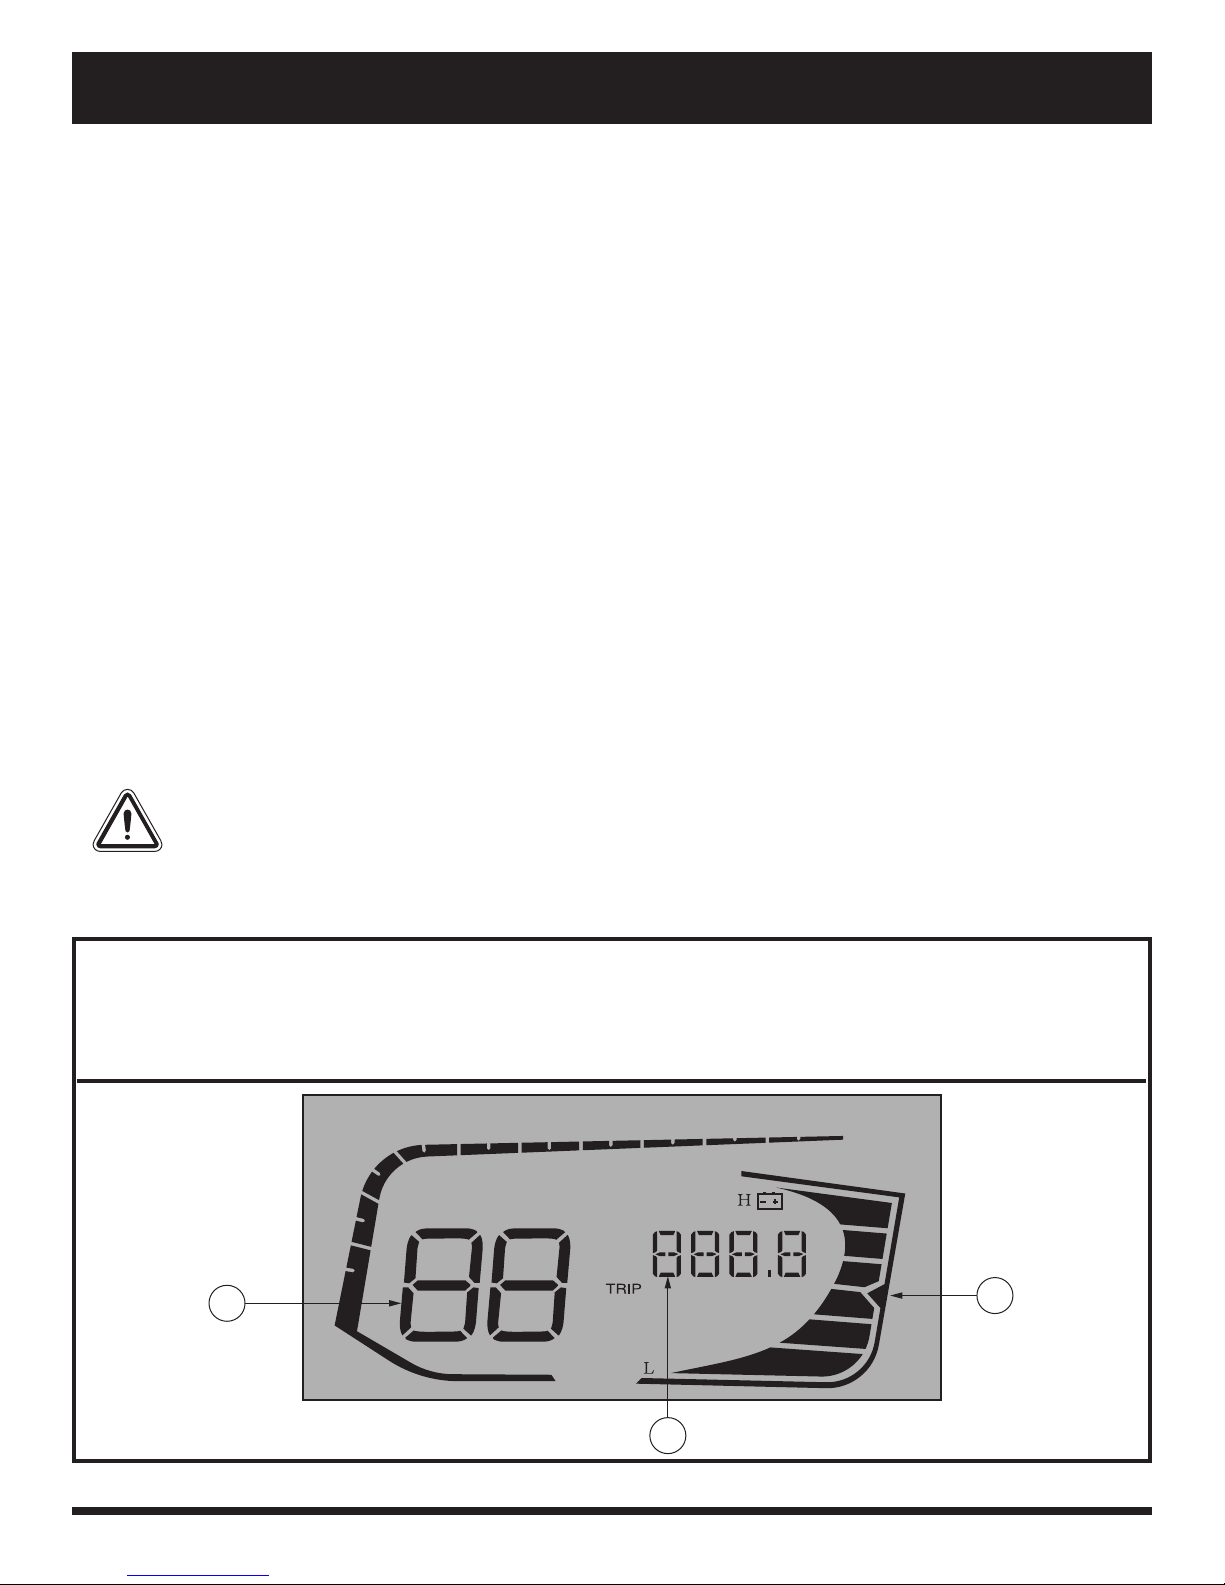
LCD SCREEN
The LCD screen offers easily intuited feedback information. See figure 2.
IDENTIFICATION KEY
1. Speed
2. Battery Condition Indicator
3. Odometer/Tripometer
1
Figure 2. LCD Screen
Raptor 9
2
3
II. YOUR SCOOTER
Speed Indicator
The LCD Screen displays your current traveling speed. The Hi-Low setting determines the maximum
scooter speed. When set to Low, the speed will be half of the maximum speed at the Hi setting.
Battery Condition Indicator
When the key is turned to the “on” position, the LED indicator gives an approximate reading of battery
strength.
Odometer/Tripometer
When the key is turned to the “on” position, The LCD Screen will initially display the odometer, or total
distance traveled, before resetting to zero and displaying the tripometer.
NOTE: Speed indicator and odometer/tripometer may not reflect actual speed and distance
traveled.
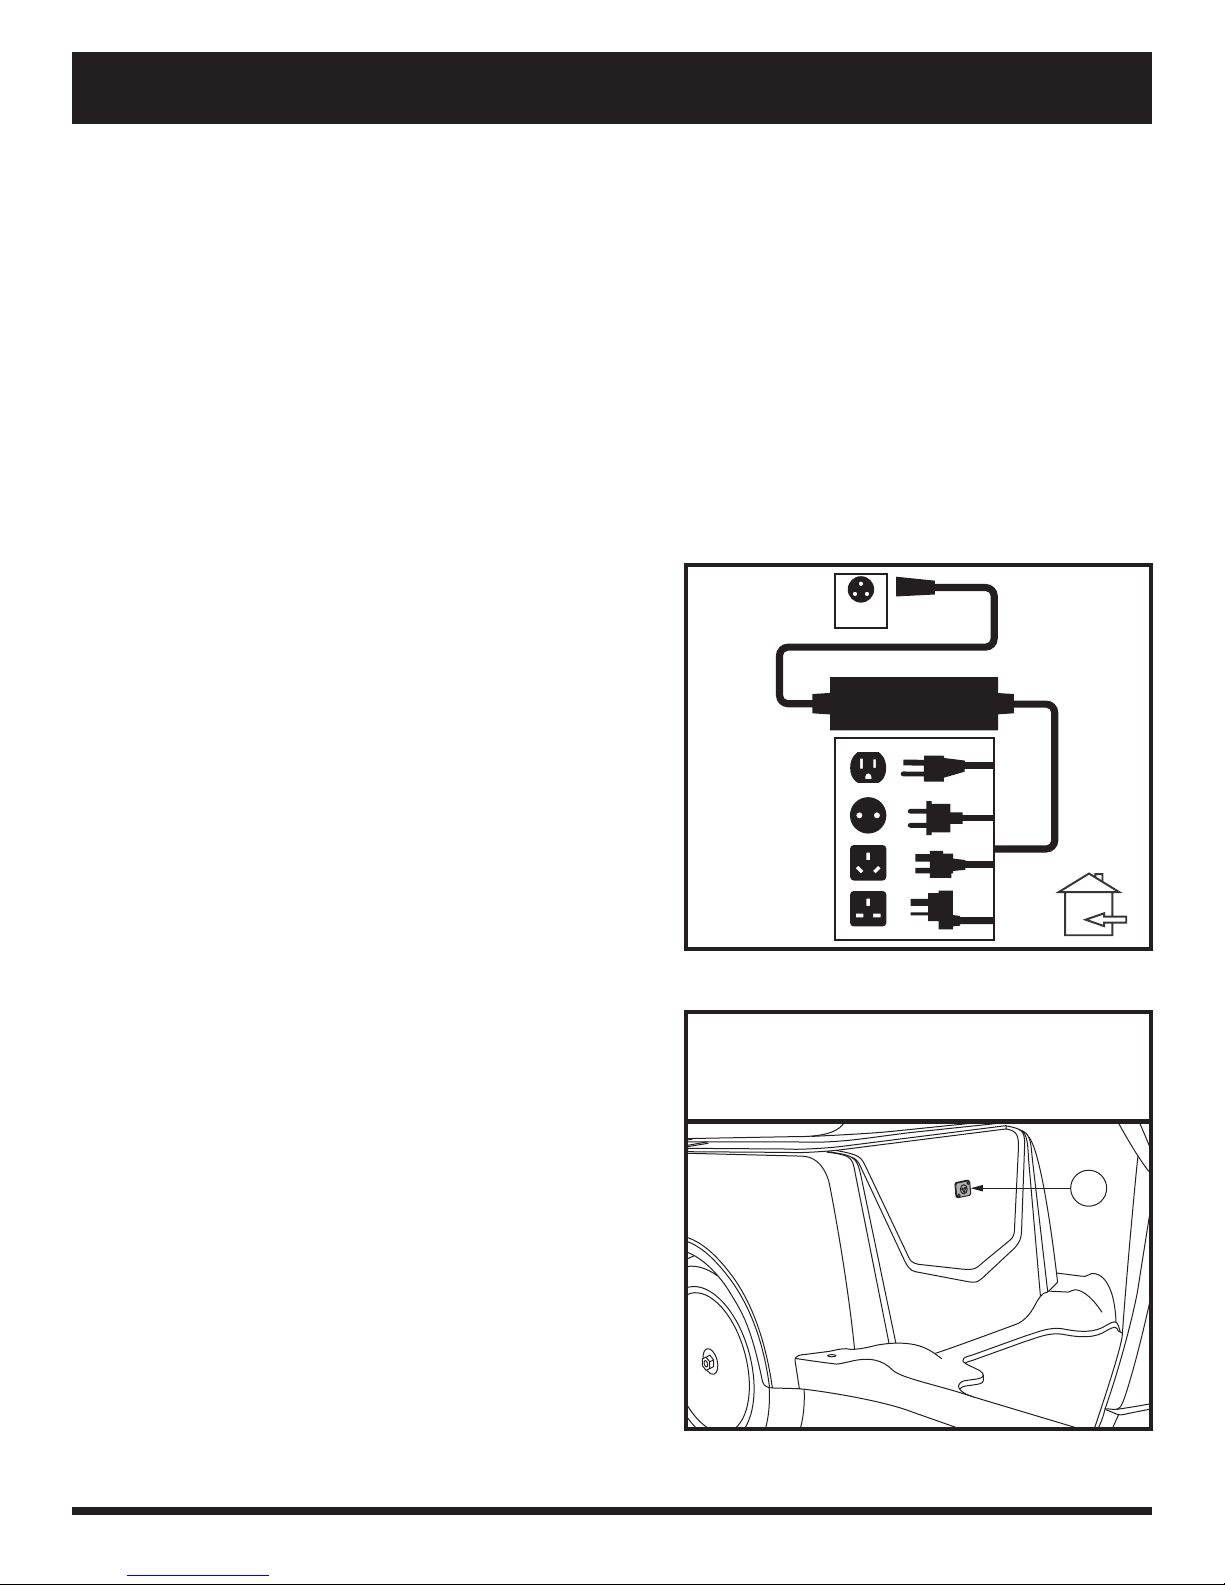
Off-board Charger Port
The off-board charger power cord, when plugged into
the charger power cord receptacle and a standard
electrical outlet, charges the scooter’s batteries. See
figure 3. The off-board charger port will be located
at the front of the rear shroud, below the seat. See
figure 4.
XLR
Charger Power Cord Receptacle
The 3-pin end of the charger power cord plugs into the
receptacle. There is a protective rubber flap that, when
pressed into place, fits over the receptacle to shield it
from dirt, debris, moisture, or damage.
Electrical System Fuses
Your scooter is equipped with a series of electrical
system fuses, which help protect the off-board
charging system, key switch, and lighting system from
receiving an overload of electrical current. These fuses
are located in a compartment within the rear shroud,
below the seat.
NOTE: Keep all electrical areas clean and free of
moisture and foreign material.
Figure 3. Off-board Battery Charger
IDENTIFICATION KEY
1. Off-board Charger Port
1
10 Raptor
Figure 4. Off-board Charger Port
 Loading...