

Prevue Hendryx 485, 485 A User Manual
Feisty Ferret
read first REVIEW BEFORE ASSEMBLY
Home
Model: # 485 (A)
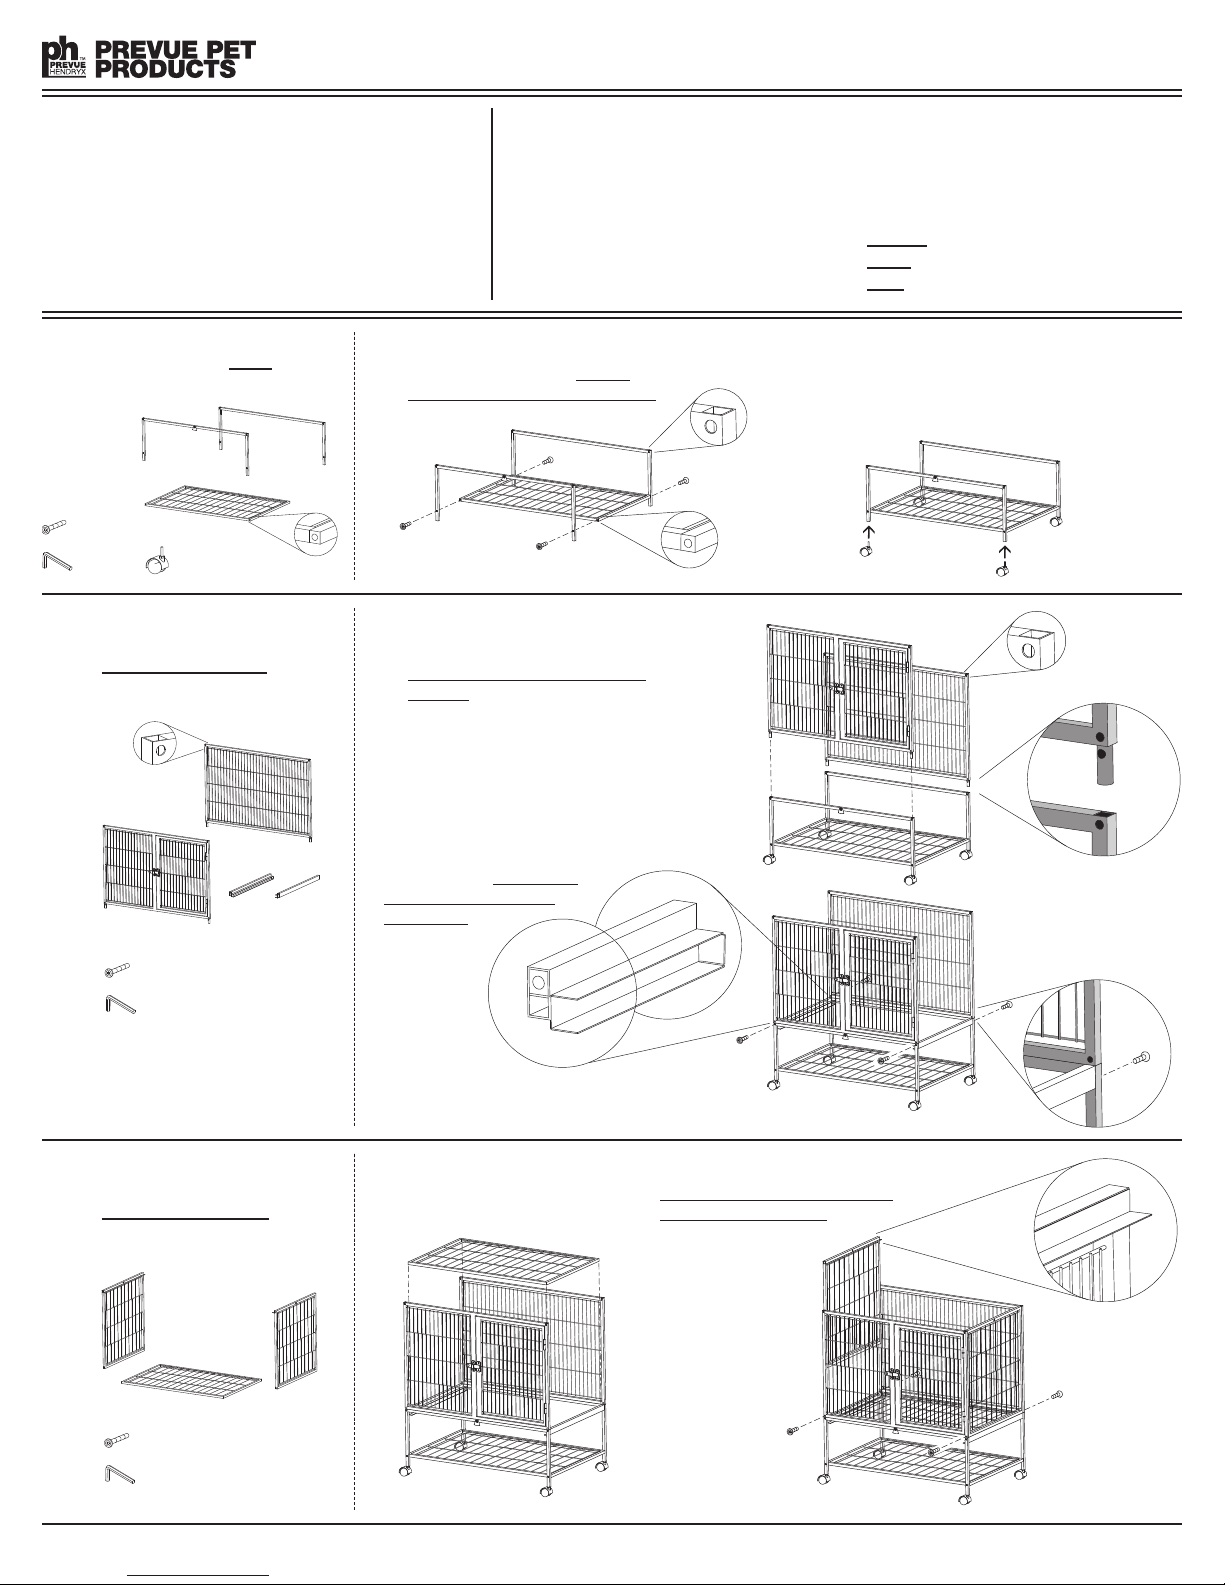
To assemble the BASE, you
1
2
will need these pieces:
× 4 (long)
× 4
To assemble the first level
CAGE FRONT & BACK
you will need these pieces:
• TOOLS: Allen wrench (included).
Have needle nose pliers (not included)
n hand. If using power tools, be
o
careful not to over-tighten screws.
Attach the storage shelf to the leg frames with
one long screw in each corner. Note: the
windbell lock on the front leg frame faces out.
Guide the lower level front panel (with door)
,
and back panel into the leg frames as illustrated.
Note: the lower panels have openings at the
top corners.
For assistance or replacement parts,
please contact Prevue Pet Products:
OLL-FREE
T
ONLINE www.prevuepet.com
EMAIL
Flip unit over and fully insert
casters into frame legs.
00.243.3624
8
customerservice @prevuepet.com
3
× 4 (long)
To assemble the first level
CAGE FLOOR & SIDES
you will need these pieces:
,
Attach the grille/tray track frames. Secure the
tracks in place with one long screw in each
corner (lower hole). Note: the track
orientation is with the open end
facing the front.
Slide the first floor panel
down into place.
Slide the lower level side panels into place.
Note: the track that will hold the mid-level
floor is at the top and facing in.
Secure the panels with one
long screw in each
bottom corner.
× 4 (long)
485 (A)—07/15— USL Made in China for Prevue Pet Products, Inc. , Chicago IL USA www.prevuepet.com 800 243-3624 customerservice @prevuepet.com
4
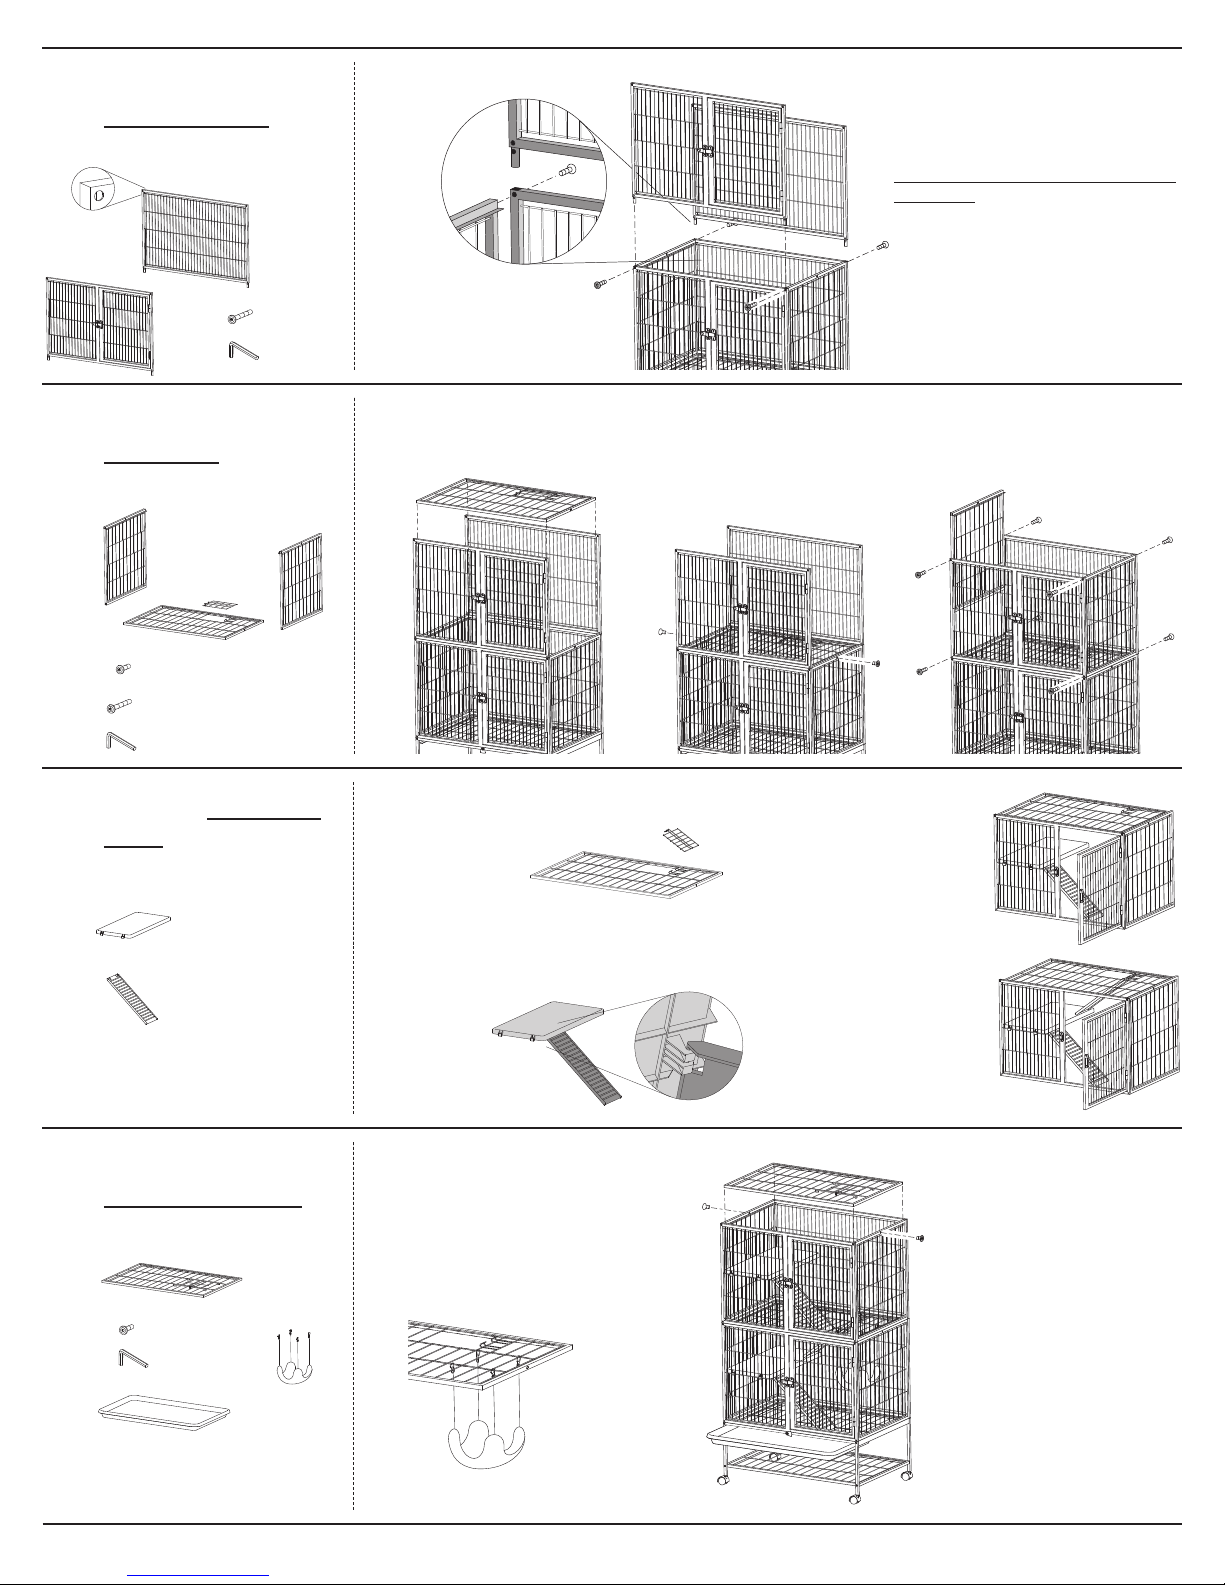
To assemble the second level
CAGE FRONT & BACK
you will need these pieces:
,
× 4 (long)
Slide the upper level front and back panels into
place and secure with one long screw in each corner.
Note: each corner screw will secure the intersection
of three panels.
5
6
To assemble the second level
FLOOR & SIDES
these pieces:
× 2 (short)
× 8 (long)
To install the PLATFORMS &
RAMPS, you will need these
pieces:
, you will need
× 2
× 3
Slide the mid-level floor (with the
removable hatch door) down into place.
6.1 Remove the hatch door cover.
6.2 Snap the ramps onto the underside of the
platforms (as illustrated) to make two
platform/ramp sets.
Secure the floor in place with a short
screw in the center of each side.
6.3 Clip a platform/ramp
set onto the cage in the
lower level.
6.4 Clip the leftover ramp
onto the floor at the
hatch opening and rest
the lower end onto the
platform.
Slide the upper level side panels into
place and secure with a long screw in
all top and bottom corners.
Finish the assembly with the
7
485 (A)—07/15— USL Made in China for Prevue Pet Products, Inc. , Chicago IL USA www.prevuepet.com 800 243-3624 customerservice @prevuepet.com
ROOF, HAMMOCK & TRAY
You will need these pieces:
× 2 (short)
.
Set the roof panel (with the sliding door)
into place and secure it into place with
a short screw in the center of each side.
Add the hammock into either level.
Rotate the windbell lock out of the way
and slide the debris tray into place.
Your cage is assembled and ready for use!
 Loading...