

Page 1
Visit us on the web at www.GoPresto.com
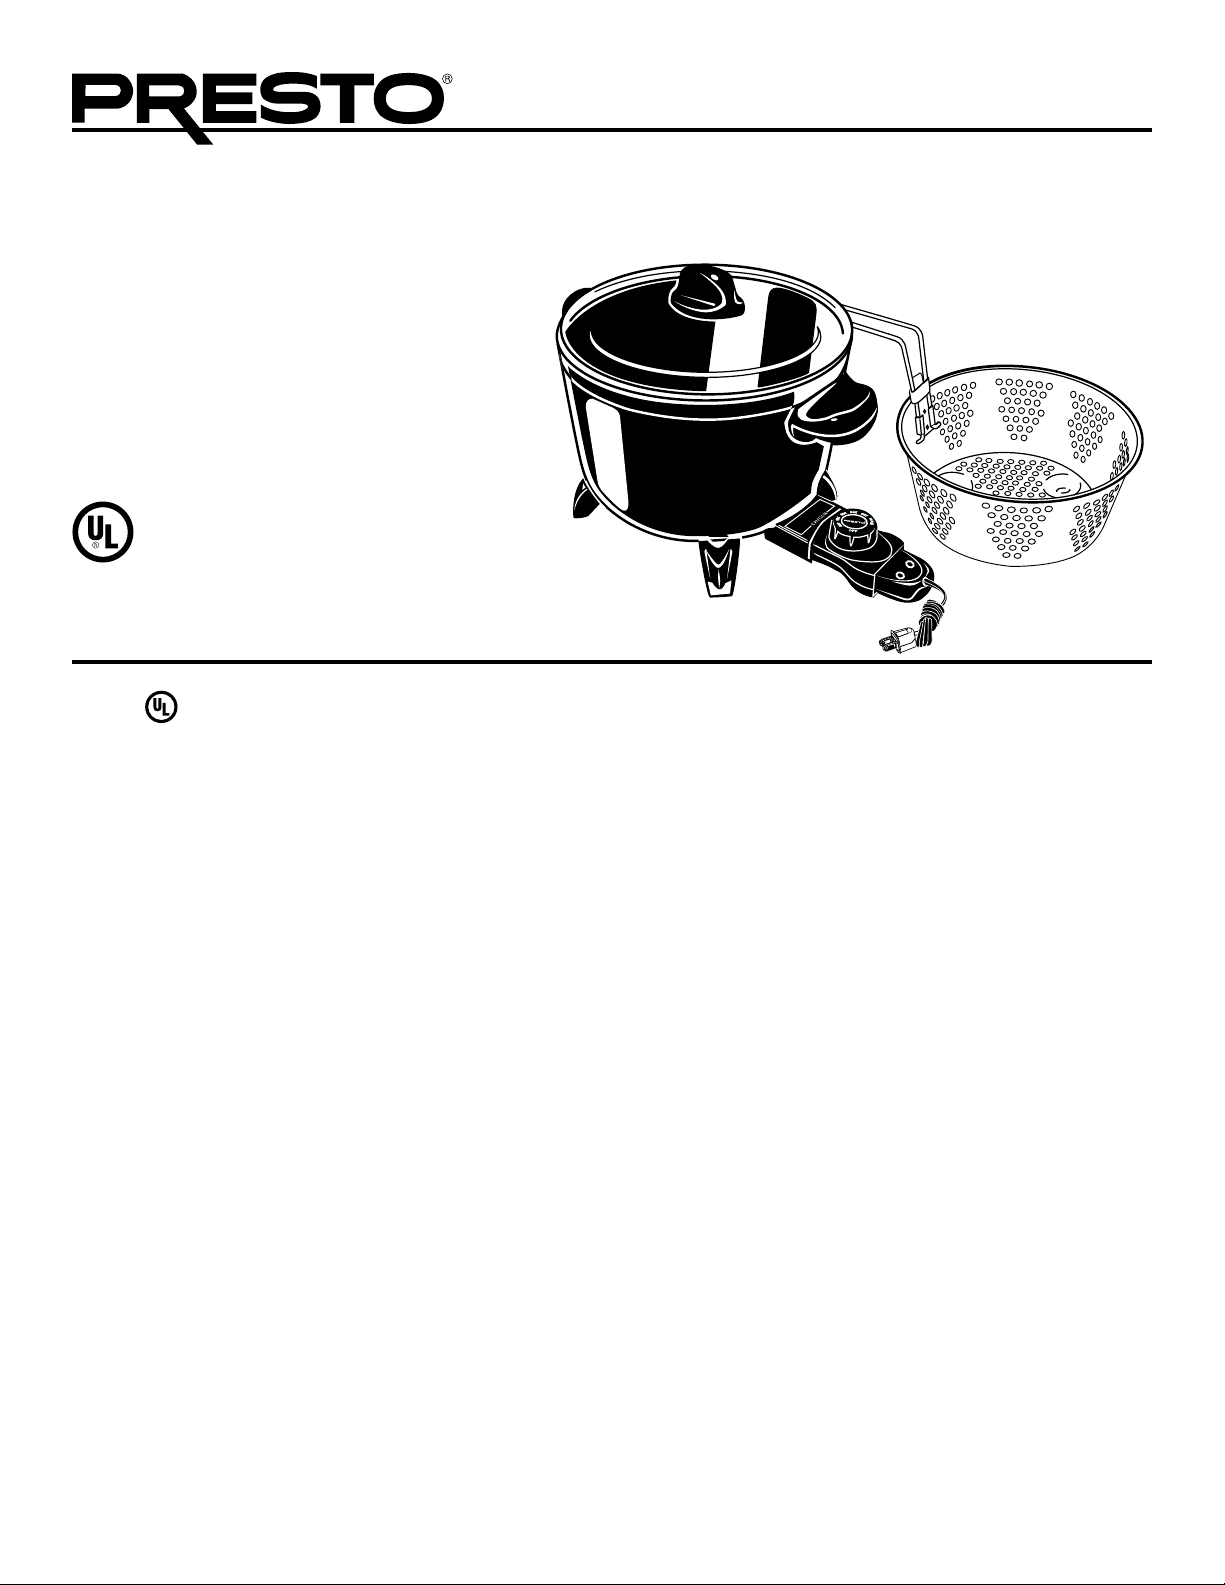
Kitchen Kettle
multi-cooker/steamer
So versatile, you’ll use it every day.
I
This is a Listed appliance. The following important safeguards are recommended by most portable appliance manufacturers.
IMPORTANT SAFEGUARDS
To reduce the risk of personal injury or property damage, when using electrical appliances basic safety precautions should always be
followed, including the following:
1. Read all instructions.
2. Be sure that handles and legs are assembled and fastened properly before using this appliance (see page 2).
3. Do not touch hot surfaces. Use handles or knobs.
4. To protect against electrical shock or burns, do not immerse heat control or magnetic cord assembly in water or other liquid.
5. Close supervision is necessary when any appliance is used by or near children.
6. Be sure handle is properly attached to basket and locked in place. See detailed assembly instructions on page 2.
7. Do not let children handle or put electrical cords or plugs in their mouths.
8. Always attach heat control and magnetic cord assembly to appliance first, then plug cord into the wall outlet. To disconnect heat
control and magnetic cord, turn control to “OFF”, remove plug from wall outlet and cord assembly from heat control. Allow appliance
to cool, then remove heat control from unit.
9. Unplug from outlet and remove heat control from appliance when not in use and before cleaning. Allow appliance to cool before
putting on or taking off parts, and before cleaning.
10. Do not operate any appliance with a damaged cord or plug or in the event the appliance malfunctions or has been damaged in any
manner. Return the appliance to the Presto Factory Service Department for examination, repair, or adjustment.
11. The use of accessory attachments not recommended by the appliance manufacturer may cause injuries.
12. Do not use outdoors.
13. Do not let cord hang over edge of table or counter or touch hot surfaces.
14. Do not place on or near a hot gas or electric burner or in a heated oven.
15. It is recommended that this appliance not be moved when it contains hot oil or other hot liquid. If it must be moved when it contains
hot oil or other hot liquid, use extreme caution.
16. Do not use appliance for other than intended use.
2009 by National Presto Industries, Inc.
SAVE THESE INSTRUCTIONS
THIS PRODUCT IS FOR HOUSEHOLD USE ONLY.
1
Page 2
IMPORTANT CORD AND PLUG INFORMATION
A short power supply cord (or cord set) is provided to reduce the risk resulting from becoming entangled in or tripping over a longer
cord. DO NOT USE WITH AN EXTENSION CORD.
Do not allow the cord to run underneath or around the unit. The magnetic cord may not detach easily if the cord is positioned in this
fashion.
Connect the power supply cord to a polarized outlet only. As a safety feature, this appliance has a polarized plug (one blade is wider than
the other). This plug will only fit in a polarized outlet one way. If the plug does not fit fully in the outlet, reverse the plug. If it still does
not fit, contact a qualified electrician. Do not attempt to defeat this safety feature.
How to Install Legs and Handles
Tools Required: Phillips type screwdriver
Parts Included: 4 Legs
2 Handles
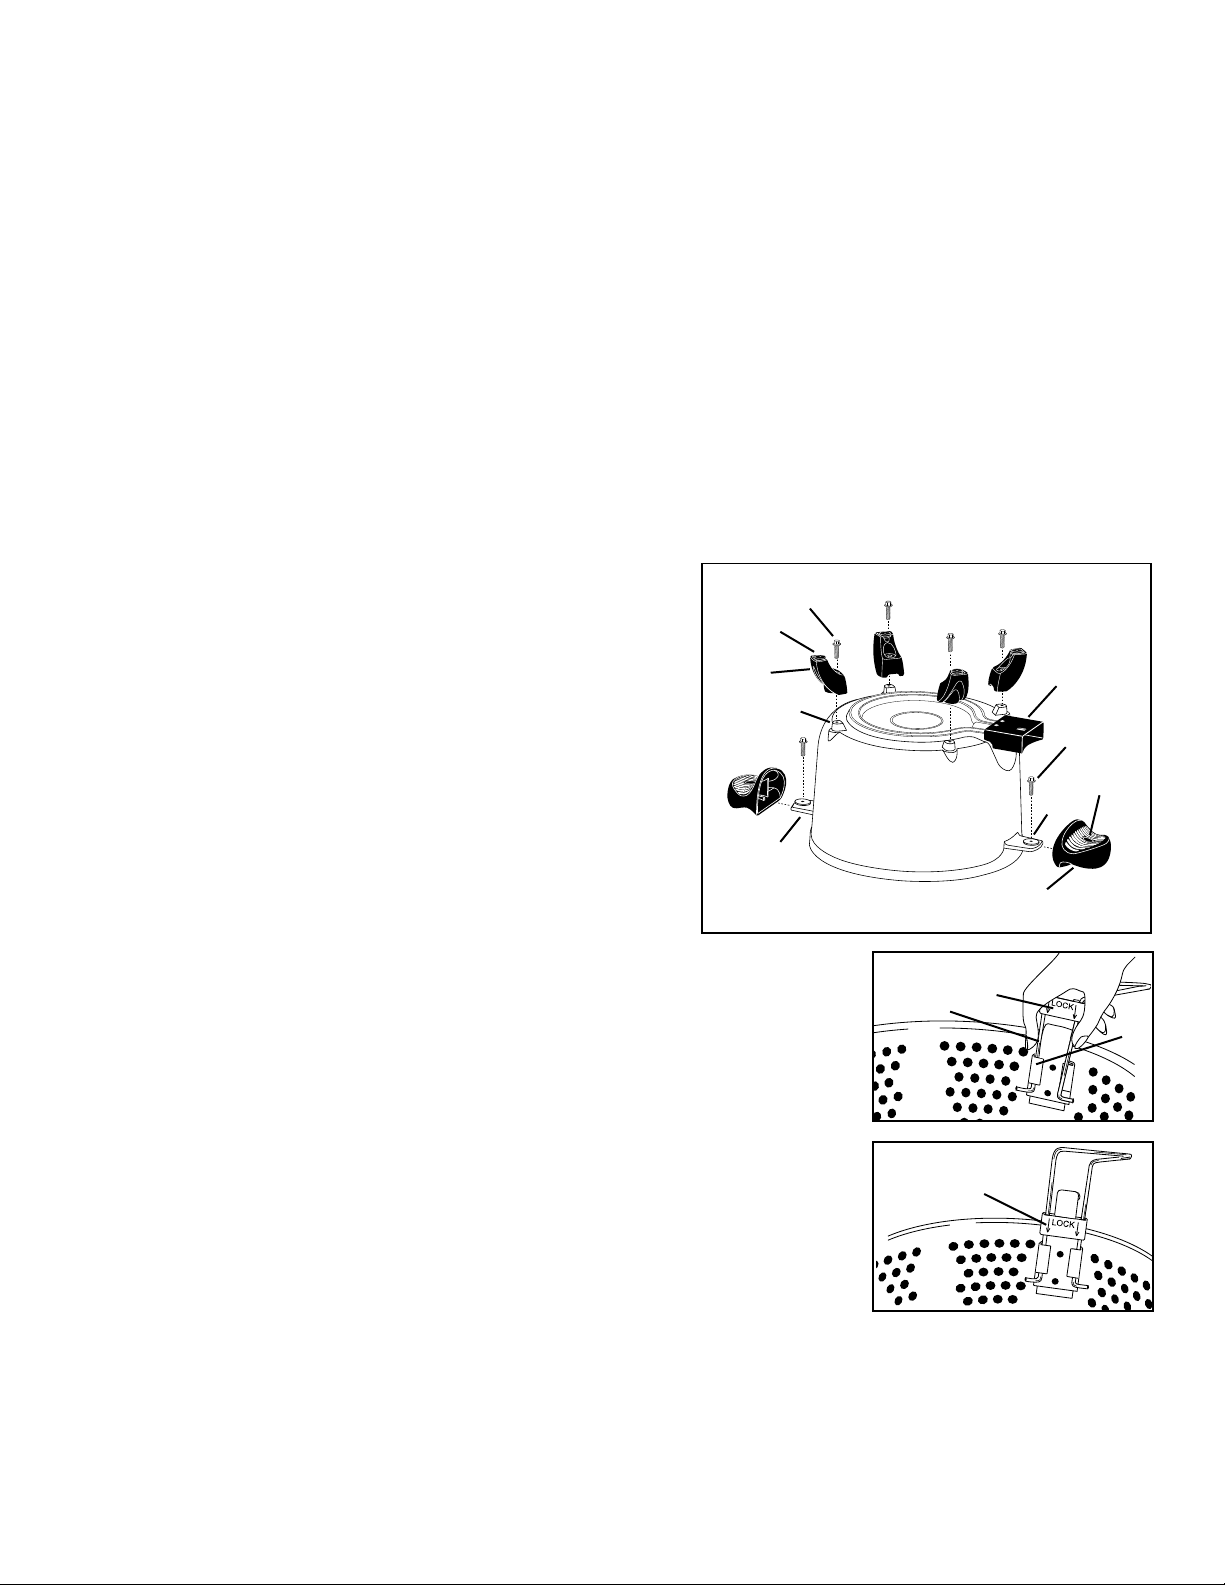
To Install Legs
1. Place multi-cooker upside down on table or counter.
2. Using the screwdriver, remove the screws from each of the four mounting projections on the bottom of the unit. These screws are for
attaching the legs to the multi-cooker base.
3. Position one of the legs, with the rubber insert facing up, over
one of the moun ting projections (Fig. A). Align the hole in
the leg with the hol e in the mounting project ion and fasten
securely with screw. Leg should not rock or move if twisted.
Caution: Overtightening can result in stripping of screws or cracking
of legs.
4. Repeat step 3 for other three legs.
Screw
Rubber
insert
Leg
Mounting
projection
5. Turn multi-cooker right side up on table or counter. When properly
assembled, the multi-cooker should sit level with no leg rock.
To Attach Handles to Base
1. With multi-cooker upside down on table or counter, remove the screws
Tab
from the tabs on each side of the multi-cooker base. These screws are
for attaching the handles to the base.
Hint: When removing the screw under the heat control receptacle,
hold the screwdriver at a slight angle or use a short screwdriver or a screwdriver with a long
shank.
2. Slide one of the handles, with the screw hole facing up, onto the tab so the screw hole on the tab
aligns with the screw hole on the handle (Fig. A). Fasten with screw and tighten fully. Handle
should not wobble or move when grasped. Caution: Overtightening can result in stripping of
screws or cracking of handles.
3. Repeat step 2 for other handle.
4. When properly installed, the handles should appear level with the table or counter.
To Attach Basket Handle
1. Slide lock bar up on handle (Fig. B) and place one of the handle bars into one of the tabs on
bracket. Then squeeze the handle bars together, and fit the other handle bar into the opposite
tab on bracket.
2. After attaching handle to basket, slide the lock bar down (Fig. C) to insure against accidental
detachment of handle from basket.
Fig. B
Lock bar
Handle bar
Fig. C
Lock bar
Fig. A
Heat
control
receptacle
Screw
Screw
hole
Tab
Handle
Tab
2
Page 3

Before First Use
Become familiar with the various parts of the
multi-cooker (Fig. D) and read the instructions
carefully.
This versatile electric multi-cooker braises,
blanches, boils, deep fries, stews, steams, makes
Tempered
glass cover
Cover Knob
Fig. D
Basket/handle
Steam/fry
basket
soups and desserts.
Caution: This product is not intended to melt
wax, gels, plastics, or other materials for making candles or for other hobbyist activities or
in any commercial or business application.
Basket snaps onto multi-cooker rim
for draining and steaming.
Steaming hook
Draining hook
Nonstick
surface inside
and out
Control Master
heat control
Magnetic cord
assembly
How To Use
Before initial use, and after each subsequent use, wash appliance in dishwasher or in warm sudsy water, rinse, and dry. Do not immerse
heat control or magnetic cord assembly in water or let them come in contact with any liquid. Prior to first use, “season” the multi-
cooker’s cooking surface by rubbing lightly with cooking oil. Remove excess oil with paper towel.
For best results use nylon, plastic, wooden, or rubber utensils to turn, stir, or remove food when not using the steam/fry basket. The use
of metal utensils is not recommended.
1. Place multi-cooker on a dry, level, heat resistant surface. The cover should not be on the multi-cooker.
CAUTION: To avoid personal injury, position multi-cooker well back from edge of counter or table. Do not let cord hang or drape
over edge of counter or table within reach of children.
2. Insert the probe end of the heat control into the multi-cooker so the two electrical
pins on the appliance are fully inserted into the heat control. Then attach the
magnetic cord assembly to the heat control by aligning the magnetic coupler
end with the two electrical pins located on the back of the heat control (Fig.
Control Master heat control
Heat selector
Pilot light
E). Due to the fact that the magnetic coupler end is polarized, it can only be
attached to the heat control one way. When properly aligned, the plug will
magnetically attach itself to the heat control. Attach the cord so that the printed
patent information on the magnetic plug is facing up. The daisy and cautionary
language will be facing towards the counter. If positioned upside down, it will
not attach.
Important: The magnetic cord was designed to detach easily from the
multi-cooker. As a result, if it is bumped or touched during use it could
Probe
Heat
control
Electrical
pins
Magnetic
coupler end
possibly detach causing the unit to stop heating. Avoid contact with cord
during operation. If contact occurs, verify that the cord is still properly
connected.
3. Plug the multi-cooker into a 120v AC electrical polarized outlet only.
4. Using the index on page 4, determine the type of cooking method you will be
following and turn to the referenced page.
5. Preheat multi-cooker as indicated in the cooking method and follow the cook-
To assure the continued accuracy of the Control
Master
during use and storage. Store the cord assembly
in a clean, dry location away from metal objects.
Always check the magnetic coupler end before use
to assure metal items have not become attached.
heat control, avoid rough handling
ing instructions. During cooking, the pilot light will go on and off indicating
temperature is being maintained.
Note: When using the multi-cooker for the first time, a slight odor or light smoking may occur as manufacturing residue evaporates.
This is normal during initial use.
6. When cooking is complete, turn heat control to OFF. Remove plug from wall outlet and then remove magnetic coupler end from heat
control. Allow appliance to cool and detach heat control from multi-cooker before cleaning.
Fig. E
Magnetic cord
assembly
4
Page 4

Specific Uses
Your Kitchen Kettle multi-cooker/steamer is truly versatile as you can prepare soups and stews, steam vegetables and seafood, deep
fry, and even prepare fruits and vegetables for freezing (known as blanching). Because this pot does so many things, this book provides
a general overview of how to use, clean, and care for the appliance and then specific sections which provide more detailed instructions,
along with many delicious recipes.
Detailed instructions and recipes for the various methods of cooking that you can perform with your multi-cooker can be found on the
pages indicated below:
Specific Uses Page Specific Uses Page
Simmering (Soups and Stews) 5 Boiling (Pasta and Rice) 8
Braising 7 Blanching 8
Steaming (Vegetables and Fish) 7 Deep Frying 8
Care and Cleaning
Wash appliance in dishwasher or in warm sudsy water, rinse, and dry. Do not immerse heat control or magnetic cord assembly in
water or let them come in contact with any liquid.
After each use, clean the nonstick base with a non-metal cleaning pad, such as Scotch-Brite* Multi-Purpose Scrub Sponge or ScotchBrite* Dobie* Cleaning Pad. Firm pressure can be applied, if necessary. Do not use steel wool or abrasive kitchen cleaners.
In time, the nonstick finish may darken over the heating element. To remove this discoloration, use a commercial cleaner designed for
cleaning surfaces, such as dip-it* destainer. These cleaners are available at most grocery and hardware stores. For best results, follow the
manufacturer’s instructions, being careful that any cleaning solution coming in contact with the exterior of the appliance is wiped off.
After treating the appliance with a commercial cleaner, it is recommended that the cooking surface be wiped lightly with a cooking oil
before using.
Periodically check the screws on the two handles and four legs for looseness. Retighten, if necessary, with a Phillips type screwdriver.
CAUTION: Overtightening can result in stripping of screws or cracking of handles and legs.
Any maintenance required for this product, other than normal household care and cleaning, should be performed by the Presto Factory
Service Department, see page 11.
For answers to any questions regarding the operation of your Presto appliance or if you need parts for your appliance, see the Service
Information on page 11.
Glass Cover Care and Use Instructions
Caution: Your glass cover may break for no apparent reason if you fail to follow these instructions. Broken glass can cause
personal or property damage.
Never use cover when frying food or heating oil. Do not use cover if it is chipped or cracked. Handle cover carefully and avoid rough
handling.
Do not handle hot cover with wet towel or place hot cover on a cold or wet surface. Sudden, extreme changes in temperature may cause
glass to break. Allow cover to cool before washing. This cover is dishwasher safe. Keep the cover clean. Do not use steel wool cleaning
pads or abrasive powders which can scratch or weaken the glass. Nonabrasive pads or powders may be used if necessary. Do not scrape
or gouge glass with hard or sharp utensils.
* Scotch-Brite is a trademark of 3M.
Dobie is a trademark of Pechney Plastic Packaging, Inc.
dip-it is a registered trademark of Ecolab, Inc.
4
Page 5

Simmer
The Presto Kitchen Kettle multi-cooker makes preparing your favorite soups and stews so easy. In your multi-cooker, foods will simmer
at some point between the Warm setting and 200°. Heat the multi-cooker at 250° until the food boils. Then place cover on multi-cooker
and reduce the heat to the simmer level by turning the heat control down until the pilot light goes out.
Beef Stock
1
2 pounds beef soup meat
8 cups water 1 bay leaf
1 cup sliced onion 1 teaspoon salt
1 cup celery, cut into 1-inch pieces
Preheat multi-cooker at 375°. Add oil and brown meat. Add remaining ingredients and bring to a boil. Turn heat control down until pilot
light goes out. Cover and simmer 2 to 3 hours. Strain stock.
6 to 8 servings
VEGETABLE SOUP: Add 2 cups cooked diced vegetables of your choice. Salt and pepper to taste and heat through.
BEEF TOMATO SOUP: Add 2 cups tomato juice, 3⁄4 cup rice, 1⁄2 cup chopped onion, and 1 teaspoon salt. Cover and simmer 30 minutes
or until rice is done.
Minestrone
3 cups beef broth 2 garlic cloves, minced
1
2 cups shredded cabbage
¾ cup chopped onions 1 14-15 ounce can cannelloni
¾ cup sliced carrots or navy beans, drained
¾ cup green beans 1 ounce spaghetti, broke in half
1 14-15 ounce can diced tomatoes
Place all ingredients except beans, spaghetti, and cheese in multi-cooker. Set heat control at 250° and bring to a boil. Turn heat control
down until pilot light goes out. Cover and cook for 30 minutes. Add beans and spaghetti; cook until spaghetti is tender, about 20 minutes.
Top individual servings with cheese.
8 to 10 servings
1
⁄2 tablespoons cooking oil 1 cup carrot, cut into 1-inch pieces
1
1
⁄2 tablespoon parsley flakes
⁄8 teaspoon pepper
Delicious Soup From Beef Stock
1
⁄2 cups tomato juice 1 teaspoon dried basil
1
⁄4 pound beef soup meat 1 teaspoon dried oregano
1
⁄4 pound sausage
1
⁄2 cup sliced celery
1
⁄2 teaspoon salt
1
⁄4 teaspoon black pepper
1
⁄4 cup grated cheese
Traditional Beef Stew
1
2 pounds beef stew meat 3 carrots, cut into 1-inch pieces
4 cups beef stock or broth 1 cup sliced mushrooms
1
1
Preheat multi-cooker at 375°. Add oil and brown meat. Add broth, salt, and pepper. Bring to a boil. Turn heat control down until pilot
light goes out. Cover and simmer 1 to 2 hours. Add remaining ingredients. Cover and simmer 30 minutes or until vegetables are tender.
If desired, thicken with a paste made of cornstarch and water.
6 to 8 servings
1
⁄2 tablespoons cooking oil 1 small onion, diced
⁄2 teaspoon salt 1 cup peas
⁄4 teaspoon pepper 1 cup sliced celery
5
Page 6

Brunswick Stew
2 tablespoons cooking oil 1 small bay leaf
2 pounds chicken, cut up 1 cup cubed cooked ham
4 cups water 2 potatoes, diced
1
⁄2 onion, chopped 2 tomatoes, peeled and quartered
1 teaspoon salt 1 10-ounce package frozen lima beans
1
⁄2 teaspoon basil 1 10-ounce package frozen whole
1
⁄4 teaspoon pepper kernel corn
Preheat multi-cooker at 375°. Add oil and brown chicken. Add water, onion, and seasonings. Bring to a boil. Turn heat control down
until pilot light goes out. Cover and simmer 45 minutes or until chicken is tender. Remove chicken; set aside until cool enough to handle.
Remove and discard skin and bones. Cut chicken into bite-size pieces. Return to multi-cooker. Add ham and vegetables. Cover and
simmer 30 minutes or until vegetables are tender.
6 to 8 servings
Southwest Stew
2 tablespoons vegetable oil 2 cloves garlic, minced
4 boneless, skinless chicken breast 1 16-ounce can pinto beans
halves, cut into 1-inch pieces
1 green bell pepper, cut into 3⁄4-inch 1 cup whole kernel corn
pieces 1 cup salsa, desired level of spiciness
1 red bell pepper, cut into 3⁄4-inch 1 tablespoon chili powder
pieces 2 teaspoons ground cumin
1 jalapeño pepper, chopped
1 cup coarsely chopped purple onion
Preheat multi-cooker at 375°. Add oil and brown chicken. Add peppers, onion, and garlic; cook for 2 to 3 minutes. Add beans, tomatoes,
corn, salsa, chili powder, cumin, and salt. Bring to a boil. Turn heat control down until pilot light goes out. Cover and simmer for 20 to
25 minutes. Garnish with cilantro.
6 servings
1 141⁄2-ounce can stewed tomatoes
1
⁄2 teaspoon salt fresh cilantro (optional)
Chicken and White Bean Chili
1 cup dry great northern beans 1 jalapeño pepper, seeded, minced
1 tablespoon vegetable oil 4 cups chicken stock or broth
1 pound boneless, skinless chicken 11⁄2 teaspoons packed brown sugar
breasts, cut into ¾-inch pieces 1 teaspoon white wine vinegar
2 cloves garlic, minced
1
⁄2 cup chopped onion 2 teaspoons chili powder
1
⁄2 cup sliced carrot 1 teaspoon dried oregano
1
⁄4 teaspoon ground allspice
Clean and rinse beans. Soak beans overnight in 4 cups of water or by using the quick soak method. To soak beans using quick method,
place beans in multi-cooker and cover with 4 cups of water. Set heat control at 250° and bring to a boil; boil for 1 to 2 minutes. Turn off
heat control, cover, and let stand for at least 1 hour. Drain off soaking water and remove beans. Dry multi-cooker.
Preheat multi-cooker at 375°. Pour oil in multi-cooker; brown chicken. Add onion, carrot, garlic, and jalapeño pepper. Sauté 1 to 2
minutes. Stir in beans, chicken stock, brown sugar, vinegar, chili powder, oregano, and allspice. Bring to a boil. Turn heat control down
until pilot light goes out. Cover and simmer until beans are tender, about 1 hour.
4 servings
New England Boiled Dinner
1
serving pieces
4 potatoes, halved 1 teaspoon salt
6 small onions
Place ham and water in multi-cooker. Set heat control at 250˚ and bring to a boil. Turn heat control down until pilot light goes out. Cover
and simmer 1 hour or until meat is nearly tender. Add remaining ingredients, cover, and simmer until vegetables are done. Add water if
necessary.
6 to 8 servings.
1
⁄2 pounds ham, cut into 4 carrots
3 cups water
1
⁄2 head cabbage, cut into wedges
1
⁄2 rutabaga, sliced
1
⁄8 teaspoon pepper
6
Page 7

Braise
To create a personalized roast, choose and combine the following ingredients. Pick foods having compatible flavors. Figure 2 to 4 servings per pound of roast.
Start with 1½ to 3 pounds of beef, pork, or poultry...
Chuck Roast Pot Roast Flank Steak Brisket
Round Roast Fore Shank Boston Butt Whole Chicken
Rib Roast Standing Rump Roast Sirloin Roast Turkey Breast
Blade Roast Boneless Rump Roast English Cut
Preheat multi-cooker at 375˚. Brown roast in...
Vegetable Oil Margarine Vegetable Shortening
Add 2 cups...
Water Tomato Juice Coffee Fruit Juice
Beer Broth Red Wine Carbonated Beverage
Add a pinch or two of...
Salt Celery Marjoram Sage
Pepper Thyme Bay Leaf Basil
Garlic Rosemary Mustard Dry Soup Mix
Onion Oregano Dill
Turn heat control down until pilot light goes out. Cover and simmer 1 to 3 hours or until tender.
Steam
Fresh Vegetables:
Place 2 cups water in the multi-cooker. Set heat control at 250˚. Remove handle from steam/fry basket. Place vegetables in basket and
using tongs attach basket to rim of the multi-cooker with steaming hook. Cover and steam as indicated in the table below. Steaming time
begins once water starts to boil. Add additional water as necessary.
Vegetable Steaming Time
Asparagus
Thin spears 3-4 minutes
Thick spears 4-5 minutes
Beans
Whole 7-8 minutes
1-inch pieces 7-8 minutes
Beets, 2½ to 3-inch diameter 35-40 minutes
Broccoli
Spears 5-7 minutes
Florets 5-7 minutes
Brussels Sprouts, 1 to 1½-inch diameter 9-11 minutes
Cabbage, 2-inch wedge 15-20 minutes
Carrots
Whole 18-22 minutes
¼-inch slices 6-7 minutes
Baby-cut 11-14 minutes
Vegetable Steaming Time
Cauliflower
Whole head 18-20 minutes
Florets 7-9 minutes
Corn-on-the-cob 10-15 minutes
Kale, cut into strips 6-7 minutes
Parsnips, ¼-inch slices 6-7 minutes
Potatoes, white
Small (1 to 2 ounces each) whole or
Medium, quartered 13-15 minutes
Potatoes, sweet
1-inch slices 17-19 minutes
Rutabaga, ¾ to 1-inch slices 20-22 minutes
Spinach, whole leaves 3-4 minutes
Squash (yellow, crookneck, zucchini)
¼-inch slices 5-7 minutes
Turnips, ¾ to 1-inch slices 10-12 minutes
Fish:
Place 1 or 2 cups of water, wine, or herb-flavored broth into multi-cooker. Set heat control at 250˚. Remove handle from steam/fry
basket. Place one layer of fish fillets in basket and using tongs attach basket to multi-cooker rim with steaming hook. Cover and steam
5 to 10 minutes or until the fish flakes easily when tested with a fork.
7
Page 8

Boil
Pasta
Following package directions, place water and salt into multi-cooker. Set heat control at 250°. Bring water to a rolling boil. Add pasta
gradually so that the boiling is not disturbed. Continue to boil uncovered until pasta is tender. Drain. (The steam/fry basket may be used
for draining cooked pasta.)
Fluffy Rice
Place 2 cups rice, 1 teaspoon salt (optional) and specified amount of water (see table below) in multi-cooker. Set heat control at
250°. Cover and bring to a vigorous boil, stirring once. Turn heat control down until pilot light goes out and simmer for the amount
of time specified in the table. Turn heat control OFF and let stand, covered, for 5 minutes. Fluff with fork.
TYPE LIQUID COOKING TIME
White, long-grain 4 cups 15 – 18 minutes
White, medium-grain 3
White, short-grain 3
Brown 4 cups 45 – 50 minutes
1
⁄2 cups 15 – 18 minutes
1
⁄2 cups 18 – 23 minutes
Blanch
Vegetables are blanched before freezing to stop enzyme action and to retain fresh flavor and appearance.
Wash vegetables thoroughly and sort according to size or cut into uniform pieces. Place 4 quarts of water in the multi-cooker, set heat
control at 250˚ and bring to a rolling boil. Place vegetables in the steam/fry basket and lower into boiling water. Cover and boil for time
specified. After heating, immediately plunge vegetables in ice water to cool quickly and thoroughly. When cool, remove from water,
drain, pack, seal, and freeze. For successive batches, return water to a full boil.
VEGETABLE BLANCHING TIME
Asparagus
Thin Stalks 2 minutes
Thick Stalks 4 minutes
Beans
Green or wax 3 minutes
Lima 2-4 minutes
Broccoli, Florets 1
Brussels Sprouts 3-5 minutes
Carrots
Small 5 minutes
Diced, sliced, or lengthwise strips 2 minutes
1
⁄2-inches across 3 minutes
VEGETABLE BLANCHING TIME
Cauliflower, Florets 1-inch across 3 minutes
Corn
On Cob 7-11 minutes
Kernel 4 minutes
Greens 2 minutes
Peas, green 1
Turnips, diced 2 minutes
1
⁄
minutes
2
Deep Fry
CAUTION:
l Do not let cord hang or drape over edge of counter or table within reach of children.
l Remove cover for all deep frying. Never use any cover while oil is heating or while deep frying in this unit.
l CAUTION: OIL AND WATER DO NOT MIX. The combination can be dangerous. When the oil is heated, any water droplets in
the oil super-heat, becoming a volatile steam that can cause hot oil to spatter, boil over, or even erupt out of the multi-cooker. Hot oil
can cause severe burns!
Accordingly, before pouring oil into the multi-cooker be sure that it is COMPLETELY dry. Before placing food in multi-cooker,
always remove ice crystals and excess moisture from food by patting dry with toweling.
l Use caution when deep frying doughs, such as beignets, donuts, dumplings, hushpuppies, and fritters. These foods may develop air
bubbles during heating, which may burst and cause burns. Use a slotted spoon or tongs, rather than a fork, when turning food during
frying and when removing food from oil.
l Use caution when deep frying flour tortillas. Flour tortillas contain air bubbles. During deep frying, oil can become trapped within
these bubbles. If not properly drained, the bubbles can burst and cause burns. Therefore, after deep frying tortillas, carefully raise
them out of the cooking oil, but not out of the Kitchen Kettle, and allow oil to drain from the tortilla for approximately 30 seconds.
l Always allow multi-cooker to cool completely before moving, removing oil, or cleaning.
8
Page 9

How To Use:
Place multi-cooker on a dry, level, stable, heat resistant surface away from countertop edge. Fill unit with cooking oil or shortening
up to oil level line, which is located on inside of unit. Never use more than seven, 8-ounce cups of cooking oil. Set the heat control at
400˚ and preheat for 20 minutes. Leave heat control at 400˚ for frying.
During preheat time, prepare food for deep frying, making sure to remove excess moisture by patting food dry. While steam/fry basket
is sitting on countertop, fill basket up to ¾ full with food. Once oil has preheated, slowly lower basket into oil. Fry food until golden
brown.
Lift basket and using drain hook, hook basket onto multi-cooker rim to drain. Empty basket on absorbent paper.
Allow oil to cool completely before handling the unit. If you plan to reuse the oil, strain it to remove any food particles. Store strained
oil in a tightly sealed container in a cool, dark place.
Frying Timetable
Food Frying Time
Chicken, raw, breaded 13 to 18 minutes
Fish, raw, battered or breaded 3 to 4 minutes
Fish, frozen 7 to 8 minutes
French fries, frozen 11 to 12 minutes
French fries, raw (see recipe below) 10 to 12 minutes
Onion rings, frozen 2 to 3 minutes
Onion rings, raw, battered 1
Shrimp, raw, breaded or battered 3 to 5 minutes
1
⁄2 to 21⁄2 minutes
Helpful Hints
l Do not overfill the basket. Too much food lowers the oil temperature causing food to absorb too much oil.
l Use only a good, reliable brand of vegetable shortening or cooking oil for deep frying. Deep frying foods in butter, margarine, olive
oil, or animal fat is not recommended because of lower smoking temperatures.
l Foods that are battered rather than breaded may stick to the basket; therefore, you may wish to fry these types of foods without using
the basket.
l The number of times the oil can be reused will depend on the food that is fried. For example, the oil will need to be replaced more
often if fish or food coated with bread or cracker crumbs is fried frequently.
l It is time to replace the oil if any of the following occur: The oil is dark in color, has an unpleasant odor, smokes when it is heated,
or foams excessively during frying.
l Fry foods of uniform size and thickness as they will fry more evenly and at the same speed.
Recipes
Raw French Fries
Cut medium potatoes, peeled if desired, into ¼ to ½ inch thick strips. Place into large bowl and cover with hot, tap water. Soak potato
strips for 15 minutes or until ready to fry. Rinse, drain, and pat dry with paper towels.
Because raw fries contain a high percentage of moisture extreme care must be used when deep frying. Thoroughly dry raw fries before
deep frying. Fill the basket ½ rather than ¾ full. Lower the filled basket slowly into the oil. If the oil starts to boil up too quickly lift
the basket out of the oil for a couple of seconds, then lower it again. Repeat as necessary until the basket is completely lowered into the
fryer.
Fry for 3 to 4 minutes until fries are cooked through but not browned. Drain; let stand to cool for at least 10 minutes, but not more than
2 hours. Just before serving, fry potatoes at 400˚ for 7 to 8 minutes or until golden brown.
(Double Fry Method)
Crispy Coating
1
1 egg Salt and Pepper
In a small bowl, whisk milk and egg. In a medium bowl, combine flour and seasonings. Dip food into milk-egg mixture, then coat in
seasoned flour. Fry food according to timetable above.
⁄2 cup milk Flour
9
Page 10

Apple Pie Fritters
1 cup all-purpose flour 1 tablespoon butter, melted
2 tablespoons sugar
1
1
2
1
⁄2 teaspoons baking powder 4 tablespoons sugar
⁄4 teaspoon salt 4-5 apples, peeled, cored, sliced
⁄3 cup milk, minus 1 tablespoon 1⁄4 inch thick
1 tablespoon brandy 2 teaspoons ground nutmeg
1 egg yolk 2 egg whites
In medium bowl, mix flour, sugar, baking powder, and salt. In a second bowl, whisk milk, brandy, egg yolk, and melted butter. Gradually
stir into dry ingredients until smooth. Set aside.
Mix cinnamon and sugar. Sprinkle over both sides of apple slices, saving remainder to dust over finished fritters. Sprinkle slices lightly
with nutmeg. In clean bowl, beat egg whites until stiff, but not dry. Fold into reserved butter.
Dip several apple slices into batter to coat evenly, letting excess drip off. Carefully place 1 to 2 slices at a time into preheated oil. Deep
fry for 3 to 4 minutes, turning once. Drain on paper towels. Sprinkle both sides with reserved cinnamon and sugar mixture. Best served
warm.
1
⁄2 tablespoon ground cinnamon
Quesadilla Crispers
1
⁄4 pound fresh sausage
(chorizo, Italian, etc.) shredded (1-cup)
1 cup refried beans 8 (7-inch) flour tortillas
1
1
⁄4 cup finely chopped onion 1 tablespoon flour
⁄4 cup diced canned green 2 tablespoons cold water
chilies, drained
1
⁄4 pound jalapeño jack cheese,
Cook sausage until done, breaking it up as it cooks. Combine sausage, beans, onion, chilies, and cheese. Makes about 11⁄2 cups.
Cut tortillas into quarters. Place about 1 teaspoon of bean mixture in center. Brush edges with mixture of flour and water. Fold in half
and press to seal; keep covered as you work. Continue until all are made. Makes 32.
Let stand 5 minutes before frying to allow edges to stick together. Deep fry 3 or 4 at a time for 2 minutes. Drain on paper towels.
Alternate method: Cut tortillas into 8 pieces. Fry in hot oil. Heat bean dip and serve with fried chips.
10
Page 11

Consumer Service Information
If you have any questions regarding the operation of your Presto appliance or need parts for your appliance, contact us by any of these
methods:
• Call 1-800-877-0441 weekdays 8:00 AM to 4:30 PM (Central Time)
• Email us at our website www.GoPresto.com
• Write: NATIONAL PRESTO INDUSTRIES, INC.
Consumer Service Department
3925 North Hastings Way, Eau Claire, WI 54703-3703
When contacting the Consumer Service Department, please indicate the model number and the date code for the multi-cooker. These
numbers can be found on the bottom of the heat control receptacle.
Please record this information:
Model Number ______________________ Date Code _________________ Date Purchased ___________________________
Inquiries will be answered promptly by telephone, email, or letter. When emailing or writing, please include a phone number and a time
when you can be reached during weekdays if possible.
Any maintenance required for this product, other than normal household care and cleaning, should be performed by our Factory Service
Department. Be sure to indicate date of purchase and a description of defect when sending an appliance for repair. Send appliances for
repair to:
CANTON SALES AND STORAGE COMPANY
Presto Factory Service Department
555 Matthews Dr., Canton, MS 39046-0529
The Presto Factory Service Department is equipped to service all PRESTO
PRESTO replacement parts are manufactured to the same exacting quality standards as PRESTO appliances and are engineered
specifically to function properly with its appliances. Presto can only guarantee the quality and performance of genuine PRESTO
parts. “Look-alikes” might not be of the same quality or function in the same manner. To ensure that you are buying genuine PRESTO
replacement parts, look for the PRESTO trademark.
appliances and supply genuine PRESTO parts. Genuine
PRESTO Limited Warranty
This quality PRESTO appliance is designed and built to provide many years of satisfactory
performance under normal household use. Presto pledges to the original owner that should
there be any defects in material or workmanship during the first year after purchase, we will
repair or replace it at our option. Our pledge does not apply to damage caused by shipping.
To obtain service under the warranty, return this PRESTO appliance, shipping prepaid, to
the Presto Factory Service Department. When returning a product, please include a description of the defect and indicate the date the appliance was purchased.
We want you to obtain maximum enjoyment from using this PRESTO appliance and ask
that you read and follow the instructions enclosed. Failure to follow instructions, damage
caused by improper replacement parts, abuse or misuse will void this pledge. This warranty
gives you specific legal rights, and you may also have other rights which vary from state to
state. This is Presto’s personal pledge to you and is being made in place of all other express
warranties.
NATIONAL PRESTO INDUSTRIES, INC.
Eau Claire, WI 54703-3703
U.S. Patents 6,719,576; 6,527,570; D575,098 Form 72-743A
11
 Loading...