

Page 1
1PRESTIGIO P371
ENG
Prestigio P371
Users manual
1. IMPORTANT INFORMATION
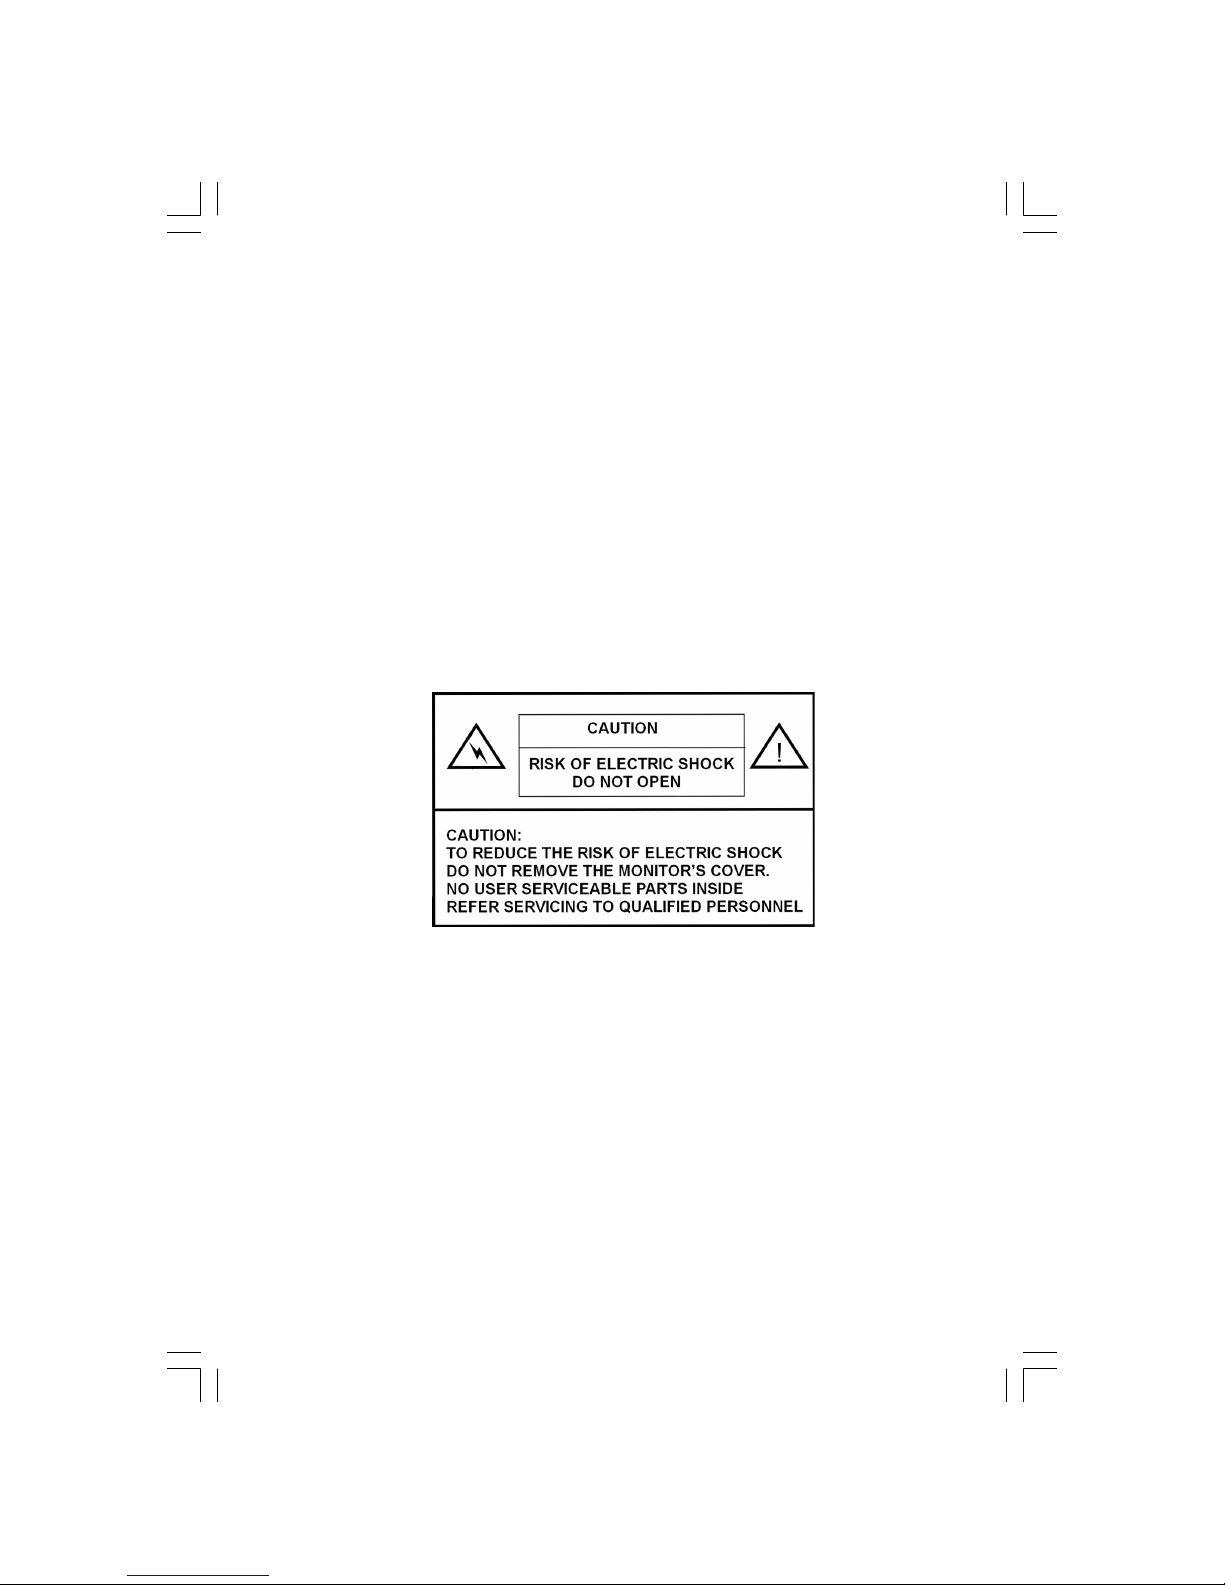
WARNING:
TO PREVENT FIRE OR SHOCK HAZARD, DO NOT EXPOSE THIS MONITOR TO LIQUIDS OR MOISTURE.
HIGH VOLTAGE EXISTS ON THIS MONITOR. DO NOT REMOVE THE MONITOR’S COVER.
CAUTION:
1. Keep Monitor away from excessive dust, high temperature, moisture or direct sunlight.
2. Use well ventilated area and do not cover ventilation openings.
3. Unauthorized modification to this equipment, substitution or the use of an unshielded connecting
cable may cause excessive interference.
4. When the monitor is not in use disconnect it from the mains power supply.
5. If the picture display is abnormal in any way, disconnect from the main power by turning the power
switch OFF. Check and ensure the installation is correct. Then turn the POWER switch back ON.
Page 2

2 PRESTIGIO P371
ENG
2. SAFETY INSTRUCTIONS
Prior to using this product, please ensure that you have carefully read and understood all the procedures outlined in this
user’s manual.
I. Read all of these instructions and save for later use.
II. Follow all warnings and instructions marked on the product.
III. Disconnect the monitor from the main power supply before you clean it. Do not use liquid or aerosol cleaners. Use
only a slightly damp cloth for cleaning.
IV. Do not use this product near water or moisture.
V. Do not press hard on the LCD panel surface, as this may scratch the LCD surface. Oils from skin contact can mark or
stain the LCD screen, so use caution when handling it. If it becomes marked or stained, clean it with a soft, lint free
cloth.
Dust: Wipe off lightly with a soft cloth. Do not press hard or rub.
Dirt: Wipe off gently with a damp soft cloth. Only use isopropyl or ethanol alcohol if dirt is difficult to remove.
Be careful not to splash the monitor with any water or solvent to prevent liquid from penetrating the LCD panel.
Do not use the solvents such as ketone (acetone,etc.) and aromatics ( xylene , toluene ,etc.).
If any type of liquid is left on the monitor surface for a long time, it may cause partial deformation or discoloring.
Wipe off immediately.
Do not allow oil to adhere to the display, since this may cause marks or stains.
VI. Do not place this product on an unstable cart, stand or table. The product may fall causing serious damage to the
monitor.
VII. Slots and openings in the cabinet located at the back and/or underneath the monitor are for ventilation purposes.
To ensure reliable operation of the product and to protect it from overheating, these openings must not be
blocked or covered. The monitor should never be placed on a bed, sofa, rug, or other similar surface which could
cause blockage of ventilation. This monitor should never be placed near or over a radiator or heat source. This
monitor should not be placed in an enclosed space unless proper ventilation is provided.
VIII. This product should be operated from the type of power source indicated on the marked label in back of the
monitor.
IX. Do not place any heavy items on the power cord. Do not put this product where people will walk on or trip on the
cord.
X. If an extension cord is used with this product, ensure that the total ampere ratings of the products connected to
the extension cord do not exceed the extension cord ampere rating. Also ensure that the total amperes of all
products connected to the mains outlet do not exceed 15 amperes.
XI. Never insert objects of any kind into this product through the ventilation slots as they may touch dangerous
voltage points or short out parts that could result in a risk of fire or electric shock. Never spill any kind of liquid
on the product.
XII. Do not attempt to service this product yourself; opening or removing covers may expose you to dangerous
voltage points or other risks. Refer all servicing to qualified service personnel.
XIII. Disconnect this product from the main power supply and refer servicing to qualified service personnel under the
following conditions:
A If the power cord or plug is damaged or frayed.
B If liquid has been spilled onto or into the product.
C If the product has been exposed to liquid or water.
D If the product does not operate normally when the operating instructions are followed, adjust only those controls that
are covered by the operating instructions since improper adjustment of other controls may result in damage and will often
require extensive work by a qualified technician to restore the product to normal operation.
Page 3

3PRESTIGIO P371
ENG
E If the product has been dropped or the cabinet has been damaged.
F If the product exhibits a distinct change in performance, which may indicate a need for service.
XIV. To prevent glare on the screen, set the LCD panel perpendicular to the light source.
3. PRODUCT SPECIFICATIONS
LCD panel
Display Area
17.0” viewable
Brightness
250cd /m
2
Contrast ratio
500:1
Response Time
8 ms
Viewing angle
140o horizontala, 130o vertikala
Video Signal
Analog
RGB analog
Frequency
FH: 31-82 KHz FV:50-75 Hz
Max. Resolution
1280*1024 @75Hz
Input Connector
Analog RGB
15-pin mini D-sub
Power
AC Jack
Power
Voltage
AC 100-240V
Consumption
VESA-DPMS; 60W (max.)
OSD Language
English, Francais, Italiano, Japanese, Traditional Chinese, Simplified Chinese, Deutsch, Espanol
Operating Conditions
Temperature
32oF to 104oF (0oC to 40oC)
Humidity
30-80% (non-condensing)
Safety & EMI
UL, CE, FCC
*Specifications are subject to change
Page 4

4 PRESTIGIO P371
ENG
APPLICATION VIDEO TIMING
Resolution
720 X 400
640 X 480
640 X 480
640 X 480
640 X 480
800 X 600
800 X 600
800 X 600
832 X 624
1024 X 768
1024 X 768
1024 X 768
1024 X 768
1152 X 864
1152 X 870
1280 X 1024
Horizontal
Frequency(KHz)
31.47(N)
31.47(N)
35.00(N)
37.86(N)
37.50(N)
37.88(P)
48.08(P)
46.86(P)
49.72(N)
48.36(N)
56.48(N)
60.02(P)
60.24(N)
67.50(P)
68.68(N)
64.00(P)
Vertical
Frequency(Hz)
70.08(P)
60.00(N)
67.00(N)
72.80(N)
75.00(N)
60.32(P)
72.19(P)
75.00(P)
74.55(N)
60.00(N)
70.10(N)
75.00(P)
74.93(N)
75.00(P)
75.06(N)
60.00(P)
Remark
DOS
DOS
Macintosh
VESA
VESA
VESA
VESA
VESA
Macintosh
VESA
VESA
VESA
Macintosh
VESA
Macintosh
VESA
Page 5
5PRESTIGIO P371
ENG
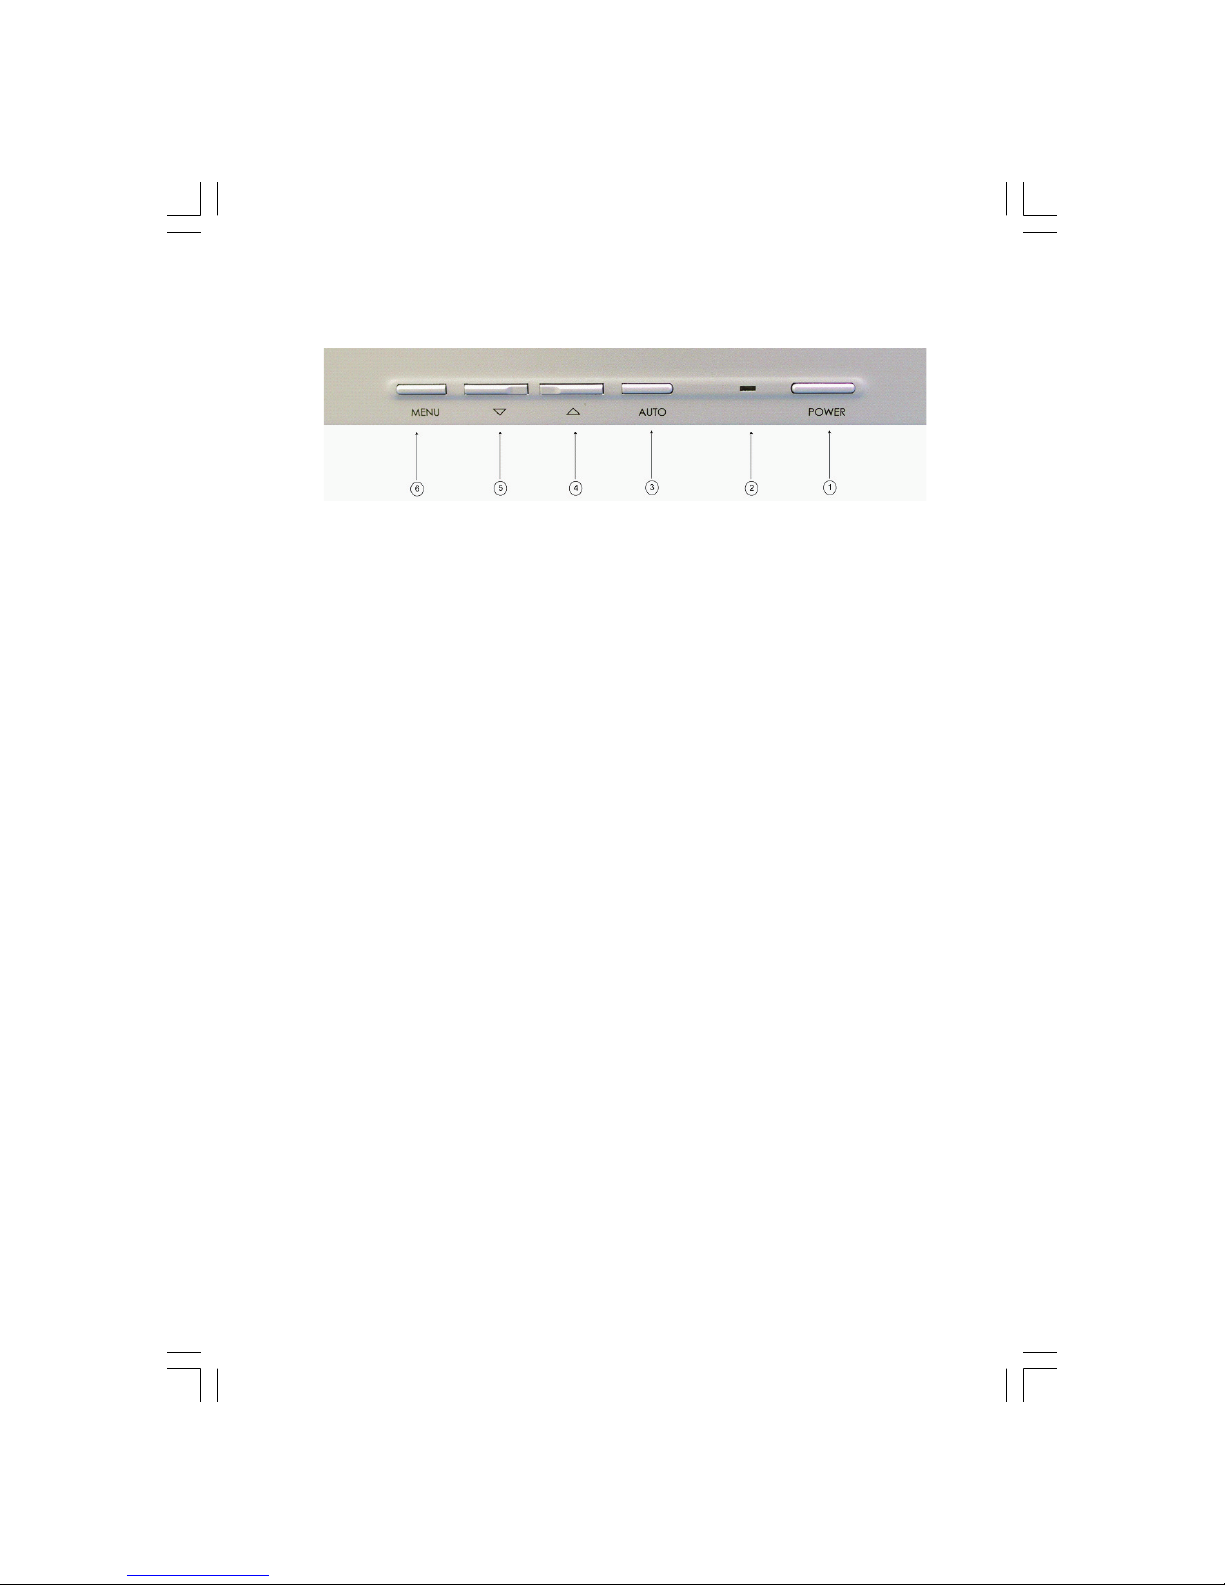
4. MONITOR BUTTON OVERVIEW
1. POWER
Turns power on/off from standby mode. There is a 3-second wait between on/off cycles.
2. LED
Indicates the status of monitor operation.
Green - Normal - Power on.
Red - Standby
The LED will illuminate RED in color if the PC is shut-off but the main power cord is plugged into the back of the unit.
Not Illuminated - No AC Power detected
3. AUTO BUTTON “AUTO”
This function is for Auto Adjust.
4~5. /\ \/ (Adjust the value)
Use both buttons to toggle between selections in the On Screen Display (OSD), or to adjust settings (i.e. volume, brightness,
etc).
6. MENU “MENU”
Use the MENU key to display the OSD (On-Screen Display) menu of monitor.
Page 6

6 PRESTIGIO P371
ENG
5. BACK PANEL AND CONNECTORS
1. RGB input (PC in)
The D-Sub 15-pin port is for RGB analog signal input.
3 .AC
The AC port is for power cord.
Page 7

7PRESTIGIO P371
ENG
6. INSTALLATION PROCEDURE
I. Make sure that the PC and LCD monitor are both turned OFF.
II. Using the cables enclosed with the monitor, connect the video and audio output por ts of the PC to their
respective input ports on the monitor.
III. Connect the power cord to the por t of the monitor. Then plug the AC power cord to the AC power
source.
IV. Turn on the computer.
V. Push the power switch button located at the lower right on the underside of the monitor. The power
LED light indicates if the monitor is on.
VI. Install the desktop stand. As below:
Page 8

8 PRESTIGIO P371
ENG
7. ON SCREEN DISPLAY FUNCTIONS
The monitor function settings are accessed using the On-Screen Display (OSD). To access function settings, simply press
“MENU” on the front of the monitor to display “MENU”. Press the /\ or \/ buttons to choose items you wish to adjust, and
use “MENU” button to enter the sub-item.
Choose to enter the Sub-choice of a sub-item, and adjust its value by /\ or \/ buttons. The display will change its status
according to the adjustments you made. When the adjustment is done, press “AUTO” button until you exit the OSD setting
window.
VGA MODE – The screen of OSD when connected to PC
ITEM SUB-ITEM SUB-CHOICE
1.Auto Adjust
2. Luminance Brightness
Contrast
Exit
3.Geometry H. Position
V. Position
Pixel Clock
Phase
Exit
4. Color 9300
6500
5800
User Preset Red, Green, Blue, Exit
Exit
5. OSD H. Position
V. Position
OSD Timer
Exit
6. Language English, Deutsch, Francais, Espanol, Italiano, Simplified Chinese, Traditional Chinese,
Japanese
Exit
7. Recall Color Recall
Recall All
Exit
8. Miscellaneous Sharpness
Display Information
Exit
9. Exit
Page 9

9PRESTIGIO P371
ENG
1) Auto Adjust
It will return to Display Card of customer’s PC you choose the Auto Adjust function, the display status will return to the
original default settings. Please refer to the picture below:
2) Luminance
Press the MENU button to enter the OSD function menu. Use the /\ or \/ buttons to choose Luminance, and then press the
MENU button to enter the sub-menu for Brightness or Contrast settings. Press the /\ or \/ buttons to adjust the values. After
adjusting the sub-item, press the MENU button and then press the AUTO button to exit. Please refer to the picture below:
Press the /\ or \/ buttons to adjust the value of Brightness.
Press the /\ or \/ buttons to adjust the value of Contrast.
3) Geometry
Press the MENU button to enter the OSD function menu. Use the /\ or \/ buttons to choose Geometry, and then press the
MENU button to enter one of the sub-menus: H Position, V Position, Pixel Clock, or Phase settings. After adjusting the subitem, press the MENU button and then press the AUTO button to exit. Please refer to the picture below:
Page 10

10 PRESTIGIO P371
ENG
Press the /\ or \/ buttons to adjust the value H. Position.
Press the /\ or \/ buttons to adjust the value of V. Position.
Press the /\ or \/ buttons to adjust the value of Pixel Clock.
Press the /\ or \/ buttons to adjust the value of Phase.
4) Color
Press the MENU button to enter the OSD function. Use the /\ or \/ buttons to choose Color, then press the MENU button
to enter one of the sub-menus: 9300, 6500, 5800, or User Preset settings. After adjusting the sub-item, press the MENU
button and then press the AUTO button to exit. Please refer to the picture below:
Page 11

11PRESTIGIO P371
ENG
If you choose the User Preset sub-menu, press the MENU button to enter the sub-item menu. Adjust the Red, Green, and
Blue values and then press the AUTO button to exit. Please refer to the picture below:
Press the /\ or \/ buttons to adjust the value of Red.
Press the /\ or \/ buttons to adjust the value of Green.
Press the /\ or \/ buttons to adjust the value of Blue.
Page 12

12 PRESTIGIO P371
ENG
5) OSD
Press the MENU button to enter the OSD function menu. Use the /\ or \/ buttons to choose OSD, and then press the MENU
button to enter one of the sub-items: H Position, V Position, or OSD Time settings. After adjusting the sub-item, press the
MENU button and then press the AUTO button to exit. Please refer to the picture below:
Press the /\ or \/ buttons to adjust the value of OSD H. Position.
Press the /\ or \/ buttons to adjust the value of OSD V. Position.
Press the /\ or \/ buttons to adjust the value of OSD H. Position.
6) Language
Press the MENU button to enter the OSD function menu. Use the /\ or \/ buttons to choose the language you need. When
you have chosen your language, press the MENU button and then press the AUTO button to exit. Please refer to the picture
below:
Page 13

13PRESTIGIO P371
ENG
7) Recall
Press the MENU button to enter the OSD function menu. Use the /\ or \/ buttons to choose Recall, and then press the MENU
button to enter one of the sub-items: Color Recall or Recall All settings. After adjusting the sub-item, press the MENU button
and then press the AUTO button to exit. Please refer to the picture below:
If you choose Color Recall, you will then have to choose Yes or No. Choosing Yes will make the color settings reset to the
factory default values.
If you choose Recall all, you will then have to choose Yes or No. Choosing Yes will return all the settings of the display values
to the original default values.
8) Miscellaneous
Press the MENU button to enter the OSD function. Use the /\ or \/ buttons to choose Miscellaneous, and then press the MENU
button to enter one of the sub-items: Sharpness or Display Information settings. After adjusting the sub-item, press the
MENU button and then press the AUTO button to exit. Please refer to the picture below:
Choose the sharpness setting from 1~5.
Page 14

14 PRESTIGIO P371
ENG
Enter the Display Information to see the resolution and frequency settings of the monitor.
9) Exit
Choose Exit to exit the OSD menu at any time.
Page 15

15PRESTIGIO P371
ENG
8. TROUBLESHOOTING
Before calling for service, check the information in this section to see if you can remedy any problems by yourself. If you
need assistance, please call the dealer where you purchased the LCD monitor.
Problem Cause Remedy
No picture 1. Is the power cord disconnected? 1. Connect power cord.
2. Is the power switch on? 2. Turn the power switch on.
3. Is the signal cable properly 3. Connect the signal cable properly.
connected?
4. Is the monitor in power saving 4. Press any key on your keyboard or
mode? move your mouse to activate the
computer
Color is abnormal 1. Is the monitor’s video cable 1. Connect cable properly.
properly connected?
Picture runs/Distorted 1. Is the signal cable properly 1. Connect the signal cable properly.
horizontal flickering connected?
2. Is the input signal out of 2. The unit will not view signals which are
the required frequency range? within the frequency range. It is
important that the video refresh rate be
set to the optimum (70-75Hz is optimum,
Verify your settings by right clicking on
your windows desktop and clicking
“properties”, then click on “settings”, there
you can adjust the screen resolution and
to adjust the refresh rate, click
“Advanced” and then click on the
“monitor” tab to adjust.
Display image is 1. Are Brightness and Contrast set 1. Adjust brightness and contrast to your
too dark too low? preference.
Display image is 1. Does the Horizontal or Vertical 1. Re-adjust to your preference.
too large or small control need adjusting?
Page 16

16 PRESTIGIO P371
ENG
9. ACCESSORIES
VGA CABLE X 1
POWER CORD X 1
USER’S MANUAL X 1
 Loading...