

Page 1

www.prestigio.com
PRESTIGIO LIBRETTO
e-Book Reader PER307
Page 2

7’ eBook Reader
2
Table of Contents
Disclaimer
3
Introduction
3
Package Content
3
Getting Started
4
Charging the Reader
5
Power On/Off, Reset Device, Insert MicroSD
6
Main Menu
7
History
8
Books
11
Music
14
Video
20
Photo
22
Explorer
24
User Manual
25
Settings
27
Creating an Adobe account
30
Installing Adobe Digital Editions (ADE)
31
Authorizing PC and Reader
33
Transferring DRM e-books to Reader
34
Product Specifications
35
Technical Support and Warranty Information
35
Copyright and Trademark Notice
36
Page 3

7’ eBook Reader
3
Disclaimer
All the information, design and specifications contained in this manual were at the
time of publication. However, as the product is under development and upgrading,
the final device may have a slightly different appearance or modifications in
functionality than presented in this manual.
Introduction
Prestigio Libretto PER307 is an e-book reader with full color TFT display screen 19
cm (7”) diagonal and resolution of 800*600.
PER307 supports e-books encrypted with Adobe DRM, as well as FB2, HTML, etc.
Support of 17 languages including English, Russian, Greek, Polish, German, etc.
Includes audio and video playback and a photo viewer.
2GB built in flash memory.
Inbuilt speakers.
Package Content
1. E-book Reader
2. USB cable
3. Leather Cover
4. User guide in multiple languages
5. International warranty card
Page 4
7’ eBook Reader
4
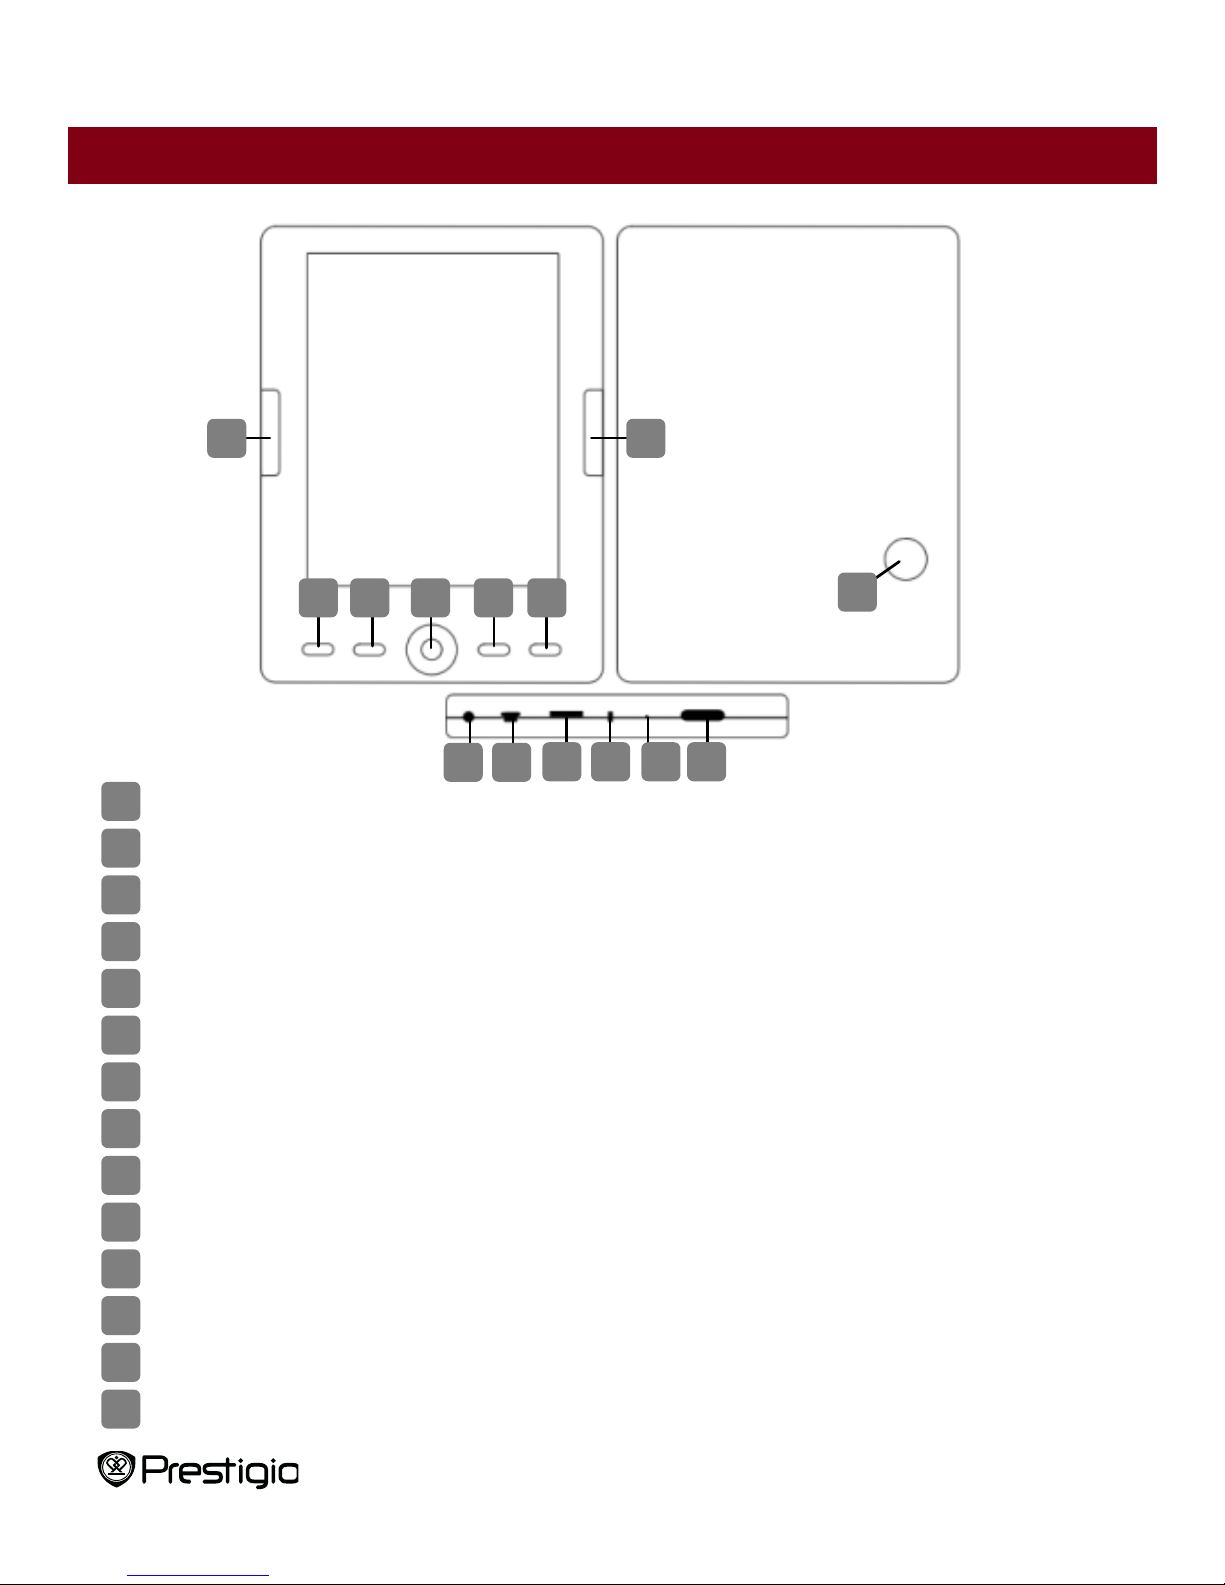
Getting Started
Previous Page
Skip to previous page, Volume down
Next Page
Skip to next page, Volume up
Menu Button
Enter the menu options
Zoom Button
Zoom in/out contents on screen
Navigation Pad
Navigate through all options
“OK”; Play/ Pause
“OK” Button; start/stop playback
Return/Cancel Button
Return to previous menu/Cancel action
Built in Speaker
Produce sound
Headphone Jack
Insert headphones/earphones
USB Jack
Connect to the host PC USB port
MicroSD Card Slot
Insert a MicroSD card
Indicator Light
“Red” charging indicator
Reset button
Reset the device (not factory reset)
Power Button
Start/Shut down the device
14
13
12
11
10 9 8 7 6 5 4 3 2
1
1
5 4 3 6 7
9
11
14
2 8 12
10
13
Page 5
7’ eBook Reader
5
Getting Started
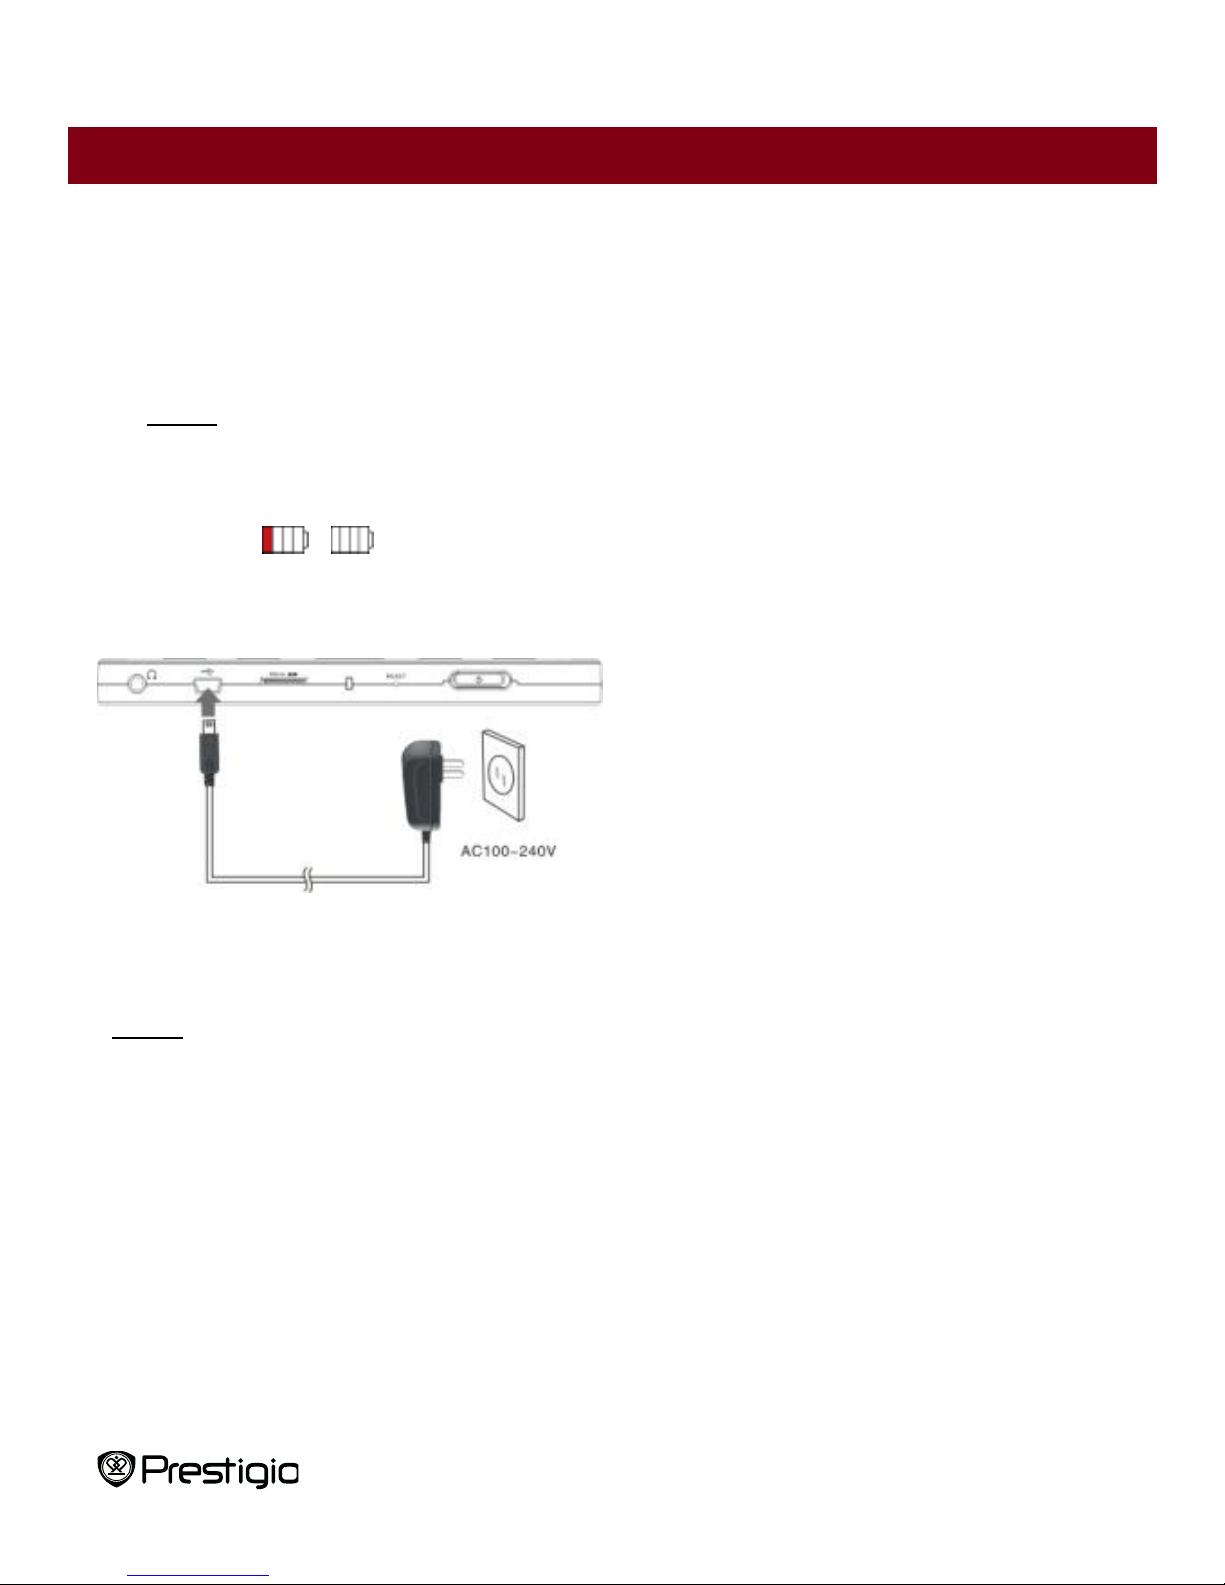
Charging the Reader
You need to charge the Reader prior to using it for the first time or when battery
power is low.
Note: It’s recommended to charge the battery for 8 hours before the first time
use. Normally it takes approximately 7 hours to fully charge the device.
Recharge the device as soon as possible when the battery is in low-power level
shown as . icon appears once the battery is fully charged.
You can charge the Reader by:
Inserting Mini USB connector to the
USB port on the device and
connecting power adapter to wall
socket for charging.
Connecting the host PC USB port
and the device with the included USB
cable to start charging.
Note: When charging through PC, you cannot operate the Reader. To operate the
reader during charging, click the Safely Remove Hardware icon on your desktop
with the Reader connected to PC. Click any button on the Reader to go from “USB
Connection” screen.
Switch the Reader to stand-by mode to speed up the charging process.
Page 6
7’ eBook Reader
6
Getting Started
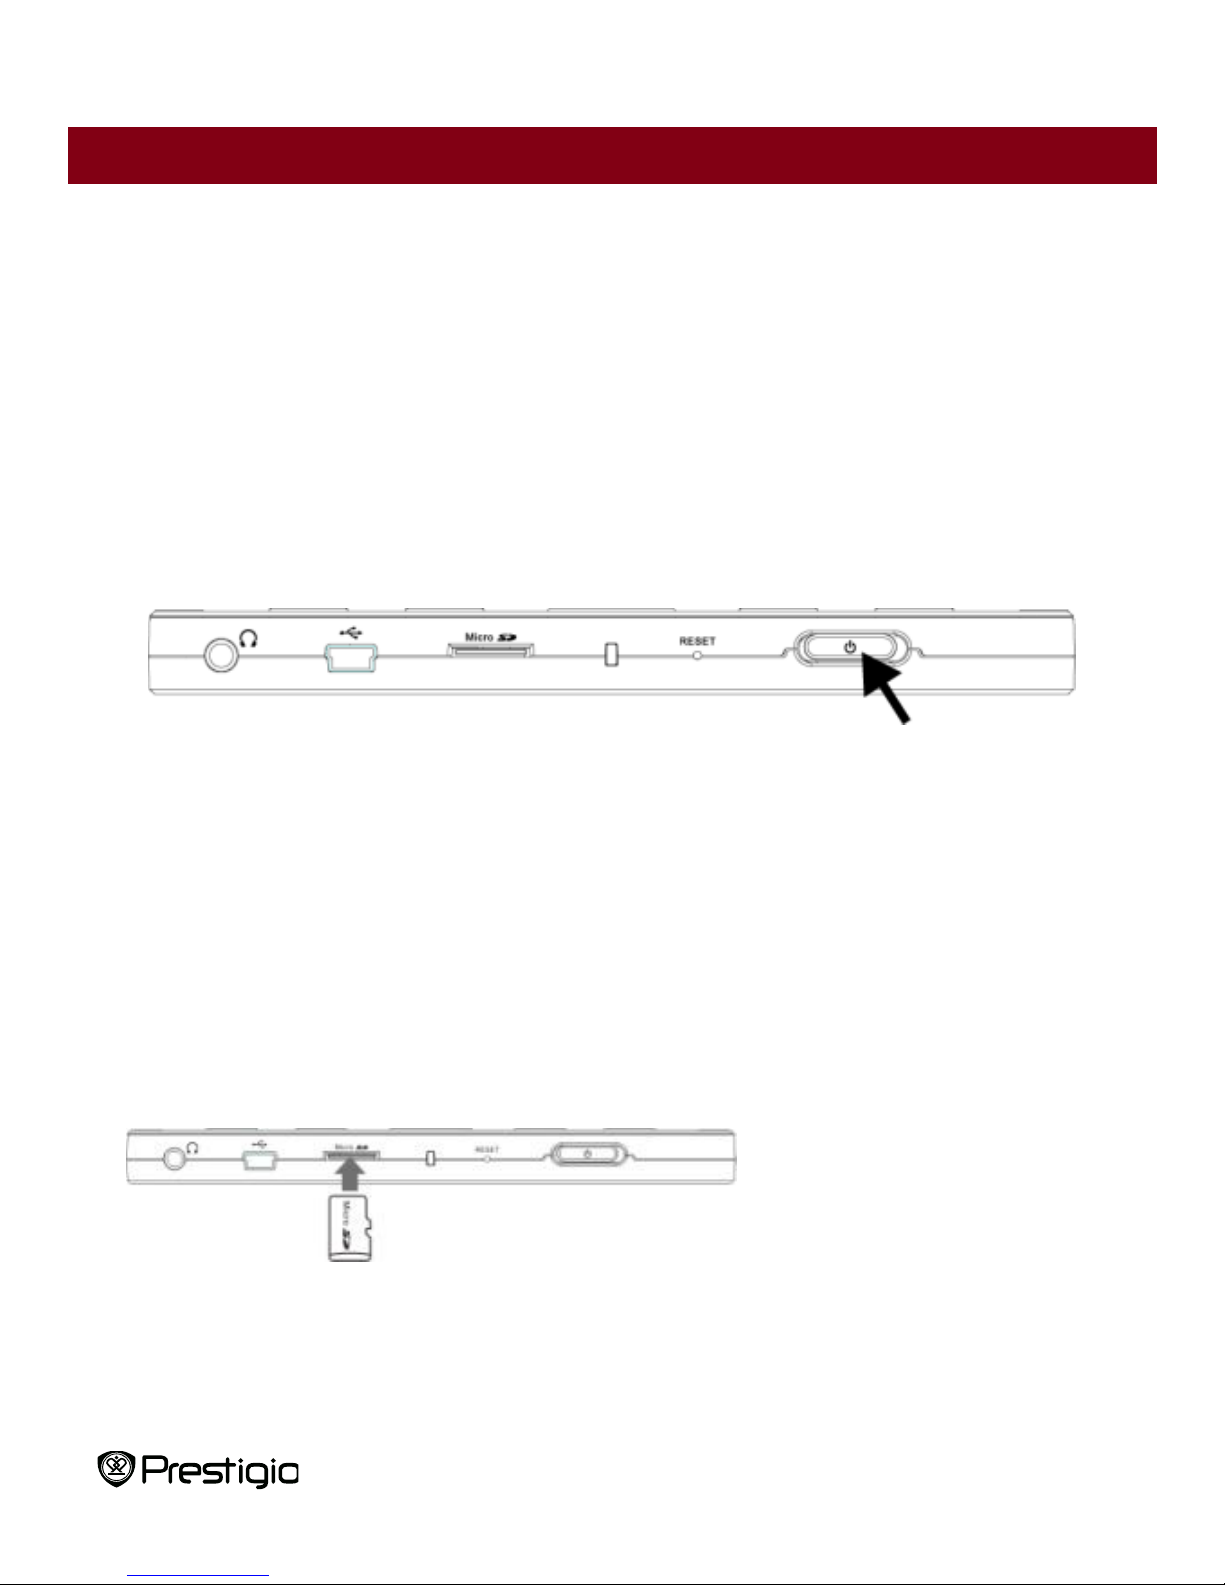
Power Reader On and Off
Press and hold the [Power] button for 5-6 seconds to turn on Reader - it will
automatically enter the main menu on Home screen after the start-up screen.
It may take a few moments for reader to turn on and load the content.
If Reader does not turn on, charging is required.
To turn off Reader, press and hold [Power] button for 3-4 seconds.
Restoring to Factory Default Settings
Reset the device by pressing reset button when device fails to start up or function
properly.
Using a micro SD Card (Not Included)
Insert micro SD card into
micro SD slot.
Page 7
7’ eBook Reader
7
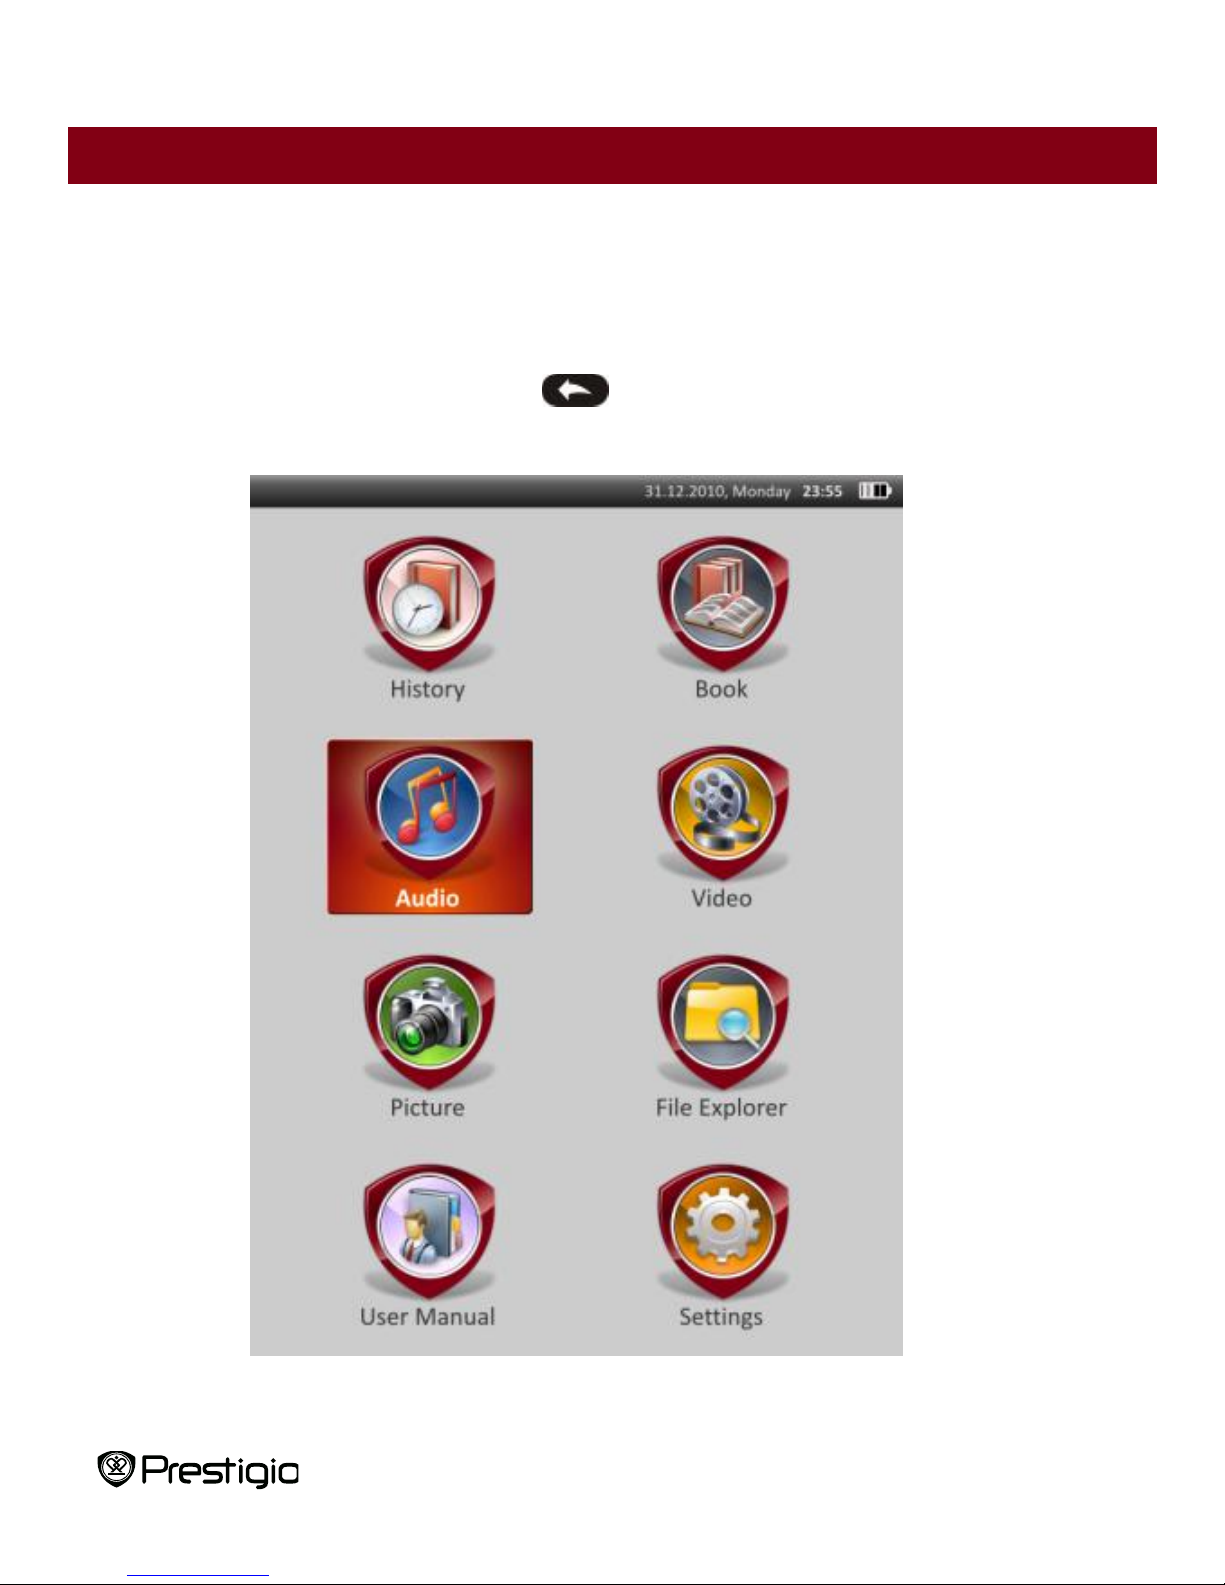
Main Menu
The main menu includes History, Book, Music, Video, Photo, Explorer, User
Manual, and Settings. Use the Navigation Pad to highlight the desired mode and
press “OK” button to confirm. Press to return to previous option.
Page 8
7’ eBook Reader
8
Main Menu: History
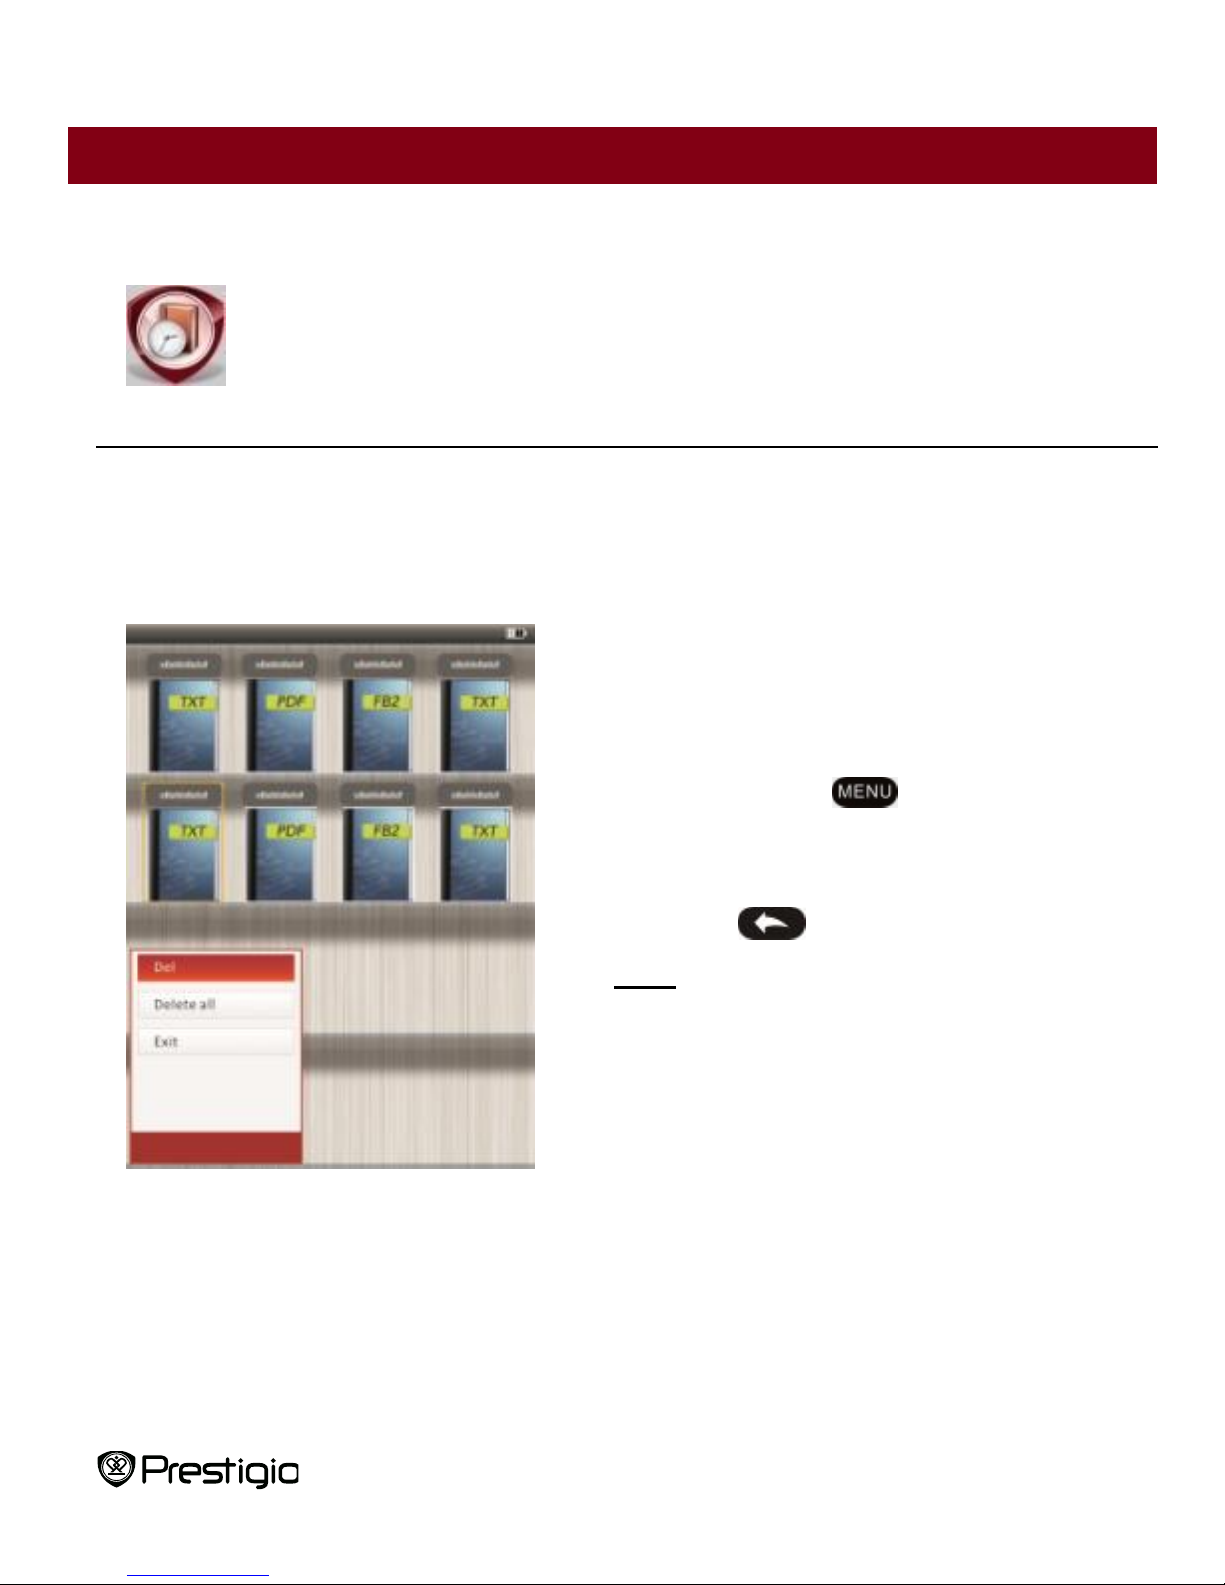
History
Files viewed in the past will be displayed on the screen. Press Navigation Pad to
navigate to History icon and press “OK” button to enter previously opened files list.
At the files list, press to pop up the option
menu. Highlight Del/Delete all and press “OK”
button to delete the history of current book or all
books. Press or Exit to cancel.
Note: Files that were saved on the MicroSD
card will not be displayed in History list if the
MicroSD card is removed.
Page 9
7’ eBook Reader
9
Main Menu: History
Use the Navigation Pad to select the desired files or press Page Jump
Buttons to turn pages if available. Press “OK” button to open file or press
to exit the mode.
During text playback, press Page Jump Buttons or Navigation Pad to turn
pages. Press to zoom the contents in/out. Use Navigation Pad to select
the Font Size (S, M, L and XL) and press “OK” button to confirm.
Reading books while playing a track. Please refer to Music part for more
instructions.
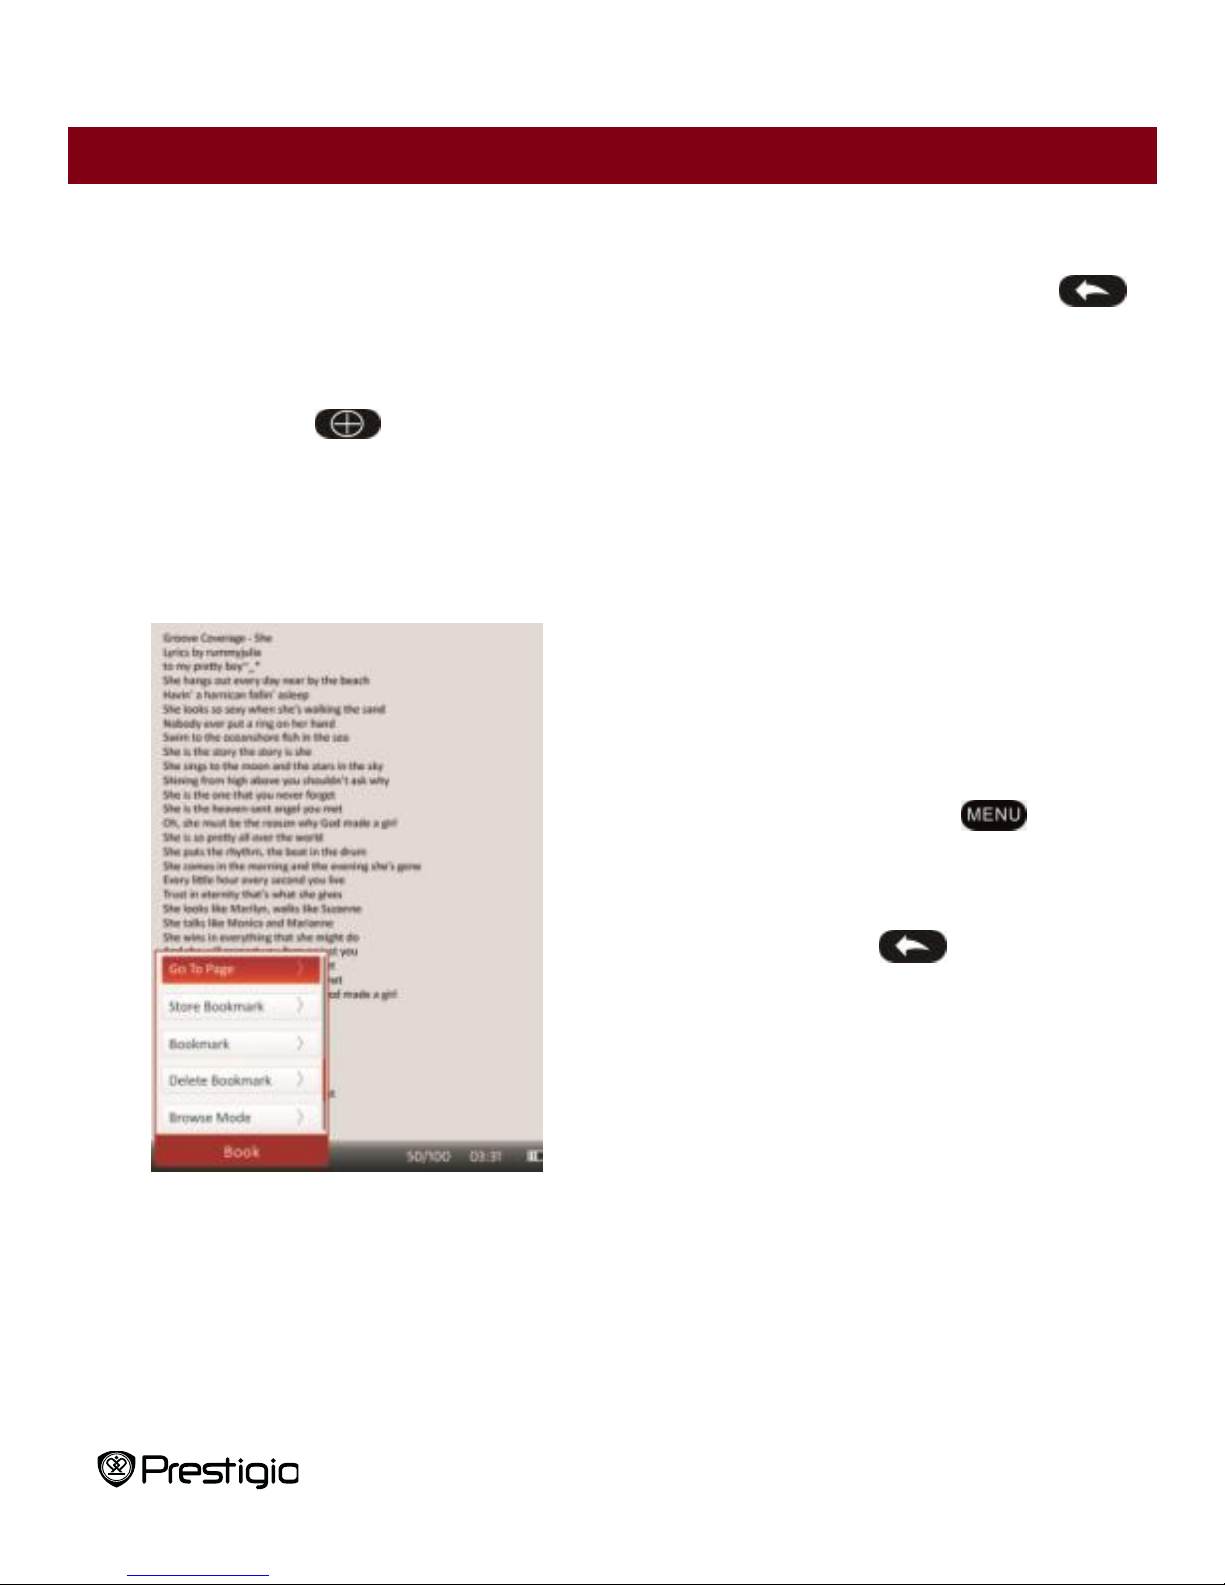
During text playback, press to enter
option menu. Use Navigation Pad to select
the desired item and press “OK” button to
enter settings. Press to cancel. 11
different items’ functions are available
respectively as follows.
Page 10

7’ eBook Reader
10
Main Menu: History
Item
Description
Go To Page
Press the Navigation Pad to select desired page. Press
“OK” button to confirm or press to cancel.
Save bookmark
Press “OK” button to save the address of the current
page. 5 items are available.
Open bookmark
Highlight the item and press “OK” button to open the
bookmark.
Delete bookmark
Highlight the desired item and press “OK” button to
delete the bookmark. It will disappear from Save
bookmark and Open bookmark.
Browse mode
Highlight Auto mode or Manual mode and press “OK”
button to confirm.
Auto flip
Highlight desired item and press “OK” button to set up
the interval (10s, 15s, 20s, 25s and 30s) of Auto mode.
Brightness
Highlight desired item and press “OK” button to adjust
brightness.
Volume
adjustment
Press / of Navigation Pad to adjust volume level.
Font color
Highlight desired item and press “OK” button to select
the font color.
Code menu
It’s only available for files in TXT format.
Remove Enter Set
Enable/disable line return function.
Page 11
7’ eBook Reader
11
Main Menu: Books
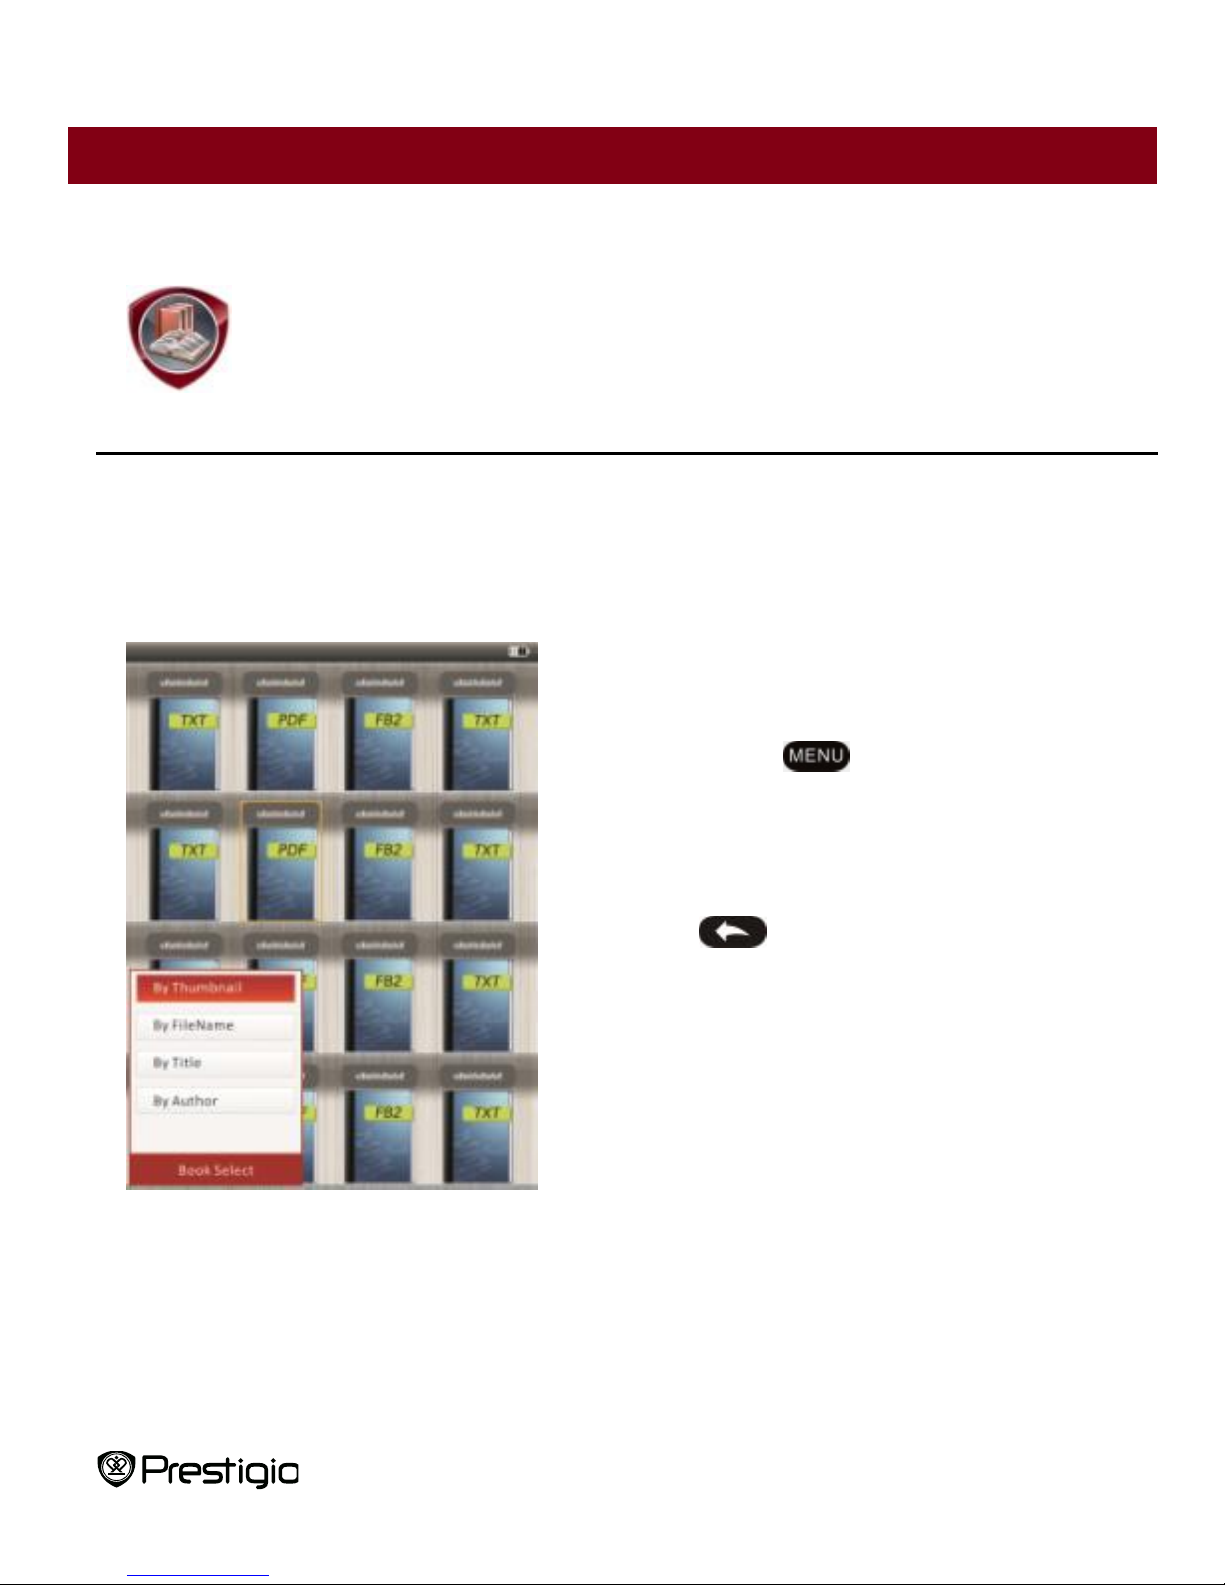
Books
Libretto PER307 supports 6 kinds of e-book formats, including .txt, html, fb2, pdb,
epub, and pdf. Please make sure it is NOT a DRM protected file, which cannot be
read by the E-reader.
Press Confirm Button to enter Book
mode. Press to select the desired
sorting method (By Thumbnail /File Name
/ Title / Author). Highlight the item and
press “OK” button to enter books list.
Press to exit Book mode.
NOTE:
Highlight Flash or SD Card and Press
“OK” button to enter books list if available.
Page 12

7’ eBook Reader
12
Main Menu: Books
Use / of Navigation Pad to select the desired file in the books list or press
Page Jump Buttons to turn pages if available. Highlight the desired file and
press “OK” button to open file.
During text playback, press Page Jump Buttons or Navigation Pad to turn
pages. Press to zoom in/out the contents on screen. Press the Navigation
Pad to select the Font Size (S, M, L and XL) and press “OK” button to confirm.
Note: When the texts in PDF-format are z, following operations can be
performed.
Item
Description
To Page
Page fits screen size. (Default Settings)
To Width
Page fits width of window.
To height
Page fits height of window.
S
The scale switches in S size.
M
The scale switches in M size.
L
The scale switches in L size.
Selection
ZOOM
To select desired section of page. If you select the function,
+ appears at the edge of the screen. Press left/right button
to select desired section and press “OK” button to confirm.
Press to cancel.
During text playback, press to enter options menu. 10 different items are
available within the section. Press Navigation Pad to select the item and press
“OK” button to confirm. Press to cancel.
Page 13

7’ eBook Reader
13
Main Menu: Books
Item
Description
Information
Display technical information of the current book.
Catalog
The book index information is displayed. Highlight desired
item and press “OK” button to confirm.
NOTE:
The Catalog function is only available with files in PDF
and EPUB formats with index information
Note: Please refer to History part for more detailed instructions of other items.
Reading books while playing a track. During music playback, press to
enter background music mode, in which you can use the device with music
playing. Press to display play bar and press it again to pause /resume
playback any time. Press / of Navigation Pad to adjust volume level. Press
/ of Navigation Pad to skip to previous/next track. Press to exit the
menu.
Page 14

7’ eBook Reader
14
Main Menu: Music
Music
Use the Navigation Pad to select the icon and press “OK” button to enter the
mode. The music list will be displayed. It supports WMA, AAC, WAV and OGG files’
formats only.
Note: Music files saved on micro SD card are also displayed in the list.
Item
Description
Music play/
Resume play
Currently played track.
All music
List of all tracks.
Artist
The album list of artists.
Album
The track list of the album.
Genre
The artist list in the same genre.
My favorites
The favorite tracks list.
Directories list
Files list sorted by Flash and SD Card.
Break point memory
3 last played tracks.
Updating media
library
To update media library.
Page 15

7’ eBook Reader
15
Main Menu: Music
Highlight Music/Resume Play to enter current playback screen.
To play the lists of All Music, Artist, Album, My favorites, Genre and
Directories List, press Navigation Pad to select desired track or press Page
Jump Buttons to turn pages if available, and then press “OK” button to enter
playback screen. The playback will be restarted even if a track is being played.
Highlight Break point memory and press “OK” button to resume playing the
latest 3 tracks. Highlight Updating media library and press “OK” button to
update media library.
Press to add music folder or music
file to My Favorites. Use Navigation Pad
to highlight Yes and press “OK” button to
confirm.
Page 16

7’ eBook Reader
16
Main Menu: Music
Press to pop up the options menu.
Highlight Delete/Delete All and press “OK”
button to delete current music file or all files
in My Favorites.
Page 17

7’ eBook Reader
17
Main Menu: Music
On the playback screen, the following operations can be performed.
1. Press / of Navigation Pad to adjust volume level. Press / of Navigation
Pad to skip to previous/next track. Press to pause /resume playback.
Press and hold / of Navigation Pad to rewind/go forward. Press to
exit playback screen.
NOTE:
Fast forward/rewind speed varies, depending on the length of the track.
Page 18

7’ eBook Reader
18
Main Menu: Music
2. Press to enter Music Settings as follows. Use Navigation Pad to
highlight item and press “OK” button (repeatedly) to confirm. Press to exit
settings.
Item
Description
Repeat Settings
Play modes’ settings.
Play Settings
Play orders’ settings.
Microsoft Sound
Sound quality settings.
Sound select
Equalizer settings.
My music mode
settings
User-customizable sound settings. To edit the sound
settings, press / of Navigation Pad to select the
band (5 bands: 60Hz to 6kHz) and press / of
Navigation Pad to select the sound level (7 levels: 6 to +6). Repeat this step to set the sound level of
every band. Highlight Yes and press “OK” button to
confirm.
Note: The equalizer My sound is subject to
change according to adjusted music mode settings.
Screen display
settings
Synchronized Lyrics display. Make sure lyric files are
imported to the device. It supports LRC format only.
Page 19

7’ eBook Reader
19
Main Menu: Music
It is possible to read books (or view pictures) while playing a track. During music
playback, press to enter background music mode, in which you can use
the device with playing music. Press to display play bar and press it again
to pause /resume playback any time. Press Navigation Pad to adjust volume
level and skip to previous/next track. Press to exit the menu.
Note: It is also available in other modes except video playback. Press to
pause /resume playback.
Page 20

7’ eBook Reader
20
Main Menu: Video
Video
Highlight Flash or SD Card and press “OK” button to confirm. It supports 3GP,
FLV, MP4, MPG, VOB, AVI, RM, RMVB, WMV and MOV formats.
Use / of Navigation Pad to highlight desired file or press Page Jump
Buttons to turn pages if available. Press “OK” button to enter playback screen.
Highlight “Yes” and press “OK” button to resume last playback when prompted.
Press to cancel.
On the playback screen, the following operations can be performed. The video
orientation is set to Horizontal (left). (Default Settings)
Page 21

7’ eBook Reader
21
Main Menu: Video
1. Press to pause /resume playback. Press / of Navigation Pad to skip
to previous/next video file. Press and hold / of Navigation Pad to rewind/
go forward quickly. Press / of Navigation Pad to adjust volume level.
2. Fast forward/rewind speed varies, depending on the length of the video.
3. Press to pop up the play bar.
4. Press to pop up options menu.
Subtitle Language
Choose subtitle language if available.
Select Time Play
Press “OK” button to confirm. Press / of
Navigation Pad to move the cursor. Press / of
Navigation Pad to adjust the value. Highlight Yes
and press “OK” button to confirm.
Full Screen/
Normal/Original
Highlight the item and press “OK” button to toggle
between 3 windows.
Page 22

7’ eBook Reader
22
Main Menu: Photo
Photo
The device supports only the following picture formats: JPEG, GIF, BMP and PNG.
All other file formats will not be displayed on purpose.
Press Navigation Pad to select Flash or SD Card and press “OK” button to
confirm. Use Navigation Pad to highlight desired file or press Page Jump
Buttons to turn pages if available. Press “OK” button to enter or press to
exit.
Press to zoom in/out the picture. Press Navigation Pad to scroll the
screen to display the rest of the page if available.
Note: This function only applies to .JPEG, .PNG and .BMP picture formats.
Page 23
7’ eBook Reader
23
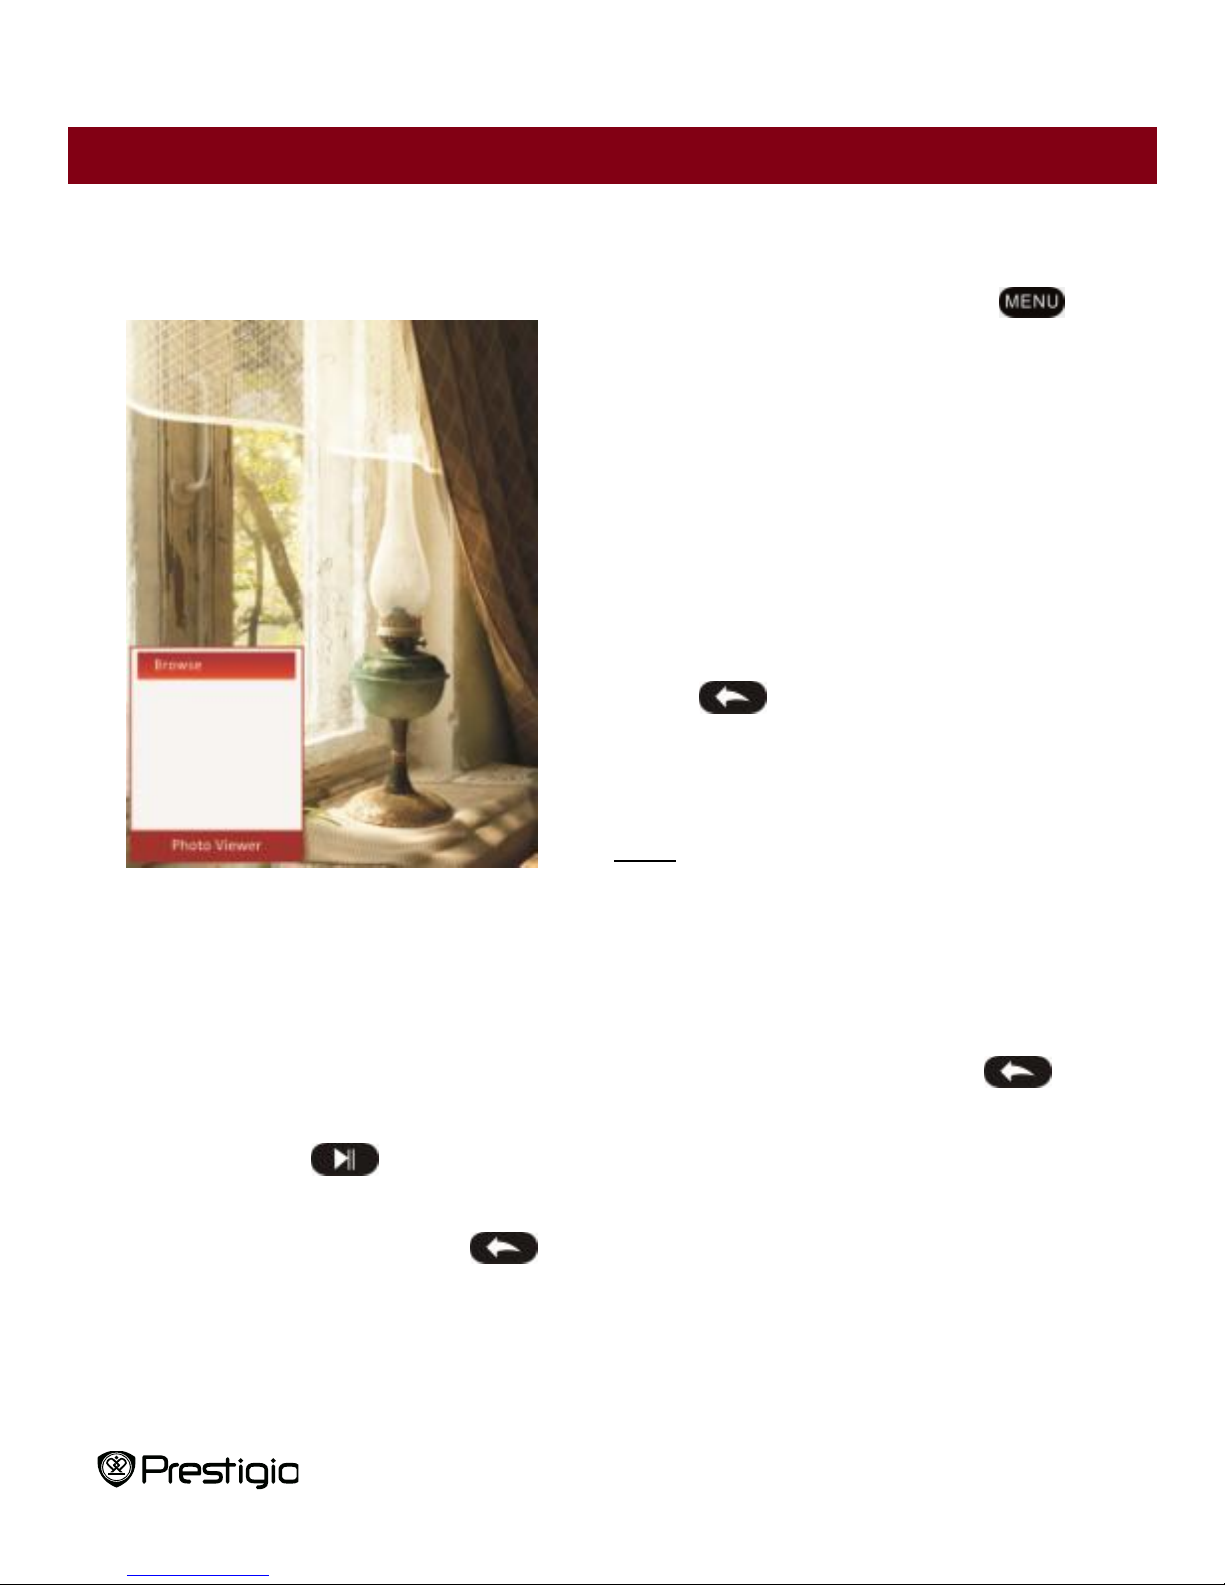
Main Menu: Photo
During picture playback, press to set
a slide show. Select <Slide> to start the
picture slideshow and click “OK” button.
Use Navigation Pad to choose available
time options between pictures. Options are
5, 10, 20 sec and “Turn Off”. When chosen,
click “OK” button.
Highlight Close and press “OK” button to
disable the function.
Press to exit slide show.
Note: It may take time to display a picture if
its size is large.
Screen orientation changes automatically from Portrait to Landscape with
rotation of the device (360° rotation is available).
Viewing pictures while playing a track. During music playback, press to
enter background music mode, in which you can use the device with playing
music. Press to display play bar and press it again to pause /resume
playback any time. Press Navigation Pad to adjust volume level and skip to
previous/next track. Press to exit the menu.
Page 24

7’ eBook Reader
24
Main Menu: Explorer
Explorer
Select file of Flash or SD Card and Press “OK” button to enter. All files in flash or
SD Card are in the list.
Use Navigation Pad to select the desired file or press Page Jump Buttons to
turn pages. Press “OK” button to enter.
Highlight the desired file and press to
delete current file from flash or SD card.
Highlight Yes and press “OK” button to
confirm. Press to cancel.
Note: Only a single file but not the whole
folder can be applied to this function.
Page 25

7’ eBook Reader
25
Main Menu: User Manual
User Manual
Included with the device are the Quick Start Guide and this PDF-format User
Manual. This PDF-format User Manual can be browsed on both your computer and
the device.
1. Double click on the drive letter of the device, and then select the User Manual to
start Adobe Reader and open the User Manual. For details on how to use Adobe
Reader, refer to Adobe Reader Help.
2. From main menu, highlight the icon and press “OK” button to browse this User
Manual on the device.
Press Page Jump Buttons or Navigation Pad to turn pages.
To zoom in/out the content, press to pop up options menu. Highlight the
item and press “OK” button to confirm.
Page 26

7’ eBook Reader
26
Main Menu: User Manual
Item
Description
To Page
Page fits screen size. (Default Settings)
To Width
Page fits width of window.
To height
Page fits height of window.
S
The scale switches in S size.
M
The scale switches in M size.
L
The scale switches in L size.
Selection
ZOOM
To select desired section of page. If you select the function,
+ appears at the edge of the screen. Press left/right button
to select desired section and press “OK” button to confirm.
Press to cancel.
Note: Press Navigation Pad to scroll the screen if available.
During text playback, press to enter options menu. 10 different items are
available within the section. Use Navigation pad to select the item and press
“OK” button to enter. Press to cancel. Highlight Information to display
the brief technical information of the User Manual. Highlight Catalog and press
“OK” button to enter if available.
Note: Please refer to History part for more detailed instructions on the additional
8 items.
Screen orientation can be set to vertical/horizontal manually.
Page 27

7’ eBook Reader
27
Main Menu: Settings
Settings
From the main menu, press Navigation Pad to select Settings, and then press
“OK” button to enter Settings menu. Use Navigation Pad to select desired item
and press “OK” button to enter settings.
In the Settings menu, you can configure the following settings.
Display Settings
Backlight Time
To set backlight display time.
Brightness
To adjust brightness.
System settings
System recover
Highlight Yes and press “OK” button to restore the
device to factory default settings.
Key Lock Time
Lock the device in set time. Press to unlock.
Erase Activation
Record
Highlight Yes and press “OK” button to erase
activation record.
Page 28

7’ eBook Reader
28
Main Menu: Settings
Language
Available options are “English”, “French”, “German”, “Russian”, “Polish”, “Italian”,
“Czech”, “Slovak”, “Greek”, “Serbian”, “Bulgarian”, “Romanian”, “Estonian”,
“Lithuanian”, “Latvian”, “Hungarian” and “Spanish”.
System Information
Display the technical information of the device.
Auto Shut Down Time
Turn off the device to minimize the power consumption of the battery. Select the
shut down time and press “OK” button to activate the function. Select Disable to
disable the function.
Note: When you connect the device to your PC/Notebook after shutting down,
it’s necessary to turn on the device again. The indicator lights up in red while battery
icon is not displayed. In this case, disconnect the USB cable from the device, then
turn on the device and reconnect it.
Time Settings
Set time and date displayed on the device.
Press / on Navigation Pad to move the cursor. Press / on Navigation Pad
to adjust the value. Highlight “Yes” and press “OK” button to confirm.
Page 29

7’ eBook Reader
29
Main Menu: Settings
Note: The following format for the time and date settings
Time Setting:
HH
Hour
MM
Minute
Date setting:
YY
Year
MM
Month
DD
Date
Calendar
Display the calendar. Press Navigation Pad to select the day. Press Page Jump
Buttons to skip to particular year.
Screen Orientation
Highlight Auto/Off to activate/disable the screen rotation.
Page 30

7’ eBook Reader
30
Importing Content
Authorizing PC and Reader
The Reader supports USB Mass Storage Device function.
To import contents (e-books, video, audio, photo, etc) into the reader, connect
the reader to PC via supplied USB cable.
Upon successful connection to PC, the reader will enter USB mode and all the
operations will be halted.
Go to [My Computer], double click on the reader’s removable disk to open.
Perform normal file management operation like other USB devices.
Importing DRM Contents
The Reader supports Adobe DRM contents. Adobe Digital Editions (ADE) is
required.
Installing Adobe Digital Editions (ADE)
The ADE installer is preloaded into the Reader.
Connect the Reader to PC via the supplied USB cable and open the reader as
removable disk.
Double click on the [digitaleditions_172] file to open the installer.
Alternatively, you can download the installer from
http://www.adobe.com/products/digitaleditions/#fp
Page 31

7’ eBook Reader
31
Importing Content
Installing Adobe Digital Editions (ADE)
For first time use you will need to get a free Adobe ID from Adobe website. Click
on the [get an Adobe ID online] link as illustrated:
Page 32

7’ eBook Reader
32
Importing Content
Installing Adobe Digital Editions (ADE)
Enter your e-mail address and complete the online form as instructed.
Page 33

7’ eBook Reader
33
Importing and Transferring Content
Authorizing PC and Reader
Upon registration, return to the ADE window. Enter the username and password
to activate your Adobe account.
After activation, connect the Reader to PC. ADE will detect the Reader and you
are prompted to authorize the device.
After authorization, you will be able to find the Reader recognized in ADE as
shown below. Contents inside the Reader will be displayed in the right hand
windows.
You can now start downloading or buying e-books from online “E-book stores”
supporting Adobe DRM.
Purchased or downloaded e-books will be stored in [My Digital Editions] in [My
Documents].
Page 34

7’ eBook Reader
34
Importing and Transferring Content
Transferring DRM e-books to Reader
From ADE menu, click on [All Items] in the left hand column.
Items in [My Digital Editions] will be listed down in the right window.
Select the desired item(s) to be transferred.
Drag and drop the selected item(s) into the Reader’s Drive located in the last
row of the left side column illustrated below.
Page 35

7’ eBook Reader
35
Specifications
Display
7” TFT
Resolution
800 x 600, 4:3
File Formats
Book: HTML, TXT, EPUB, PDF, PDB, FB2
Music: MP3, WMA, AAC, WAV, OGG
Video: 3GP, FLV, MP4, MPG, VOB, AVI, RM, RMVB,
WMV, MOV
Photo: JPEG, GIF, BMP, PNG
Storage
Temperature
Humidity < 90%, -20°C ~ 60°C
Operating
Temperature
Humidity < 80%, 0°C ~ 45°C
External Storage
micro SD card, up to 16GB
Power source
USB connected DC 5V
Battery
Built-in Lithium Battery, 3500 mAh
Dimensions
195 mm x 145 mm x 13 mm (L x W x H)
Weight
375 g
Technical Support and Warranty Information
Please refer to www.prestigio.com for technical support and included warranty card
for warranty information.
Page 36

7’ eBook Reader
36
Copyright and Trademark Notice
Copyright laws prohibit copying the data of this product or the contents of this
manual (illustrations, related documents, etc.) in whole or in part without the
permission of the copyright holder.
Additionally, use of data of this product or the contents of this manual is not allowed
without permission of Prestigio Europe Ltd. except for personal use.
Adobe, the Adobe logo, Reader and PDF are either registered trademarks or
trademarks of Adobe Systems incorporated in the United States and / or other
countries.
MP3 audio coding technology and patents are licensed from Egoman Ltd.
Prestigio Libretto PER307 contains Adobe® Reader® Mobile software under license
from Adobe Systems Incorporated, Copyright © 1995-2009 Adobe Systems
Incorporated. All rights reserved. Adobe and Reader are trademarks of Adobe
Systems Incorporated.
 Loading...