

Page 1
Wine Wall Base Kit
ase Unit Installation Instructions (all sizes)
B
For installations using Wine Wall Expansion units, please refer to directions included with those
products.
Parts List
• (2) Steel Wine Wall Brackets
• ES Wine Rods (quantity varies
by configuration)
Required Tools
• Measuring tape
• Pencil
• 4’ level
• ES Screws (2 per rod)
• (1) 5mm Allen key
• (4 or 6) M6 Toggle Bolts
• Drill
• 5/8” Paddle drill bit
• 5/64” drill bit
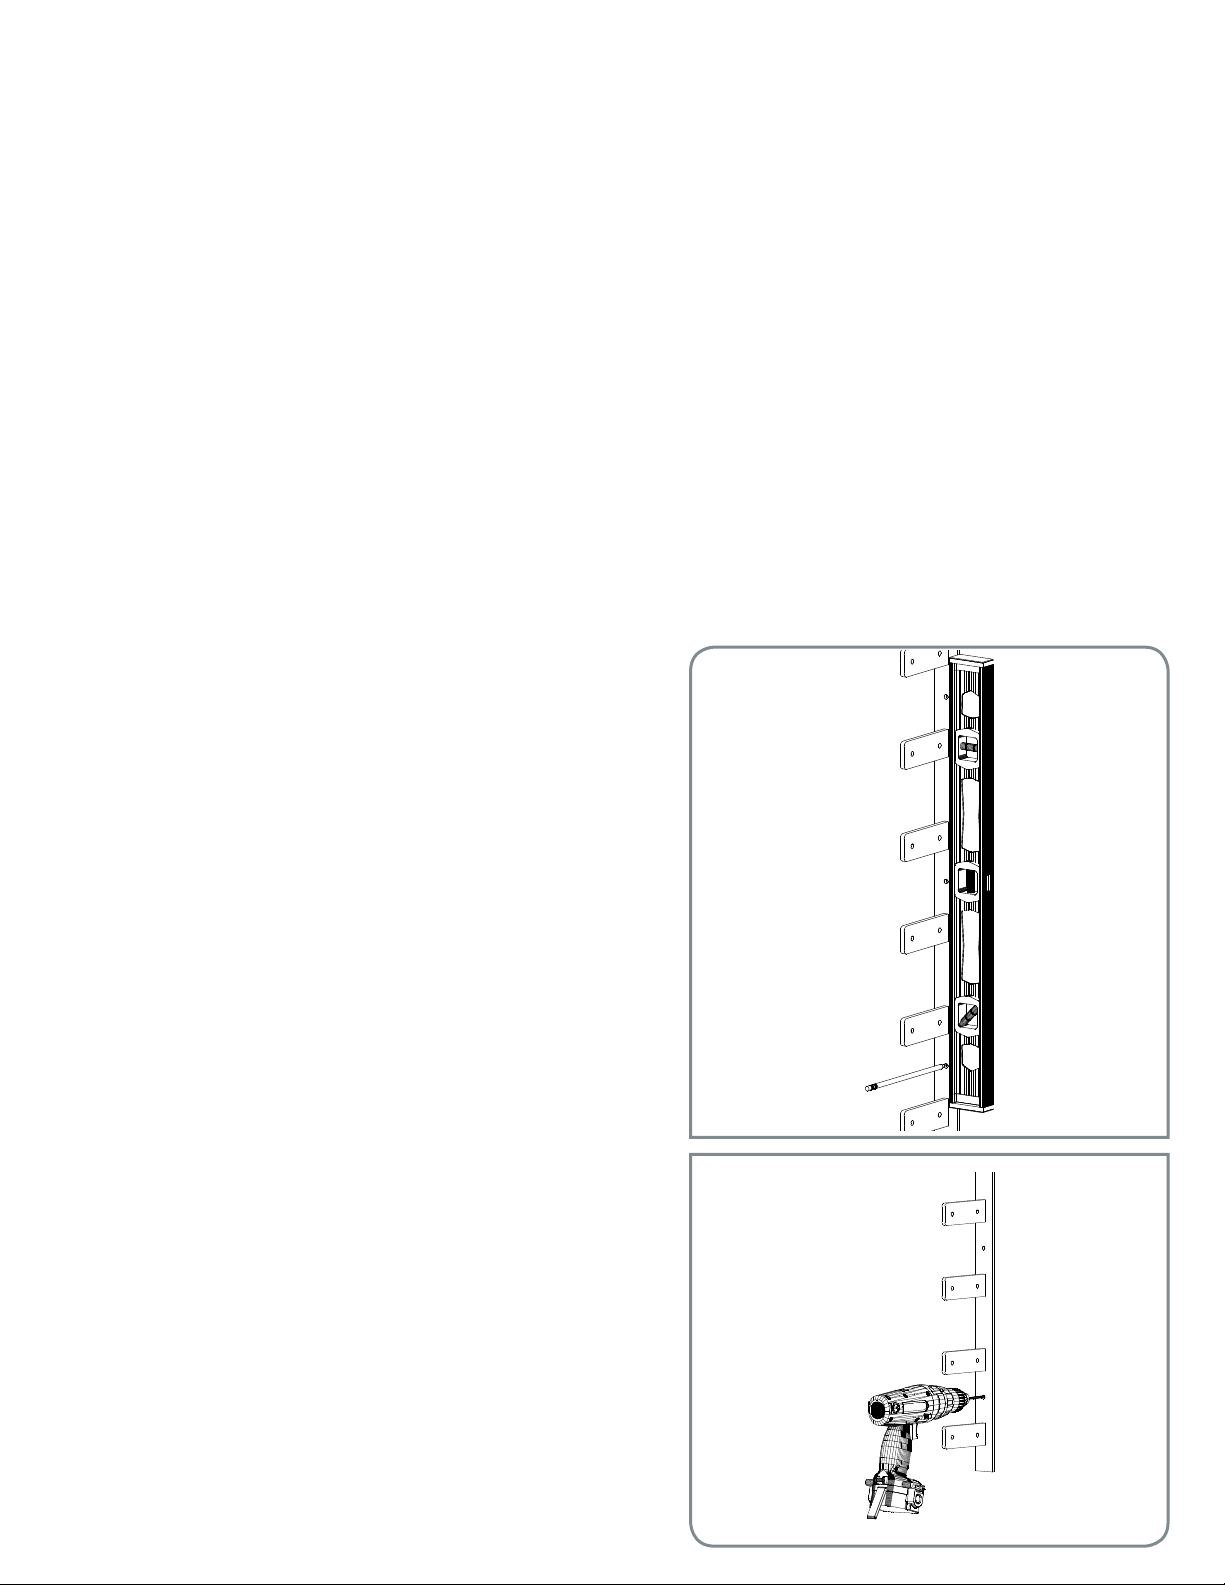
Step 1: Plot Mounting Holes
Position one Wine Wall Steel Bracket in desired place on
the wall — leaving a minimum of 1” clearance from adjacent walls or obstructions — and mark locations of the
mounting holds. Ensure bracket is plumb by using a level.
Plot the mounting holes for the second bracket by measuring 39-9/16”* from the first brackets’ top mounting hole.
Use a level to be sure that the marks are aligned.
• (4 or 6) Wood screws
• A handy friend
Step 2: Drill Mounting Holes
Using the smaller drill bit, drill a pilot hole to determine
if drywall or wood hardware is needed for installation. If
the surface is determined to be wood, drill remaining pilot
holes at the marked locations and move to step 3. If it is
determined to be drywall, use the 5/8” paddle drill bit to
drill holes in marked locations.
Note: For concrete, brick or stucco we recommend 3/16”
x 1-1/4” masonry screw (sold separately).
Page 2
I
nstructions
Step 3: Build the Wine Wall
Insert one Screw through the support fin on the Wall
Bracket. Thread one Rod onto the Screw and fully tighten
with provided 5mm allen key. Repeat for all support fins
on both Wall Brackets.
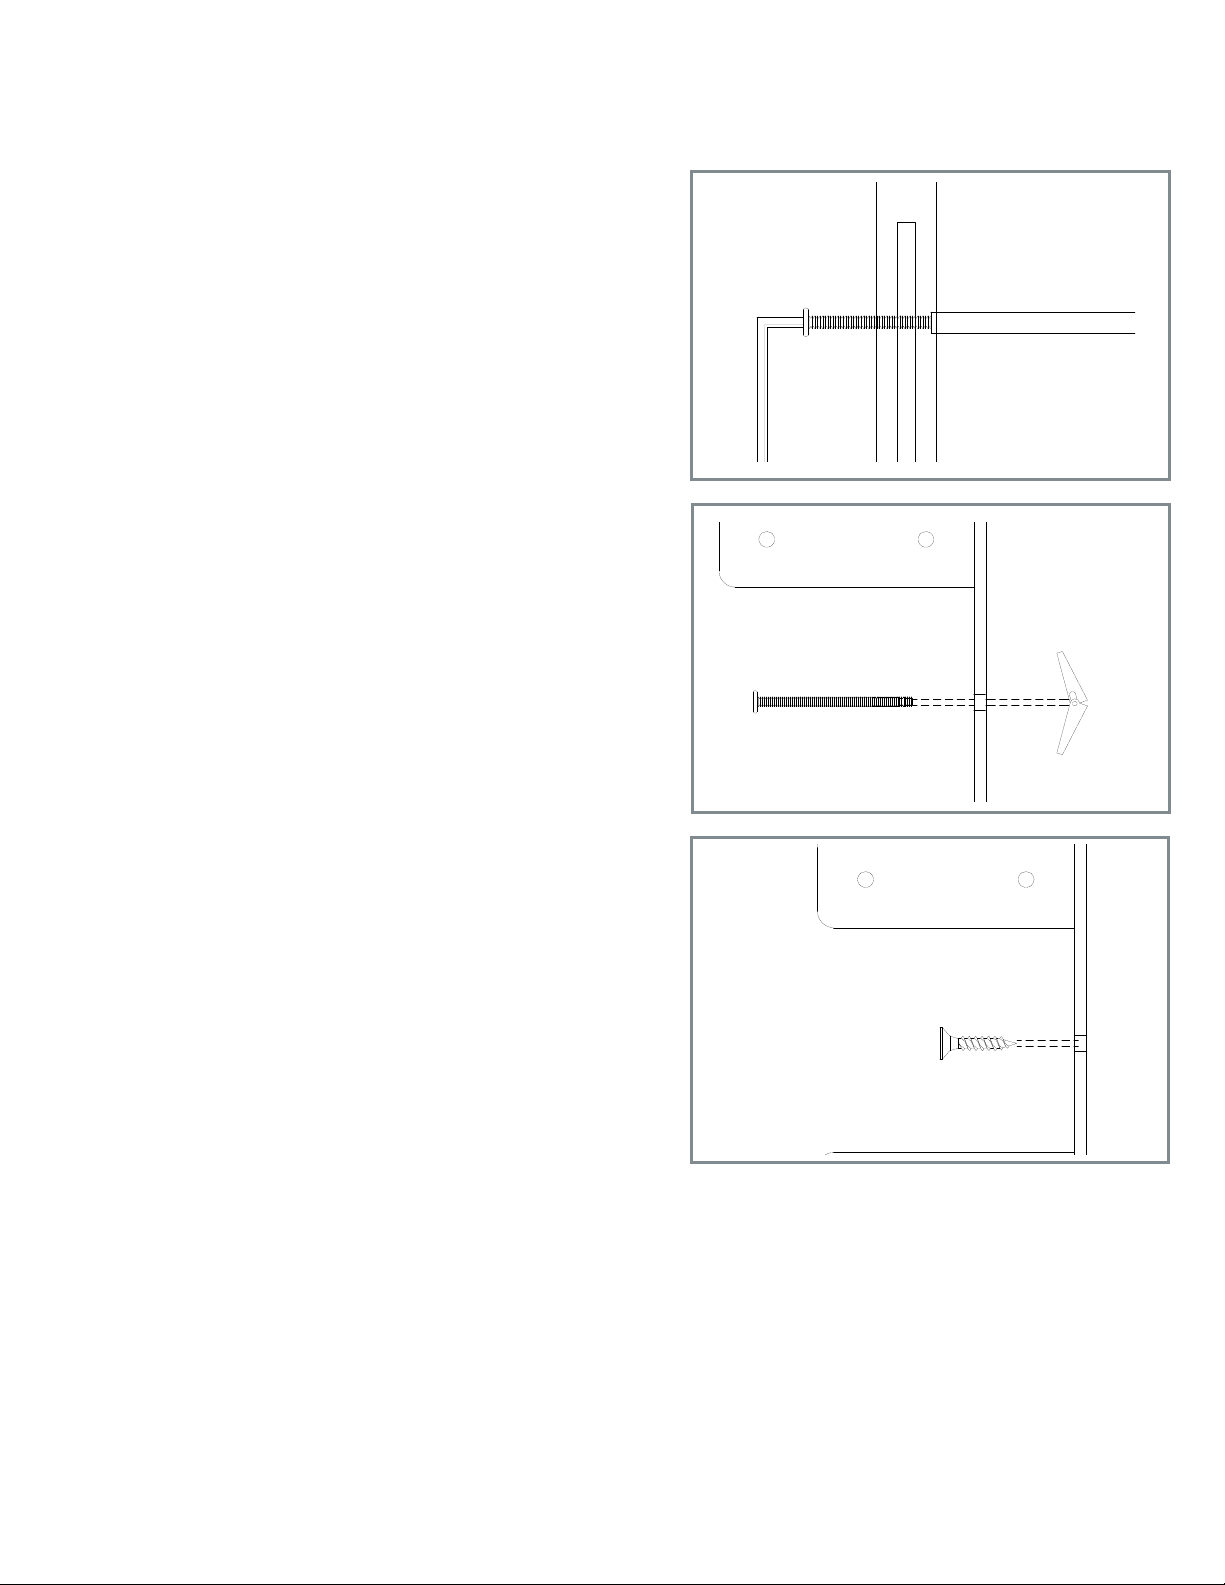
Step 4a: Mount the Wine Wall (drywall)
Disassemble provided toggle bolts, removing each expanding nut. Insert the bolt through the mounting hole
on the wall bracket. With the wings of the expanding
bolt oriented toward the bolt head, thread the nut onto
the bolt until it begins to protrude from the nut by 1/2”.
Repeat for remaining mounting holes.
Close the wings of the expanding nuts and gently push
through the drywall whole until the wings open behind
the drywall. Repeat for all mounting points then tighten
the bolt using care to not over-tighten and to maintain
level for the unit.
Step 4b: Mount the Wine Wall (wood)
With the assembled Wine Wall held in final mounting
position. use provided wood screws to fasten the Wall
Brackets to the wall. Be sure to check the unit remains
plumb using a level.
Step 5: Add wine.
Only the good stuff.
 Loading...