

Page 1
AST-1321 Suspension Adapter
AST-1321 INSTALLATION INSTRUCTIONS
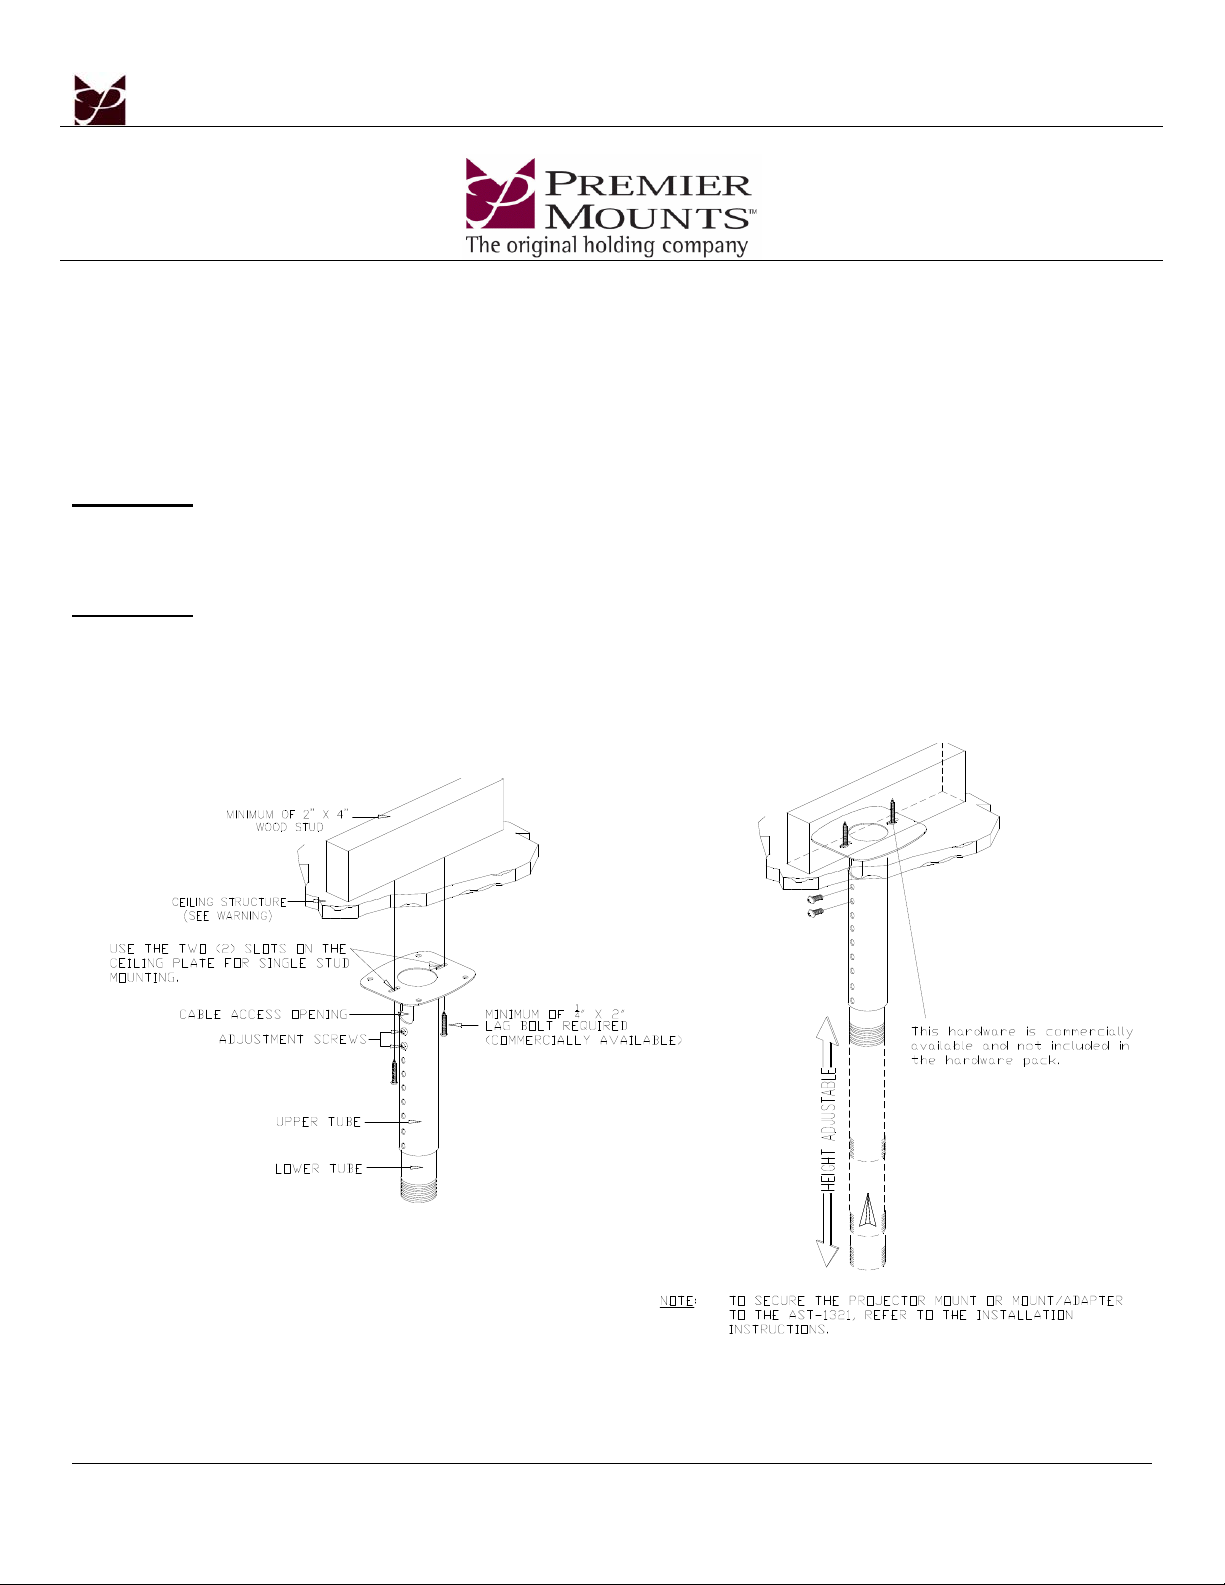
Single Stud Installation
1. Secure the ceiling plate to the ceiling structure (see WARNING).
2. Use suitable hardware (commercially available) depending on your installation environment to secure the
two (2) mounting points found on the ceiling plate to the ceiling structure (Figure 1).
3. Refer to ceiling mount or adapter installation instructions to complete the installation.
WARNING: Do not attach equipment over 160 lbs to the AST-1321. The ceiling structure must be capable of
supporting a minimum weight of 320 lbs. If not, the ceiling must be reinforced. Proper
installation procedure by qualified personnel as outlined in the installation instructions must be
adhered to. Failure to do so could result in serious personal injury.
WARNING: Make sure to hold the flat panel display, or projector, securely and remove it from the mount to
make the height adjustment prior to loosening the adjustment screws. Loosen, remove, adjust
then re-tighten the screws. Failure to do so could result in injury and or damage to the display or
projector.
Figure 1. AST-1321 Single Stud Installation
Page - 1 - Installation Instructions
9533-011-031-00
Page 2
AST-1321 Suspension Adapter
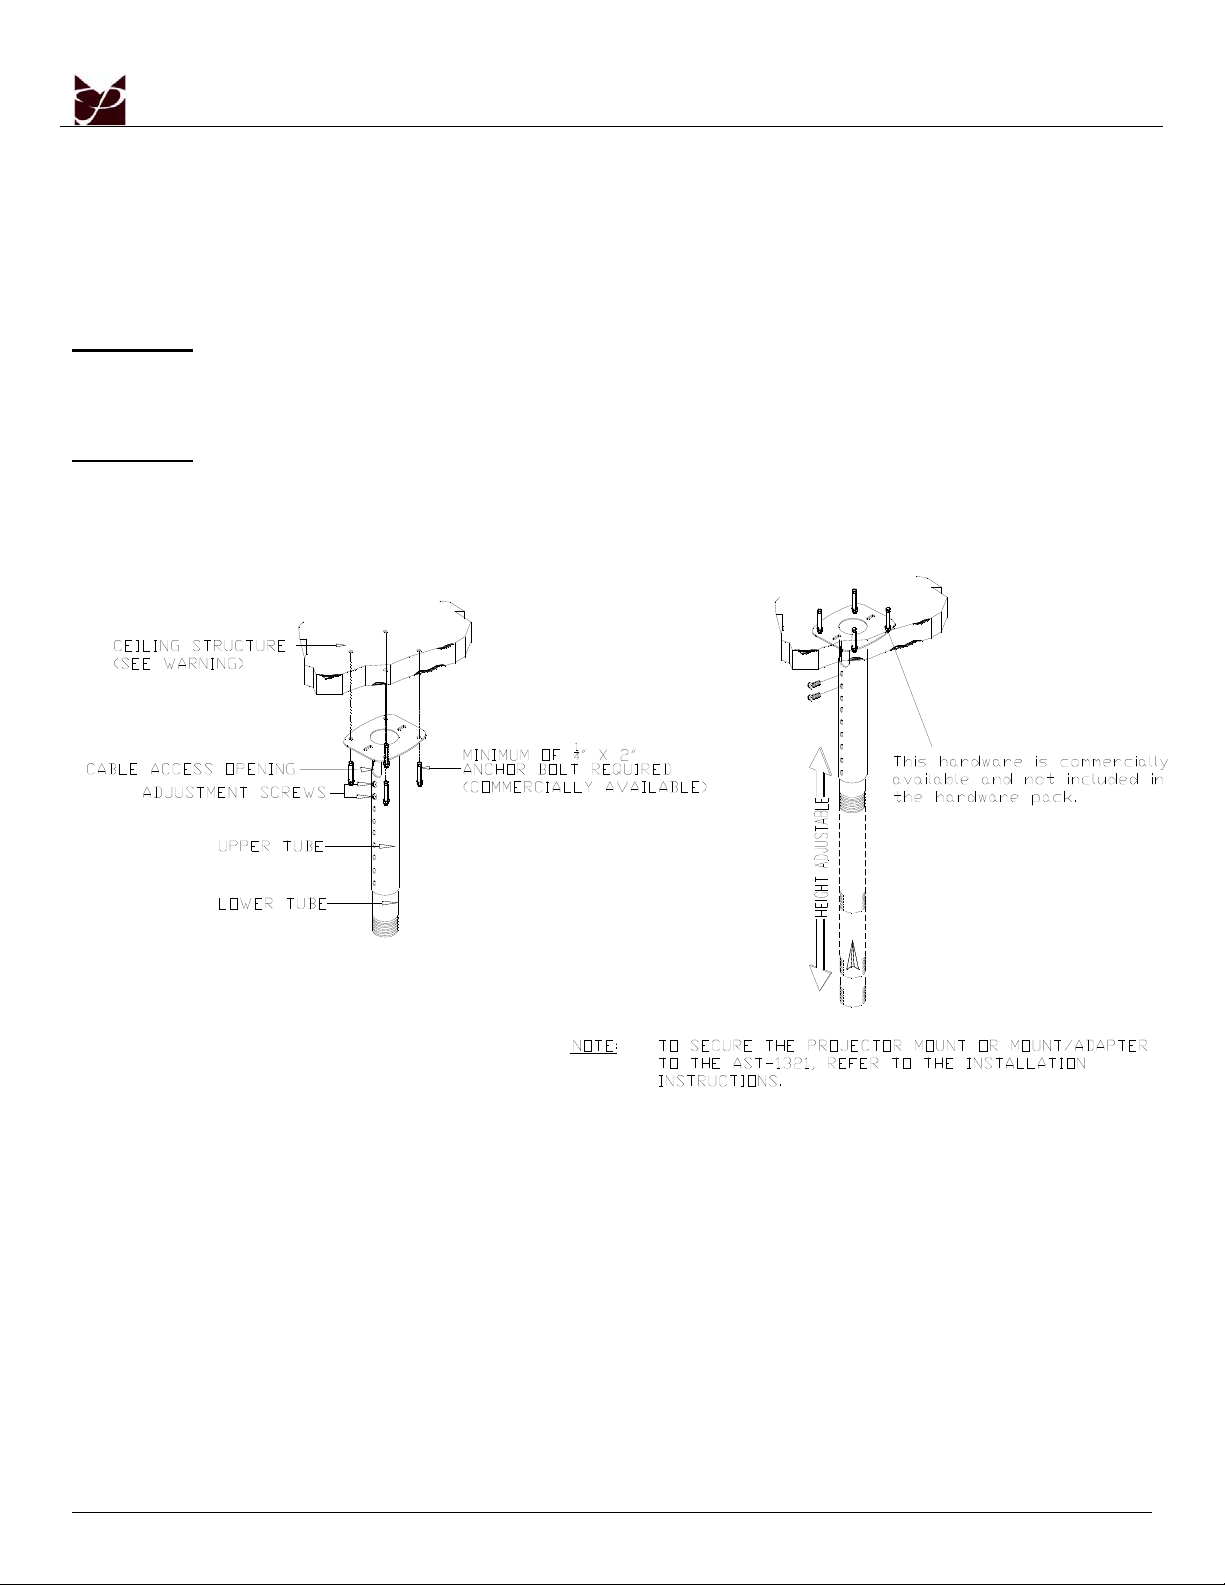
Solid Structure Installation
1. Secure the ceiling plate to the ceiling structure (see WARNING).
2. Use suitable hardware (commercially available) depending on your installation environment to secure the
four (4) mounting points found on the ceiling plate to the ceiling structure (Figure 2).
3. Refer to ceiling mount or adapter installation instructions to complete the installation.
WARNING: Do not attach equipment over 160 lbs to the AST-1321. The ceiling structure must be capable of
supporting a minimum weight of 320 lbs. If not, the ceiling must be reinforced. Proper
installation procedure by qualified personnel as outlined in the installation instructions must be
adhered to. Failure to do so could result in serious personal injury.
WARNING: Make sure to hold the flat panel display, or projector, securely and remove it from the mount to
make the height adjustment prior to loosening the adjustment screws. Loosen, remove, adjust
then re-tighten
Figure 2. AST-1321 Solid Surface Installation
Page - 2 - Installation Instructions
 Loading...