

Page 1
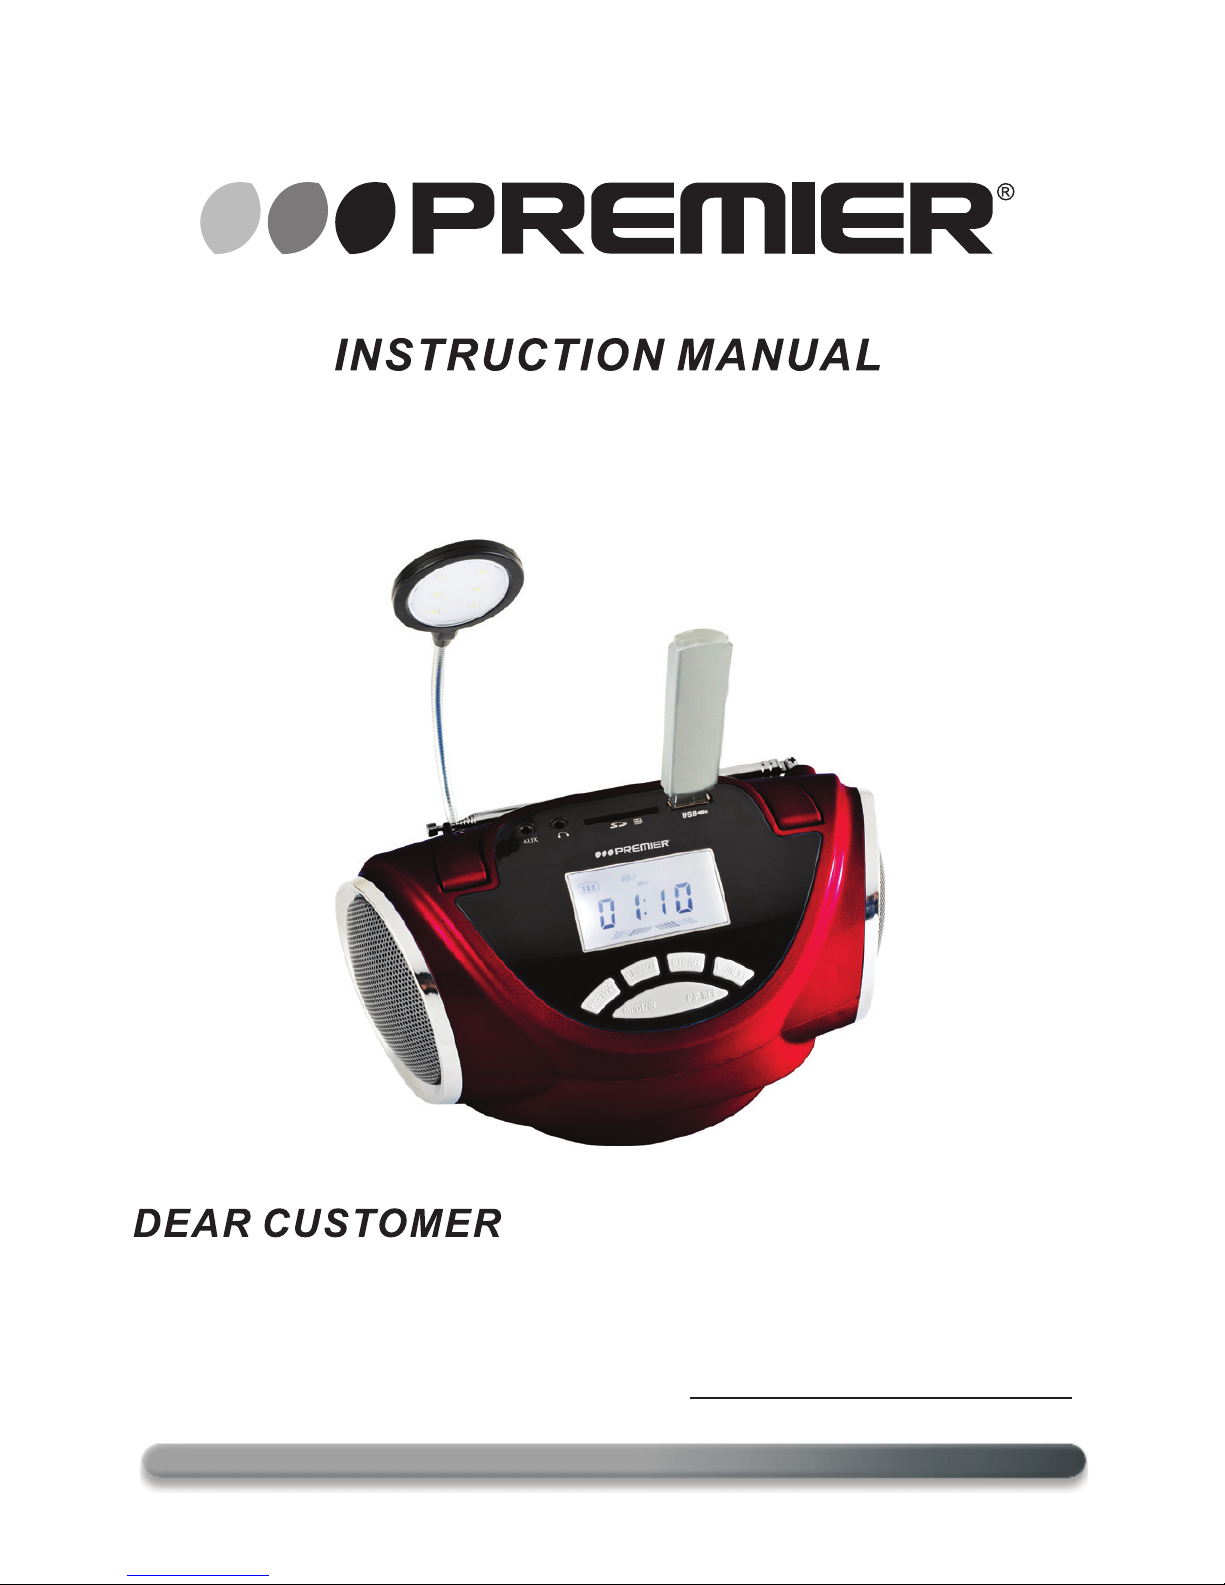
SX-4973USD
NO T E
This unit may be submitted to changes in specifications,
characteristics and/or operation without prior notice to the user, in
order to continue improving and developing its technology.
In order to achieve the best performance of your product, please read
this instruction manual carefully before using, and keep it for future
reference.
If you need extra support, please write to info@ premiermundo. c om
RADIOWITHRECORDING
ALARMFUNCTION
PORTABLE MULTIMEDIA PLAYER W/RADIO
Page 2
Venezuela:
Panama:
Website
E-mail:
RISK OF ELECTRIC
SHOCK, DO NOT
OPEN
CAUTION
Caution: To reduce the risk of electric shock do not open
this device, there are not serviceable parts for customers.
Please refer any maintenance or repair to qualified
personnel.
This sign means the existence of dangerous voltage at
the inside of the unit, which states a risk of electric shock.
This sign means that there are important instructions of
operation and handling in the manual that comes with this
device.
0800 – ELECTRIC (353-2874)
300-5185
www.premiermundo.com
[email protected]
PREMIER CUSTOMER SERVICE
NOTE
This unit may be submitted to changes in specifications,
characteristics and/or operation without prior notice to the user, in
order to continue improving and developing its technology.
1
Page 3
1
2
3
4
5
6
7
8
9
10
11
12
2
SPECIFICATION
Notes: 1. Since stand by mode will consume electricity of battery, if
Notes: When required sleep off time was set, system will power off on
2. R a d io
and long press ALARM/SCAN button will auto-search channels,
during this period, the programs will be saved automatically and
displaying P1 P2 P3…P30 on LCD. Short press ALARM/SCAN will
end auto-searching. Then swift to the saved radio program P1, LCD
dis
program. Long press PREV/V- or NEXT/V+ can regulate the volume.
3. P l a y U S B / S D .
songs, insert into corresponding positions, LCD displays SD/USB
symbol and the song’s format (Ex: MP3 /WMA /WAV) and will play
relevant programs and displays playing time. Long press PREV/V- or
NEXT/V+ to regulate the volume. Short press PREV/V- or NEXT/V+
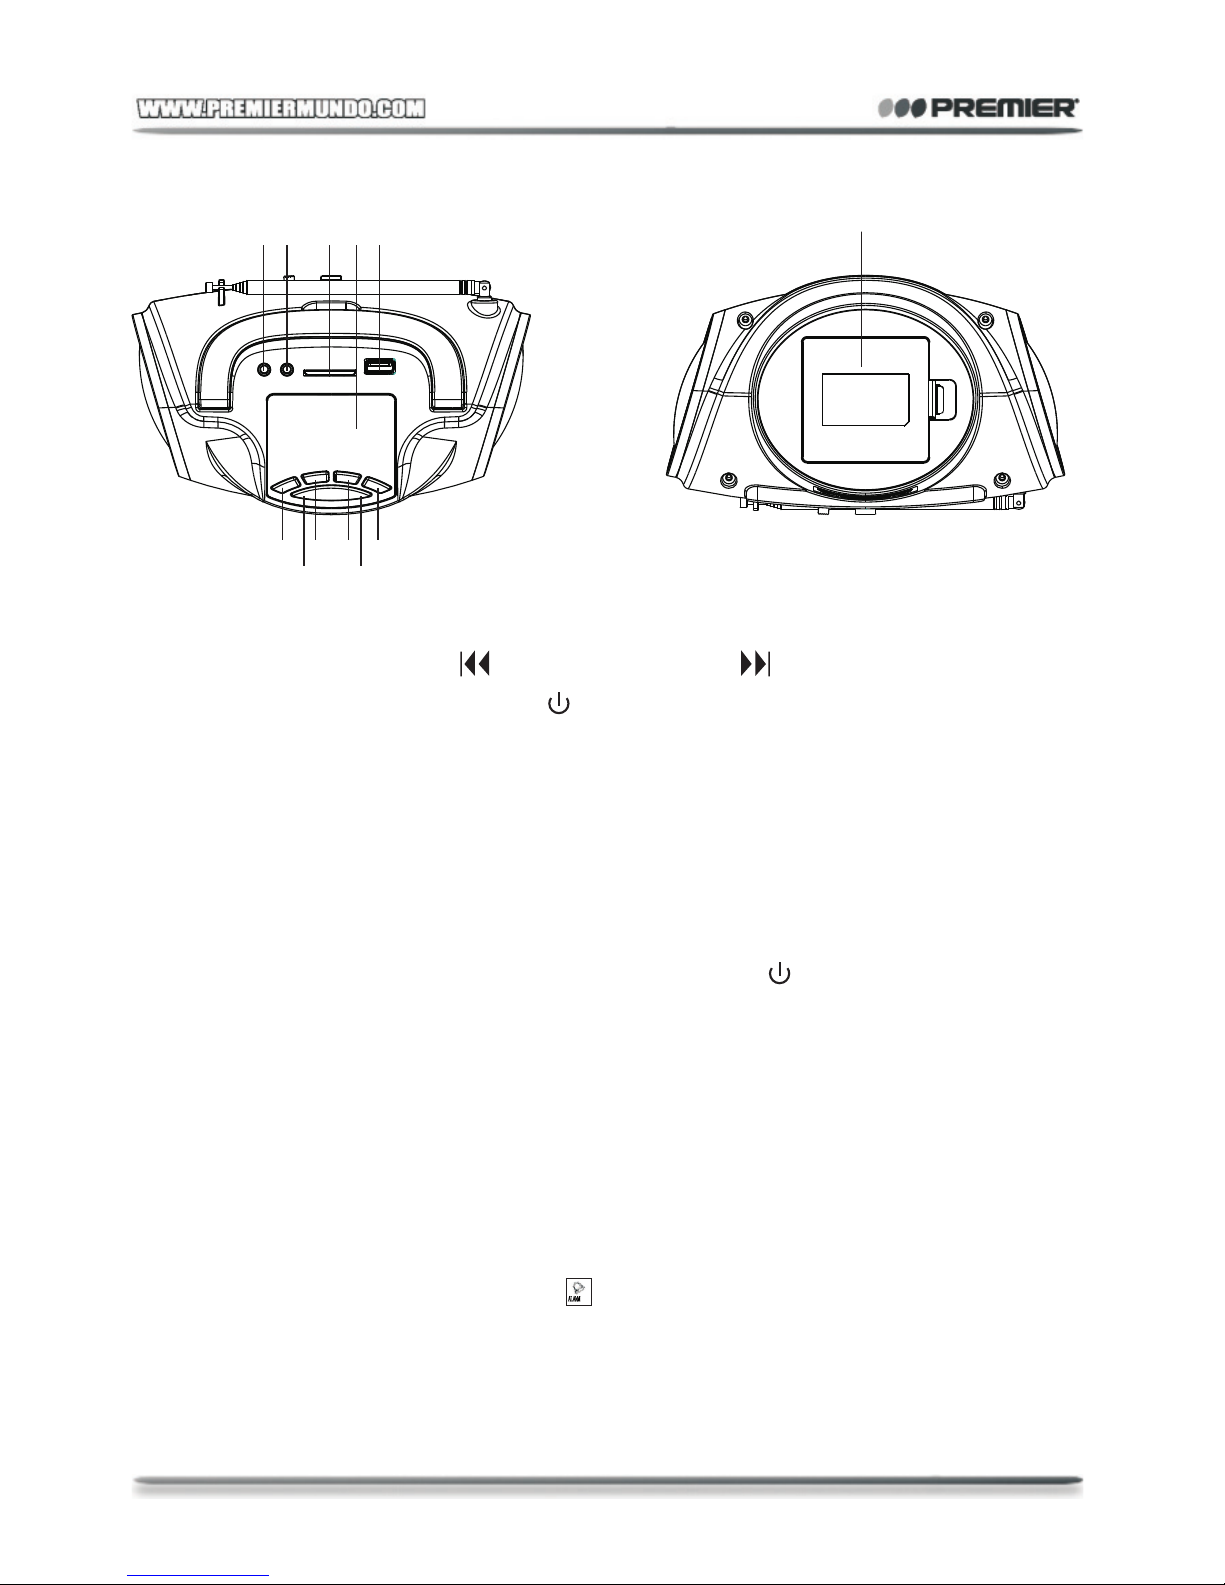
L O C AT IO N OF C O N T R O L S
1. C lo c k S e tting :
(1) Clock Time: Power On
LCD DISPLAY 23:00
Power on status, please long press MODE/ butt
on, then power
OFF displaying time.
Setting time: CLOCK ALARM/SCAN, long press MODE then LCD
codes will twinkle, press NEXT/V+ or PREV/V-, you can now set the
clock.
(2) Alarm time:
Standby status: long press ALARM/SCAN, the LCD codes will
twinkle now you press NEXT/V+ or PREV/V-, you can set the alarm.
Notes: Set the clock time first, then set the alarm. When setting LCD
displays ALARM symbol
Alarm timing auto Power on
ALARM
1. AUX/MP3-IN
2. EARPHONE JACK
3. SD SLOT
9. SLEEP/DEL
10. P/P REC
11. /V+
12. BATTERY COMPARTMENT
4. LENS
5. USB PORT
6. /V-
7. MODE/
8. ALARM/SCAN
Page 4
3
Standby status, short press ALARM once, LCD screen
showing the alarm symbol , then initiate the alarm timing auto
power on, then press ALARM/SCAN will cancel it, LCD will no
longer showing this symbol
Notes: 1. Since stand by mode will consume electricity of battery, if
long time no use please close this function
2. Alarm(Auto power on) will ring 1 minute and auto power on,
press any button to cancel the rings.
3. Sleep off time setting:
On standby or power on status, press SLEEP button to set
required sleep off time. LCD cycling displays (Start Sleep off
time)10 20 30 40 50 60 90 120 mines OFF(Close sleep off
function) LCD displays SLEEP symbol.
Notes: When required sleep off time was set, system will power off on
setting time and standby. Better use this function before
sleeping.
2. Radio
Full Auto Searching Channels
Fully pull the antenna then press MODE / swift to Radio mode,
and long press ALARM/SCAN button will auto-search channels,
during this period, the programs will be saved automatically and
displaying P1 P2 P3…P30 on LCD. Short press ALARM/SCAN will
end auto-searching. Then swift to the saved radio program P1, LCD
displays frequency. Press PREV/V- NEXT/V+ can listen the saved
program. Long press PREV/V- or NEXT/V+ can regulate the volume.
3. Play USB/ SD.
Using the USB or SD /MMC card with MP3/ WMA/ WAV format
songs, insert into corresponding positions, LCD displays SD/USB
symbol and the song’s format (Ex: MP3 /WMA /WAV) and will play
relevant programs and displays playing time. Long press PREV/V- or
NEXT/V+ to regulate the volume. Short press PREV/V- or NEXT/V+
ALARM
ALARM
Page 5
4
can shift to previous songs or next songs. Long press ALARM /SCAN
can repeat the playing songs. LCD displays ONE/ALL then showing
the song’s playing time (ex. 00.:28)
Notes: This product can support memory size of USB/SD device
up to 16GB.
4. Recording
(1) Recording the programs broadcasting ( from inside)During
listening the programs, long press P/P /REC 1 second and LCD
displays REC codes & start to recording the programs,(ex.:REC
88.5MHZ). Short press P/P /REC can end recording and play the
recorded programs.
(2) Recording from outside media Long press P/P /REC when
insert USB or SD card, LCD displays REC and counts 00:01 to record
using the MIC or short press P/P /REC to end the recording and play
the content just recorded. Delete the sound recording Long press
SLEEP/DEL for about 2 seconds to delete the current playing songs.
LCD displays DEL. (Can delete the current playing songs when
paused)
5. Using AUX/MP3-IN
Can transfer the music from other equipments (such as Mobile
phone, MP3 MP4 MP5 etc.) via connecting wire to this machine and
plays it.
Notes: when AUX-in, remove the AUX LINE before pressing MODE/
to shift to Radio.
6. Using the earphone:
Using the earphone in order to avoid influence on others .
7. Using outer power source:
Can use the outer power source to auto cut-off the battery
supplying and recharge for the built-in battery. LCD displays
electricity symbols twinkling.
8. Using Antenna:
reception effects.
9. Using the Lamp
SX-4973USD have the LAMP PORT.
10. Installing batteries
positive and negative pole of batteries.
Notes: While battery is about to exhausted, the performance of this
status, normal charging once every two weeks is suggested.
11. Main technical data:
Frequency:
FM 87.5 ---- 108MHZ
This machine was adjusted by professional equipment to best
condition before ex-work. Please don’t dismount it.
distortion sound or lower sound.
FM Telescopic antenna
Storeage Media USB Flash Drive/ SD Card
3.5mm Headphone Socket For 32 ohm
Power output 1.6W+1.6W
Power requirements DC 6V using 4 size C(R14) batteries or
Inputs AUX/MP3-IN 500mV/50kΩ
Page 6
5
Pull out the antenna,then roll to suitable position for the best
reception effects.
9. Using the Lamp
Switch on LAMP and plug the lamp in LAMP PORT. (Optional)Only
SX-4973USD have the LAMP PORT.
10. Installing batteries
(1) Put 4pcs AA batteries as instruction in battery cabinet as
positive and negative pole of batteries.
Notes: While battery is about to exhausted, the performance of this
machine will reduce and the volume will lower, the sound will
be distorted. Please change batteries in time.
(2) Recharging:
Power off status, continuous recharging for 10-15 hours. Standby
status, normal charging once every two weeks is suggested.
Charging while use, the charging time will be different.
When should we recharge it?
11. Main technical data:
Frequency:
FM 87.5 ---- 108MHZ
This machine was adjusted by professional equipment to best
condition before ex-work. Please don’t dismount it.
when the LCD electricity icon was shown: with low electricity or
distortion sound or lower sound.
FM Telescopic antenna
Storeage Media USB Flash Drive/ SD Card
3.5mm Headphone Socket For 32 ohm
Impedance Headphones
Power output 1.6W+1.6W
Power requirements DC 6V using 4 size C(R14) batteries or
Inputs AUX/MP3-IN 500mV/50kΩ
1 x 9V rechargeable battery or
DC-IN 9V
 Loading...