

Prem-I-Air PUH-610 User Manual
ULTRASONIC IONISER HUMIDIFIER
Please read this instruction manual before operating
PUH-610
and keep safe for future reference.
IMPORTANT SAFETY INSTRUCTIONS
When using any electrically powered product, basic safety precautions should
always be followed.
PLEASE READ ALL INS T RU CTIONS CAREFULLY BEFORE USING THE
PRODUCT.
1. Check the household voltage to ensure it matches the units rated specification
before operating.
2. CLOSE SUPERVISION IS NECESSARY WHEN THE UNIT IS USED BY OR
NEAR CHILDREN OR PETS, OR LEFT UNATTENDED.
3. DO NOT ALLOW CHILDREN TO PLAY WITH ANY PRODUCT PACKAGING,
SUCH AS PLASTIC BAGS.
4. Do not operate the unit with a damaged cord or plug, after the product
malfunctions, or has been dropped of damaged in any way. Return the
complete product to an authorised service facility for examination and repair.
5. If the supply cord is damaged it must be replaced by the Manufacturer or an
authorised service centre in order to avoid a hazard.
6. This product is intended for domestic use only and not for commercial,
industrial or outside use.
7. Always turn the unit off, unplug and empty the water tank before moving
location.
8. To disconnect from the power supply, grip the plug and pull from the power
socket. Never pull by the cord.
9. Do not operate the unit in areas where petrol, paint, or other flammable liquids
are used or stored.
10. Do not use the unit in artificially hot or humid condition s or allow it to be used in
any hazardous environment.
11. Do not place the unit near an open flame, cooking or heating appliance, or hot
surface.
12. This unit is not intended for use in wet or damp locations. Never locate the
unit in an area where it may fall into a bath or other water container. Always
use on a dry level surface.
13. Do not let the power cord hang over the edge of a table or counter. Arran ge the
power cord away from an area where it may be tripped over.
14. Never place the power cord under a carpet or rug.
15. Do not place objects on the product or allow objects to obstruct the inlet or
outlet openings. Do not operate in close proximity to walls or curtains, etc.
16. The use of attachments or accessories not recommended or sold by the
product distributor is not recommended as they may cause injury to persons or
property and void the warranty.
17. Do not attempt to repair the unit other than to clean the tank and transducer . To
repair the unit take it to a qualified service engineer.
18. Do not allow water to run inside the humidifier as this could result in a fire or
electric shock.
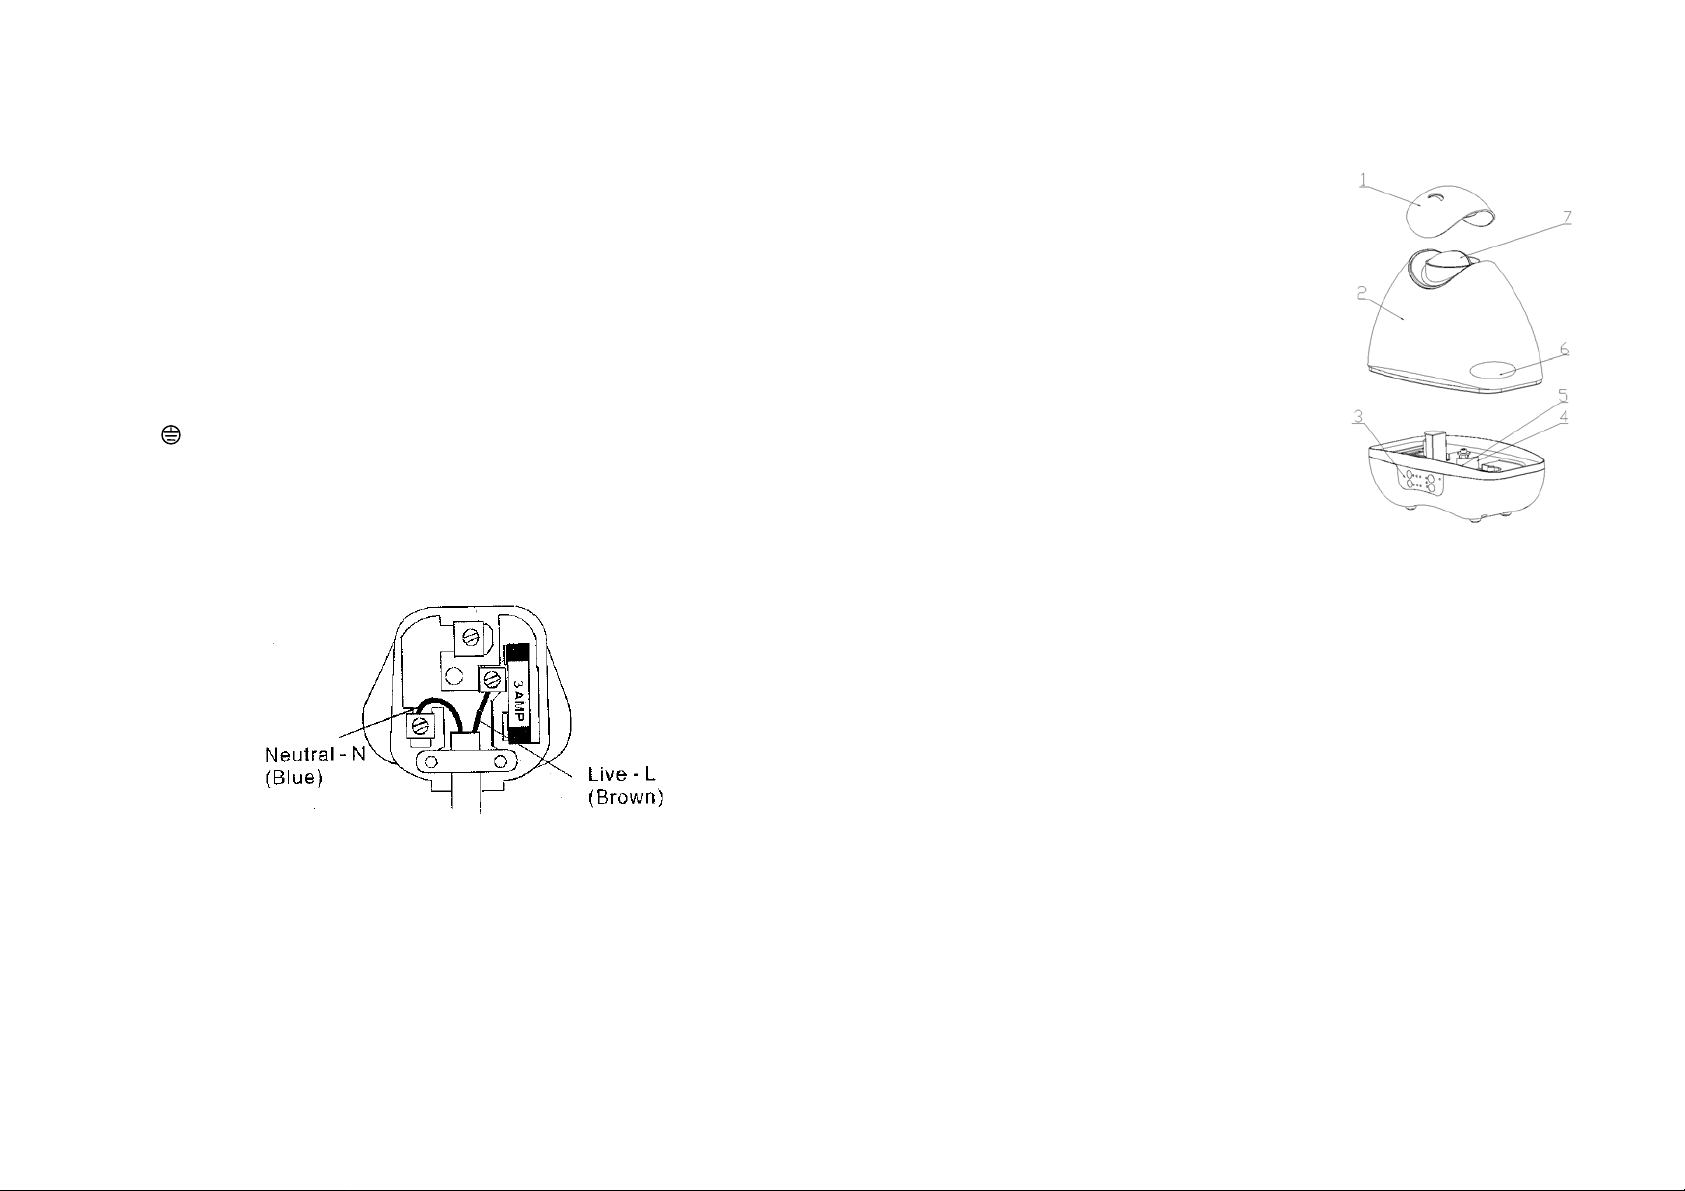
BS PLUG WIRING
Wiring Instructions: Should it be necessary to change the plug please note the wires in
the mains lead are coloured in accordance with the following code :
BLUE - NEUTRAL
BROWN - LIVE
1. The BLUE wire is the NEUTRAL and must be connected to the terminal that is
marked with the letter N or coloured BLACK.
2. The BROWN wire is the LIVE and must be conn ected to the termin al that is marked
with the letter L or coloured RED.
3. Neither wire is to be connected to the terminal which is marked with the letter E or
or coloured GREEN OR GREEN/YELLOW.
4. Always ensure that the cord grip is positioned and fastened correctly.
If a 13A (BS 1363) fused plug is used it must be fitted with a 3A fuse. If in doubt consult a
qualified electrician.
Please read this User Guide carefully before using:
Do not use your humidifier in a closed room; excessive moisture may build up if there is
insufficient ventilation in the room. If moisture forms on the walls or windows you should
turn the humidifier off or decrease the output as the room has plenty of moist air and
additional moisture may cause damage.
Locate your humidifier in an area inaccessible to children.
Never direct the mist spray outlet (1) directly towards electronic equipment, a wall or piece
of furniture.
Do not place your humidifier on a rug, carpet or finished surface that may be damaged by
excess moisture.
Wallpaper an d wooden surfaces can be damaged by excessive moisture.
For extra protection place a waterproof pad under the humidifier.
Do not block the mist spray outlet (1).
Do not add any oils or perfumes to the water in the tank.
Parts Description
1.Mist spray outlet
2.Water tank
3.Control panel
4.Water channel
5.Transducer
6.Tank Cap
7.Handle
Main Functions
1. Special construction and pl astic materials
reduce the growth of fungus and bacteria
in your humidifier.
2. Automatic switch off and alarm when the
tank is empty.
3. Negative ions can be added to the mist
output that combine with dust, bacteria
and mildew in the air and neutralise them.
Operating Instruction
1. Remove the water tank (2) and turn it upside down.
2. Remove the tank cap (6), fill the water tank with cold water (never use hot
water). Tighten the nut cap and place the water tank onto the base.
3. Check that the mist spray outlet (1) is correctly fitted on the tank so that the
mist is blown out of the front of your humidifier.
4. To turn your humidifier ON press the ON/OFF button. Press it again and the
machine is turned OFF.
5. Press the MODE button to select the moisture output. The Mode I is on
constantly, Mode II is on for 1 minute and off for one minute, Mode III is on for 1
minute and off for 3 minutes. Select the best mode to create a comfortable
humidity in your room. LED indicators show the selected mode. Remember
that during the off periods your humidifier will not produce any mist.
6. Y our humidifier can be set to turn off after up to 7 hours by pressing the TIMER
button. LED indicators show the timer setting selected, 1 hour, 2 hours, 3
hours etc.
7. Press the IONS button to add negative ions to the mist output.
8. When all the water in the tank has been used an alarm will sound briefly and
the TANK EMPTY LED will illuminate. Unplug your humidifier, remove the
tank and refill it with cold water.
 Loading...