

Page 1
SERVICE & WARRANTY
Do not operate the unit with a damaged cord or plug, after the unit malfunctions, or
has been dropped or damaged. Return the product to an authorised service facility
for examination and repair to avoid a hazard.
For your convenience record the complete model number and product name
(located on the Product Identification Plate), the date you purchased the product
and your purchase receipt as proof of purchase.
To ensure your product is covered by warranty, the complete faulty product
together with your purchase receipt should be returned to your retailer.
This product has been manufactured to comply with
EEC Directives 73/23/EEC and 89/336/EEC
Please read these instructions carefully before use retain for future reference
0
5/05
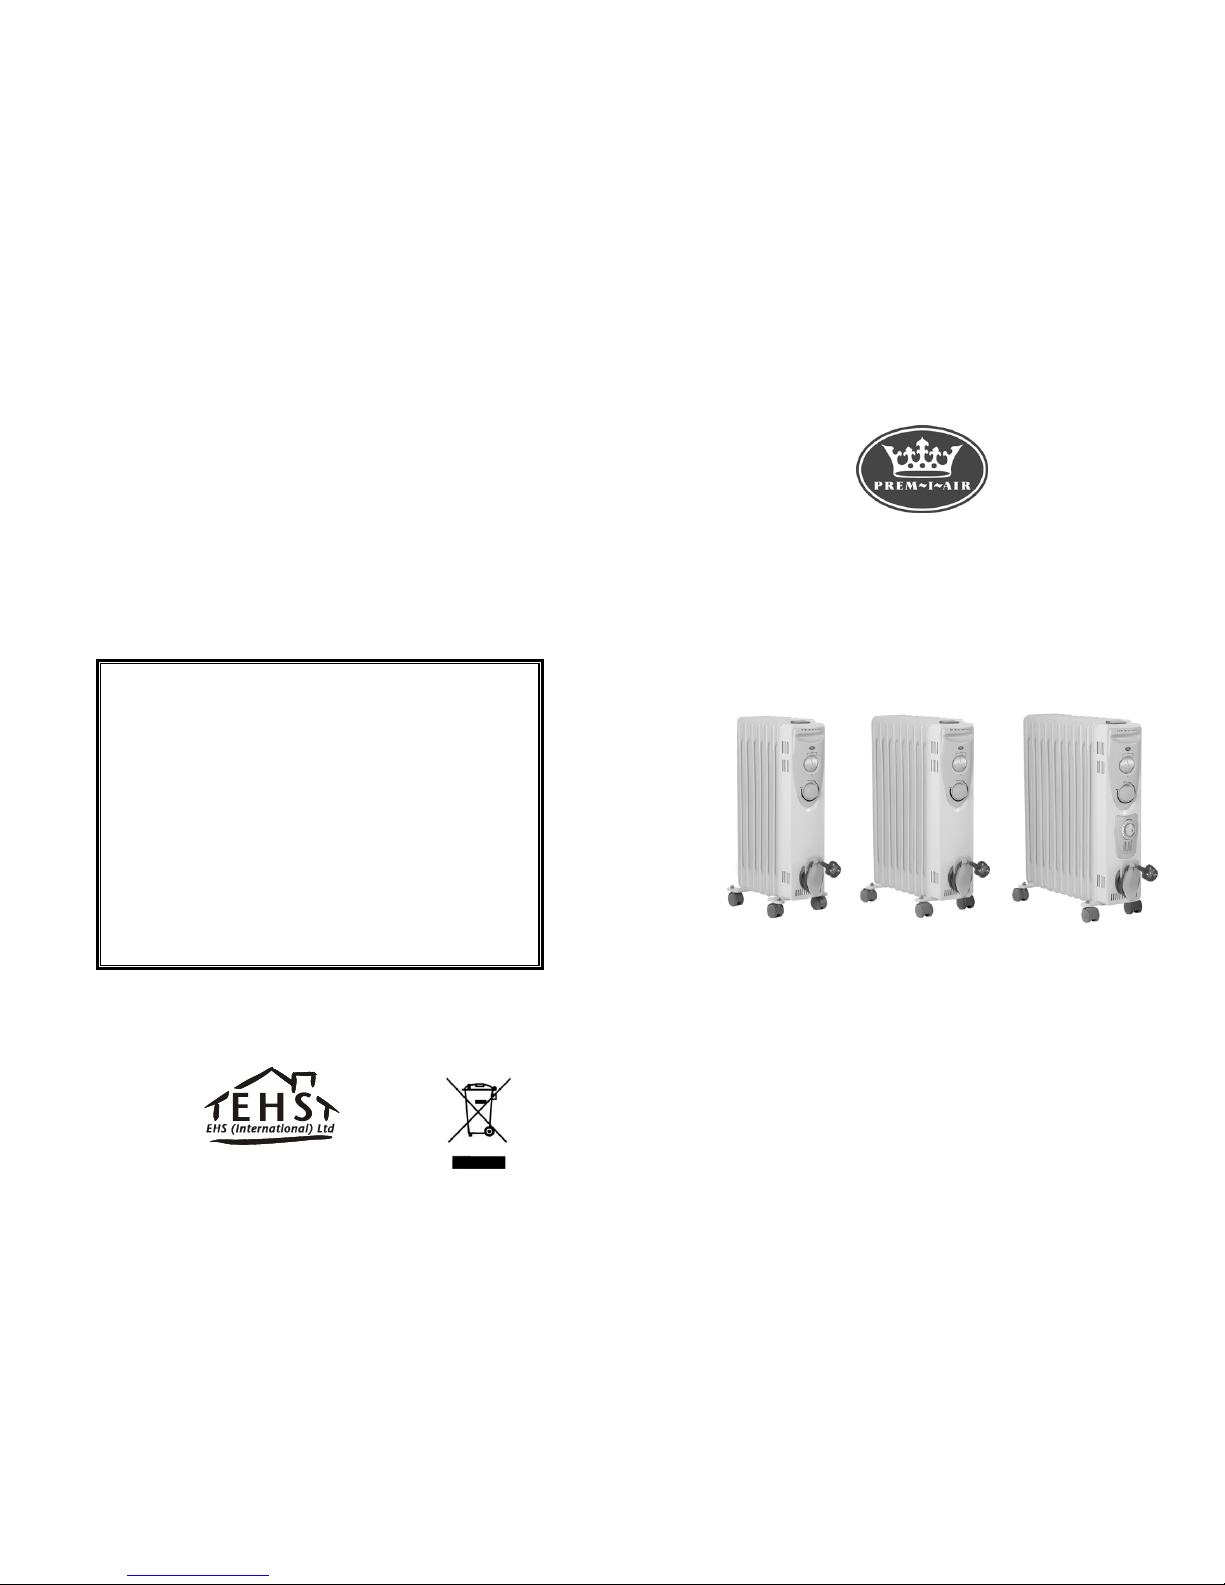
OIL FILLED RADIATOR
MODEL
C307, C309 & C3011T
ONE (1) YEAR LIMITED WARRANTY
Save This Warranty Information
EHS (International) Ltd. Guarantees this product free from
defects in materials and workmanship for a period of one (1)
year.
Should this unit be operated under conditions other than those
recommended, at voltages other than the voltage indicated on
the unit, or any attempts made to service or modify the unit, will
render this WARRANTY VOID. The product you buy ma
y
sometimes differ slightly from illustration. This warranty is in
addition to, and does not affect, your statutory rights
Should you have a problem with this product, please call ou
r
Help Desk on: (0870) 742 5021.
C307 C309 C3011T
EHS, Manchester, M17 1RN
Please read this instruction manual before
operating and keep safe for future reference
Page 2
IMPORTANT SAFETY INSTRUCTIONS
PLEASE READ ALL INSTRUCTIONS CAREFULLY BEFORE USING THIS
PRODUCT.
Use this heater only as described in this manual. Any other use not
recommended by the manufacturer may cause a fire or electrical shock.
When using electrical appliances, basic safety precautions should always be
followed:
1. Before operating the heater remove the unit from its packaging and
check it is in good condition.
2. The surfaces of this heater are hot whilst in operation. Always allow a
cool down period before moving it to another location. Keep all
flammable materials well away from the heater.
3 . Extreme caution is necessary when any heater is used by or near children
or pets and whenever the heater is left operating and unattended.
4. Always unplug heater when not in use.
5. Do not operate any heater with a damaged cord or plug, after the heater
malfunctions, has been dropped or damaged in any manner. Re turn the
heater to a n authorised service facility for examination and repair.
6. Do not use outdoors. It is not intended for use in wet or damp locations.
Never locate heater where it may fall into a bathtub or other water container.
7. Do not run cord under carpeting. Do not cover cord with rugs or
runners. Arrange cord away from an are a where it may be tripped
over. Do not use this heater with a programmer, timer or any other device that
switches the heater on automatically, since a fire risk exists if the heater is
covered or positioned incorrectly.
8. To disconnect heater, turn switches to the off position and remove plug from the
power socket. Pull only by the plug. Never pull on the cord.
9. Do not place the heater on soft surfaces. Always place on a flat level surface.
10. Do not use it in areas where p etro l, paint, or flammable liquids are used or
stored.
11. Do not let children play with the packaging, for example plastic bags.
12. Check household voltage to ensure it matches the rating plate specification.
13. Avoid the use of an extens ion cord as it could overheat and cause a fire.
14. This heater is filled with a precise quantity of special oil. Repairs requiring
t h e opening of the oil container are only to be made by the
manufacturer or a qualified service engineer, who should be contacted if
there is any leakage.
READ & SAVE THESE IMPORTAN T INSTRUCTIONS
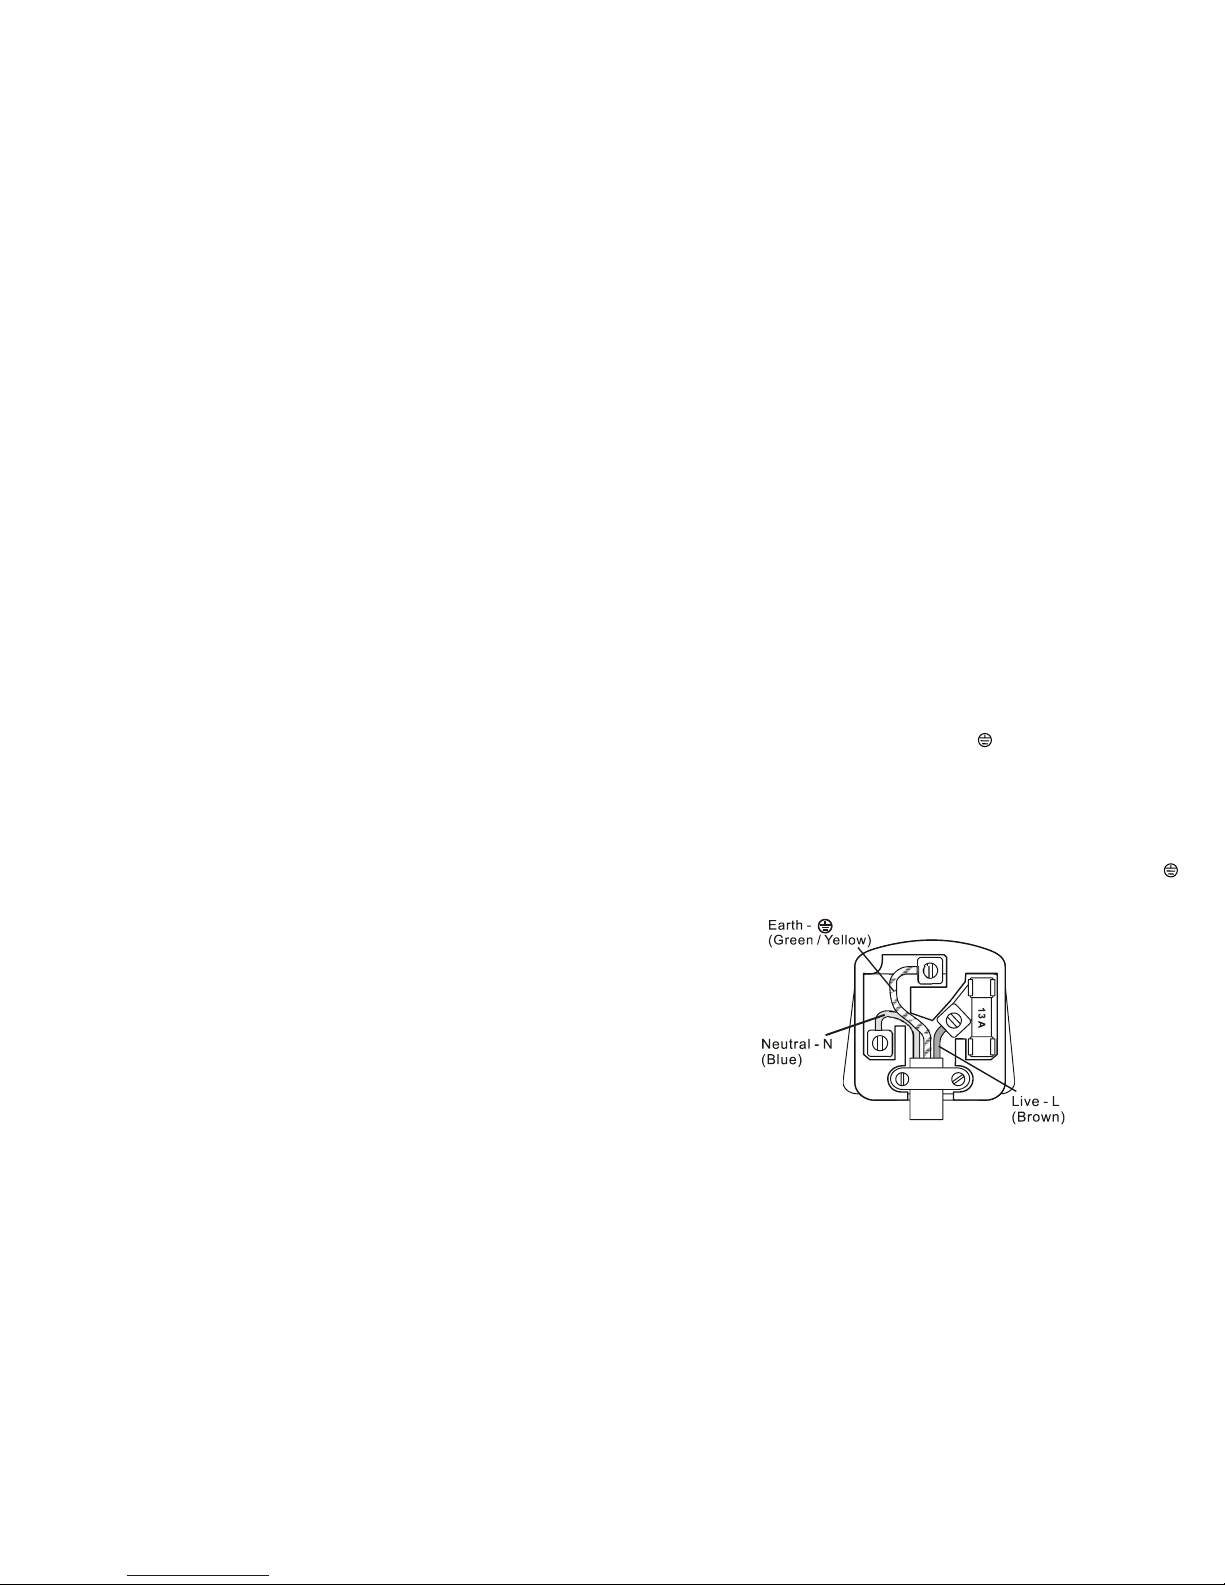
BS PLUG WIRING
Wiring Instructions: Should it be necessary to change the plug please
note the wires in the mains lead are coloured in accordance with the
following code:
BLUE - NEUTRAL
BROWN - LIVE
GREEN AND YELLOW - EARTH
As the colours of the wires in the mains lead of this appliance may not
correspond with the coloured markings identifying the terminals in your plug,
proceed as follows:
1. The BLUE wire is the NEUTRAL and must be connected to the terminal
which is marked with the letter N or coloured BLACK.
2. The BROWN wire is the LIVE and must be connected to the terminal
which is marked with the letter L or coloured RED.
3. The GREEN/YELLOW is the EARTH and must be connected to the
terminal which is marked with the letter E or or coloured GREEN OR
GREEN/YELLOW.
4. Always ensure that the cord grip is positioned and fastened correctly.
If a 13A (BS 1363) fused plug is used it must be fitted with a 13A fuse. If in
doubt consult a qualified electrician.
Wiring for a 13 Amp Plug (BS1363)
Please note. The Earth Terminal is marked with the letter E or Earth Symbol
Page 3

PARTS DESCRIPTION
PRE-OPERATING INSTRUCTIONS
1. Carefully remover your heater from t he bo x.
(please save the ca rton for off-season storage).
2. Do not use without casters fitted.
3. When operating, the distance between the radiator and the wall and any
other objects must be a minimum of 20cm
4. Make sure the unit is in the off position before plugging the heater into
the power socket and unwind the power cord from the cord bracket.
5. Place the heater on firm level surface in the upright position.
6. Avoid overloading the circuit. Do not use other high wattage
appliances in t he same power socket. Never use a multi-point adaptor in
conjunction with this app li anc e.
Caution:
Do not cover or use to dry clothes.
The surface of this radiator is hot when in operation.
CASTOR ASSEMBLY INSTRUCTIONS
Do not operate the heater without the castors attached to the bottom of
the unit.
Parts: 4 castors, 2 metal axles, 2 U shaped metal brackets, 4 bolts, 2
wing nuts
1. Fit the castors to the metal axles, by screwing in and securing with the
enclosed bolts. The flat side is the top of the axel (fig 1).
2. Turn the radiator upside down and lean against yourself to ensure it does
not fall over (fig 2).
3. Fit front U shaped metal bracket onto the back of the front fin, by hooking
it over the bottom of the fin (fig 3) and hold in place.
Metal Axle
4. Turn one of the metal axels upside down and fit the U shaped metal
bracket, which is now on the unit through the holes on the axel (fig 4).
One side hooks into place and the other side is threaded. Secure the
threaded side in place with one of the wing nuts.
Castors
5. Repeat the same assembly instructions to fit the back castors (fig 5).
6. Check all nuts are secured tightly and turn the unit carefully back to it’s
upright position.
OPERATING INSTRUCTIONS
Caution: This is heater is hot while in operation. It should not be
operated unless it is placed in an upright position. Remove all
packaging material from the heater.
1. Select an indoor location for the heater away from electrical power cords,
curtains and other furnishing. DO not place the heater directly beneath an
electrical outlet or against paperboard or low-density fibreboard.
2. Push the power switch to off and turn the thermostat to low before
plugging in the radiator.
3. Plug the heater into the power sockets and push the power switch to on.
4. There are two indicator light switches, which allow you to set your desired
power levels. For example on C309: ‘I’ is for 800W, ‘II’ is for 1200W. To
set the third power setting, 2000W, press both switches (II & I).
Page 4

5. Switch the heater to one of the three power settings:
C307 – 500W (I), 1000W (II), 1500W (I & II)
C309 - 800W (I), 1200W (III) & 2000W (I & II)
C3011T - 1000W (I), 1300W (II) & 2500W (I &II)
6. The operating temperature is selected by adjustment of the thermostat.
7. To determine the correct operating temperature for you conditions, when you
first switch the unit on set the thermostat to the maximum position. When the
unit reaches the required temperature, slowly turn down the thermostat, until the
unit switches off. The temperature will now be kept constant. When the
temperature falls the unit will come on again.
TIMER SETTING ON C0311T ONLY
The heater will be alway s o n when the slide switch is in TIMER position (I).
The heater will be alway s o ff when the slide switch is in TIMER position (0).
The timer operates when the slide switch is in TIMER position ( ).
To set the timer, rotate the clock dial clockwise, until the current time is aligned
with the indicator arrow at the centre.
When you wish the heater to switch ON, push the corresponding time segment
outwards from the centre. Each segment represents around 15 minutes. For
example, if you want the heater continuously ON for 2 hours, push 8 segments
outwards the centre face.
NOTE: The dial turns CLOCKWISE ONLY. Forcing the clock face
in the other direction will destroy the timing gear. The timer will stop
functioning when unplugged or during a power failure, The correct
time must be reset when power is restored.
SAFETY OVERHEAT SHUT OFF
A thermal overload protector is built in to prevent overheating. When a
potential overheat temperature is reached, the heater will be automatically
shut off. It can only resume operation when the user resets the unit.
RESET THE HEATER
1. Push the Power Switch to the OFF position.
2. Unplug the heater and wait 5-10 minutes for the unit to cool down.
3. Inspect and remove any objects on or adjacent to the heater that may
cause high temperature.
4. After 5-10 minutes, plug the unit in again and operate normally.
CLEANING
Before cleaning turn the heater turn off and unplug from the power supply.
To clean use a soft cloth to wipe off any dust. If the heater is very dirty use a
damp cloth and wipe dry. Do not use any cleaning detergents, sprays or
other chemicals, as they will damage the heater. Store in the original
packaging in a ventilated dry area, during off season use.
Caution: Do not allow water to run into the interior of the heater as this
could cause a fire or electric shock. DO NOT attempt to repair this heater
yourself.
SPECIFICATIONS
Model Power Voltage N.W. kg G.W. kg
C307 1500W 230V~ 50Hz 11.00 12.20
C309 2000W 230V~ 50Hz 13.20 14.60
C3011T 2500W Max 230V~ 50Hz 15.40 17.00
* Wattage will vary dependant on power
 Loading...