

Prefect Control Atlantic Instructions For Use Manual
V1.1
21/07/2017
IN-147
Prefect Instructions
1
Prefect Control Ltd Unit 2, Church Field Business Park, Church Field Road, Sudbury, Suffolk, CO10 2YF
Tel: 01787 320 604 Fax: 0845 450 3020 Email: mail@prefectcontrols.com Website: www.prefectcontrols.com
Due to our policy of continuous improvement, we reserve the right to change specifications without notice
Atlantic panel heaters
SUPPLY VOLTAGE: 220-240 Volts AC 50 Hz AVAILABLE HEATER SIZES: 0.5KW, 1KW, 1.5KW, 2KW
SPECIFICATION:
WARNING:
Caution, hot surface. WARNING: Some parts of this product may become very hot and cause
burns on contact. Special care must be taken if children and vulnerable adults are present.
Caution: For safety reasons, and to avoid overheating, do not cover the heating appliance.
Appliances carrying this symbol must never be disposed of with household waste, but must be
collected separately for recycling. At the end of their life, products must be collected and recycled
according to local regulations and ordinances.
When an appliance is installed at a higher altitude, the air output temperature rises (around 10°C per
1000m rise in ground).
WARNING: this heating unit must only be connected to the supply via a Prefect control which
complies with EU regulation 2015/1188 Lot 20.
• Children under 3 years must be kept away from this appliance, unless they are constantly supervised.
• Children between 3 and 8 years should only switch on or off the heater provided that the appliance has been
placed or installed in a normal position and that these children have supervision or have received instructions
regarding the use of the machine safely.
• This heater can be used by children upper 8 years, or by people of reduced physical, sensory or mental
capacity, if supervised. correctly or instructions for using the appliance safely given to them and if the risks were
apprehended.
• This appliance may only be plugged in or connected by an authorized person, according to valid regulations and
rules.
• Do not use the appliance if the power cable is damaged.
INSTALLATION:
• The heater must be installed in accordance with
professional standards, and comply with the
regulations in force in the country of installation.
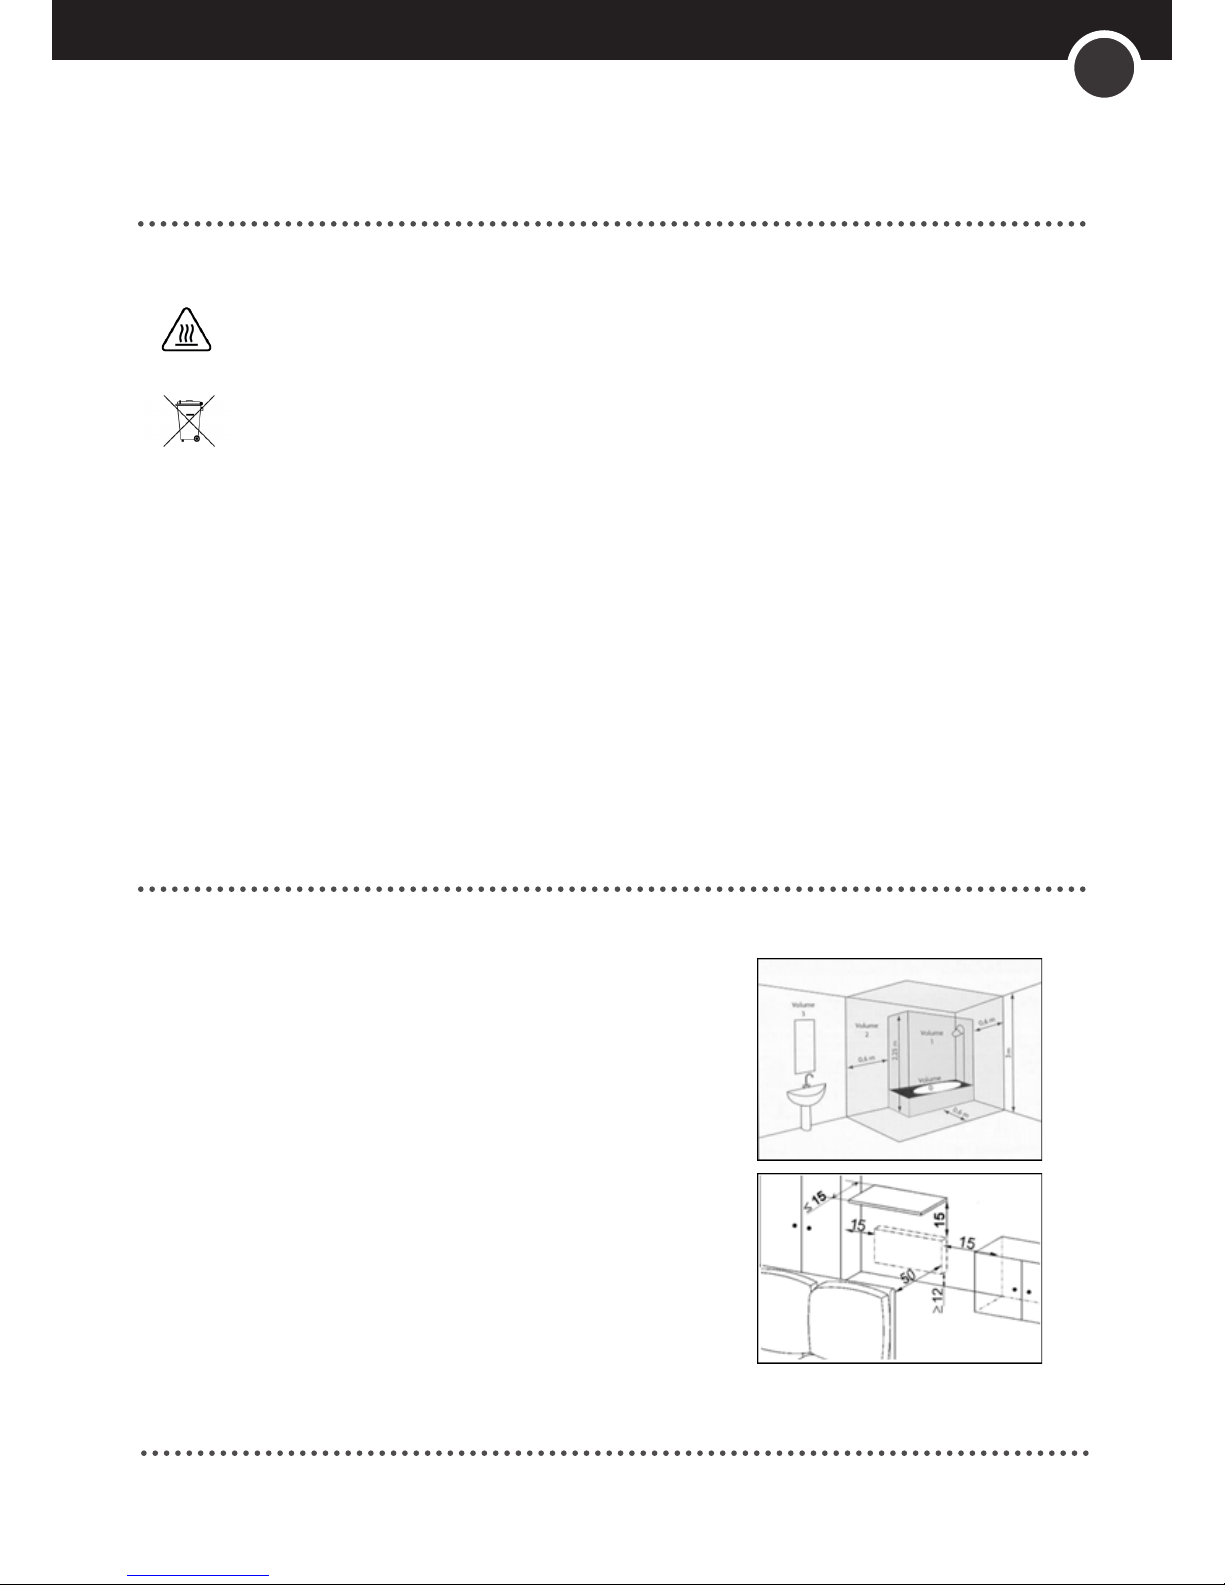
• The appliances are class II, and protected from
water splashes, to IP 24. They may therefore be
installed in volume 2 of shower rooms (see Fig 1). It
must be impossible for anyone using the shower or
bath to reach the appliance’s controls.
• See Fig 2 for minimum distances to obstacles when
positioning the heater.
Do not install the appliance:
• Underneath a fixed mains socket.
• In volume 1 of bathrooms.
• Near curtains or any flammable materials.
• The air outlet must be visible at the top of the
appliance.
Fig 1
Fig 2
V1.1
21/07/2017
IN-147
Prefect Instructions
2
Prefect Control Ltd Unit 2, Church Field Business Park, Church Field Road, Sudbury, Suffolk, CO10 2YF
Tel: 01787 320 604 Fax: 0845 450 3020 Email: mail@prefectcontrols.com Website: www.prefectcontrols.com
Due to our policy of continuous improvement, we reserve the right to change specifications without notice
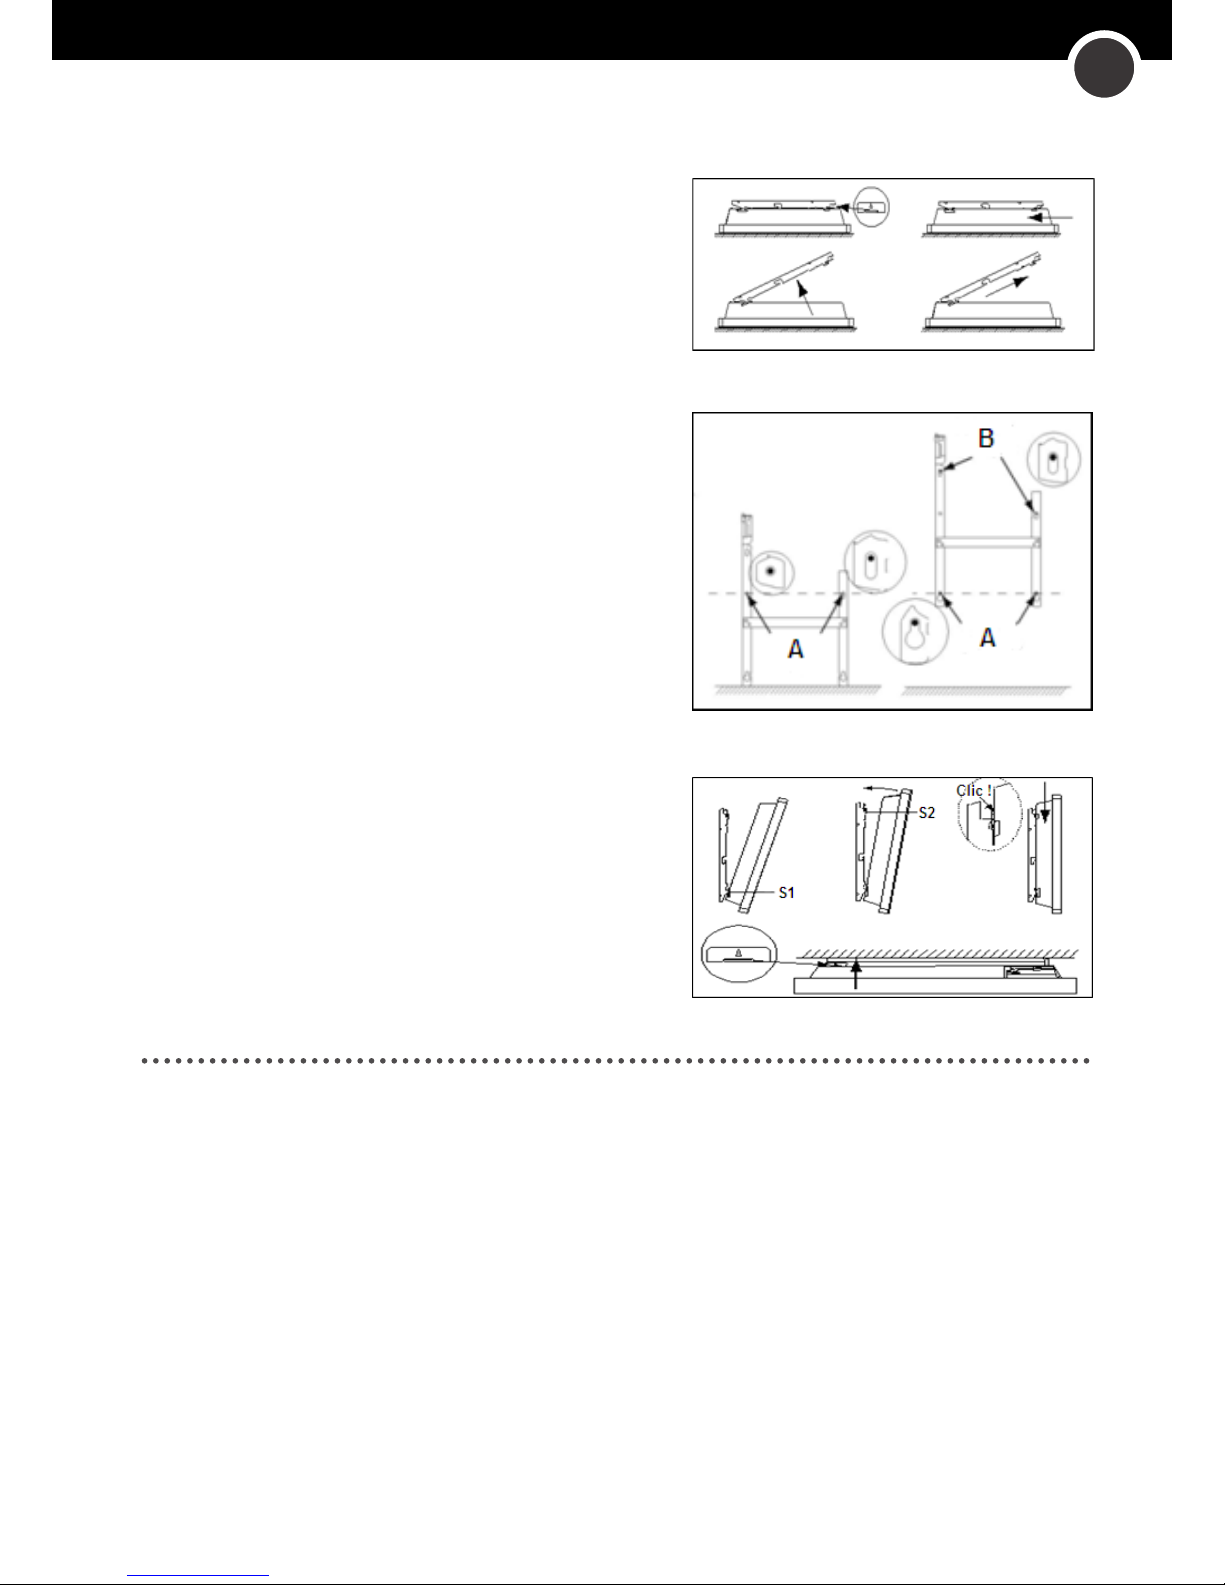
INSTALLATION - FIXING:
Releasing the Heaters bracket latching bar:
• Place the heater flat on level ground facing down, take care
not to damage the heater.
• Use a flat blade screwdriver to raise the tongue at the top of
the bracket. Take care not to raise the tongue to far as this
will result in damage to the bracket. Whilst holding the tongue
raised in the up position slide the bracket downwards towards
the base of the heater to release the top latches.
• Pivot the bracket up and remove from the heater.
Fixing the heater bracket:
• Place the latching bar on the floor upright against the wall
locate drilling holes A (see Fig 4), These show where the lower
fastenings need to be located for the correct heater height.
• Lift the bracket aligning it with drilling point A to locate the B
drilling points.
• Drill the A and B drill holes and insert suitable plugs if
required.
• Locate the bracket and fix in place with suitable fixings.
Locating the Heater onto the bracket:
• Locate the heater onto the lower latches of the bracket, the
heater must be located at a 30° angle to locate into the lower
latch, once the lower latches are located pivot the heater
parallel to the fixing surface and locate the top latches, once
the top latches are located slide the heater downwards until
a click is heard indicating the heater is properly latched into
place.
Releasing the heater from the fixed position:
• To release the heater from the bracket, use a flat bladed
screwdriver to lift the latch tongue (see fig 5) away from the
heater towards the fixing surface. Take care not to bend the
tongue too far. With the tongue in the lifted position lift the
heater upwards and then pivot away from the fixing surface by
30° and then lift the heater away from the bracket.
Fig 3
Fig 4
Fig 5
INSTALLATION - ELECTICAL CONNECTION:
The power supply to the appliance is 220/230V, 50Hz/60Hz.
• The panel heater must be connected to the mains by a 2-wire cable (Brown= Live, Blue = Neutral) by means of a
Switched fused spur.
• In humid areas such as bathrooms and kitchens the power socket must be installed at least 25 cm above the
floor. The installation should be fitted with a double pole break device with a break of at least 3 mm.
• The Heater must not be connect to the earth.
• The appliance must be installed by a professional (a qualified electrician) in accordance with the regulations in
force in United Kingdom.
• The “no control appliance” Must be installed with a suitable thermostat for example the PRE2000 or PRE5003.
• When fitted in conjunction with an external thermostat as suggested above the thermostat should be mounted at
least 300mm away from the heater, and protected from artificial heat sources for example: Desktop computers,
TV’s, Desk lamps etc. The Thermostat should be mounted at chest height or mounted in the dado trucking above
the workstation. Mount in a 25mm or greater back box.
 Loading...