

Preeflow eco-PEN450 Commissioning And Maintenance Manual

Dosing system
Commissioning and
maintenance manual
eco-PEN450


eco-PEN450
Commissioning and maintenance manual
Copyright © Version 1.8 3 / 15
Contents
1 This manual 5
2 The dispenser 5
3 Safety 5
4 Starting up for the first time 6
4.1 Inserting the stator 6
4.1.1 Connecting the dosing unit to the drive unit 7
4.1.2 Supply and bleed the medium. 7
5 Connection options 9
6 Cleaning 10
7 Spare parts 11
8 Maintenance 12
8.1 Changing the stator 12
8.2 Troubleshooting 12
9 Disposal 12
10 Technical specifications 13

eco-PEN450
Commissioning and maintenance manual
4 / 15 Version 1.8 Copyright ©
eco-PEN450
Commissioning and maintenance manual
Copyright © Version 1.8 5 / 15
1 This manual
Dear customer,
This manual forms part of the operating and maintenance manual for the dosing system
eco-CONTROL EC200. The operating and maintenance manual must have been read
and understood in full before commissioning or carrying out maintenance work on the
eco-PEN450.
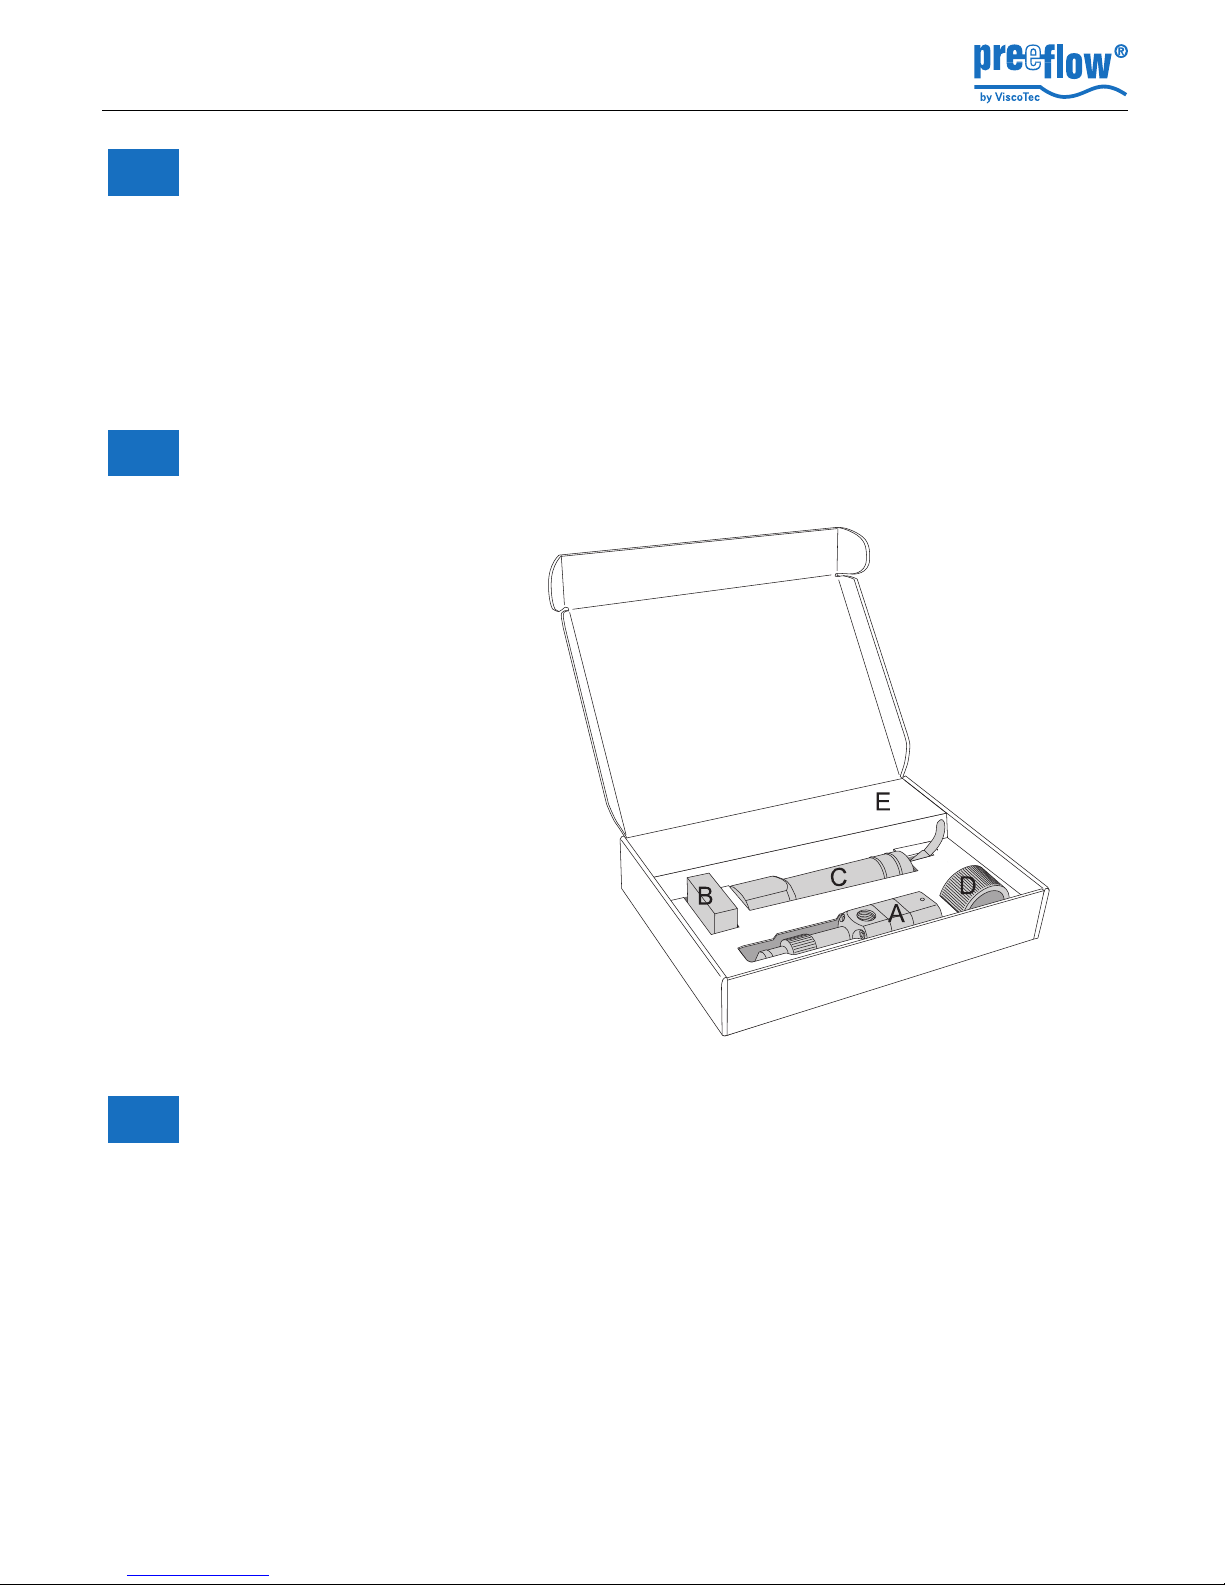
2 The dispenser
The dispenser is supplied with these components and accessories:
3 Safety
All instructions in the Safety section of the maintenance and operating manual for the
dosing system must be complied with and implemented.
fig. 1
A Dosing unit
B Stator
C Drive unit
D Assembly aid
E Installation tool
(2 Allen wrenches)
F Spraying device (without fig.)
 Loading...