

Preco Electronics PreView Plus, PVP710 Setup Manual

PreView® Plus Monitor
PVP710
Setup Guide
www.preco.com


TRADEMARKS
The names of actual companies and products mentioned herein may
be the trademarks of their respective owners. Any rights not
expressly granted herein are reserved.


Contents
Product Description ............................................................................................ 1
Safeguard Instructions ....................................................................................... 1
Function ............................................................................................................... 3
On Screen Symbols: ............................................................................................ 4
Settings: ............................................................................................................... 5
Basic Installation with the PVP710: ................................................................... 9
Configuring the PVP710: .................................................................................... 9
Understanding Sensor IDs: ............................................................................... 12
Detections & Triggers*: .................................................................................... 12
Setting up Camera Views & Volume: ............................................................... 13
Locking Out the Monitor (Set the Home Screen): ........................................... 14
Standby Feature: ............................................................................................... 15
Alarm Acknowledge (ACK) Feature: ................................................................. 15
Specifications .................................................................................................... 18
Troubleshooting: ............................................................................................... 19
Additional Options ............................................................................................. 20
Warranty Information ........................................................................................ 21

+1.866.977.7326 www.preco.com 3700042D
Copyright 2016
Page 1
Product Description
The PRECO Electronics® PVP710 is an integrated monitor/communication
device that operates in conjunction with PRECO Electronics® PreView® radar
sensors and PRECO Electronics® ClearPath cameras. When properly
configured, the monitor will switch to show the camera view that is
associated with the highest priority object detection and will provide visual
as well as audio cues to alert the operator to the presence of an object.
Safeguard Instructions
Please read the following cautions carefully before using this product.
Following these rules prevent users from damages related to the misuse of
the product.
Caution:
o Electrical shock or damage to the product may occur if
machine power is not turned off during installation.
o Do not install the monitor closer than 6” (15cm) to a heat
emitting source.
o Do not clean exterior with solvents as they may damage the
product and could potentially cause a fire.
o Do not mount the unit where it would be subjected to
extreme vibration or shock.
o Do not place near a magnet as it may cause undesirable
performance.
o Do not disassemble unit as it will void the warranty.
+1.866.977.7326 www.preco.com 3700042D
Copyright 2016
Page 2
Features
Water resistant (IP67), Aluminum housing
4 Camera input (NTSC/PAL compatibility)
Multiple display modes (single, 2, 3, 4 split)
Automatic dimmer sensor
7 inch WVGA (800x480) Wide LCD Panel
Automatic trigger for displays (4)
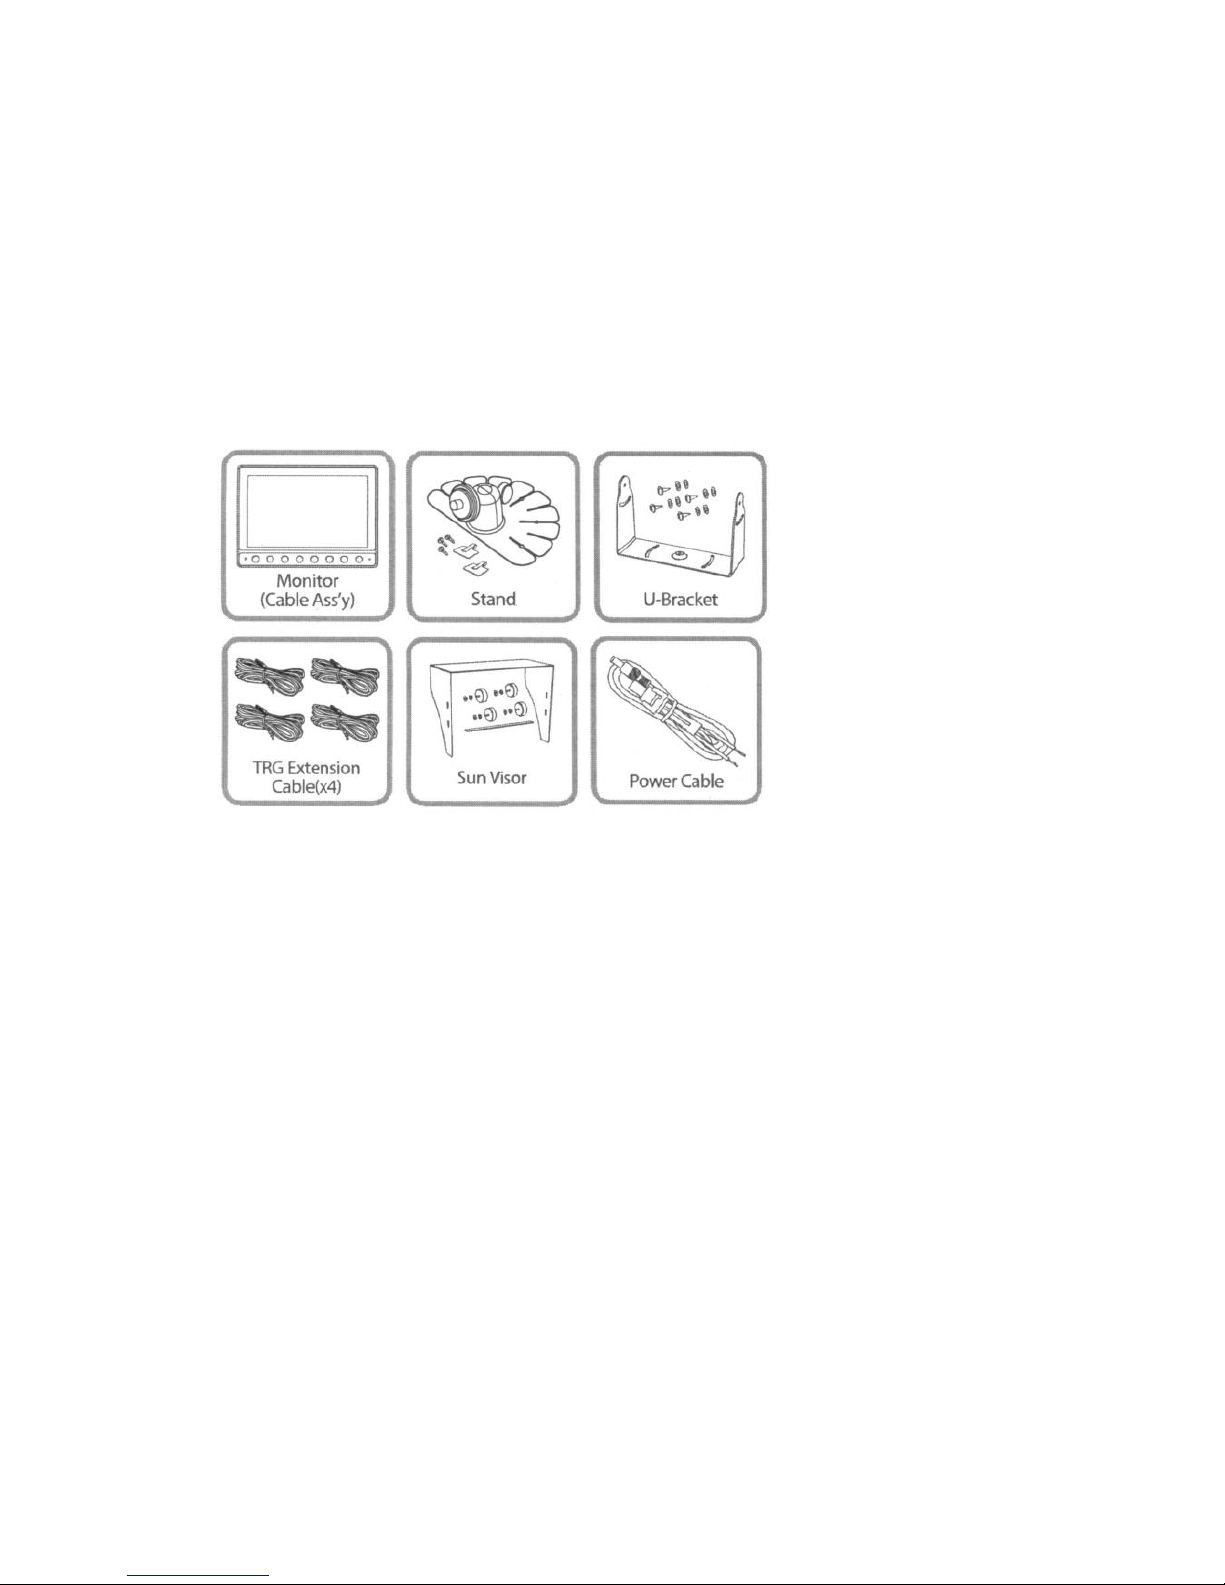
Contents
Before using this product, please check the contents. If there are missing
parts, please contact PRECO Electronics®.
Design and Specifications are subject to change without notice.
+1.866.977.7326 www.preco.com 3700042D
Copyright 2016
Page 3
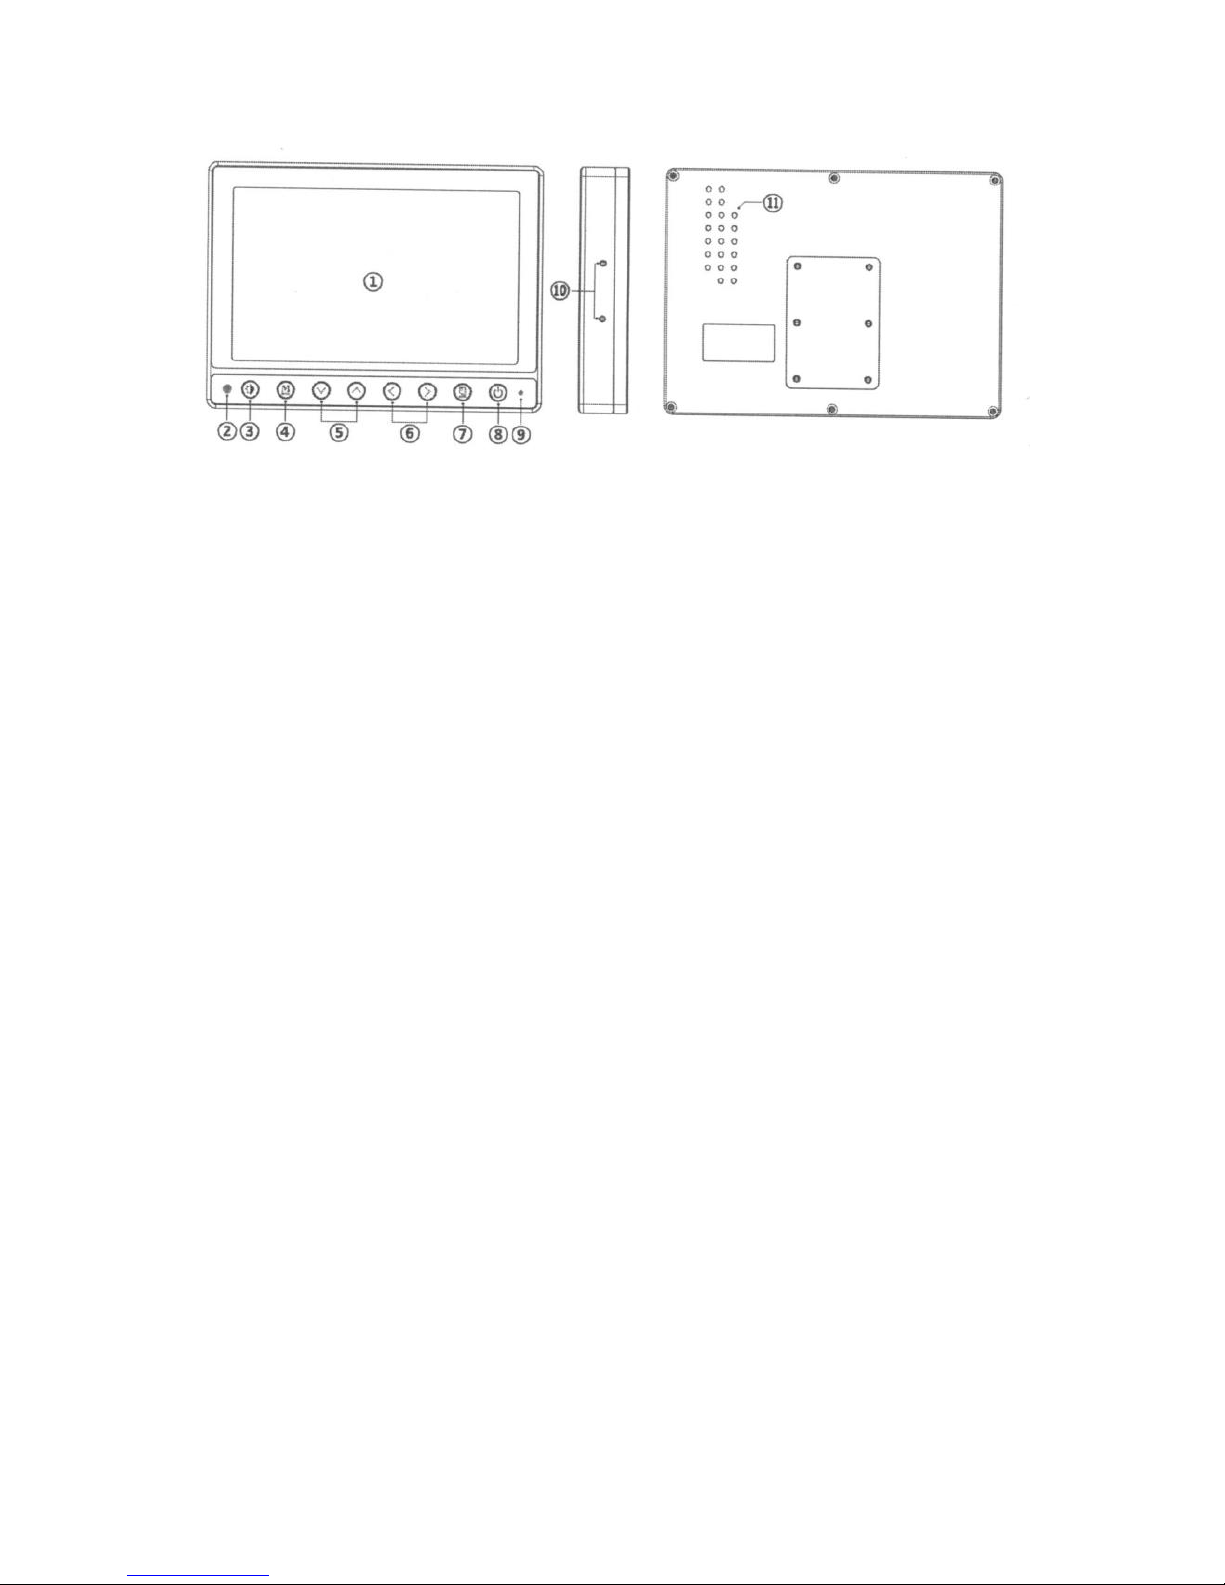
Function
1. LCD Screen – WVGA (800x480)
2. Dimmer Sensor – Automatic brightness control sensor
3. Dimming Button – Select the screen brightness
4. Mode Button – Cycle through camera modes – single, double, triple,
quad.
5. Up/Down Buttons – Used to select the different menu functions and
cycle through the different camera views
6. Left/Right Buttons – Used to change values for the different menu
functions
7. Menu Button – The menu button activates the on screen display (OSD)
menus for monitor adjustments. Press button multiple times to cycles
through different functions.
8. Standby Button – Enters and wakes the monitor from Standby mode
9. Standby LED – Illuminates to indicate the unit is powered and in standby
mode
10. Sun Visor Hole – Sun visor & U bracket installation hole
11. Speaker hole – Speaker hole (Waterproof)

+1.866.977.7326 www.preco.com 3700042D
Copyright 2016
Page 4
On Screen Symbols:
This symbol indicates that the sensor associated with that camera is
powered and communicating with the monitor properly.
This symbol indicates object detection. This symbol will flash and
vary in count, size, and color depending on the proximity to the
object. Five of these symbols represent immediate proximity to an
object.
An arrow will appear in place of the symbol when an object is
detected to inform the operator which sensor is detecting by
pointing in the direction of the detecting sensor. The arrow will vary
in color relating to the proximity of the object being detected with
red representing closest proximity.
This icon will appear in the event of a PreView® radar sensor
reporting a BIST (Built In Self Test) error. If this icon appears, the
system is in need of repair.
This icon will appear in the event the monitor receives no
communication from any sensor. If this icon appears, the system is
in need of repair.
This icon will appear in the event of a communication error with a
single sensor in a multiple sensor application. If this icon appears,
the system is in need of repair.
This icon will appear in the event of a PreView® radar sensor
reporting a blockage error. If this icon appears, the sensor needs to
be cleaned off.
If any of the above error icons are present PRECO Electronics® recommends
ceasing operation of the vehicle until the object detection system is repaired.
 Loading...