

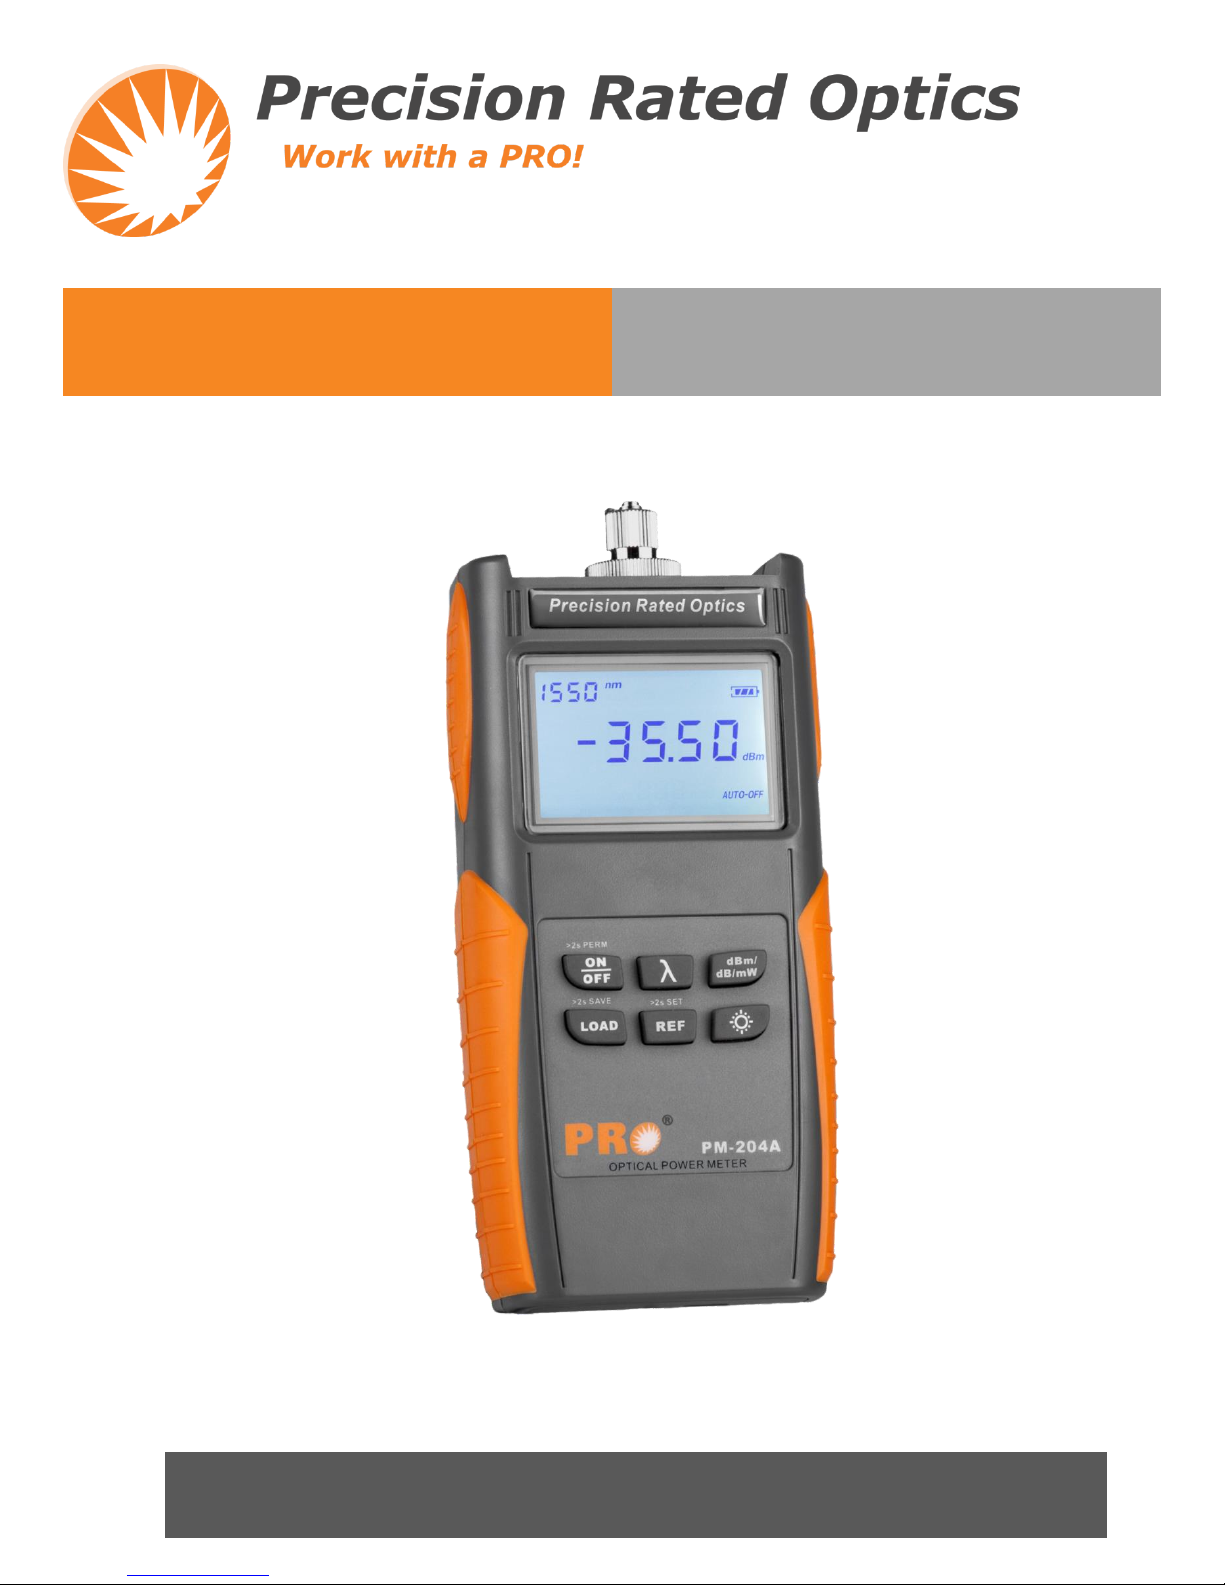
PM-204A/B
Power Meter
Operation Guide

2
888-545-1254 | www.PrecisionRatedOptics.com
PM-204A/B
Contents
1. Introduction ..........................................................................................................................................................3
2. Warranty ...............................................................................................................................................................3
3. Safety Information................................................................................................................................................3
4. Preparing for Operation ......................................................................................................................................4
4.1. Unpacking the instrument ................................................................................................................................4
4.2. Discharged batteries ........................................................................................................................................4
4.3. AC operation ...................................................................................................................................................5
5. Operation ..............................................................................................................................................................5
5.1. Display and controls ........................................................................................................................................5
5.1.1. Keypad ......................................................................................................................................................5
5.1.2. LCD ..........................................................................................................................................................6
5.2. Turning the instrument on and off ...................................................................................................................6
5.3. Setting the wavelength & Activate the Auto-wavelength Recognition (TWIN) .............................................6

www.PrecisionRatedOptics.com | 888-545-1254
3
PM-204A/B
1. Introduction
The PM 200 series of Power Meters are both rugged and refined. Operating in all commonly used wavelengths,
these well-engineered units have been designed to function in laboratories, LANs, WANs and CATV
environments, as well as long-distance optical networks.
The PM 200 series, used in conjunction with our Stabilized Light Sources, allows the user to identify optical fiber,
measure optical attenuation, verify continuity and evaluate fiber link transmission quality. The Auto- Wavelength
Recognition eliminates the need for communication between technicians and reduces the potential for error.
Sold, serviced and supported in the USA, the PM 200 series comes with a standard 3-Year manufacturer warranty
as well as all standard connectors, AC/DC charger and carrying case.
2. Warranty
Three Years Limited Warranty
Products are warranted against the defective components and workmanship for a period of three years from the
date of delivery to the original customer. Any product found to be defective within the warranty period would be
returned to authorized service center for repair, replacement and calibration.
Exclusions
The warranty on your equipment shall not apply to defects resulting from the following:
Unauthorized repair or modification including battery replacement
Misuse
Negligence
Accident
Returning Product
To return product, you may contact PRO to obtain additional information if necessary. To serve you better, please
specify the reasons for the return. All delivery and mails should be sent to the following address:
9999 Hamilton Blvd Breinigsville, PA 18031
3. Safety Information
Warning
Never look directly into optical outputs or a fiber while the equipment is on. Invisible and visible laser
beam may damage your eyes.
Do not short-circuit the terminal of AC adapter I charger and the batteries. Excessive electrical current
may cause personal injury due to fumes, electric shock or equipment damage.
Connect AC power cord with the equipment and wall socket properly. While inserting the AC plug, make
sure there is no dust or dirt on the terminals and both plugs are fully seated. Incomplete engagement may
cause fuming, electric shock or equipment damage and may result in personal injury.
Do not operate the equipment near hot objects, in hot environments, in dusty/ humid atmosphere or when
condensation is present on the equipment. This may result in electric shock, product malfunction or poor
performance.

4
888-545-1254 | www.PrecisionRatedOptics.com
PM-204A/B
4. Preparing for Operation
4.1. Unpacking the instrument
Packing material
We suggest that you keep the original packing material. Using the original packing material is your guarantee of
protecting the instrument during transit.
Standard Accessories:
Power Meter, FC/PC, SC/PC, ST/PC Interchangeable Connectors, NiMH Batteries (x2), Built-in 2.5mm
Universal Adaptor, Manual, Software (CD), USB Cable, Worldwide Compatible AC/DC Power Adaptor, Test
Report, Carrying Case
Checking for damage in transit
After unpacking the instrument, check to see whether it was damaged in transit. This is particularly likely if the
outer casing is clearly damaged. If there is damage, do not attempt to operate the instrument or to repair it without
authorization. Doing so can cause further damage and you may lose your warranty qualification.
4.2. Discharged batteries
There is a battery indicator on the screen to show the remaining charge. There are four possibilities the indicator
may show, full, with 2 blacks, with 1 black and empty. If an empty battery indicator flashes it means the power is
almost out, and that is when you should recharge the batteries by connect the AC adapter with the instrument. If
the discharged batteries get to their limitations after long-time use, please replace it with a new one. To replace
the batteries, please remove the battery plate on the back of instrument with a screwdriver.
When the battery charge is extremely low to supply the necessary power, the instrument will automatically switch
off.
Note:
1) The AC indicator is not displayed when power is supplied by battery.
2) To eliminate the possibility of acid leakage, please take out the battery if the unit is not used for a long
time.

www.PrecisionRatedOptics.com | 888-545-1254
5
PM-204A/B
Key
Function
Switches instrument on I off. Long
keypress while powering on to activate the
instrument without Auto-off function.
Selects measurement wavelength in
sequence of 85011300113101
14901155011625nm and to activate autowavelength recognition (TWIN).
Switches measurement unit among dBm,
dB and mw.
Long keypress for 2s to store the current
test value; short keypress to display the
record.
Short keypress to display reference level of
present test wavelength. Long keypress to
set a new reference level of present test
wavelength.
Switches backlighting on I off.
Bottom
4.3. AC operation
If the instrument is mainly used at one location, e.g. in a laboratory or test department, the AC adapter can be used
to power it instead of batteries. There is a DC input jack on the bottom of the PM-204A/B instrument casing into
which the output cable of the AC adapter is plugged. And when the AC adapter is plugged in, the AC indicator on
the LCD will be displayed.
Note:
1) Power is supplied by the AC adapter even if battery is fitted. And the battery indicator is not dis played on
the screen when AC adapter is plugged.
2) Make sure that the operating voltage of the AC Adapter I Charger is the same as the local AC line
voltage.
5. Operation
5.1. Display and controls
5.1.1. Keypad
The PM-204A/B keypad is used to access a wide range of instrument functions.

6
888-545-1254 | www.PrecisionRatedOptics.com
PM-204A/B
5.1.2. LCD
5.2. Turning the instrument on and off
1) Press the "ON/OFF" key briefly.
2) The instrument powers on and backlighting switches on.
3) Please check the battery capacity if it fails.
4) Press the "ON/OFF" key briefly again.
5) The instrument powers off and backlighting switches off.
Note: Auto-off function
1) The instrument powers off automatically if no keypress in 10 minutes.
2) Press the "ON/OFF" key for about 2 seconds to power on the instrument with "Auto-off" function
deactivated.
5.3. Setting the wavelength & Activate the Auto-wavelength Recognition (TWIN)
Press the " " key repeatedly until the desired wavelength is
displayed. You can select from six possible wavelengths: 850nm,
1300nm, 1310nm, 1490nm, 1550nm, 1625nm. The instrument
defaults to the wavelength which the user set in the last test.
When used with the PM-204 Series optical laser source, the
wavelength will shift automatically according to the output
wavelength of the laser source. Long keypress [ ] is to activate
the auto-wavelength recognition and the "TWIN" will show on the
LCD. Short keypress [ ] is to close the "TWIN".

www.PrecisionRatedOptics.com | 888-545-1254
7
PM-204A/B

Precision Rated Optics, Inc.
Corporate Office
Billing & Processing
PO Box 877 Trexlertown, PA 18087
Precision Rated Optics, Inc.
Product Distribution Center Manufacturing & Testing
9999 Hamilton Blvd Breinigsville, PA 18031
 Loading...