


1.88
Precision
360
Atome User Guide
40.3
35
R11.24
SCALE 2.000
15.5
11.98
1st June 2019
Rev 2.0
Introduction
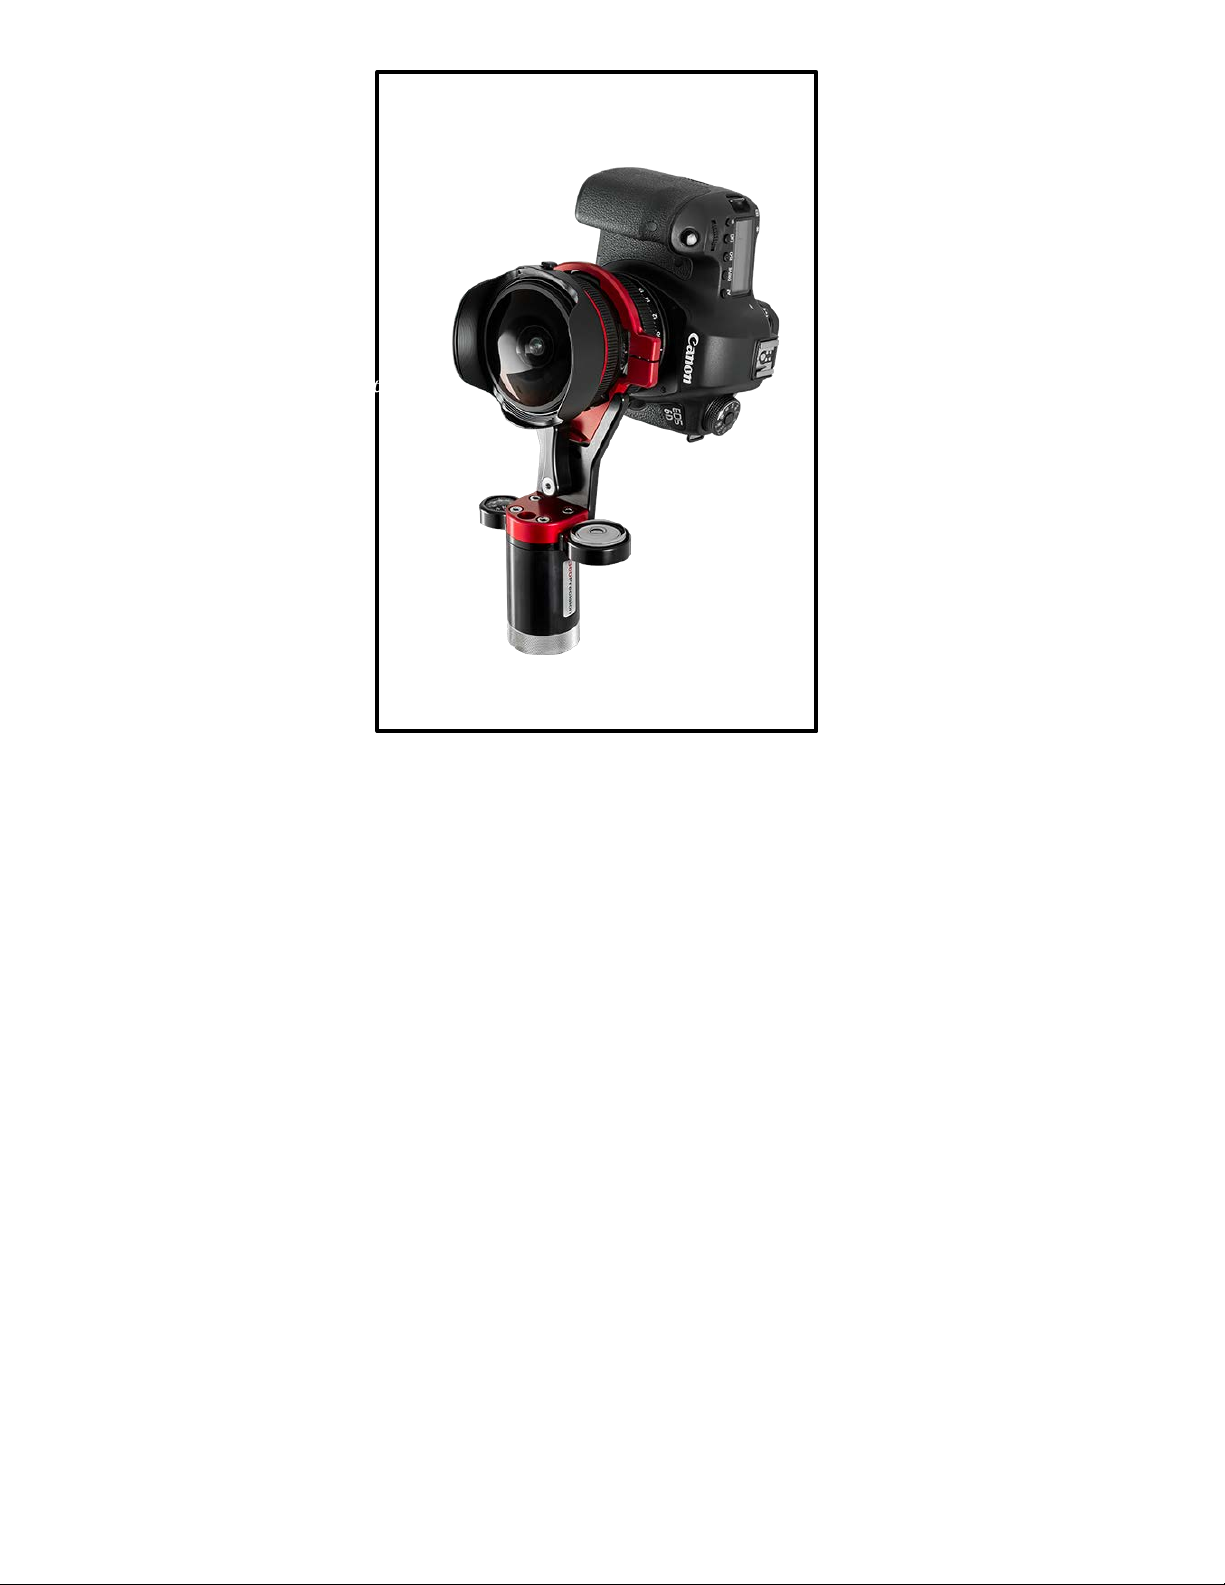
Congratulations on your purchase of a Precision360 Atome! The Atome is designed to compliment
rather than replace our other panoramic tripod heads. The small & lightweight design of the Atome
is primarily designed for travel panography; we realise that carrying a Precision360 Absolute up a
mountain is an unenviable task! Please do not infer that the Atome is inferior to our other models; in
fact the Atome alone may prove enough hardware for hobbyist panoramic use.
As with our other products, this panohead is designed for specic lens and camera combinations. The lens
specic requirement seems clear, but use of a fullframe or DX sensor may effect our recommendation as
to the specic Atome that we should supply (e.g. some, such as the Sigma8 Atome, can have a bracket
which enables small upward tilt to ensure good zenith coverage, and detent options can change). The
consequence from this is that any Atome we supply to you will only need minor assembly before you
can get shooting. Once setup there are no settings which can go wrong, so no spoiled shots. The nodal
point is xed and automatically setup. This is one of the main benets of our design and manufacturing
technique.
Due to the intimate contact between the lens ring and the lens we cannot guarantee that use of the
Atome will not leave small mounting marks on your lens. The ability to make such a small panohead
is only possible with a lens mount; we think this is a trade-off worth making. In our testing we have
not seen any marking on the lens, but if a scratch on your lens housing is unacceptable we would
recommend use of a different panohead from our range.
Words written in this manual in italics refer to a physical part of the head, photos of which can be found
in the parts list at the back of this manual.
1

Description of operation
The overriding difference between the Atome and our other panoheads is that the camera & lens are
supported by the lens, rather than the camera body. The lens ring which facilitates this is designed to be
permanently attached to the lens, and a quick release between the lens ring and the Y support enables
release of the lens and camera from the panohead.
Walking with a camera on a tripod is very difcult; this panohead solution enables easy motion whilst
walking, and keeps the valuable/delicate camera & lens close to your body.
Operation in the eld would typically go along these lines:
Camera on neck strap around neck (with lens ring on lens) & tripod under arm with the rest of
•
the Atome on tripod.
Find position you wish to shoot from. Setup tripod and level.
•
Drop camera via lens ring onto Y support and move the lock* across to lock the lens and camera
•
to the head.
Setup camera (Meter shot/ISO/Focus/WB etc.)
•
Take photographs through 360 degrees.
•
Undo lock and lift camera and lens off head, to now be held by neck strap.
•
Shoot handheld zenith/nadir if you wish
•
Pick up tripod; carry on moving to next shot.
•
*The quick release lock is designed to ensure that the lens
ring rests in intimate contact with the Y support. The lock is
NOT DESIGNED to rest fully to the left hand side of its track.
Use your thumb to push the lock towards the left, and let it
rest where it chooses to when using a medium force upon it.
Typically it will rest around the vertically upwards position. Do
not use a high force to try to push the lock all the way across,
this may damage the Atome. The image to the right shows the
Atome with the lock correctly engaged..
Assembly
The Atome comes 95% assembled out the box. All that remains is for you to attach the lens ring to your
lens before you can get shooting. Fitment of the lens ring to the lens needs to be completed carefully to
ensure that the camera is rotated to the correct orientation and with the correct screw tension.
Remove the screw from the lens ring. This makes it easier to place the lens ring over the lens.
•
For the Nikon 10.5 slide the ring on from the front of the lens (shown below), for the Sigma8 the
•
ring attaches from the rear of the lens. Make sure the internal ridge is tight against the chamfer on
the lens to ensure the lens will be clasped properly and in the correct nodal position
2

With the lens ring in place, rotate the lens so that the camera will be in a portrait position with the
•
lens ring on the Y support. It may help to carefully place the lens into the Y support so you can
visualise the setup. (With the lens ring balanced on its at edge on a table, you would normally
you wish to have the Nikon mounting dot at a 3 O’clock position.)
When you are happy with where the lens should be rotated to, insert the screw into the lens ring
•
and gently screw it in. Make sure you keep the lens ring at the correct rotation as the screw starts
to grip the lens. The screw should at one point feel quite ‘positive’, stop at this stage.
To prove correct tension of the screw, hold the lens and lens ring in the in the Y support and lift
•
them both upward while keeping one edge tight in the Y support. The aim is to hold the lens at a
height so you can see a thin line of light through the gap. The picture below shows the 3 states
you can achieve. If the bolt is too tight or loose, undo/do up and retest until you have a level and
parallel gap – this ensures the whole assembly is in intimate contact.
Too loose: tighten screw Perfect Too tight: loosen screw
If for whatever reason you decide to take the panohead apart (we do not normally recommend doing
so) it is important to place the spring washers on the main internal shoulder bolt back in the correct
orientation. The spring washers oppose each other like a clamshell and go onto the shoulder bolt
before the small spacer washer. A picture of correct orientation is shown in the parts list. Once again,
there is normally no reason to dismantle the panohead, so we recommend you do not do so unless you
need to!
Warranty
We hope this panoramic tripod head will provide you with years of trouble free use. Precision360
will warranty the Atome against manufacturing defects for a period of 60 months from purchase. The
warranty specically excludes any claims pertaining to mounting marks left on the lens.
Parts li
st
Lens ring and screw
3

Nodal plate
Y Support
Lock
Cylinder
Base
Shoulder bolt
Spring washers
Spacer washer
4

1.88
40.3
R11.24
35
11.98
(C) Precision360 2019
matthew@precision360.co
SCALE 2.000
15.5
 Loading...