

Page 1
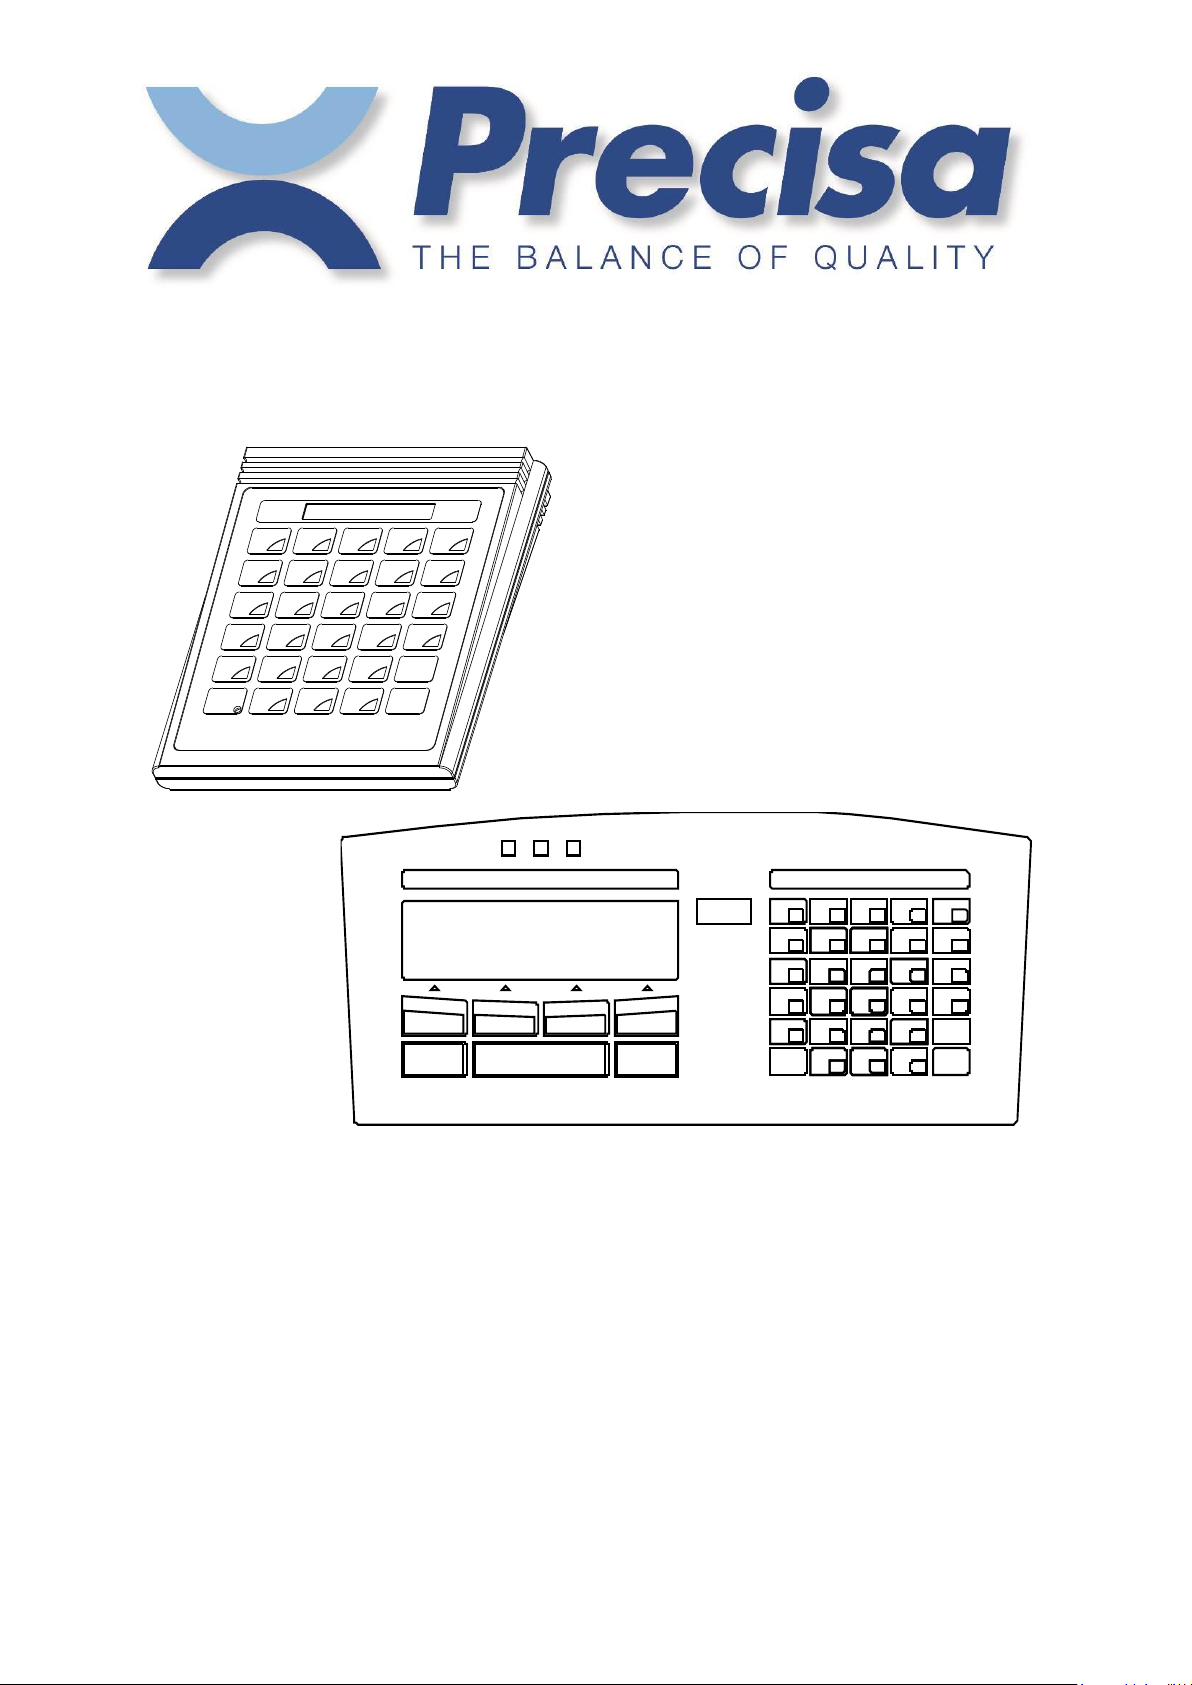
Operating Instructions
Smartbox
Piece counting
Precisa Gravimetrics AG 350-8117-000e1
Page 2

Smartbox Piece counting
Software P00.01.01
1 Brief description 5
1.1 Starting up 5
1.1.1 Smartbox type: External box 5
1.1.2 Smartbox type: In balance-terminal integrated 5
2 Description of keys 6
3 Configuration menu 7
3.1 Printing out the configuration 9
3.2 Arrangement of output channels 9
3.3 Operating diagram for signallamp (TU,TO) 10
3.4 Connection of external keys 10
4 Menu 11
5 Error messages 11
6 General notes 12
6.1 General settings 12
6.2 Program update 12
6.3 Technical data 12
7 Article 13
7.1 The components of the article 13
7.2 The signallamp limits of the article 14
7.3 Storing an article in memory 15
7.4 Editing an article 16
7.5 Loading an article from the memory 16
7.6 Deleting an article from the memory 16
7.7 Deleting all articles from the memory 17
7.8 Deleting the article from the working memory 17
7.9 Barcodes and articles 17
7.10 Table for automatic tolerance calculation (TU, TO) 17
8 Tare 18
8.1 Storing a tare in the tare memory 18
8.2 Deleting the current tare 18
8.3 Loading a tare from the tare memory 18
8.4 Deleting a tare from the tare memory 19
8.5 Deleting all tares from the tare memory 19
8.6 Pre-setting tare using the decimal keypad 19
8.7 Barcode and tare 19
Precisa Gravimetrics AG 2
Page 3

Smartbox Piece counting
Software P00.01.01
9 Printout 20
9.1 Printing out measurements 20
9.2 Allocating a fixed print format to the PRINT key 20
9.3 Printing out an article 20
9.4 Printing out a list of articles 20
9.5 Printing out a tare from the tare memory 21
9.6 Printing out the list of tares 21
9.7 Printing out the current tare 21
9.8 Printing out the current reference value 21
9.9 Printing out the version of the Smartbox software 21
10 Counting 22
10.1 Counting with number of pieces as reference 22
10.1.1 Fixed reference key – without preset tare value 22
10.1.2 Variable reference – without preset tare value 23
10.1.3 Fixed reference key – with preset tare value 23
10.1.4 Variable reference – with preset tare value 24
10.2 Counting with unit weight as reference 24
10.3 Barcodes and reference weight 25
10.4 Counting with temporary article memory 25
10.5 Counting with the article memory 26
10.6 Unit weight determined with reference balance 27
11 Percentage deviation 28
11.1 Set reference weight 28
11.1.1 Set reference weight to 100% 28
11.1.2 Set reference weight to any desired percentage 28
11.2 Weighing with temporary article memory 29
11.3 Weighing with the article memory 30
12 Weighing with tolerance range 31
12.1 Weighing with temporary article memory 31
12.2 Weighing with the article memory 32
13 ADD UP 33
13.1 Totalling and printing out 33
13.1.1 Printout of the Add Up Sample Format 1 33
13.1.2 Printout of the Add Up Sample Format 2 33
13.1.3 Printout of the Add Up Sample Format 4...14 33
13.2 Deleting samples 34
13.2.1 Printout of a deleted sample 34
13.3 Printing out the total 34
13.3.1 Printout of the Add Up Result Format 1 34
13.3.2 Printout of the Add Up Result Format 2 34
Precisa Gravimetrics AG 3
Page 4

Smartbox Piece counting
Software P00.01.01
14 Defining print formats 35
14.1 Storing an ASCII text line 35
14.2 Storing a line of HEX (control codes) 35
14.3 Deleting a text or HEX line 35
14.4 Pre-defined text lines 36
14.5 Storing a print format 38
14.6 Allocate print format to the PRINT key 38
15 Eltron LP2022SE or LP2824 Barcode-Printer 39
15.1 Print article number in EAN8 code (Printformat 16) 39
15.2 Print article number in EAN13 code (Printformat 17) 39
15.3 Print article number in Code39 (Printformat 18) 39
15.4 Print tare weight in EAN13 code (Printformat 19) 39
15.5 Print reference weight in EAN13 code (Printformat 20) 39
15.6 Print text-label (Printformat 21) 39
16 Barcode-Reader 40
16.1 Storing an article number with the barcode-reader 40
16.2 Loading an article with the barcode-reader 40
16.3 Reading in a reference weight with the barcode-reader 40
16.4 Reading in tare weight with the barcode-reader 40
17 Reference-Balance 41
17.1 Configuring the reference-balance 41
17.2 Determining the unit weight from several articles 41
17.3 Transferring unit weight of an article 41
17.4 Transferring tare weight 41
18 Interfaces and accessories 42
18.1 Standard interface 42
19 Controlling the Smartbox remotely via the interface 43
19.1 Key code for the functions 43
19.2 Direct commands 44
19.2.1 Direct commands for the article 44
19.2.2 Direct commands for the tare 45
19.2.3 Direct commands for the strings and print formats 46
20 Tips and tricks 47
20.1 < DISP > key 47
20.2 < > key 47
20.3 < - > key 47
Precisa Gravimetrics AG 4
Page 5
Smartbox Piece counting
Software P00.01.01
1 Brief description
The SMARTBOX COUNTING program provides various ways to determine numbers of pieces, to determine
proportional differences between weighing goods and to do checkweighings with +/-tolerances.
Article numbers, product names, reference weights, tare weights etc. can be stored in a permanent memory and
later be activated as required.
Furthermore the individual weighing samples can be totalled up, with the respective protocol-printout of the
individual samples and the total.
1.1 Starting up
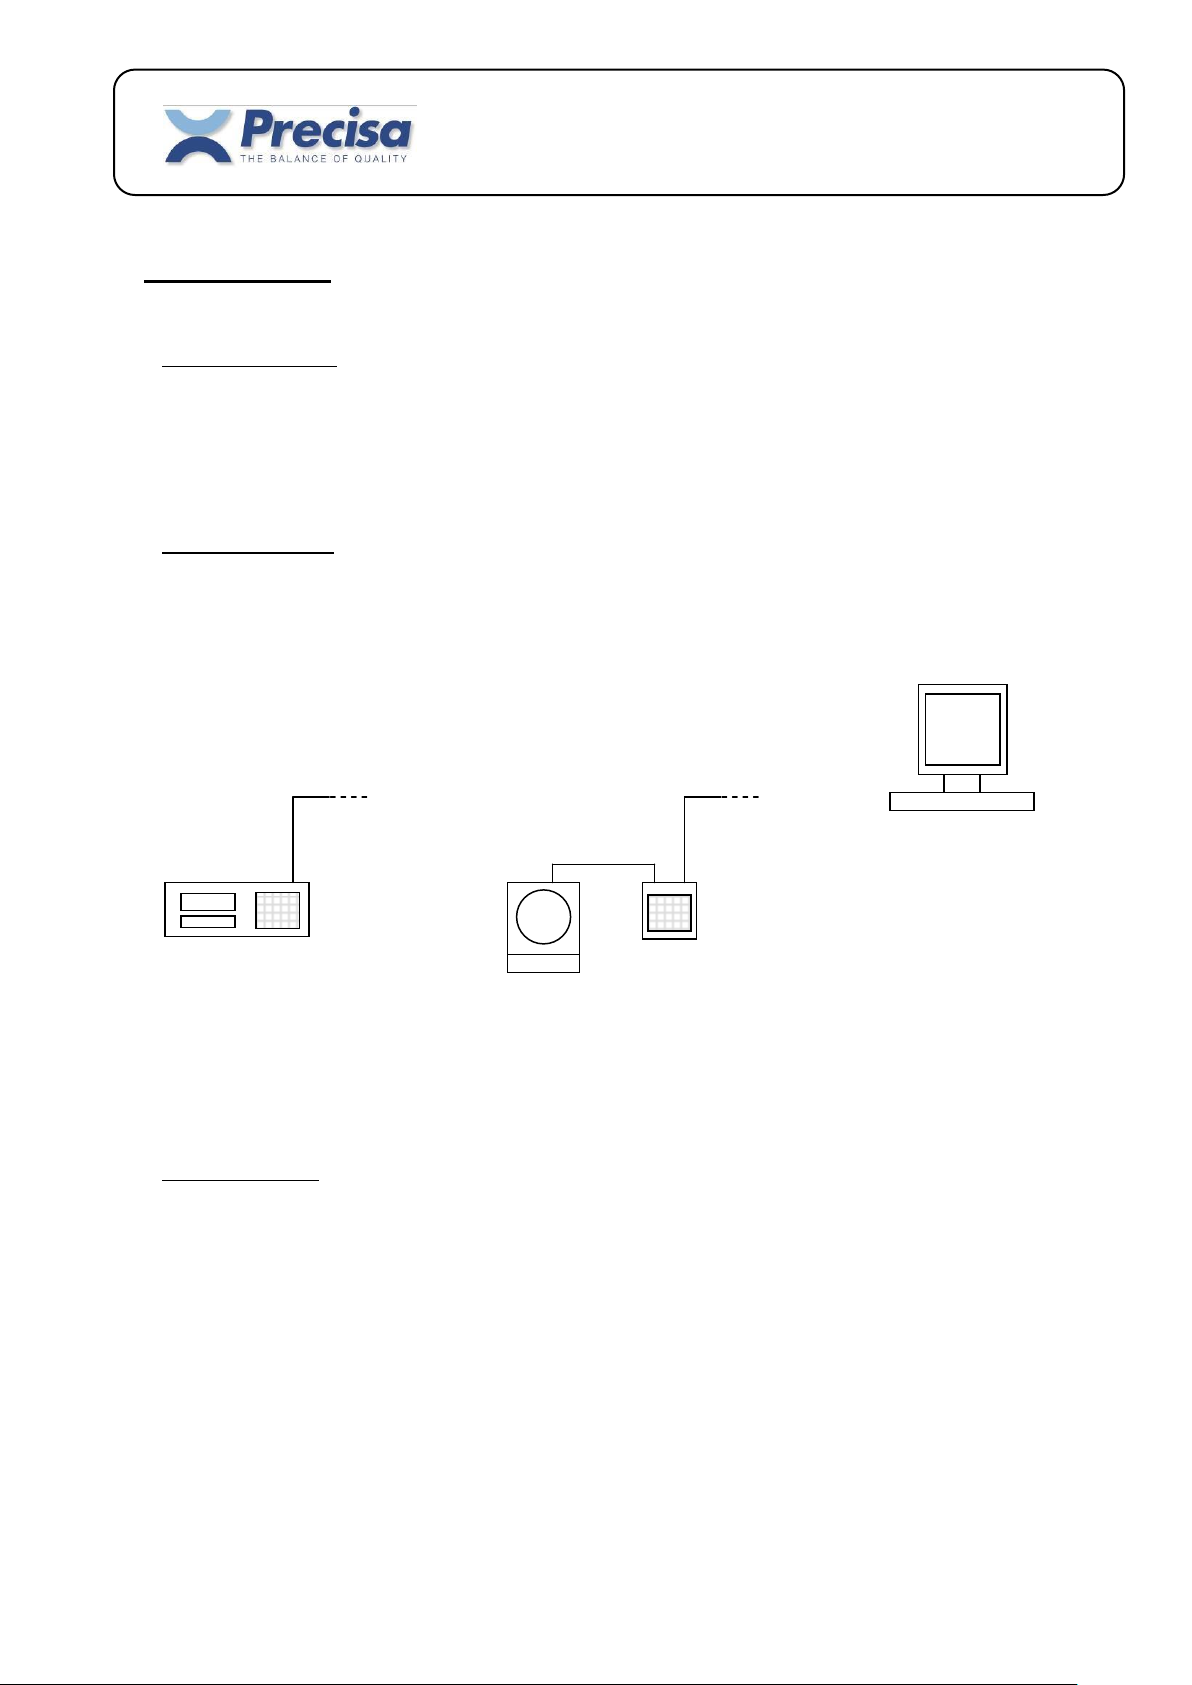
1.1.1 Smartbox type: External box
Please connect the RS232-interface of the balance with one of the two BUS-connectors of the Smartbox by using
the included datacable. While the Smartbox is connected to the balance, CH1 of the Smartbox takes over the
functions of the RS232-interface of the balance.
The second bus-connector serves as a connector for further peripheral devices.
1.1.2 Smartbox type: In balance-terminal integrated
Press the MENU/ESC key on the left side of the terminal and select the application “SMARTBOX”.
Precisa Gravimetrics AG 5
Page 6

Smartbox Piece counting
Software P00.01.01
2 Description of keys
< ENTER > Confirmation key
< CLR > Delete key
< SHIFT > Select alphabetical characters
< - > Change sign or switch over to difference-display if nominal value available.
< PRINT > Enable data transfer
< REF > Enter a reference piece quantity
< REF.W > Enter a reference weight
< T> Tare input
< ART > Store or recall an article
< STO > Store ( tare, article etc. )
< RCL > Recall ( tare, article etc. )
< MEM > Store a measurement
< INFO > Display or print various values
< BASE > Switch to “data-input from channel (ref. balance)”.
Instead of data-input via keyboard, “data-input from channel” may be selected by using
<BASE > "No. " < ENTER >.
< DISP > Switch between capacity-display and text-display
< > Change unit (weight, pieces, percent)
< MENU > Menu key
< CONF > Configuration key
< FIX R > Fixed reference key
< . > Decimal point
< 8 > Figure
<SHIFT> < M > Letter (hold alpha key = change between capital- and small-letter)
Precisa Gravimetrics AG 6
Page 7
Article Variation
Art. Variation 1
Short Code
No / Yes
Pre-set:
Product Name
No / Yes
PCS
Lot Number
No / Art. / Global*
Operator
No / Art. / Global*
Reference PCS
No / Yes
Reference %
No / Yes
Nominal Value
No / Yes
Limits
No / Yes
Tare
No / Yes
Art. Variation 2
Short Code
No / Yes
Pre-set:
Product Name
No / Yes
%
Lot Number
No / Art. / Global*
Operator
No / Art. / Global*
Reference PCS
No / Yes
Reference %
No / Yes
Nominal Value
No / Yes
Limits
No / Yes
Tare
No / Yes
Art. Variation 3
Short Code
No / Yes
Pre-set:
Product Name
No / Yes
+/-
Lot Number
No / Art. / Global*
Operator
No / Art. / Global*
Reference PCS
No / Yes
Reference %
No / Yes
Nominal Value
No / Yes
Limits
No / Yes
Tare
No / Yes
Art. Variation 4
Short Code
No / Yes
Pre-set:
Product Name
No / Yes
PCS +/-
Lot Number
No / Art. / Global*
Operator
No / Art. / Global*
Reference PCS
No / Yes
Reference %
No / Yes
Nominal Value
No / Yes
Limits
No / Yes
Tare
No / Yes
Reference acquisition
see page 9
Output channel
Digit Code 1
(see chapter 3.2.)
Linefeeds
Qty. 0
(number of linefeeds after each printout)
Signallamp
Digit Code 1
(see chapter 3.3.)
Smartbox Piece counting
Software P00.01.01
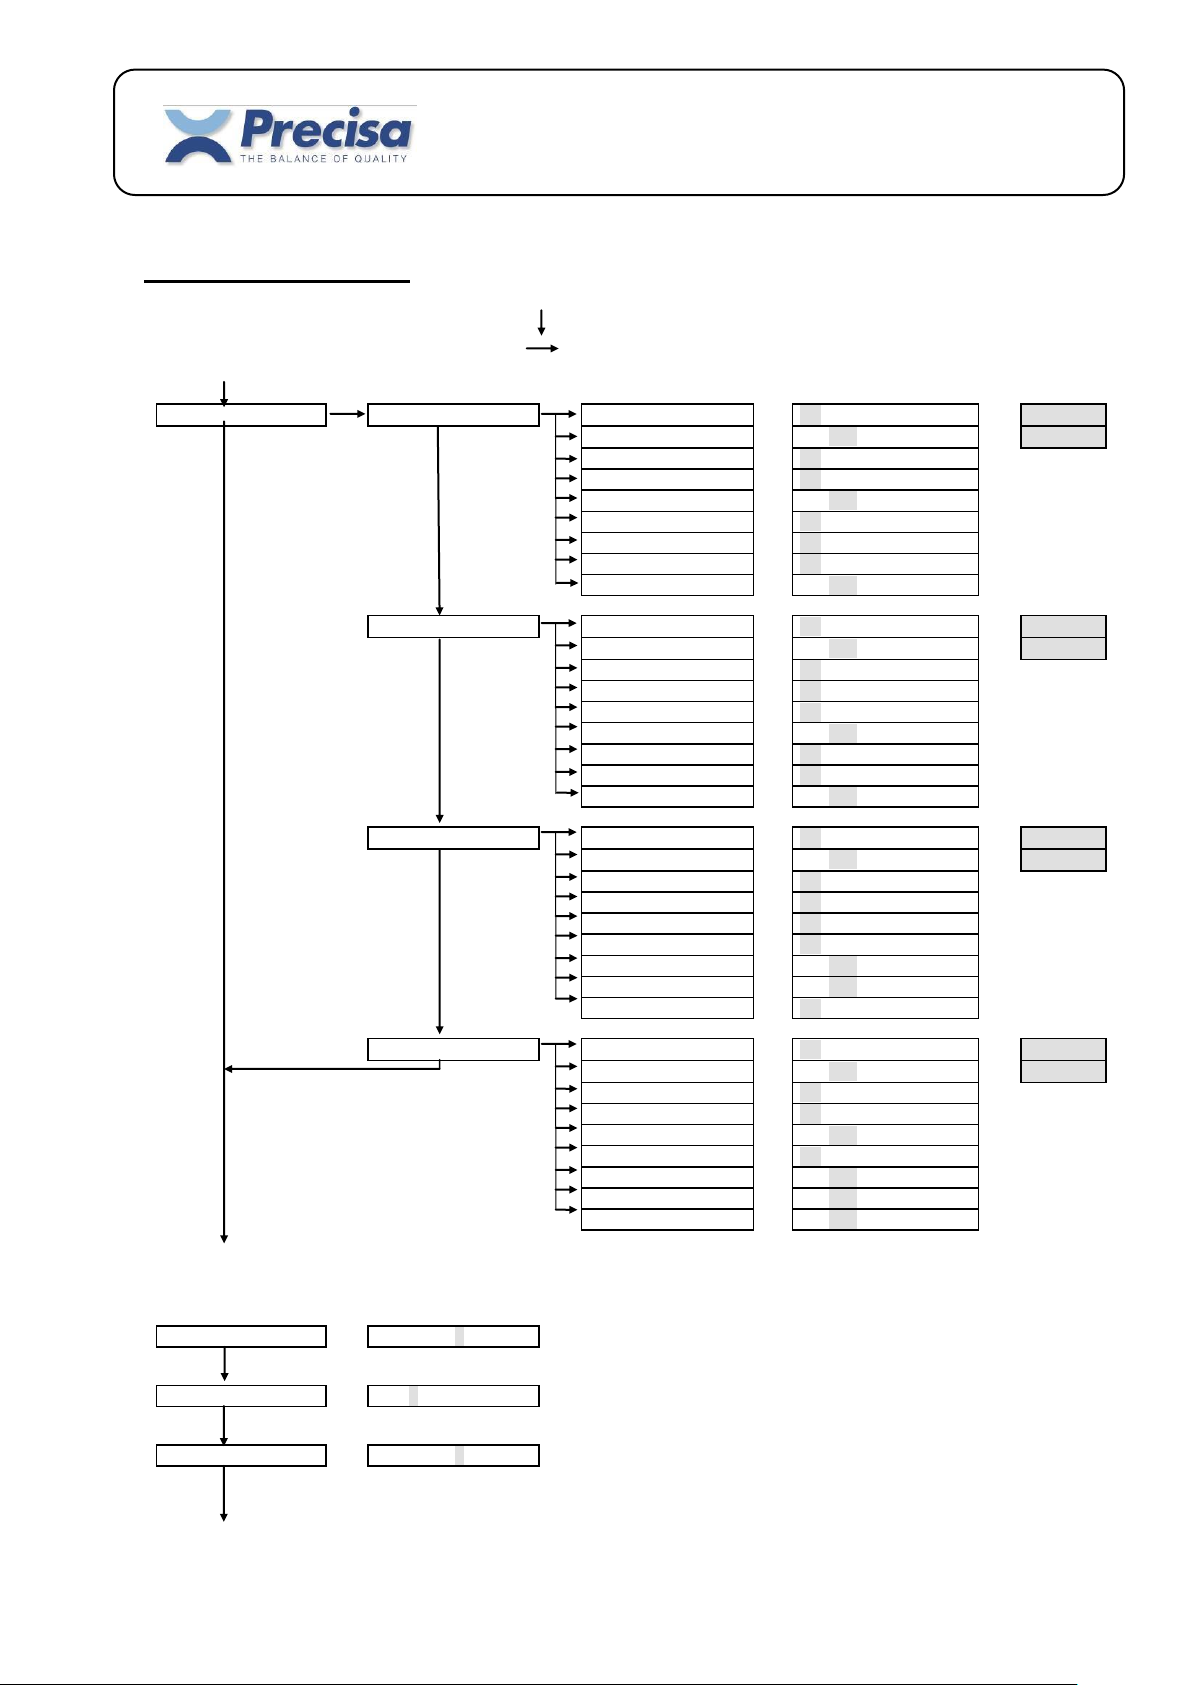
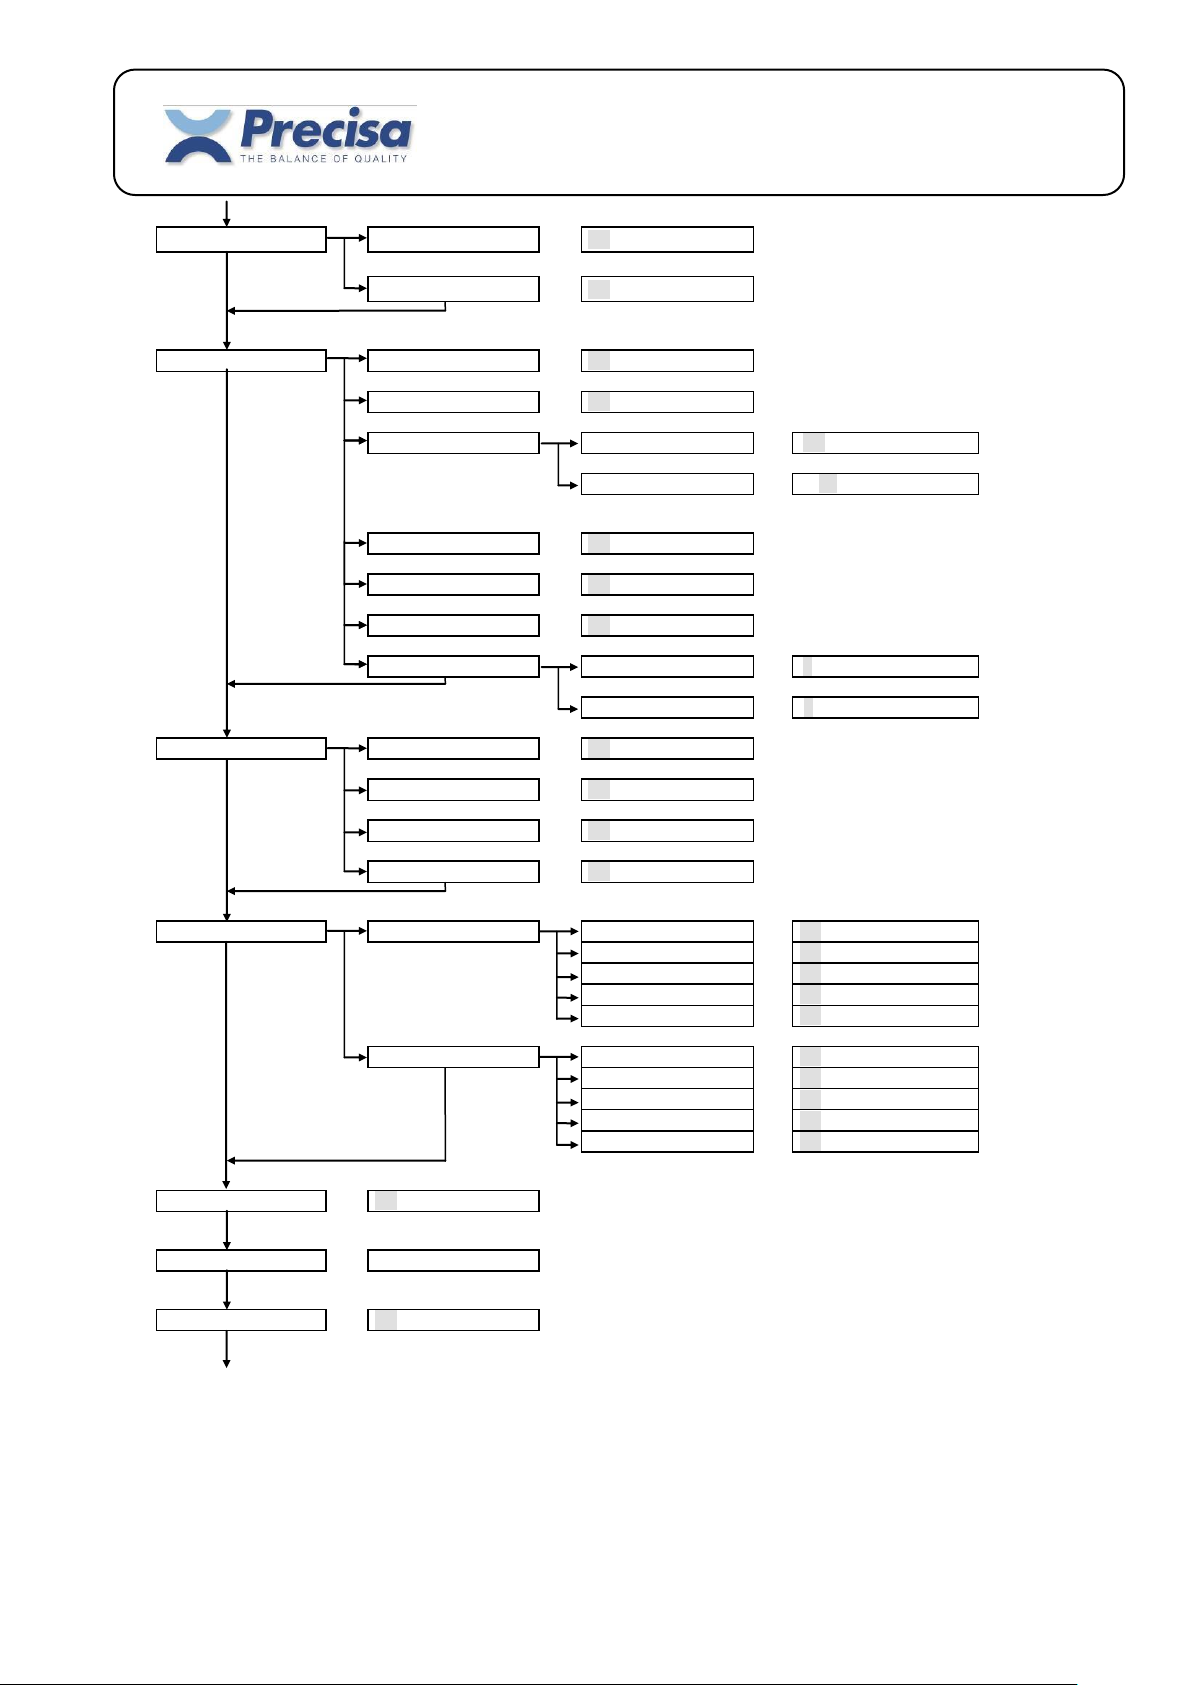
3 Configuration menu
< CONF > : < CONF > ( grey background := Pre-set )
Enter code (8953) : < MENU >
< ENTER > Change : < >
Precisa Gravimetrics AG 7
Page 8
PC Configuration
Art. query from PC
No / Art. / Sto Art.
(autom. article-query from PC if
article not found on smartbox)
2.Report on PC
No / Print / Table
(Parallel-printout to PC.
Channel-selection, see chap.3.2.)
Add Up Configuration
Add Up
No / Yes
Auto Recording
No / Yes
Value Acceptance
Check Value
No / Yes
Nom.Value +/-
1...30...99 %
(automatic value-recording only,
when value within these limits)
Auto Print
No / Yes
Auto Tare
No / Yes
Clear Stat. after result
No / Yes
Report Formats
Add Up Sample
1 / 2 /..../ 15
Add Up Result
1 / 2 /..../ 15
Memory protection
Working memory
No / Yes
Article
No / Yes
Tare
No / Yes
Print format
No / Yes
Blocked Functions
Print < TU
No / Yes
TU-TO
No / Yes
>TO
No / Yes
without TU, TO
No / Yes
without Article
No / Yes
Mem
< TU
No / Yes
TU-TO
No / Yes
>TO
No / Yes
without TU, TO
No / Yes
without Article
No / Yes
Keyboard Beep
No / Yes
New Code
(Enter code)
(optional user code, valid beside 8953)
Set Default
No / Yes
(set the configuration back to default-settings as shown above)
End
Smartbox Piece counting
Software P00.01.01
Notes:
* Lot number, operator: Article = defined in each article
Global = defined globally. To be entered when loading an article.
Precisa Gravimetrics AG 8
Page 9
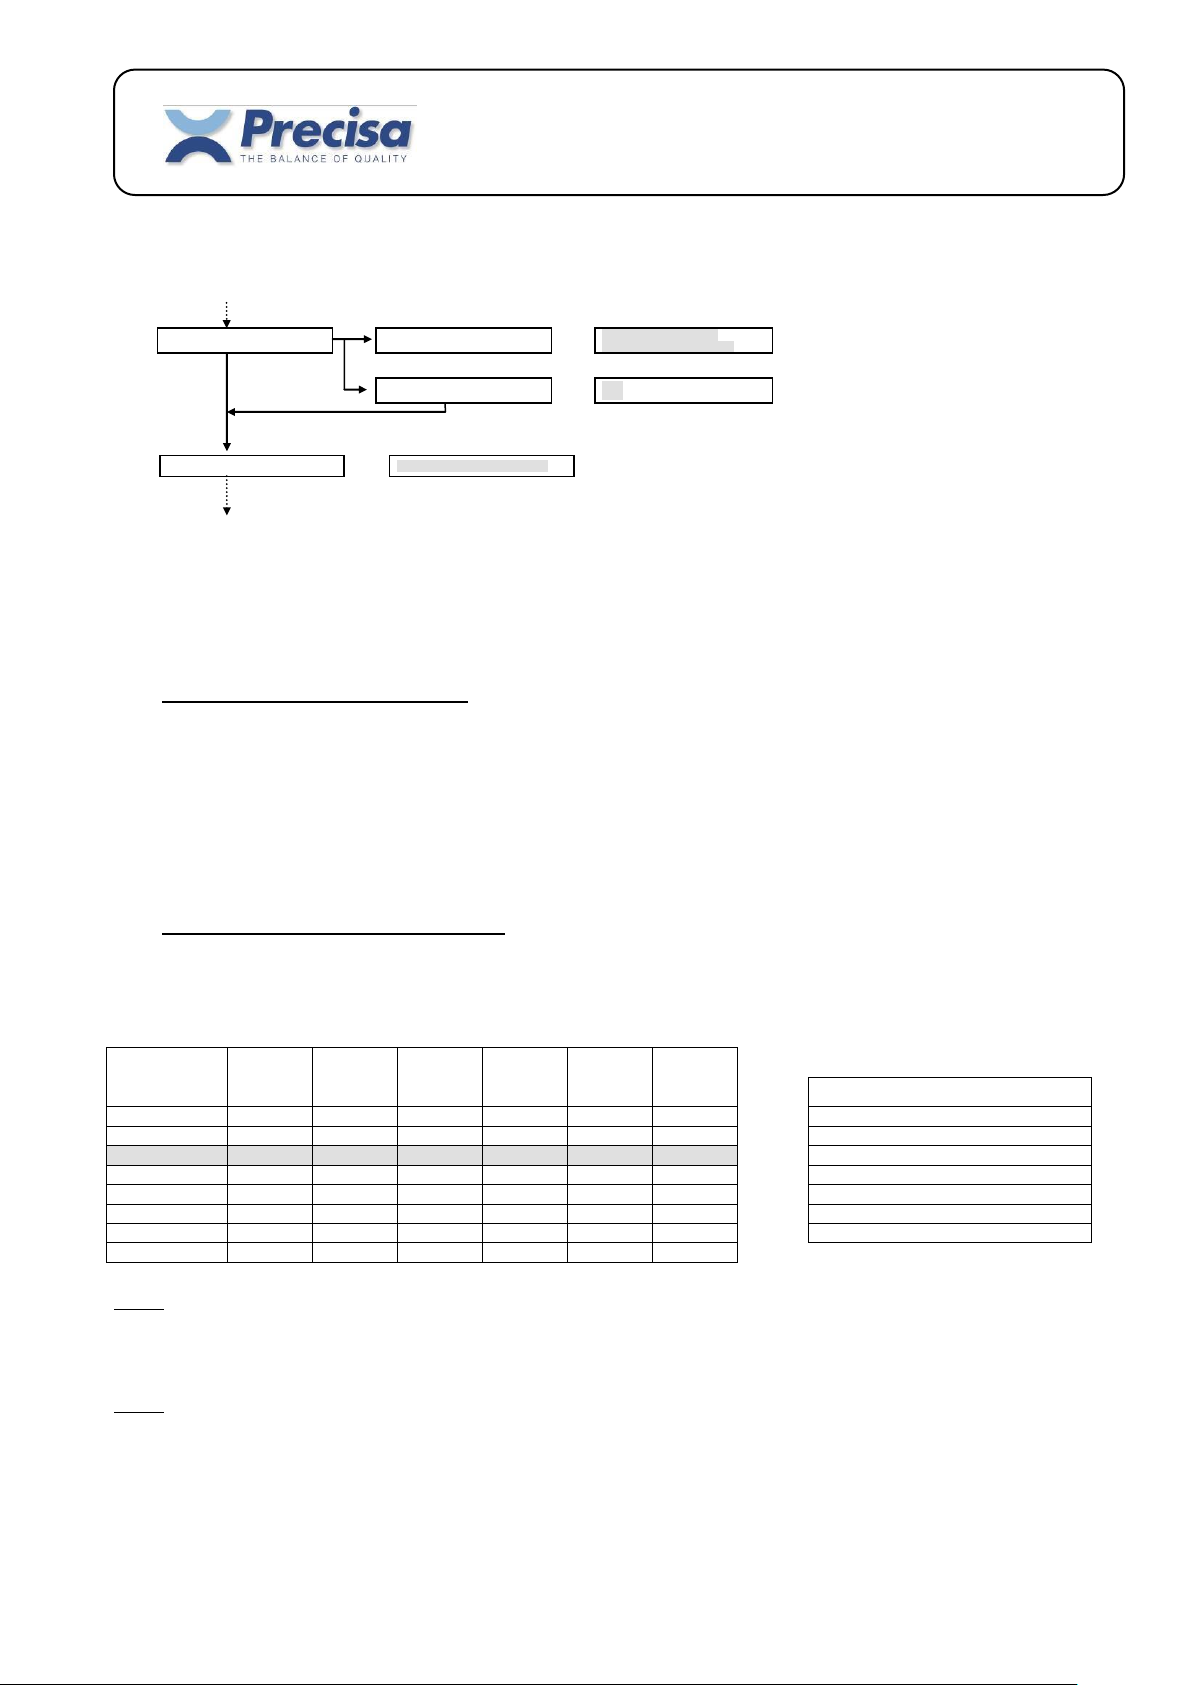
Ref. Optimization
Mode
Parts-Tolerance < 5% /
Parts-Tolerance > 5% / Off
Info
No / Yes
Ref. Accuracy
1 Digit / 0.1 Digit / 0.01 Digit
Predetermined
Model
On Smartbox
(addr=0)
On Smartbox
(addr=1)
External:
(addr 2...15)
lowest
address
External:
(addr 2...15)
External:
(addr 2...15)
External:
(addr 2...15)
highest
address
Function
Chn. 1
Chn. 2
Chn. 3
Chn. 4
Chn. 5
Chn. 6
0 = No Function
1 = Report printer (standard-printout)
1 default
1 2 0 0 0 0
2 = Barcode reader
2 1 3 0 0 0 0 3 = Reference balance (base)
3 1 2 3 0 0 0 4 = Barcode printer
4 1 2 3 4 0 0 5 = PC connection (2nd report)
5 1 2 3 4 5 0 6-8 = External keys (see chap. 3.4.)
6 1 5 0 0 0 0
Smartbox Piece counting
Software P00.01.01
Reference acquisition:
3.1 Printing out the configuration
< INFO >
< PRINT>
< CONF >
3.2 Arrangement of output channels
In the case of the output channels a predetermined model 1..6 or a user model (always 6 digits) may be entered.
Exp.1: Printer connected to channel 1, barcode-reader connected to channel 2
Configuration-menu: „Output Ch. 1“ or „Output Ch. 1 2 0 0 0 0“
Exp.2: Printer connected to channel 1, reference-balance connected to channel 2, barcode-printer connected to channel 3
Configuration-menu: „Output Ch. 1 3 4 0 0 0“
Precisa Gravimetrics AG 9
Page 10
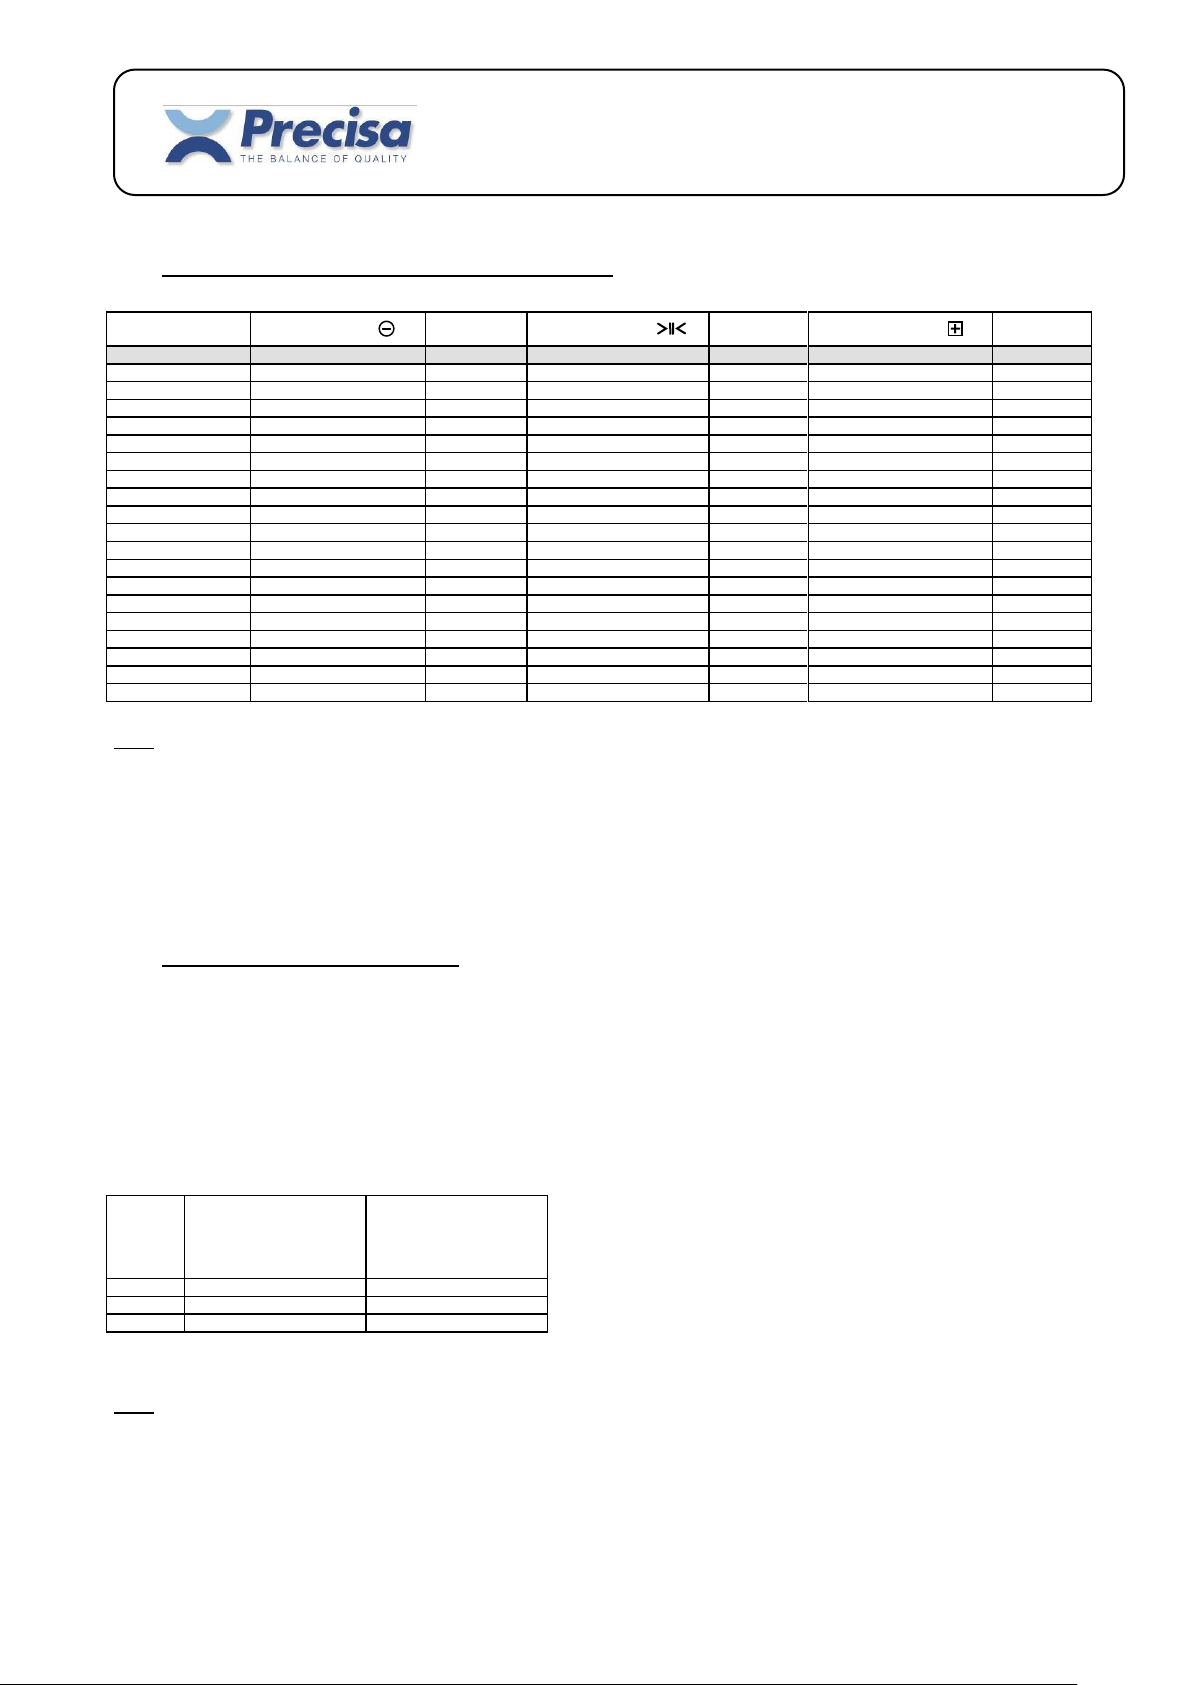
Model
Red light
Buzzer
(stable)
Green light
Buzzer
(stable)
Yellow light
Buzzer
(stable)
1 default
50% - TU (always)
-
TU - TO (always)
-
TO - OL (always)
- 2 0% - TU (always)
-
TU - TO (always)
-
TO - OL (always)
- 3 50% - TU (stable)
-
TU - TO (stable)
-
TO - OL (stable)
- 4 0% - TU (stable)
-
TU - TO (stable)
-
TO - OL (stable)
- 5 50% - TU (always)
Beep
TU - TO (always)
-
TO - OL (always)
- 6 0% - TU (always)
Beep
TU - TO (always)
-
TO - OL (always)
- 7 50% - TU (stable)
Beep
TU - TO (stable)
-
TO - OL (stable)
- 8 0% - TU (stable)
Beep
TU - TO (stable)
-
TO - OL (stable)
- 9 50% - TU (always)
-
TU - TO (always)
Beep
TO - OL (always)
-
10
0% - TU (always)
-
TU - TO (always)
Beep
TO - OL (always)
-
11
50% - TU (stable)
-
TU - TO (stable)
Beep
TO - OL (stable)
-
12
0% - TU (stable)
-
TU - TO (stable)
Beep
TO - OL (stable)
-
13
50% - TU (always)
-
TU - TO (always)
-
TO - OL (always)
Beep
14
0% - TU (always)
-
TU - TO (always)
-
TO - OL (always)
Beep
15
50% - TU (stable)
-
TU - TO (stable)
-
TO - OL (stable)
Beep
16
0% - TU (stable)
-
TU - TO (stable)
-
TO - OL (stable)
Beep
17
50% - TU (always)
Beep
TU - TO (always)
-
TO - OL (always)
Beep
18
0% - TU (always)
Beep
TU - TO (always)
-
TO - OL (always)
Beep
19
50% - TU (stable)
Beep
TU - TO (stable)
-
TO - OL (stable)
Beep
20
0% - TU (stable)
Beep
TU - TO (stable)
-
TO - OL (stable)
Beep
Function
Pin
DTR and CTS
Pin
RS232-Out and RS232-In
6 Tare - Key
Print - Key
7
Tare - Key
Mem - Key
8
Print - Key
Mem - Key
Smartbox Piece counting
Software P00.01.01
3.3 Operating diagram for signallamp (TU,TO)
Exp.: Red = from 50% of the nominal value to TU always light
Green = from TU to TO always light; short acoustic signal, as soon as weight is stable
Yellow = from TO to OL (Overload) always light
Configuration-menu: „Signallamp 9“
3.4 Connection of external keys
At pins DTR and CTS or RS232-Out and RS232-In of a channel of your choice an external key can be connected
to.
By short-circuiting briefly these two pins (e.g. DTR and CTS) a tare-, print- or mem-command can be initiated.
Please note: Only channel 1 and channel 2 are available for this function.
Exp.: Printer connected to channel 1, external tare-key connected to pin DTR and CTS of channel 2.
Configuration-menu: „Output Ch. 1 6 0 0 0 0“
Precisa Gravimetrics AG 10
Page 11
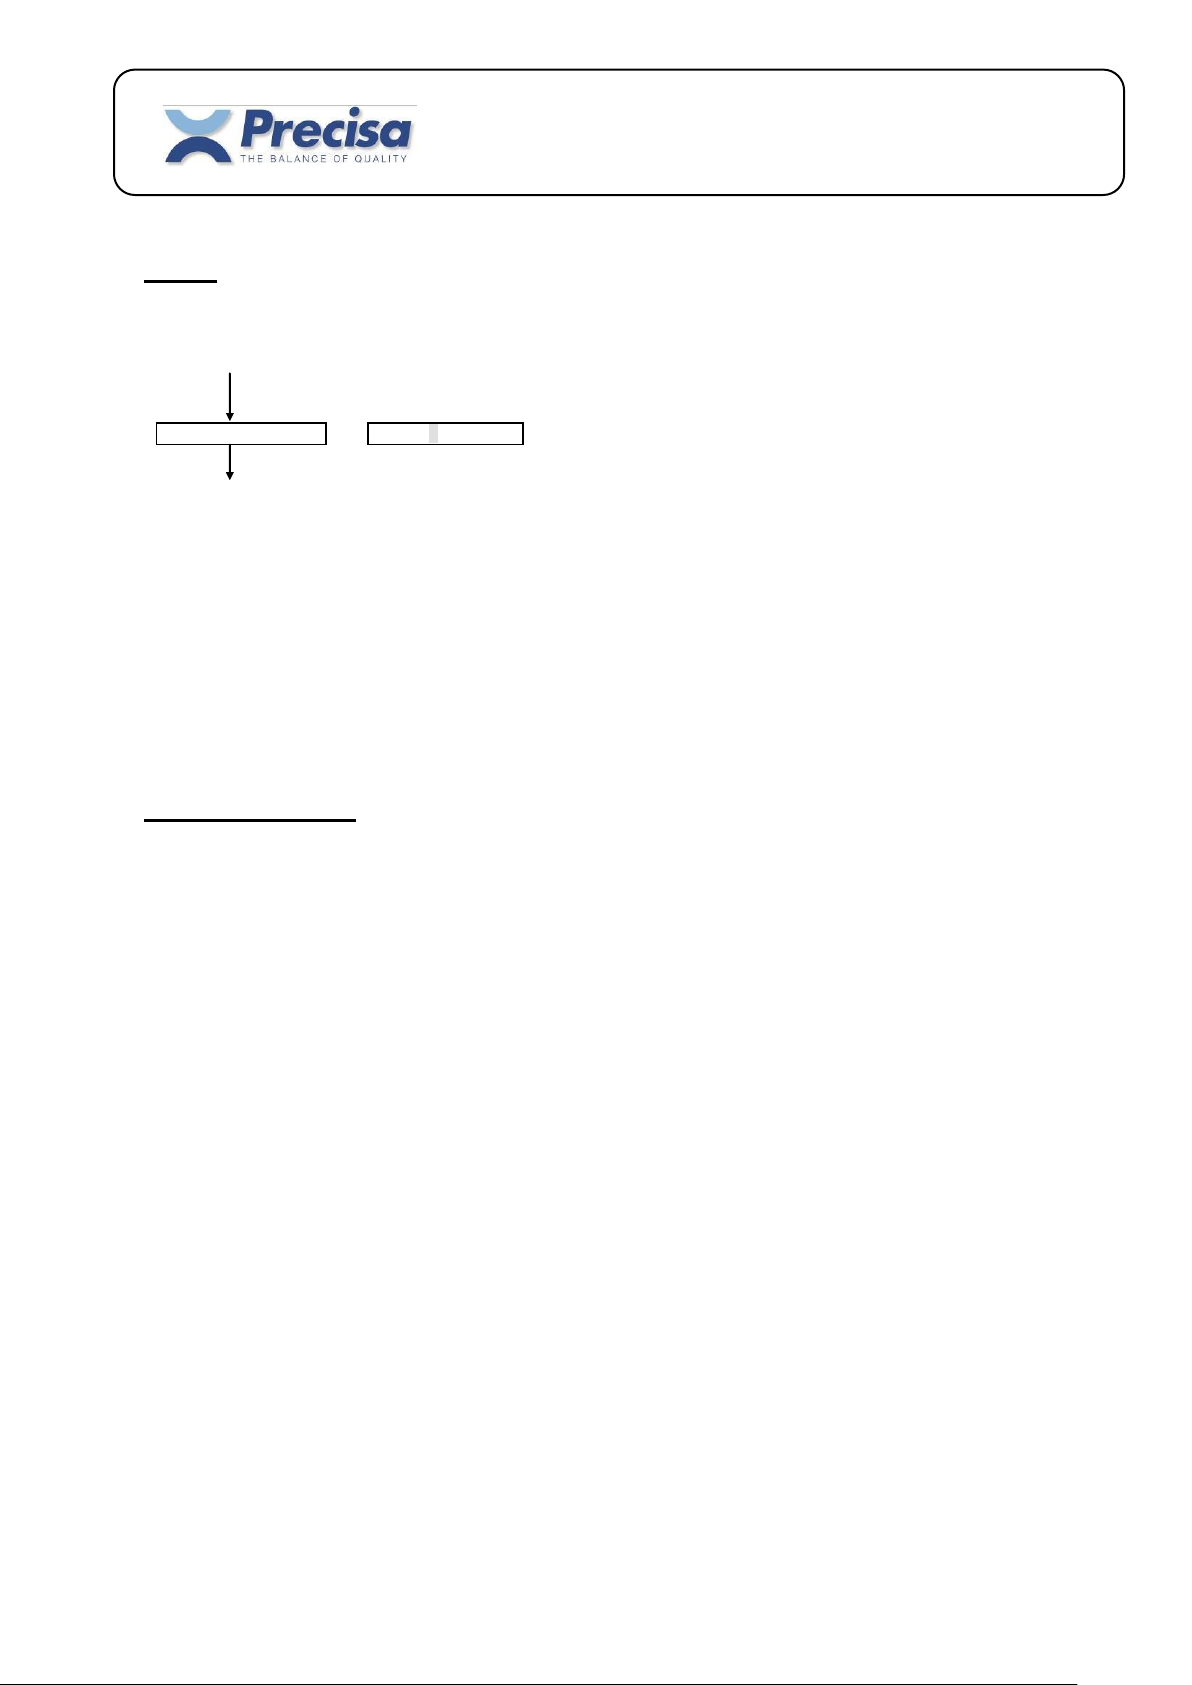
Article Variation
Select 1 / 2 / 3 / 4
End
Smartbox Piece counting
Software P00.01.01
4 Menu
< MENU >
The pre-selection of the variation number (1...4) defines which values will be prompted during the storage
of an article (see chapter 3 “article variation”).
The subsequent work (weighing) with the stored article is independent of the variation number selected
at that time.
5 Error messages
Display: aa ErrXX (aa: Device-address)
.........................................
Exp.: 72 Err40
ARTICLE NOT FOUND (72: Device-address of Smartbox)
'Memory protected' Err38
'Article not found' Err40
'Not enough memory' Err44
'Tare-No. too big' Err46
Precisa Gravimetrics AG 11
Page 12
PC
Balance
Ch.1
Bus
Smartbox
External
to
COM x
Ch.1
to
COM x
Smartbox
Internal
Terminal
Smartbox Piece counting
Software P00.01.01
6 General notes
6.1 General settings
Language settings (German, English and French) and interface parameters (RS232) are taken from the
balance and can only be set there.
6.2 Program update
The program can be loaded into the Smartbox using a special PC-download-software. For downloading,
COM x of the PC and Ch.1 of the Smartbox must be used.
6.3 Technical data
Maximal memory capacity :
1000 Articles
250 Tares
Precisa Gravimetrics AG 12
Page 13
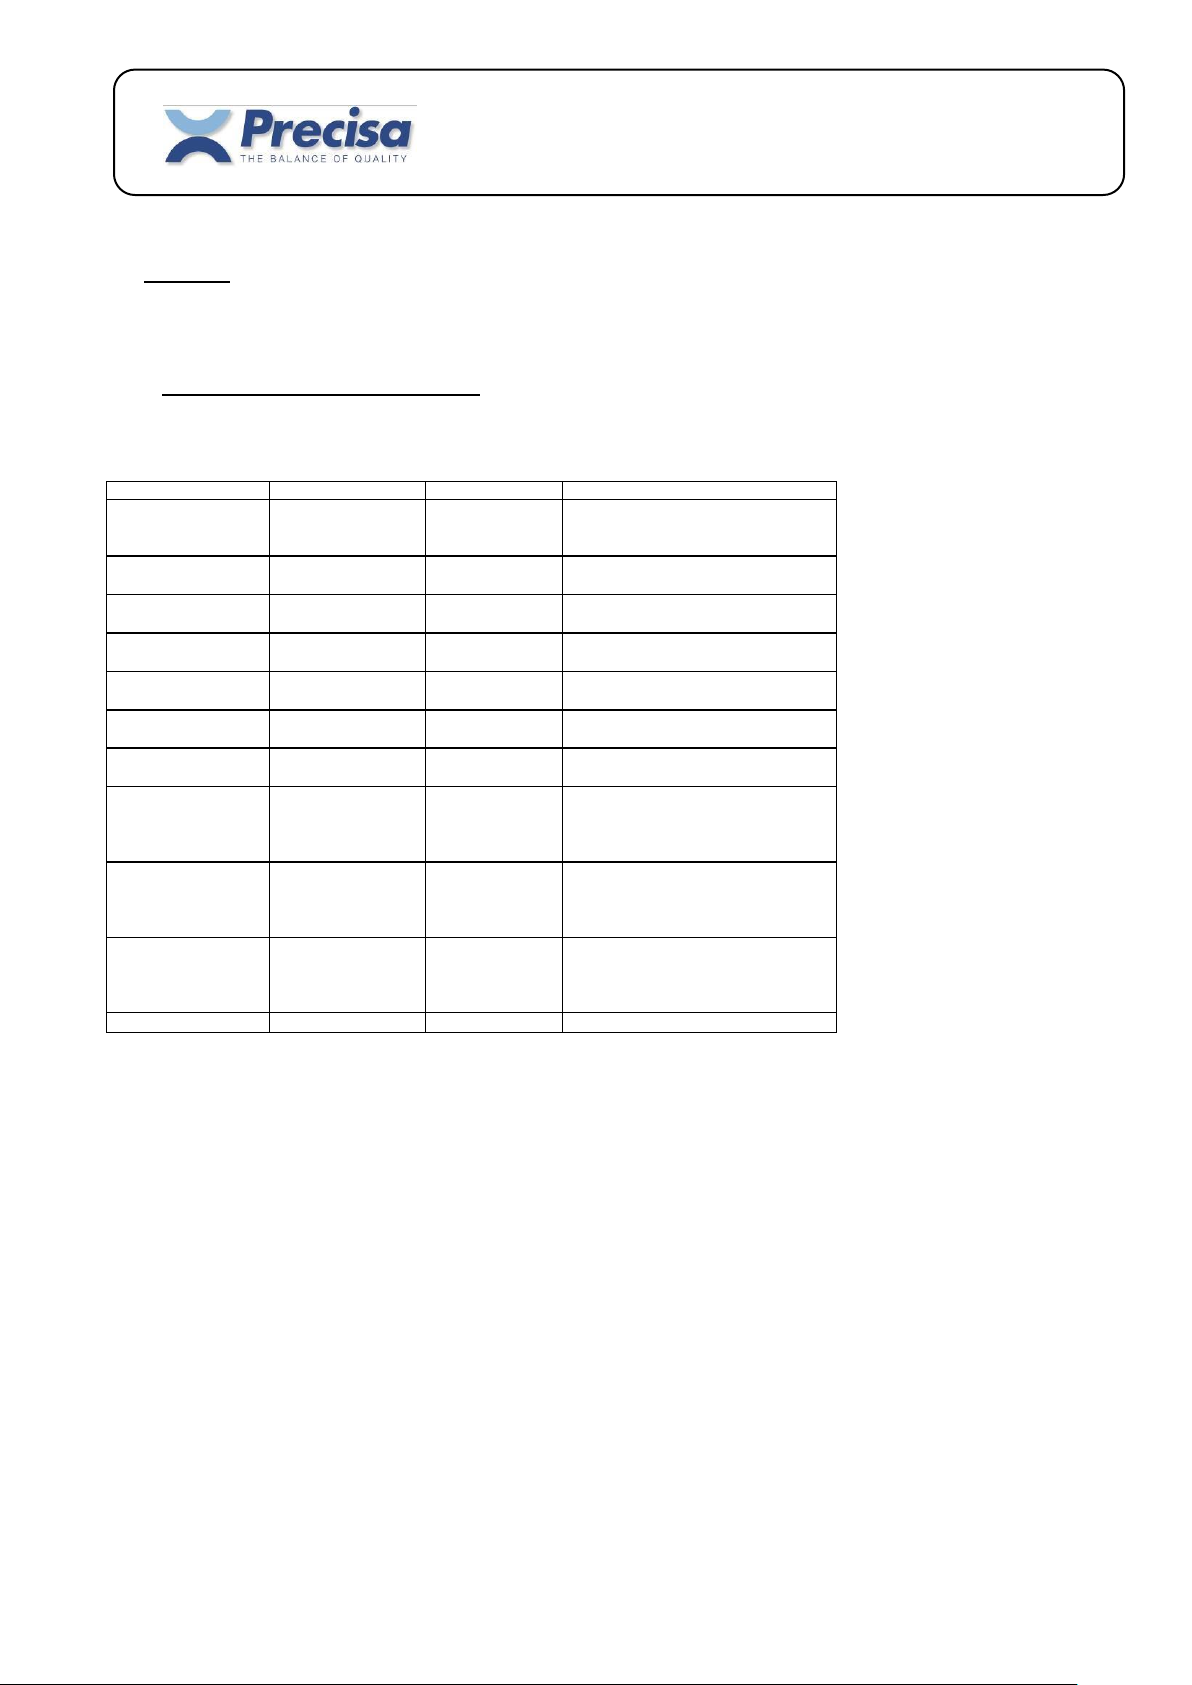
Name
Input requirements
Format
Description
Article number
ART. NO. ?
20 characters
Identification of the article
An article can be activated or
deleted using its identification
Short code
SHORT CODE ?
3 characters
Short Identification of the article
for activation
Product name
PROD ?
20 characters
Description of the article
Lot No.
LOT-NO. ?
20 characters
Lot number for information
User's name
Name ?
20 characters
User name for information
Article weight
REF. W g/PCS ?
Real number
Reference weight for
counting program
Percent weight
Weight for 100%
REF. W g/100% ?
Real number
Reference weight for
percent program
Nominal value
NOM. VALUE g ?
Real number
Nominal value for statistics
and tolerances
in the reference unit
or base unit
Lower limit
TU g ?
Real number
Lower limit for plus/minus
display and statistics
in the reference unit
or base unit
Upper limit
TO g ?
Real number
Upper limit for plus/minus
display and statistics
in the reference unit
or base unit
Mean tare weight
TARE g ?
Real number
Input for automatic tare subtraction
Smartbox Piece counting
Software P00.01.01
7 Article
7.1 The components of the article
Precisa Gravimetrics AG 13
Page 14
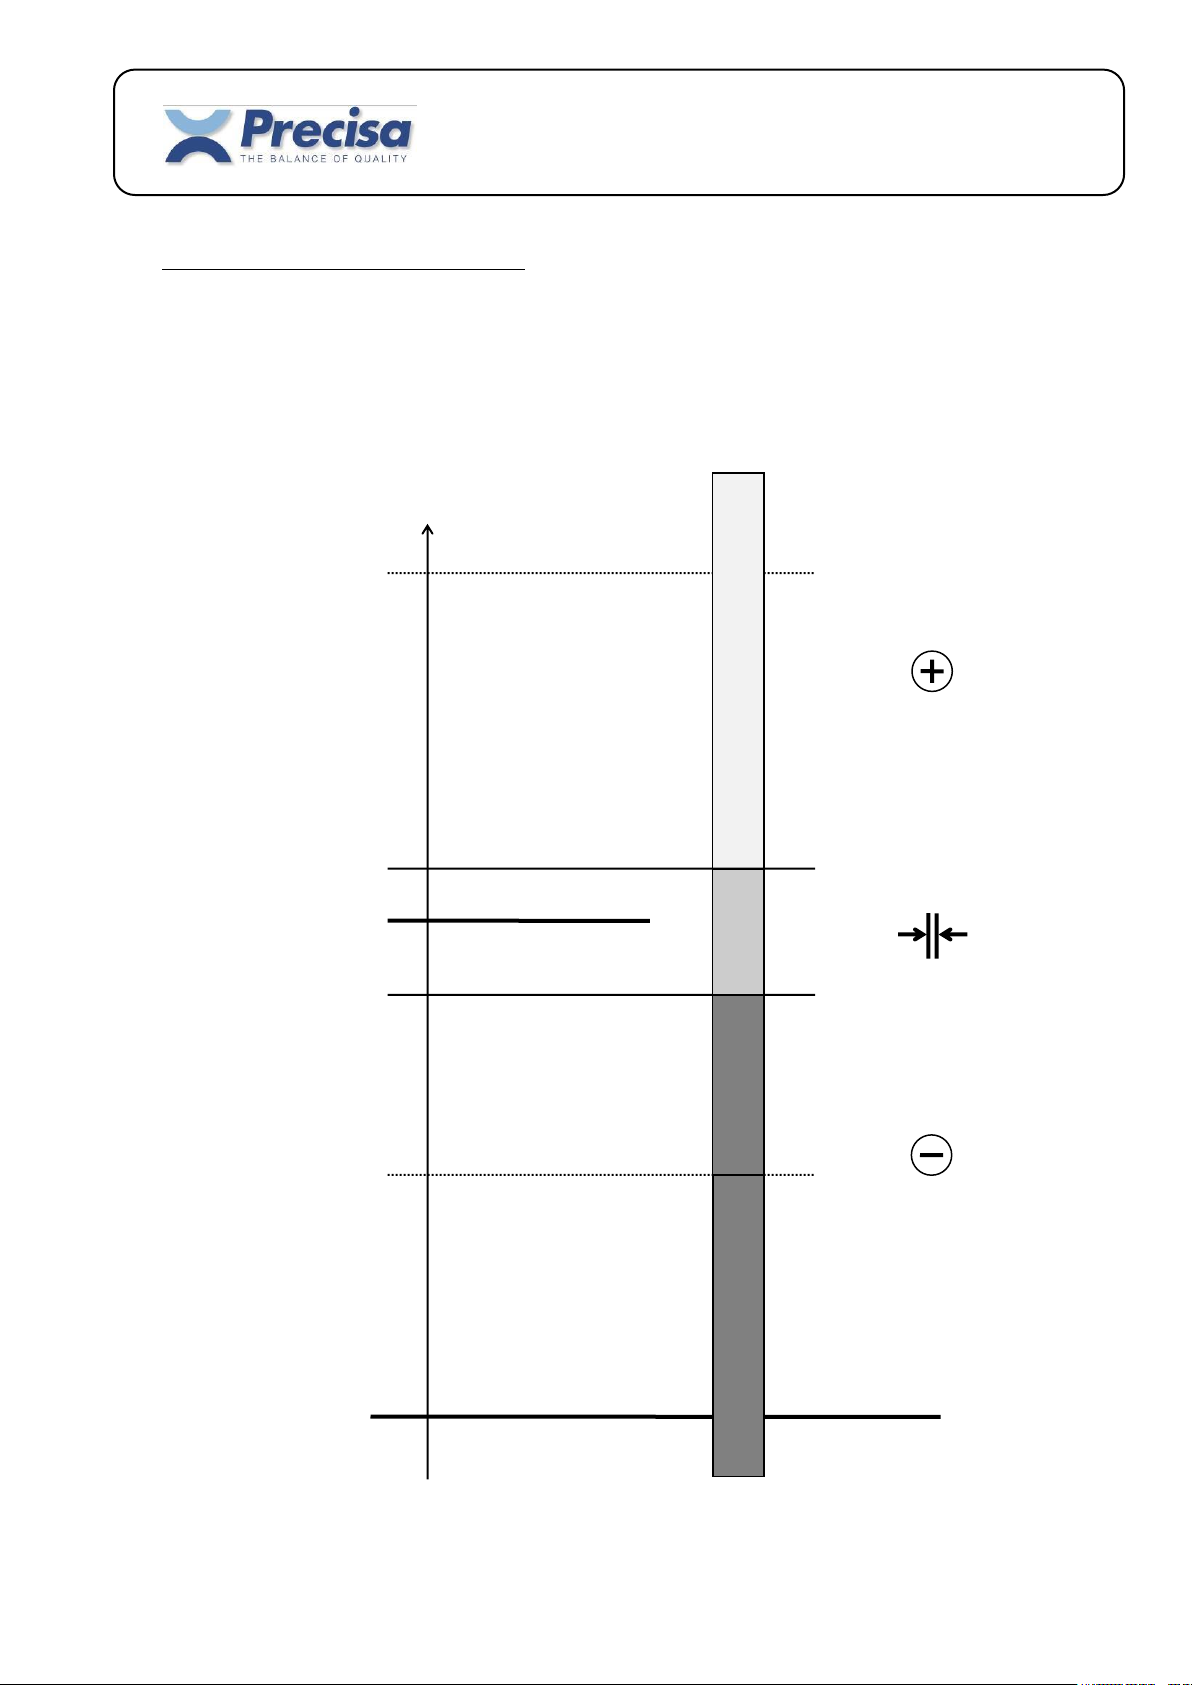
Upper limit TO*
Zero point
Overload
50 % Nominal value N
Lower Limit TU*
Nominal value N
OL
1070 g
900 g
500 g
0 g
1000 g
yellow
green
red
(red)
Smartbox Piece counting
Software P00.01.01
7.2 The signallamp limits of the article
* Red range : weight value < TU
Green range : TU weight value TO
Yellow range : weight value > TO
Precisa Gravimetrics AG 14
Page 15

Smartbox Piece counting
Software P00.01.01
7.3 Storing an article in memory
< STO >
< ART >
Enter article number
< ENTER >
Enter short code*
< ENTER >
Enter product name*
< ENTER >
Enter lot number*
< ENTER >
Enter user name*
< ENTER >
Enter reference weight*
< ENTER >
Enter nominal weight*
< ENTER >
Enter lower limit*
< ENTER > The upper and lower limits will be automatically
Enter upper limit*
< ENTER > The upper limit will be automatically calculated
Enter mean tare weight*
< ENTER >
* Can only be entered if activated in Art. Variation
calculated on exiting
proportional to the lower limit on exiting
Precisa Gravimetrics AG 15
Page 16

Smartbox Piece counting
Software P00.01.01
7.4 Editing an article
An article already stored may be corrected or altered.
< STO >
< ART >
Enter article number
< ENTER >
Enter or confirm short code*
< ENTER >
Enter or confirm product name*
< ENTER >
Enter or confirm lot number*
< ENTER >
Enter or confirm user name*
< ENTER >
Enter or confirm reference weight*
< ENTER >
Enter or confirm nominal weight*
< ENTER >
Enter or confirm lower limit*
< ENTER >
Enter or confirm upper limit*
< ENTER >
Enter or confirm mean tare weight*
< ENTER >
* Can only be entered if activated in Art. Variation
7.5 Loading an article from the memory
< RCL >
< ART >
Enter article number or short code
< ENTER >
7.6 Deleting an article from the memory
< CLEAR >
< ART >
Enter article number
< ENTER >
Precisa Gravimetrics AG 16
Page 17
Smartbox Piece counting
Software P00.01.01
7.7 Deleting all articles from the memory
< CLEAR >
< ART >
‘ALL’
< ENTER >
7.8 Deleting the article from the working memory
< CLEAR > This command also deletes from the working memory a reference value
< ART > or a mean tare weight which is not entered with the article.
< ENTER >
7.9 Barcodes and articles
Whenever an article number is entered, this may also be done using a barcode reader.
Barcodes of types Code 39, EAN 8 and EAN 13 are accepted.
< STO >
< ART >
Read article number with barcode reader
< ENTER >
.....
The reading of a standard barcode, without prior input via the keyboard, will always be interpreted by the
balance as < RCL > < ART > ‘barcode’ < ENTER >.
7.10 Table for automatic tolerance calculation (TU, TO)
Allowable plus or minus deviations
Nominal value QN in grams as % of QN in grams
5 to 50 9 50 to 100 - 4.5
100 to 200 4.5 200 to 300 - 9
300 to 500 3 500 to 1’000 - 15
1’000 to 10’000 1.5
Precisa Gravimetrics AG 17
Page 18
Smartbox Piece counting
Software P00.01.01
8 Tare
8.1 Storing a tare in the tare memory
Storing a tare using the keypad
< STO >
< T >
Number of the tare memory
< ENTER >
Enter mean tare weight
< ENTER >
Storing a tare from the balance
< STO >
< T >
Number of the tare memory
< ENTER >
< ENTER > Indicated weight is stored in tare memory
In the case of an existing tare, this can be edited
< STO >
< T >
Number of the tare memory
< ENTER >
Enter or confirm mean tare weight
< ENTER >
8.2 Deleting the current tare
< CLEAR >
< T >
< ENTER >
8.3 Loading a tare from the tare memory
< RCL >
< T >
Number of the tare memory
< ENTER >
Precisa Gravimetrics AG 18
Page 19
Smartbox Piece counting
Software P00.01.01
8.4 Deleting a tare from the tare memory
< CLEAR >
< T >
Number of the tare memory
< ENTER >
8.5 Deleting all tares from the tare memory
< CLEAR >
< T >
‘ALL’
< ENTER >
8.6 Pre-setting tare using the decimal keypad
< T >
Enter mean tare weight
< ENTER >
8.7 Barcode and tare
The mean tare weight can be read directly with a barcode reader. The barcode must be of Type
EAN 13. It must be specially coded and contain the tare.
The reading of a special barcode without prior input via the keypad will always be interpreted by the balance
as < T > ‘barcode’ < ENTER >.
Precisa Gravimetrics AG 19
Page 20
Smartbox Piece counting
Software P00.01.01
9 Printout
All available measurements, tares and article data can be printed out using the < PRINT > key.
9.1 Printing out measurements
< PRINT > The current measurement will be printed out
9.2 Allocating a fixed print format to the PRINT key
Three permanently programmed print formats may be allocated to the PRINT key:
Format 1: current net-weight
Format 2: date/time, article, current net-, gross- and tare-weight
Format 3: date/time, article, current net-weight, article-definitions
< STO >
< PRINT >
Enter format number
< ENTER >
9.3 Printing out an article
< INFO >
< PRINT>
< ART >
Enter article number
< ENTER >
9.4 Printing out a list of articles
< INFO >
< PRINT>
< ART >
Enter ‘ALL’
< ENTER >
Precisa Gravimetrics AG 20
Page 21
Smartbox Piece counting
Software P00.01.01
9.5 Printing out a tare from the tare memory
< INFO >
< PRINT >
< T >
Enter tare number
< ENTER >
9.6 Printing out the list of tares
< INFO >
< PRINT >
< T >
Enter ‘ALL’
< ENTER >
9.7 Printing out the current tare
< INFO >
< PRINT >
< T >
< ENTER >
9.8 Printing out the current reference value
< INFO >
< PRINT >
< REF.W >
< ENTER >
9.9 Printing out the version of the Smartbox software
< INFO >
< PRINT >
< >
By skipping the <PRINT> key the information can be shown line by line in the display instead of being printed. Each
line then will be shown for 2 seconds. By using the < > key the display can be be halted or continued.
Precisa Gravimetrics AG 21
Page 22
Smartbox Piece counting
Software P00.01.01
10 Counting
Using the Smartbox it is possible to count in various ways.
Note : The parts which you wish to count may not vary too greatly in weight, otherwise errors will occur.
10.1 Counting with number of pieces as reference
If you do not know the unit weight of the parts, use the following procedure :
1. Place a number of parts on the balance
2. Tell the balance how many parts you have added
3. The balance will calculate the unit weight and then you can commence counting
10.1.1 Fixed reference key – without preset tare value
The simplest method of counting is counting with the fixed reference. Place 10 pieces on the balance
and press the < FIX R > key. The balance will then immediately know the unit weight and you can then
commence counting.
You can associate any fixed reference with the < FIX R > key using the key sequence < STO > < FIX R >
Enter quantity < ENTER >.
Preparation Place container on balance
Tare < T >
Add reference quantity
< FIX R > (positive piece count)
Counting Place article on balance
Preparation Place container with parts on balance
Tare < T >
Remove reference quantity
< FIX R > (negative piece count)
Counting Place article on balance
Precisa Gravimetrics AG 22
Page 23

Smartbox Piece counting
Software P00.01.01
10.1.2 Variable reference – without preset tare value
If you do not wish to operate with the predetermined fixed reference you may freely select any desired
reference.
Preparation Place container on balance
Tare < T >
Add reference quantity
< REF >
Enter reference quantity
< ENTER > (positive piece count)
Counting Place article on balance
Preparation Place container with parts on balance
Tare < T >
Remove reference quantity
< REF >
Enter reference quantity
< ENTER > (negative piece count)
Counting Place article on balance
10.1.3 Fixed reference key – with preset tare value
Would you like to determine the contents of a filled container in pieces unit and is the tare weight
of the container known, you can proceed as follows:
Preparation Place filled container on balance
< T >
Enter tare value
<ENTER>
< FIX R > The start-value of the weight will be determined
(Display: DIFF. FIX REF ...)
Remove or add reference
quantity
< ENTER > The end-value of the weight will be determined
-> weight difference / reference quantity = unit weight
Counting The current contents of the container will be displayed
in pieces unit
Precisa Gravimetrics AG 23
Page 24

Smartbox Piece counting
Software P00.01.01
10.1.4 Variable reference – with preset tare value
If you do not wish to operate with the predetermined fixed reference you may freely select any desired
reference.
Preparation Place filled container on balance
< T >
Enter tare value
<ENTER>
< REF > The start-value of the weight will be determined
(Display: DIFF. REF ...)
Remove or add reference
quantity
Enter reference quantity
< ENTER > The end-value of the weight will be determined
-> weight difference / reference quantity = unit weight
Counting The current contents of the container will be displayed
in pieces unit
10.2 Counting with unit weight as reference
If you know the unit weight of the parts, proceed as follows :
1. Inform the balance of the unit weight
2. You can now commence counting
Without tare:
Preparation < REF.W >
Enter reference weight
< ENTER >
Counting Place article on balance
With tare:
Preparation Place container with parts on balance
< T >
Enter tare weight
< ENTER >
< REF.W >
Enter reference weight
< ENTER >
Counting Place article on balance
Precisa Gravimetrics AG 24
Page 25
Smartbox Piece counting
Software P00.01.01
10.3 Barcodes and reference weight
The reference weight can be read directly with a barcode reader. The barcode must be of type EAN 13. It
must be specially coded and contain the unit weight.
The reading of a specially coded barcode without prior input via the keypad will always be interpreted by
the balance as < REF.W > ‘barcode’ < ENTER > (see also Section 15.5).
10.4 Counting with temporary article memory
If you use one-off identifications, such as article number and product name, then
you operate with the temporary article memory, also called the working memory.
Preparation < ART >
Enter article number
< ENTER >
Enter product name
< ENTER >
Enter Unit Weight
< ENTER >
Enter mean tare weight optional input
< ENTER >
Counting Place article on balance
Clear working memory
< CLEAR >
< ART >
< ENTER >
Precisa Gravimetrics AG 25
Page 26

Smartbox Piece counting
Software P00.01.01
10.5 Counting with the article memory
If you always work with the same article numbers and product name, then you use the permanent
article memory.
Storing Article
Preparation < STO >
< ART >
Enter article number
< ENTER >
Enter short code
< ENTER >
Enter product name
< ENTER >
Enter unit weight If there is already a unit weight in the working memory, this
< ENTER > unit weight can be transferred using < ENTER >
Enter mean tare weight Optional input
< ENTER >
Working memory is deleted
Call up article
Preparation < RCL >
< ART >
Enter article number or short code
< ENTER >
Counting Place article on balance
Precisa Gravimetrics AG 26
Page 27

Smartbox Piece counting
Software P00.01.01
10.6 Unit weight determined with reference balance
The unit weight can also be taken directly from a reference balance.
For connecting and adjusting the reference balance see Section 17. Reference balance.
Determining unit weight from several articles
< REF >
< BASE >
Enter base number
< ENTER >
Enter quantity
< ENTER >
Transferring unit weight of an article
< REF.W >
< BASE >
Enter base number
< ENTER >
Precisa Gravimetrics AG 27
Page 28
Smartbox Piece counting
Software P00.01.01
11 Percentage deviation
Using the Smartbox you can measure the deviation from a reference weight in %.
The reference weight can be defined as 100% or as 0%.
The deviation can accordingly be displayed, e.g., as 97% or as -3%.
11.1 Set reference weight
11.1.1 Set reference weight to 100%
Preparation < REF.W >
< > percentage must be selected
Enter reference weight
< ENTER >
Weighing Place article on the balance
11.1.2 Set reference weight to any desired percentage
Preparation Place reference weight on the balance
< REF >
< > percentage must be selected
Enter % - value
< ENTER >
Weighing Place article on the balance
Precisa Gravimetrics AG 28
Page 29

Smartbox Piece counting
Software P00.01.01
11.2 Weighing with temporary article memory
If you use one-off identifications, such as article number and name of product, then
you operate with the temporary article memory, also called the working memory.
Preparation < ART >
Enter article number
< ENTER >
Enter product name
< ENTER >
Enter reference weight for 100%
< ENTER >
Enter mean tare weight optional input
< ENTER >
Weighing Place article on balance
Clear working memory
< CLEAR >
< ART >
< ENTER >
Precisa Gravimetrics AG 29
Page 30

Smartbox Piece counting
Software P00.01.01
11.3 Weighing with the article memory
If you always work with the same article numbers and name of product, then you use the permanent
article memory.
Storing Article
Preparation < STO >
< ART >
Enter article number
< ENTER >
Enter short code
< ENTER >
Enter product name
< ENTER >
Enter reference weight for 100% If there is already a reference weight in the working memory, this
< ENTER > unit weight can be transferred using < ENTER >
Enter mean tare weight Optional input
< ENTER >
Working memory is deleted
Call up article
Preparation < RCL >
< ART >
Enter article number or short code
< ENTER >
Weighing Place article on balance
Precisa Gravimetrics AG 30
Page 31
Smartbox Piece counting
Software P00.01.01
12 Weighing with tolerance range
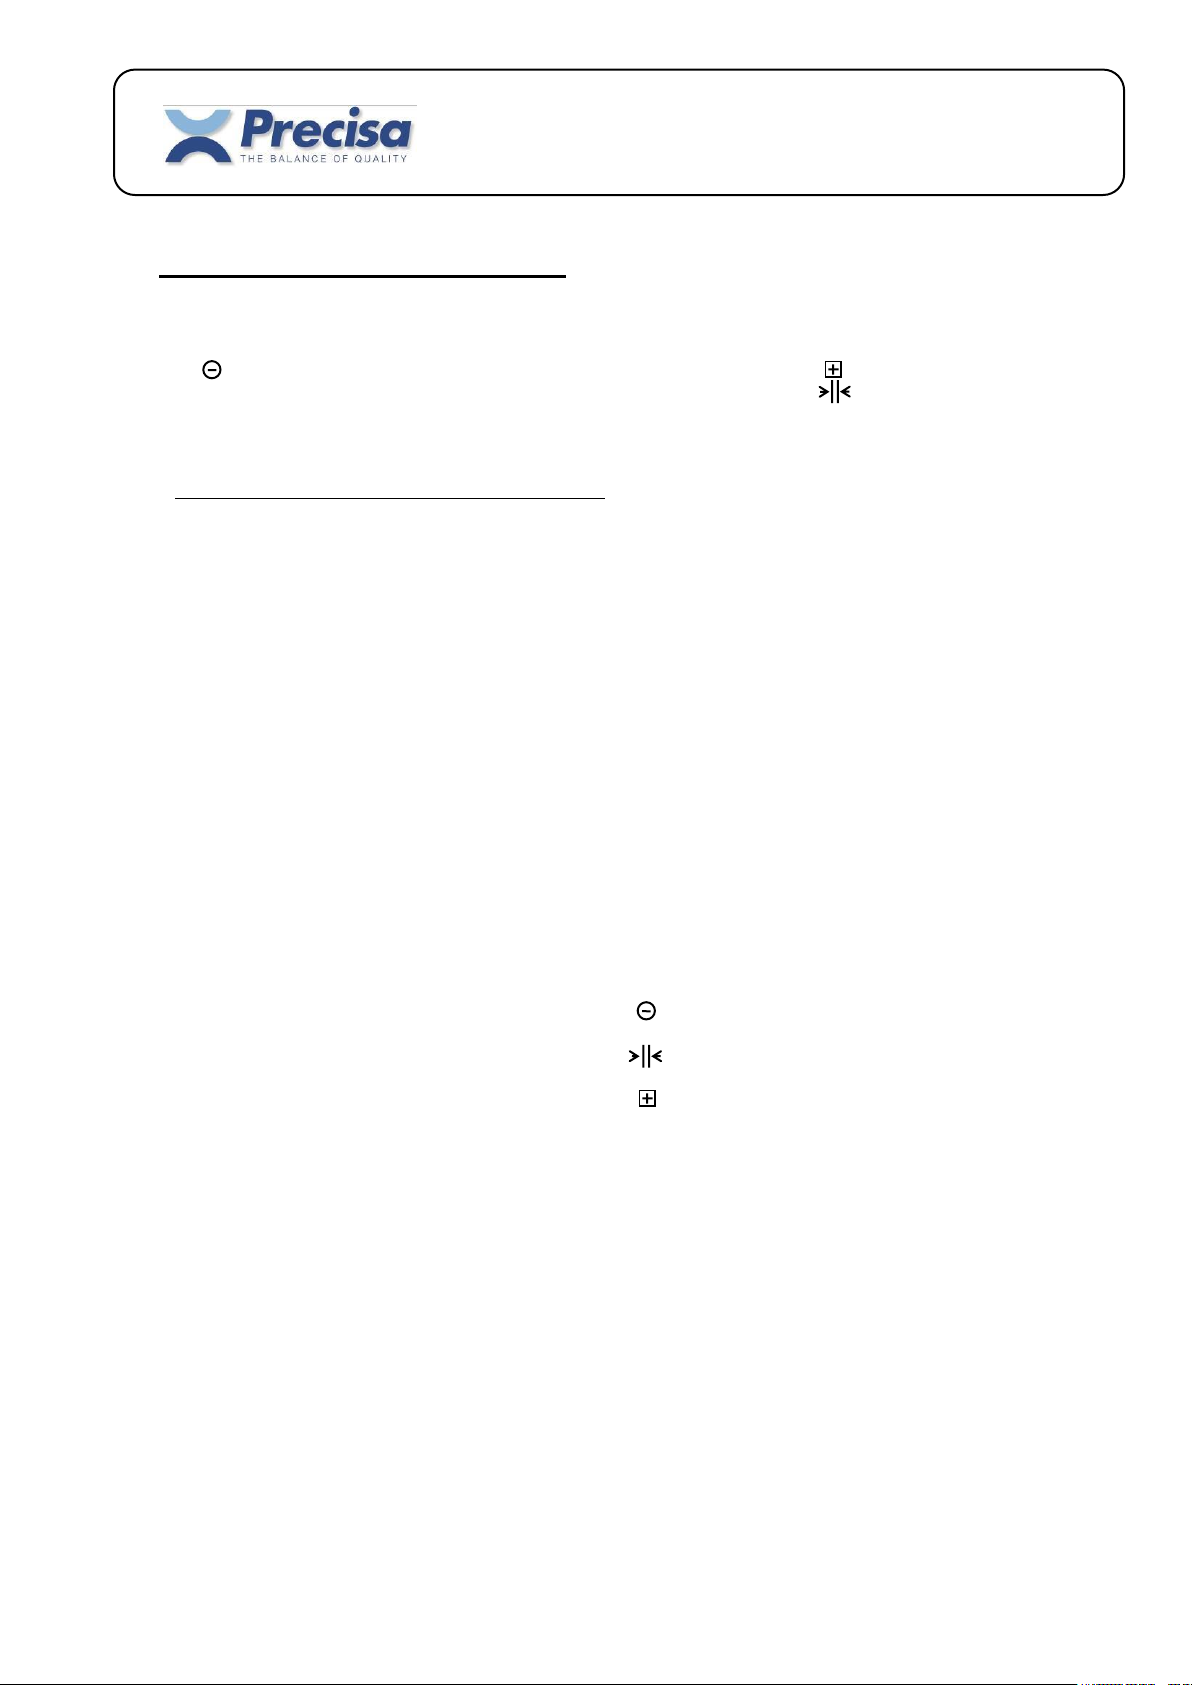
Using the Smartbox it is possible to check whether the weight of an article is within a certain
tolerance. For this, the nominal weight and a lower and upper limit are entered. In weighing,
the sign is then illuminated if the weight is below the lower limit and the sign illuminates if
the upper limit is exceeded. If the weight is within the tolerance range, the sign will light up.
In addition, the display will show the weight.
12.1 Weighing with temporary article memory
If you use one-off identifications, such as article number and product name, then you operate with
the temporary article memory, also called the working memory.
Preparation < ART >
Enter article number
< ENTER >
Enter product name
< ENTER >
Enter reference weight for article if no reference weight is entered,
or % the subsequent entries are in grams
< ENTER >
Enter nominal weight
< ENTER >
Enter lower tolerance (TU) if TU is not entered, TU and TO will be calculated
< ENTER > from the table Chapter 7.12
Enter upper tolerance (TO) if TO is not entered, TO will be set symmetrical to TU
< ENTER >
Enter mean tare weight Optional input
< ENTER >
Weighing Place article on balance : below TU
: within tolerance range
: above TO
Clear working memory
< CLEAR >
< ART >
< ENTER >
Precisa Gravimetrics AG 31
Page 32
Smartbox Piece counting
Software P00.01.01
12.2 Weighing with the article memory
If you always work with the same article numbers and name of product, then you use the permanent
article memory.
Storing Article
Preparation < STO >
< ART >
Enter article number
< ENTER >
Enter short code
< ENTER >
Enter product name
< ENTER >
Enter reference weight for article if no reference weight is entered,
or % the subsequent entries are in grams
< ENTER >
Enter nominal weight
< ENTER >
Enter lower tolerance (TU) if TU is not entered, TU and TO will be calculated
< ENTER > from the table Chapter 7.10
Enter upper tolerance (TO) if TO is not entered, TO will be set symmetrical to TU
< ENTER >
Enter mean tare weight Optional input
< ENTER >
Working memory is cleared
Call up article
Preparation < RCL >
< ART >
Enter article number or short code
< ENTER >
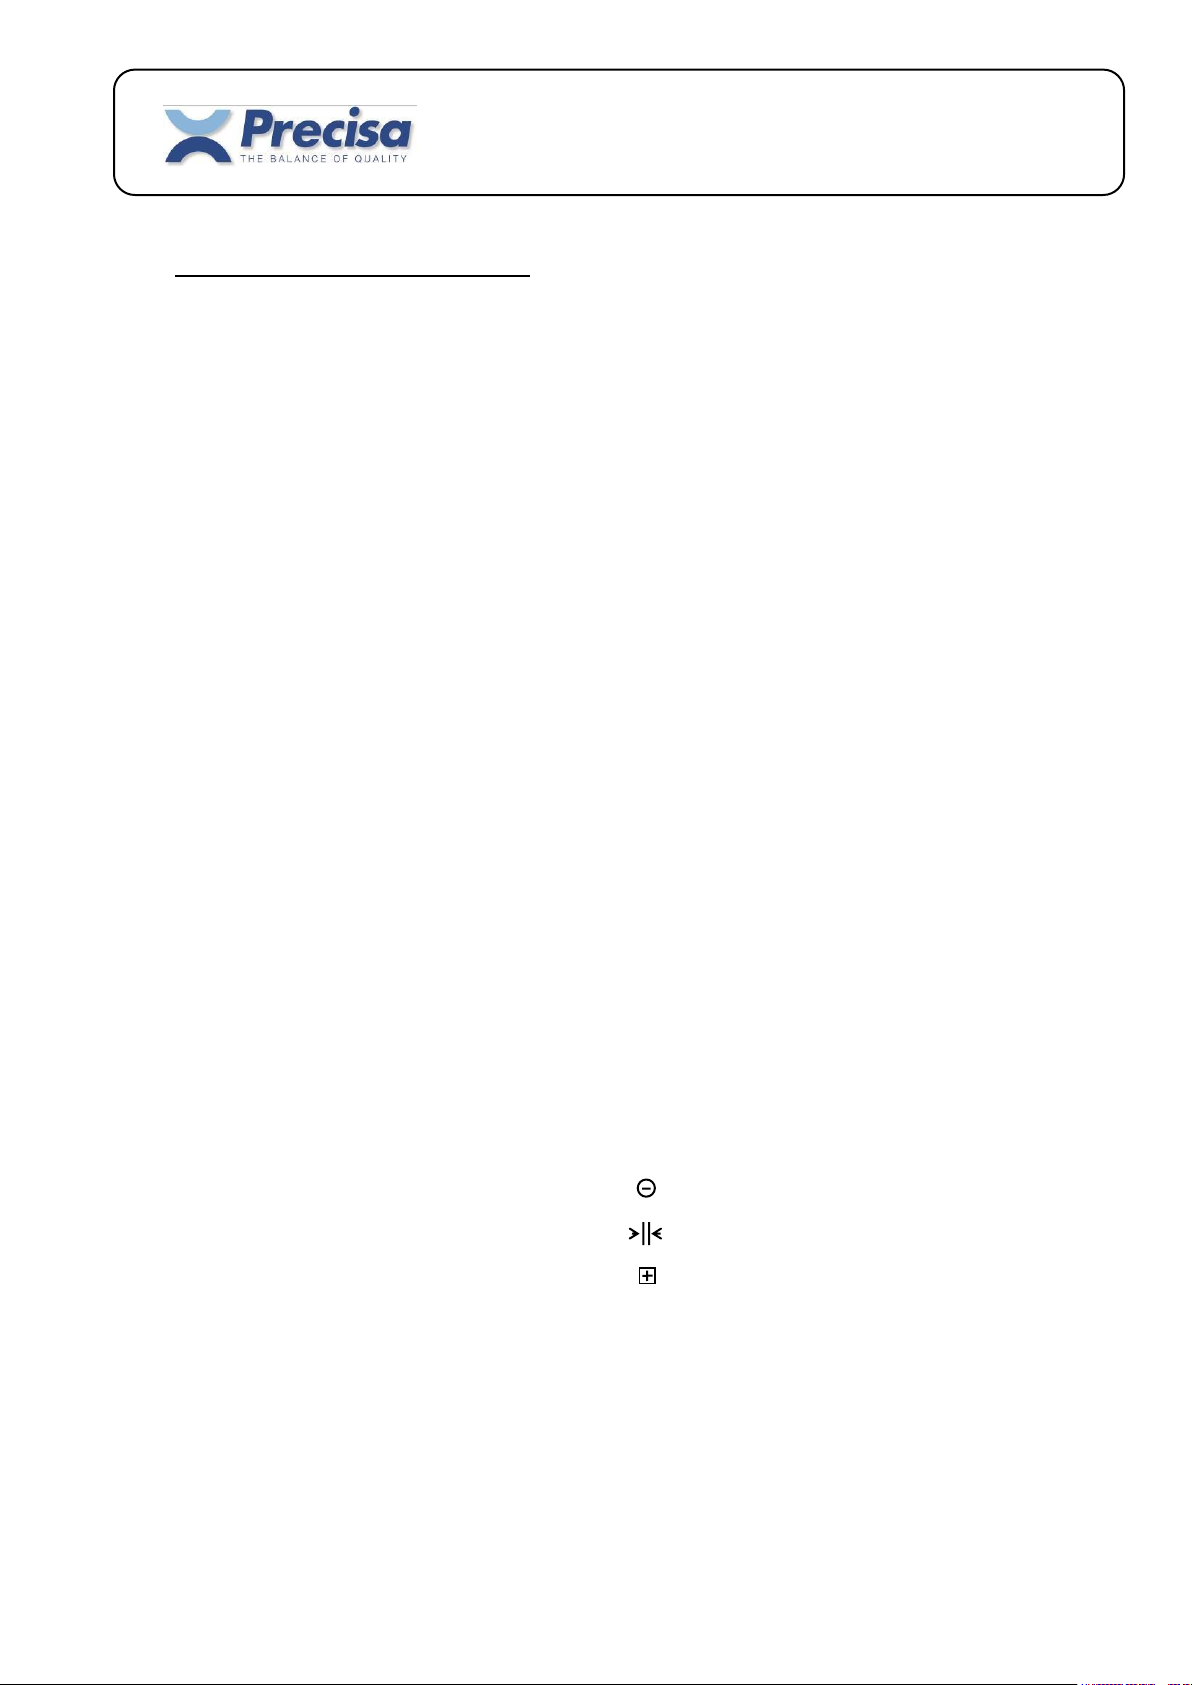
Weighing Place article on balance : below TU
: within tolerance range
: above TO
Precisa Gravimetrics AG 32
Page 33
Smartbox Piece counting
Software P00.01.01
13 ADD UP
Using the Smartbox it is possible to sum articles, print reports on individual articles and
print summary reports.
13.1 Totalling and printing out
An article can be totalled using the < MEM > key. If the Add Up Setting Auto Recording is set to ‘Yes‘ in
the Configuration menu, the articles will be automatically totalled on change of load.
If the Add Up Setting Auto Print is set to ‘Yes’, the Report, associated with the Add Up Sample Report,
will be automatically printed out on totalling.
If the Add Up Setting Auto Print is set to ‘No’, the Sample Report can be printed out once with the
< PRINT > key after totalling. Subsequently, the Standard Report will again be printed out with the
< PRINT > key.
13.1.1 Printout of the Add Up Sample Format 1
Date 08-10-2004 Time 11:20:34
Sample 3
Art.No. 33
Prod. TABLE SALT 1KG
+ 994.0 g
13.1.2 Printout of the Add Up Sample Format 2
Date 08-10-2004 Time 11:23:34
Sample 3
Art.No. 33
Prod. TABLE SALT 1KG
+ 994.0 g
Diff. - 6.0 g
Nom.Value + 1000.0 g
TU + 985.0 g
TO + 1015.0 g
13.1.3 Printout of the Add Up Sample Format 4...14
In user-defined sample formats (4...14) printformat 15 is prefixed to the first sample as a header.
Precisa Gravimetrics AG 33
Page 34
Smartbox Piece counting
Software P00.01.01
13.2 Deleting samples
The last sample can be deleted from the total using < CLEAR > < P > .
13.2.1 Printout of a deleted sample
Date 08-10-2004 Time 11:25:02
Sample 3 deleted
13.3 Printing out the total
Using < INFO > < PRINT > < MEM > the current total will be printed out.
Using < CLEAR > < MEM > the current total will be deleted.
If the Add Up Setting ‘CLR after Result’ is set to ‘Yes’, the current total will be deleted automatically
after INFO-PRINT-MEM.
13.3.1 Printout of the Add Up Result Format 1
Begin Date 08-10-2004 Time 11:20:34
Number of Samples 2
Total Net + 1988.0 g
End Date 08-10-2004 Time 11:26:47
13.3.2 Printout of the Add Up Result Format 2
Begin Date 08-10-2004 Time 11:20:34
Number of Samples 2
Total Net + 1988.0 g
Total Diff. - 12.0 g
Total Nom. + 2000.0 g
End Date 08-10-2004 Time 11:27:22
Precisa Gravimetrics AG 34
Page 35
Smartbox Piece counting
Software P00.01.01
14 Defining print formats
The user has the possibility to create his own print formats. For this purpose there are 15 freely definable
text lines and over 50 pre-defined text lines (measurements, results) available.
These text lines can be combined in a print format and this print format can then be assigned to the PRINT
key.
Furthermore, to all print formats (pre-defined and free-defined) a certain number of linefeeds can be
appended.
14.1 Storing an ASCII text line
< STO >
< SHIFT >
‘ S ‘
Enter text number
< ENTER >
Enter text
< ENTER >
There are 15 memory locations available for ASCII and HEX lines. Text Numbers from 01 to 15 are
possible. Text Number 01 will also always be used for the barcode labels.
40 characters can be entered for each memory location.
14.2 Storing a line of HEX (control codes)
< STO >
< SHIFT >
‘ H ‘
Enter HEX line number
< ENTER >
Enter HEX Code always 2-digit codes: Exp. 1B 30 2B 41 42 (= ESC 0 + A B)
< ENTER >
There are 15 memory locations available for ASCII and HEX lines. Text numbers from 01 to 15 are
possible. Text number 01 will also always be used for the barcode labels.
80 characters, i.e. 40 ASCII symbols, can be entered for each memory location.
14.3 Deleting a text or HEX line
< STO >
< SHIFT >
‘ H ‘
Enter HEX line number
< ENTER >
Enter ‘00’ ( HEX symbol 0)
< ENTER >
Precisa Gravimetrics AG 35
Page 36

Smartbox Piece counting
Software P00.01.01
14.4 Pre-defined text lines
The following is a list of the fixed texts with results and measurements.
Standard bold : text Italics : result or measurement CR LF : Carriage Return, Linefeed
16 CR LF
17 Date Date Time Time CR LF
18 Art.No. Article number CR LF
19 Article number CR LF
20 S.Code Short code CR LF
21 Short code CR LF
22 Prod. Product name CR LF
23 Product name CR LF
24 Lot-No. Lot number CR LF
25 Lot number CR LF
26 Operator Operator CR LF
27 Operator CR LF
28 Net Current weight CR LF
29 Current weight CR LF
30 Net 1 Weight in unit 1 CR LF
31 Weight in unit 1 CR LF
32 Gross Gross weight CR LF
33 Gross weight CR LF
34 Ref.W. Reference weight CR LF
35 Reference weight CR LF
36 Nom.Value Nominal value CR LF
37 Nominal value CR LF
38 (currently not used)
39 (currently not used)
40 (currently not used)
41 Def.from Defined from number of pieces CR LF
42 TU Lower tolerance limit CR LF
43 Lower tolerance limit CR LF
44 TO Upper tolerance limit CR LF
45 Upper tolerance limit CR LF
46 Tare Art. Article Tare CR LF
47 Article Tare CR LF
48 Tare Current Tare CR LF
49 Current Tare CR LF
50 Input text CR LF (In the balance-display appears as a text prompt the
text „Text“ or, if defined, the text-line 15.)
51 Tare barcode ENA13
52 Reference weight barcode ENA13
53 Article number barcode ENA8
54 Article number barcode ENA13
55 Article number barcode Code39
56 Current weight gramme barcode EAN13
57 Current weight pieces barcode EAN13
Precisa Gravimetrics AG 36
Page 37

Smartbox Piece counting
Software P00.01.01
58 Begin Date Date Time Time CR LF
59 End Date Date Time Time CR LF
60 Sample Sample number CR LF
61 Number of Samples Number of Samples CR LF
62 Current sample count CR LF
63 Current sample weight CR LF
64 Diff. Current sample weight difference from nominal value CR LF
65 Total Net Total pieces CR LF
66 Total Net Total weight CR LF
67 Total Diff. Difference total weight from total nominal value CR LF
68 Total Nom. Total nominal value CR LF
69 Current sample pieces CR LF
70 Current sample weight CR LF
71 <normal letters> Command for label-printer LP2824/LP2844
72 <condensed letters> “ “ “ “ “ “
73 <wide letters> “ “ “ “ “ “
74 <high/normal letters> “ “ “ “ “ “
75 <high/condensed letters> “ “ “ “ “ “
76 <high/wide letters> “ “ “ “ “ “
77 <go to label-top> “ “ “ “ “ “
80 Date
81 Time
82 Smartbox Application CR LF
83 Smartbox Software version CR LF
84 Balance Model CR LF
85 Balance Software version CR LF
86 Balance Serial number CR LF
88 Incremental number Field width min. = 1
89 Incremental number Field width = 10, right-aligned
90 Sample number Field width min. = 3
91 Article number Field width min. = 10
92 Product name Field width min. = 10
93 Total weight CR LF
94 Total pieces CR LF
Text-Line 88, 89: Defining (once) the incremental number
< STO >
< BASE >
Enter incremental number Range: 0...999'999’999
< ENTER >
After each printout the incremental number will be increased by 1. During power-off of the balance the current
incremental number will remain unchanged.
Precisa Gravimetrics AG 37
Page 38

Smartbox Piece counting
Software P00.01.01
14.5 Storing a print format
< STO >
< SHIFT >
‘ P ‘
Enter print format number
< ENTER >
Enter output function and text numbers
< ENTER >
Print format numbers can be 1,2 and 4 to 15. Print format 1 is prefixed to all permanently programmed
print formats as a header, print format 2 is appended as terminator.
Example : Print format 1
Statistics printout
Print format 2
1 to 5 may be entered as the output-function (one digit), see also Section 3.2.
The text numbers are always two position. A maximum of 40 text numbers can be entered.
Example : <STO>
<SHIFT>
’P’
’4’ Printformat 4
<ENTER>
’1172816’ 1 . . . . . . : Output-Function = 1 = Report printer (see also Section 3.2.)
. 17. . . . : Date/Time
. . . 28. . : Current weight
. . . . . 16 : Additional. CR,LFs
<ENTER>
14.6 Allocate print format to the PRINT key
Print formats with the numbers 1 to 21 can be allocated to the Print key.
< STO >
< PRINT >
Enter format
< ENTER >
Format 1 current net-weight
Format 2 date/time, article, current net-, gross- and tare-weight
Format 3 date/time, article, current net-weight, article-definitions
Format 4 - 15 Freely definable print formats
Format 16 - 21 Barcode label print format
(Barcode print formats are described in Chapter 15)
Precisa Gravimetrics AG 38
Page 39
Smartbox Piece counting
Software P00.01.01
15 Eltron LP2022SE or LP2824 Barcode-Printer
Labels with the article number, the tare and the reference weight, which can be read directly into
the balance with a barcode-reader, can be printed out with the “Eltron LP2022SE” or “LP2824”
barcode-printer. (Note: LP2824 must be configured to LINE-MODE.)
15.1 Print article number in EAN8 code (Printformat 16)
Allocate printformat 16 to the Print key, as described in Chapter 14.6.
Load an article number into the working memory and press the < PRINT > key.
A label with the article number in EAN8 Code will be printed out.
15.2 Print article number in EAN13 code (Printformat 17)
Allocate printformat 17 to the Print key, as described in Chapter 14.6.
Load an article number into the working memory and press the < PRINT > key.
A label with the article number in EAN13 Code will be printed out.
15.3 Print article number in Code39 (Printformat 18)
Allocate printformat 18 to the Print key, as described in Chapter 14.6.
Load an article number into the working memory and press the < PRINT > key.
A label with the article number in Code 39 will be printed out.
15.4 Print tare weight in EAN13 code (Printformat 19)
Allocate printformat 19 to the Print key, as described in Chapter 14.6.
Place a container on the balance pan and press the < PRINT > key.
A label with the tare weight in EAN13 Code will be printed out.
15.5 Print reference weight in EAN13 code (Printformat 20)
Allocate printformat 20 to the Print key, as described in Chapter 14.6.
Determine a reference weight for quantities, as described in Chapter 10, and press the < PRINT > key.
A label with the reference weight in EAN13 Code will be printed out.
15.6 Print text-label (Printformat 21)
Allocate printformat 21 to the Print key, as described in Chapter 14.6, and press the < PRINT > key.
A label with information on the current article and measurement will be printed out.
Precisa Gravimetrics AG 39
Page 40
Smartbox Piece counting
Software P00.01.01
16 Barcode-Reader
A barcode-reader can be attached to any Smartbox.
16.1 Storing an article number with the barcode-reader
< STO >
< ART >
Read in barcode
< ENTER >
.....
Enter remaining information on the article
16.2 Loading an article with the barcode-reader
Read in barcode with the reader. If the corresponding article is stored, it will automatically
be loaded into the working memory and the balance operates as with an < RCL > < ART >...
If the corresponding article is not found, the barcode read in remains in working memory as an
identification number.
16.3 Reading in a reference weight with the barcode-reader
Only specially coded barcodes can be read in as a reference weight. This code contains an
identification and the reference weight in g/PCS. This label can be produced as described in
Chapter 15.5. If the barcode is read in, the balance switches to the count mode and the reference
will be set.
16.4 Reading in tare weight with the barcode-reader
Only specially coded barcodes can be read in as a tare weight. This
code contains an identification and the tare weight in grams. This label can be
produced as described in Chapter 15.4.
If the barcode is read in, the manual tare of the balance will be set.
Precisa Gravimetrics AG 40
Page 41
Smartbox Piece counting
Software P00.01.01
17 Reference-Balance
A balance with RS232-interface may be used as a reference balance. Normally the reference-
balance will have a higher resolution than the counting-balance. The counting-balance takes
more precisely determined unit weights from the reference-balance.
If more than one reference-balance is allocated to the input channels, an input channel (1….) must
be supplied after the < BASE > key.
17.1 Configuring the reference-balance
The interface parameters of the counting- and reference-balances must be the same.
The base unit of the reference balance must be in grams.
17.2 Determining the unit weight from several articles
< REF.W >
< BASE >
Enter base number
< ENTER >
Enter quantity
< ENTER >
17.3 Transferring unit weight of an article
< REF.W >
< BASE >
Enter base number
< ENTER >
17.4 Transferring tare weight
< STO >
< T >
Enter tare number
< ENTER >
< BASE >
Enter base number
< ENTER >
Precisa Gravimetrics AG 41
Page 42
Smartbox Piece counting
Software P00.01.01
18 Interfaces and accessories
18.1 Standard interface
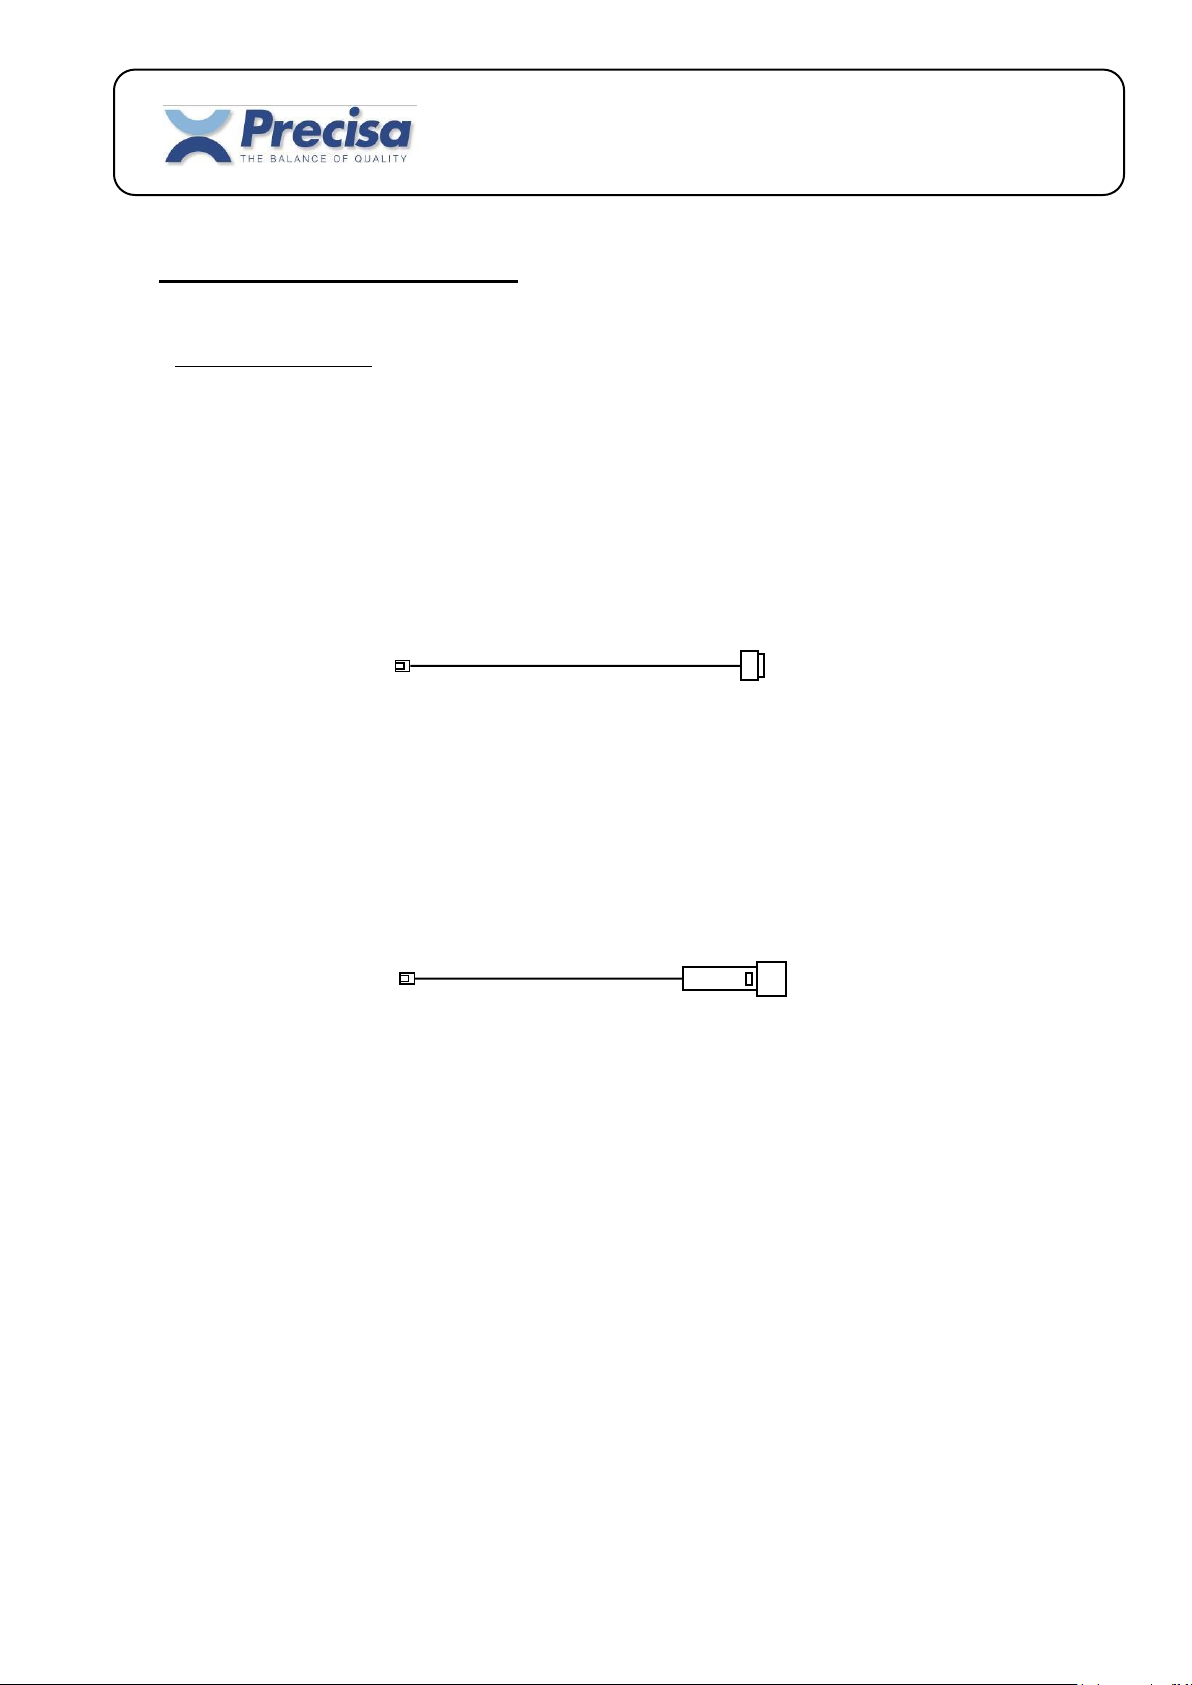
One or two peripherals may be attached to the standard interfaces RS232 (Ch.1, Ch.2) of the Smartbox.
Interface cable RS232 for a peripheral (bi-directional)
for Series 320, 490
Order No. 350-xxxx
Reference Balance
RJ-45 D-Sub
Smartbox Standard RS232 Printer
Computer
Barcode-Reader
for Series 320, 490
Order-No. 350-xxxx
RJ-45
Smartbox Standard RS232 Barcode-Reader
Precisa Gravimetrics AG 42
Page 43
Smartbox Piece counting
Software P00.01.01
19 Controlling the Smartbox remotely via the interface
Remote control of the Smartbox functions is effected in a similar manner to input via the keypad. Each
function has a key code, otherwise the ASCII Code is used. A Smartbox remote control command always
starts with '#$'.
19.1 Key code for the functions
\A < DISP >
\B < FixR >
\C < REF >
\D < REF.W >
\E < MEM >
\F < MENU >
\G < CONF >
\H < ART >
\I < TARA >
\J < STO >
\K < >
\L < RCL >
\M < BASE >
\N < INFO >
\O < PRINT >
\P < CLR >
\Q < SHIFT > ( not used )
\R < ENTER >
Precisa Gravimetrics AG 43
Page 44
Smartbox Piece counting
Software P00.01.01
19.2 Direct commands
Data in the direct commands are separated with a Tab (Hex 09) or semicolon (;). In setting or storing an
article all components of the article must always be transferred, even if not used. The numerical values may
only be transferred in grams, pieces or percentages. No other weight units will be accepted. 0 g must be
employed for unused numerical values. A hyphen may be used as a filler for alphanumeric values which are
not used.
19.2.1 Direct commands for the article
Place article in working memory #SETA...
#SETA 111;1;TEST 111;12313-ASD;Roland Moor;0.25;g/PCS;800;PCS;750;PCS;850;PCS;25;g
Store article in memory #STOA...
An article with the same article number will be overwritten.
If all article memory is full, subsequent articles will be ignored.
#STOA 111;1;TEST 111;12313-ASD;Roland Moor;0.25;g/PCS;800;PCS;750;PCS;850;PCS;25;g
#STOA 222;2;TEST 222;;;0.05;g/PCS;200;g;180;g;220;g;0;g
#STOA 333;3;TEST 333;12313-ASD;Roland Moor;0.1;g/PCS;3000;PCS;90;%;115;%;100;g
#STOA 444;4;TEST 444;123456-ABC;Roland Moor;0.02;g/PCS;0;g;0;g;0;g;20;g
Read an article #GETA 111
Read all articles #GETA ALL
The article will be printed out in the same format, as stored with #STOA…
The data received can be stored in a text file and further processed using Excel.
Clear an article #CLRA 111
Clear all articles #CLRA ALL
Precisa Gravimetrics AG 44
Page 45

Smartbox Piece counting
Software P00.01.01
19.2.2 Direct commands for the tare
Set tare in working memory #SETT...
#SETT 25.25;g
Store tare in memory #STOT...
#STOT 1;25.25;g
#STOT 13;452.42;g
#STOT 53;100;g
#STOT 244;200.42;g
Read a tare #GETT 13
Read all tares #GETT ALL
The tare weights are printed out in the same format as they are stored with #STOT..
The data received can be stored in a text file and further processed using Excel.
Clear a tare #CLRT 13
Clear all tares #CLRT ALL
Precisa Gravimetrics AG 45
Page 46

Smartbox Piece counting
Software P00.01.01
19.2.3 Direct commands for the strings and print formats
Set print format #SETP...
(corresponds to < STO > < PRINT > ....)
#SETP 3
Store string in memory #STOS...
#STOS 1;PRECISA Gravimetrics AG
#STOS 13;Moosmattstrasse 32
Store Hex string in memory #STOH...
#STOH 3;0D0A0D0A303132204444142
#STOH 4;E0E4E2E60D0A0D0A
Store print format in memory #STOP...
The first position of the string is occupied by the output function, after which is the text
number, always two positions (see also Section 14.5).
#STOP 1;1011613160316
#STOP 5;101161316
Read a string #GETS 13
Read all strings #GETS ALL
Read a print format #GETP 13
Read all print formats #GETP ALL
The strings and print formats will be printed out in the same format as stored with #STO...
The data received can be stored in a text file and further processed using Excel.
Delete a string #CLRS 13
Delete all print formats #CLRP ALL
Precisa Gravimetrics AG 46
Page 47
Smartbox Piece counting
Software P00.01.01
20 Tips and tricks
20.1 < DISP > key
If an article is in working memory, it is possible to switch the lower display between
capacity-indicator and text-display.
20.2 < > key
During the info display it is possible to stop or re-display individual lines with the < > key.
20.3 < - > key
If the working memory contains a nominal value, the weight display can be switched between
net weight and weight difference from nominal using the < - > key.
If the difference-display is active, a circle will appear in the display.
Precisa Gravimetrics AG 47
 Loading...