

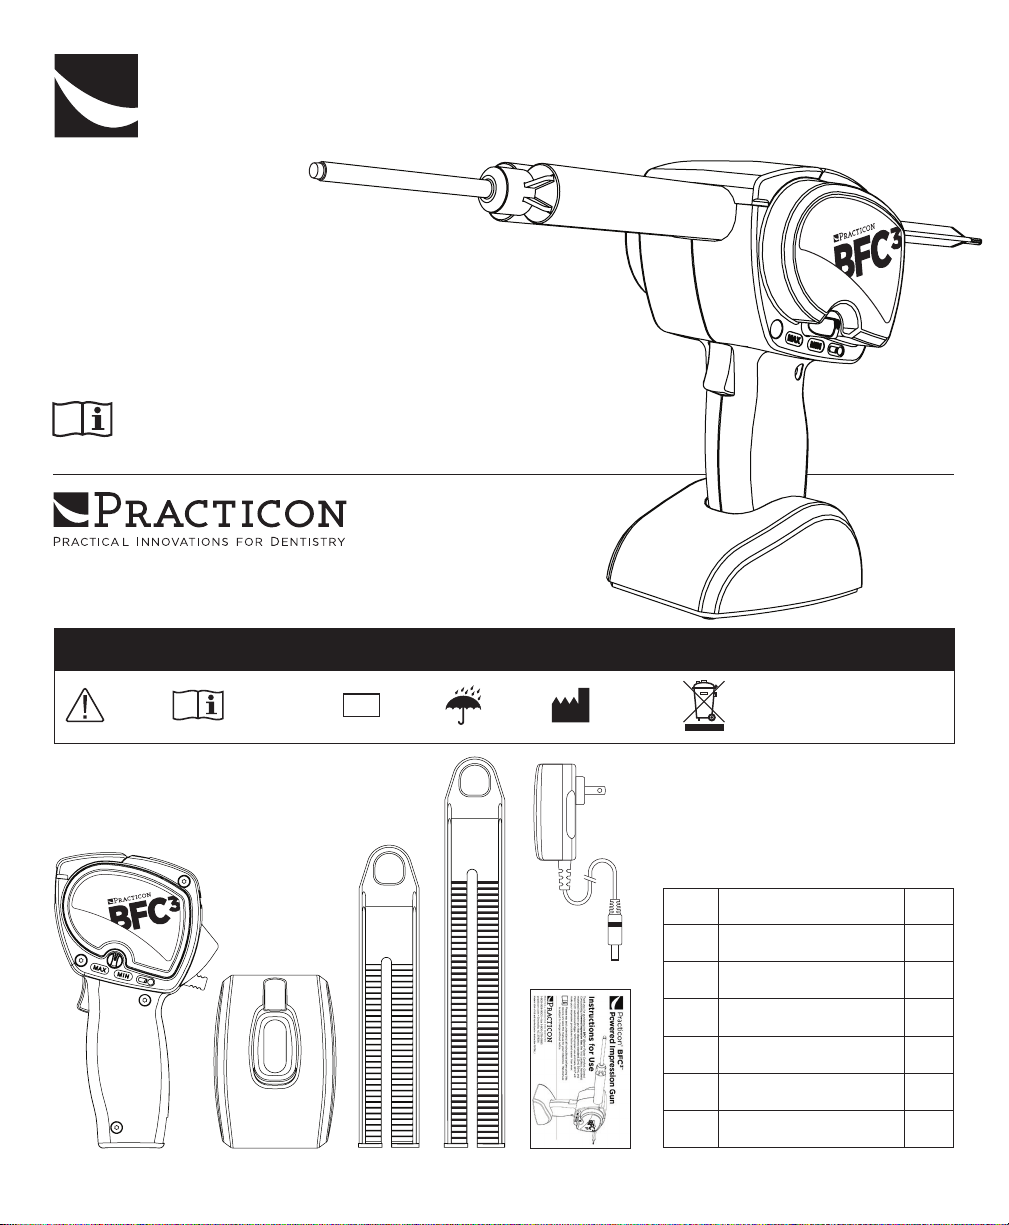
Practicon BFC3 Instructions For Use Manual
TM
POWERED
IMPRESSION
GUN
POWERED
IMPRESSION
GUN
Practicon® BFC
3
Powered Impression Gun
Instructions for Use
Thank you for purchasing the BFC3 (Better Faster Comfort, Control,
Compatibility) Powered Impression Gun, the first cordless, handheld,
motorized impression gun that dispenses standard 25ml, 50ml, and
75ml 1:1/2:1 automix cartridges. With proper use and care, BFC3 will
make your impression procedures faster and easier than ever.
Please read and understand all instructions before using this
device, and save this manual for your reference. This manual
is subject to change without notice.
1-800-959-9505 • Fax 1-800-278-0885
practicon.com • Greenville, NC 27834
Made in USA of US and imported parts • Instruction 701756_1
SYMBOLS USED
Hazard
warning
A B C D
Read instructions
before use
SN
Serial
number
Keep dry
Manufacturer
E
F
Do not dispose
of with normal
household waste
PACKAGE CONTENTS
Item Description Qty
BFC3 Impression Gun 1
A
Countertop Stand 1
B
50ml/25ml Plunger 1
C
75ml Plunger 1
D
Battery Charger 1
E
Instructions for Use 1
F
IPX0
Ordinary
equipment
Product Information
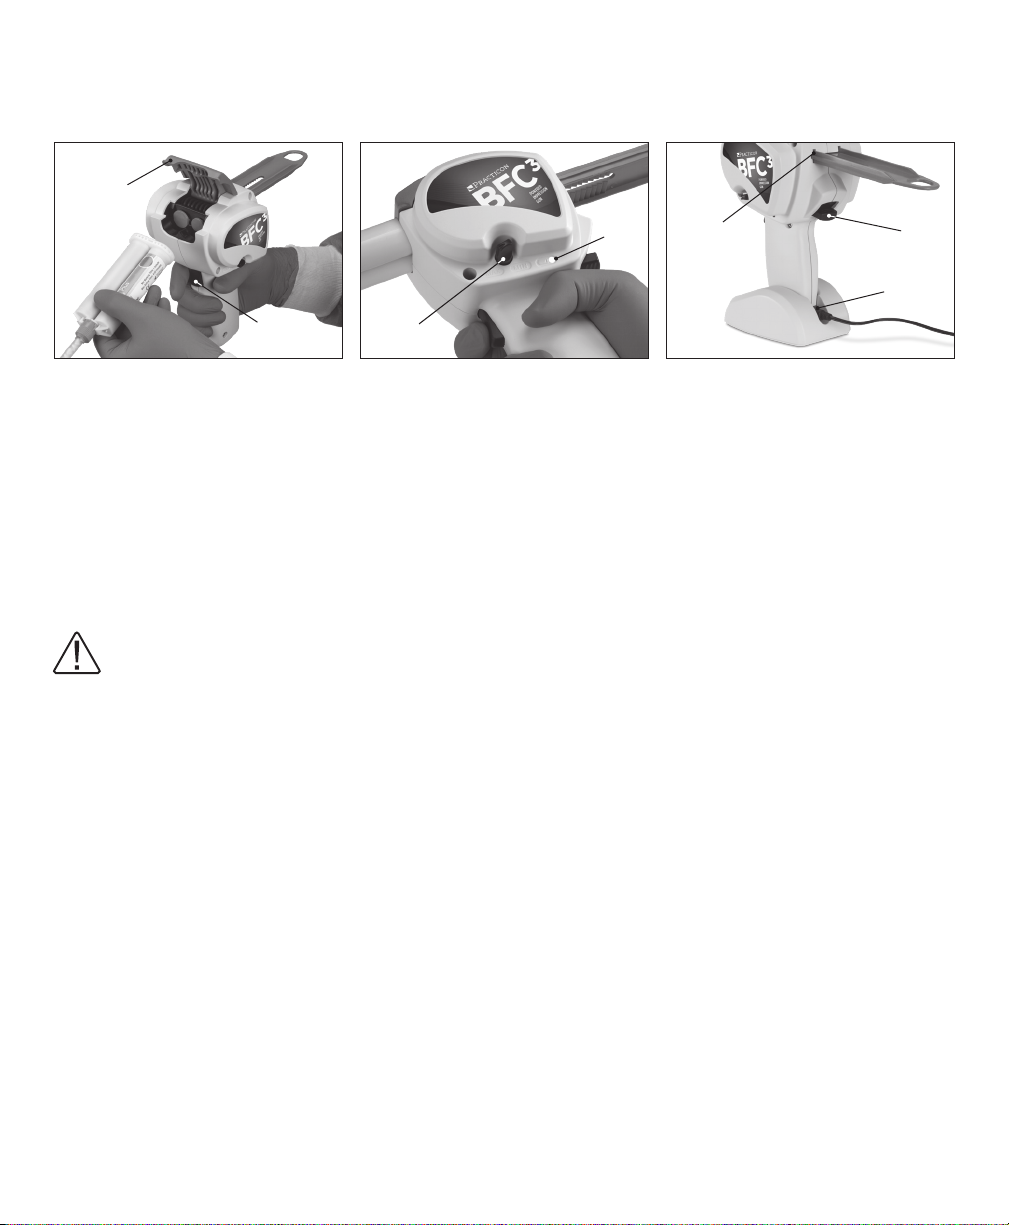
BFC3 COMPONENTS AND CONTROLS
G
K
L
M
N
H
Cartridge clamp
G
Raise to open and insert/remove
automix cartridge
Dispensing activation trigger
H
CHARGE THE BATTERY FULLY BEFORE USING THE BFC3 FOR THE FIRST TIME
Insert the charging cable into the connector
stand so the charging cable extends out the back of the stand. The LED indicator on the wall charger will change
from red to green when the battery is fully charged. A full charge can take up to 21⁄2 hours.
DISCONNECT CHARGER FROM BFC3 PRIOR TO USE.
UNIT WILL NOT OPERATE WITH BATTERY CHARGER CONNECTED.
PREPARING THE BFC
Select the 50ml plunger
appropriate for your material cartridge. Open the
cartridge clamp G. Hold the BFC3 in one hand and
press upward on the plunger release lever M with your
thumb. With the other hand, insert the plunger teeth
side down into the plunger slot L in the front of the
unit and slide it back as far as it will go. Release the
plunger release lever. The BFC3 is now ready to use.
OPERATION
Using the BFC3 is very much like using a manual
impression gun, only easier. Instead of having to
repeatedly squeeze a large spring-loaded trigger with
your hand, BFC3 dispenses automix material with the
press of a button.
LOADING A CARTRIDGE
Press the plunger release lever M upward with your
thumb, pull the plunger back until it stops, and then
release the lever. Open the cartridge clamp G and
insert an automix cartridge. Close the cartridge clamp.
3
FOR USE
or 75ml plunger D as
C
J
Dispensing speed control
J
Adjustable from 0.6ml/sec. (min)
to 1.7ml/sec. (max)
Low battery LED
K
at the base of the BFC3 handle and then place the BFC3 into the
N
Press the plunger release lever again and slide the
plunger forward until it contacts the cartridge.
Release the lever.
ADJUSTING THE FLOW RATE
The BFC
from 0.6 to 1.7ml/sec. Adjust the flow rate by rotating the
dispensing speed control J between the MIN and MAX
settings. Experiment with dierent flow rates to find the
setting that works best for your practice and procedures.
DISPENSING MATERIAL
As with all impression guns, express the first drops of
material onto a paper towel or tray liner.
Press the dispensing activation trigger H with your
index finger to start the flow of material. Release the
trigger when enough material has been dispensed.
The BFC3 includes an anti-drip feature that momentarily
reverses the plunger when the dispensing trigger
is released, and an auto-stop feature with overload
protection when a cartridge has been emptied.
3
can dispense material at a rate that ranges
Plunger slot
L
Plunger release lever
M
Press upward to insert, withdraw,
or remove plunger
Battery charger connector
N
 Loading...