

Page 1
1
PPT Powerpack 400
User Manual
Please Read this Manual carefully before using
Page 2

2
PPT Powerpack 400 Manual
Thank you for purchasing the PPT Powerpack 400. To ensure proper and safe use please read these
instructions carefully before use and retain them for future reference. If any modification is made it may
damage the product and void any warranty.
Content
1- Introduction and Overview 3
2- Features and Functions 4
3- Using the Power Inverter
Function 7
4- Using the Supplied
Accessories 7
5- Maintenance and Warnings 8
6- Warranty 9
7- Troubleshooting 9
8- Contact 9
Page 3

3
1- Introduction and Overview
The PPT Powerpack 400 is designed to provide AC and DC power as either temporary back up during
power outage or for use in off grid applications such as in vehicles or in remote homes, motor homes,
Glamping pods, caravans or where mains electricity is limited or expensive such as exhibition stands.
The PPT 400 will operate most small TV’s, DVD players, laptops and even small power drills, in fact any
load up to 400W. Its unique design allows solar charging from external panel, expansion of battery
capacity via connection of external lead acid battery and connections of LED light strips via a supplied
adapter.
Important: Before using for the first time please install fuse into fuse holder marked “Internal
Battery Fuse”. This can be found by sliding down the side panel. Then clip on fuse covers
(supplied in bag) over each fuse (marked Internal and External)
Specifications
• Inverter Output Power – 400W
• Inverter Output Voltage – 230Vac
• AC outlet – 1 x universal socket
• DC outlet – 12Vdc 10A (unregulated)
• USB outlet – 5V 1A
• Battery – 18AH SLA Battery
• Solar Regulator – 10A
• Fuses : 40A blade
• Dimensions :
(W)»410»*»(D)»110*»(H)»370mm
• Weight : 12KG
See Separate Specification sheet for more detailed
information
Contents
•
PPT400 unit
• 5 Metre Solar panel cable
• 1 Metre External battery cable
• Lighting adapter
• 4 x fuses plus covers
• 2 Amp AC Adapter
Features
• 400W 230V AC Inverter
• 12VDC socket
• USB Port
• Integrated 18AH battery
• Integrated 10A Solar Regulator
• External battery connection
• Solar Panel connection
• Integrated LED light and adapter to add
external lights (purchased separately)
Applications
• Off Grid power
• Mobile power in vehicles
• Camping/Fishing
• Caravans, boats, motorhomes
• Glamping
Page 4

4
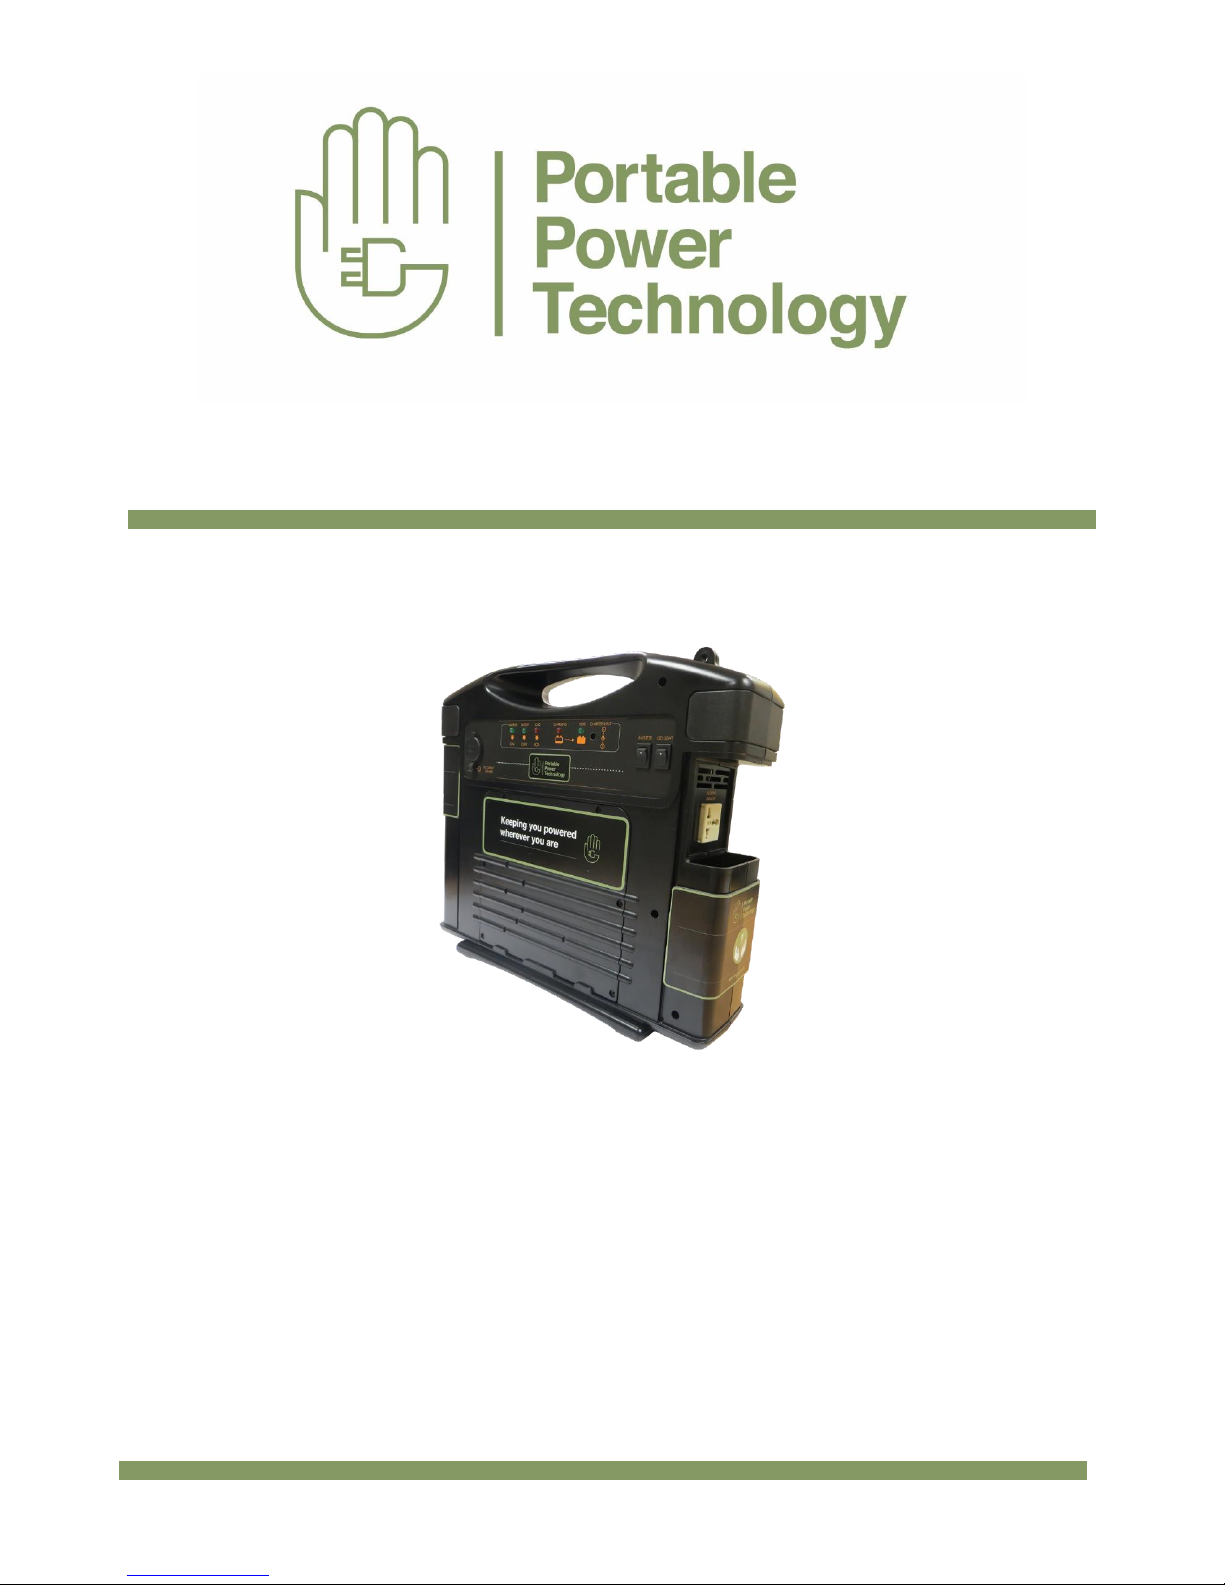
2- Features and Functions
Front View
a) ON/OFF Switch. Leave it off when not in use. When ready to use switch to the ON position.
b) USB Output – Connect a USB cable (not supplied) to charge mobile phones and other
portable devices
c) Battery Check – Press the black switch to check the battery status. The coloured LED’s light
up accordingly to show the battery status
d) 2 Watt LED Light – Integrated to front panel. ON/OFF switch on rear side
Page 5

5
Rear View
a) LED light – ON/OFF Switch
b) Inverter – Switch on to use inverter output
c) 12VDC Socket – For connecting 12VDC appliances/loads up to 144W (rated at 12A- Non
regulated). Also used with lighting adapter. (See Section 4 a)
d) Inverter Green LED light- Indicates Inverter is ON
e) Battery Low Green LED light – Indicates Internal battery (or internal and external if
connected) is low.
f) Load 80% red LED light – Indicates inverter is at 80% of max rating (400 watts)
g) Charging Red LED light – Indicates the batteries are being charged either from the AC
charger or from solar panel input
h) 100% Green LED light – Indicates the batteries are fully charged
i) Charger Input – connection for AC charger. Only suitable to charge internal battery.
Page 6

6
Front View – Left Side Panel (Slide down)
a) AC output from Inverter – 230Vac 50Hz 400W Continuous. Universal socket (can be used
for both UK and Euro plugs)
Front View Right Side Panel (Slide Down)
a) Fan – Auto operation. No operator input required
b) Solar Panel Input – Accepts 3 pin input connector as supplied with PPT Powerpack 400.
The maximum input is 10 Amps (See Section 3 b 2 for more info)
c) External Battery Fuse – Protects external batteries if connected
d) Internal Battery Fuse – Protects internal battery. NOTE: This fuse must be inserted for the
unit to operate properly.
e) EXT Battery – External battery connection. Using the supplied cable a further external
battery can be connected to the PPT Powerpack 400. (See Section 3 c for more info)
Page 7

7
3- Using the Power Inverter Function
Slide down the left side panel to reveal the universal 3 pin socket. Ensuring that the inverter
switch is in the OFF position (see 2.2 b) connect the load to be powered and then push the
inverter switch to the ON position. The appliance connected to the inverter should now turn
on. If the overload light comes on and the load turns off then the appliance exceeds the rating
of the inverter (400 watts). To reset the inverter simply reset the inverter switch to OFF and
then ON again.
The inverter will power loads connected to it for as long as the battery capacity allows. The
higher the wattage the shorter the time. The PPT Powerpack 400 is designed to power small
loads such as lights, TV, radio, dvd player and other portable devices.
TV – 60 Watts Approx run time = 2 hours*
3 x 30 LED lights strips (optional accessory) – 21 Watts Approx run time = 6 Hours*
Small Power Drill – 400 Watts Approx run time = 10-15 minutes*
NOTE * Assumes only internal 18AH is being used with no further external battery
4- Using the Supplied Accessories
The PPT Powerpack 400 is supplied with accessories to provide additional features or functionality to
the product
a) Lighting Adapter – The supplied lighting adapter is designed for connection to the 12VDC
socket (See section 2.2 c) to provide simple and safe connection of lights to the
PPT Powerpack 400. The Lighting Adapter will accommodate up to five of the PPT light strips.
These LED light strips are supplied separately and are available to order from Portable Power
Technology. The 30 LED light strips are designed at 7 Watts each to be energy efficient whilst
providing very high light output making them ideal for off grid locations, camping or on market
stalls and exhibitions.
b) Charging the PPT Powerpack 400 – The PPT Powerpack 400 can either be charged using the
supplied AC charger or by connection of a suitable solar panel using the supplied cable.
1) AC Charging: Ensure the main unit switch is in OFF position. Plug the jack plug into the
charger input socket on the rear of the unit (See Section 2.2 i). Plug into mains supply and
switch on. The Red charging LED will be on (See Section 2.2 g). When charging has
completed the 100% Green LED will be on. Please note that the 2A AC charger is not
recommended for charging the PPT Powerpack 400 if an external battery is also connected
and if it exceeds 20AH. Charging will take too long the supplied 2A charger is not suitable. If
AC charging of an external battery + Internal battery is required we would recommend the
use of a >5A charger. Please call 01474 761051 for advice.
Page 8

8
2) Solar Charging: The PPT Powerpack 400 is ready for solar connection. With integrated 10A
solar regulator and dedicated Solar input connection charge your PPT Powerpack 400
using the power of the Sun. The maximum recommended total solar panel input is 150W.
The PV panel output must be for 12V charging only (ie panel output voltage Vmp is approx.
17.5V). The supplied solar cable has ends prepared with MC4 connectors for a direct link to
a solar panel with the same connections. The 3pin connector should be inserted into the
solar connector (Front view right side panel – See Section 2.4 b). On successful connection
and in daylight the red LED charging light will be on. The PPT Powerpack 400 can be used
during solar charging and once fully charged the solar panel can be left connected if
required since the regulator will ensure the PPT Powerpack 400 is not over charged.
c) Adding External Battery using supplied cable
The PPT Powerpack 400 battery capacity can be extended by connecting an external leisure battery.
The internal battery of the powerpack 400 is 18AH. By connecting a further battery using the
External battery cable essentially puts this battery in parallel to it to further increase the AH rating
eg. Internal battery 18AH + External battery 60AH = 78AH
The connection to the external battery is made using the supplied cable. One end is terminated with
a large connector that connects to the EXT Battery connector on the PPT Powerpack 400. The other
end has crocodile clips for direct connection to the external battery. There is an inline fuse holder
with 40A fuse on the cables to protect against short circuit.
Once the connection is made any charging via solar panel will be to both batteries. Any charging
indicators and battery check LED lights will now indicate based on the battery bank.
5- Maintenance and Warnings
• To prevent fire hazard do not obstruct ventilation overheating could occur
• Keep away from fire or any corrosives
• Risk of electrical shock, do not remove cover when in use.
• Reverse polarity connection will blow internal battery fuse
• Unit is not waterproof, water damage is not covered by the warranty
• Ensure all connections are secure before use
• If product becomes dirty simply wipe down with a damp cloth
6- Warranty
Page 9

9
This Product comes with a 12 month warranty to all the parts. If you would like to make a warranty
claim please use the contact details below. Customer error and water damaged are not covered by
the warranty
7- Troubleshooting
Problem
Things to check
No Inverter Output
• Check fuses
• Battery Voltage
• Bad wiring connections
• Thermal conditions
Inverter overload light comes on
• Check the appliance connected does not exceed
400W
• To reset the switch inverter OFF then ON
again
Battery not charging
• Check connection to solar panel/AC charger
• Check external battery fuse
Unit is clicking when AC charger is connected or
solar panel is connected
• Check internal battery fuse (see section 2.4d)
Unit has been left on and is fully discharged, the
unit will not recharge.
• Connect external battery cable to a known
charged battery. Leave 10 mins. Disconnect and
try charging again
8- Contact
For Further information relating to this product or to make a warranty claim please call us on 01474
761051 or by email at sales@portablepowertech.com We will aim to respond within 24 hours.
 Loading...